Clear Guard Protective Light Shields
| Clear Guard Protective Light Shields Clear Guard Headlight |
 |
 about protecting the units looks? What if there was a way you could have an ATV for several years and still keep the headlights looking like new? This would add to resale value and more importantly, make your investment last longer. Now there is a way, Clear Guard offers a headlight protection process! They produce headlight kits that are made from an exclusive film which utilizes a softened PVC vinyl. The Clear Guard protection packages use a high quality optically clear acrylic adhesive to adhere to the headlights. This is not your everyday lamination type film. We are talking quality 17 mils thick, impact resistant, UV Resistant and also scratch resistant. Forming one of the best know protective layers available, Clear Guard will protect your headlights from the everyday scratches along with trail debris and the elements.
Owner John Byham, states “The Clear Guard Headlight Protection Kits are designed to offer a “Customized” appearance to your ATV while protecting your headlight lens from breakage due to rocks and other trail debris and will reduce the chances of your illumination covers becoming scratched and dull looking.” John tells us that he has been very successful with the Clear Guard products, “The past
 ive years have set new sales records for Clear Guard, we are excited about the market’s direction!” Each of Clear Guard’s products have been computer designed and die-cut for specific Year, Make and Model of your ATV and are now available in Clear, Blue, Yellow or Smoke and with Red becoming available in August. The Clear Guard products can be shaped and curved with the heat of an ordinary hair dryer. This is an easy application product that can be removed with no damage to headlight. Clear Guard’s unique technology increases the impact resistance, resulting in an enhanced “Trampoline Effect” when small debris is deflected. The Clear Guard Headlight Kits range in price from .95-.95, kits are available for all major ATV manufacturers (Yamaha, Honda, Polaris, Suzuki, Kawasaki, and Bombardier) models. Look to Clear Guard for protecting your headlight needs. Contact them directly or visit the website for any additional needs.
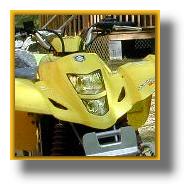
 John Byham of Clear Guard recently sent the ATV Connection several product samples of the Clear Guard Headlight protection. After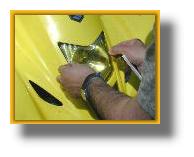 reading about his product we were anxious to give his product a try. Installation is simple and only takes a few minutes. First wash your machines headlights of any heavy dirt deposits then use a one part alcohol to three part water solution in a spray bottle. Make sure the headlight plastic is clean and dry. The last thing we want to do is apply the film to a dirt lens. Next try the protective lens film in place, don’t peal back the backing yet. Make sure you will be able to apply the film with out interference from the ATV body. Our first test bike was a Suzuki LTZ 400, this unit has a long V-shaped headlight and positioning the film was easy. For best results make sure your headlight plastic is warm to the touch, this can be accomplished by turning on the headlights for a sort time also use a hair dryer to warm the protective film. Lastly, remove the film’s backing and wet your fingers with the alcohol
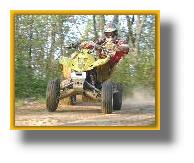
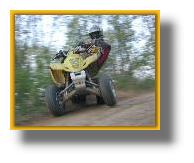
 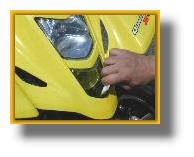 solution, making sure they stay wet through out the application. This will keep finger prints from forming on the adhesive, carefully remove the backing from the adhesive side of the film and apply the Clear Guard shield to the lens. Align the outer edges the use the squeegee to force any excess solution and air out, start in the middle and move to the edges. Don’t try to hurry, the better you remove the moisture the better the product will look. We had no problems with the application and rode the unit that afternoon. The protect is a nice feature but we liked the looks also our Z-400 was a yellow model so we used a yellow protective film and loved the results. Only time will tell how the Clear Guard will protect but our test indicated there was a supplied rebound of protection. There is one other advantage we should mention; the headlights of our test Z-400 already had a few nicks in the plastic lens. After installation of the Clear Guard film it was almost impossible to see the imperfections. Nice product Clear Guard!