
2013 550 xp adding rear work lights with led taillights work lights & reg plate
 Jun 25, 2013 | 02:56 PM
#1
Thread Starter
|
Pro Rider
Joined: Nov 2008
Posts: 1,232
Likes: 0
From: eden valley mn
I wanted work lights on my 2013 Polaris 550 xp.

I found the work light plugs so they will plug right into the work light socket. I have the wire seal now as well.
I got the taillights from the local Polaris dealer. they are for a 2008 Polaris 500. they fit the same no issues.

im ordering Polaris oem switches that are used on there hand thumb warmers for use with my work light mod. the only difference is they don't the legends on them. but there the same thing.....
here is the progress and pictures.......
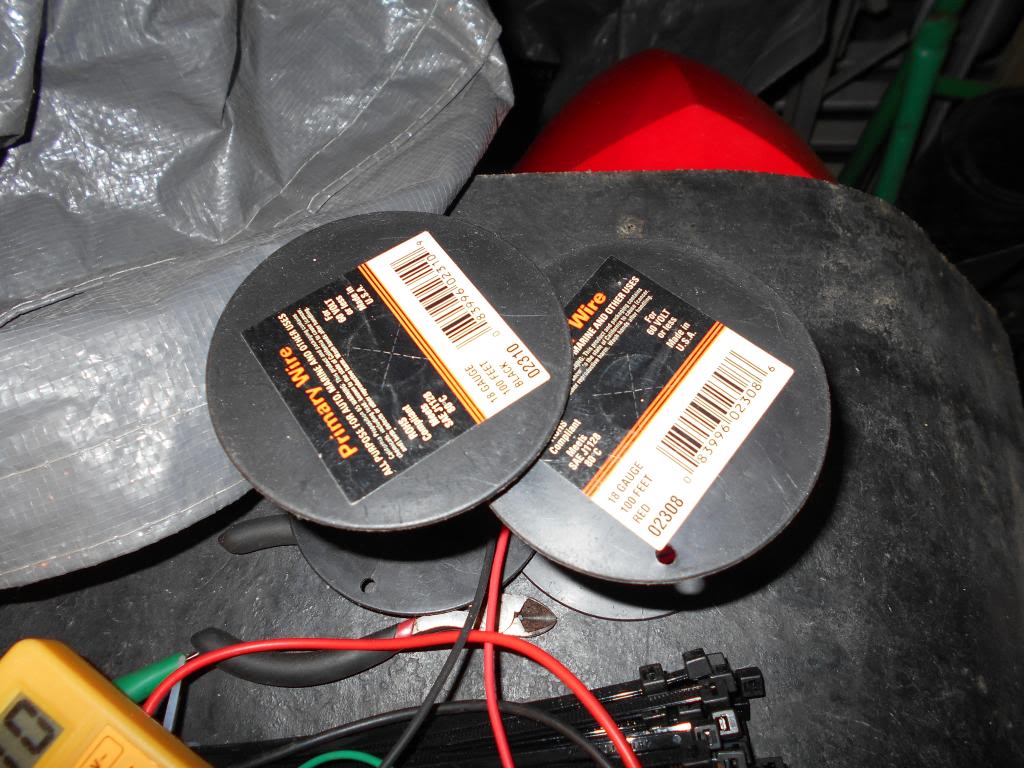
I used 18ga wire.
first you will need to remove the old taillights. by removing the 3 11mm nuts per taillight. and remove the plug to the taillight.

you will need to keep and reuse the nuts on you new taillights if you get them from the dealer. the dealer taillights come with 3157 taillight bulbs and 912 work light bulbs in them already with sockets. so if you intend on leaving light bulbs in them there is nothing else needed for them.


I installed my new taillights where the old ones were. so that I could figure out how long to make the wire leads. I had 2 part rolls of 18ga wire and 2 new rolls of 18ga wire.
so I installed plugs on the red and black wires pairs for both sides and plugged them into the work light sockets.

and left a little bit of room in case I have to remove the socket. I taped the wires to the taillight plug for the brake and run lights so it would stay the same length. I then removed the rear plastic and left side side panel along with the front rack, headlight pod cover and under the headlight pod cover.

I used the oem wire loom for the taillights and ran the wires over the oem taillight wire loom to where both sides come together and added 2 inches so there room to solder the wires together and cut them there.

I then fished the wires though the loom tell I could either get it though the split in the loom round the zip ties or the heat shield tape on the right side.


I then ran it to where both sides combine on the left side behind the rear storage compartment and soldered the part roll of 18ga wires there so it then could be run to the head light pod.


I ran the wires tell I got near the trans switch resistor pack. so I could add the trans wire reverse bypass wire from the resistor pack to the headlight pod as well. so I will add the work light wires and the trans bypass wires in my own loom.
resistor pack located under seat. can be seen really easy.


red wire pin c is the reverse wire

I then soldered my wire and heat shrinked it there.

and re loomed everything up nice and neat

I then combined all the wires in my own loom

I ran my loom right next to the main wire harness......

that's as far as I got so far........

I found the work light plugs so they will plug right into the work light socket. I have the wire seal now as well.
I got the taillights from the local Polaris dealer. they are for a 2008 Polaris 500. they fit the same no issues.

im ordering Polaris oem switches that are used on there hand thumb warmers for use with my work light mod. the only difference is they don't the legends on them. but there the same thing.....
here is the progress and pictures.......
I used 18ga wire.
first you will need to remove the old taillights. by removing the 3 11mm nuts per taillight. and remove the plug to the taillight.

you will need to keep and reuse the nuts on you new taillights if you get them from the dealer. the dealer taillights come with 3157 taillight bulbs and 912 work light bulbs in them already with sockets. so if you intend on leaving light bulbs in them there is nothing else needed for them.


I installed my new taillights where the old ones were. so that I could figure out how long to make the wire leads. I had 2 part rolls of 18ga wire and 2 new rolls of 18ga wire.

so I installed plugs on the red and black wires pairs for both sides and plugged them into the work light sockets.

and left a little bit of room in case I have to remove the socket. I taped the wires to the taillight plug for the brake and run lights so it would stay the same length. I then removed the rear plastic and left side side panel along with the front rack, headlight pod cover and under the headlight pod cover.

I used the oem wire loom for the taillights and ran the wires over the oem taillight wire loom to where both sides come together and added 2 inches so there room to solder the wires together and cut them there.

I then fished the wires though the loom tell I could either get it though the split in the loom round the zip ties or the heat shield tape on the right side.


I then ran it to where both sides combine on the left side behind the rear storage compartment and soldered the part roll of 18ga wires there so it then could be run to the head light pod.


I ran the wires tell I got near the trans switch resistor pack. so I could add the trans wire reverse bypass wire from the resistor pack to the headlight pod as well. so I will add the work light wires and the trans bypass wires in my own loom.
resistor pack located under seat. can be seen really easy.


red wire pin c is the reverse wire

I then soldered my wire and heat shrinked it there.

and re loomed everything up nice and neat

I then combined all the wires in my own loom

I ran my loom right next to the main wire harness......

that's as far as I got so far........
 Jun 27, 2013 | 04:44 AM
#5
Thread Starter
|
Pro Rider
Joined: Nov 2008
Posts: 1,232
Likes: 0
From: eden valley mn
today I have everything all zip tied up. I also added a rear 3rd brake light with warning patterns on the rear under the rear storage compartment. and along with that same bracket I also made a reg plate holder.


I also added a rear SAE plug with a 15 amp fuse at the battery that I can use for either hooking up a battery tender, or use it for my tow behind grader box scraper linear actuator.


small loom in my hand goes to the rear accessory SAE plug. larger loom is for the work light and trans reverse bypass wires that goes in to the headlight pod.

was gona wire loom the rear 3rd brake light but I may end up changing it. so I left it un loomed.

rear fender put back on. and taillight plugged in.


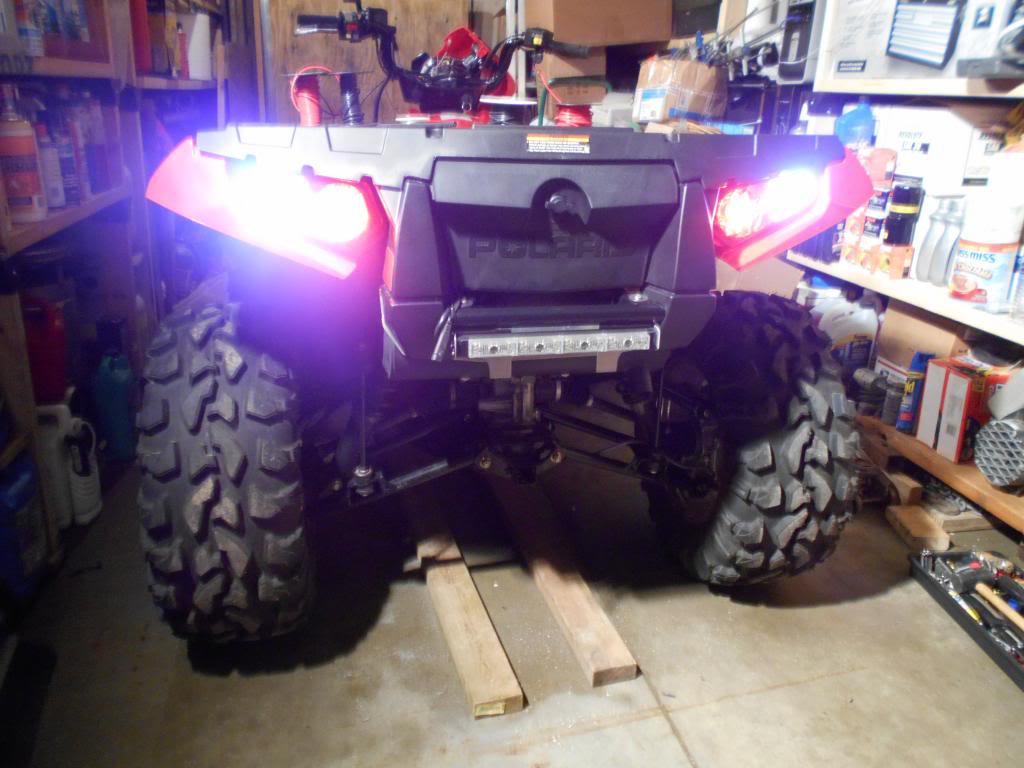
picture of the rear with the new work light taillights.

led taillights on in run.

work lights and taillights on
camera flash on

camera flash off


im gona add 2 more switches in the headlight pod. 1 for reverse light/work lights auto on in reverse, allways off, and always on. the 2nd switch I add will go to future plow lights.


also adding a fuse block so everything is fused. hand warmers, thumb warmer, reverse light/work lights, plow lights, winch ignition, and my rear 3rd brake light.


but I think I may need to replace the fuse block with a bigger one. this ones only 5 think I need a 6.
that's it for now!!!!!


I also added a rear SAE plug with a 15 amp fuse at the battery that I can use for either hooking up a battery tender, or use it for my tow behind grader box scraper linear actuator.


small loom in my hand goes to the rear accessory SAE plug. larger loom is for the work light and trans reverse bypass wires that goes in to the headlight pod.

was gona wire loom the rear 3rd brake light but I may end up changing it. so I left it un loomed.

rear fender put back on. and taillight plugged in.


picture of the rear with the new work light taillights.

led taillights on in run.

work lights and taillights on
camera flash on

camera flash off


im gona add 2 more switches in the headlight pod. 1 for reverse light/work lights auto on in reverse, allways off, and always on. the 2nd switch I add will go to future plow lights.


also adding a fuse block so everything is fused. hand warmers, thumb warmer, reverse light/work lights, plow lights, winch ignition, and my rear 3rd brake light.


but I think I may need to replace the fuse block with a bigger one. this ones only 5 think I need a 6.
that's it for now!!!!!
Jul 28, 2013 | 03:21 AM
#6
Thread Starter
|
Pro Rider
Joined: Nov 2008
Posts: 1,232
Likes: 0
From: eden valley mn
iv been busy working. so haven't had much time to work on my own stuff. but I did get a bit more done.
I got all the wires into the head light pod. along with the relays somewhat wired.


I combined the worklight ground and the relay ground and grounded them to the bolt that holds the foot brake reserve. my relays are water proof. I will be also adding dielectric grease to the pins along with silicone on the ends to make it more water proof.


I did a test on the auto reverse function. and it WORKS......
I just got different fuse block. I wanted 6 but only could find 5 at a local auto parts store. so I will be selling the 5 fuse block and replaceing it with a 6 fuse block.
I still need to order my switches yet.
Feb 20, 2016 | 04:18 AM
#7
Thread Starter
|
Pro Rider
Joined: Nov 2008
Posts: 1,232
Likes: 0
From: eden valley mn
if anyone is looking for the plugs and pins i have more forsale; New Polaris Rear Worklight Plugs Sold in Pairs New RZR Sportsman 500 450 | eBay
Trending Topics
Jan 13, 2018 | 01:41 PM
#8
Weekend Warrior
Joined: Jan 2018
Posts: 1
Likes: 0
iv been busy working. so haven't had much time to work on my own stuff. but I did get a bit more done.
I got all the wires into the head light pod. along with the relays somewhat wired.
Attachment 14517
Attachment 14518
I combined the worklight ground and the relay ground and grounded them to the bolt that holds the foot brake reserve. my relays are water proof. I will be also adding dielectric grease to the pins along with silicone on the ends to make it more water proof.
Attachment 14519
Attachment 14520
I did a test on the auto reverse function. and it WORKS......
I just got different fuse block. I wanted 6 but only could find 5 at a local auto parts store. so I will be selling the 5 fuse block and replaceing it with a 6 fuse block.
I still need to order my switches yet.
How did you get it wired up for the auto reverse light? I�m in the process of doing the auto reverse with the bypass I have a light installed and have my reverse trans wire split but I need to know where to run the wires to make the light come on automatically in reverse. I also have 2 relays ready to use I just need to know where to run what wires. Any help is appreciated.