SS Camaro - Track trips, build pics etc.
#31
 07-01-2017, 08:46 AM

Join Date: Aug 2010
Posts: 230
Likes: 0
Received 0 Likes
on
0 Posts
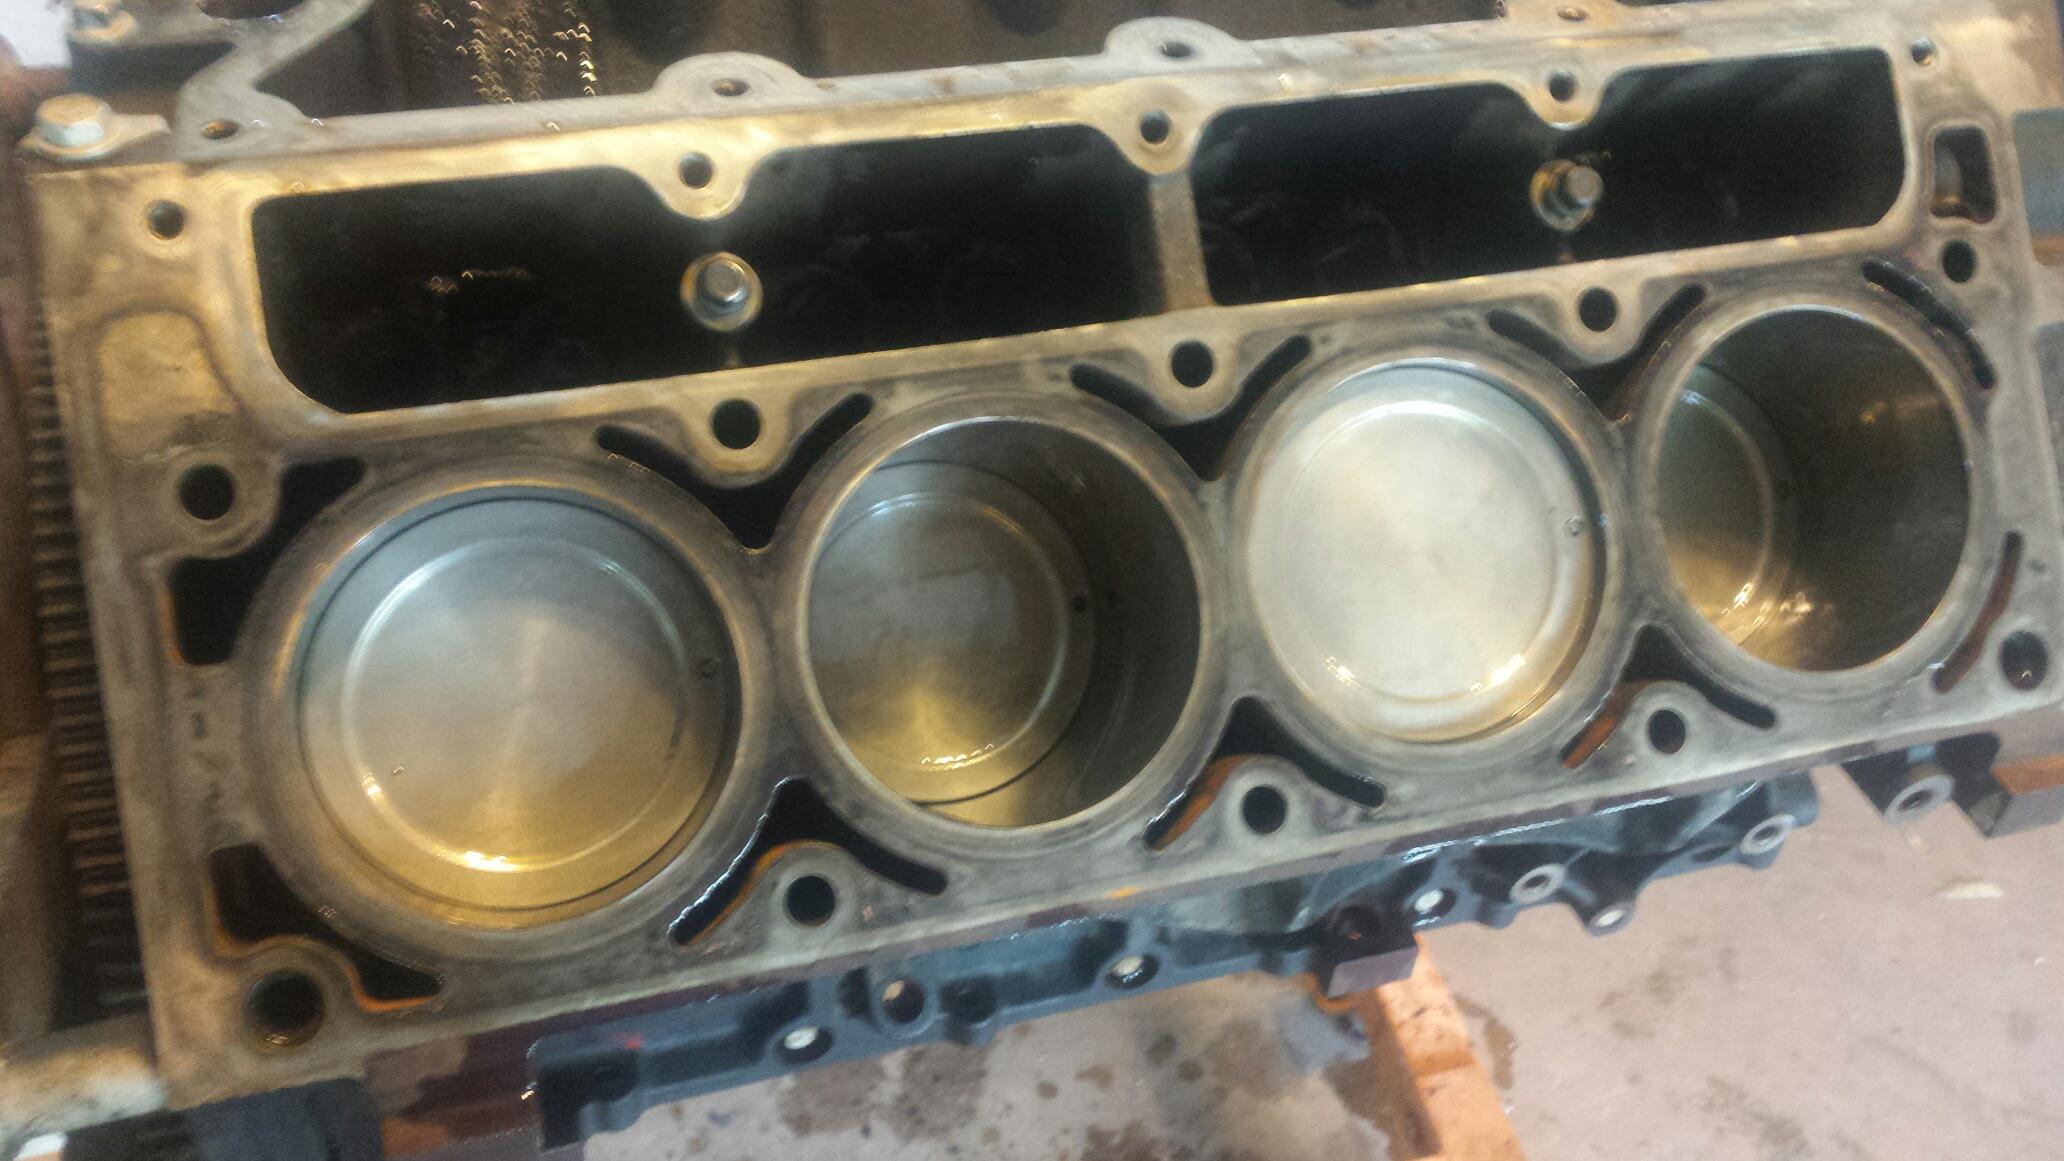
Lots of parts have been ordered, and lots have been showing up.....and I still think of new things daily. I started with the tear-down and inspection of the 2005 5.3. Bearings were acceptable, and cylinders looked really nice. I spent hours at this point to make it look this nice.
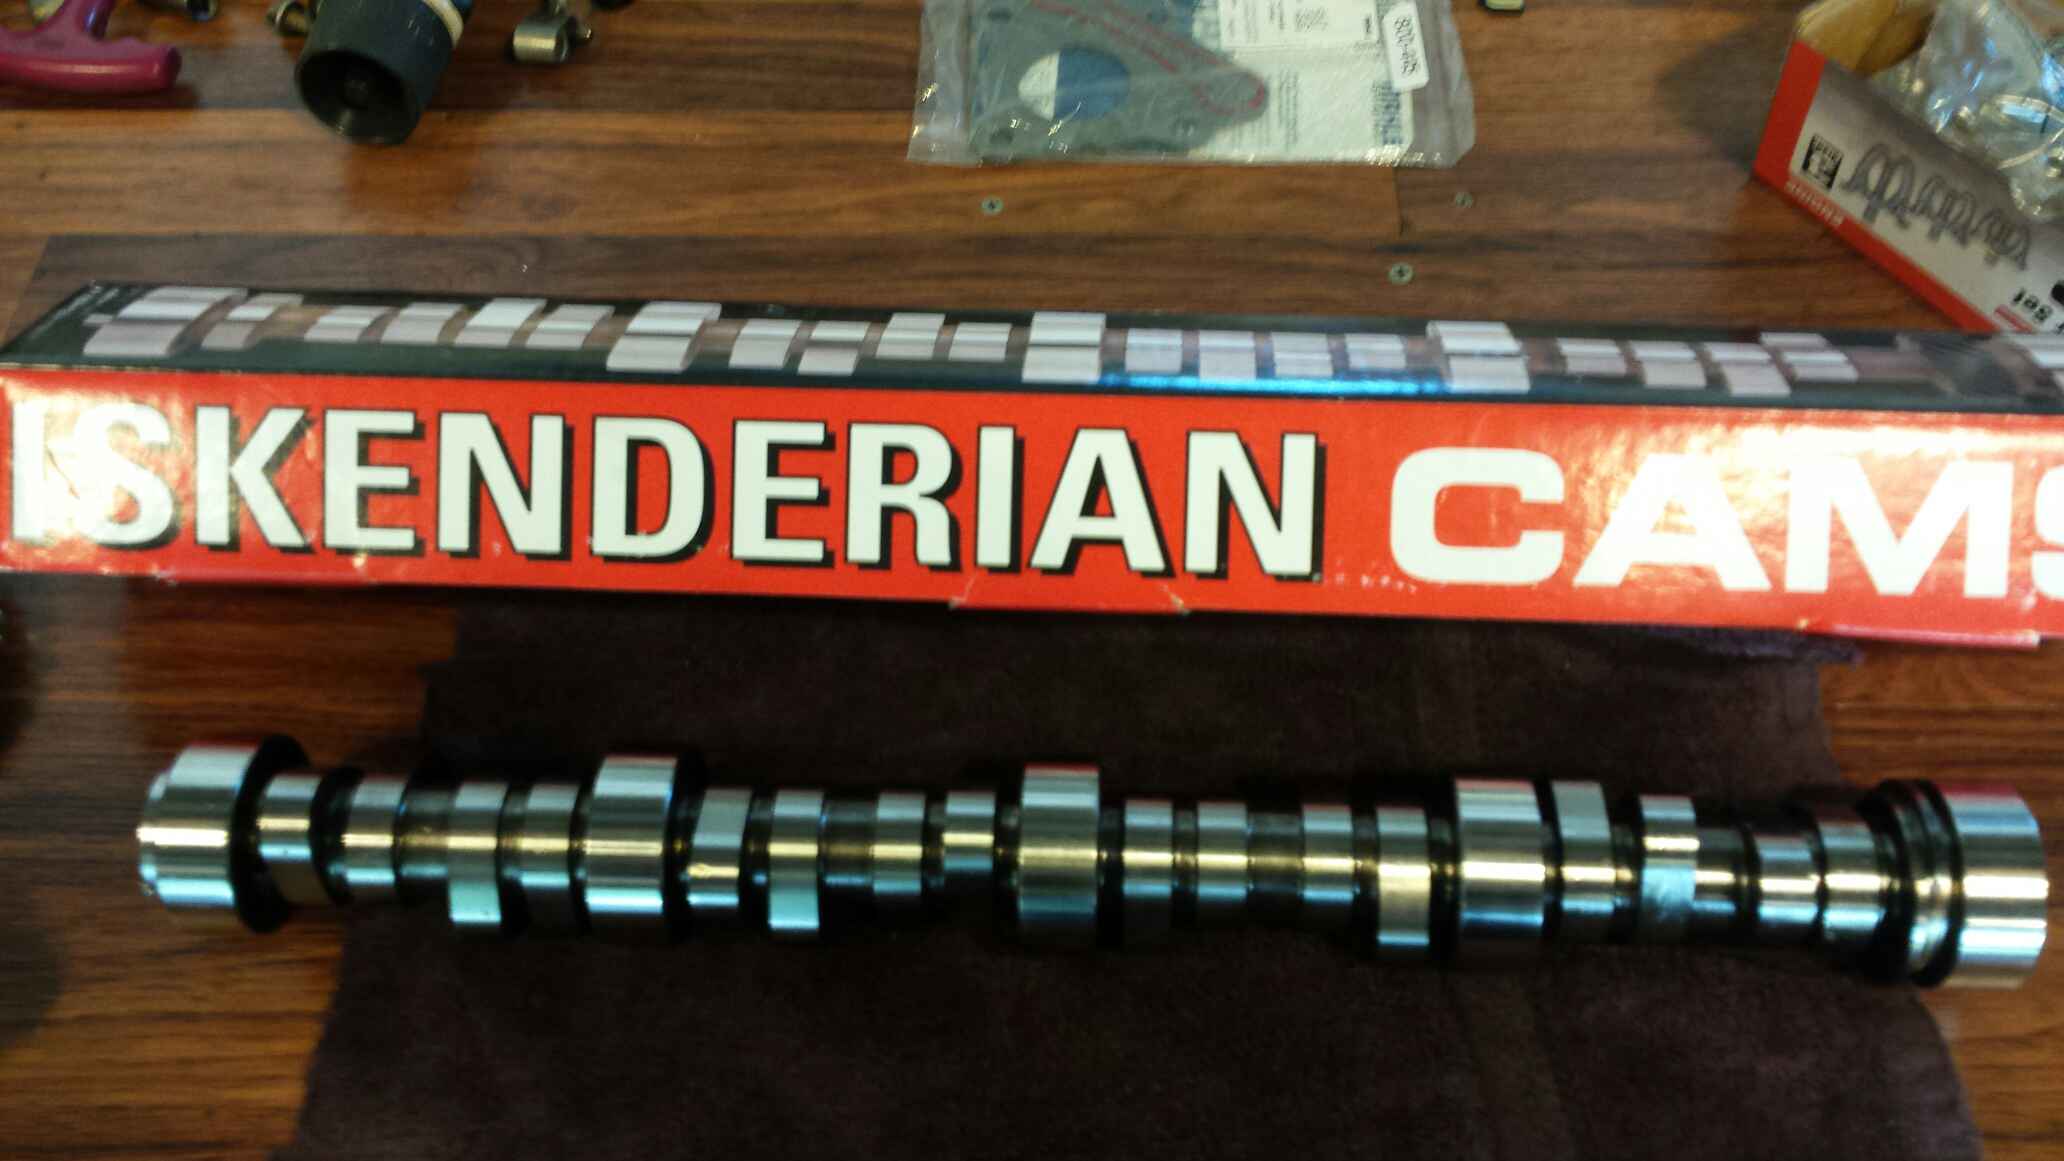
Here is the Isky cam, grind 271-HR-672. Specs are something like 218/218 .570 .570 112. Its my understanding it was spec'd for a turbo setup. The way I ended up with it is a buddy locally had it for sale, it was brand new, and it was quite a bit cheaper then new, so here it is.
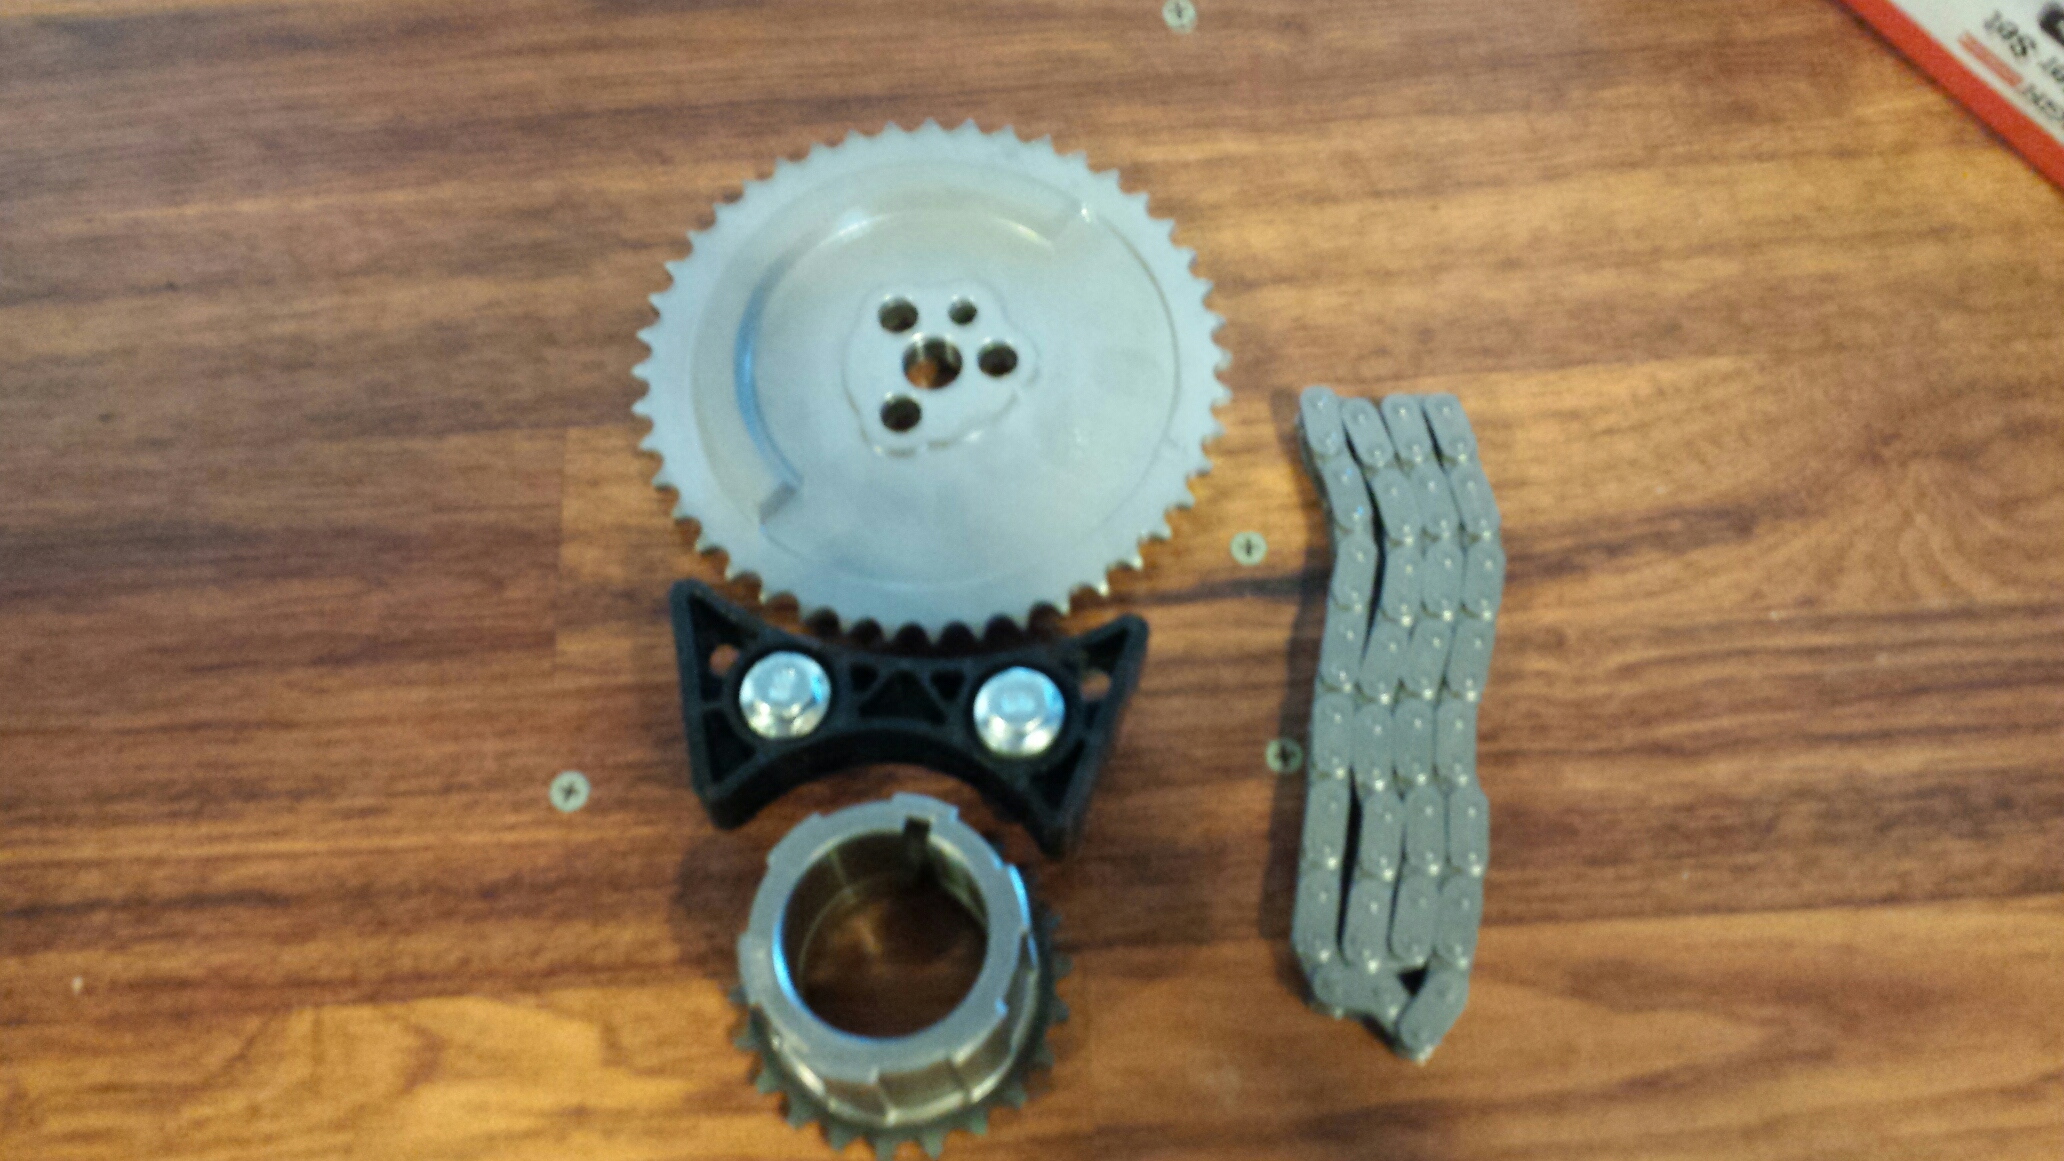
New timing set, and I wanted to drill the block for the damper but it looked like the holes would go through and hit the crank so I said **** it and through it in the scrap parts pile.
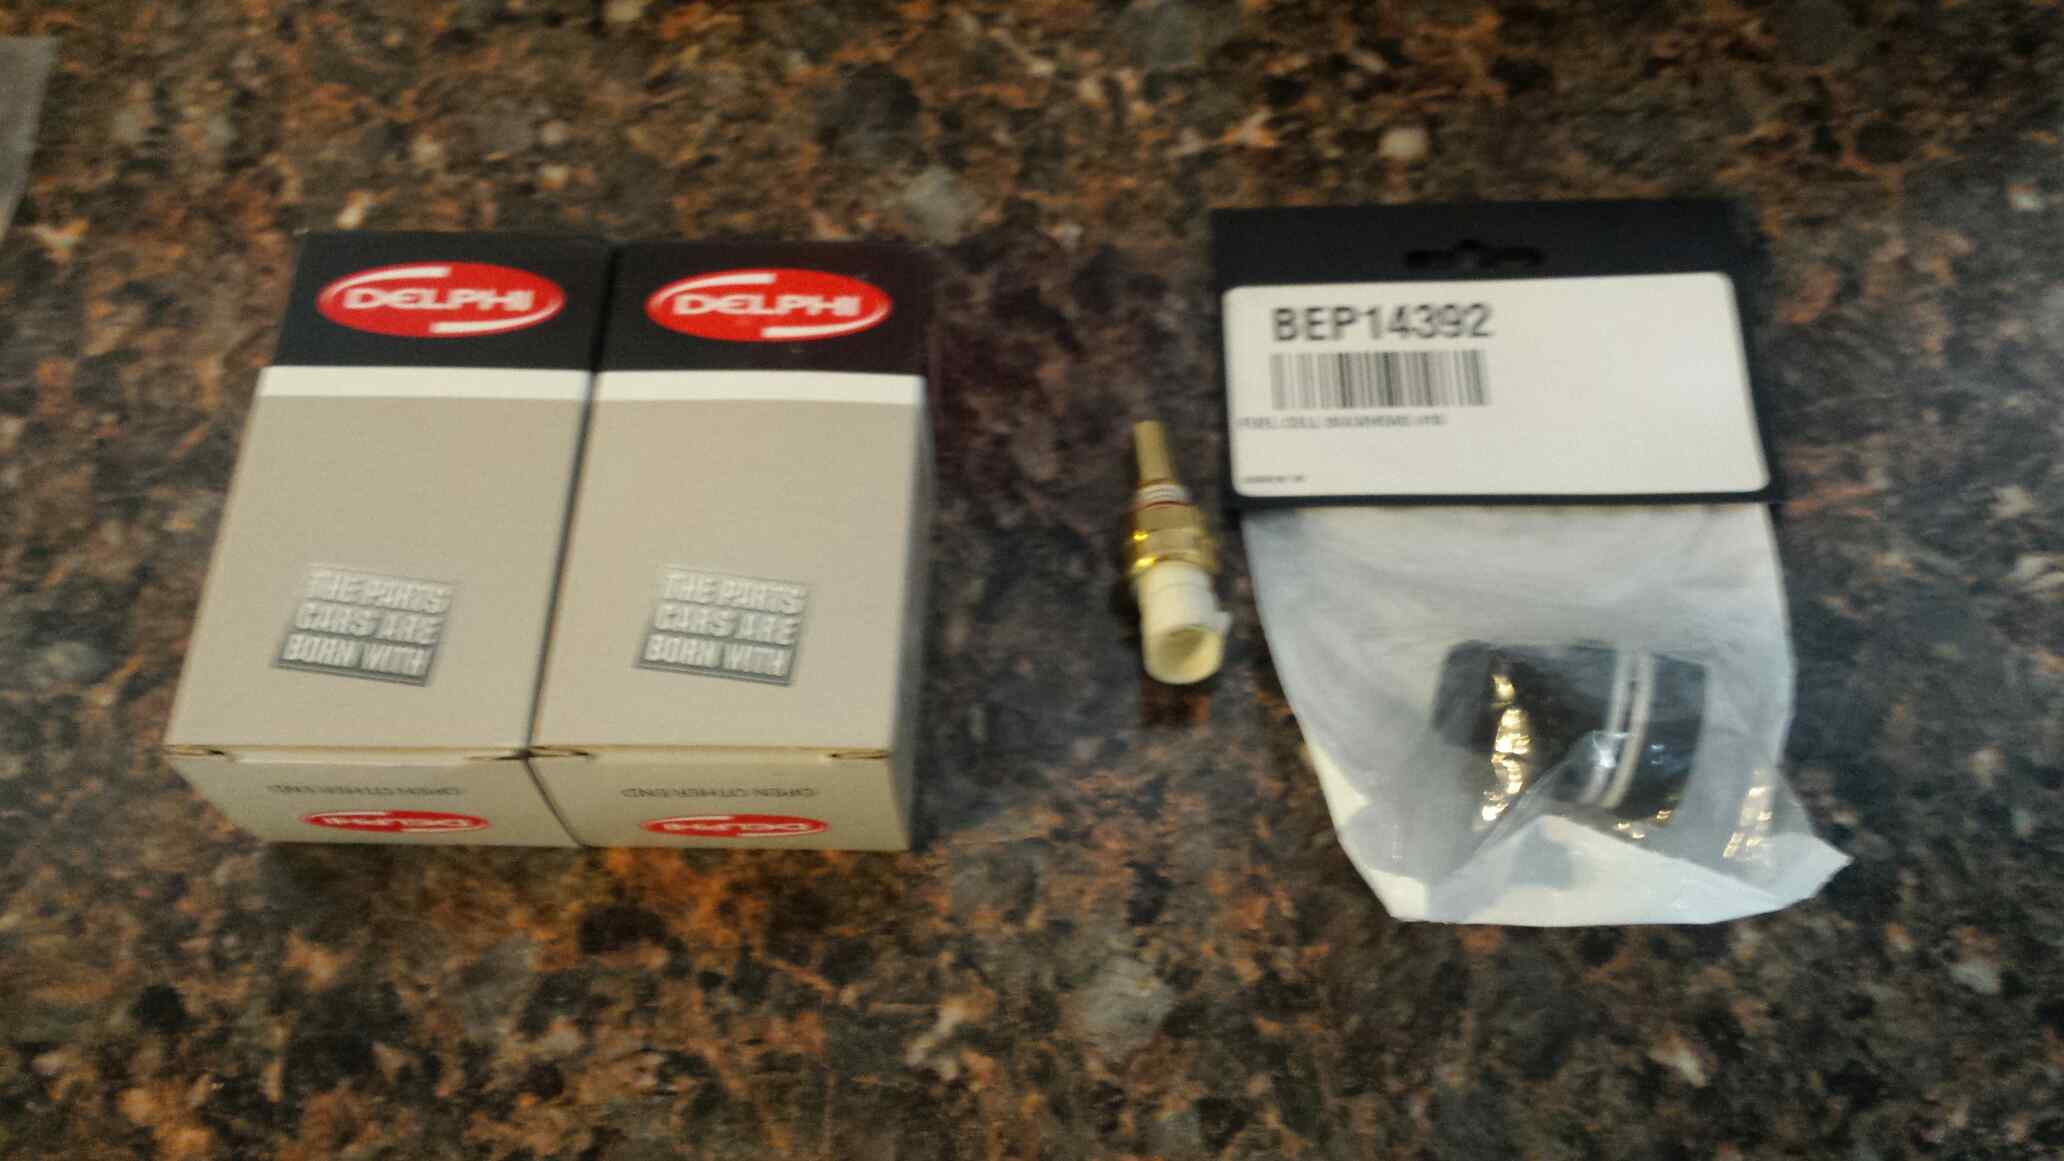
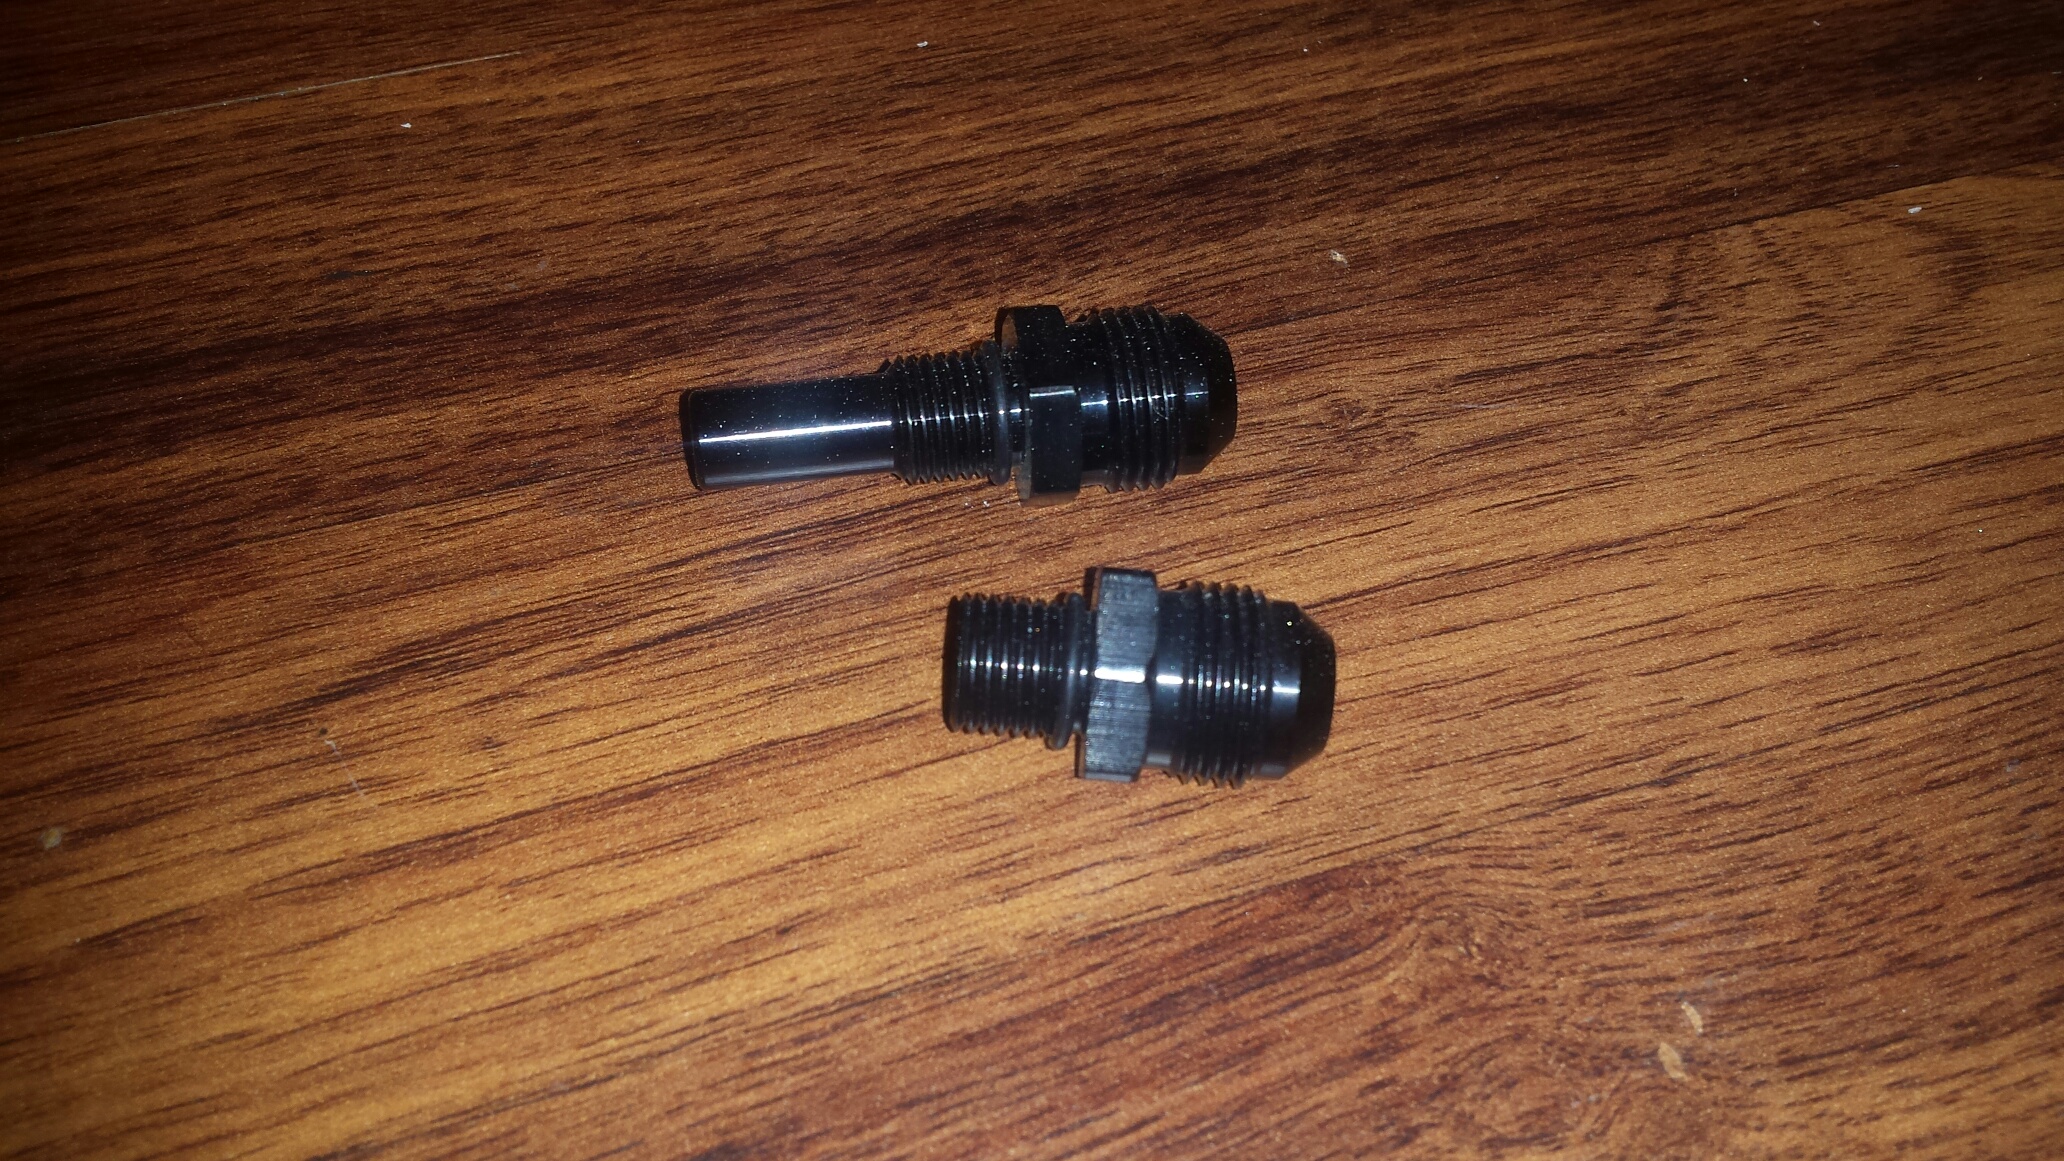
Knock sensors were crusty so I ordered a set of them, old coolant sensor broke (they are very brittle with age) so there's that in the center, and to the right is a -10 bulkhead fitting. I'm gonna try and get this in the side of the oil pan for my turbo oil drain line.
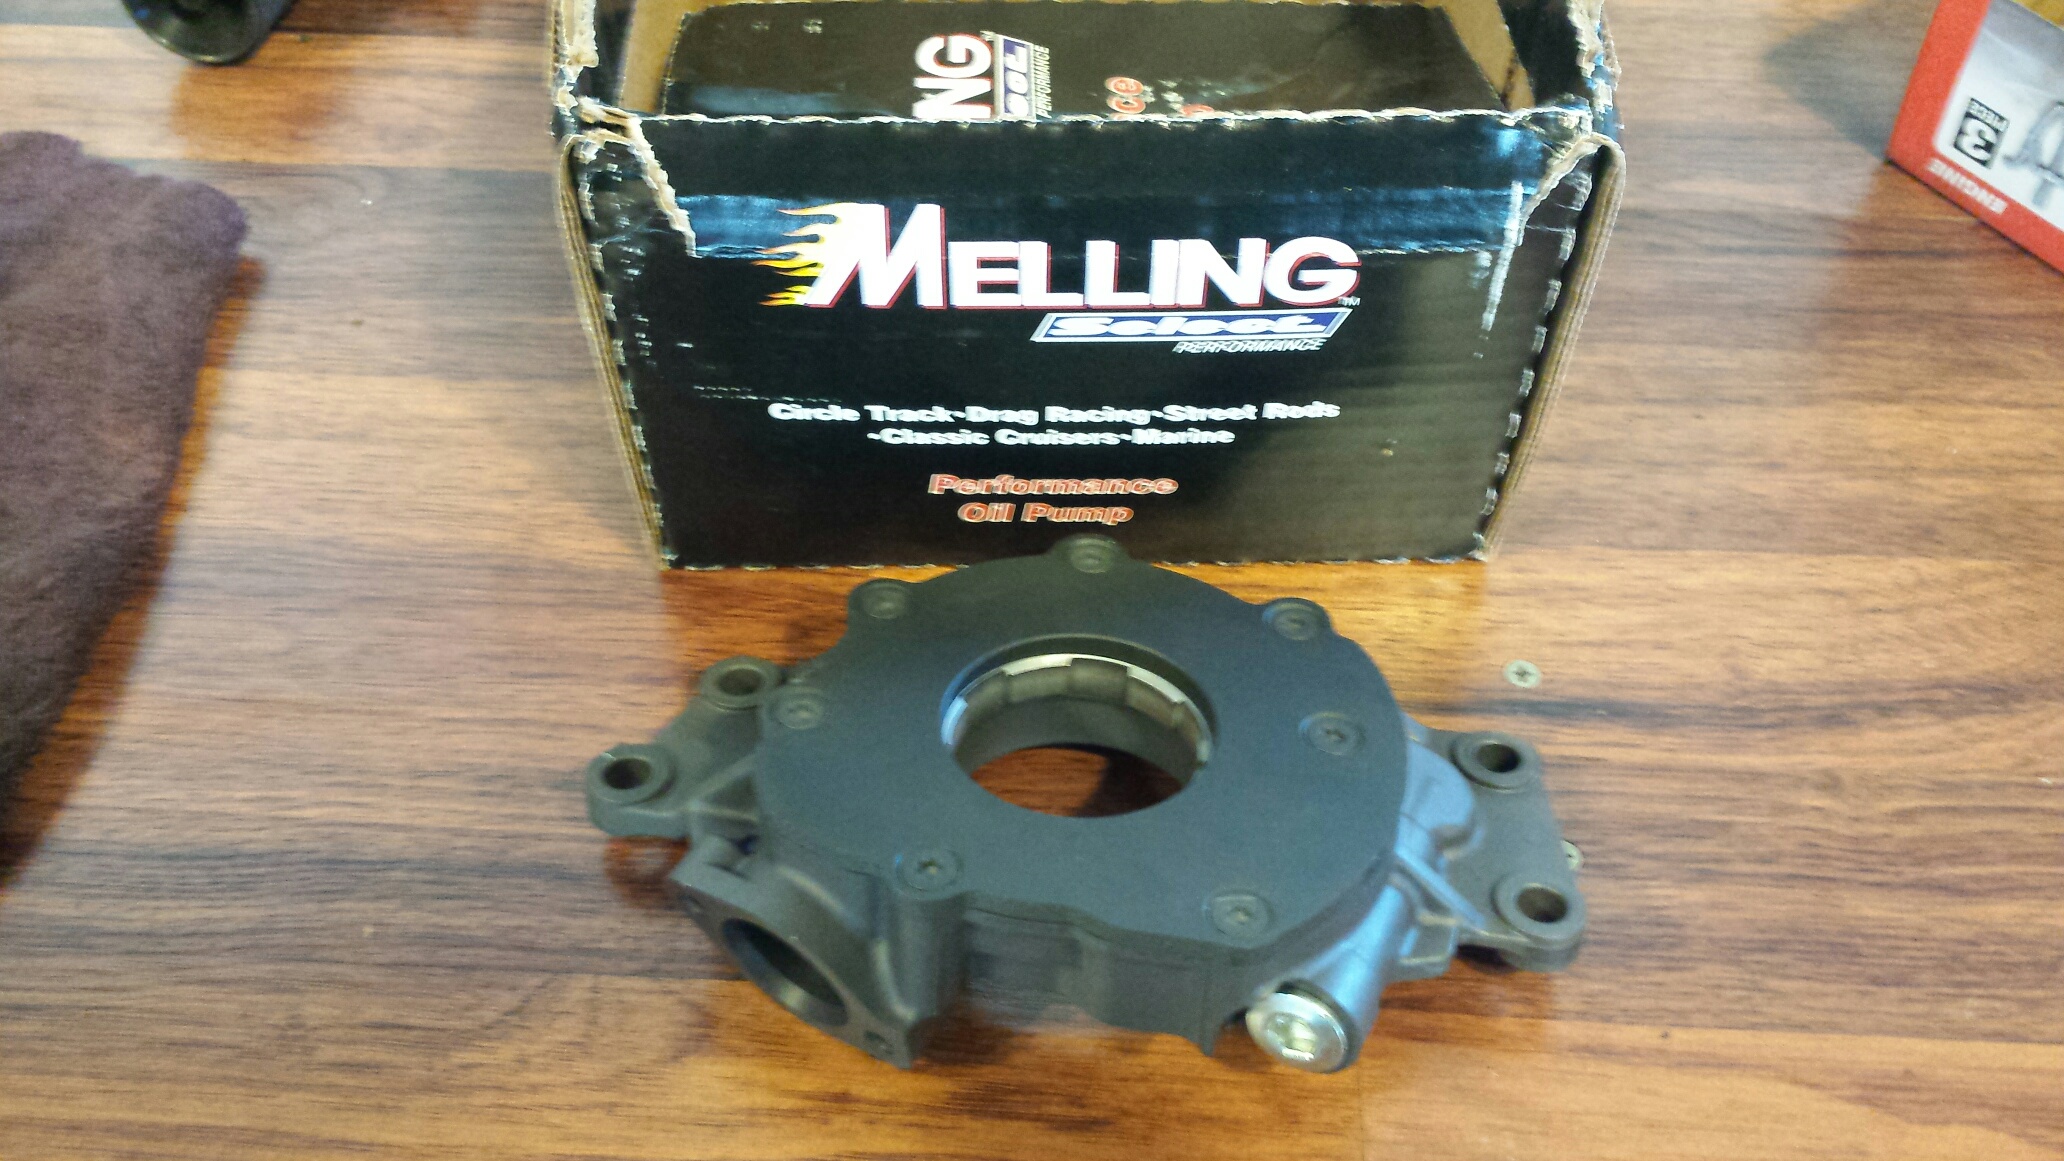
Melling 10295
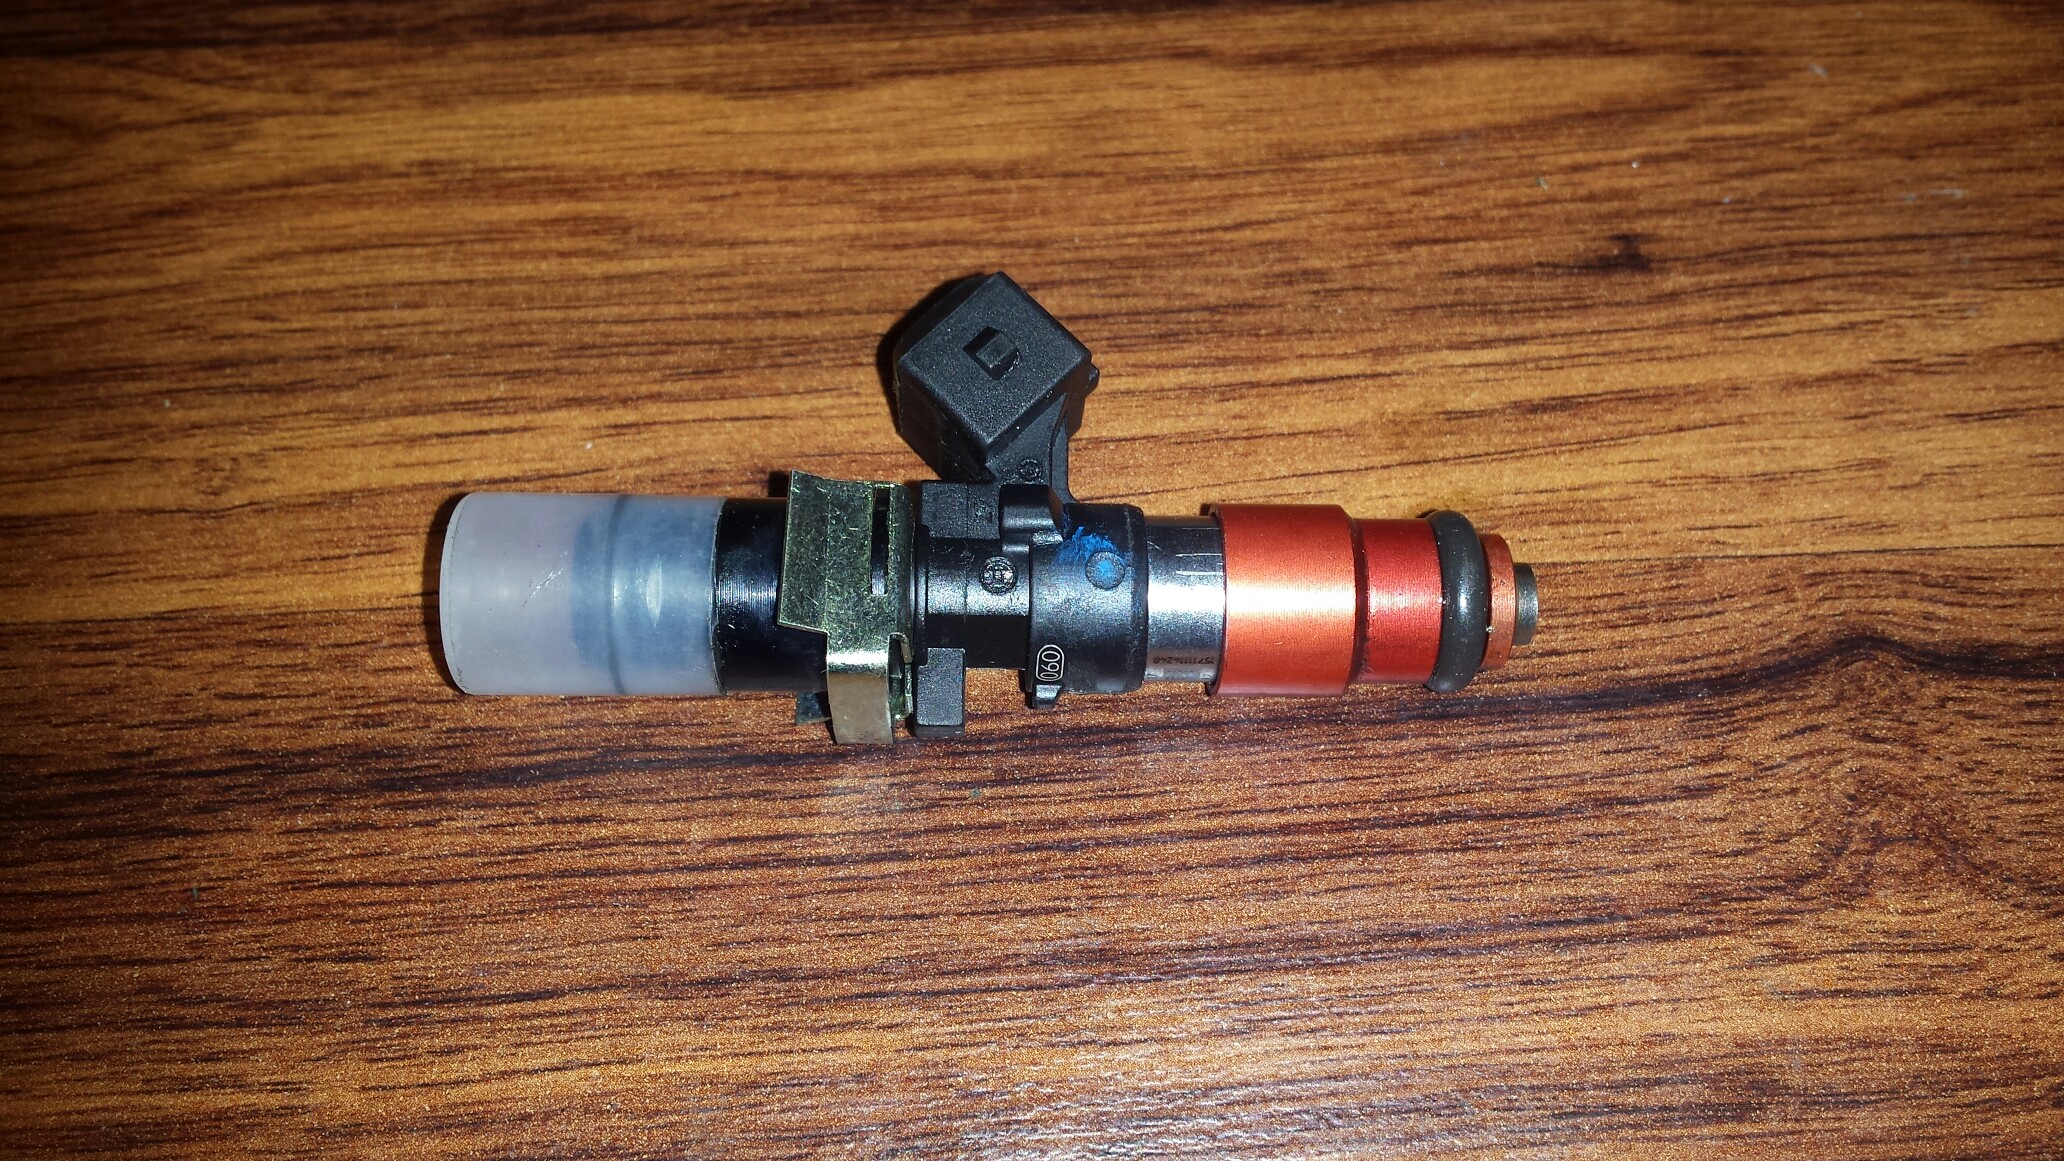
Bosch 127s. These were actually an ebay score, dyno runtime only, $600 shipped!!
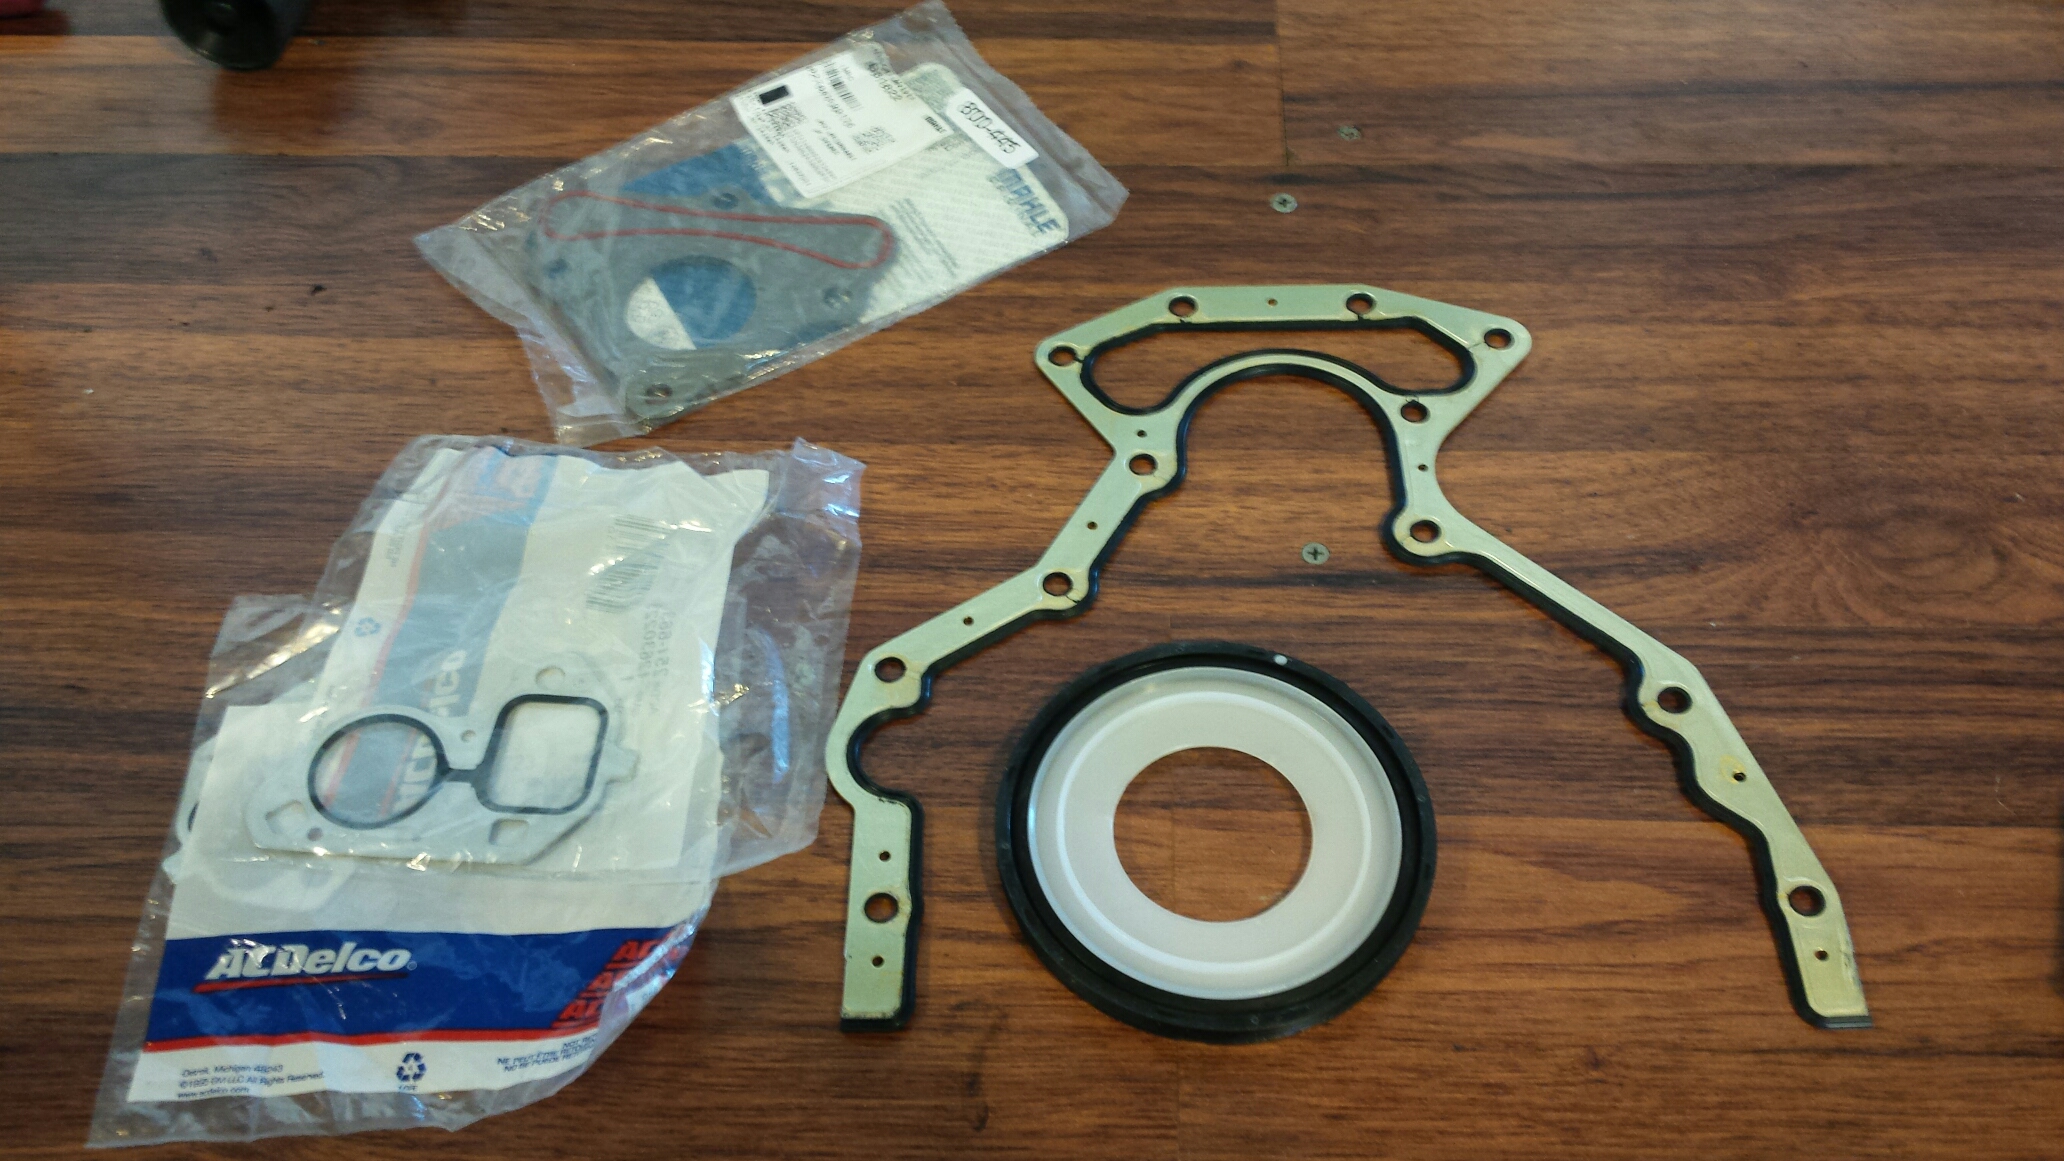
New rear cover gasket, rear main seal, water pump gaskets, and new front cam plate.
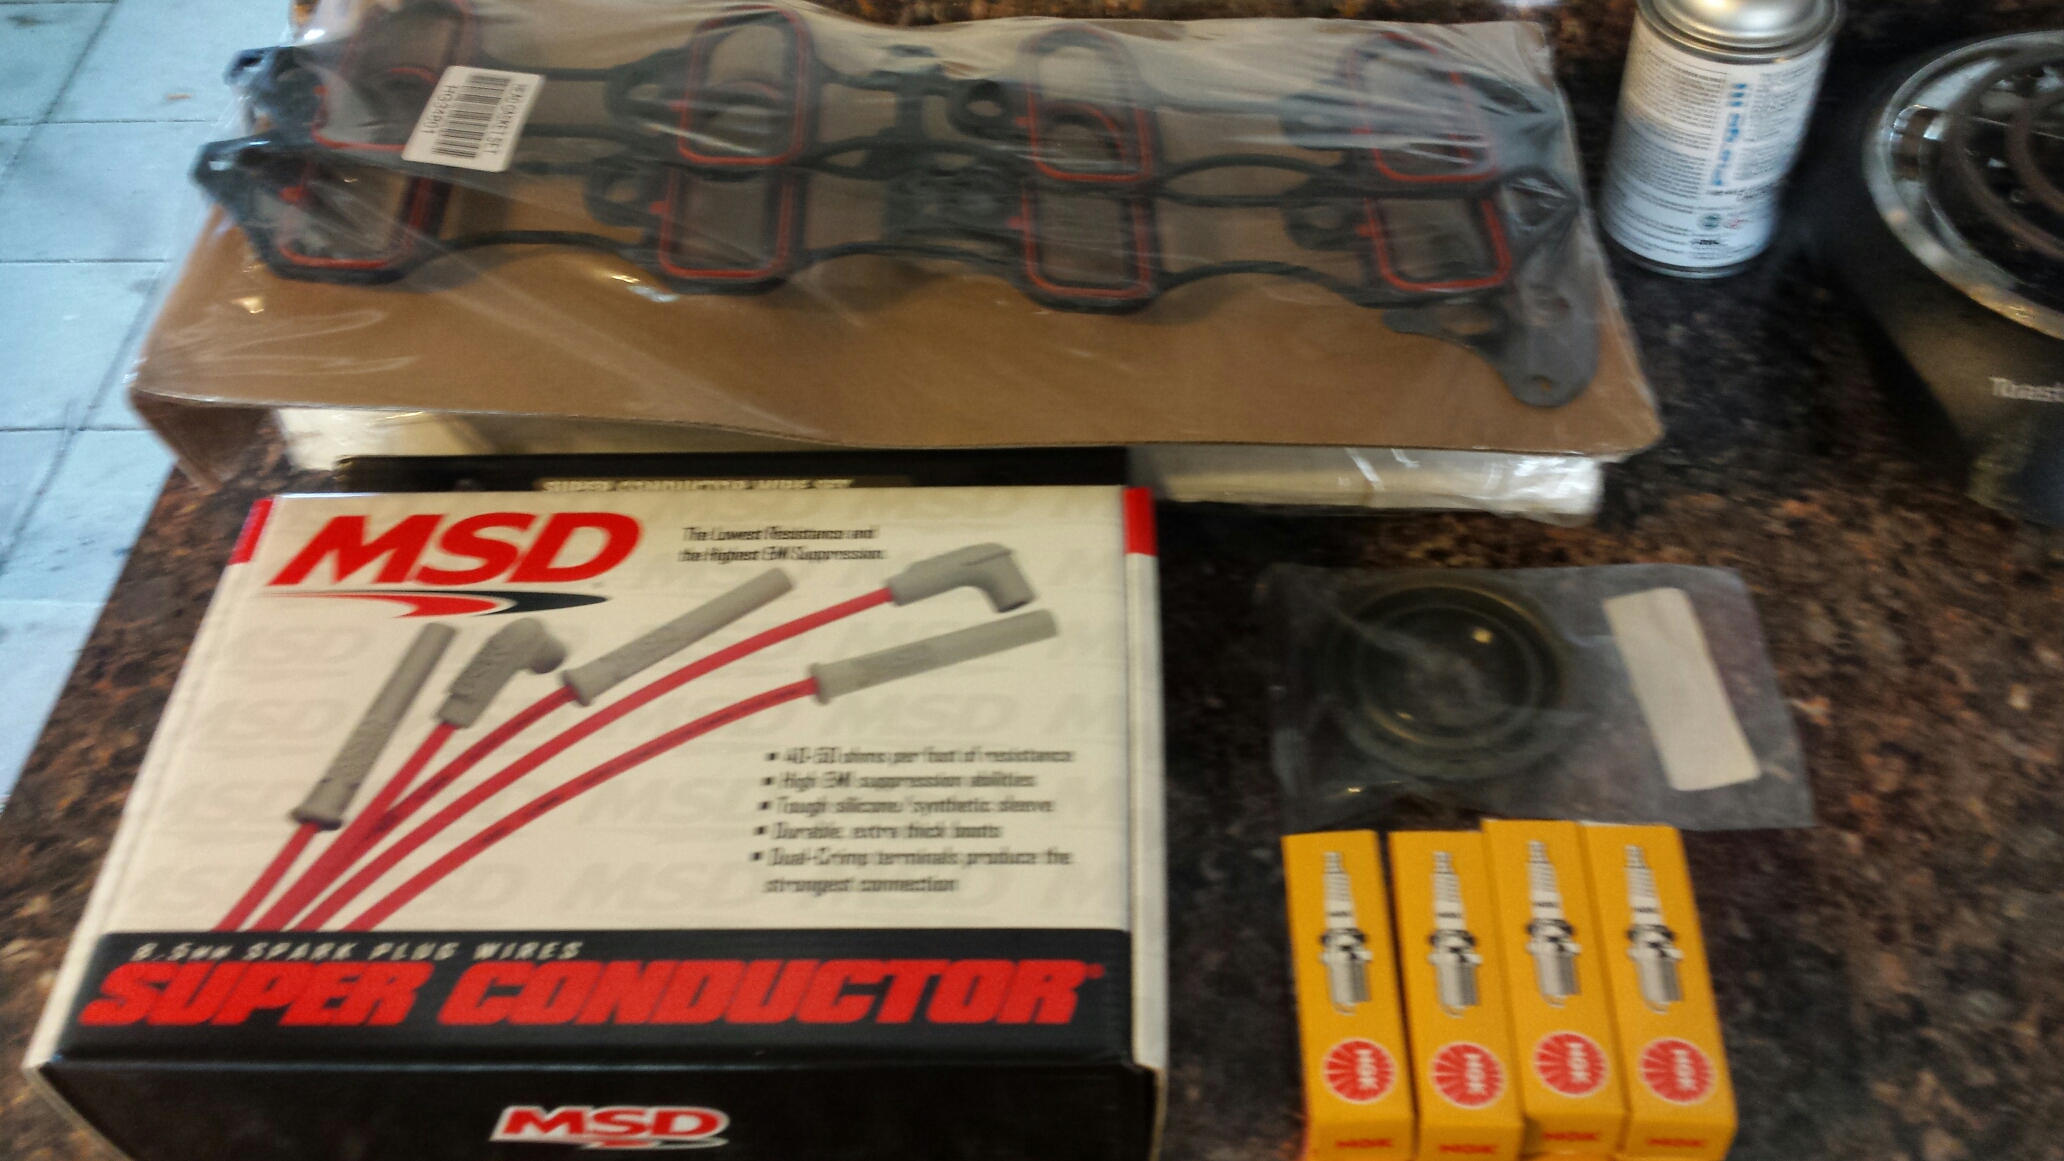
New intake gaskets, NGK BR7s, MSD plug wires fit for truck coils, and a new pinion seal for my 12 bolt, figuring I'm gonna swap out the 4.10s in favor of the 3.73s I have on my shelf.......
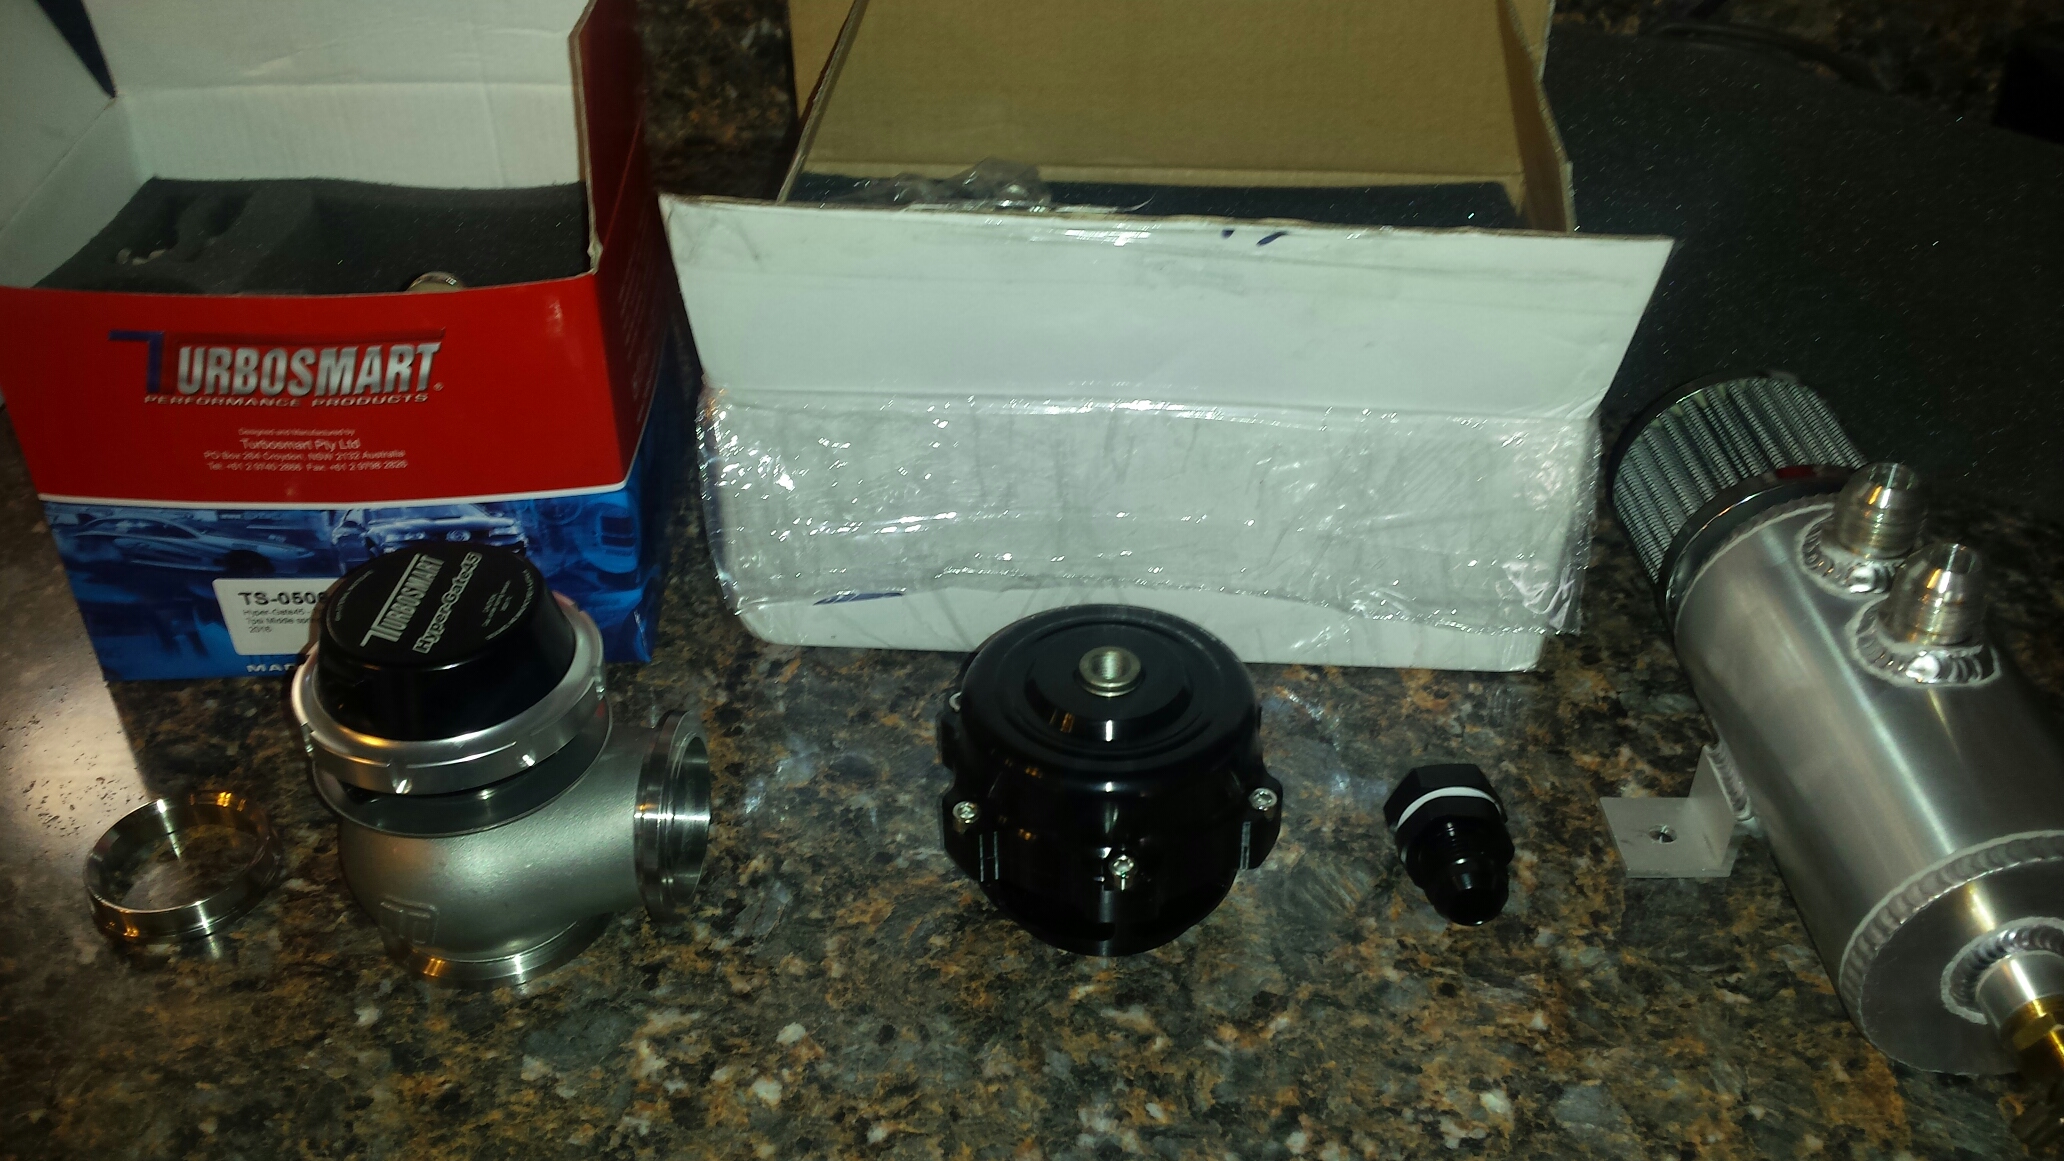
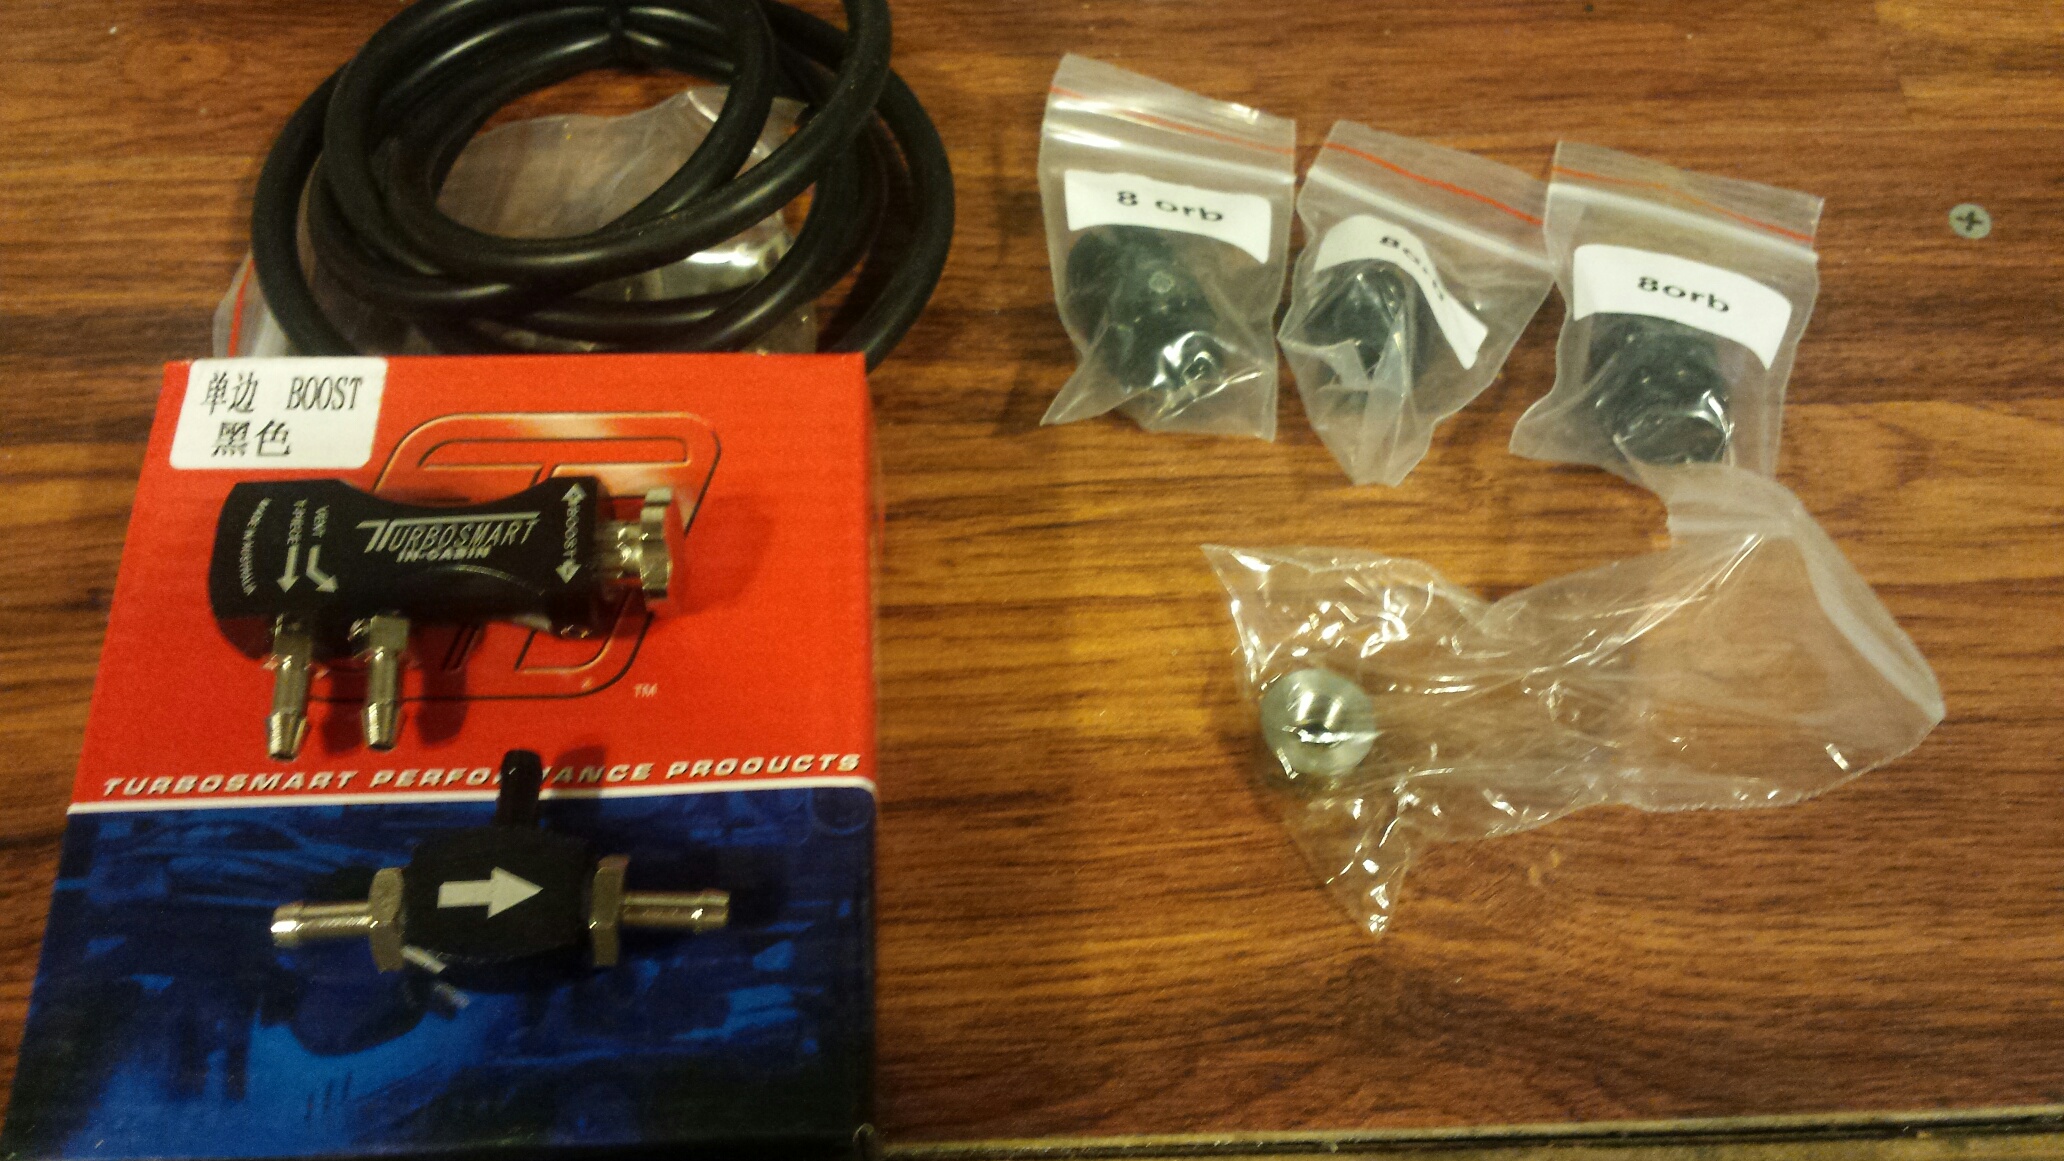
Chinese blow off valve, and really nice turbo smart wastegate that came with the huron speed kit (which is backordered BTW). Thats my ebay catch can with -10 lines that will come off each valve cover.
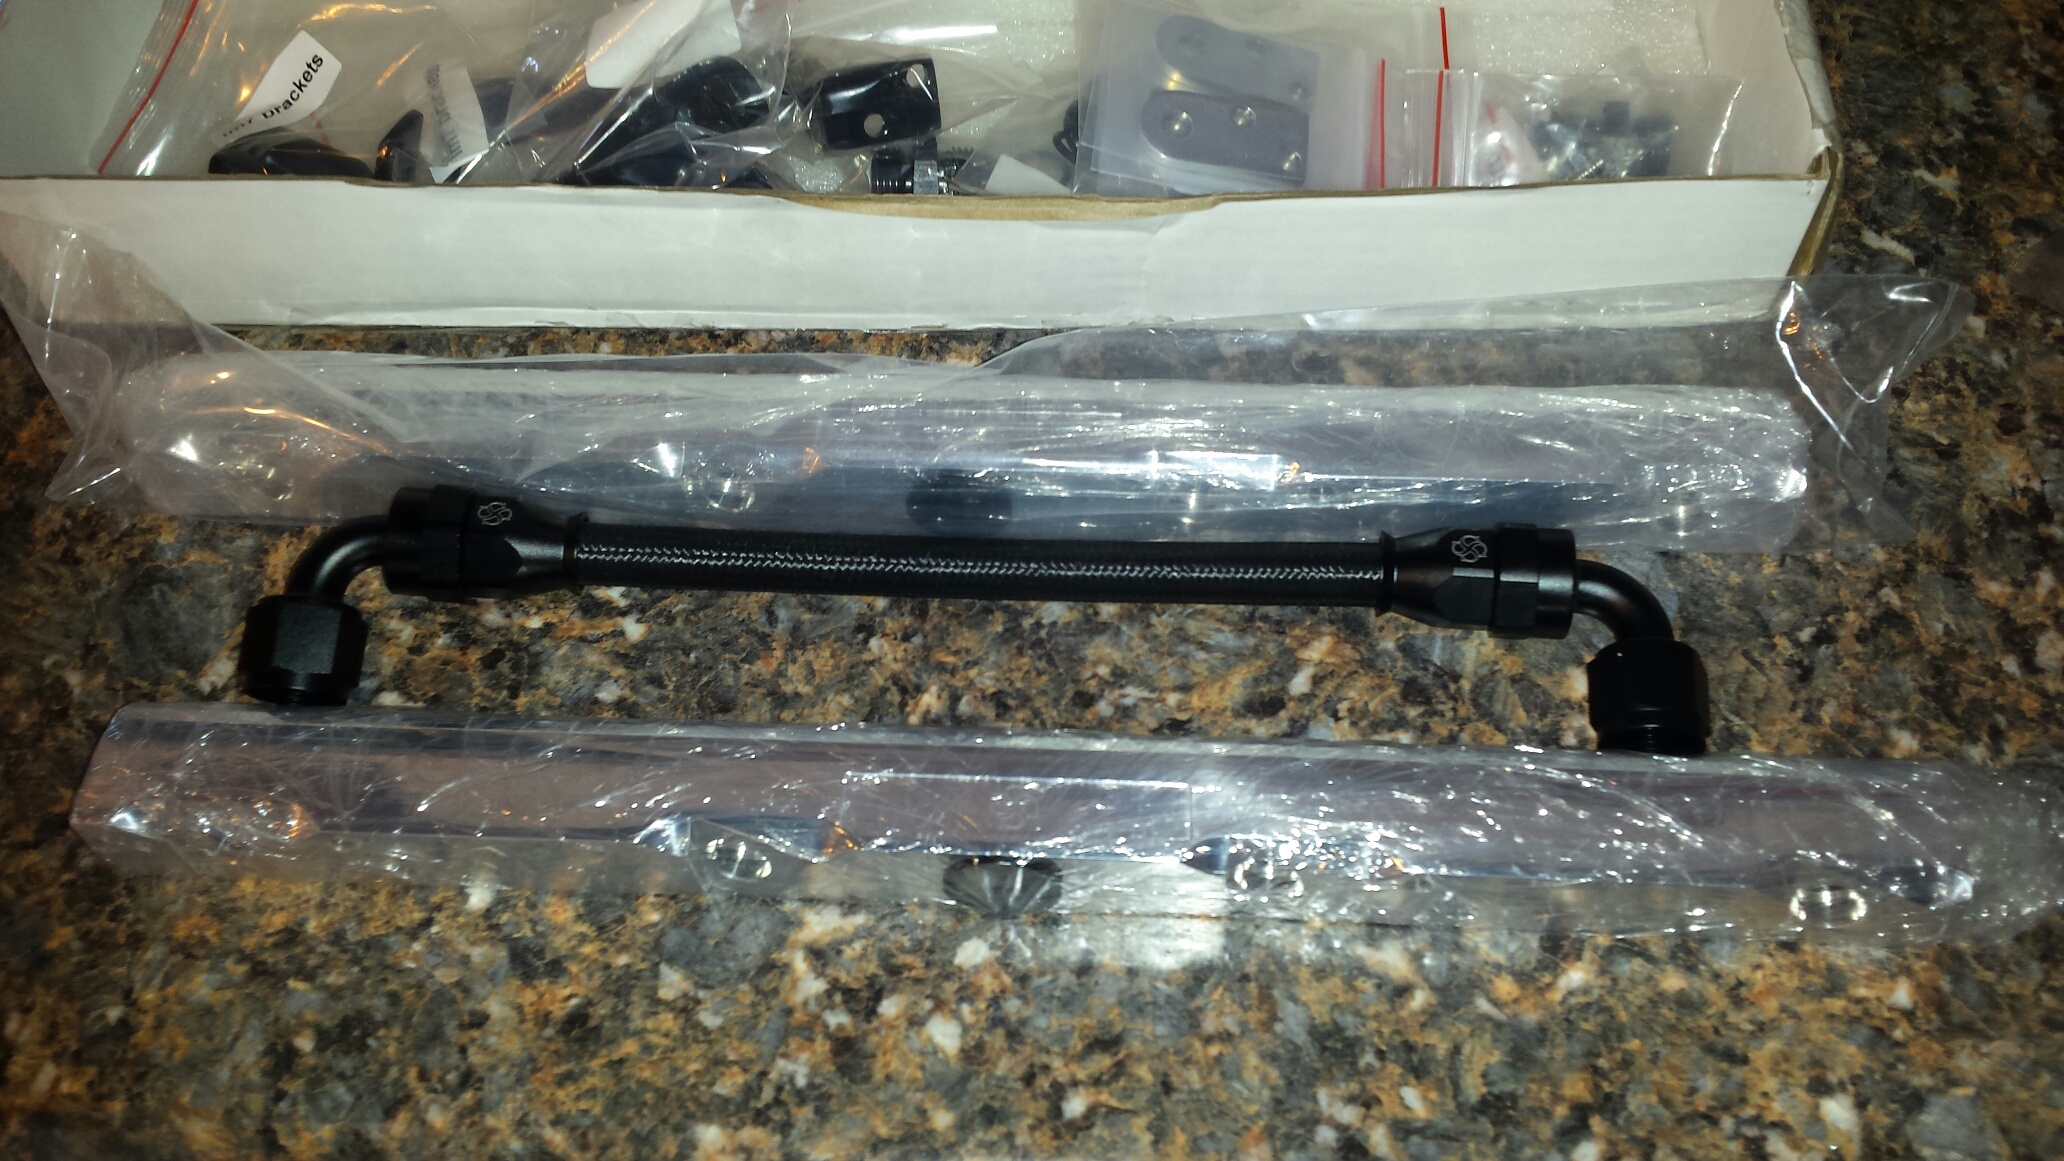
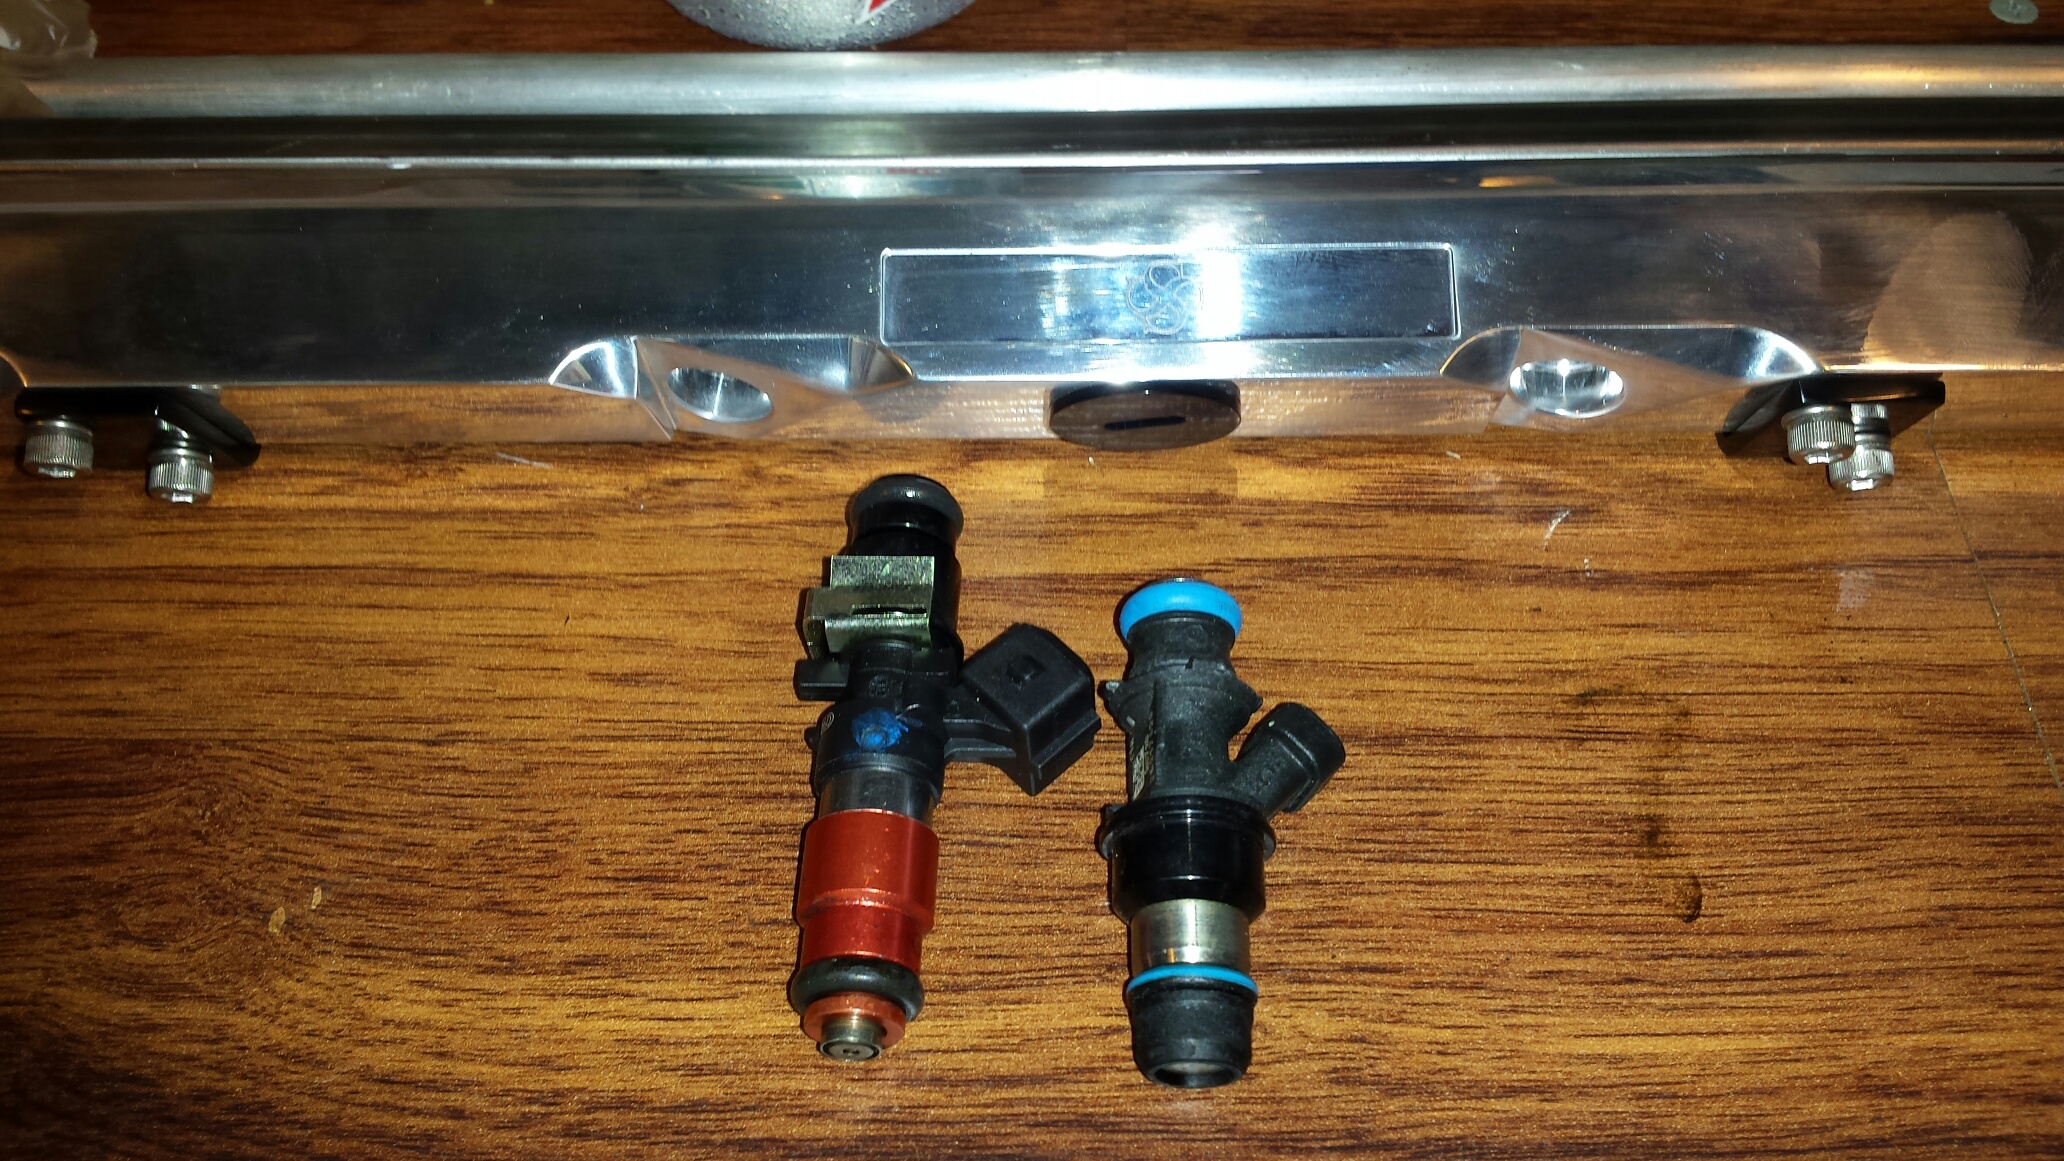
Billet fuel rails for the truck intake. Gonna have to figure out if it will work with these LS1 length injectors......Will mock it up soon.
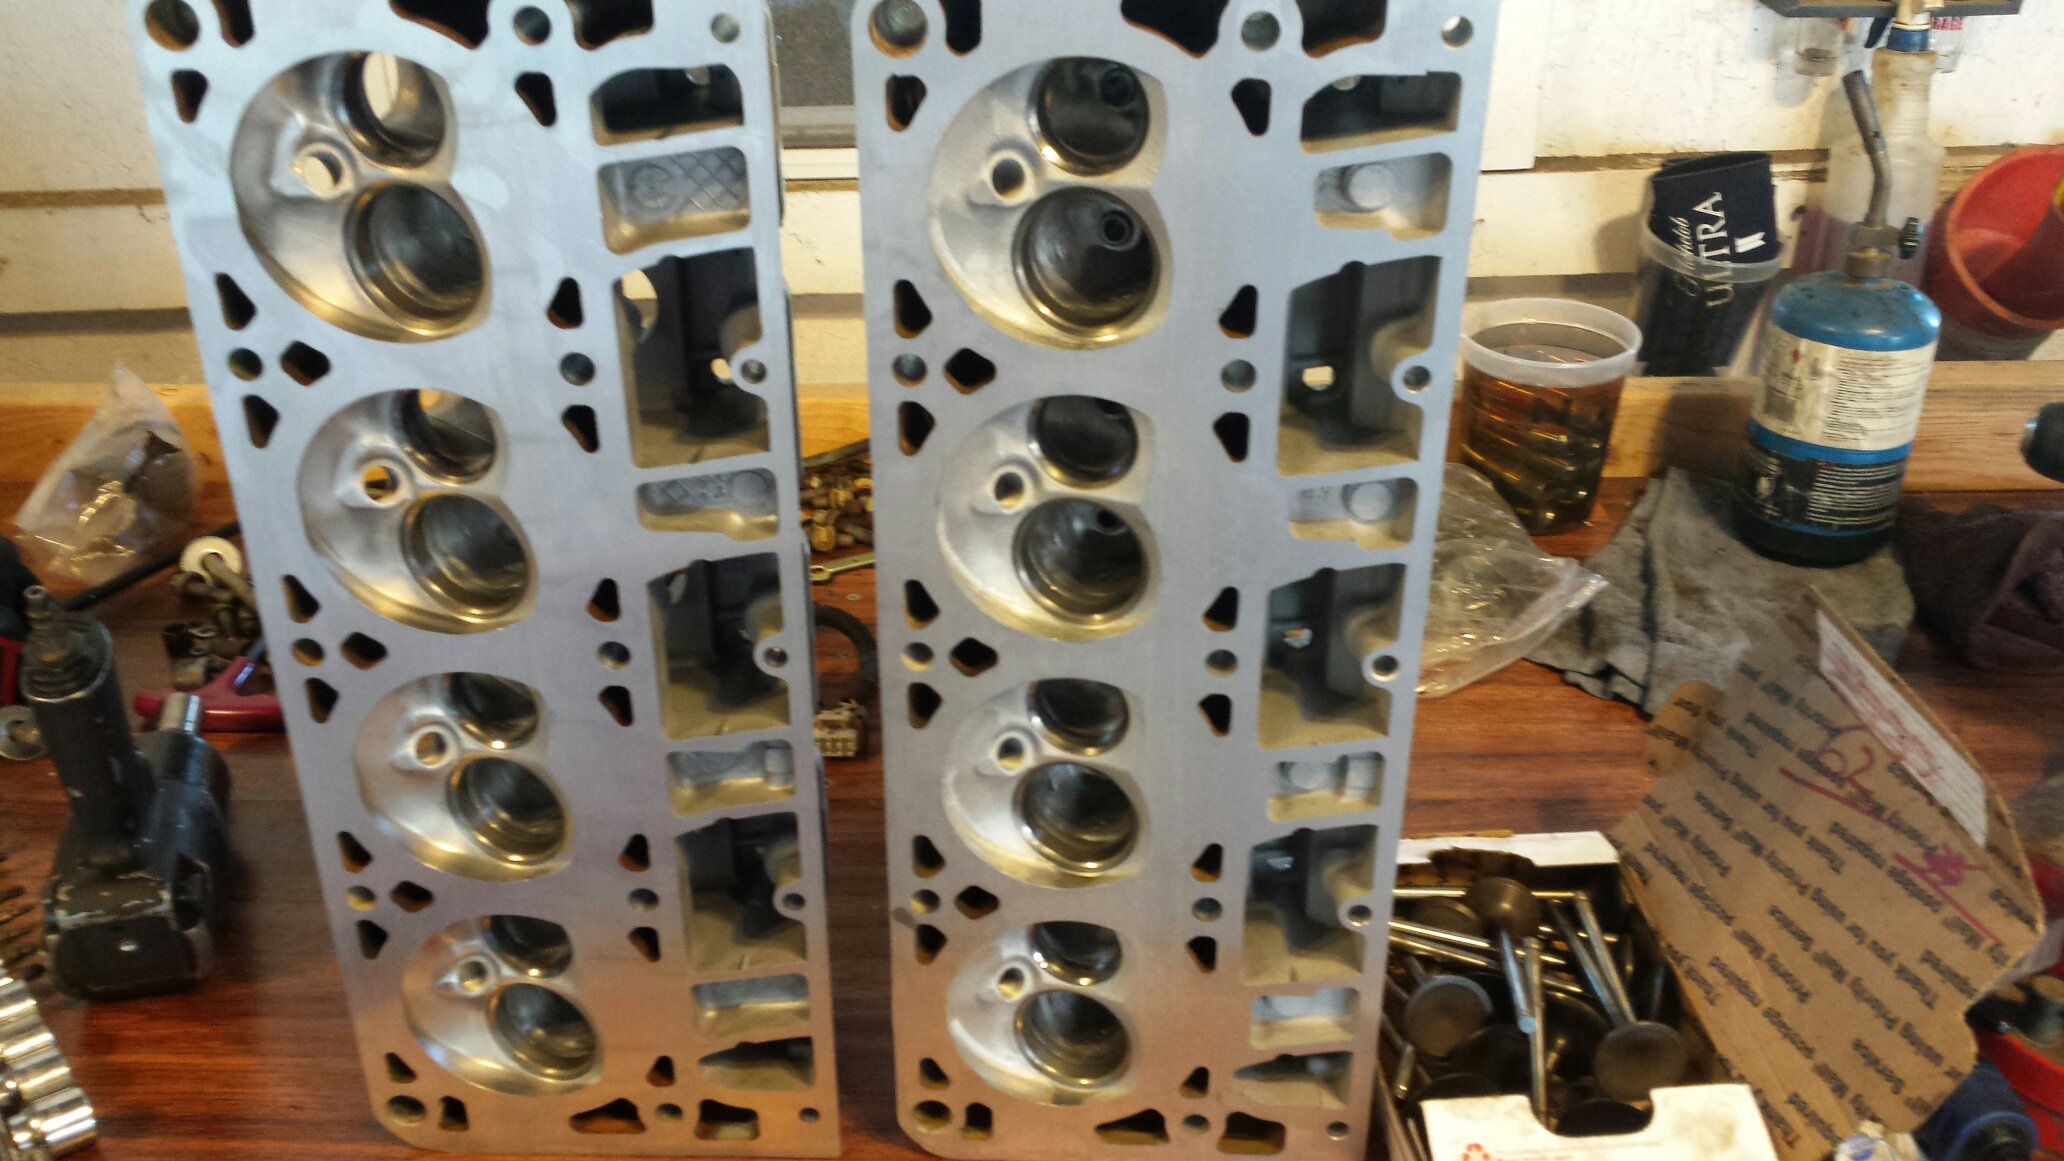
So I took the heads to the machine shop, I told them just get them clean, and touch them with the mill to make sure they seal. No valve work or anything like that. Here they are fresh and clean.
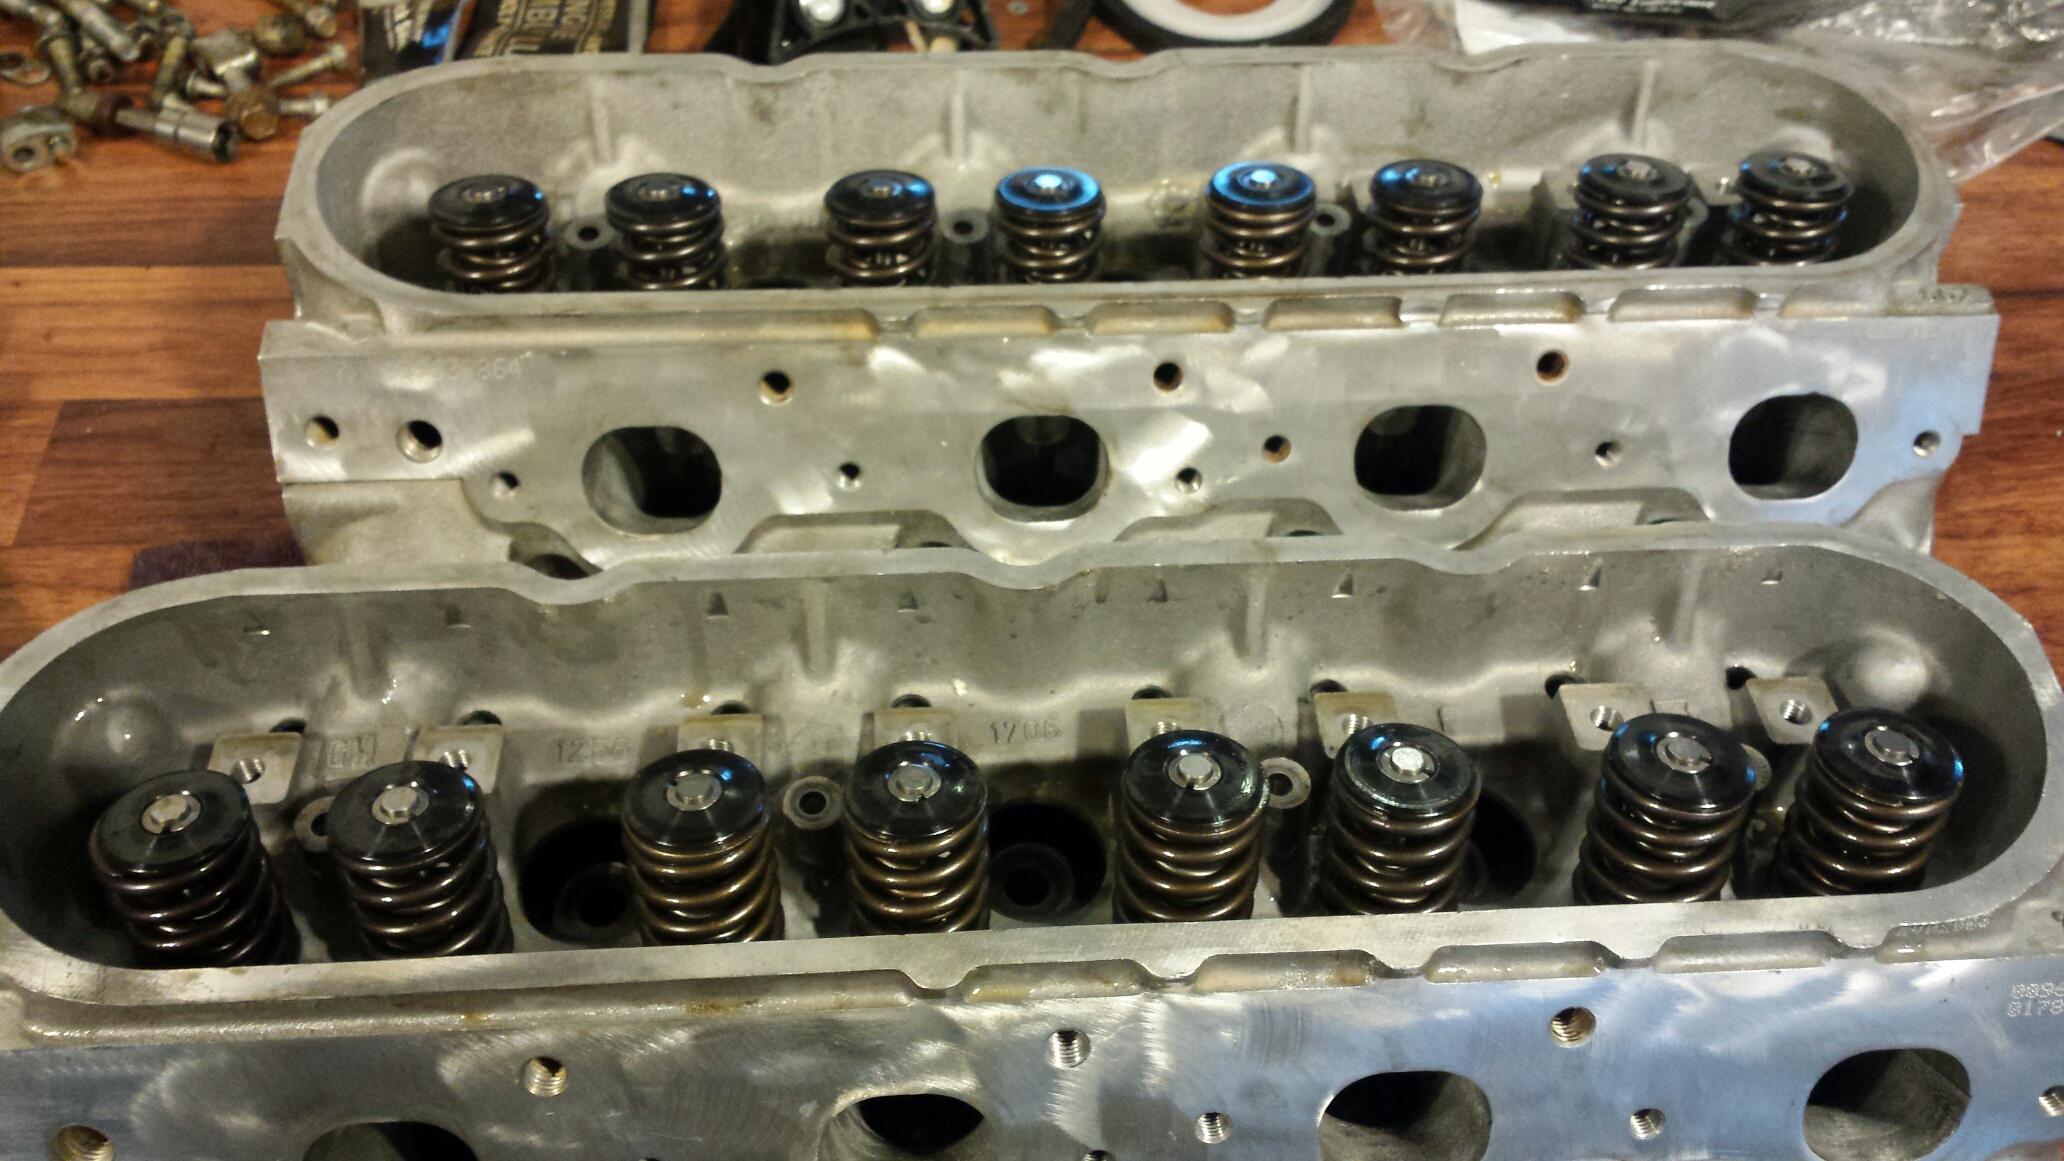
I basically added some valve grinding compound to the valves, spun them on the seats to make sure everything had a fresh sealing surface, then installed the new dual valve spring kit.
Of course i went with the head studs, and LS9 gaskets, and sealed them down to the engine. I threw the oil pan and front cover on quickly just for paint, they will need to come back off for new gaskets. Added the intake just for the pic. This was left over graphite paint that I used on the Fast 102 intake.
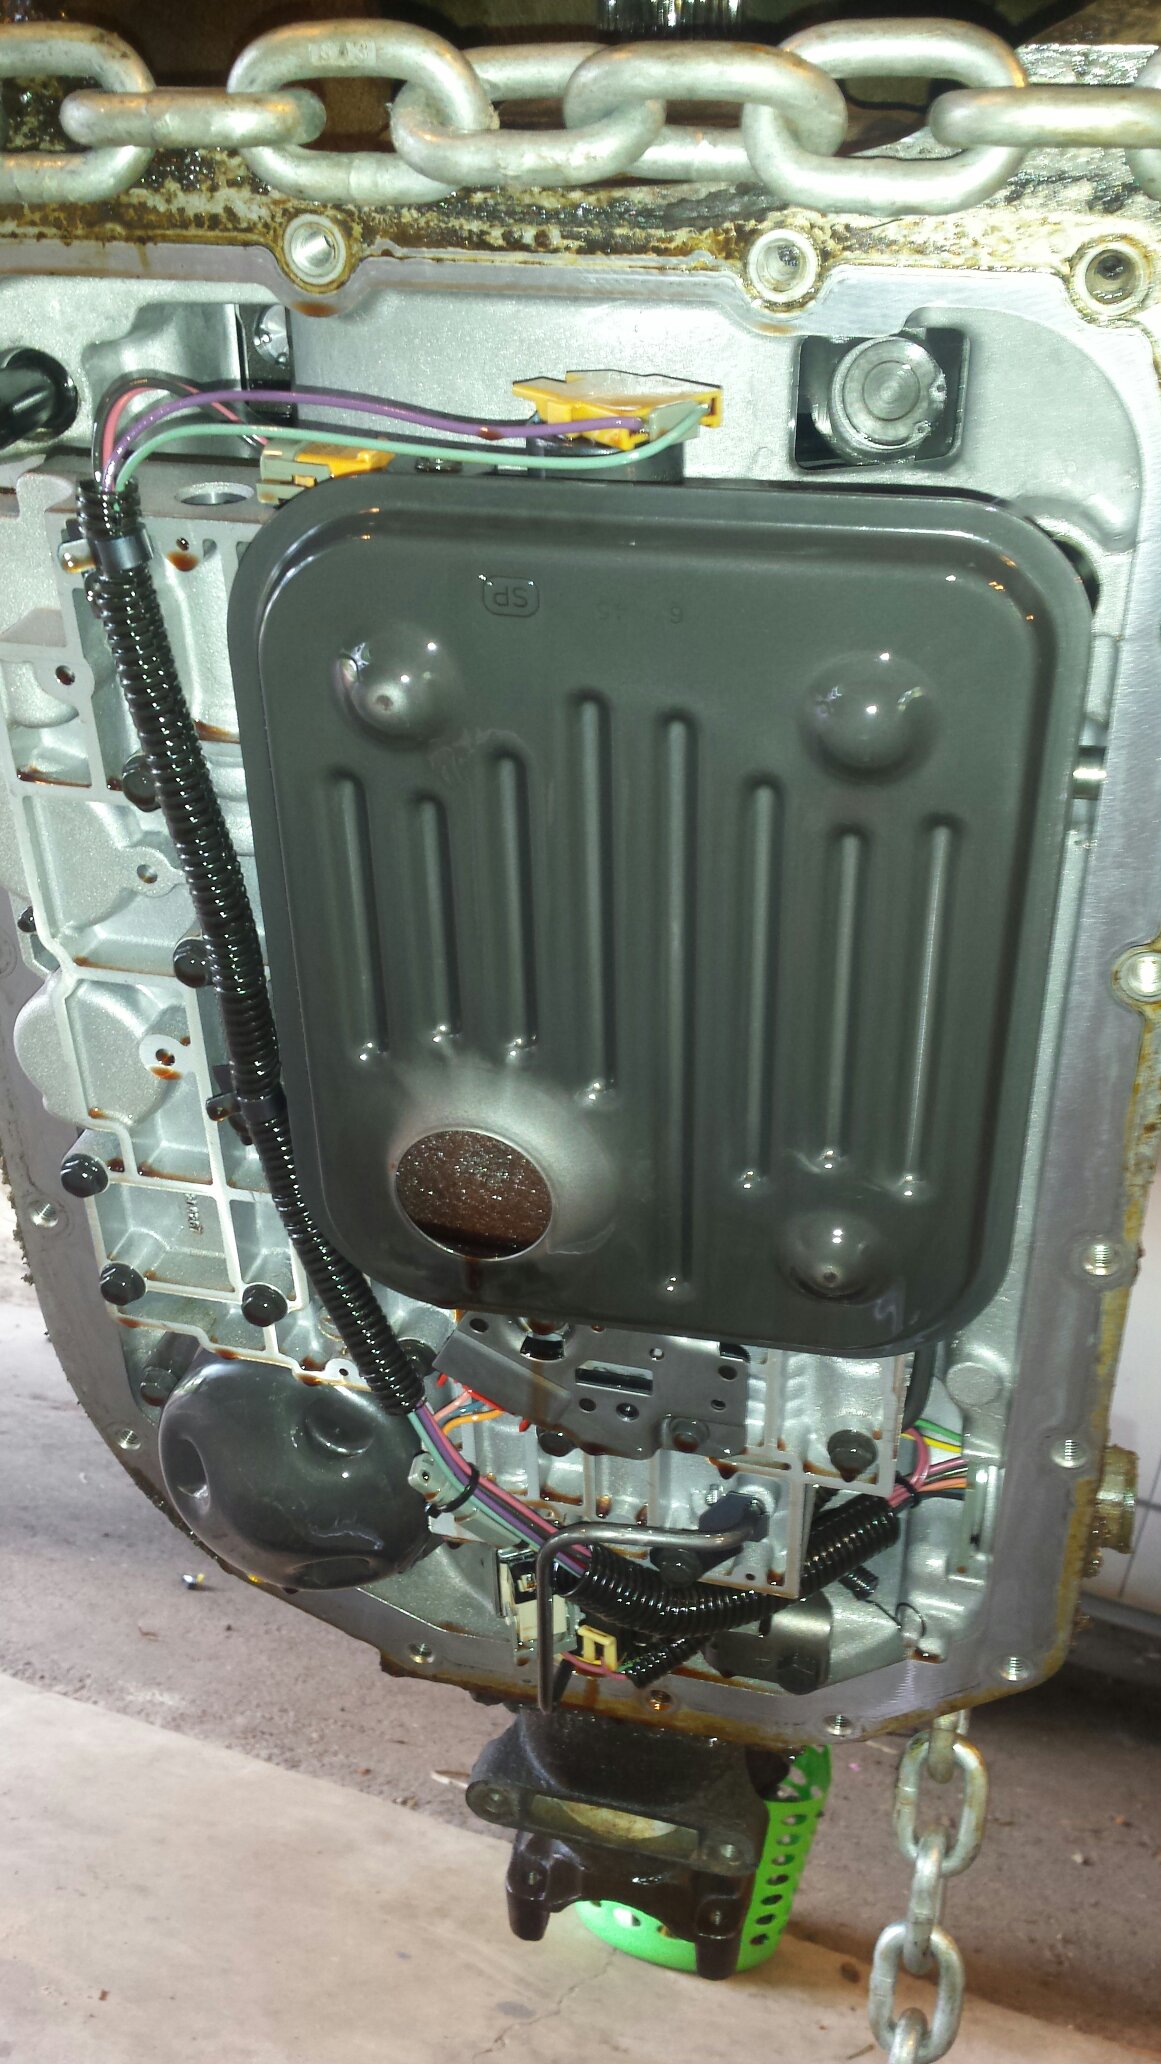
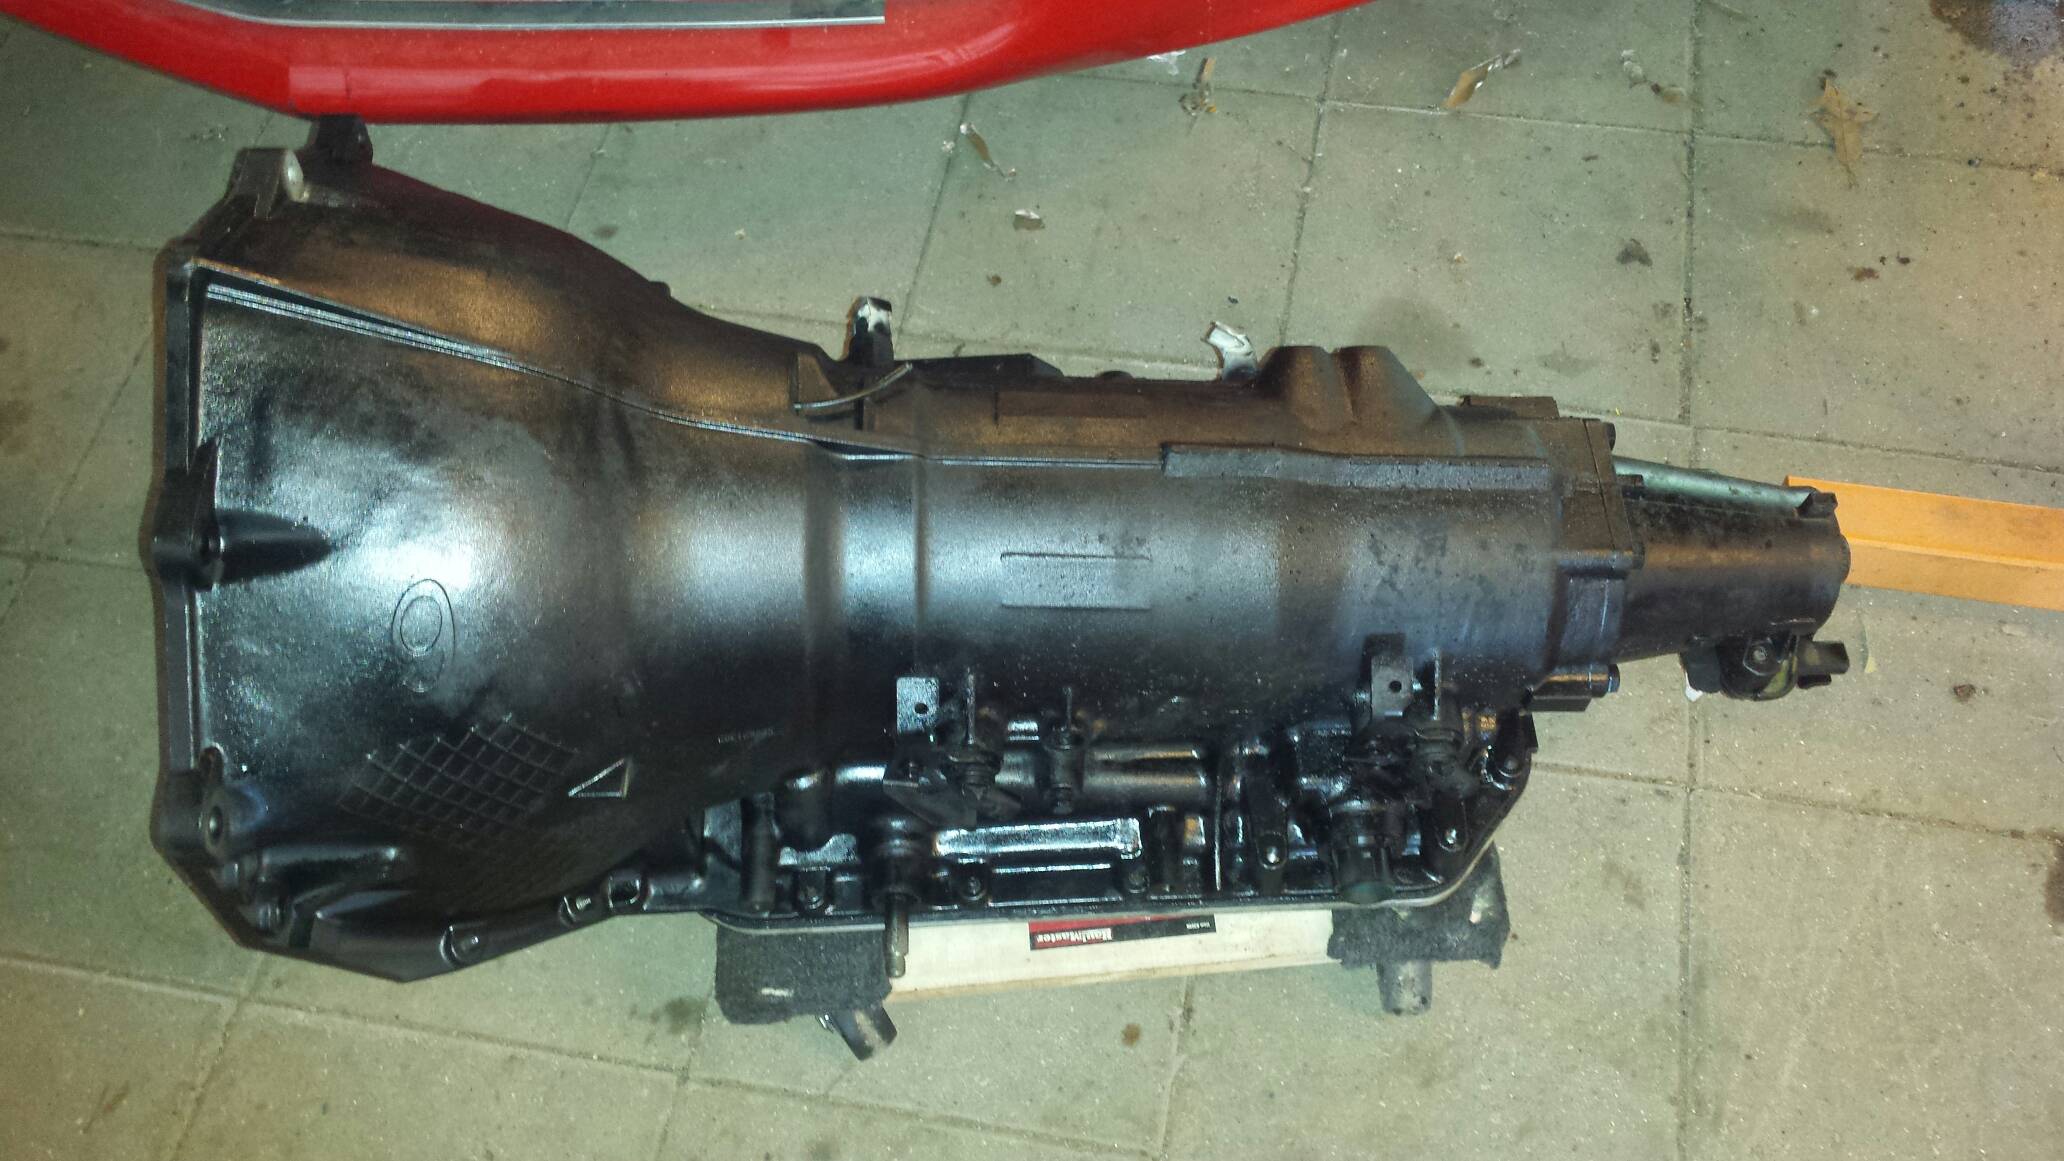
I've got a buddy that goes to the junkyards often so i told him i needed another 4l80e. He ended up driving an hour and a half away to get me the most crusty, dirty, filthy POS trans I've ever seen. But when I opened it up i was pleasantly surprised. The junkyard sells these for $89.
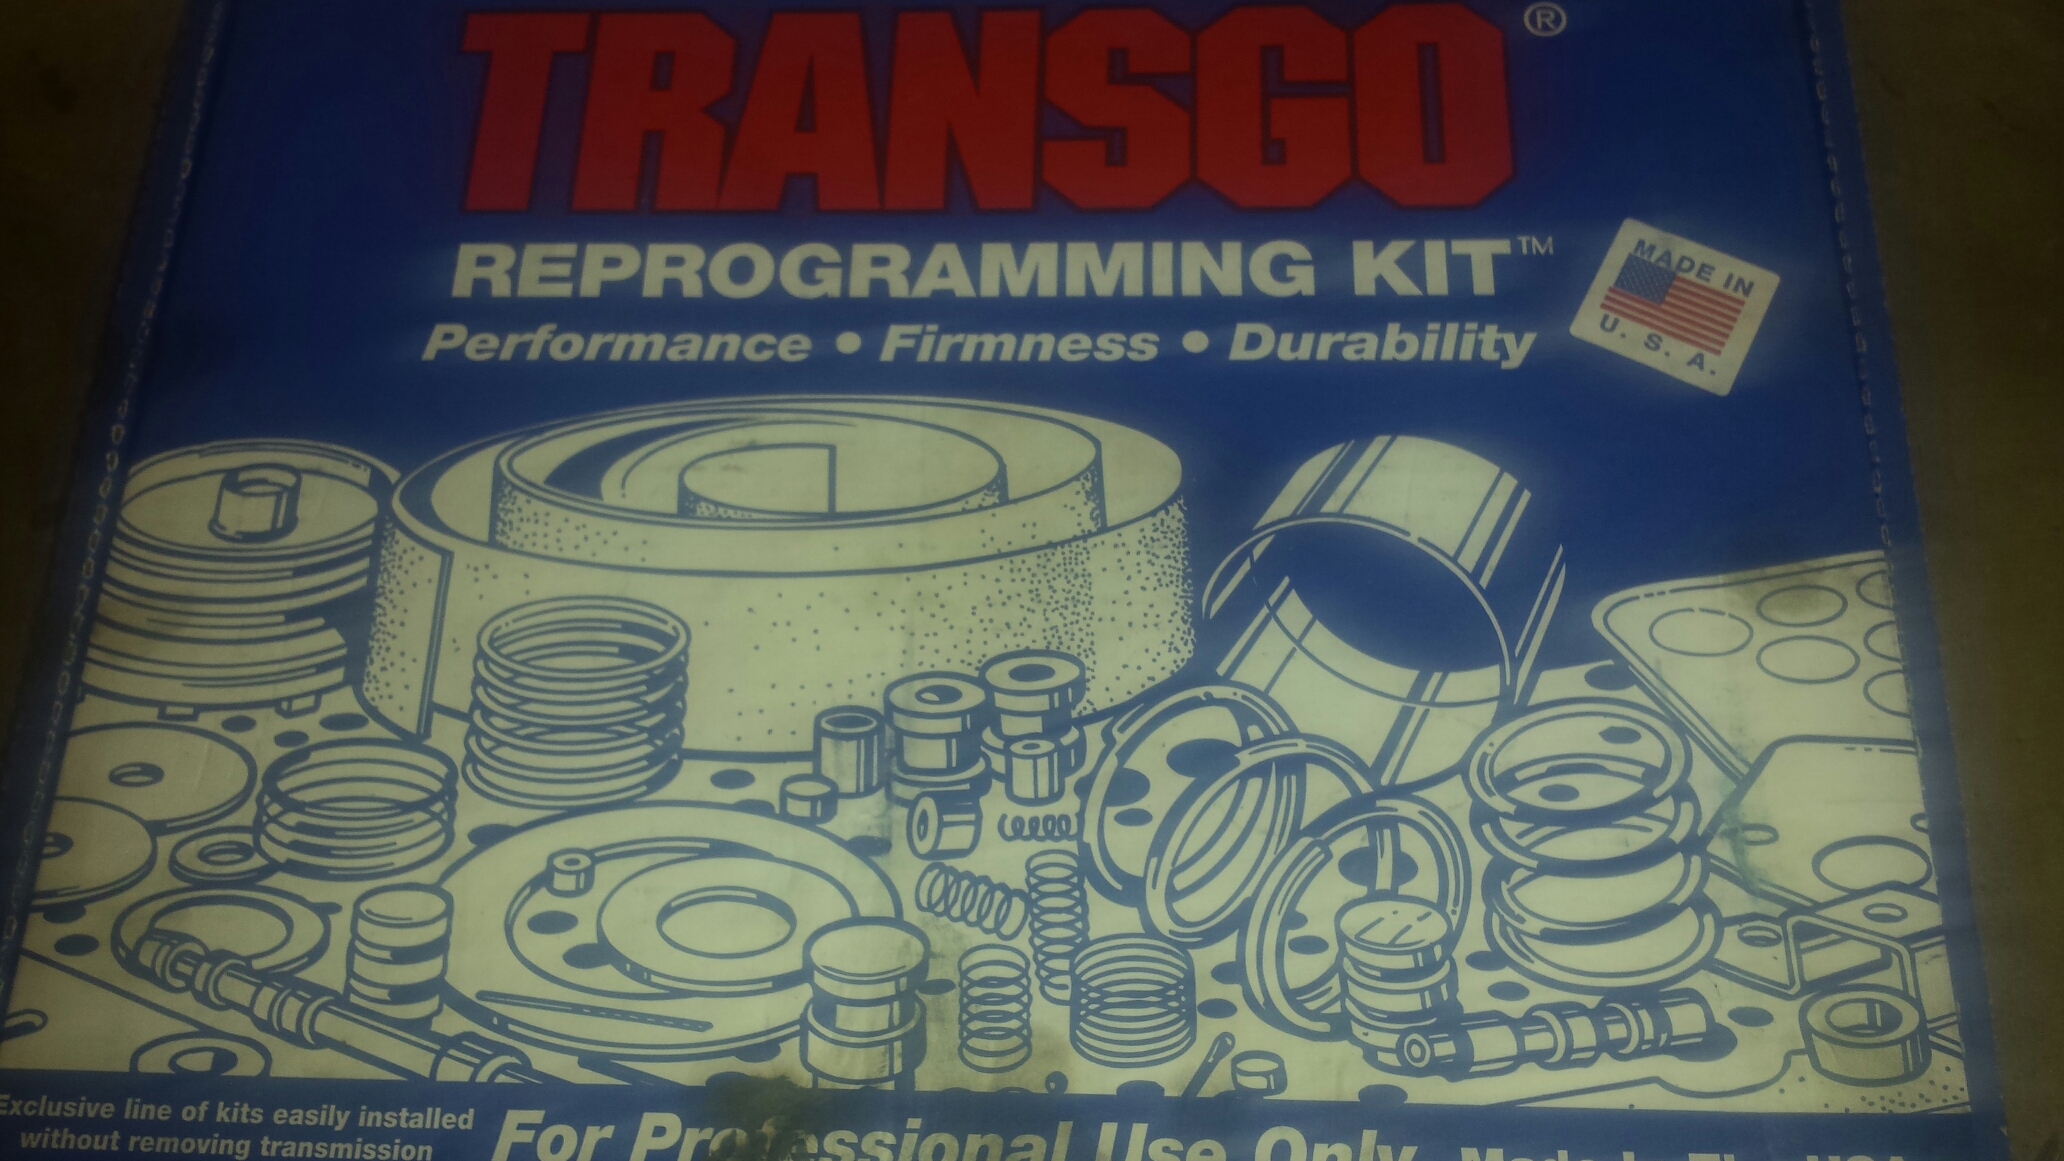
After careful calculations of time and budget, Ive decided to service this trans and add an HD2 kit and run it as is, and see what it can take.
Once fully involved in the HD2 shift kit install, it was me and my trans buddy's opinion this trans had already been rebuilt. Score!!!!!! That would explain why it was so clean inside.
With that stroke of good news I called up Circle D converters and got me a shiny new triple disc converter on the way!!! We decided on something loose (due to not having a transbrake at the moment), should footbrake to mid 3K RPMs, and will be a little loose on the big end so I will be anticipating locking it up in 3rd gear. Also, Chrs1313 dual 450 pumps will be here soon, and I just ordered a PST forged 4l80e yoke for my existing driveshaft from Midwest Chassis. Turbo should be here today though the piping is back-ordered. More pictures coming soon, parts are rolling in daily.

Here is the Isky cam, grind 271-HR-672. Specs are something like 218/218 .570 .570 112. Its my understanding it was spec'd for a turbo setup. The way I ended up with it is a buddy locally had it for sale, it was brand new, and it was quite a bit cheaper then new, so here it is.

New timing set, and I wanted to drill the block for the damper but it looked like the holes would go through and hit the crank so I said **** it and through it in the scrap parts pile.

Knock sensors were crusty so I ordered a set of them, old coolant sensor broke (they are very brittle with age) so there's that in the center, and to the right is a -10 bulkhead fitting. I'm gonna try and get this in the side of the oil pan for my turbo oil drain line.

Melling 10295

Bosch 127s. These were actually an ebay score, dyno runtime only, $600 shipped!!

New rear cover gasket, rear main seal, water pump gaskets, and new front cam plate.

New intake gaskets, NGK BR7s, MSD plug wires fit for truck coils, and a new pinion seal for my 12 bolt, figuring I'm gonna swap out the 4.10s in favor of the 3.73s I have on my shelf.......

Chinese blow off valve, and really nice turbo smart wastegate that came with the huron speed kit (which is backordered BTW). Thats my ebay catch can with -10 lines that will come off each valve cover.

Billet fuel rails for the truck intake. Gonna have to figure out if it will work with these LS1 length injectors......Will mock it up soon.

So I took the heads to the machine shop, I told them just get them clean, and touch them with the mill to make sure they seal. No valve work or anything like that. Here they are fresh and clean.

I basically added some valve grinding compound to the valves, spun them on the seats to make sure everything had a fresh sealing surface, then installed the new dual valve spring kit.

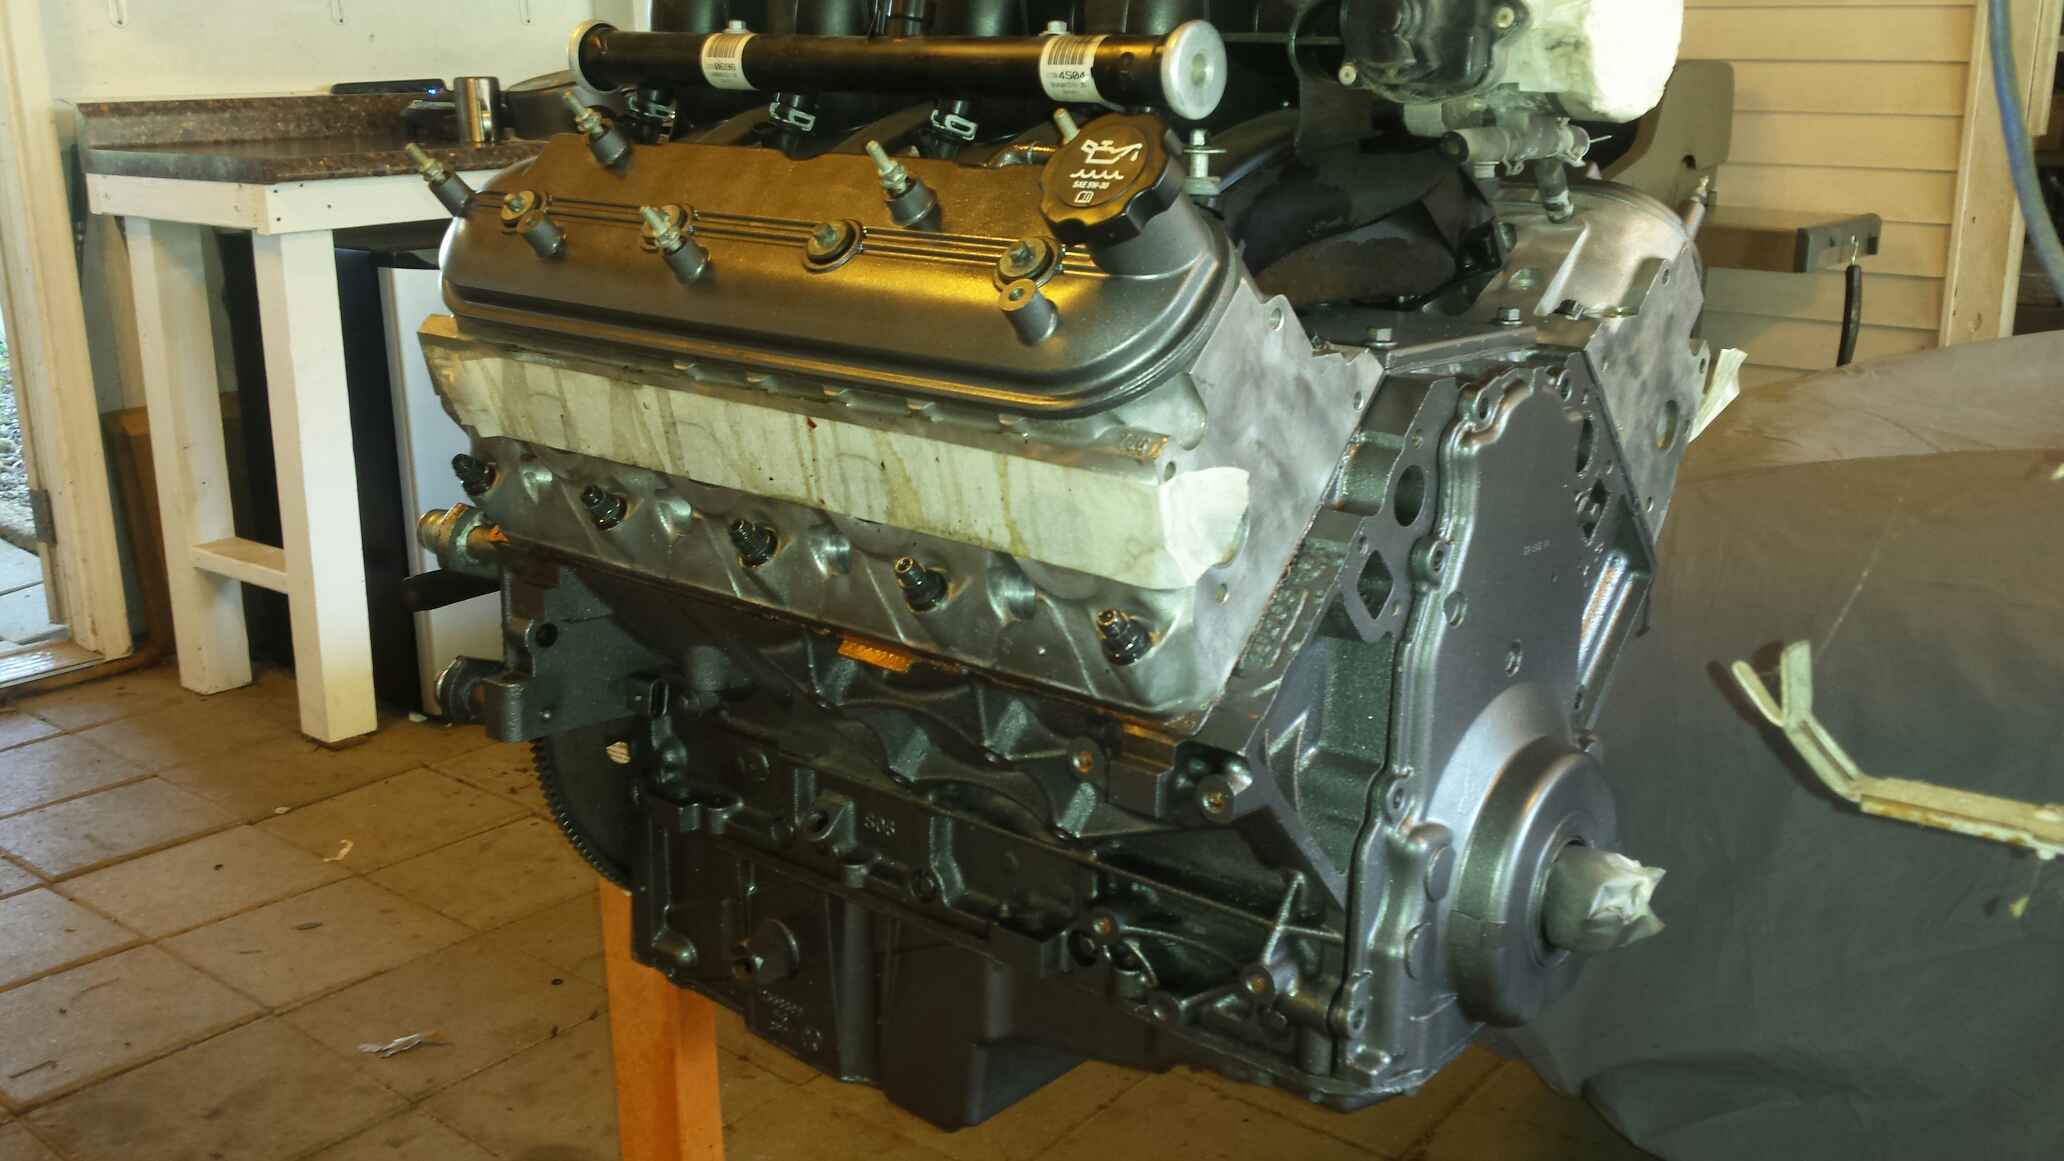
Of course i went with the head studs, and LS9 gaskets, and sealed them down to the engine. I threw the oil pan and front cover on quickly just for paint, they will need to come back off for new gaskets. Added the intake just for the pic. This was left over graphite paint that I used on the Fast 102 intake.

I've got a buddy that goes to the junkyards often so i told him i needed another 4l80e. He ended up driving an hour and a half away to get me the most crusty, dirty, filthy POS trans I've ever seen. But when I opened it up i was pleasantly surprised. The junkyard sells these for $89.

After careful calculations of time and budget, Ive decided to service this trans and add an HD2 kit and run it as is, and see what it can take.

Once fully involved in the HD2 shift kit install, it was me and my trans buddy's opinion this trans had already been rebuilt. Score!!!!!! That would explain why it was so clean inside.

With that stroke of good news I called up Circle D converters and got me a shiny new triple disc converter on the way!!! We decided on something loose (due to not having a transbrake at the moment), should footbrake to mid 3K RPMs, and will be a little loose on the big end so I will be anticipating locking it up in 3rd gear. Also, Chrs1313 dual 450 pumps will be here soon, and I just ordered a PST forged 4l80e yoke for my existing driveshaft from Midwest Chassis. Turbo should be here today though the piping is back-ordered. More pictures coming soon, parts are rolling in daily.

#33
07-05-2017, 08:29 AM
Join Date: Aug 2010
Posts: 230
Likes: 0
Received 0 Likes
on
0 Posts
Got a few things done on my days off. First, i knew a had a mismatch on injectors/rails. What I have is car injectors, a truck intake, and truck billet rails. Here's the height difference.
After mocking it up and seeing the space between the rail and the intake, I measured that i needed 4 .850 spacers. I went to Home Depot and got some 1/2" square and round tubing. After playing with them I decided I like the square tubing better, so I made 4 spacers and bought 4 longer bolts. I believe they were m6x1.0x40mm.
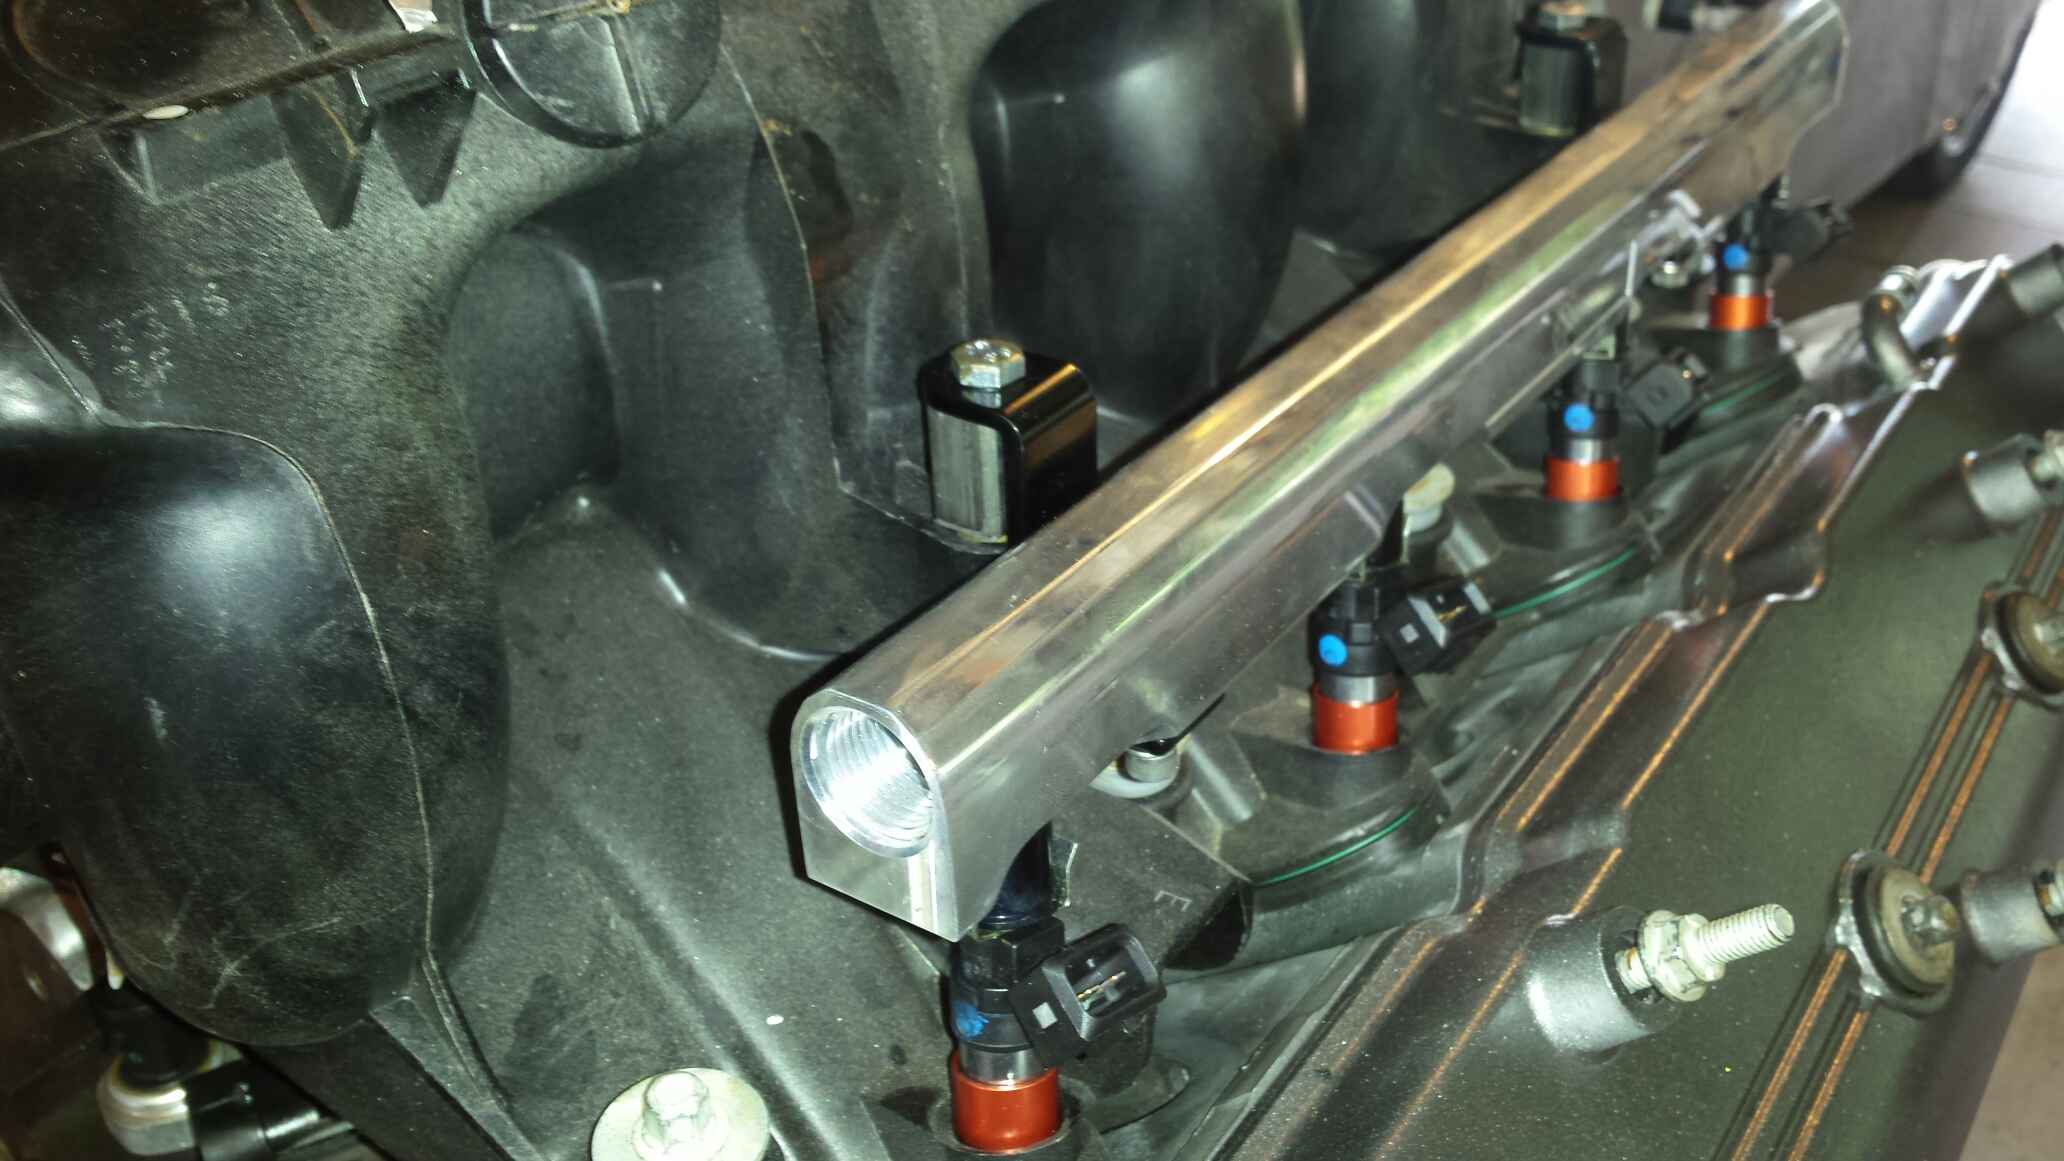
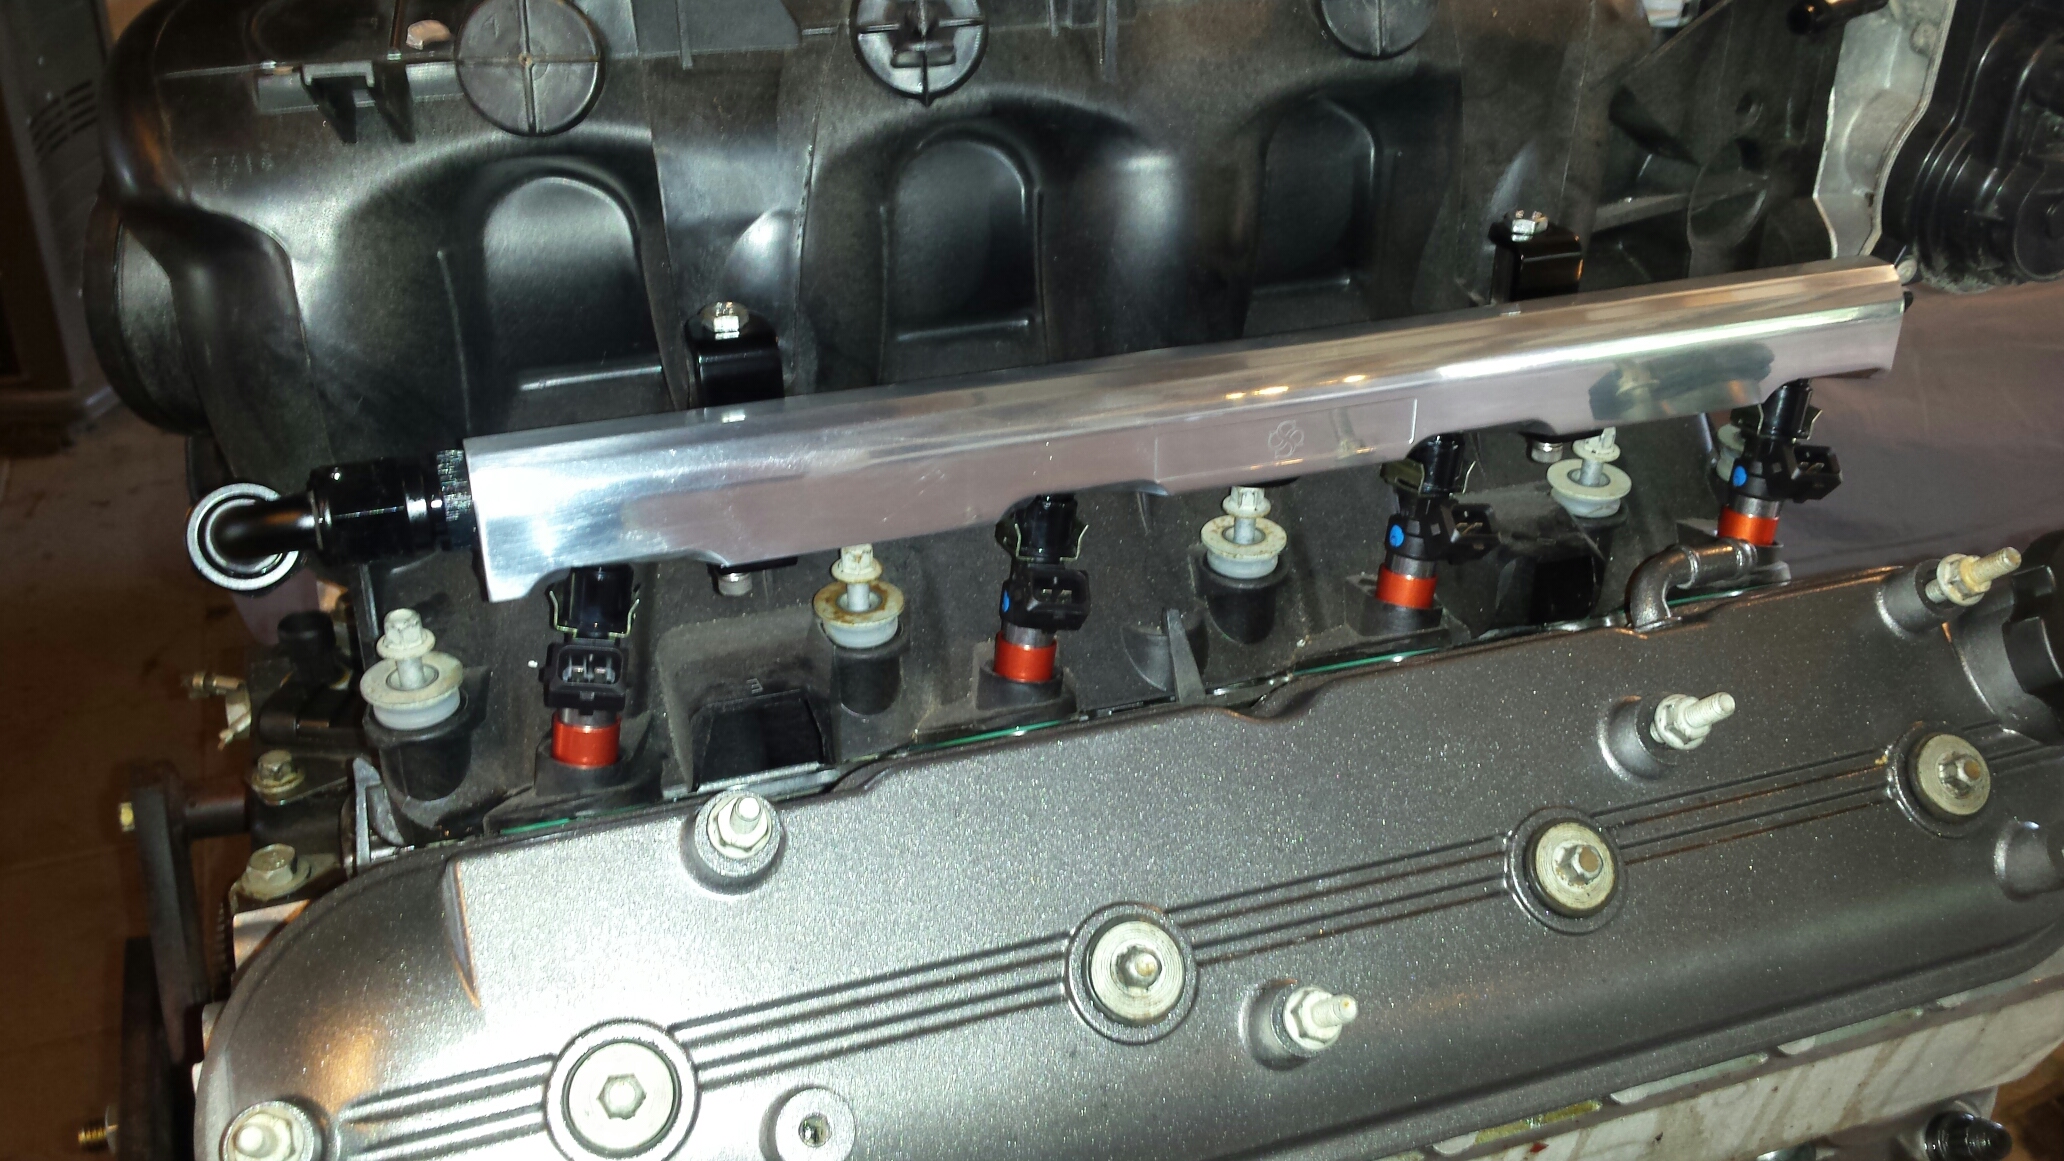
Both sides on, crossover installed, they fit nice.
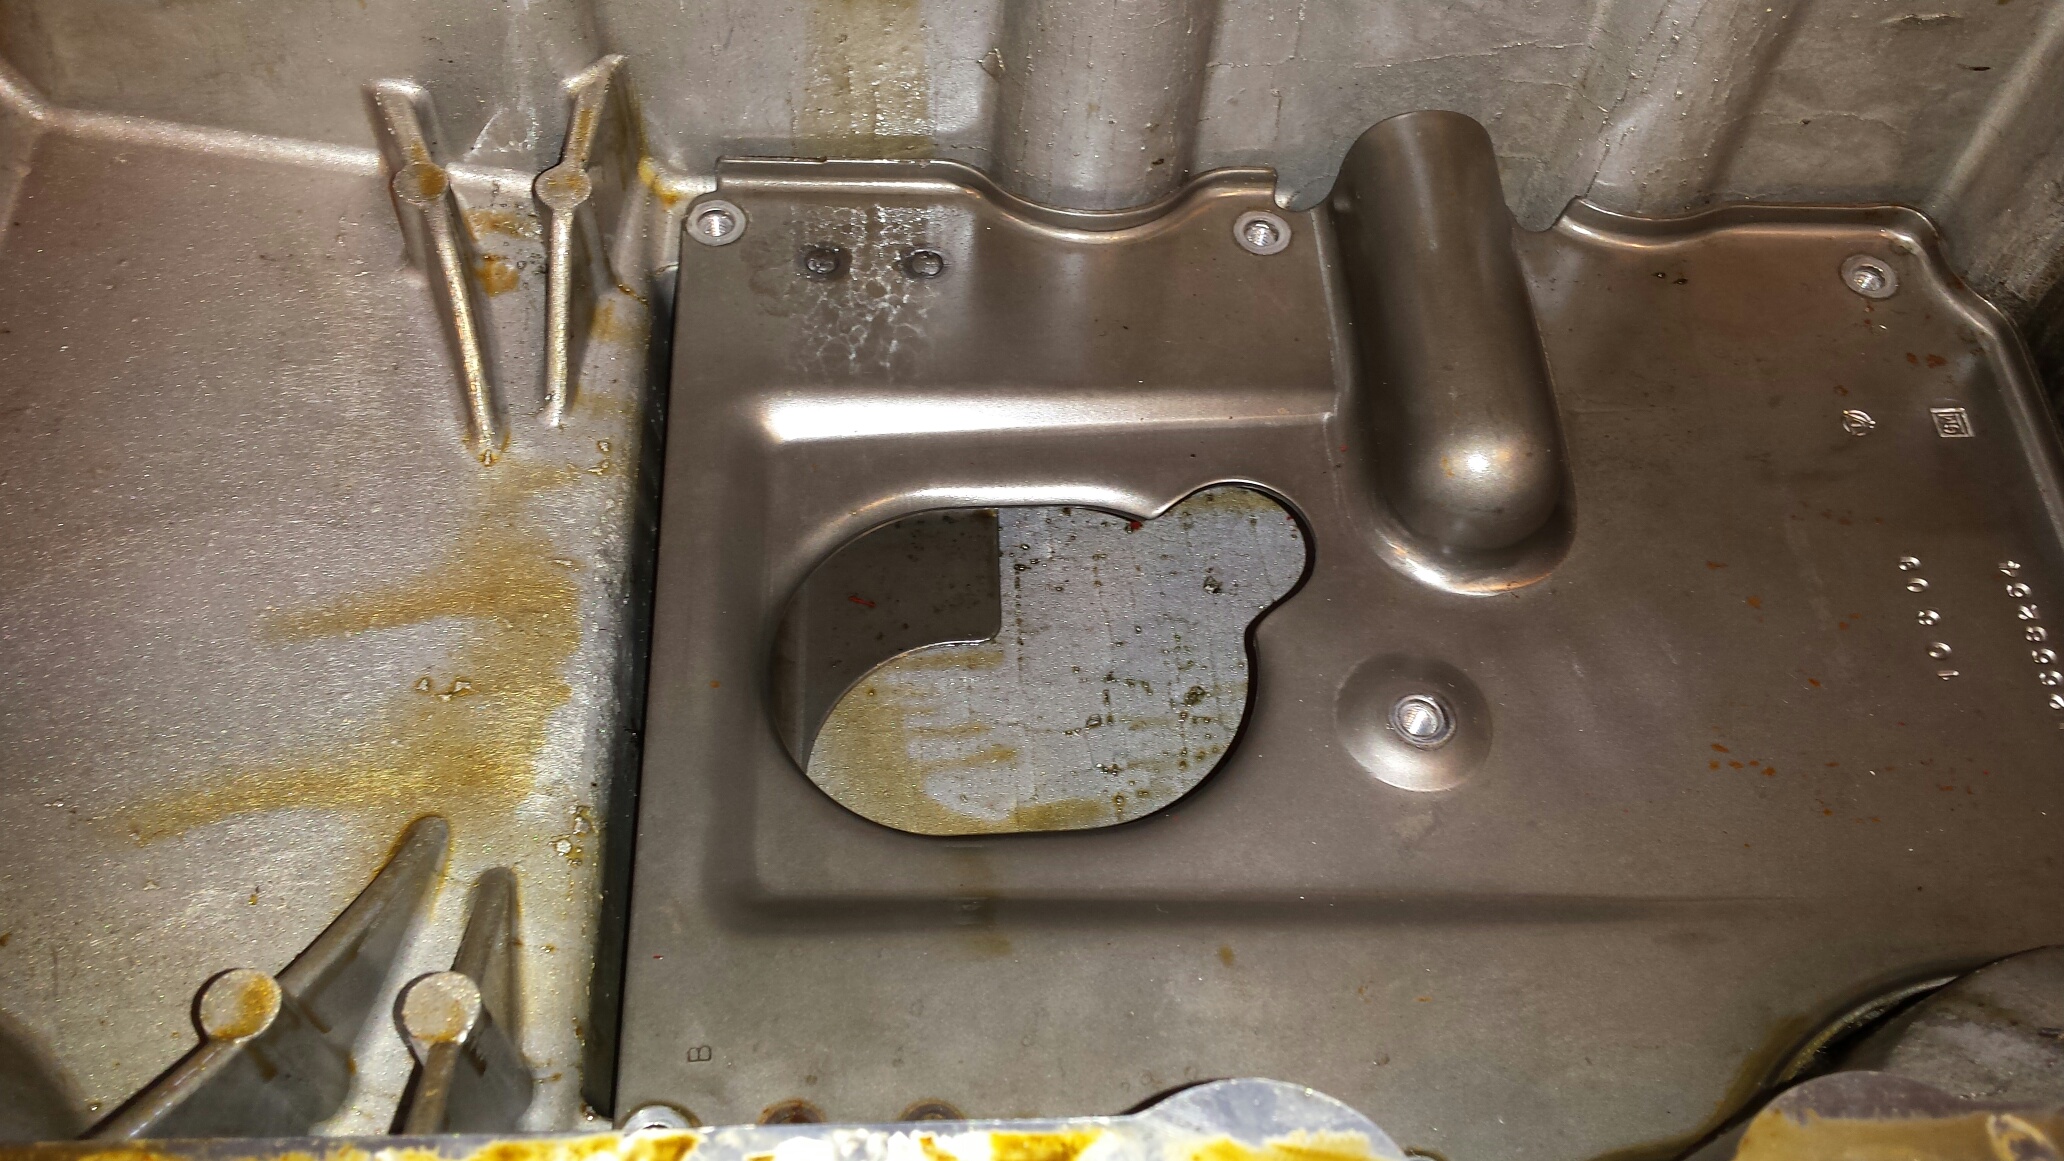
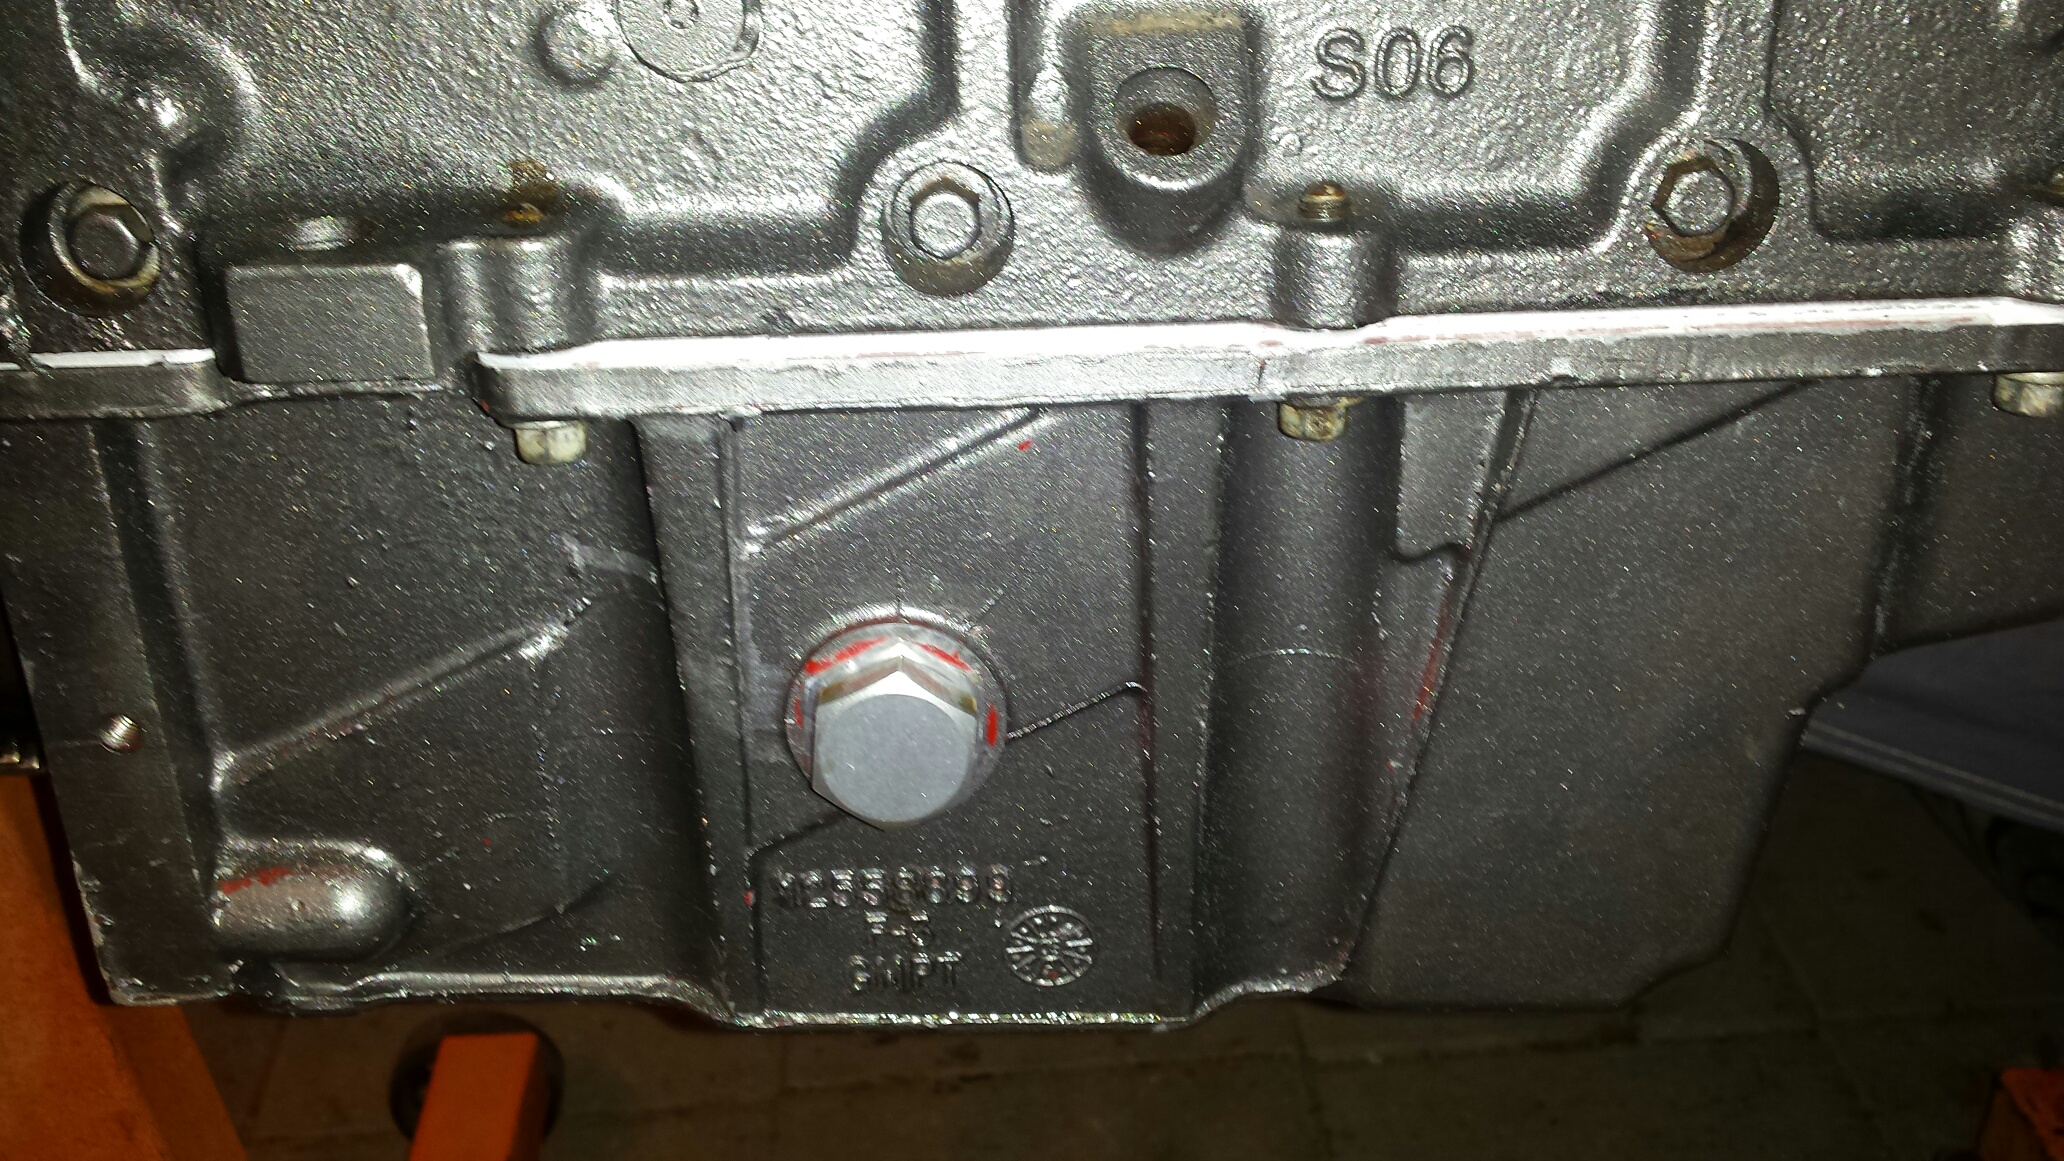
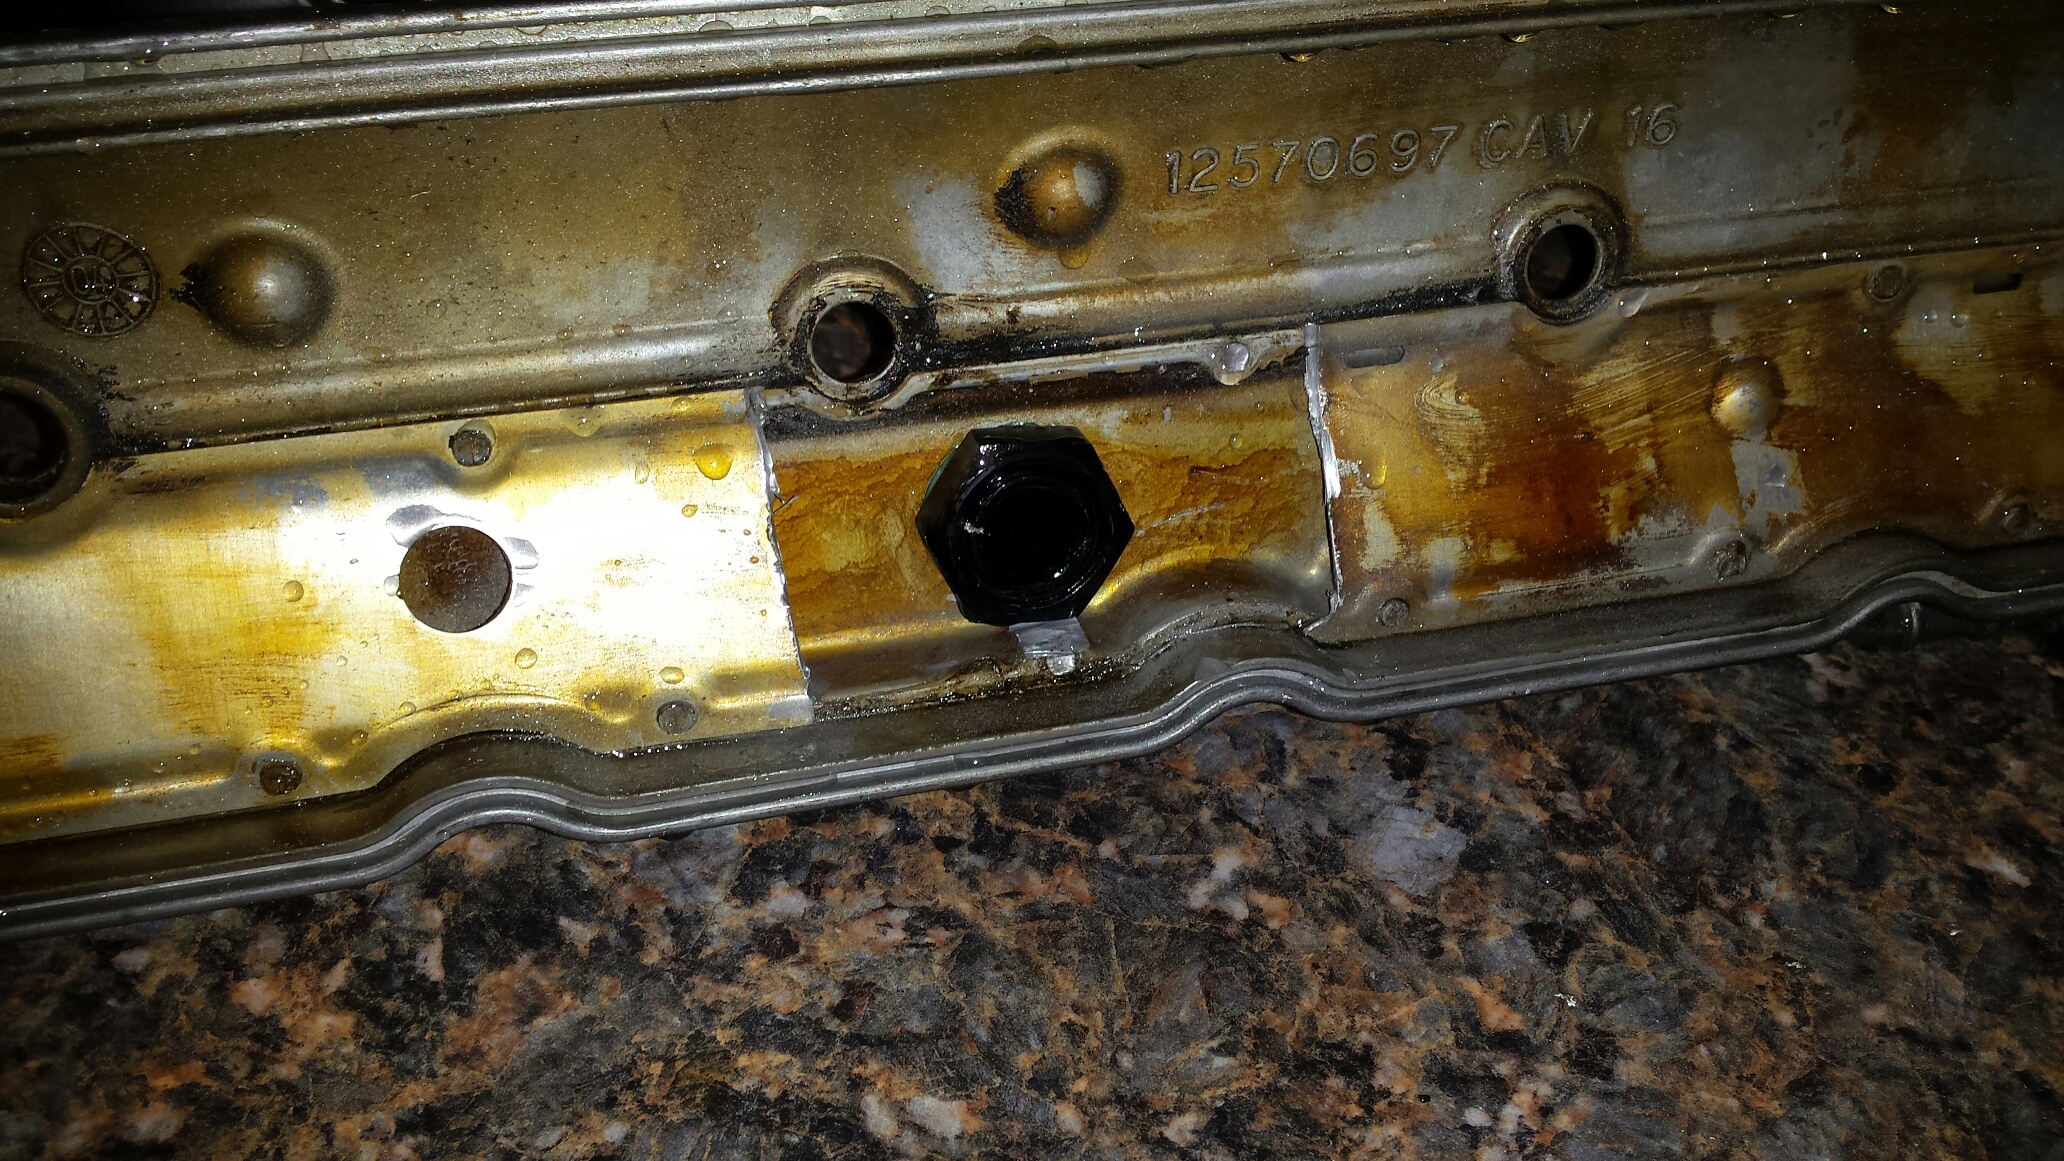
Spin the motor over. I'm not gonna use or need the low oil sensor thats in the pan, so I'm gonna remove it and buy a plug. Cruising around ebay searching that size I realize someone makes a plug specifically for this, so I bought it. This is not tapered thread so an oring must be used.
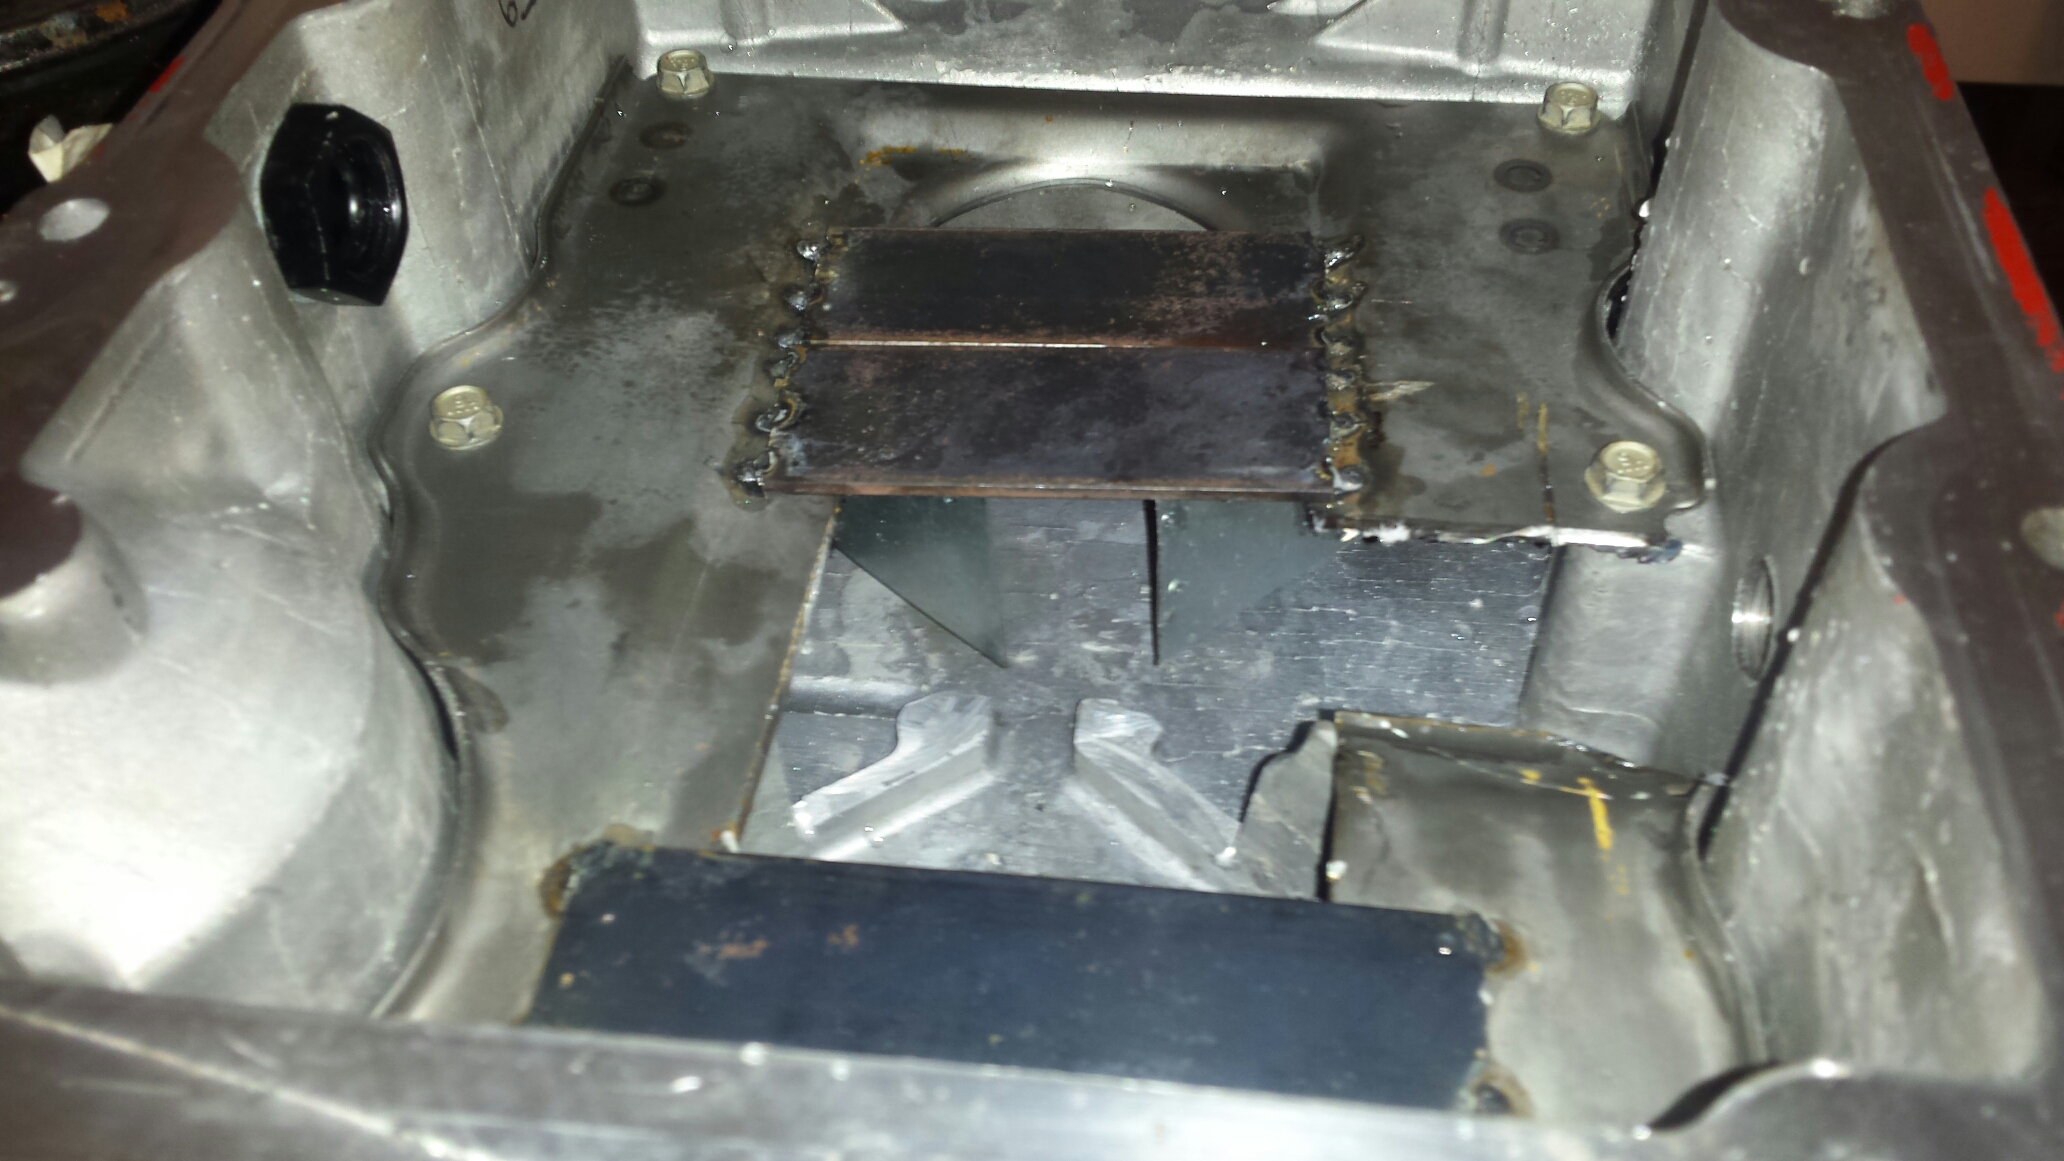
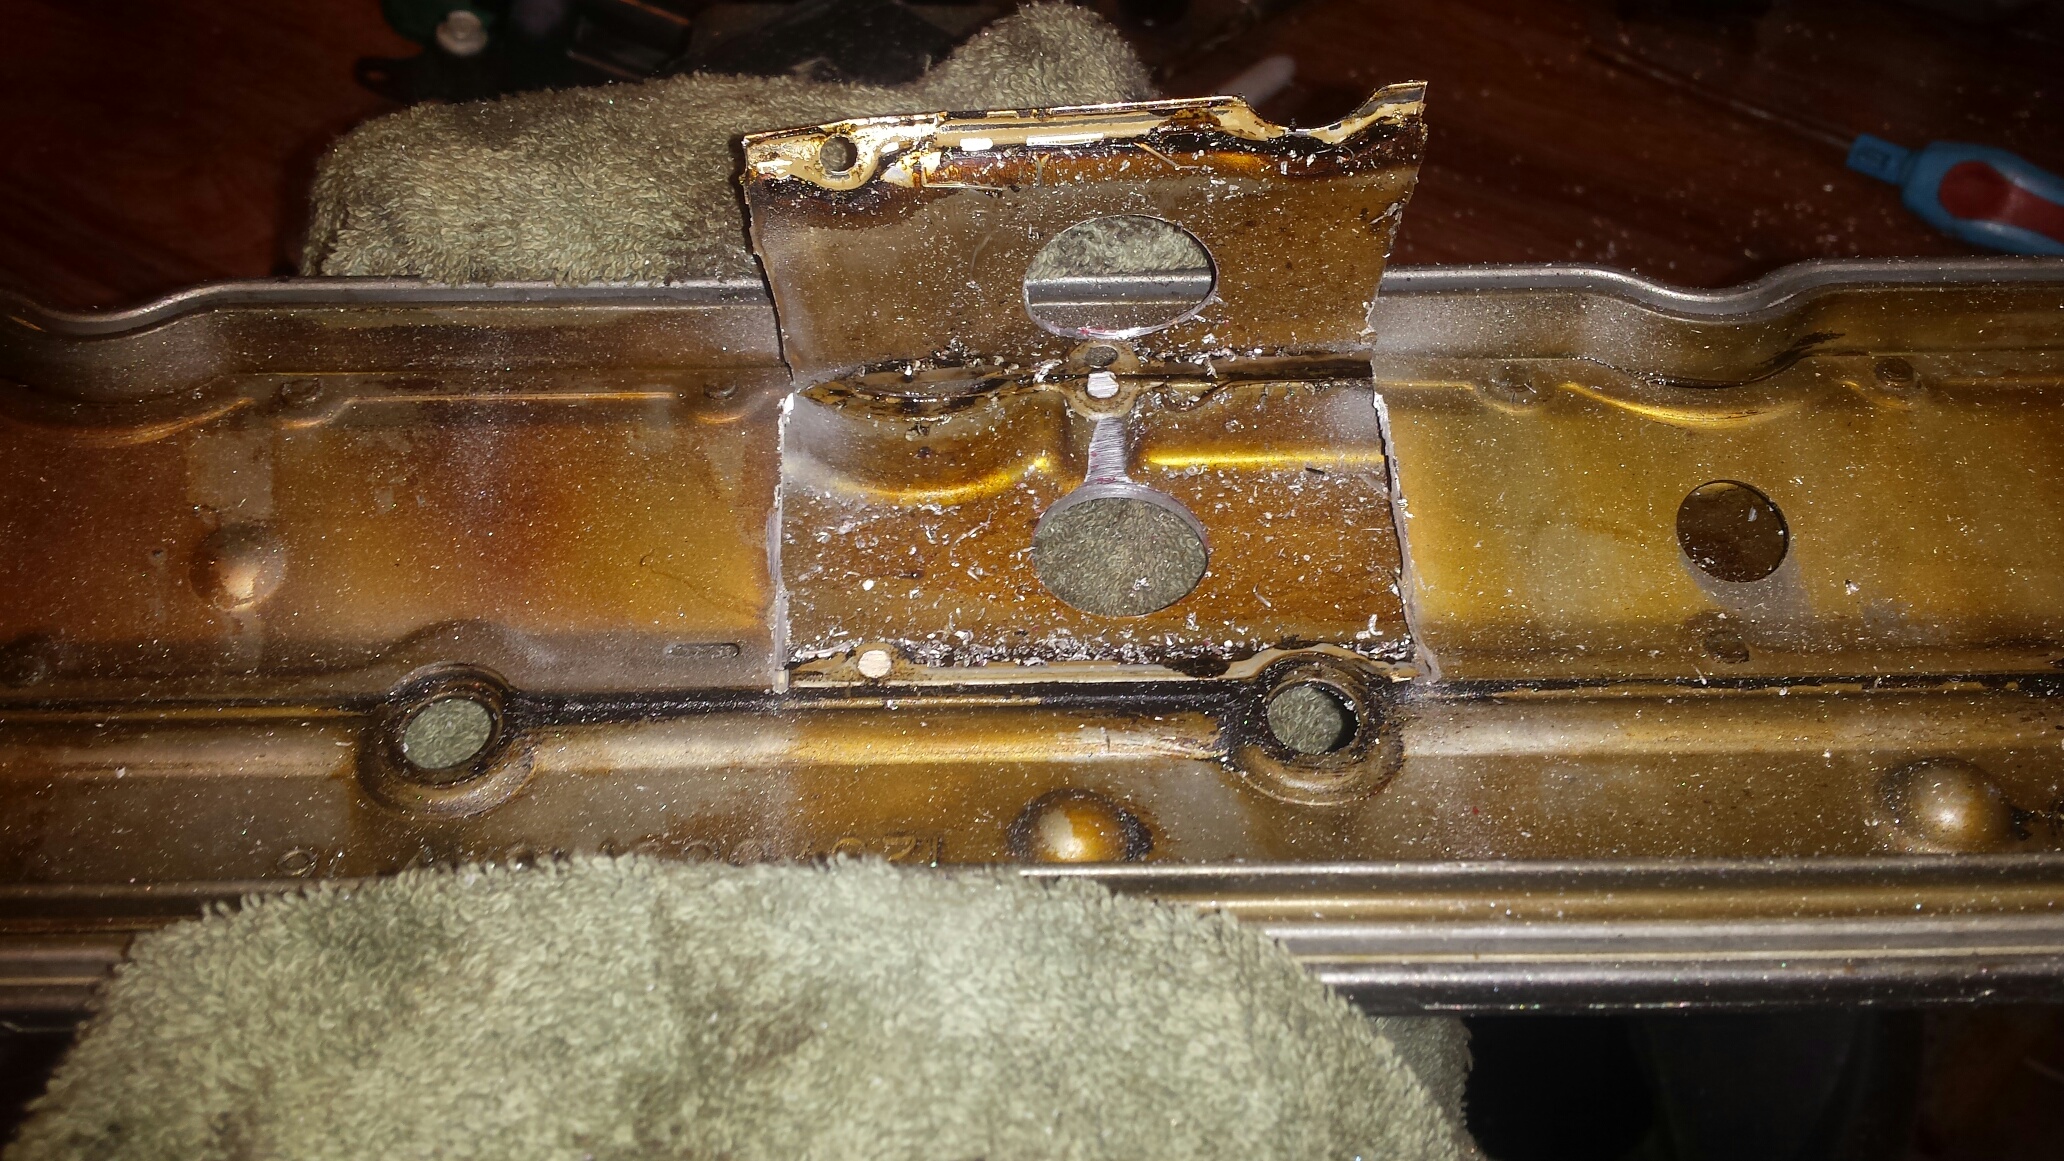
Didnt get a complete "before" pic, but i decided to move the oil sump to the rear of the pan. We know these engines can starve for oil on hard launches so I wanted to correct this and honestly didnt want to spend 200 on Improved Racing's baffle. The main cap bolts are about 4.5 inches apart, and since the support bolts to them I figure why not just move it back one....So I cut the tube and remounted it...
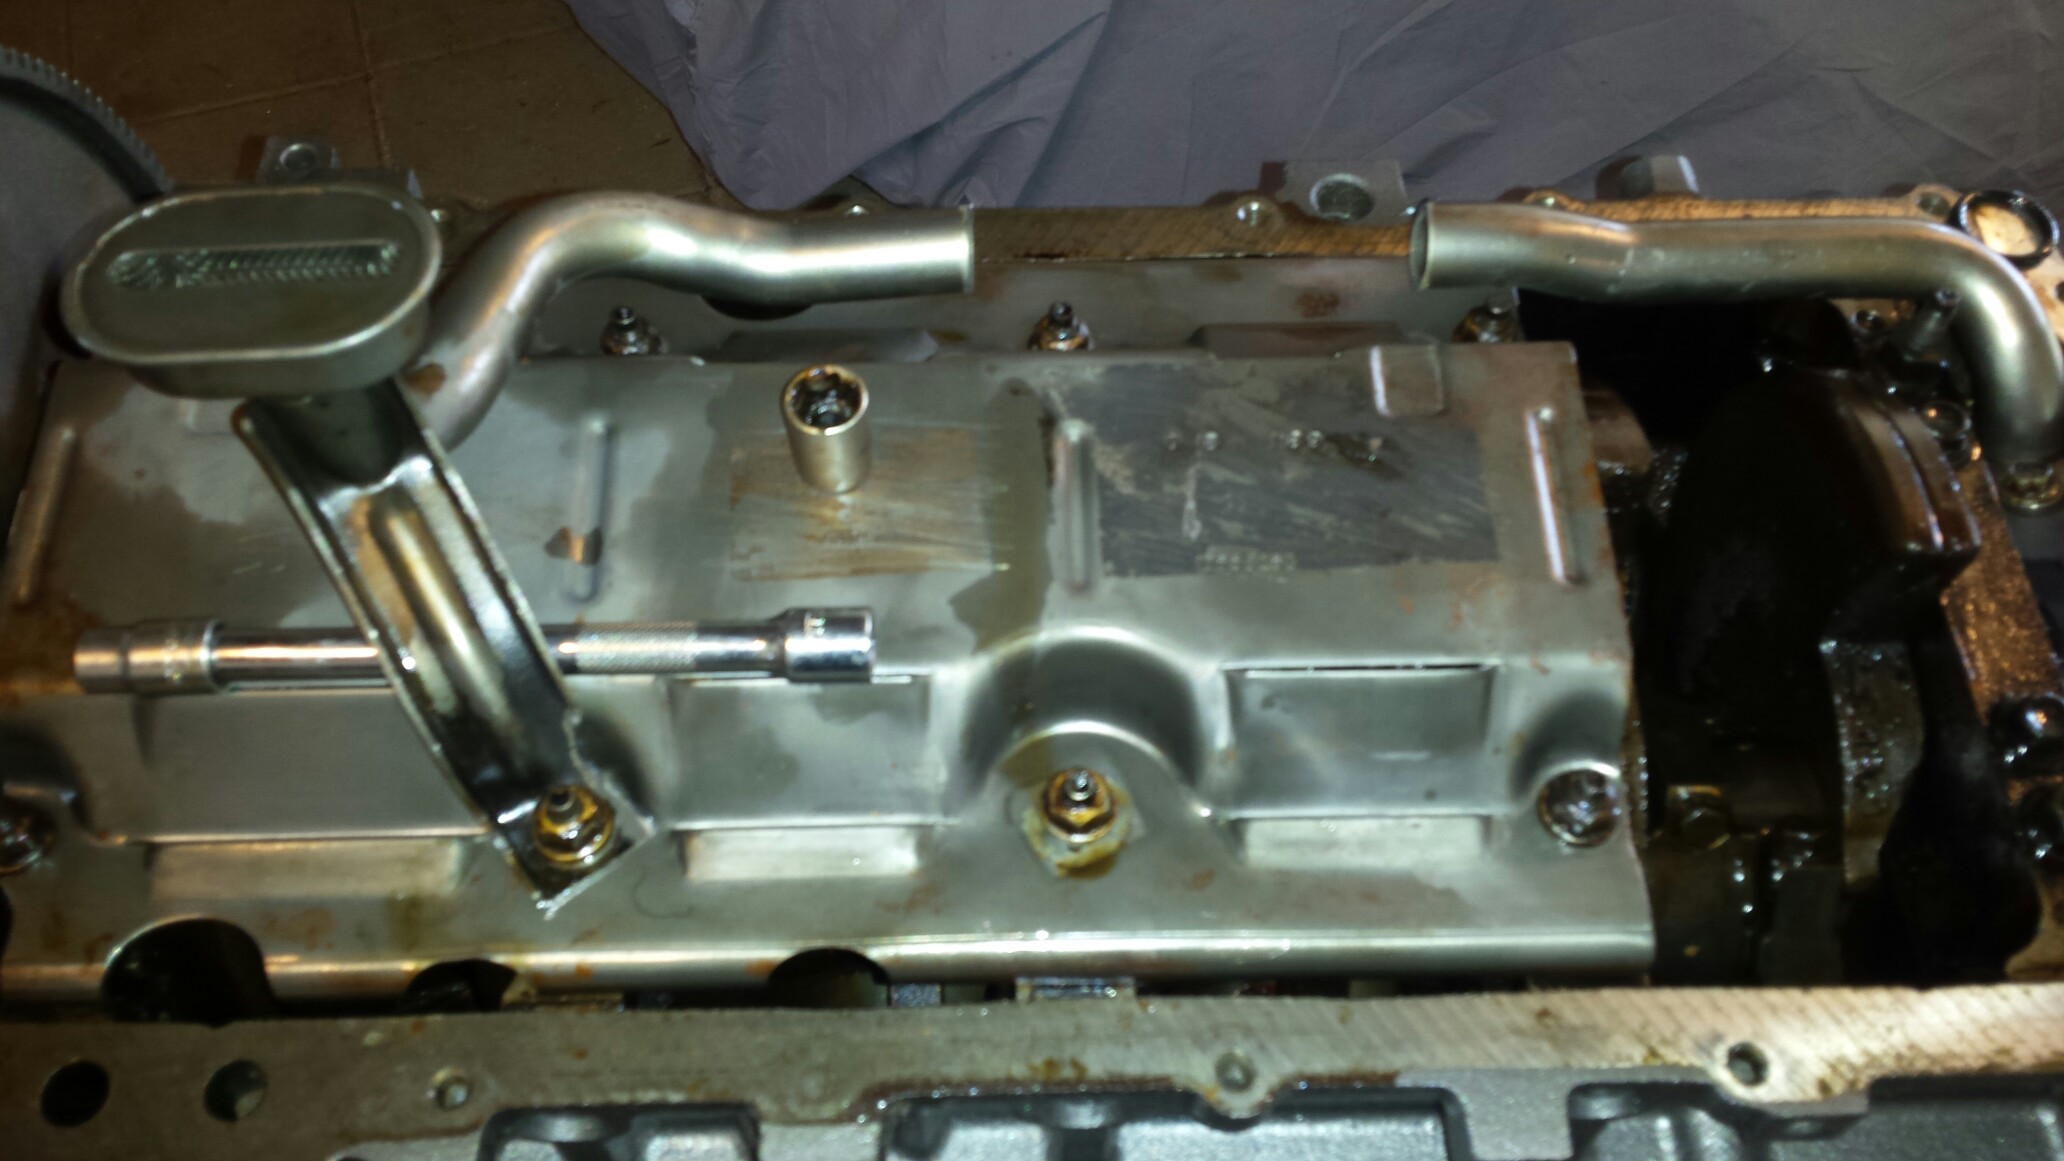
Grabbed the old pickup tube that came with the engine and hacked a piece out and welded it in.
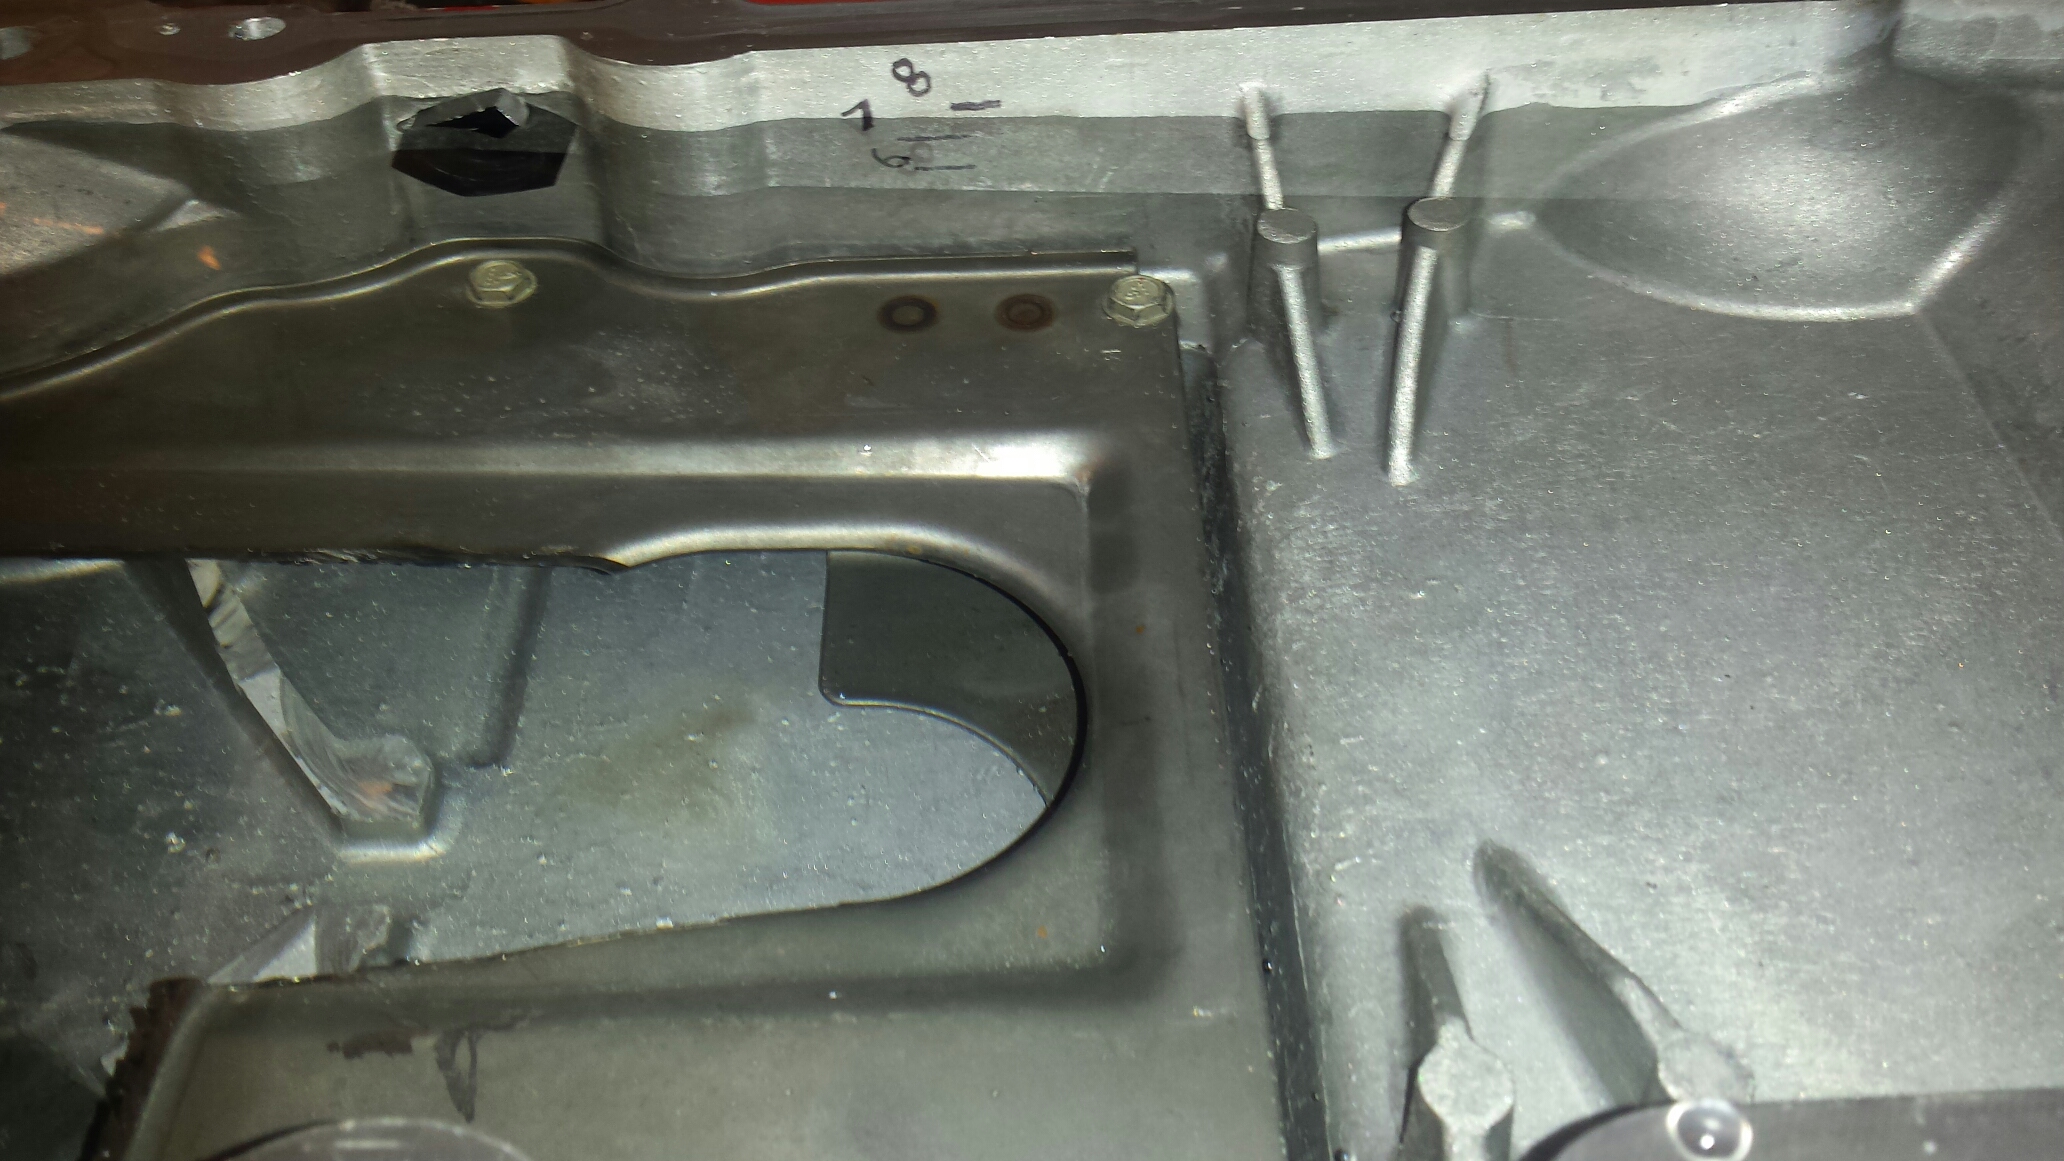
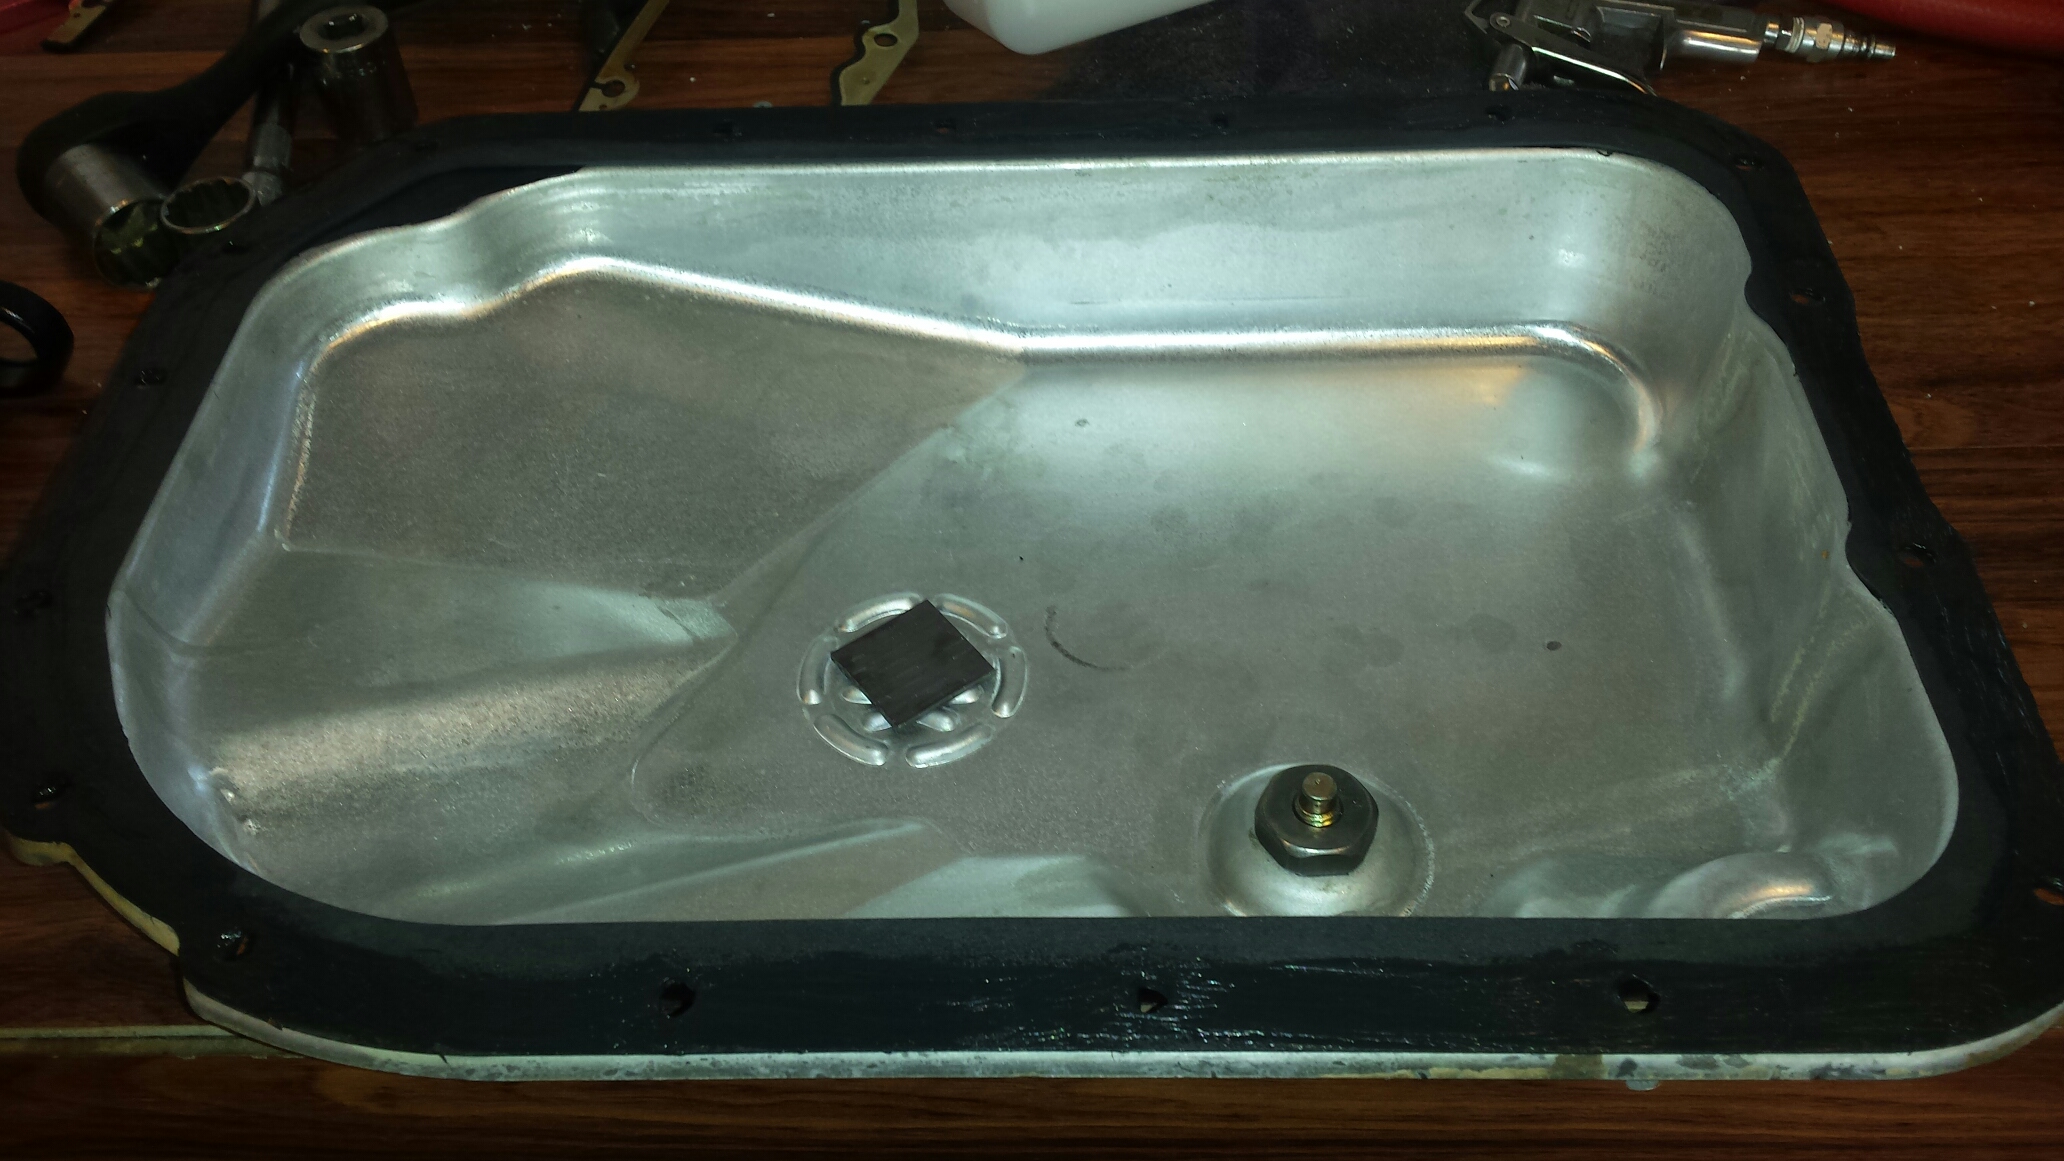
That was pretty easy, now we have to alter the pan to make it work. Here is the stock baffle, as you can see the pickup is in the center of the motor but in the front of the pan's sump. That is great for braking, and probably decent for corners, but poor for hard acceleration.
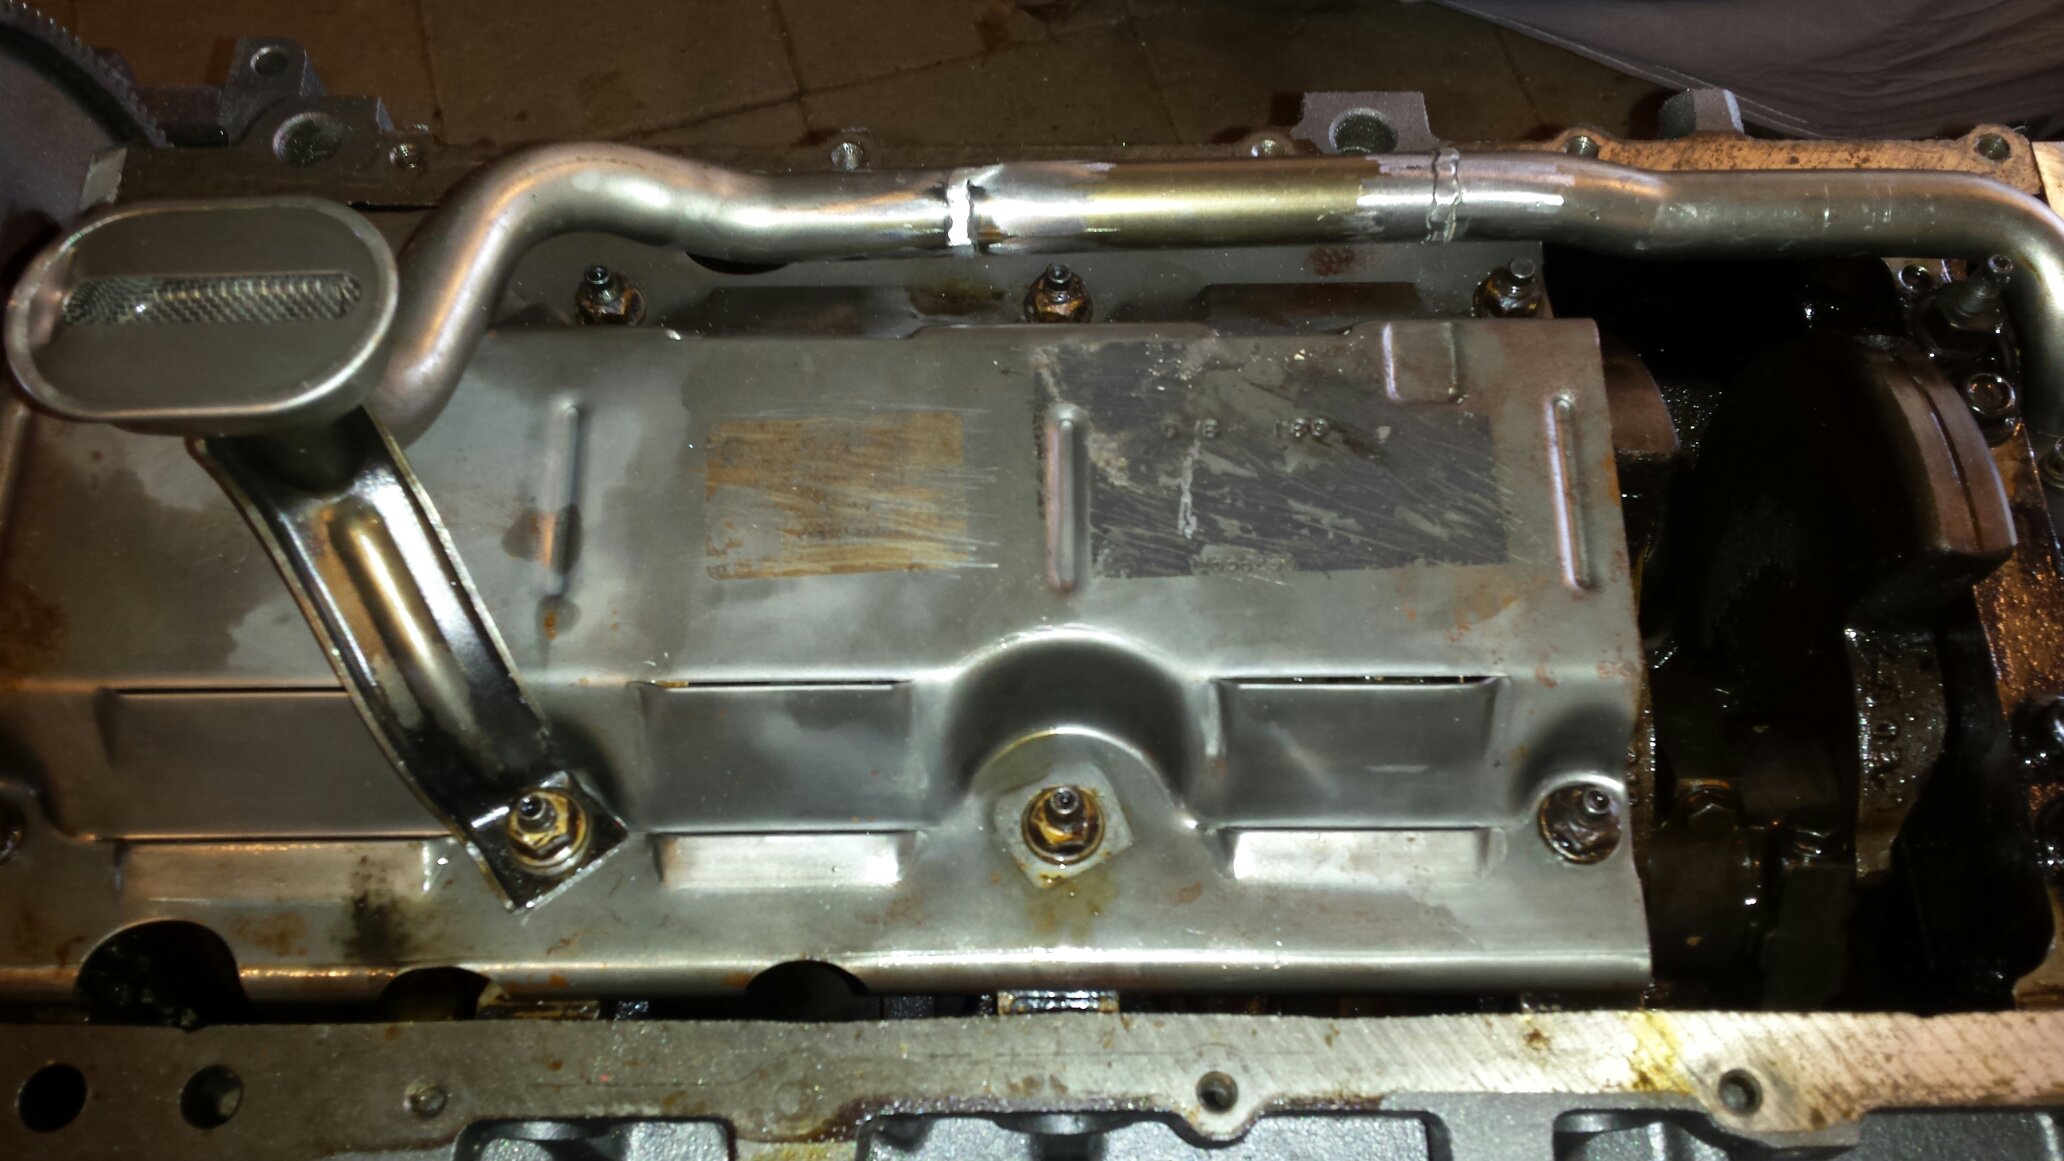
Under the bolt in baffle there is a casted in V shape. That is the way it combats acceleration forces. Some oil gets through the center but most is forced to the sides and is sort of trapped, and at the very least slowed down from going rearward. This probably works, but only so good. It had to be cut because thats where the pickup will be located now. Also notice the new -10AN drain for the turbo, more on that in a bit.
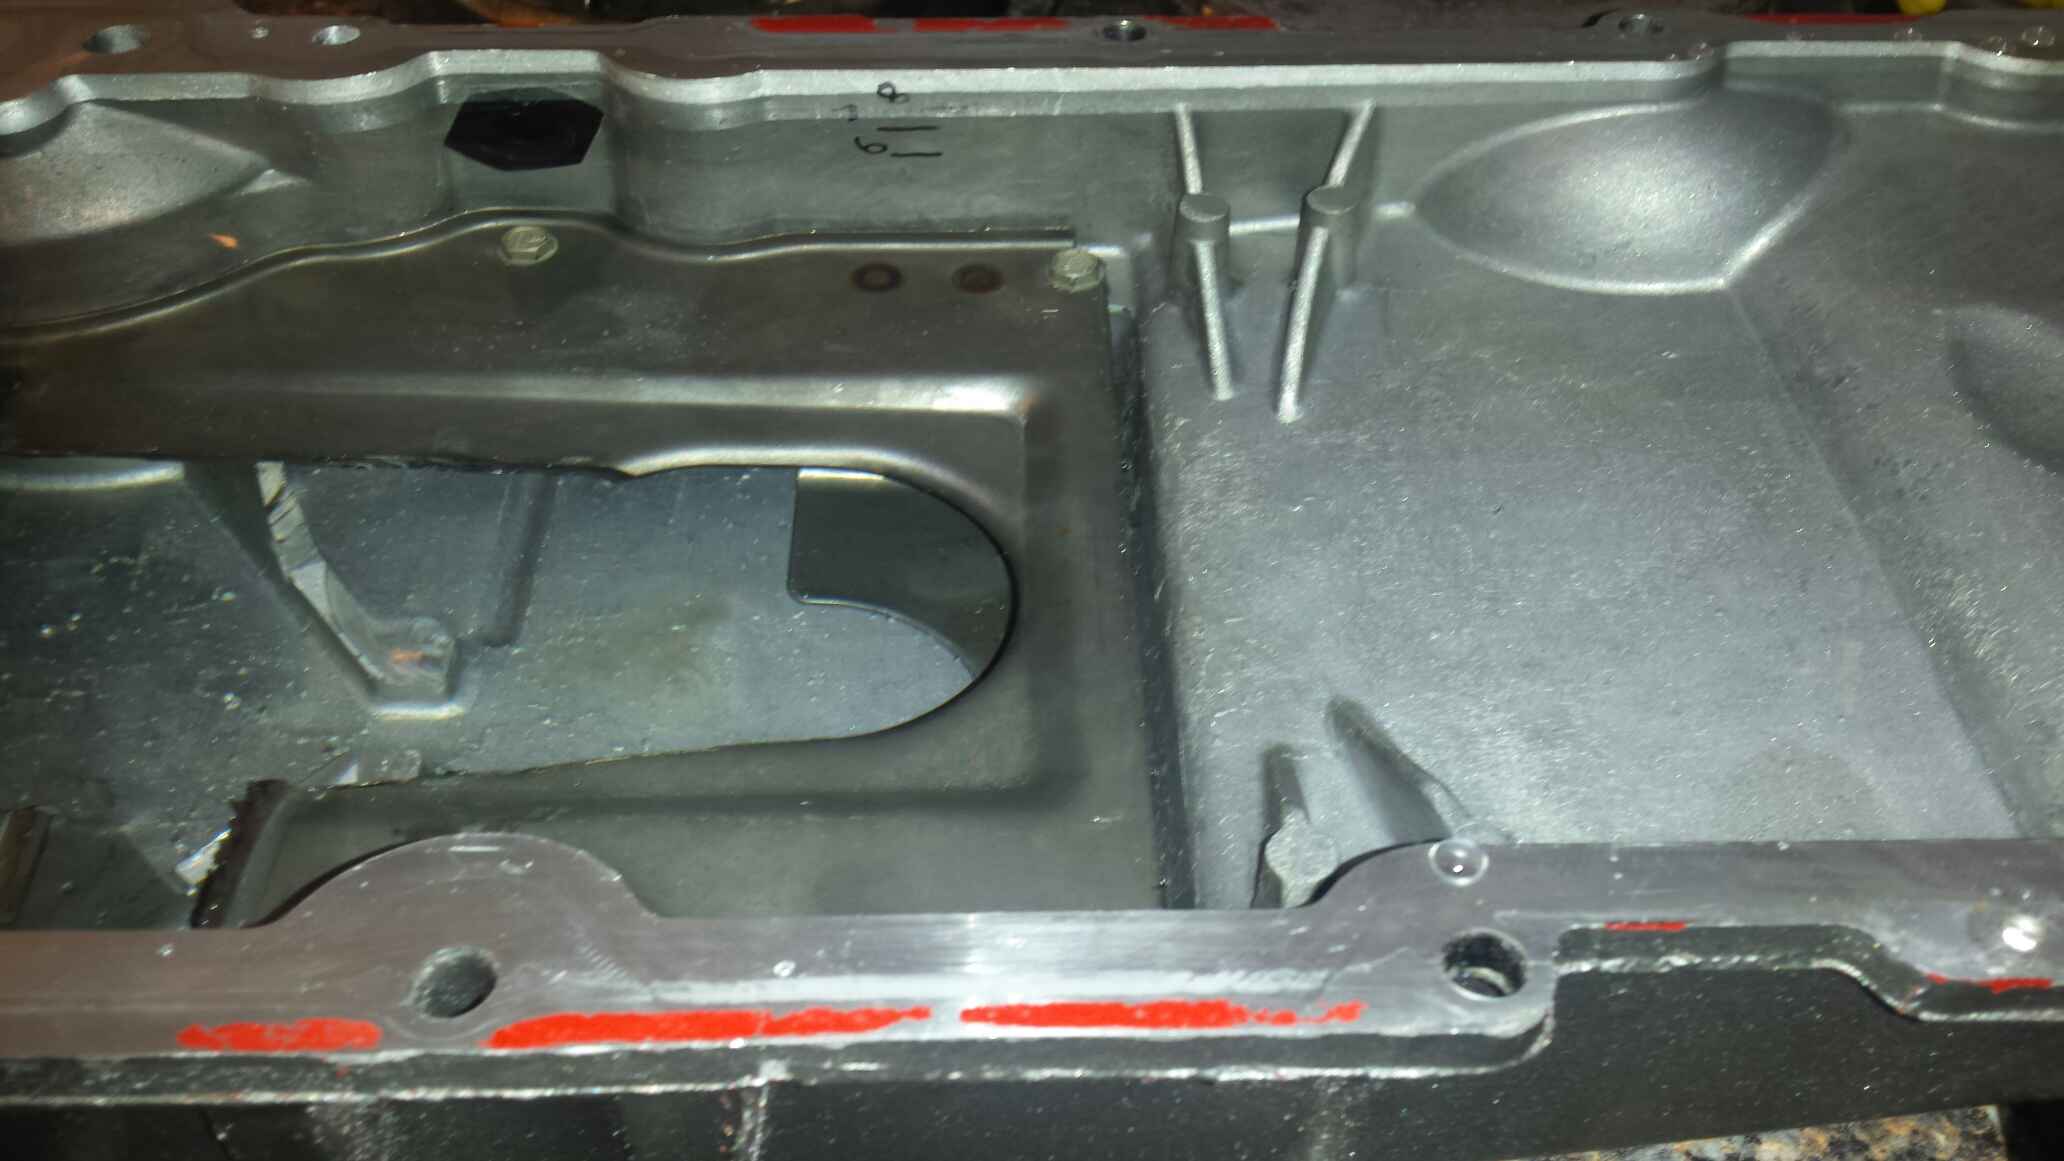
This is what was left after everything was clearanced. The hump that was on the right had to be removed for the tubing to clear, and I added the crossbar in the back to help keep the oil from going up the back of the engine during acceleration. Not pretty but functional. I just used flat bar I had laying around.
Then I realized I've just shifted my issues, now I may lose pressure during braking. So i pulled the baffle back out, bent two little sheet metal V flaps, and made two more crossbar flats across the top. The idea was to essentially reverse the stock idea, pickup in the back and control the oil going forward. Not pretty but functional.
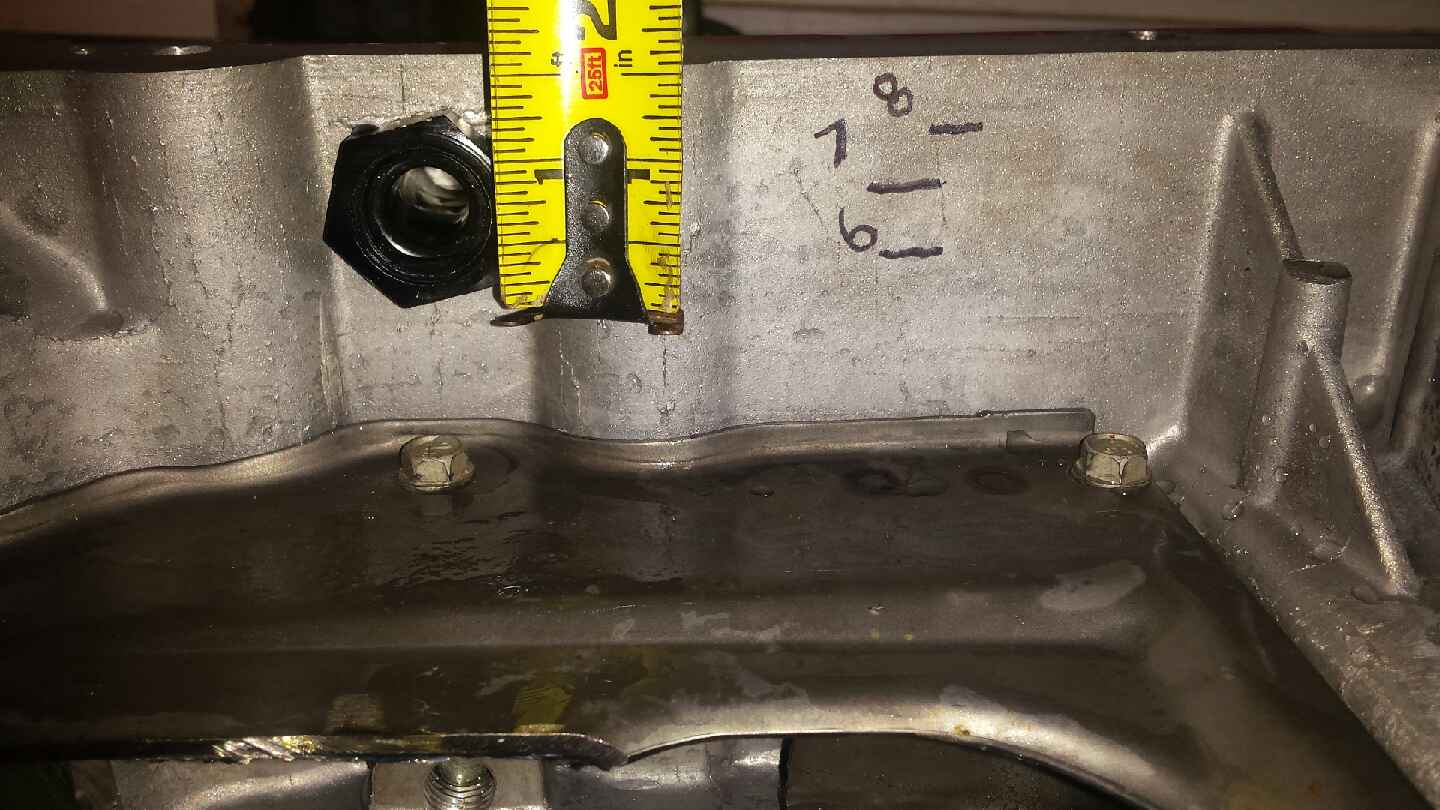
Now I wanted to do something fun. Lets see how much oil this pan can hold. Also, I wanted to know what level I could be at and still have the turbo drain properly.
6 Quarts:
7 Quarts:
8 Quarts:
Pan held level and 9 Quarts:
So we know my turbo will drain with the 7 quarts i plan on running, but what about windage, where is the crank in all of this?
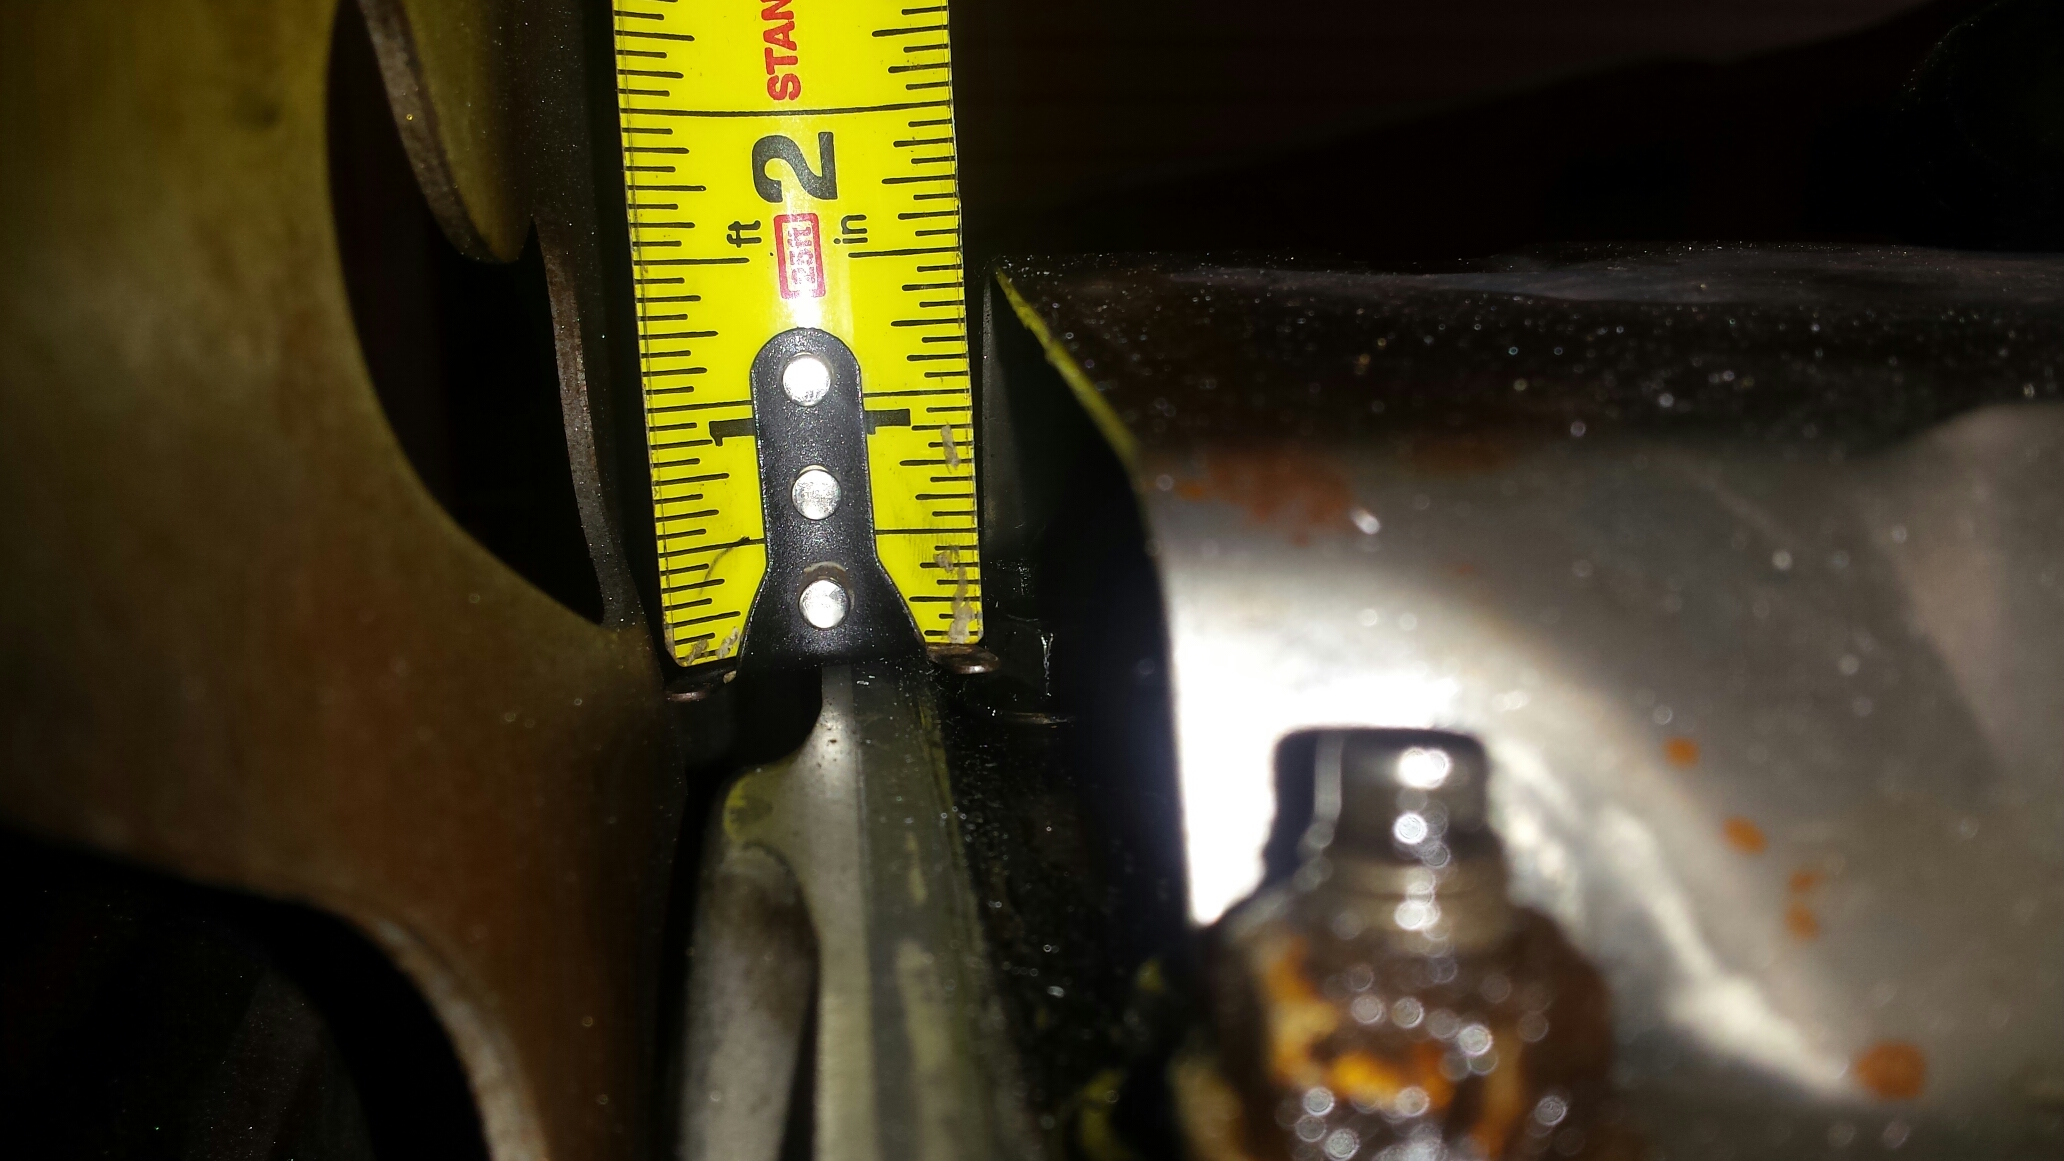
1.5 inches into the pan. Let's see how that hits the marks we just made.
I got the feed for the turbo tapped in above the oil filter with a 1/8NPT to -4AN fitting. Also got these in, these are for the 4l80e, and will converter the cooler outlets to -8AN which is what I have in the car currently.
Stay tuned, more to come.

After mocking it up and seeing the space between the rail and the intake, I measured that i needed 4 .850 spacers. I went to Home Depot and got some 1/2" square and round tubing. After playing with them I decided I like the square tubing better, so I made 4 spacers and bought 4 longer bolts. I believe they were m6x1.0x40mm.

Both sides on, crossover installed, they fit nice.

Spin the motor over. I'm not gonna use or need the low oil sensor thats in the pan, so I'm gonna remove it and buy a plug. Cruising around ebay searching that size I realize someone makes a plug specifically for this, so I bought it. This is not tapered thread so an oring must be used.

Didnt get a complete "before" pic, but i decided to move the oil sump to the rear of the pan. We know these engines can starve for oil on hard launches so I wanted to correct this and honestly didnt want to spend 200 on Improved Racing's baffle. The main cap bolts are about 4.5 inches apart, and since the support bolts to them I figure why not just move it back one....So I cut the tube and remounted it...

Grabbed the old pickup tube that came with the engine and hacked a piece out and welded it in.

That was pretty easy, now we have to alter the pan to make it work. Here is the stock baffle, as you can see the pickup is in the center of the motor but in the front of the pan's sump. That is great for braking, and probably decent for corners, but poor for hard acceleration.

Under the bolt in baffle there is a casted in V shape. That is the way it combats acceleration forces. Some oil gets through the center but most is forced to the sides and is sort of trapped, and at the very least slowed down from going rearward. This probably works, but only so good. It had to be cut because thats where the pickup will be located now. Also notice the new -10AN drain for the turbo, more on that in a bit.

This is what was left after everything was clearanced. The hump that was on the right had to be removed for the tubing to clear, and I added the crossbar in the back to help keep the oil from going up the back of the engine during acceleration. Not pretty but functional. I just used flat bar I had laying around.

Then I realized I've just shifted my issues, now I may lose pressure during braking. So i pulled the baffle back out, bent two little sheet metal V flaps, and made two more crossbar flats across the top. The idea was to essentially reverse the stock idea, pickup in the back and control the oil going forward. Not pretty but functional.

Now I wanted to do something fun. Lets see how much oil this pan can hold. Also, I wanted to know what level I could be at and still have the turbo drain properly.
6 Quarts:

7 Quarts:

8 Quarts:

Pan held level and 9 Quarts:

So we know my turbo will drain with the 7 quarts i plan on running, but what about windage, where is the crank in all of this?

1.5 inches into the pan. Let's see how that hits the marks we just made.

I got the feed for the turbo tapped in above the oil filter with a 1/8NPT to -4AN fitting. Also got these in, these are for the 4l80e, and will converter the cooler outlets to -8AN which is what I have in the car currently.

Stay tuned, more to come.
#34
07-11-2017, 08:35 AM
Join Date: Aug 2010
Posts: 230
Likes: 0
Received 0 Likes
on
0 Posts
Ok got some more parts in, on the left is a manual boost controller, top right is some -8 ORB AN fittings for the fuel rails, and the bottom right is a weldable 1/8 NPT bung for the trans pan.
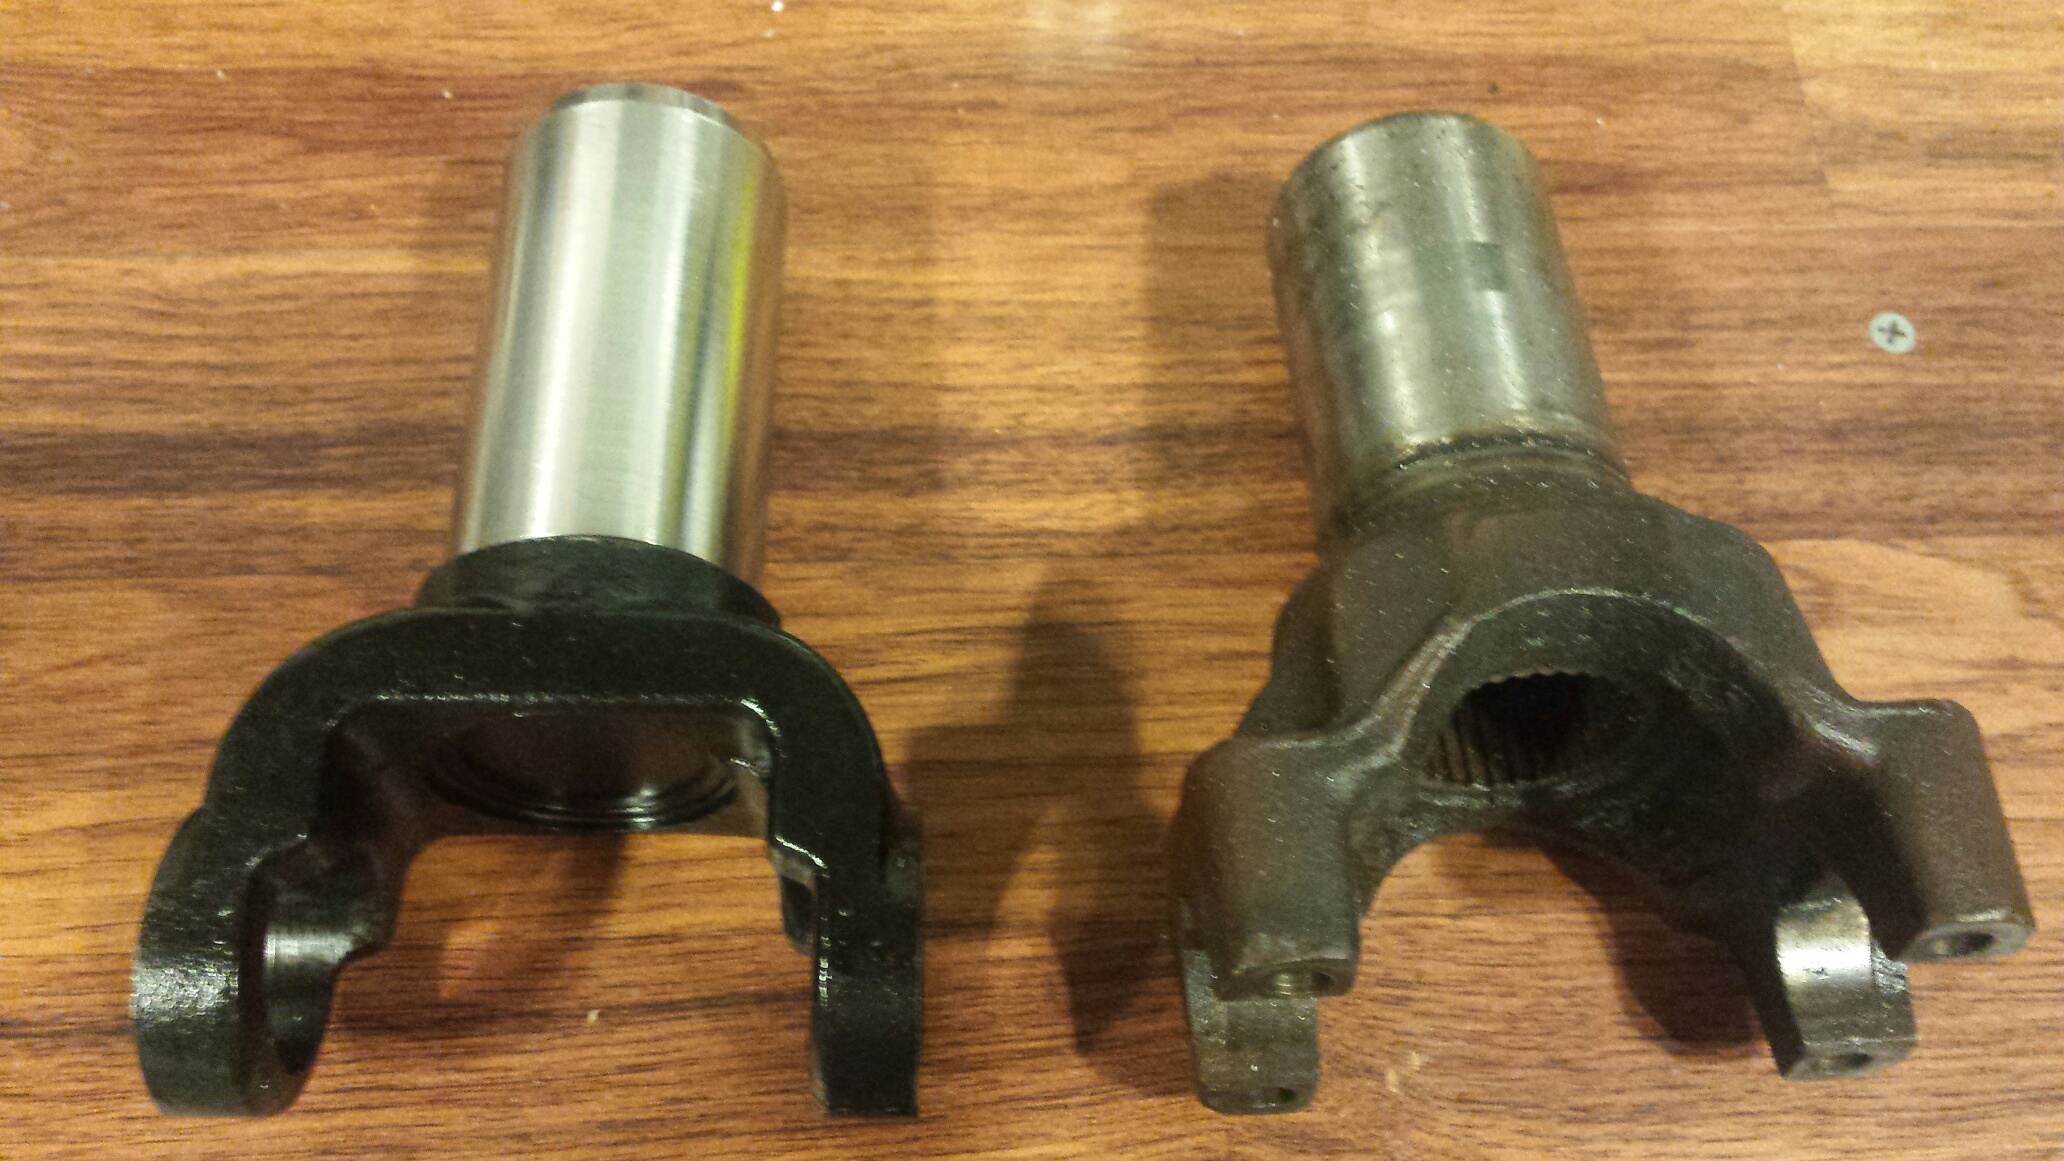
PST forged yoke for the 4l80e on the left and the stocker on the right. Im going to swap this onto my existing PST shaft.
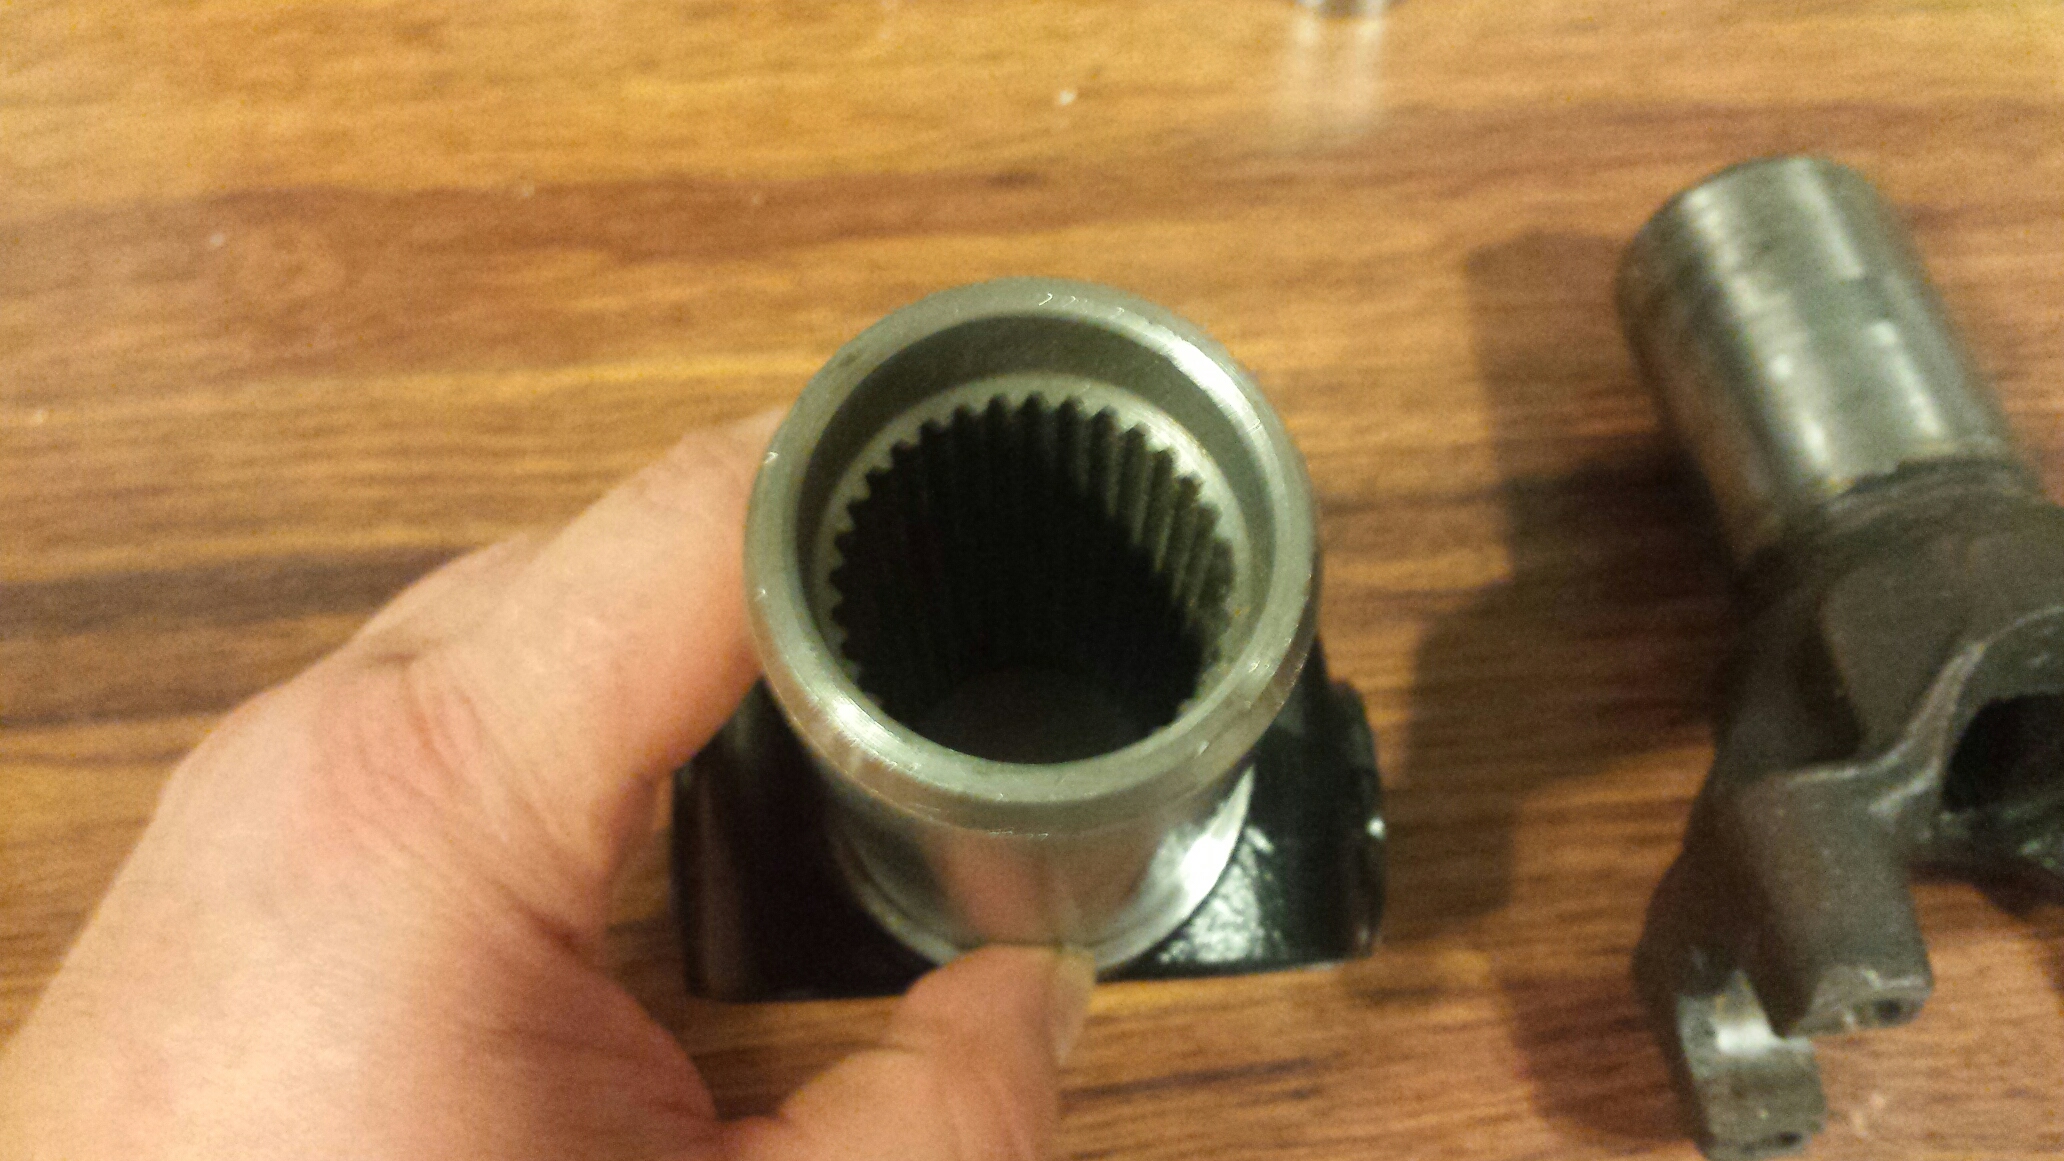
My 80e output shaft has an oring, your yoke needs to have a smooth lip to seal on it.

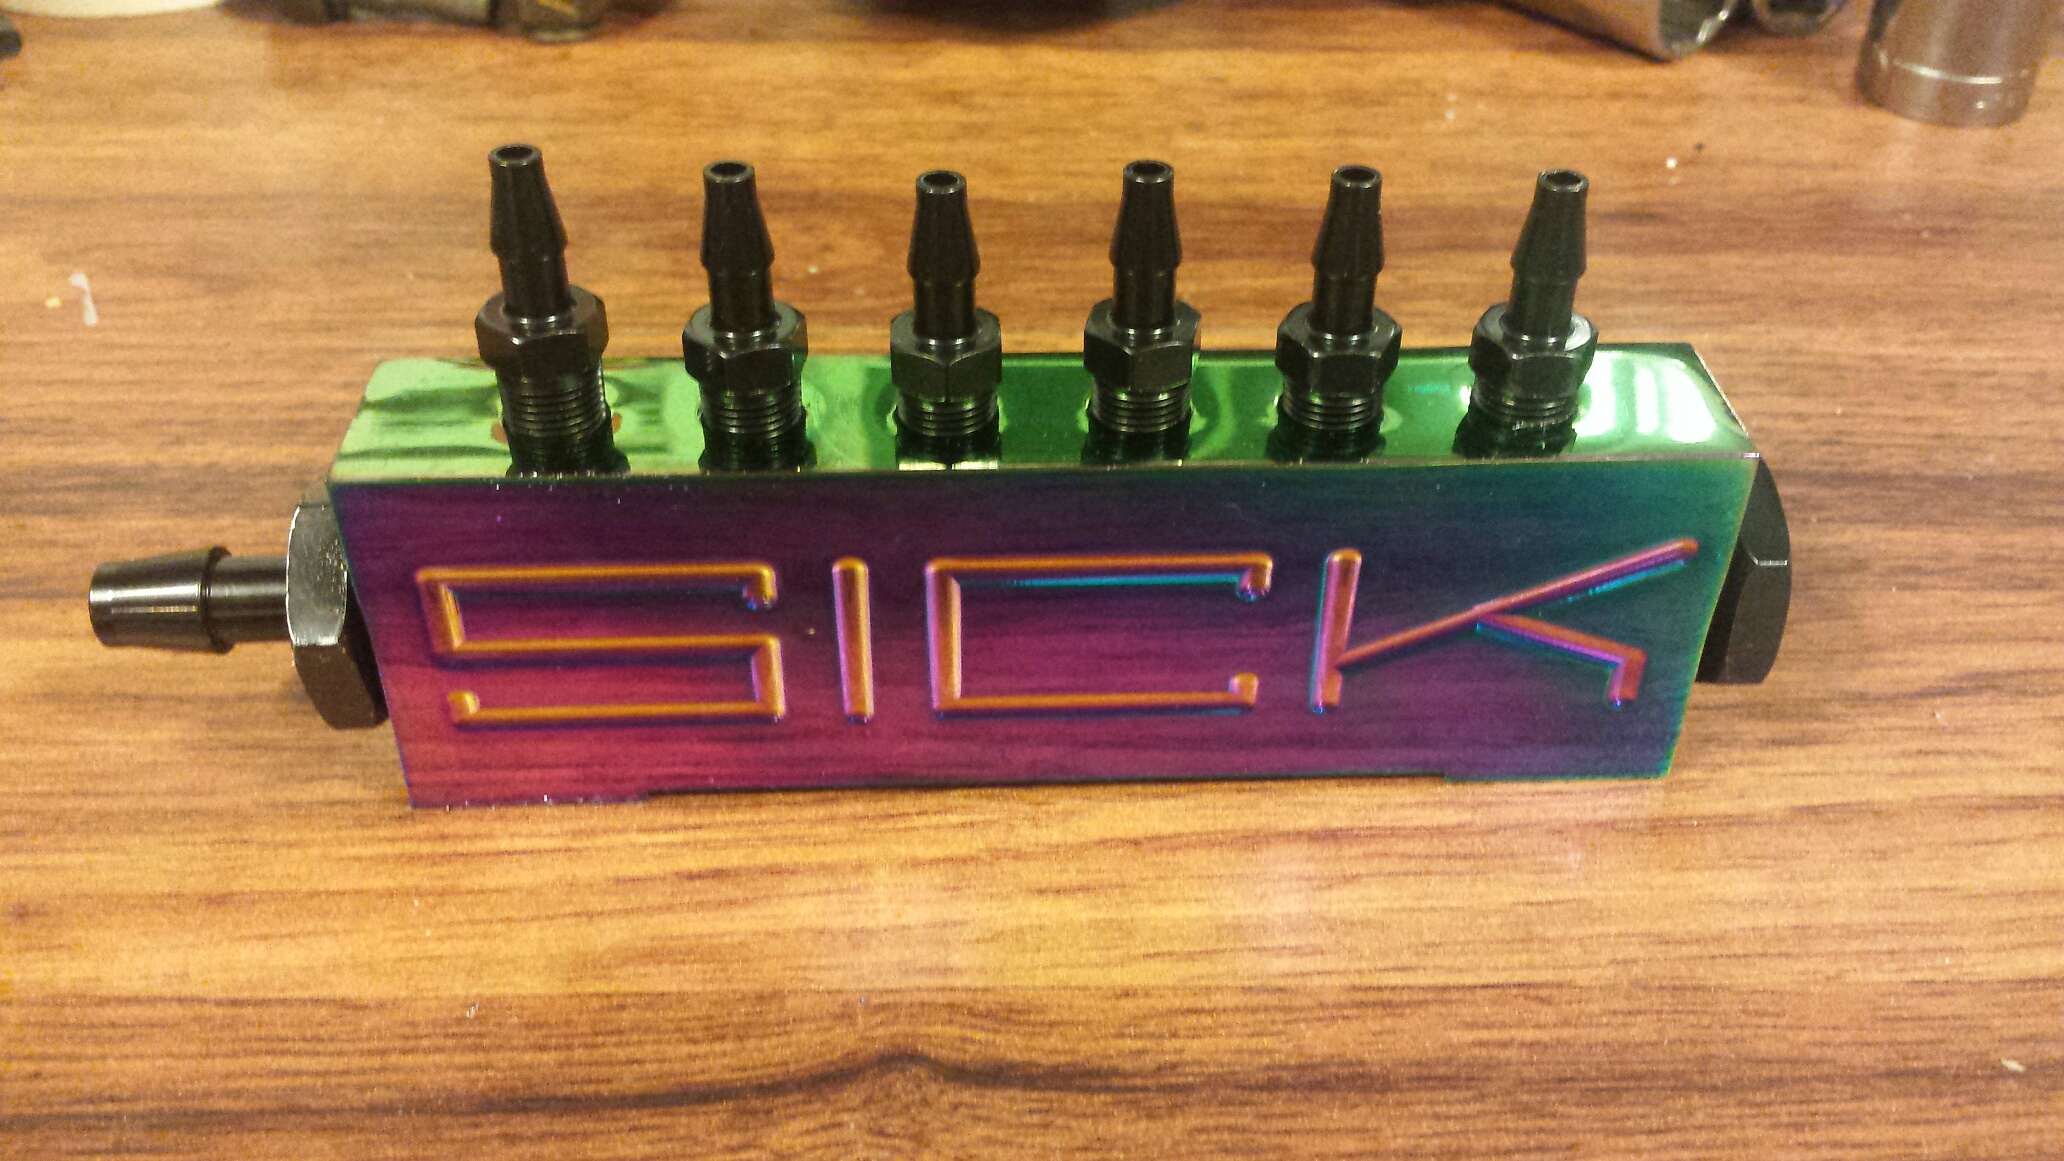
Vacuum block, yes its colorful :jest:
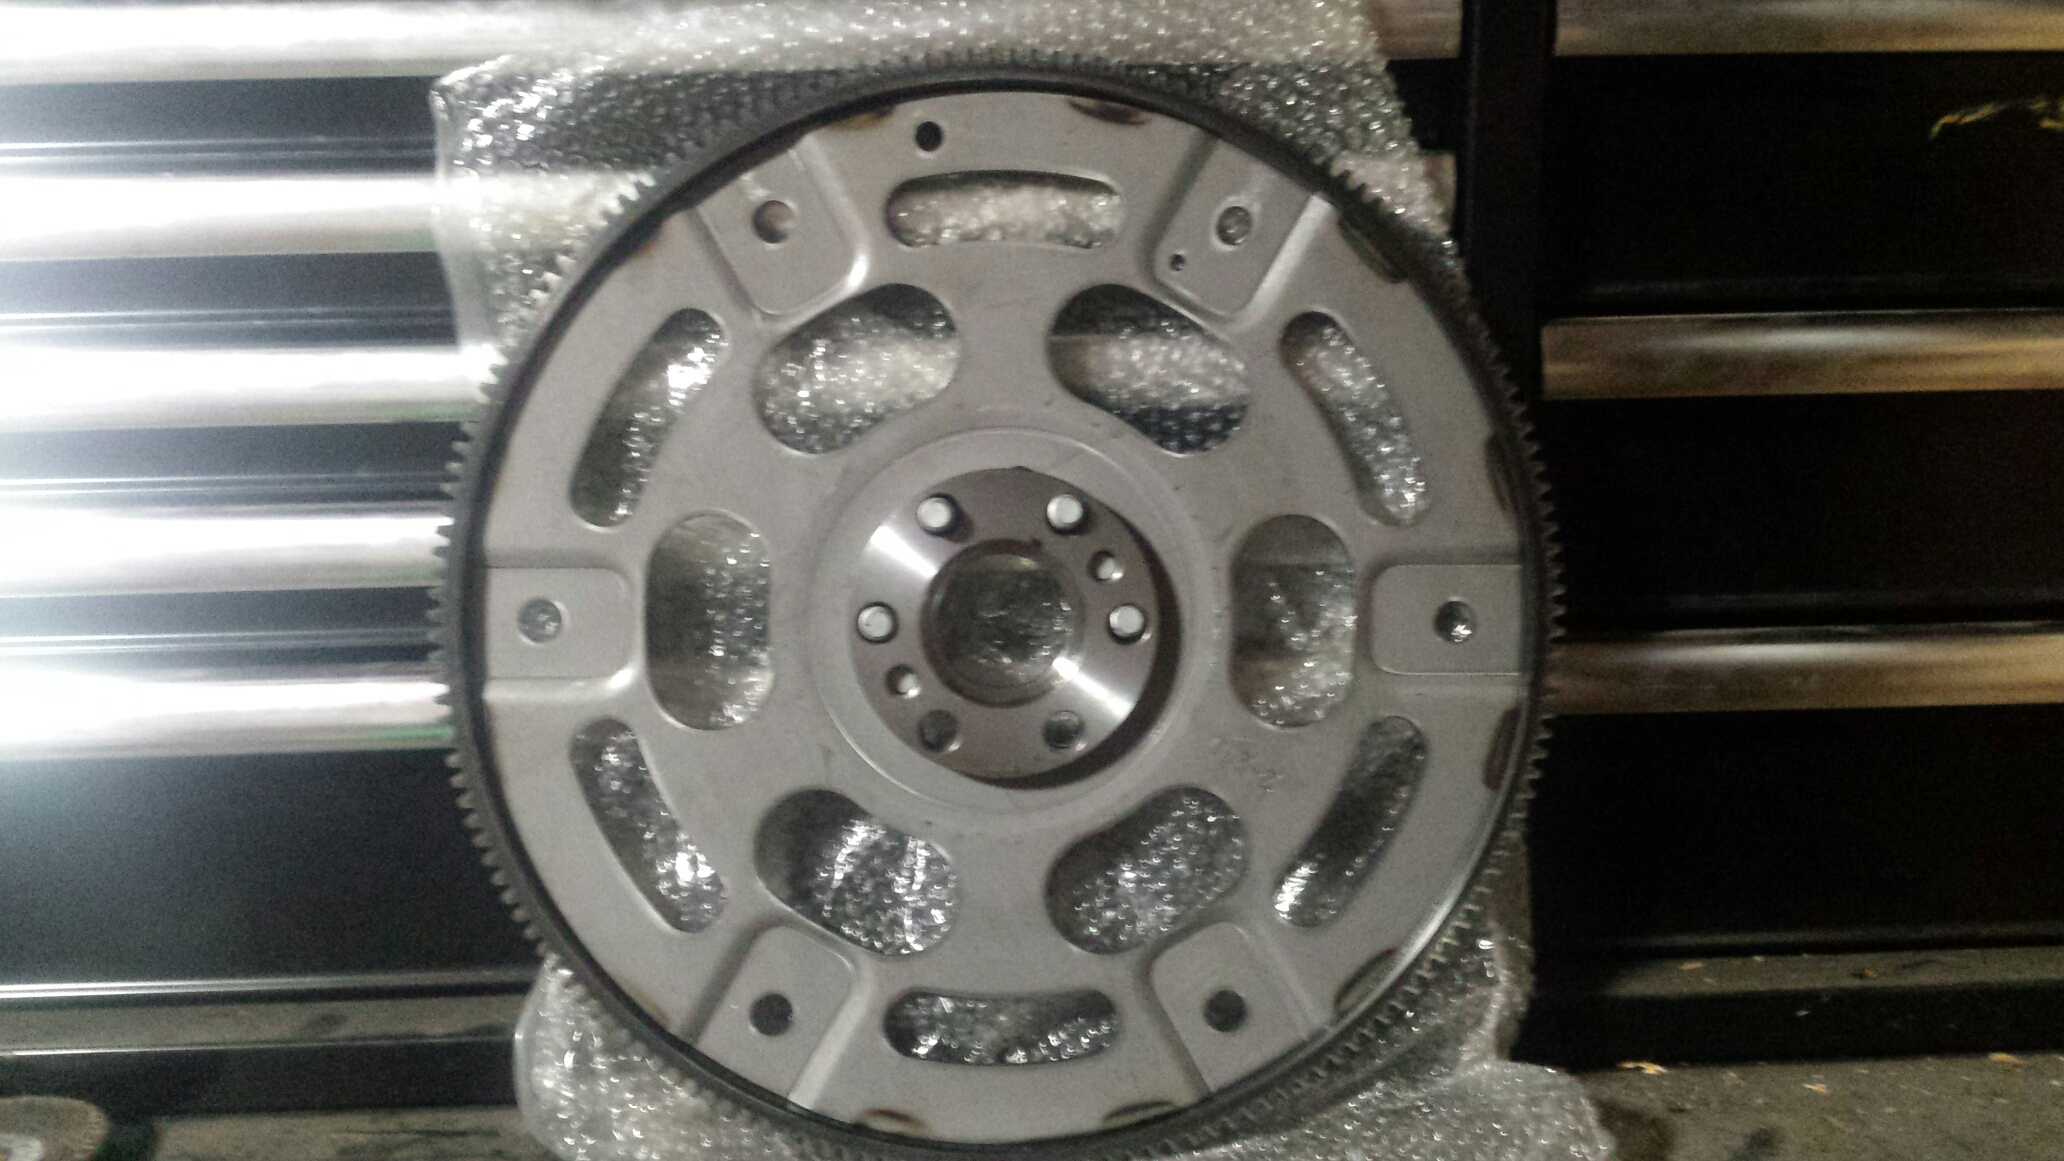
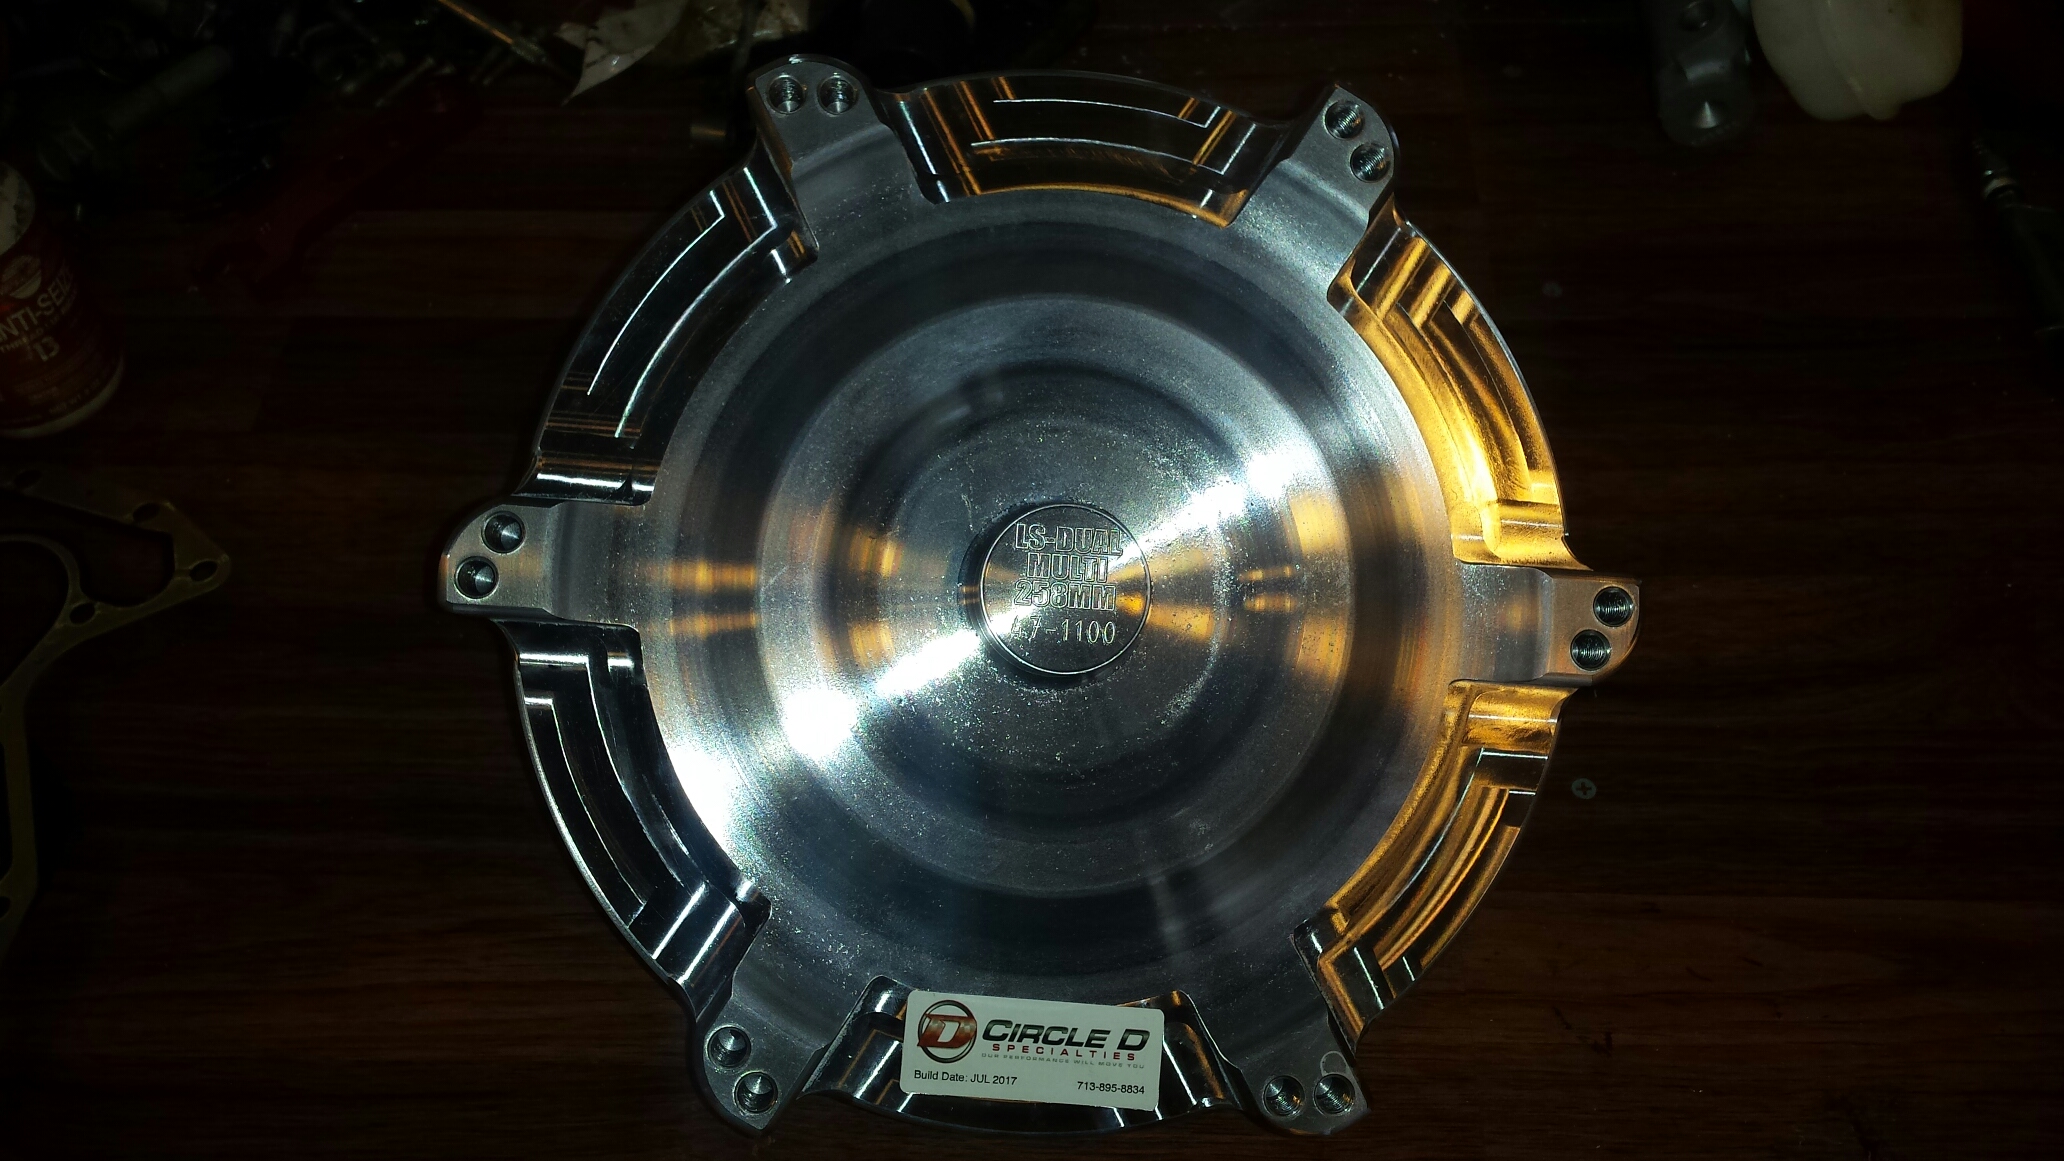
Basically the converter I bought will work with almost any LS flexplate because it has two (6 bolt) bolt patterns on it. So I didn't actually need to buy a flexplate, but I wanted to at minimum use all 6 bolts, where the stock 60e plate thats on the engine is only 3 bolts. This is an aftermarket 80e plate with all 6 holes part number ATP Z-270. The reason you see this and stuff like the manual boost controller, not welding fittings in is because I'm trying to trim expense where I can. This can get out of control with all the little bullshit things that would have to do/buy. Im basically trying to stretch this last bit as far as I can.
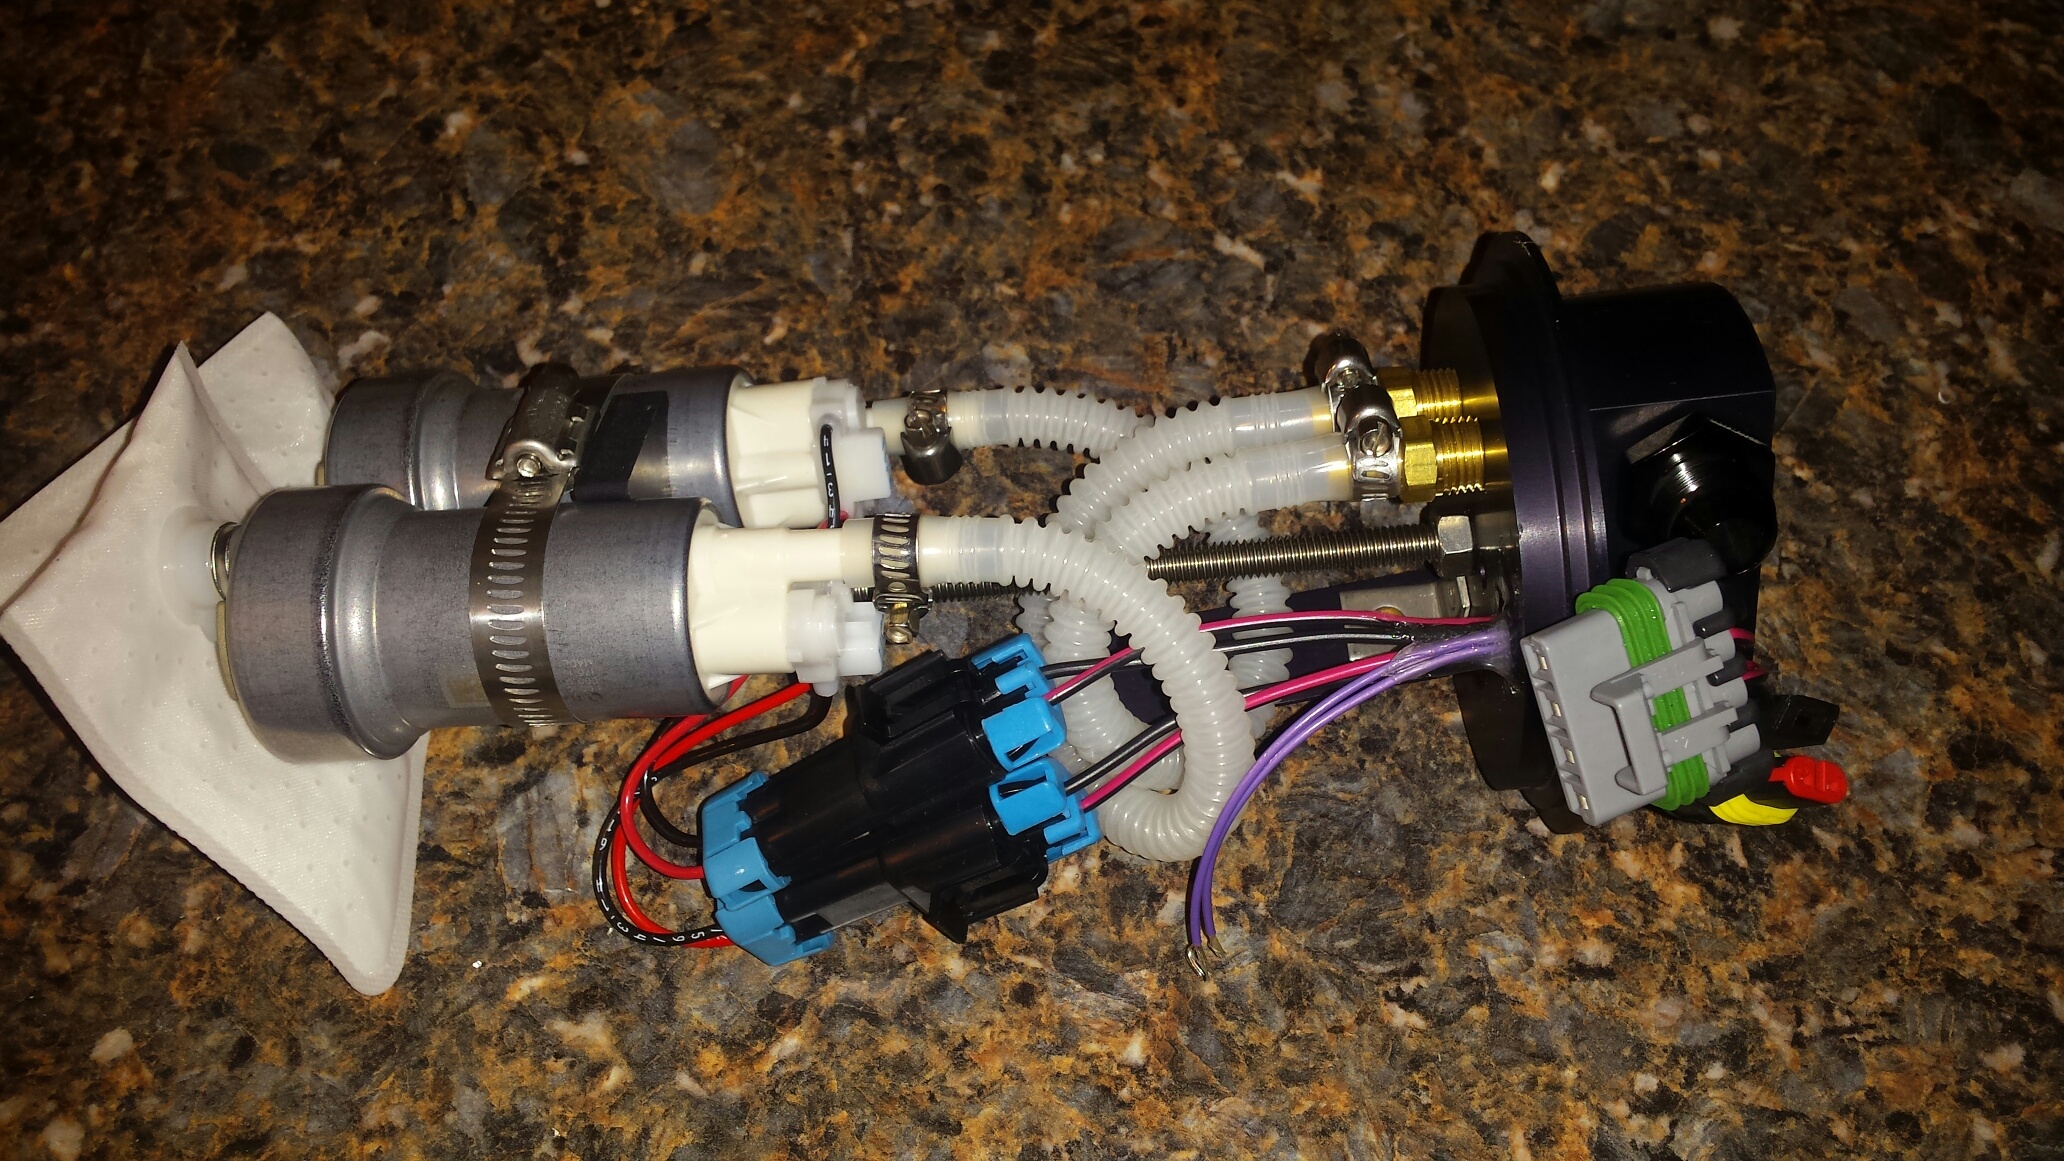
This is Chrs1313 dual 450 pumps. I also bought the hotwire harness so installation should be simple.
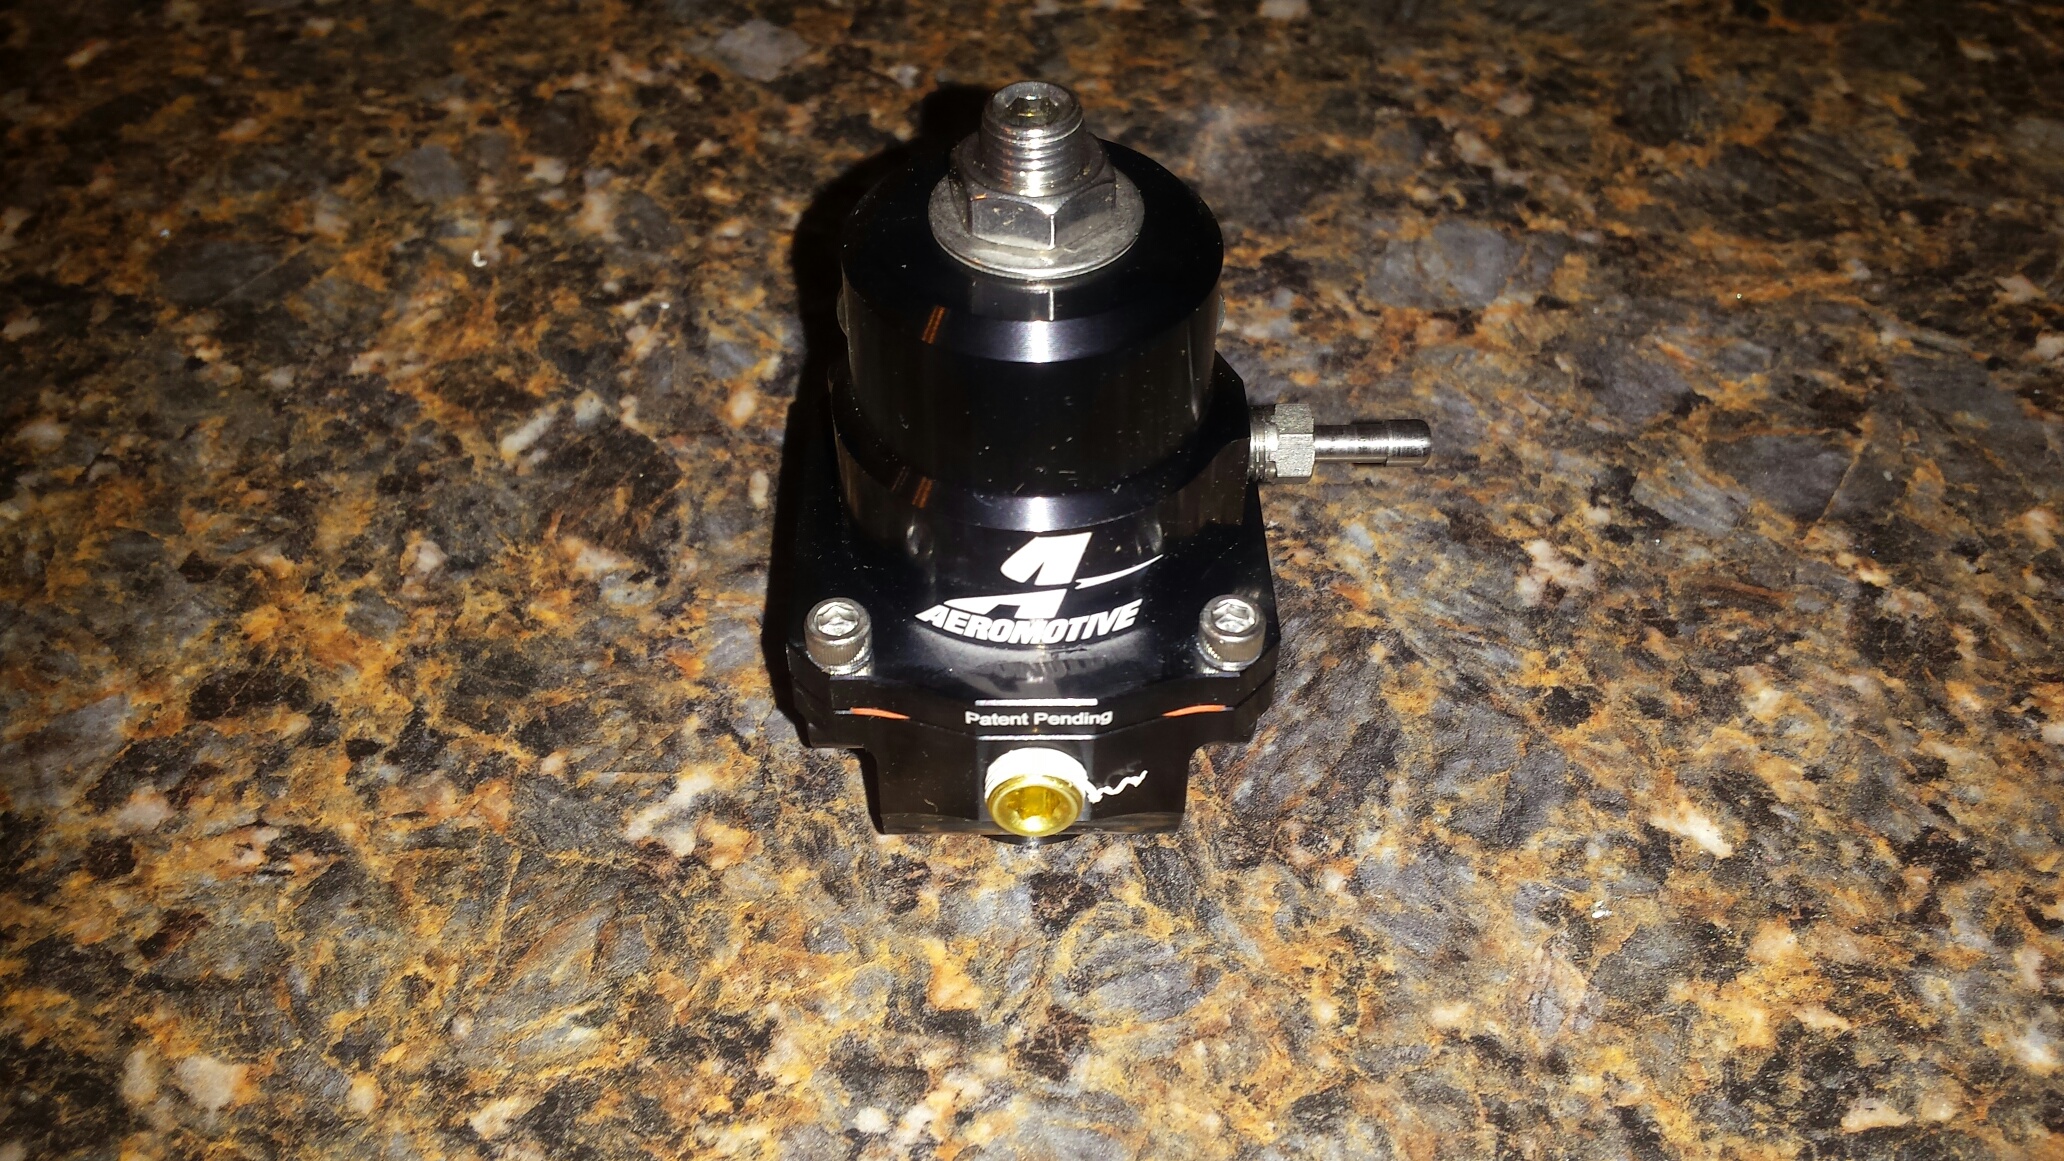
Aeromotive 13303 fuel pressure regulator, this is -8AN in and out.
Here is the plug for the oil pan. Bought from ICT Billet on ebay.
I took the valve covers off and drilled a hole in them. I also cut and removed some of the baffles.
Installed a -10AN fitting for the breather. Went back after this pic and removed all the baffling, decided it was now useless lets get rid of it.
I did one on each side to go the the catch can.
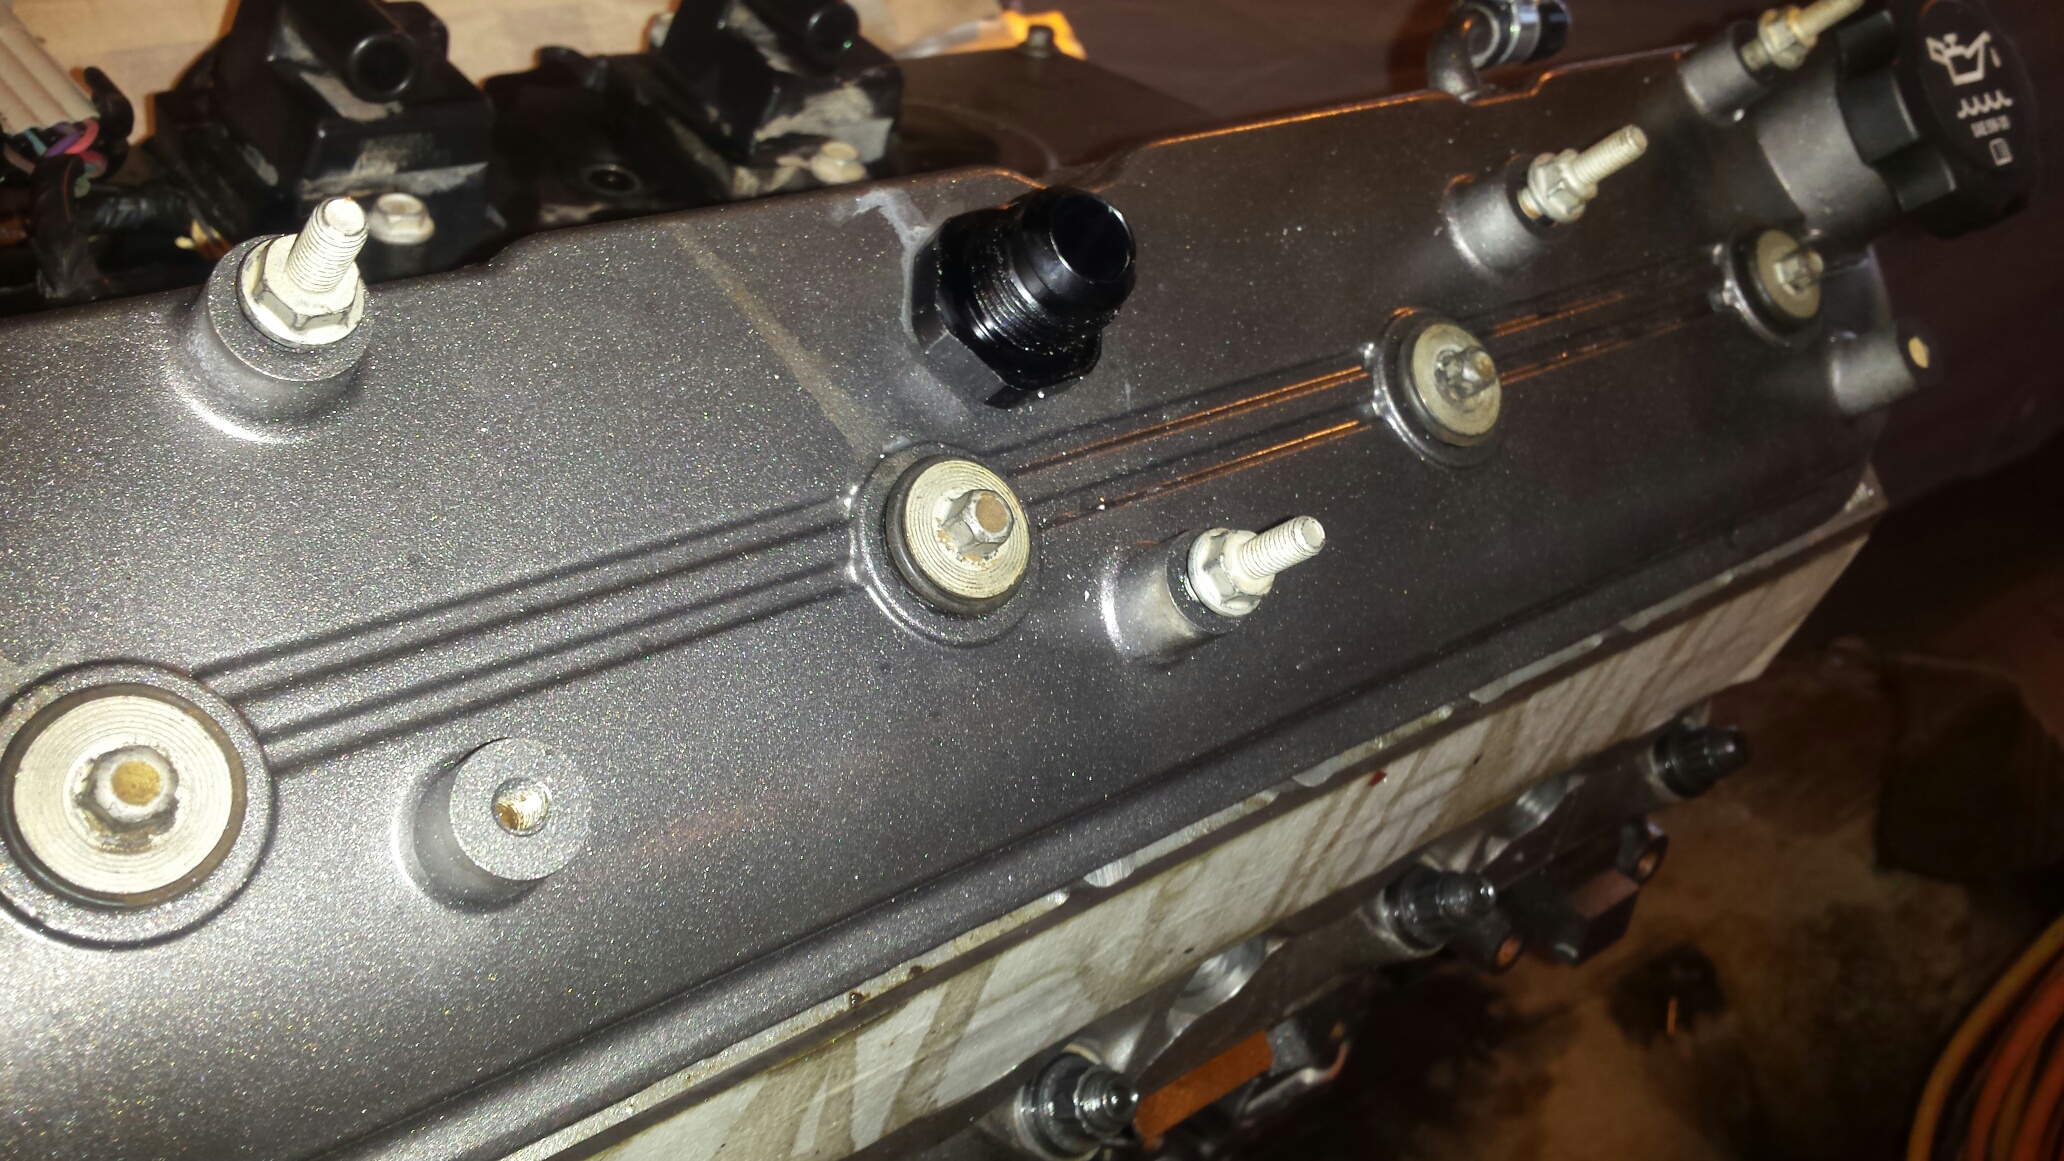
Pulled the harness off the bracket and trimmed the center metal out. Seems like an easy no weld solution. Once we get a little closer to finished I will probably buy a 90 degree -10 fitting for both covers.

PST forged yoke for the 4l80e on the left and the stocker on the right. Im going to swap this onto my existing PST shaft.

My 80e output shaft has an oring, your yoke needs to have a smooth lip to seal on it.


Vacuum block, yes its colorful :jest:

Basically the converter I bought will work with almost any LS flexplate because it has two (6 bolt) bolt patterns on it. So I didn't actually need to buy a flexplate, but I wanted to at minimum use all 6 bolts, where the stock 60e plate thats on the engine is only 3 bolts. This is an aftermarket 80e plate with all 6 holes part number ATP Z-270. The reason you see this and stuff like the manual boost controller, not welding fittings in is because I'm trying to trim expense where I can. This can get out of control with all the little bullshit things that would have to do/buy. Im basically trying to stretch this last bit as far as I can.

This is Chrs1313 dual 450 pumps. I also bought the hotwire harness so installation should be simple.

Aeromotive 13303 fuel pressure regulator, this is -8AN in and out.

Here is the plug for the oil pan. Bought from ICT Billet on ebay.

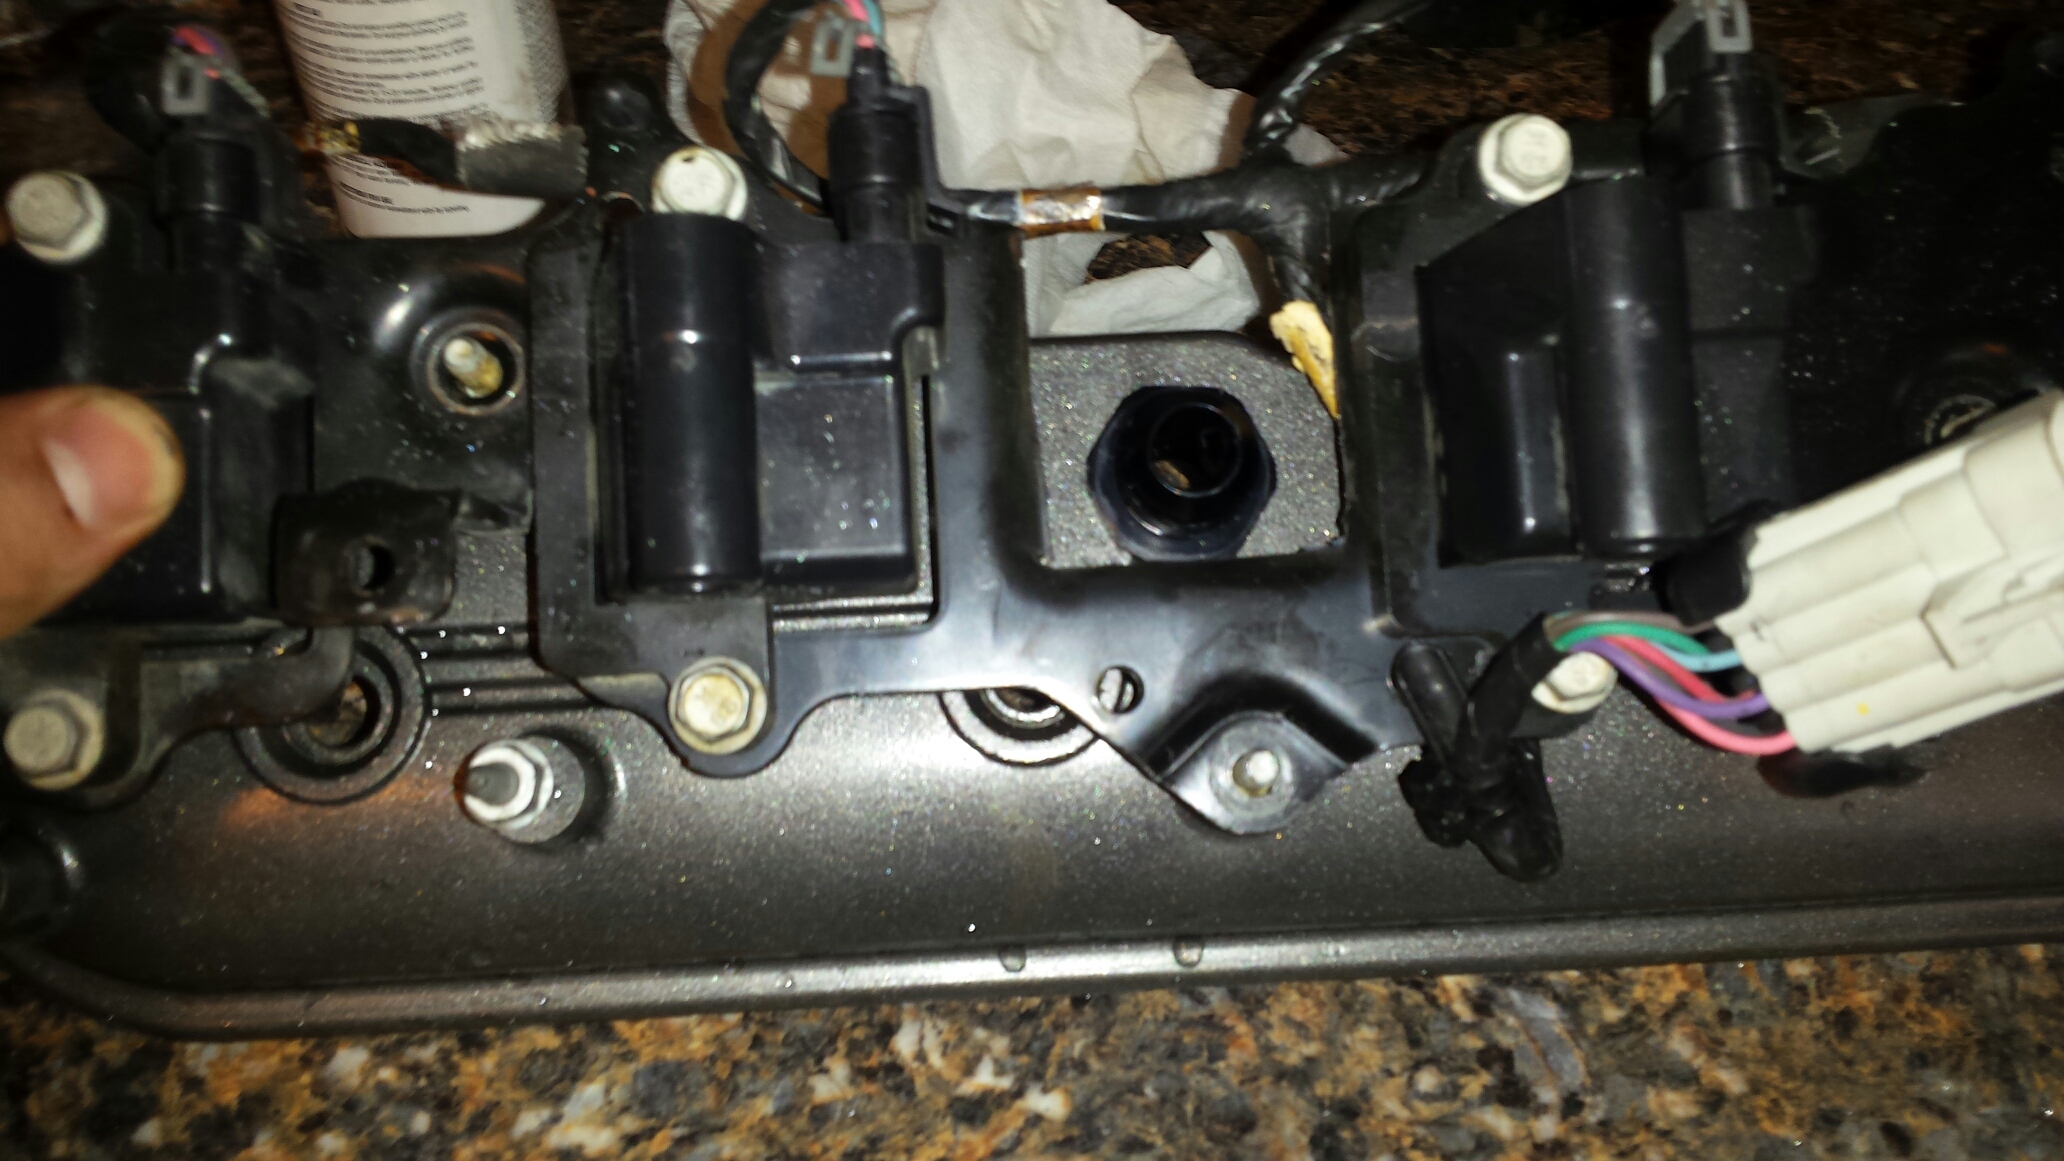
I took the valve covers off and drilled a hole in them. I also cut and removed some of the baffles.

Installed a -10AN fitting for the breather. Went back after this pic and removed all the baffling, decided it was now useless lets get rid of it.

I did one on each side to go the the catch can.

Pulled the harness off the bracket and trimmed the center metal out. Seems like an easy no weld solution. Once we get a little closer to finished I will probably buy a 90 degree -10 fitting for both covers.

#35
07-15-2017, 08:03 AM
Join Date: Aug 2010
Posts: 230
Likes: 0
Received 0 Likes
on
0 Posts
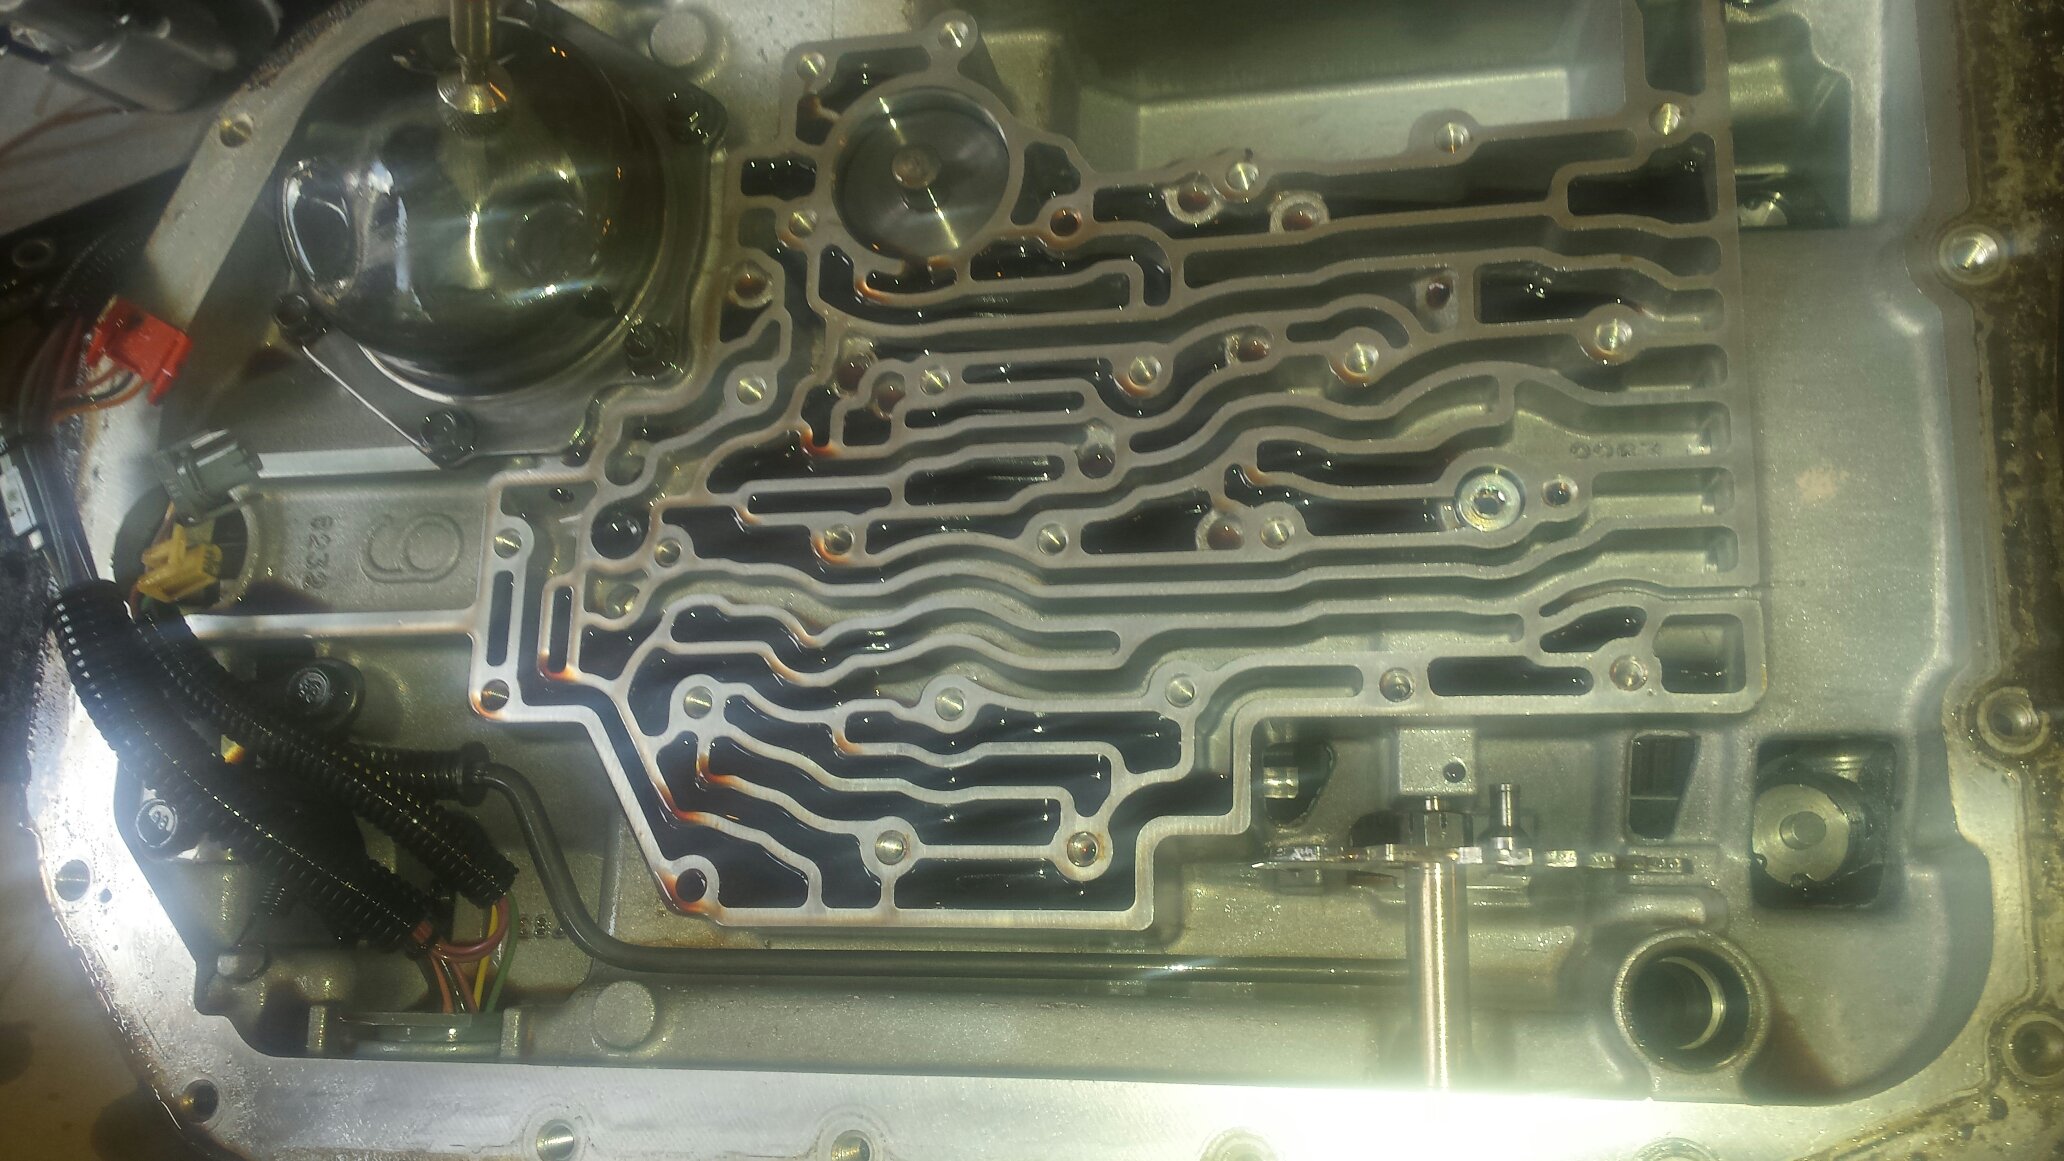
Started with the transmission, pressure washed it, and painted it. You cant see in this pic but the 1/8 NPT temp bung is welded in. I put a little rtv on both sides of the gasket before i laid the pan on.
I also installed a new output shaft seal and test fit the new DS yoke.
The gauge came with a red light cover which i had to light up and try out.
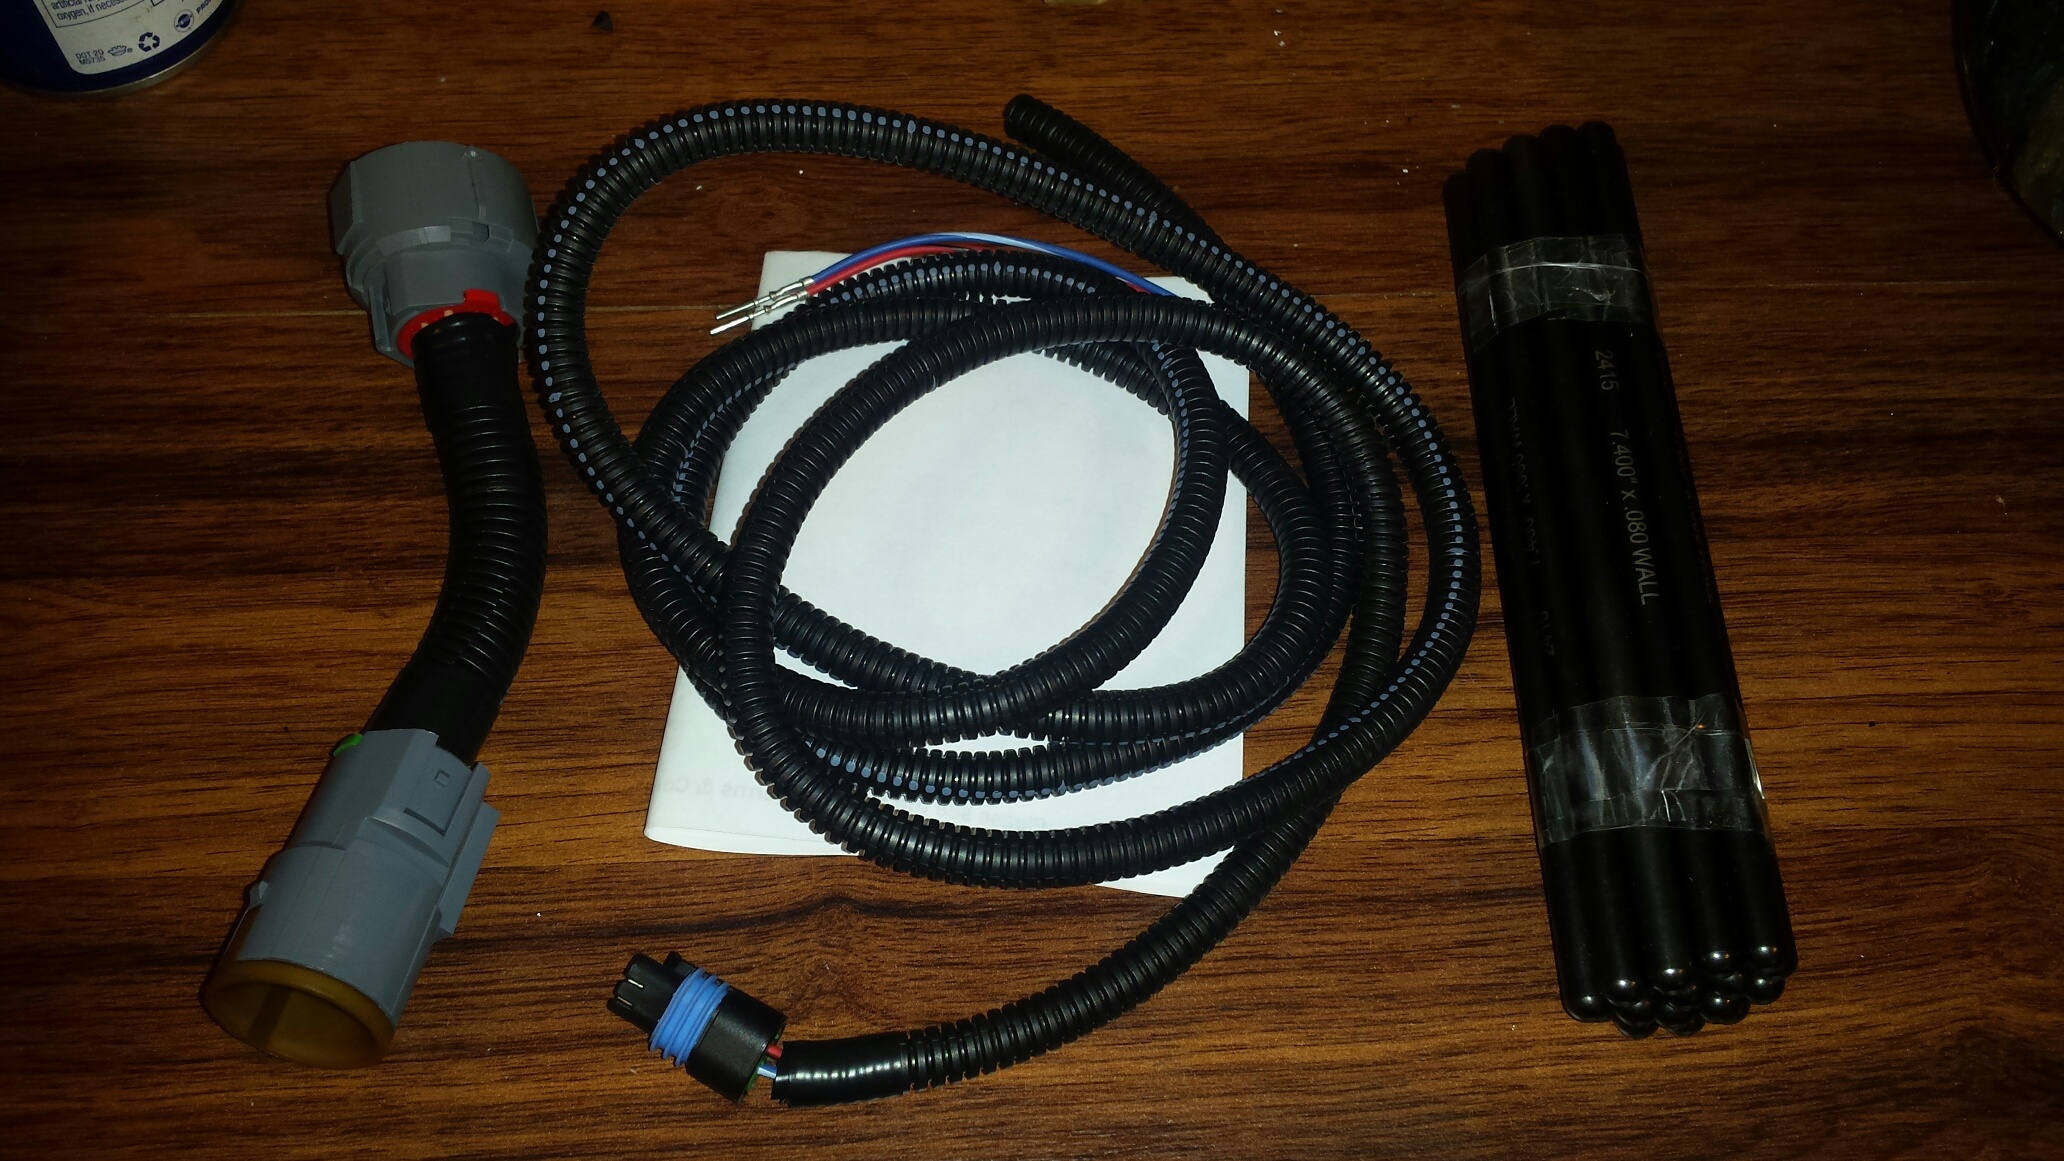
This is a Nelson 60e to 80e conversion harness. You can see it has the wiring for the extra speed sensor that the 4l80s have.
Pushrods came in, so I installed those, torqued the rockers down, installed new valve cover gaskets. The pushrods were an ebay score, new without box, about $70, they are Manley brand. After that I decided lets do something a little more fun......So I got out the air grinder...
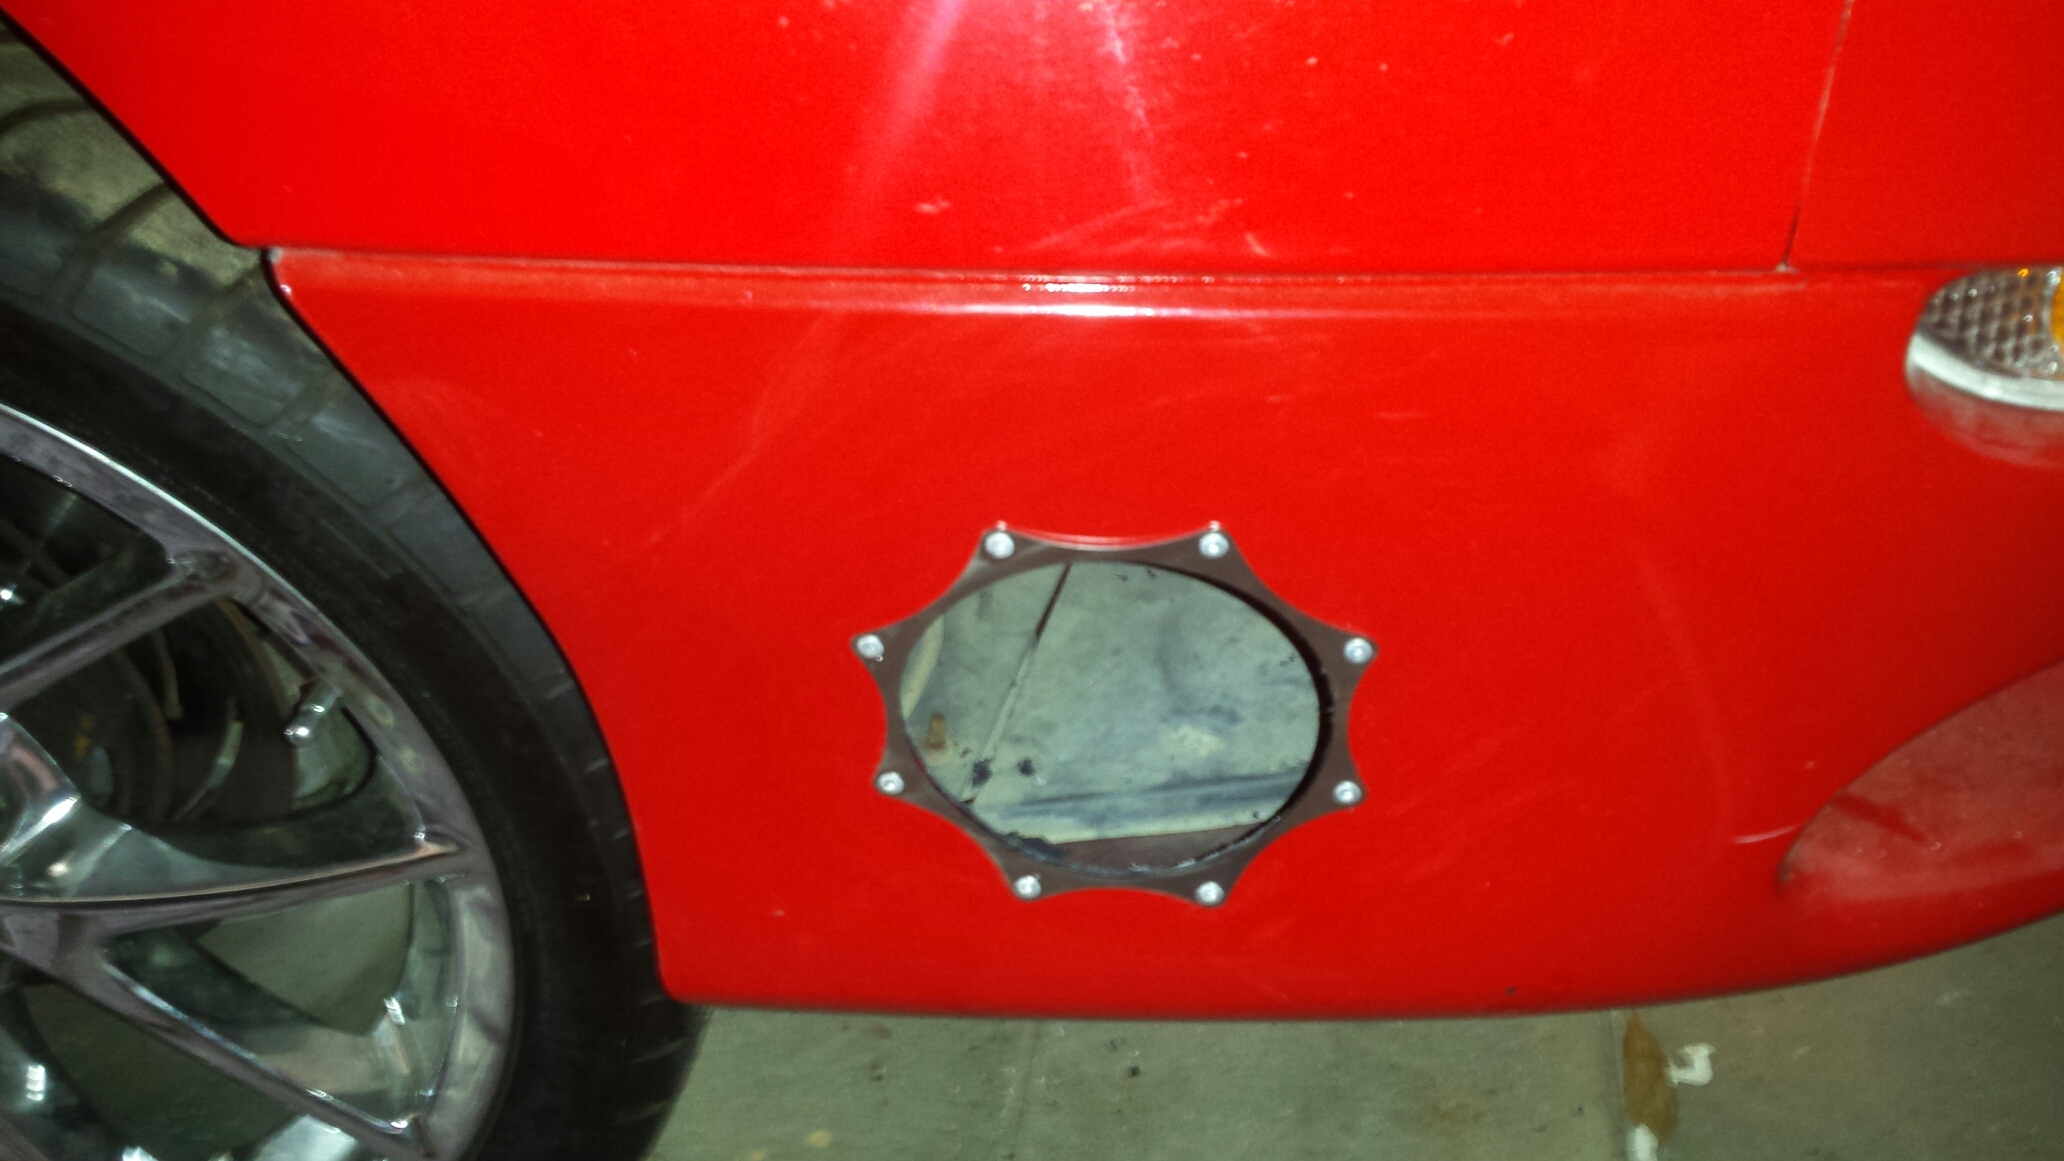
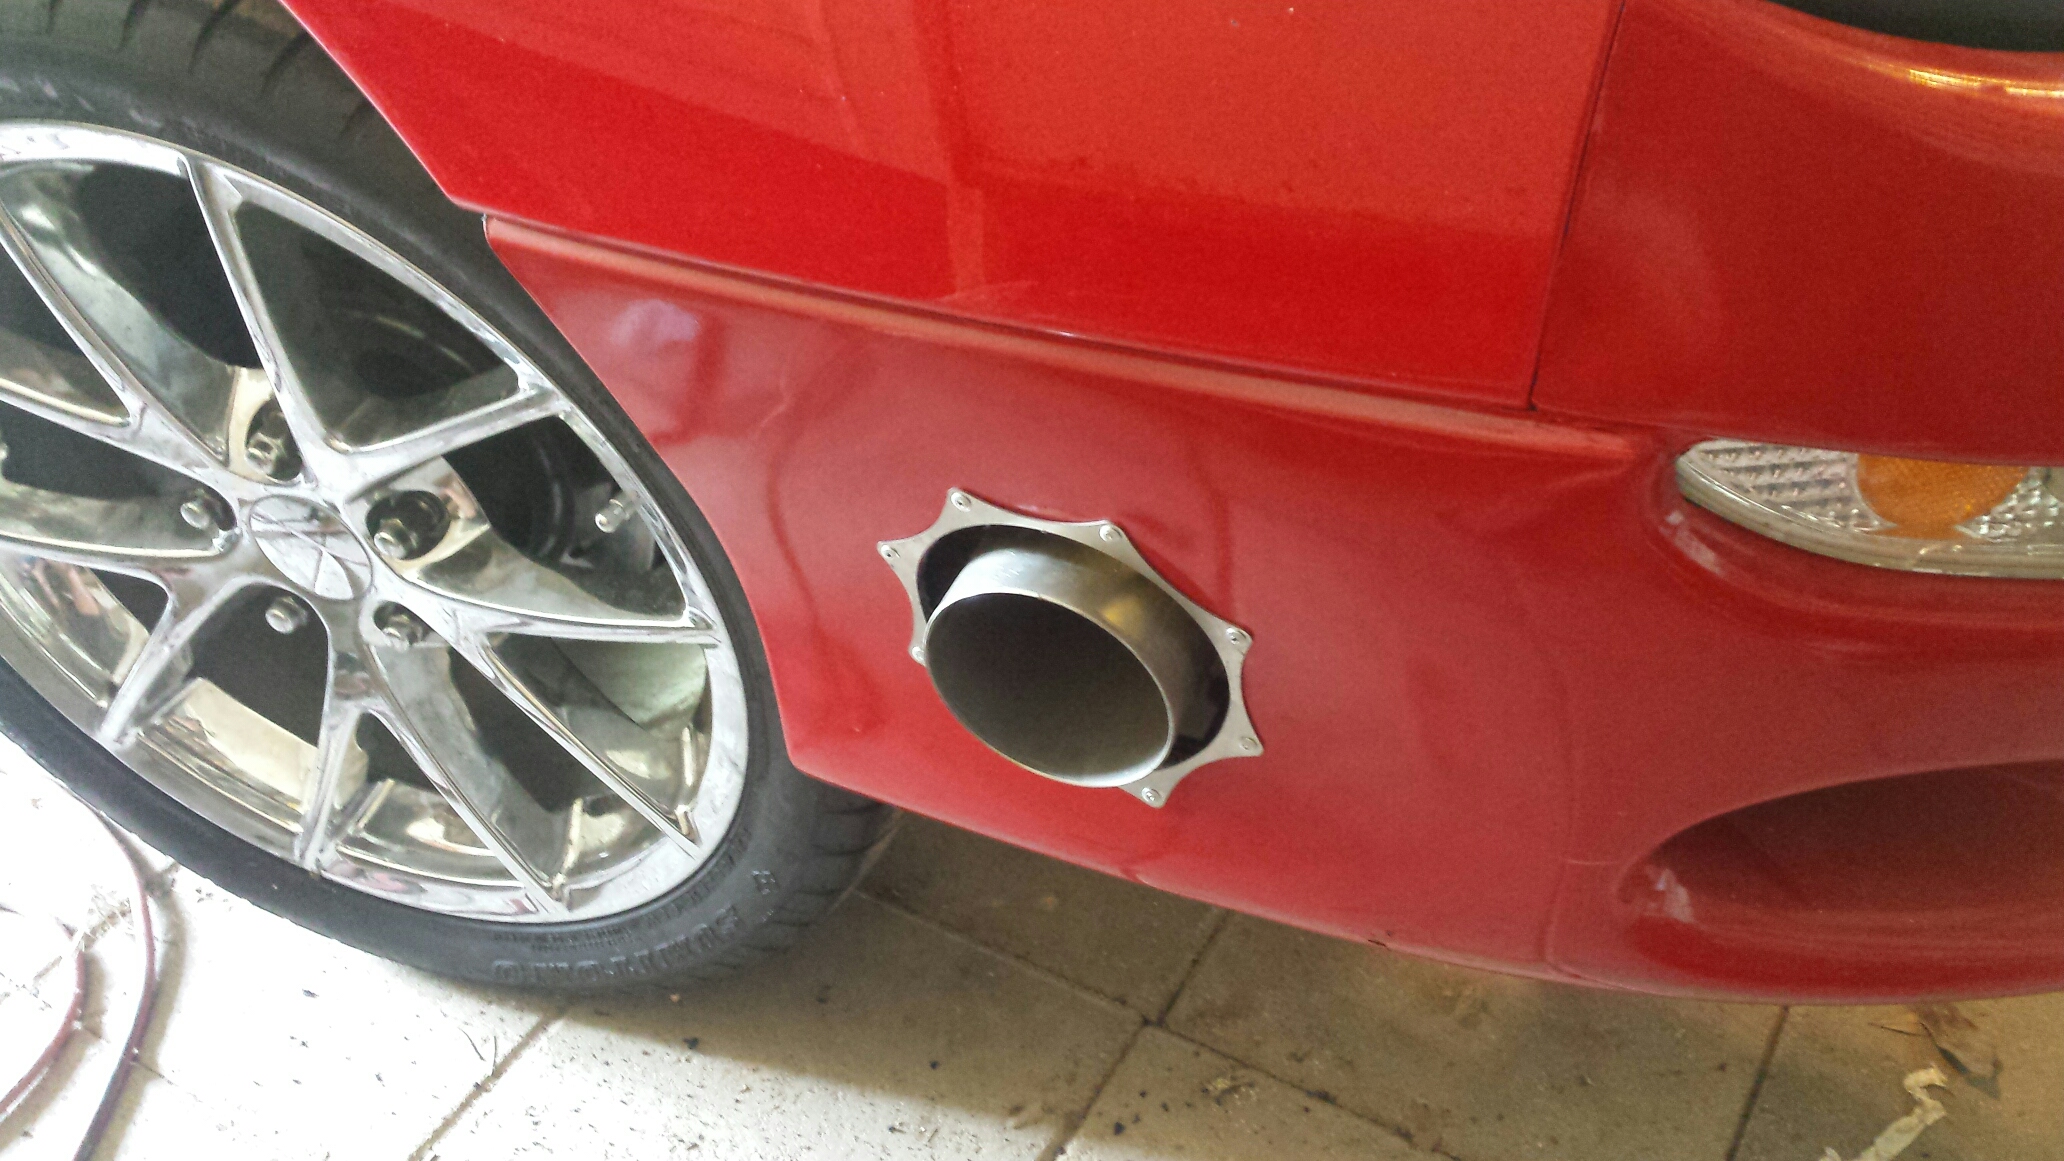
The ring is 4.25", this is a 3.5" pipe. I think it looks fine, but most people I talk to think it would look better 4".....
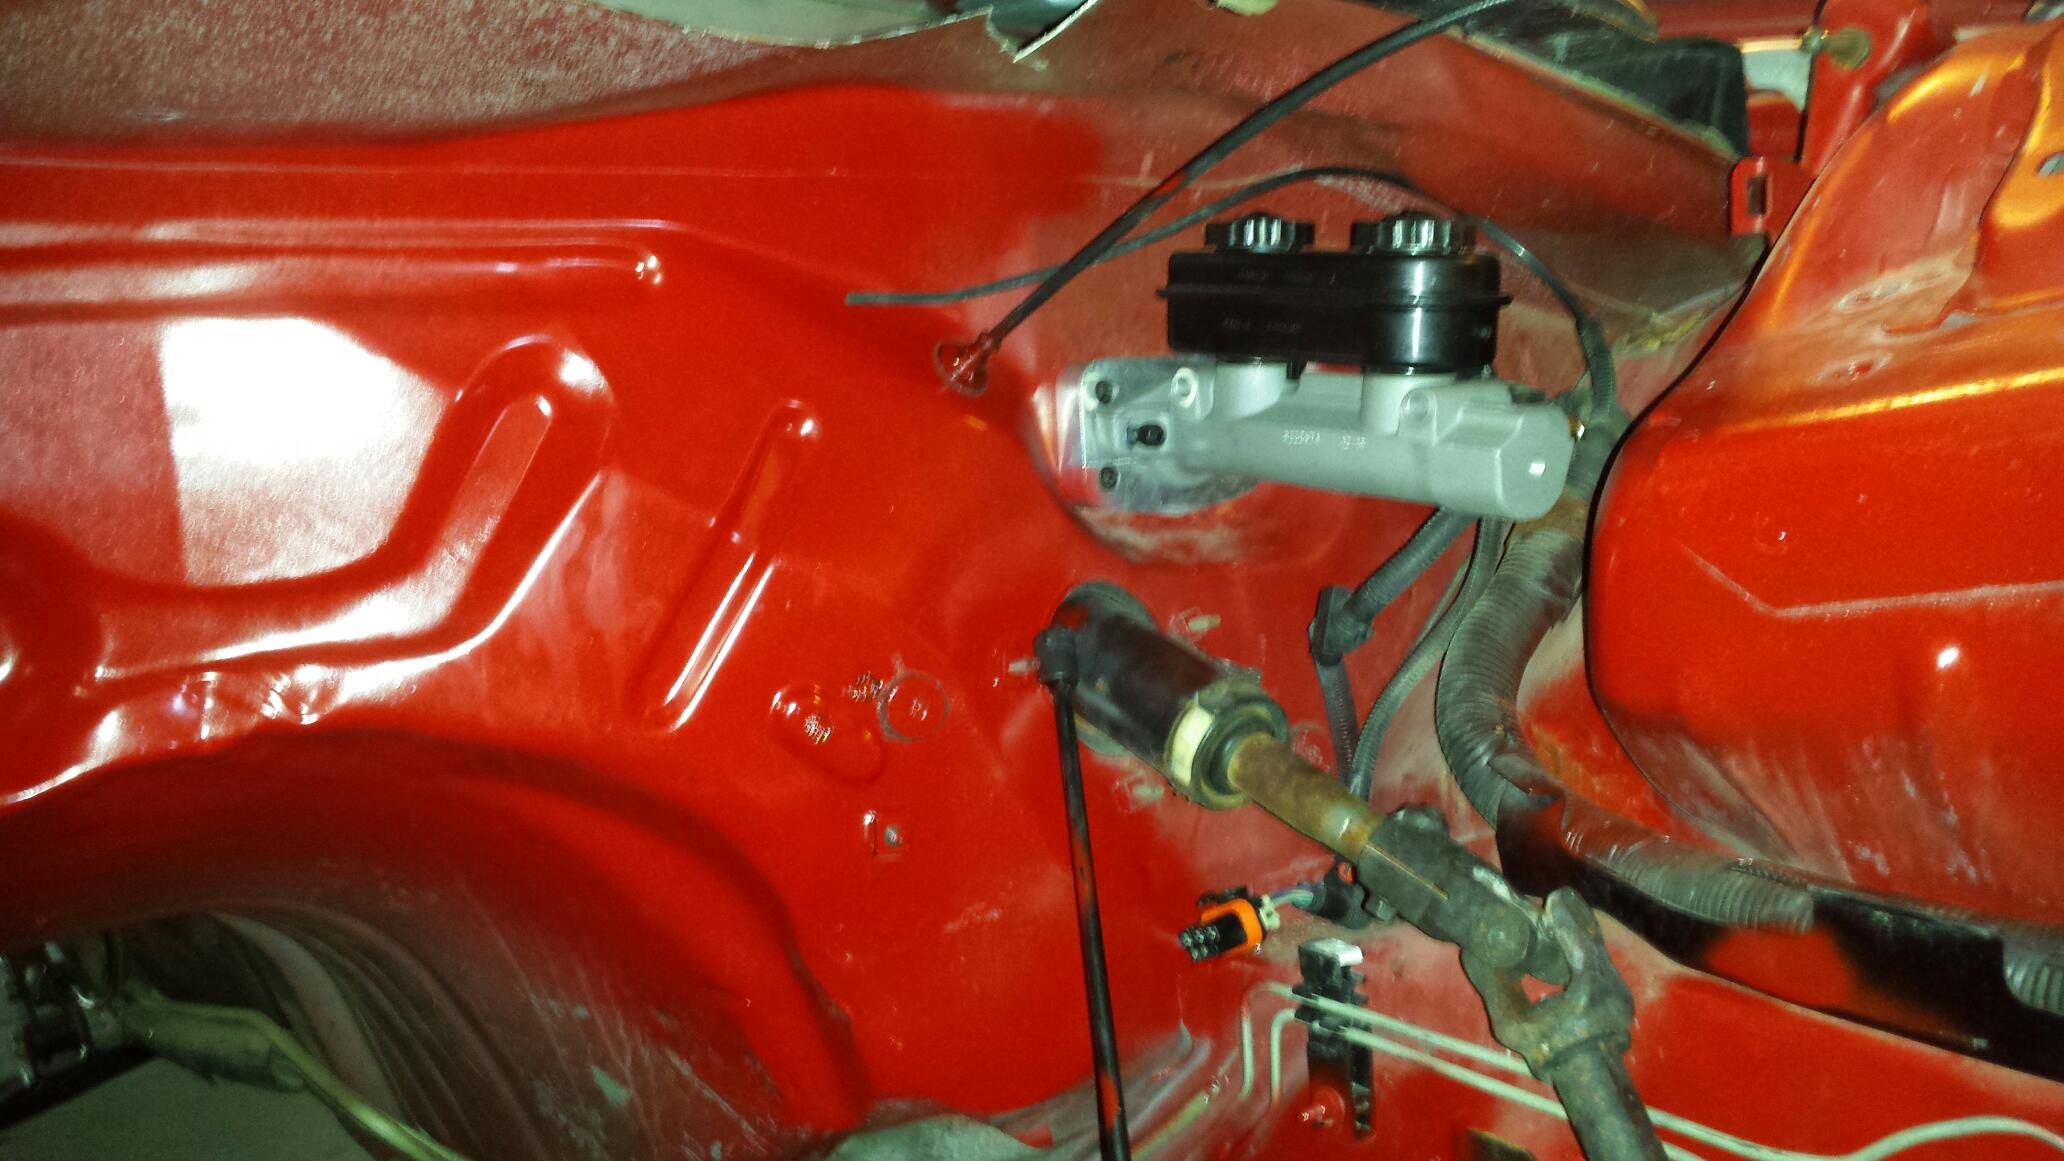
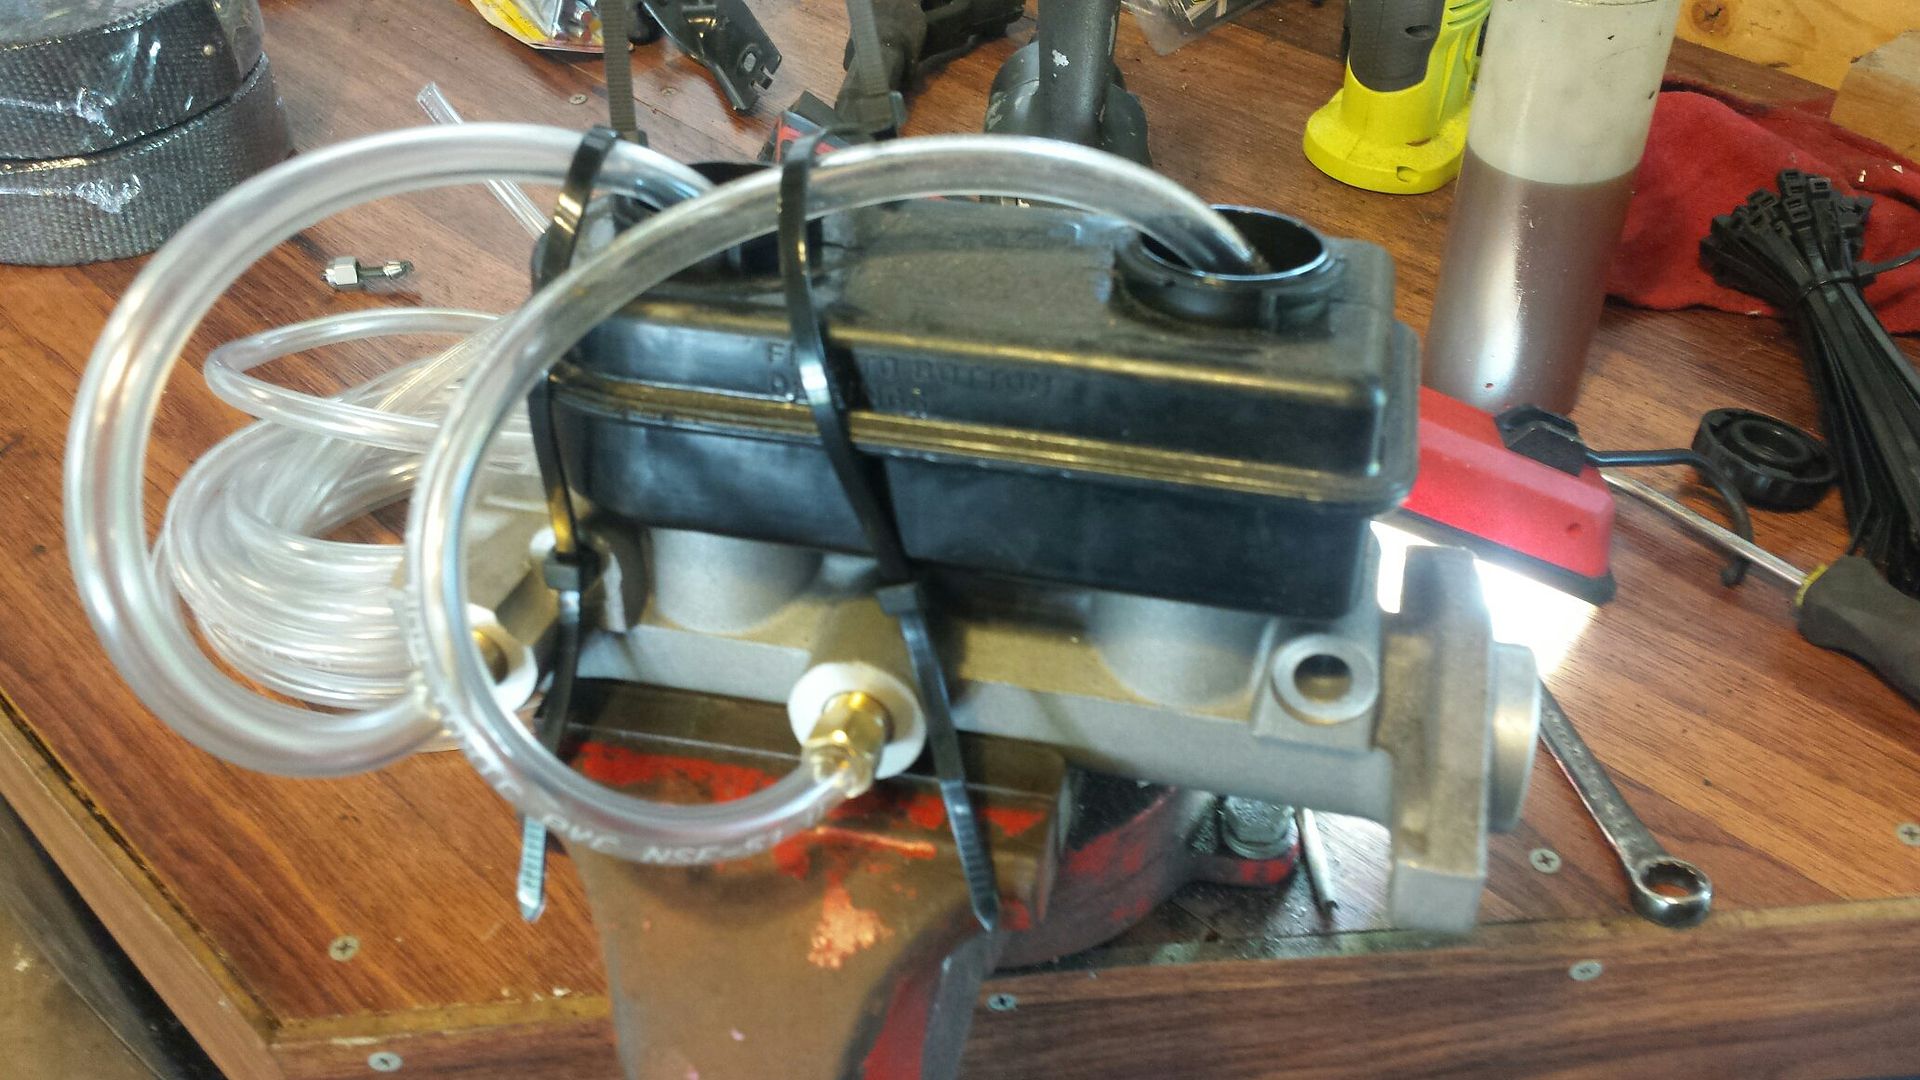
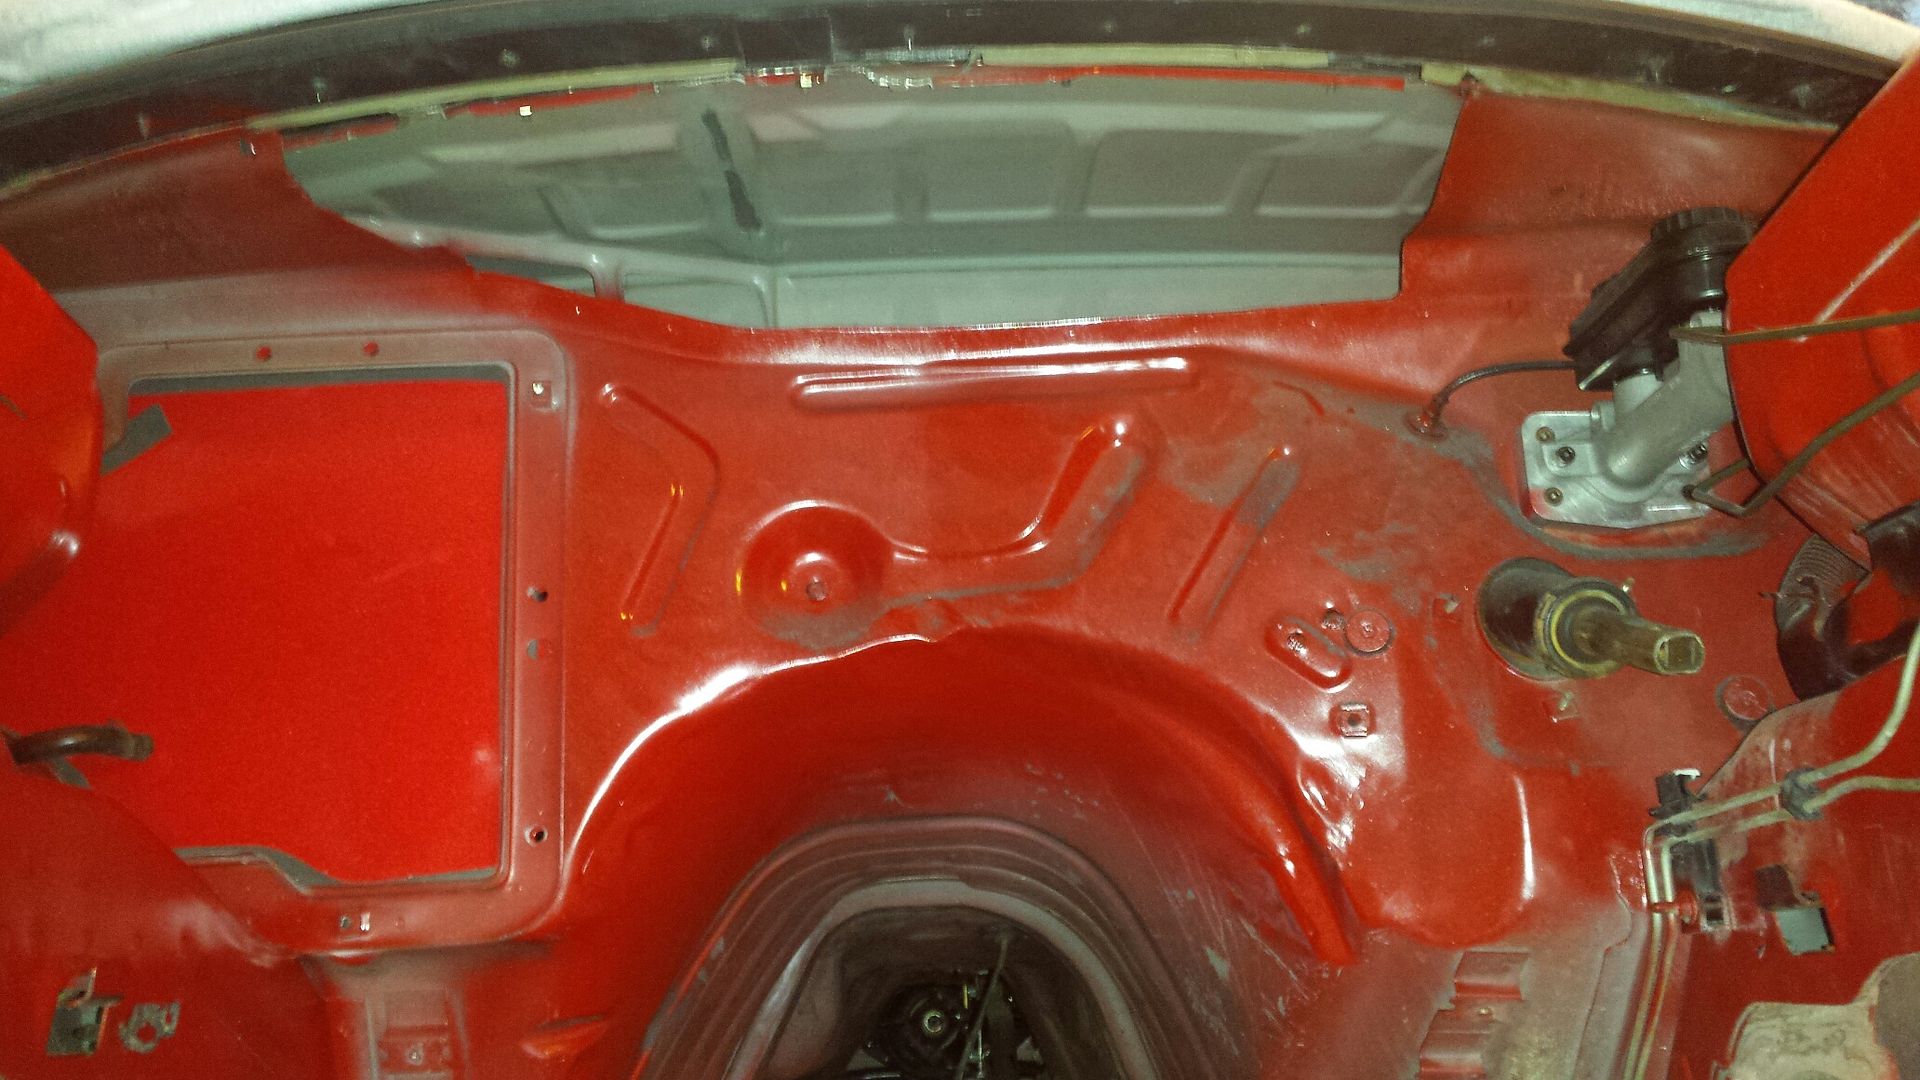
These pics with flash make the car look filthy, of course some of this hasnt seen the light of day since the car was new. Working under the hood I removed the fuel lines in the engine bay, and removed the ABS delete that was install (linelock and proportioning valve), and removed the master cylinder and brake booster off the firewall. It will be replaced with a Strange manual master and a couple of new short lines that dont run around to the front of the strut tower.
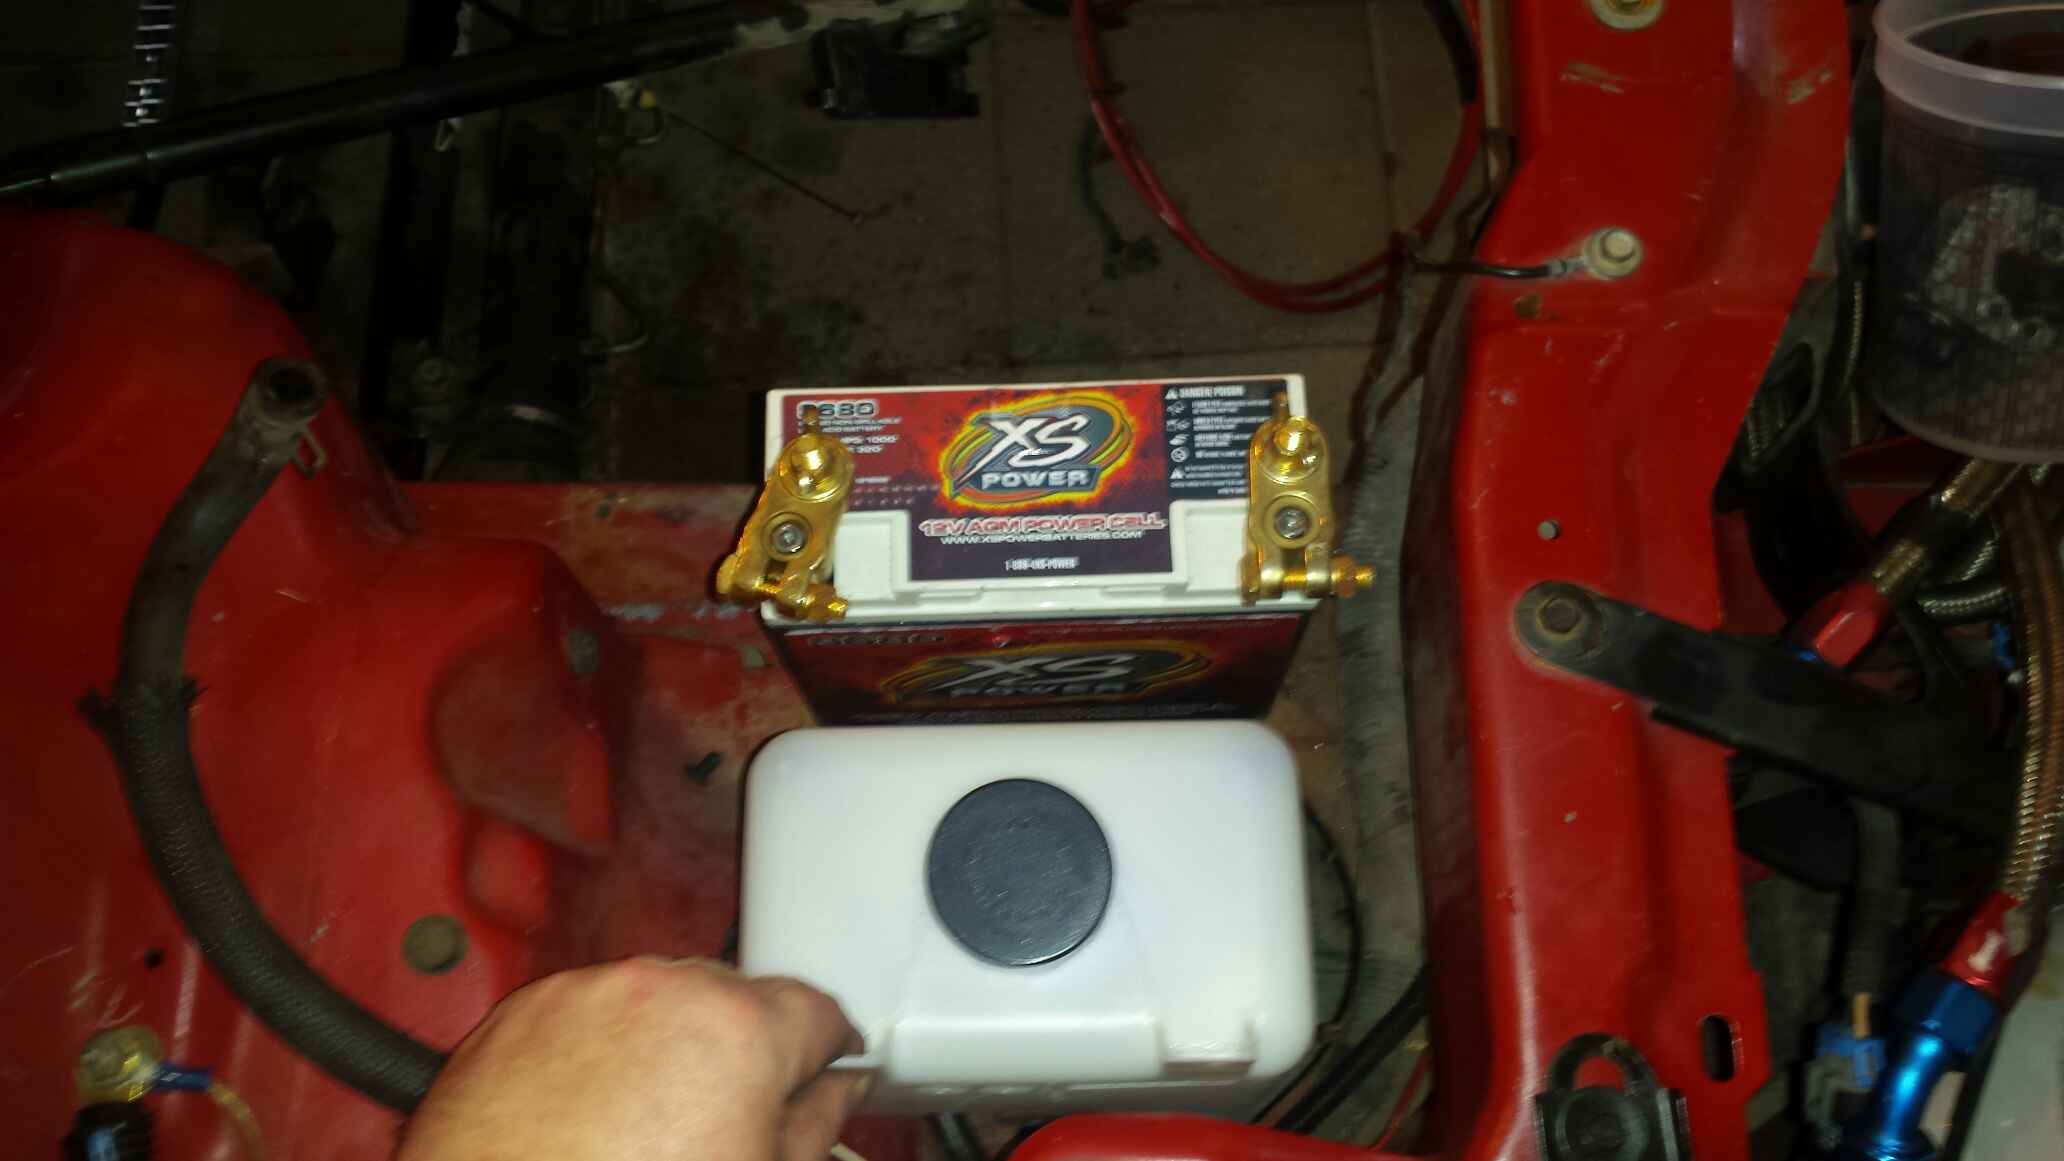
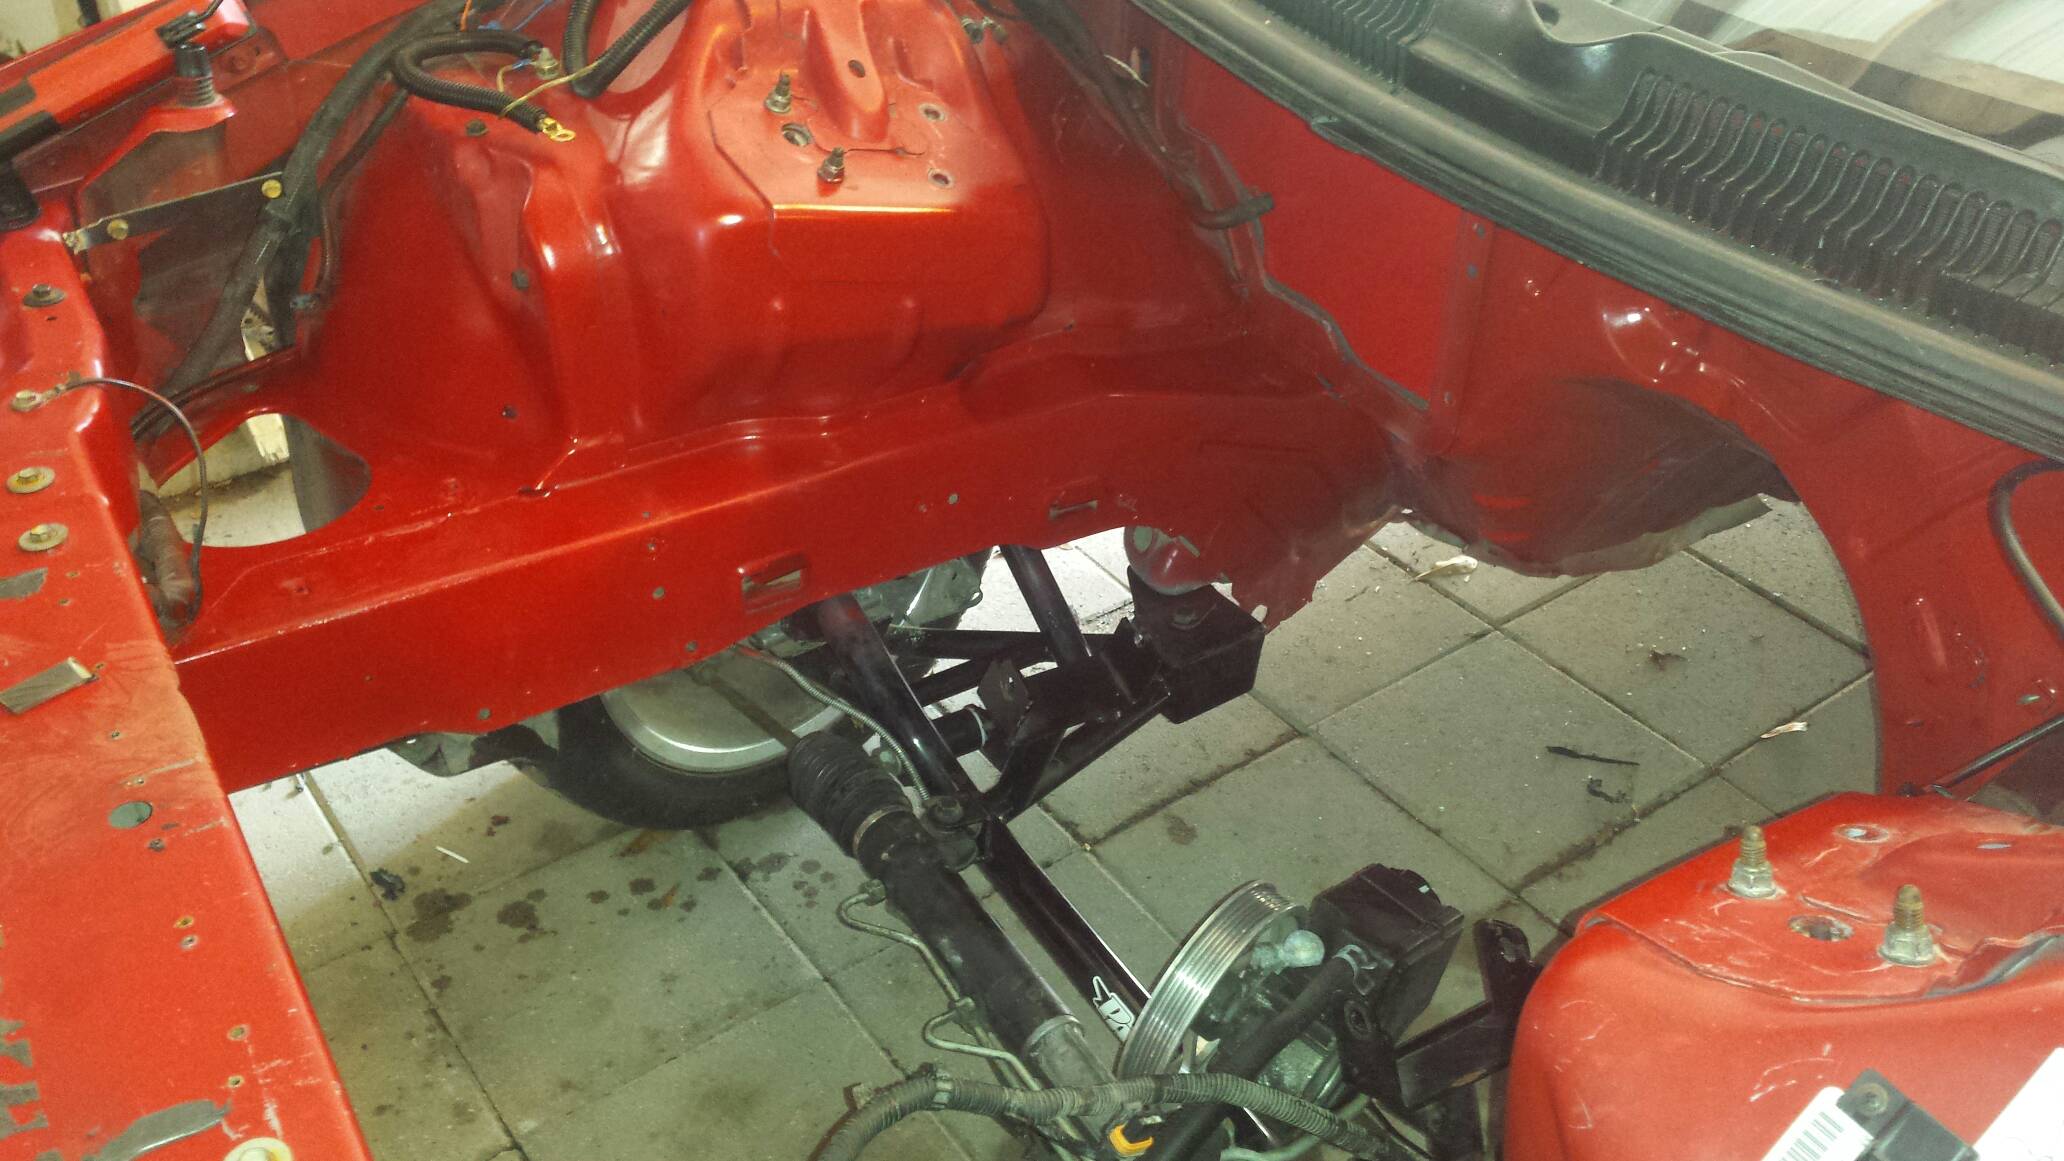
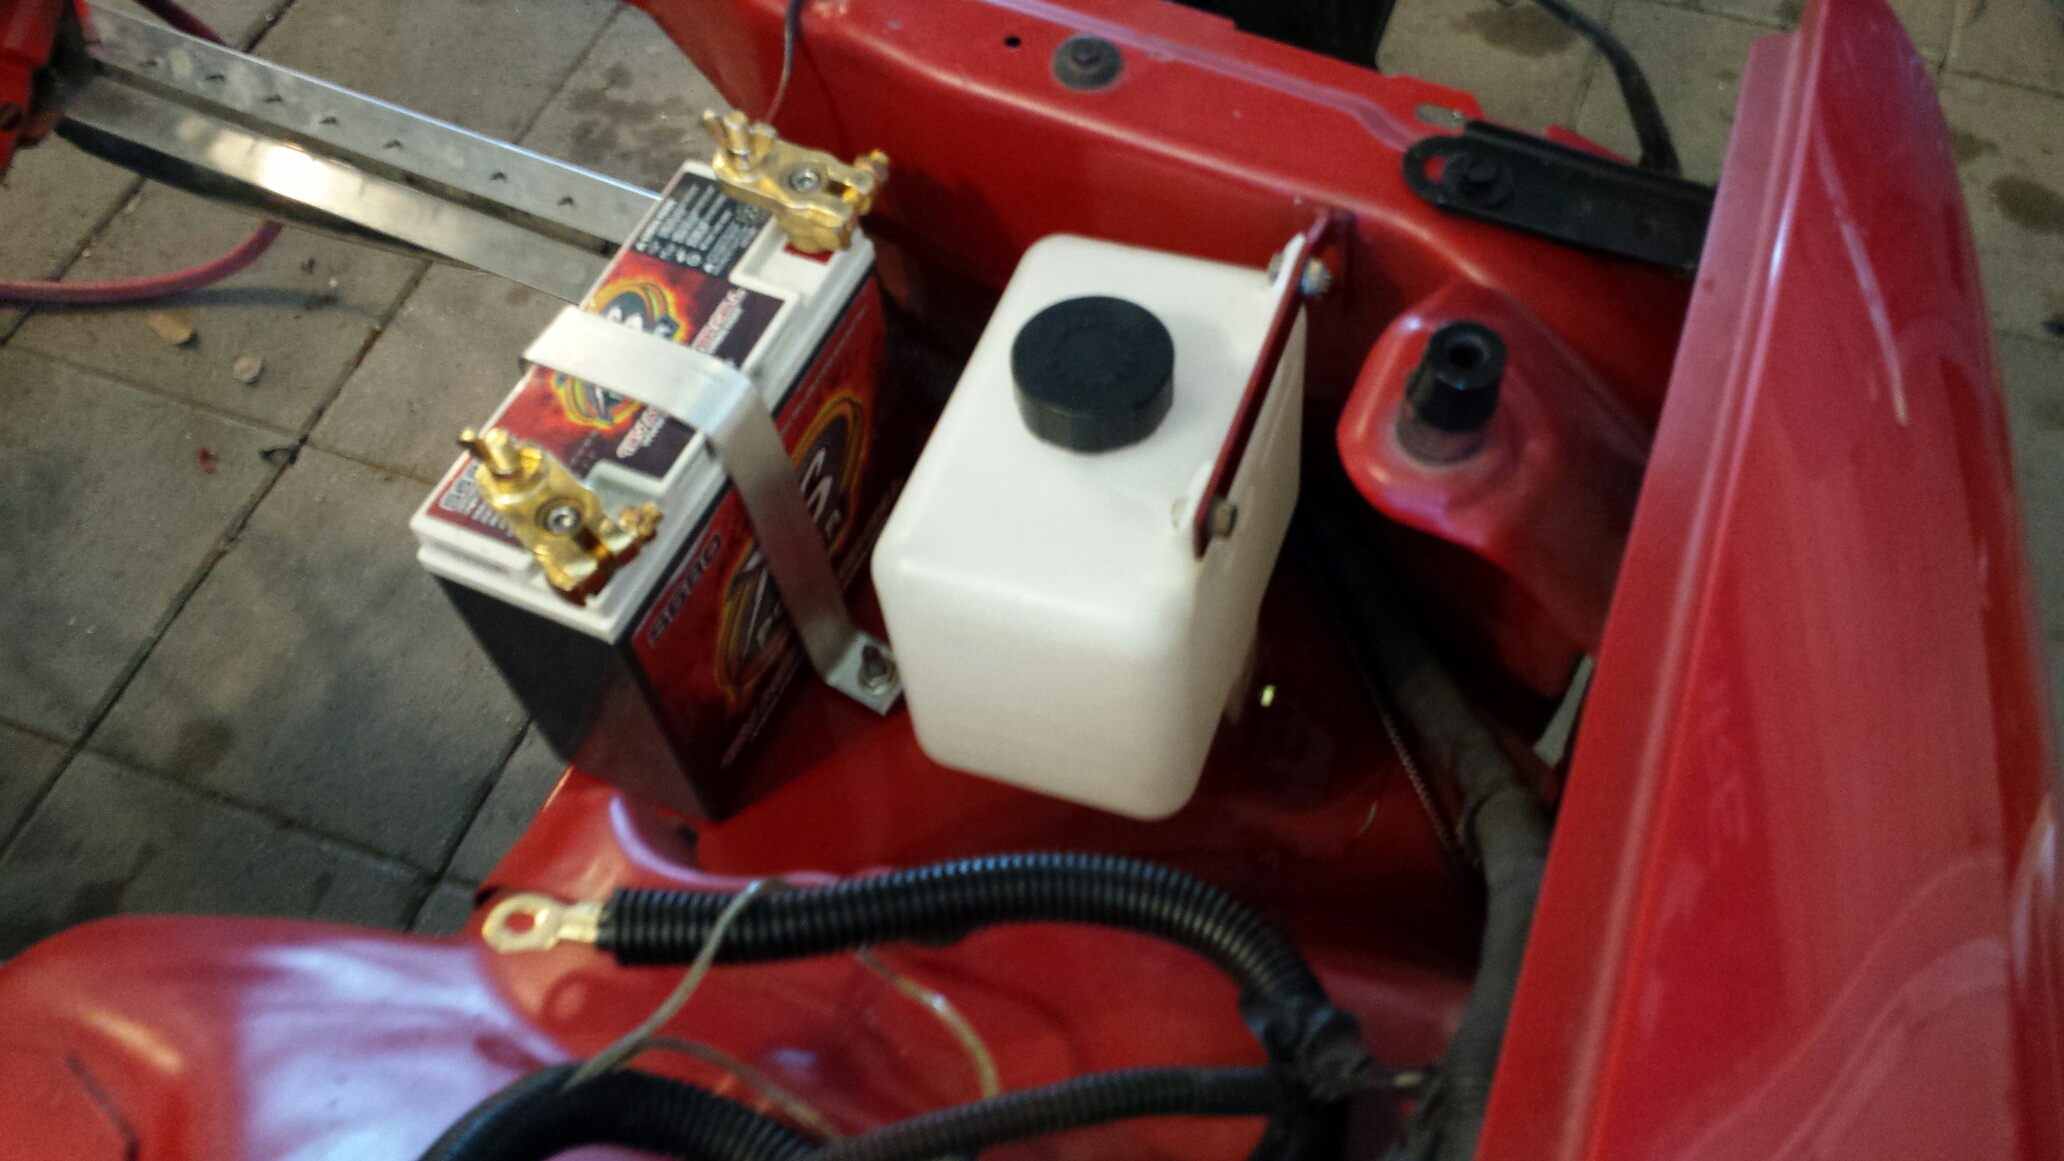
Pulled the battery, battery tray, and coolant jug. There is a little rust under there so I'm gonna clean this up and possibly paint, havent decided yet. This is standing at the driver headlight looking at where the battery sits.
I was looking at coolant expansion tanks and really really liked the Moroso aluminum ones. But not being able to justify the $110 I opted for this Dorman for $9 shipped. I like the fact that I can see the level through it. My initial thinking is since Im running the small battery maybe they can share the space? Here's my brainstorming........this is standing at the passenger fender looking straight down.
Circle D converter shipped yesterday and still more parts on the way.....Thorough engine bay cleaning coming up next!!!

I also installed a new output shaft seal and test fit the new DS yoke.

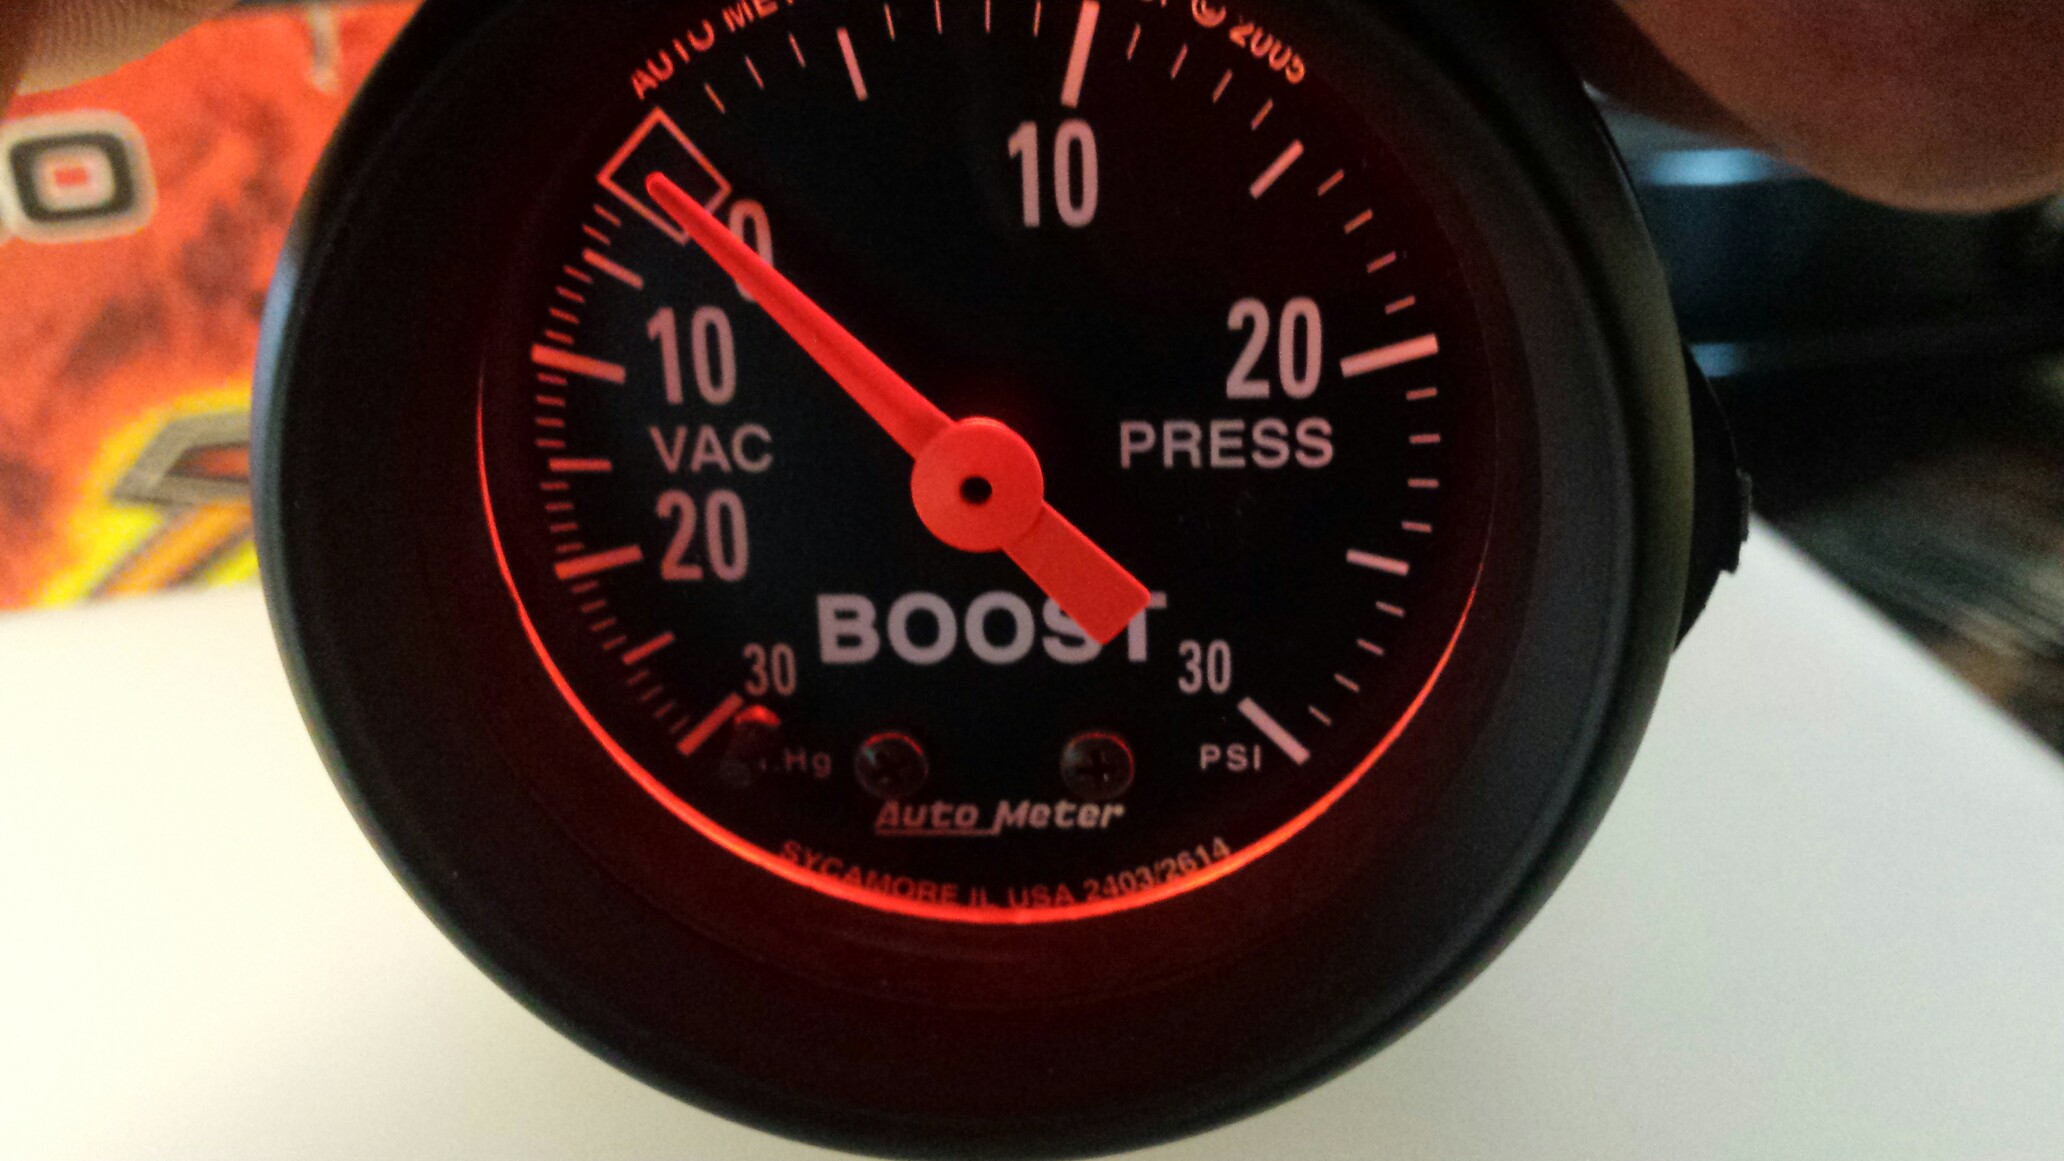
The gauge came with a red light cover which i had to light up and try out.

This is a Nelson 60e to 80e conversion harness. You can see it has the wiring for the extra speed sensor that the 4l80s have.

Pushrods came in, so I installed those, torqued the rockers down, installed new valve cover gaskets. The pushrods were an ebay score, new without box, about $70, they are Manley brand. After that I decided lets do something a little more fun......So I got out the air grinder...

The ring is 4.25", this is a 3.5" pipe. I think it looks fine, but most people I talk to think it would look better 4".....

These pics with flash make the car look filthy, of course some of this hasnt seen the light of day since the car was new. Working under the hood I removed the fuel lines in the engine bay, and removed the ABS delete that was install (linelock and proportioning valve), and removed the master cylinder and brake booster off the firewall. It will be replaced with a Strange manual master and a couple of new short lines that dont run around to the front of the strut tower.

Pulled the battery, battery tray, and coolant jug. There is a little rust under there so I'm gonna clean this up and possibly paint, havent decided yet. This is standing at the driver headlight looking at where the battery sits.

I was looking at coolant expansion tanks and really really liked the Moroso aluminum ones. But not being able to justify the $110 I opted for this Dorman for $9 shipped. I like the fact that I can see the level through it. My initial thinking is since Im running the small battery maybe they can share the space? Here's my brainstorming........this is standing at the passenger fender looking straight down.

Circle D converter shipped yesterday and still more parts on the way.....Thorough engine bay cleaning coming up next!!!
#36
07-19-2017, 07:52 AM
Join Date: Aug 2010
Posts: 230
Likes: 0
Received 0 Likes
on
0 Posts
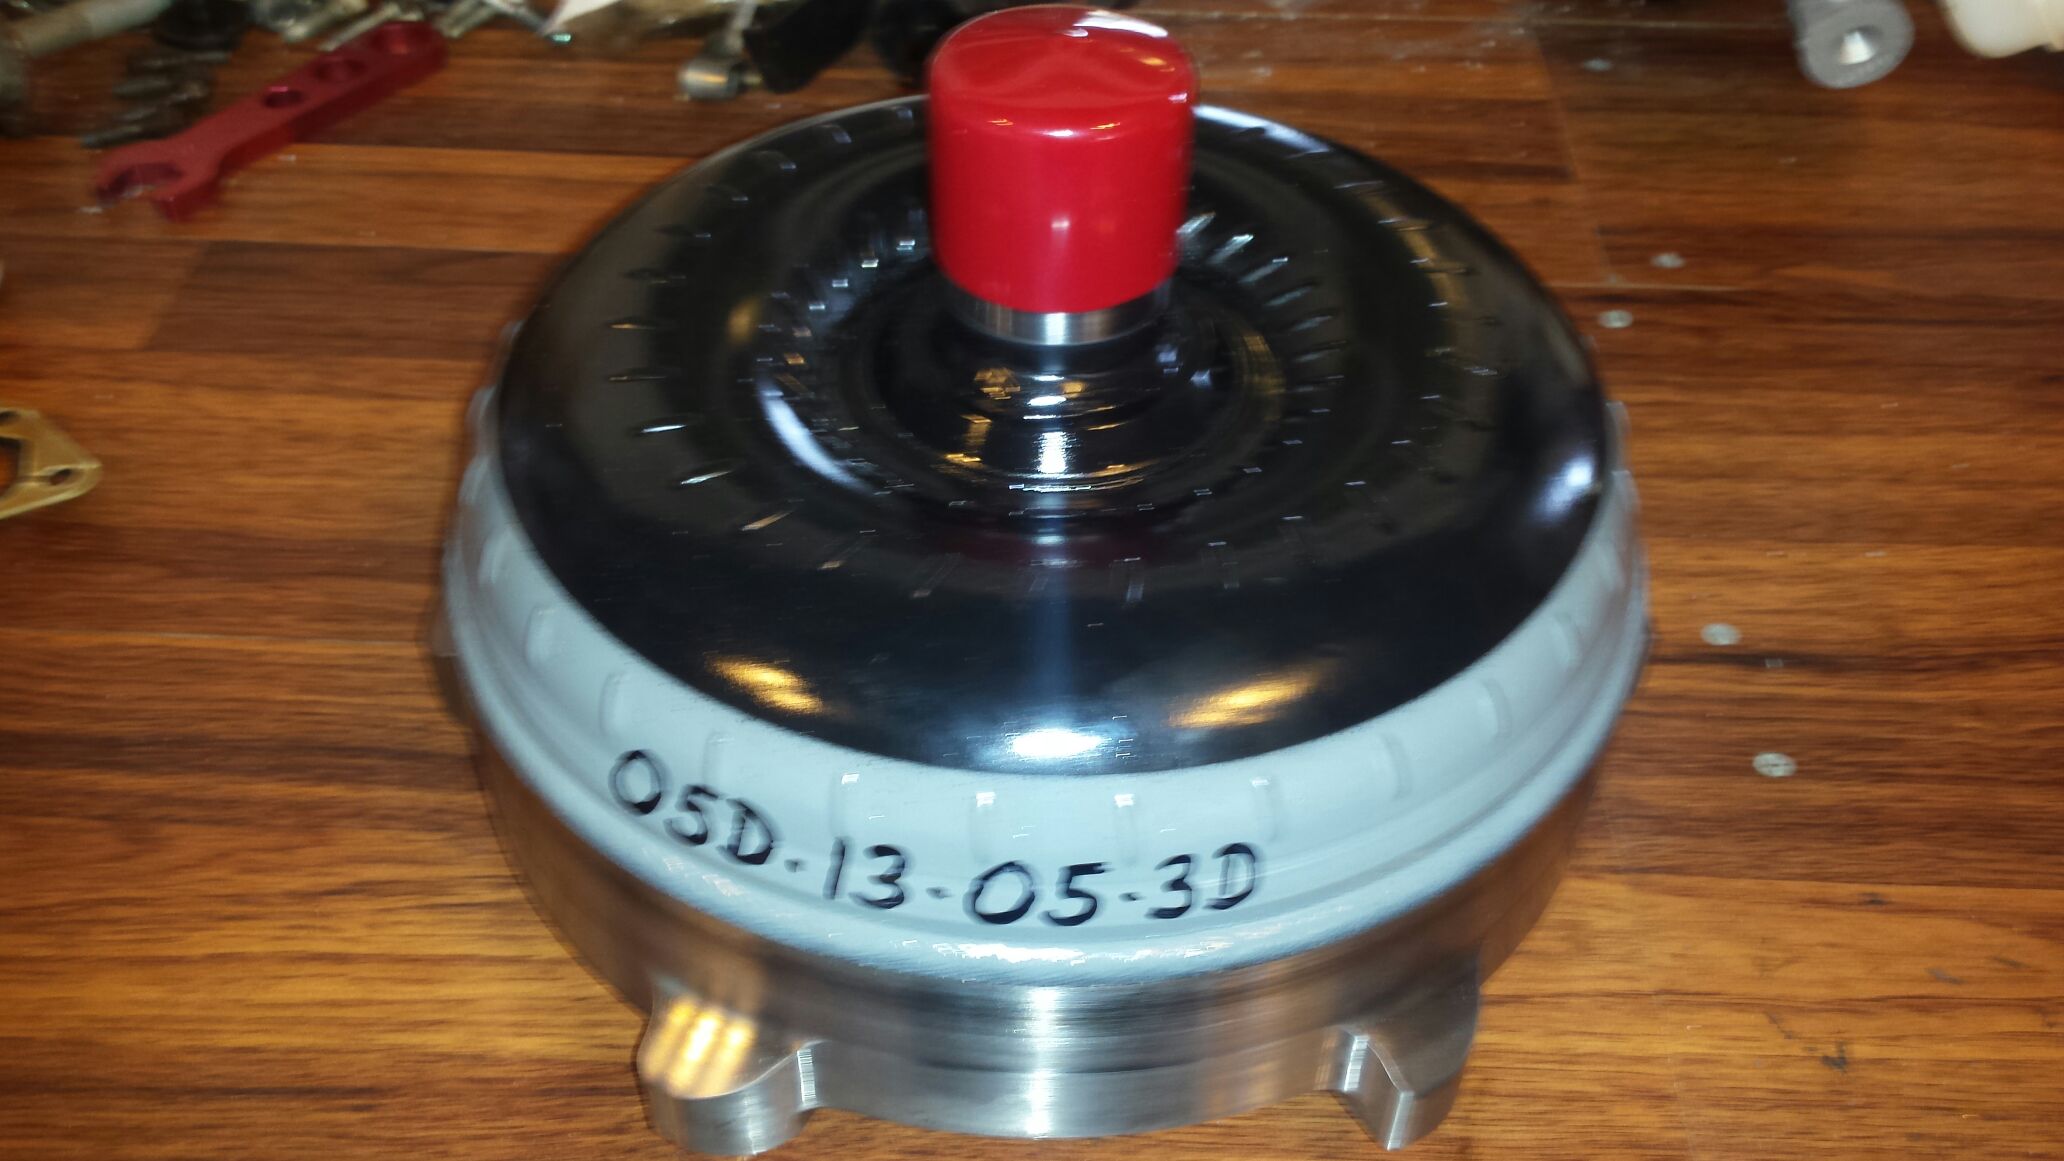
Got a lot done but only a few pics. First, the converter showed up just like circle D promised. I wanna talk about this converter for a second, as its not listed on their website. Here's a link to it:
Circle D Specialties Pro Stage III 258mm Multi Disk Torque Converter For GM 4L80 Transmission
Chris at circle D spec'd this one to foot brake to around 3500 and should give a nice hard launch for use without a transbrake since I dont have one. When ask for more clarity, here was his response:
This converter has the D stator.

It has dual x6 patterns, so it works with virtually any flexplate.
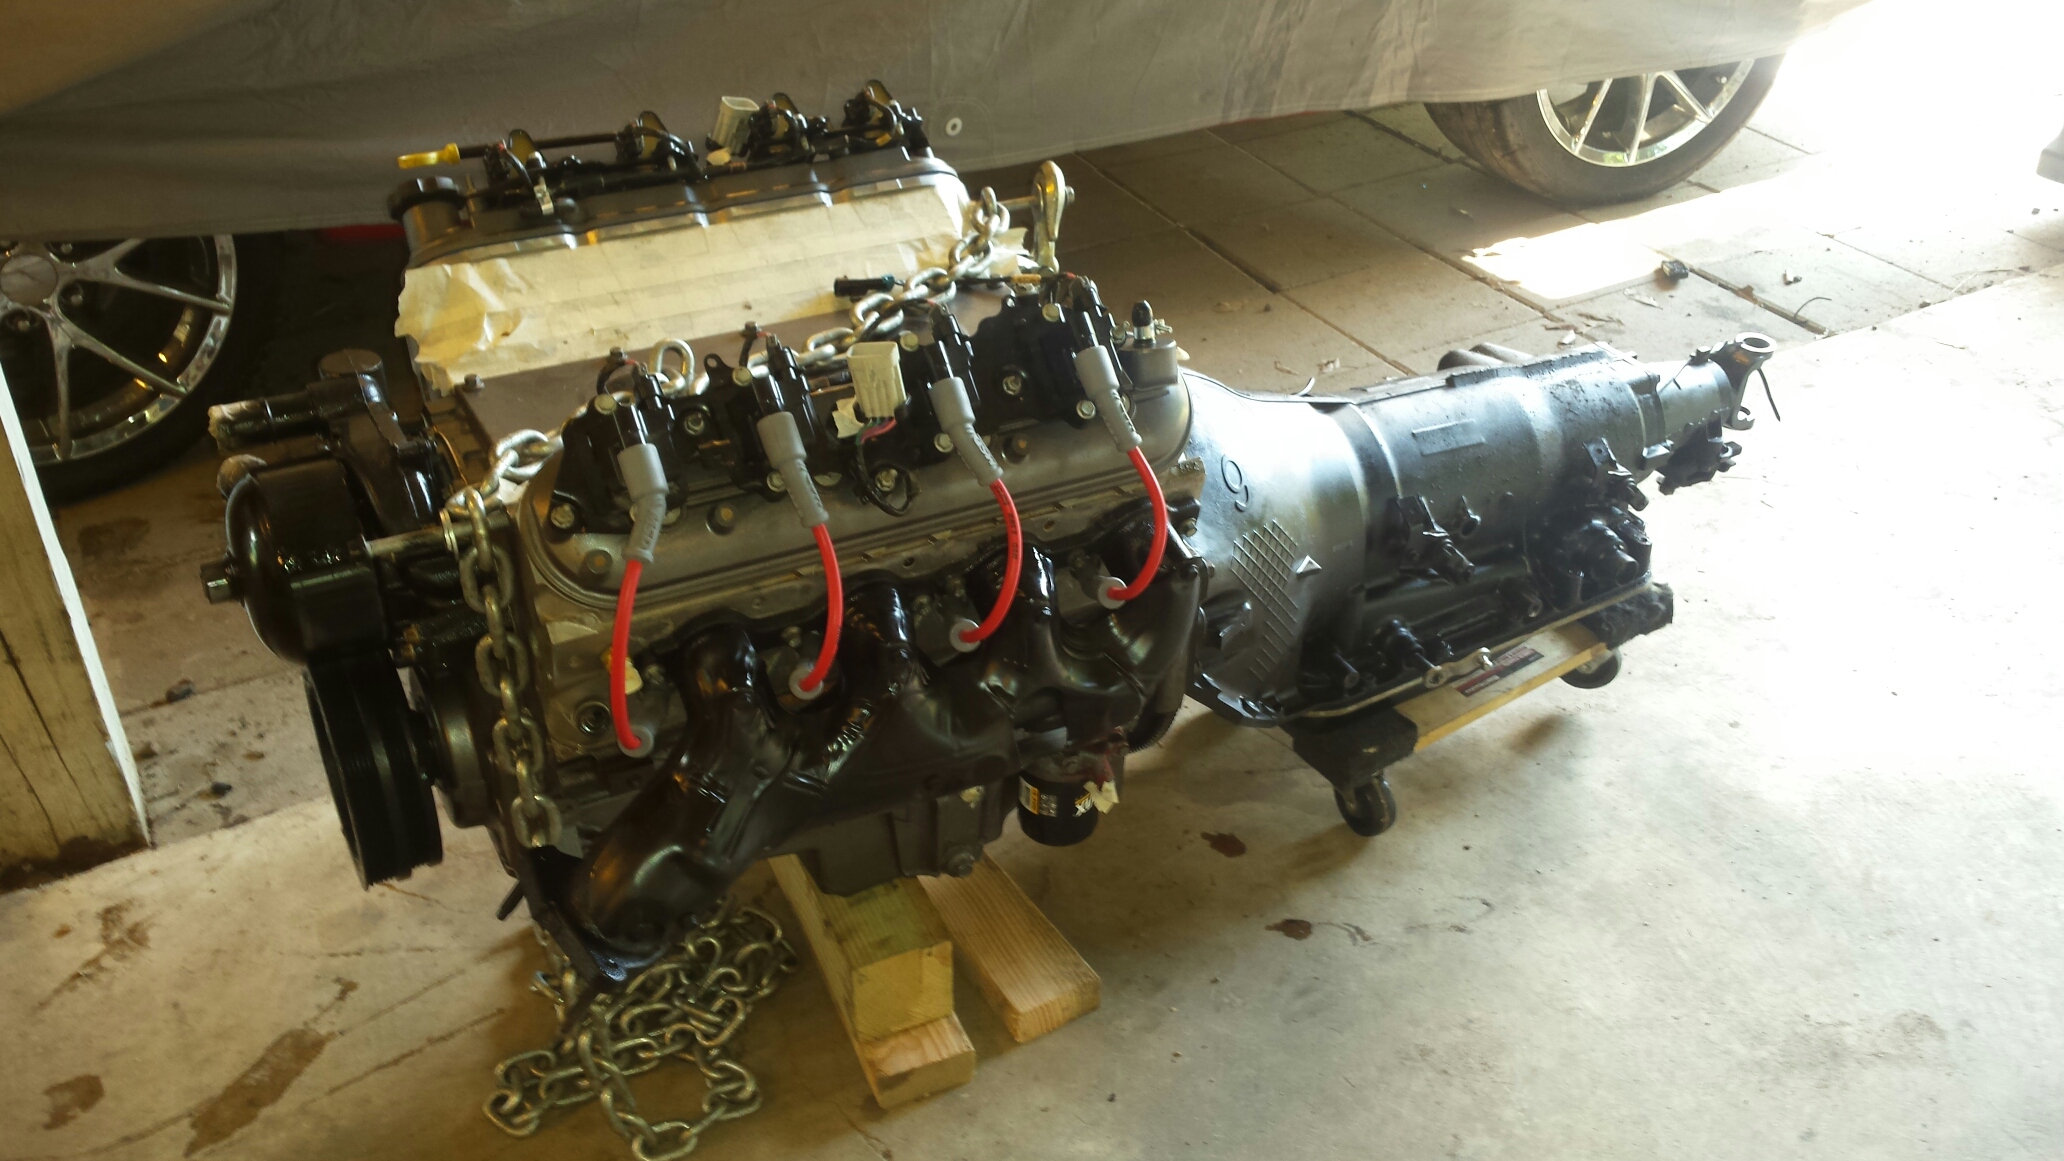
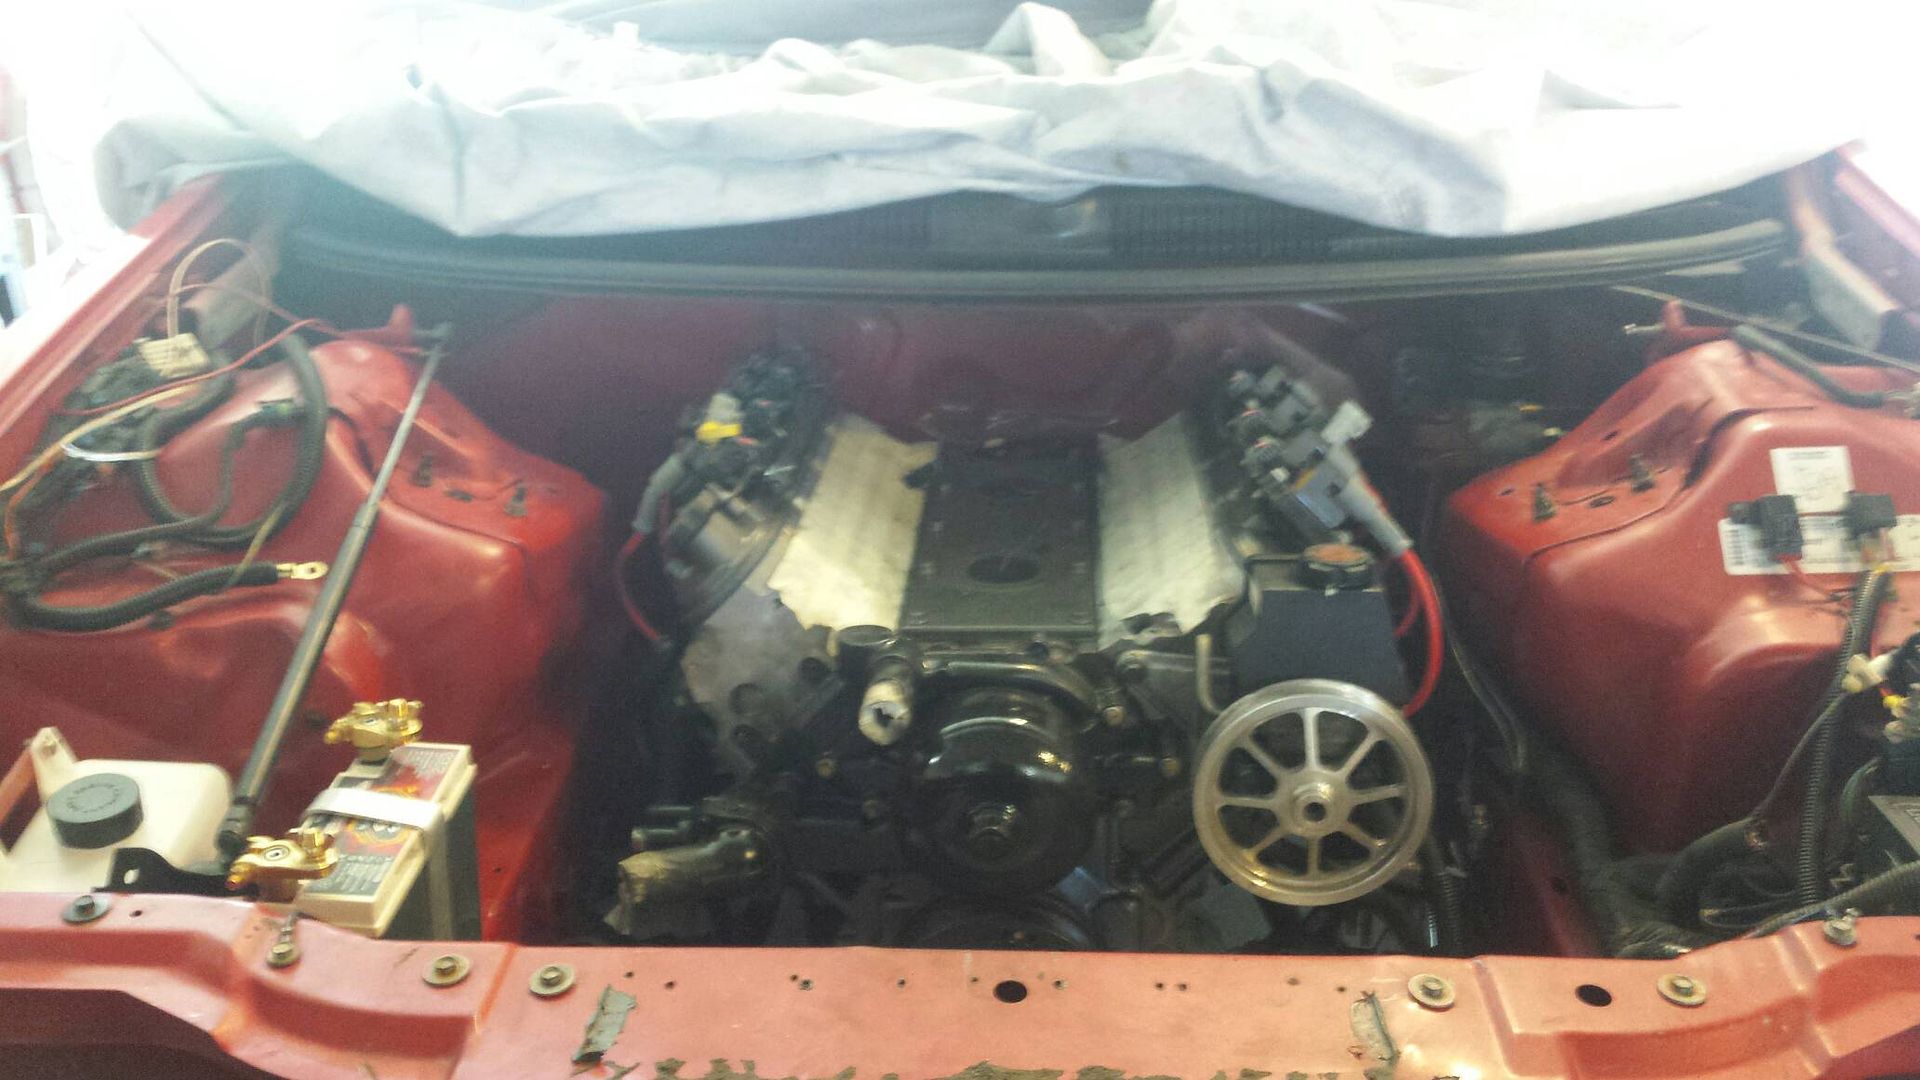
So with the converter here I couldnt wait to get it bolted up. So I started on the motor, I did a front cover seal, then installed the crank pulley. I went ahead and painted the water pump and manifolds black and bolted them on. I also added the motor mounts and plugs (gapped at 22) and wires. Then I lifted the motor up off the engine stand and replaced the rear cover seal and rear main seal. Flexplate bolted up perfect. I mated the trans and motor together and called it a day.
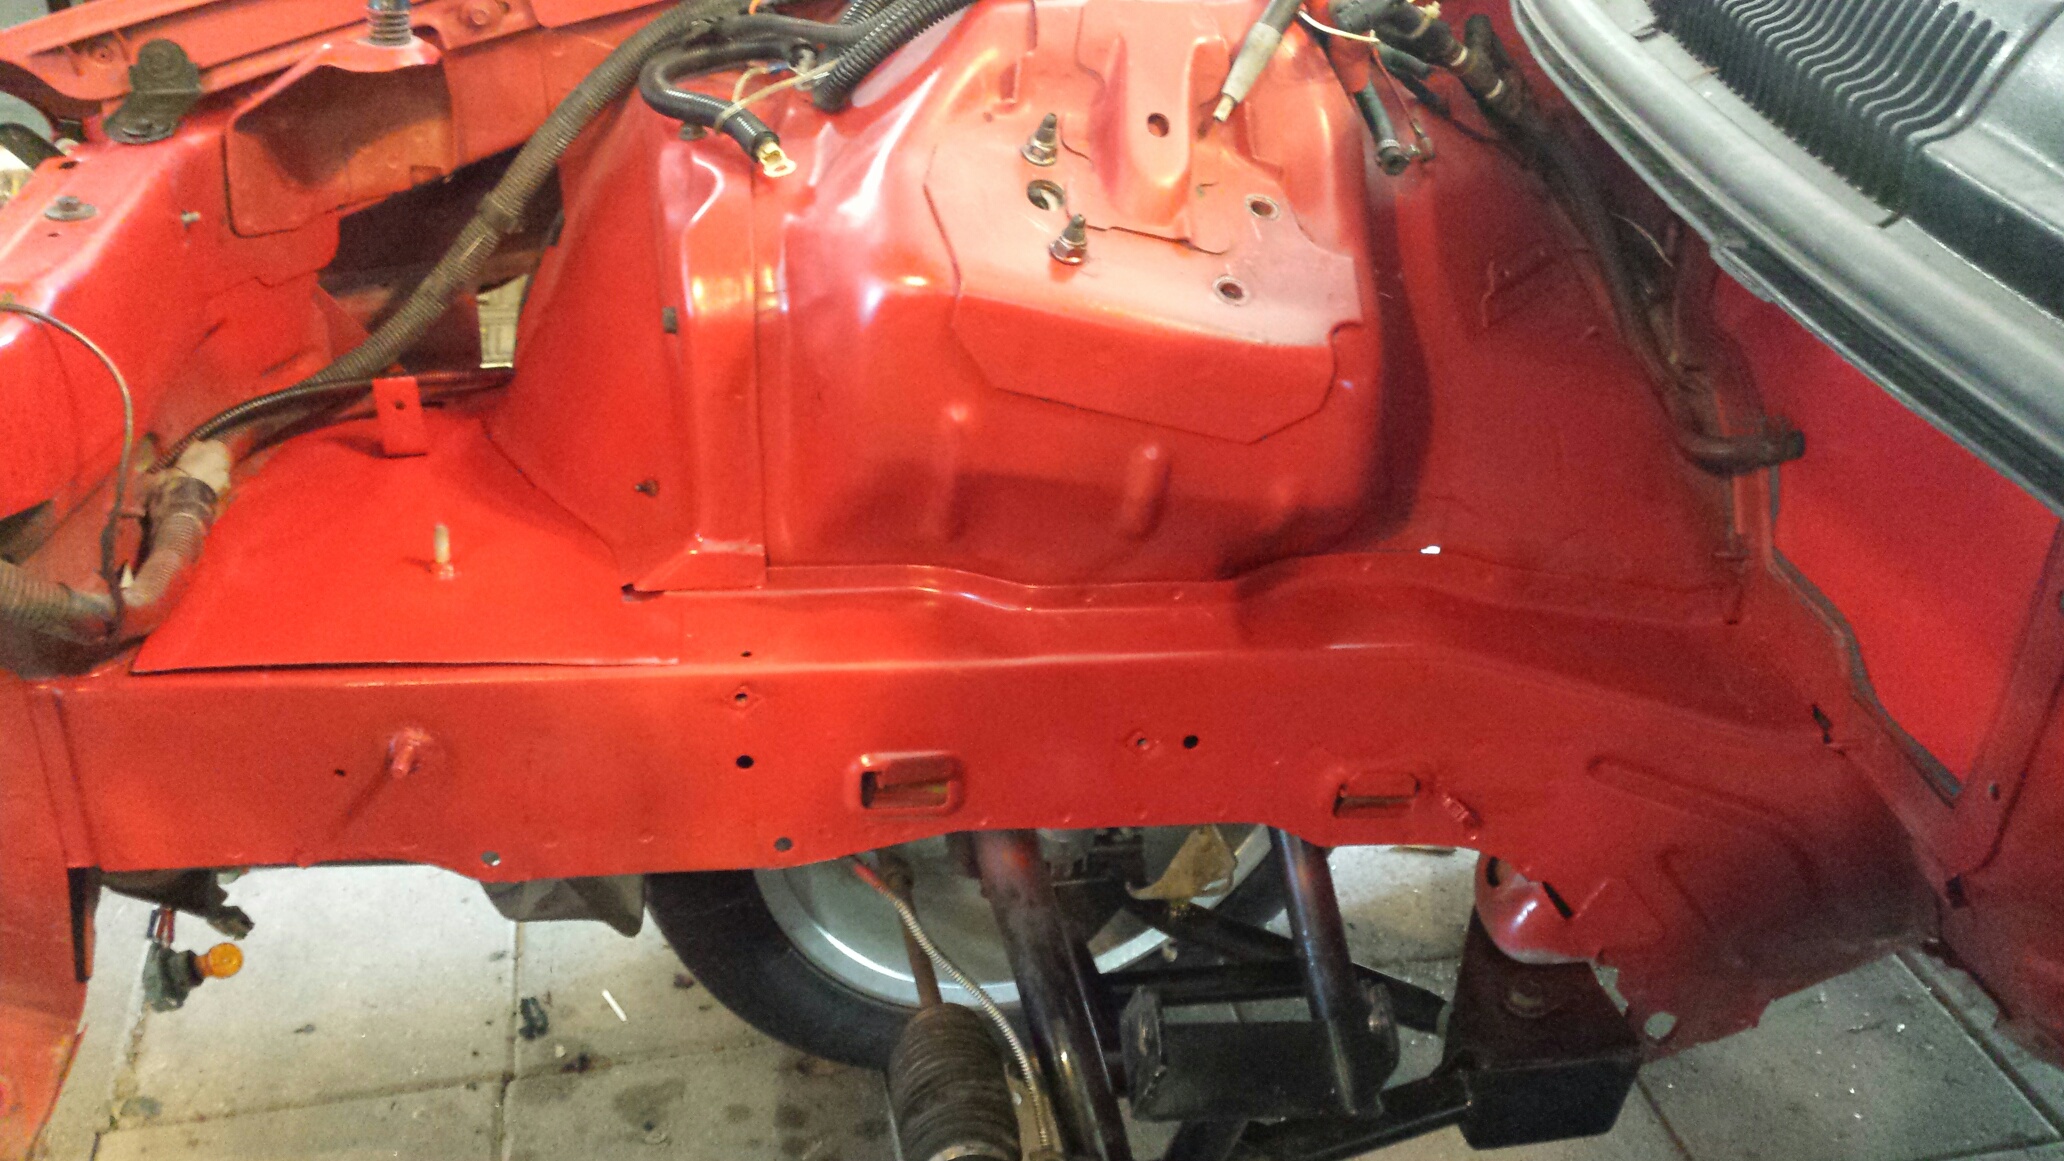
You can refer a few pics up to how dirty under the hood was. Well after some cleaning I realized it wasnt all coming clean and the discoloration that was near the battery tray was pretty bad. I had some Duplicolor engine enamel in red so I took a chance to see if it matched, and it did. Also, I started on a sheet metal tray to go where the battery was to hold the coolant tank and shield the heat that will be coming from the bumper exhaust. You can see a small bracket bolted to the radiator support in this pic that holds the top of the coolant tank. More on that when i finish it. Painted both inner frame rails, battery area, and firewall.
Circle D Specialties Pro Stage III 258mm Multi Disk Torque Converter For GM 4L80 Transmission
Chris at circle D spec'd this one to foot brake to around 3500 and should give a nice hard launch for use without a transbrake since I dont have one. When ask for more clarity, here was his response:
Originally Posted by Circle-D
There are 3 common stators for the 258mm core. We assign each of them letters. A, B, and C. We generally use the "A" stator in our bigger cube turbo builds or nitrous builds. It's the tightest of the bunch. The "B" stator has been our go-to for most turbo setups as it has a nice footbrake down low for spooling. The "C" stator is one we generally reserve for PD blown applications.
The "D" stator is a modified "C" stator. We throw it in our CNC and machine the fins for max effort footbrake turbo cars. It works great because of it's high fin count (21) and our custom angles made available by the CNC. It's not on our website, but we have been using it for a while now with great results. It's all a bit confusing, but it's kind of meant to be::secret2:
The "D" stator is a modified "C" stator. We throw it in our CNC and machine the fins for max effort footbrake turbo cars. It works great because of it's high fin count (21) and our custom angles made available by the CNC. It's not on our website, but we have been using it for a while now with great results. It's all a bit confusing, but it's kind of meant to be::secret2:


It has dual x6 patterns, so it works with virtually any flexplate.

So with the converter here I couldnt wait to get it bolted up. So I started on the motor, I did a front cover seal, then installed the crank pulley. I went ahead and painted the water pump and manifolds black and bolted them on. I also added the motor mounts and plugs (gapped at 22) and wires. Then I lifted the motor up off the engine stand and replaced the rear cover seal and rear main seal. Flexplate bolted up perfect. I mated the trans and motor together and called it a day.

You can refer a few pics up to how dirty under the hood was. Well after some cleaning I realized it wasnt all coming clean and the discoloration that was near the battery tray was pretty bad. I had some Duplicolor engine enamel in red so I took a chance to see if it matched, and it did. Also, I started on a sheet metal tray to go where the battery was to hold the coolant tank and shield the heat that will be coming from the bumper exhaust. You can see a small bracket bolted to the radiator support in this pic that holds the top of the coolant tank. More on that when i finish it. Painted both inner frame rails, battery area, and firewall.

#37
07-24-2017, 08:23 AM
Join Date: Aug 2010
Posts: 230
Likes: 0
Received 0 Likes
on
0 Posts
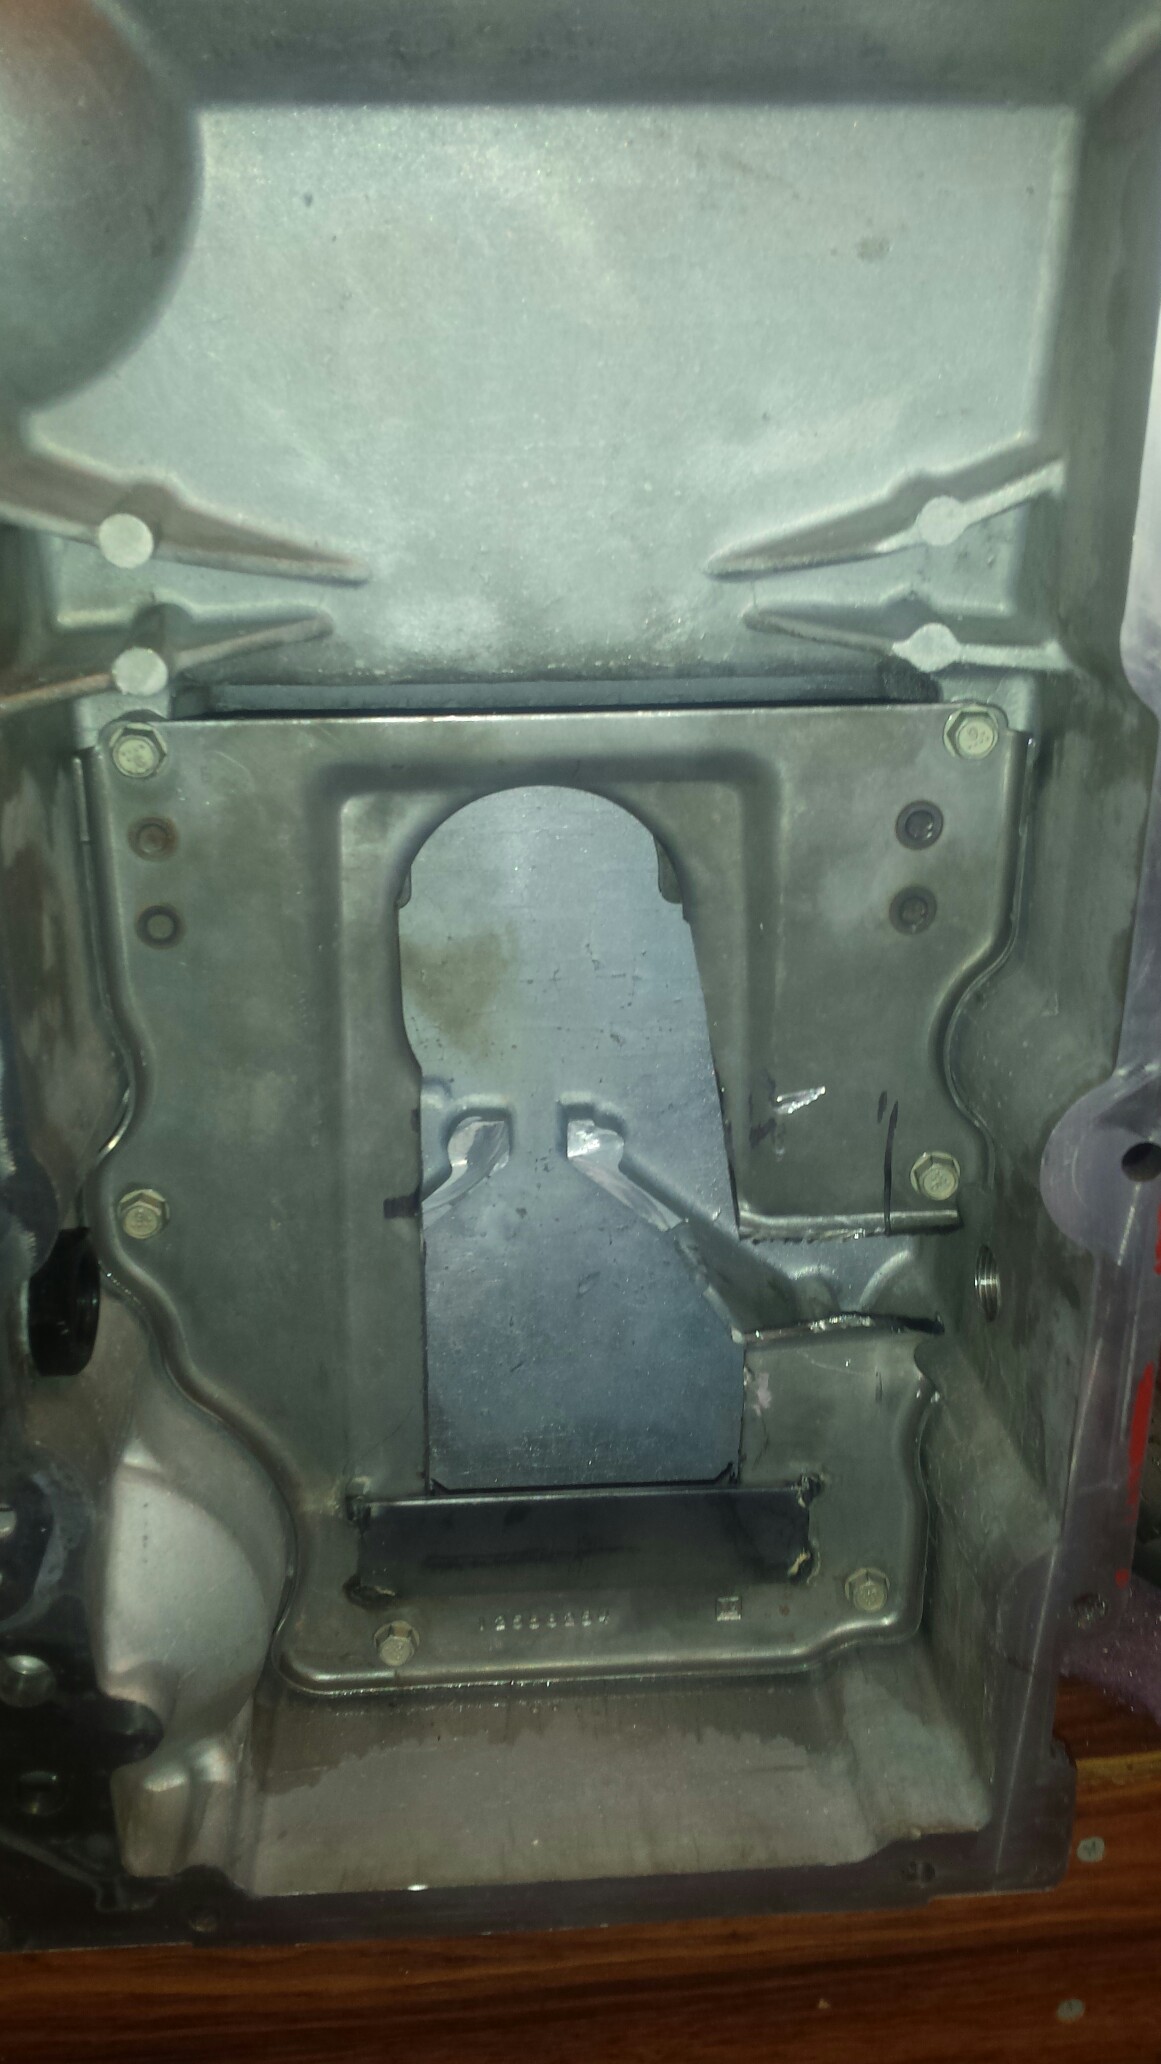
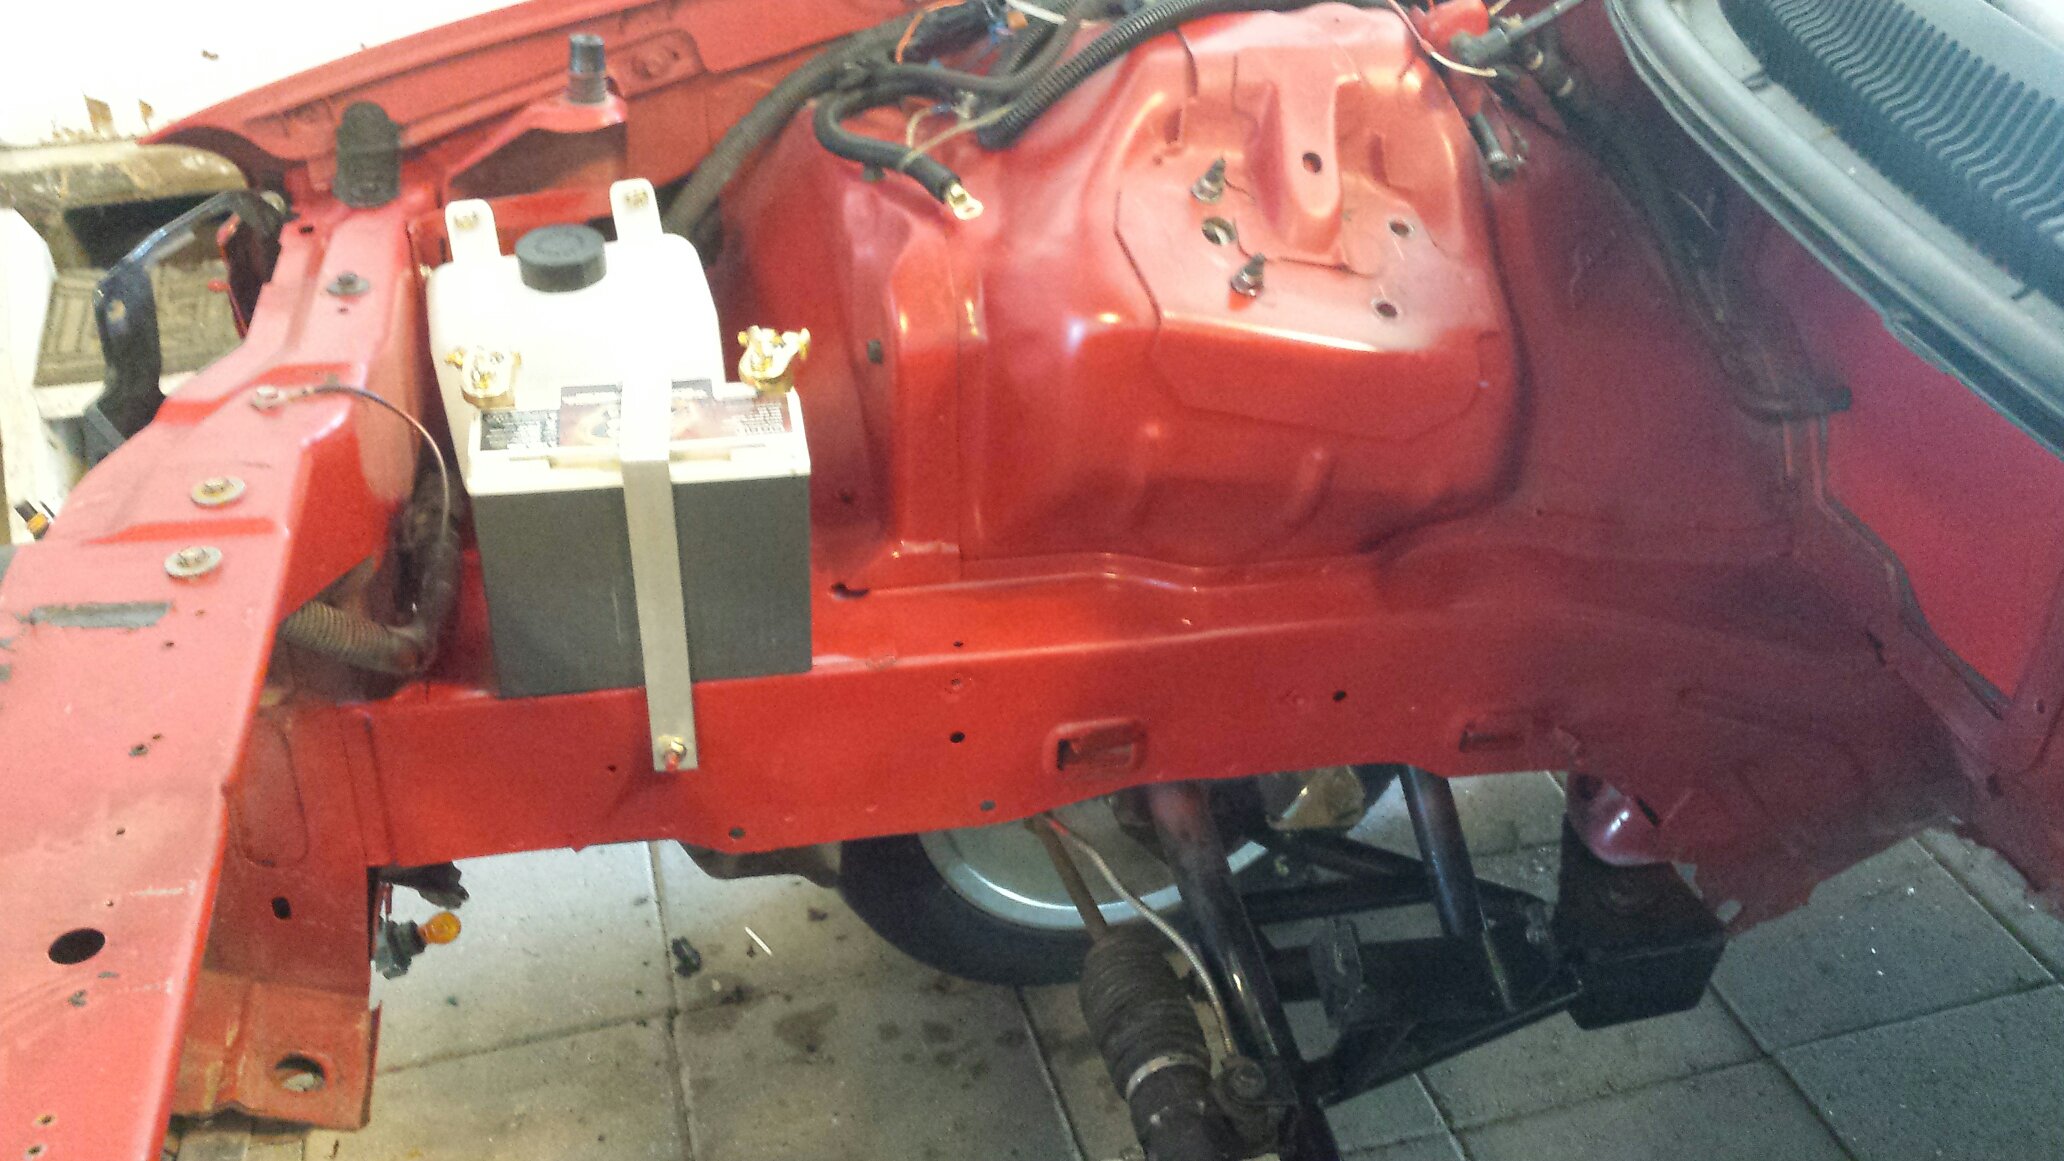
If you refer back to a pic of the battery area, there is a hole in the lower part, and I talked about wanting to make something to cover it. Well i traced the area out of cardboard and made a little sheet metal piece to cover the hole. I also welded a stud to it and the framerail. Here it is just sitting in place.
Bent an aluminum strap to go over the battery and it attaches to the studs i welded on.
Looking from the front...You see the short bracket i made for the top of the coolant tank, and i went ahead and bolted it to the car so i could swap it easily if my recovery tank changes at any point.
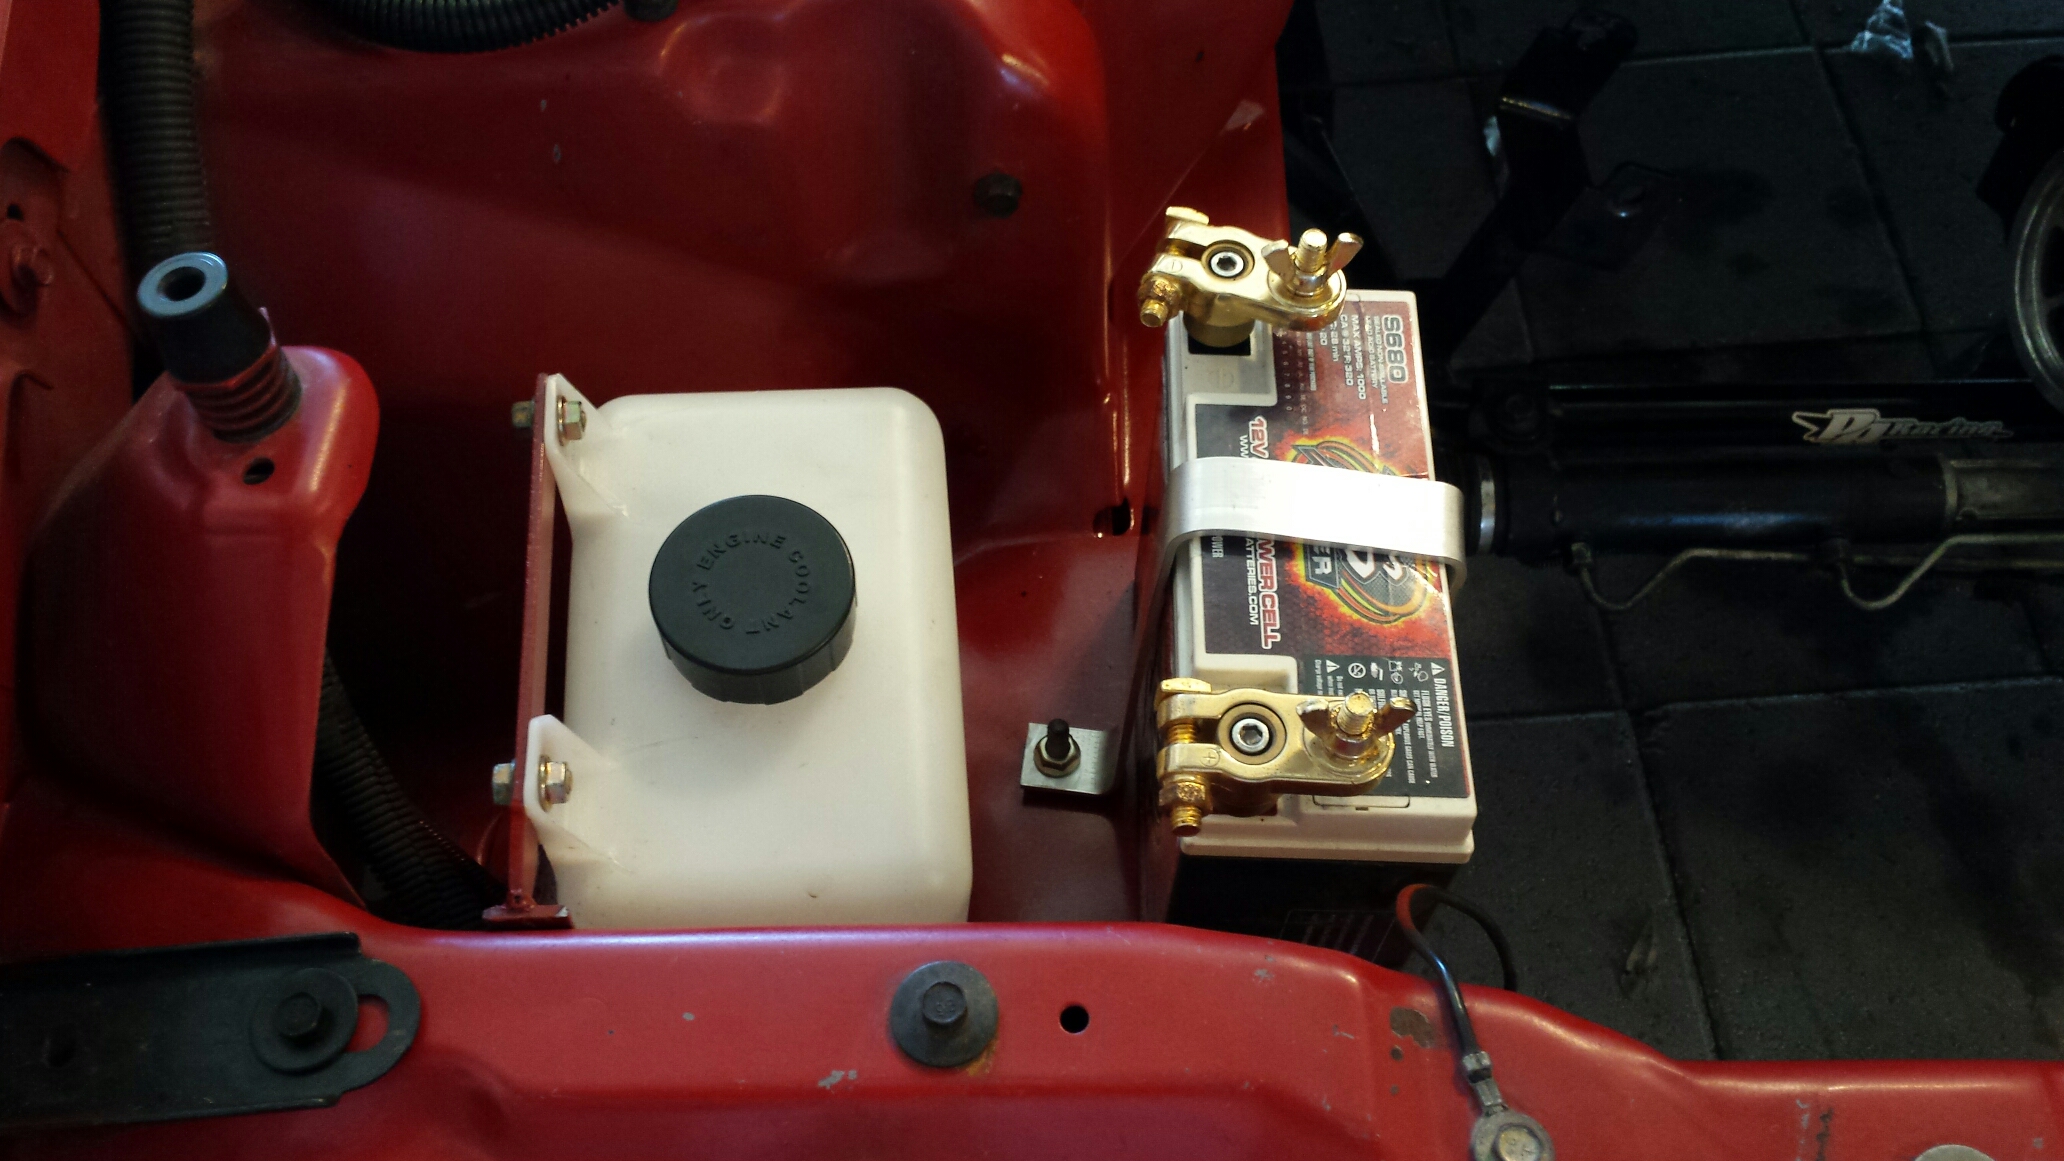
Looking from the passenger side.
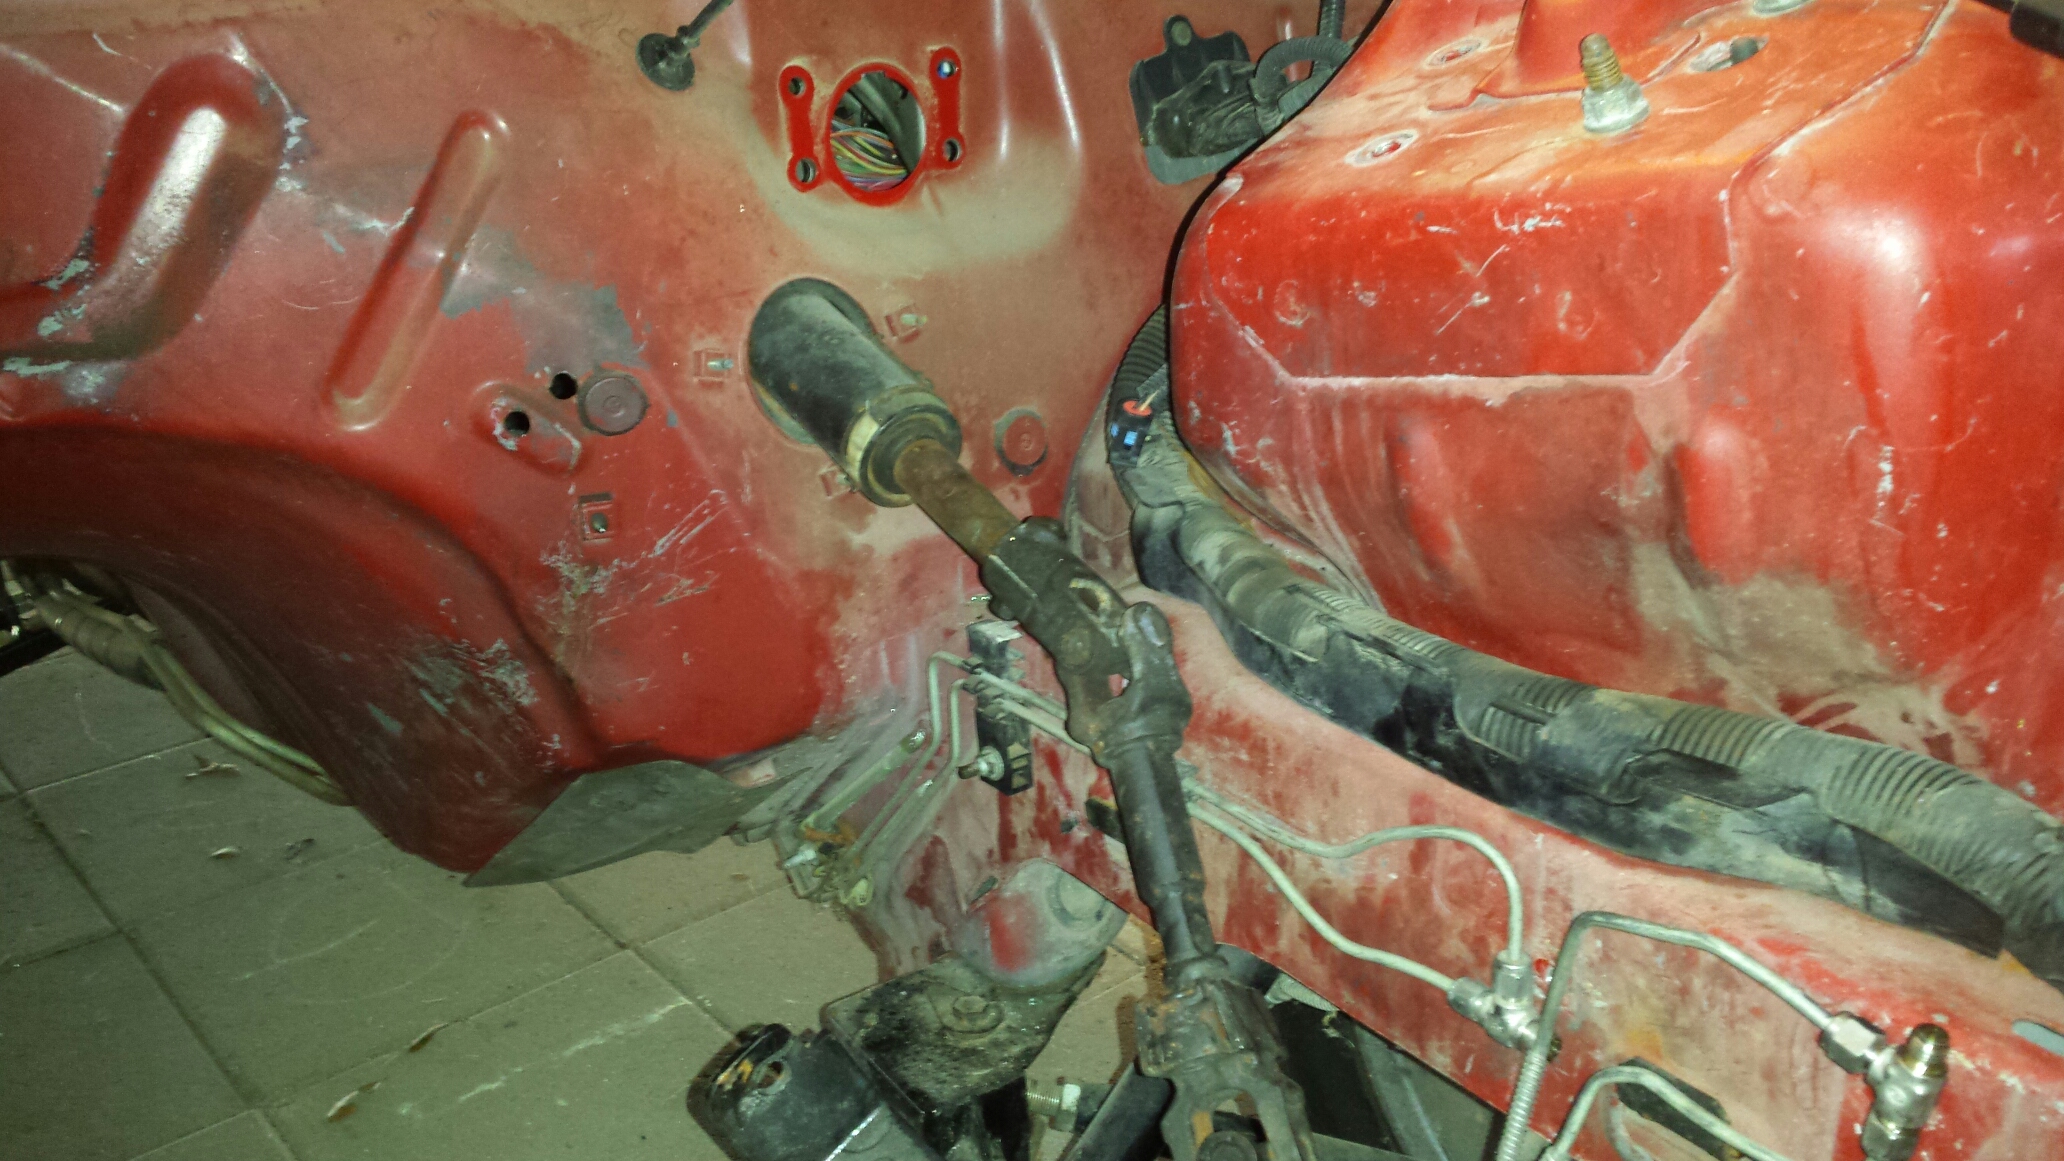
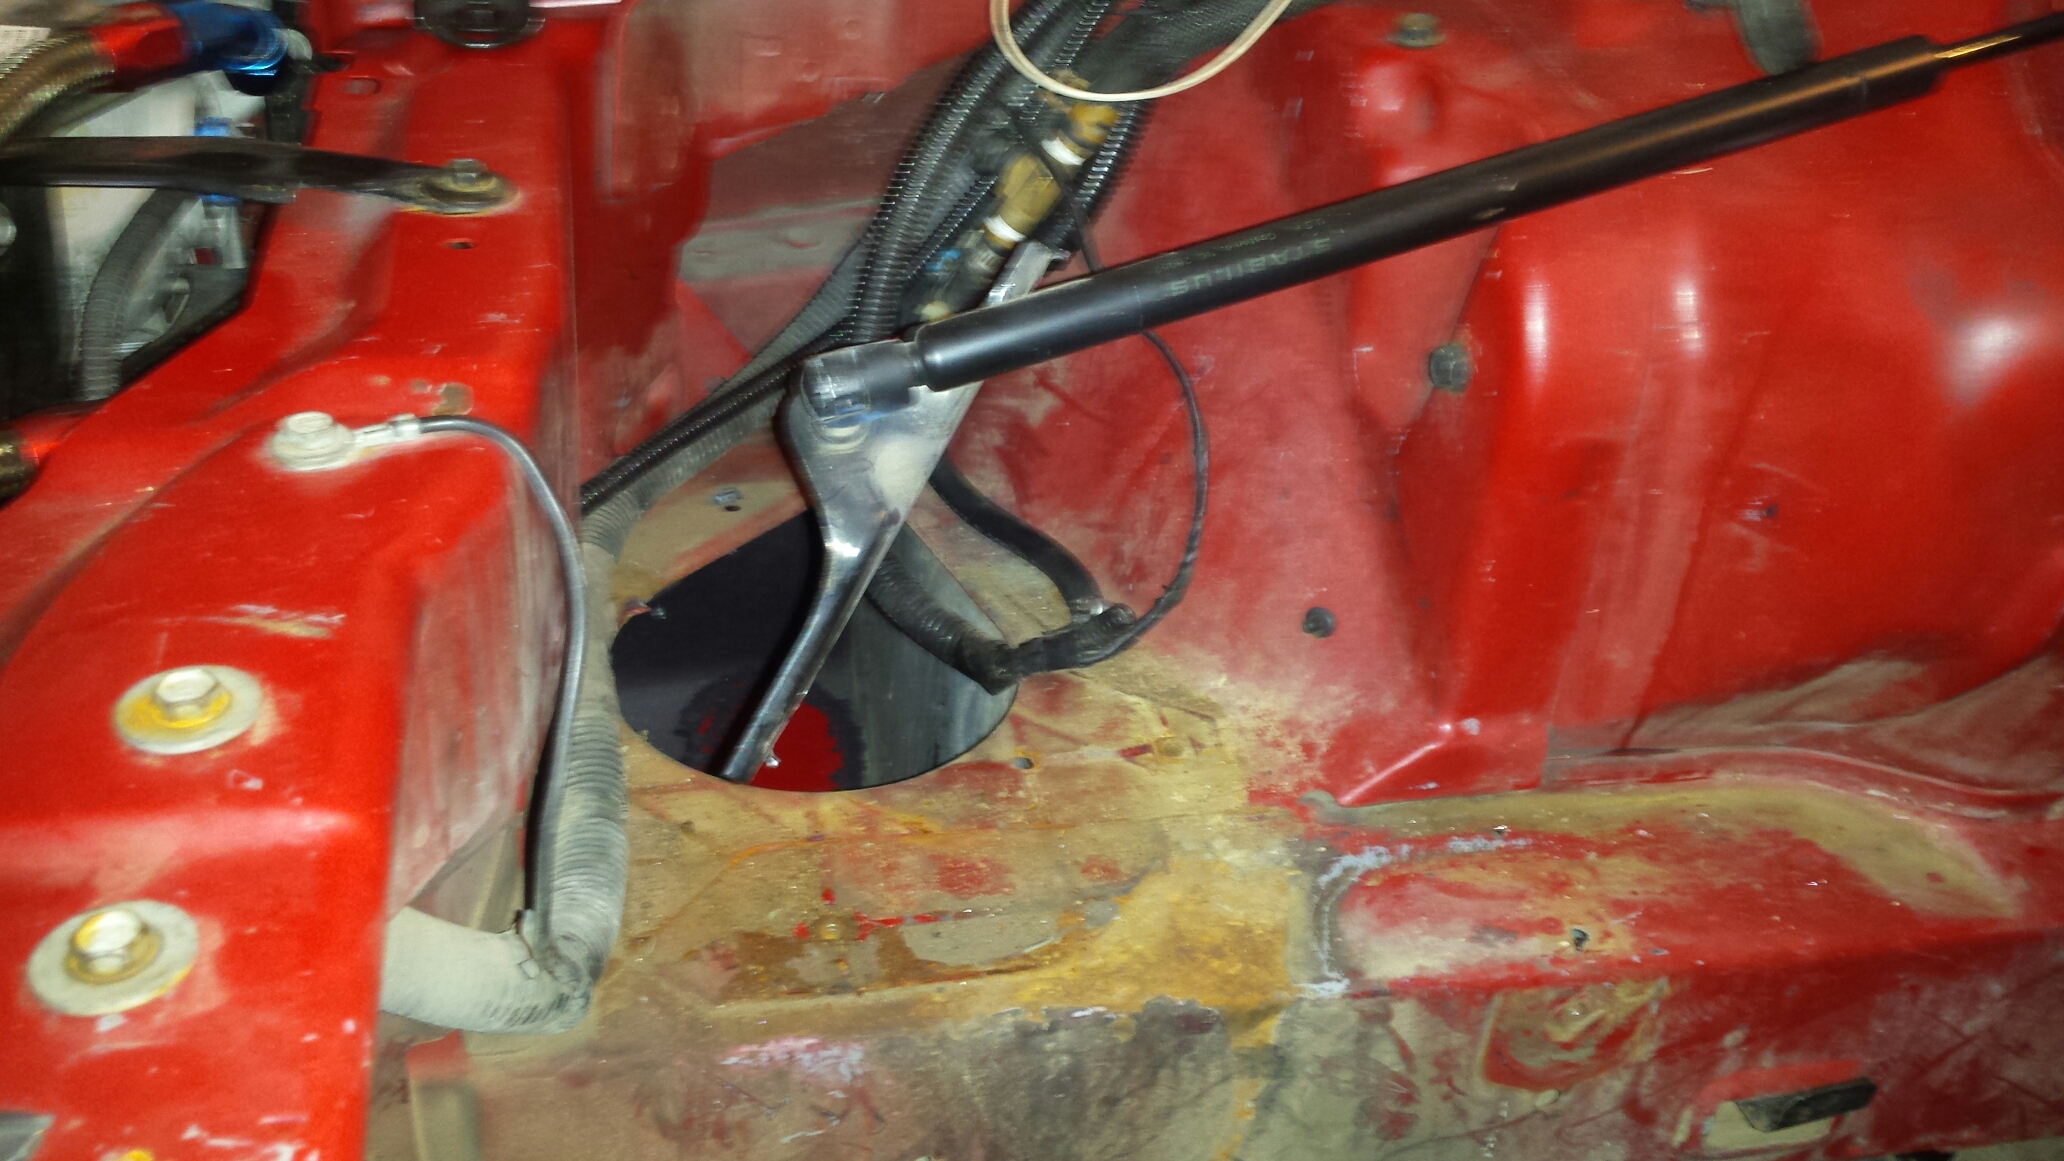
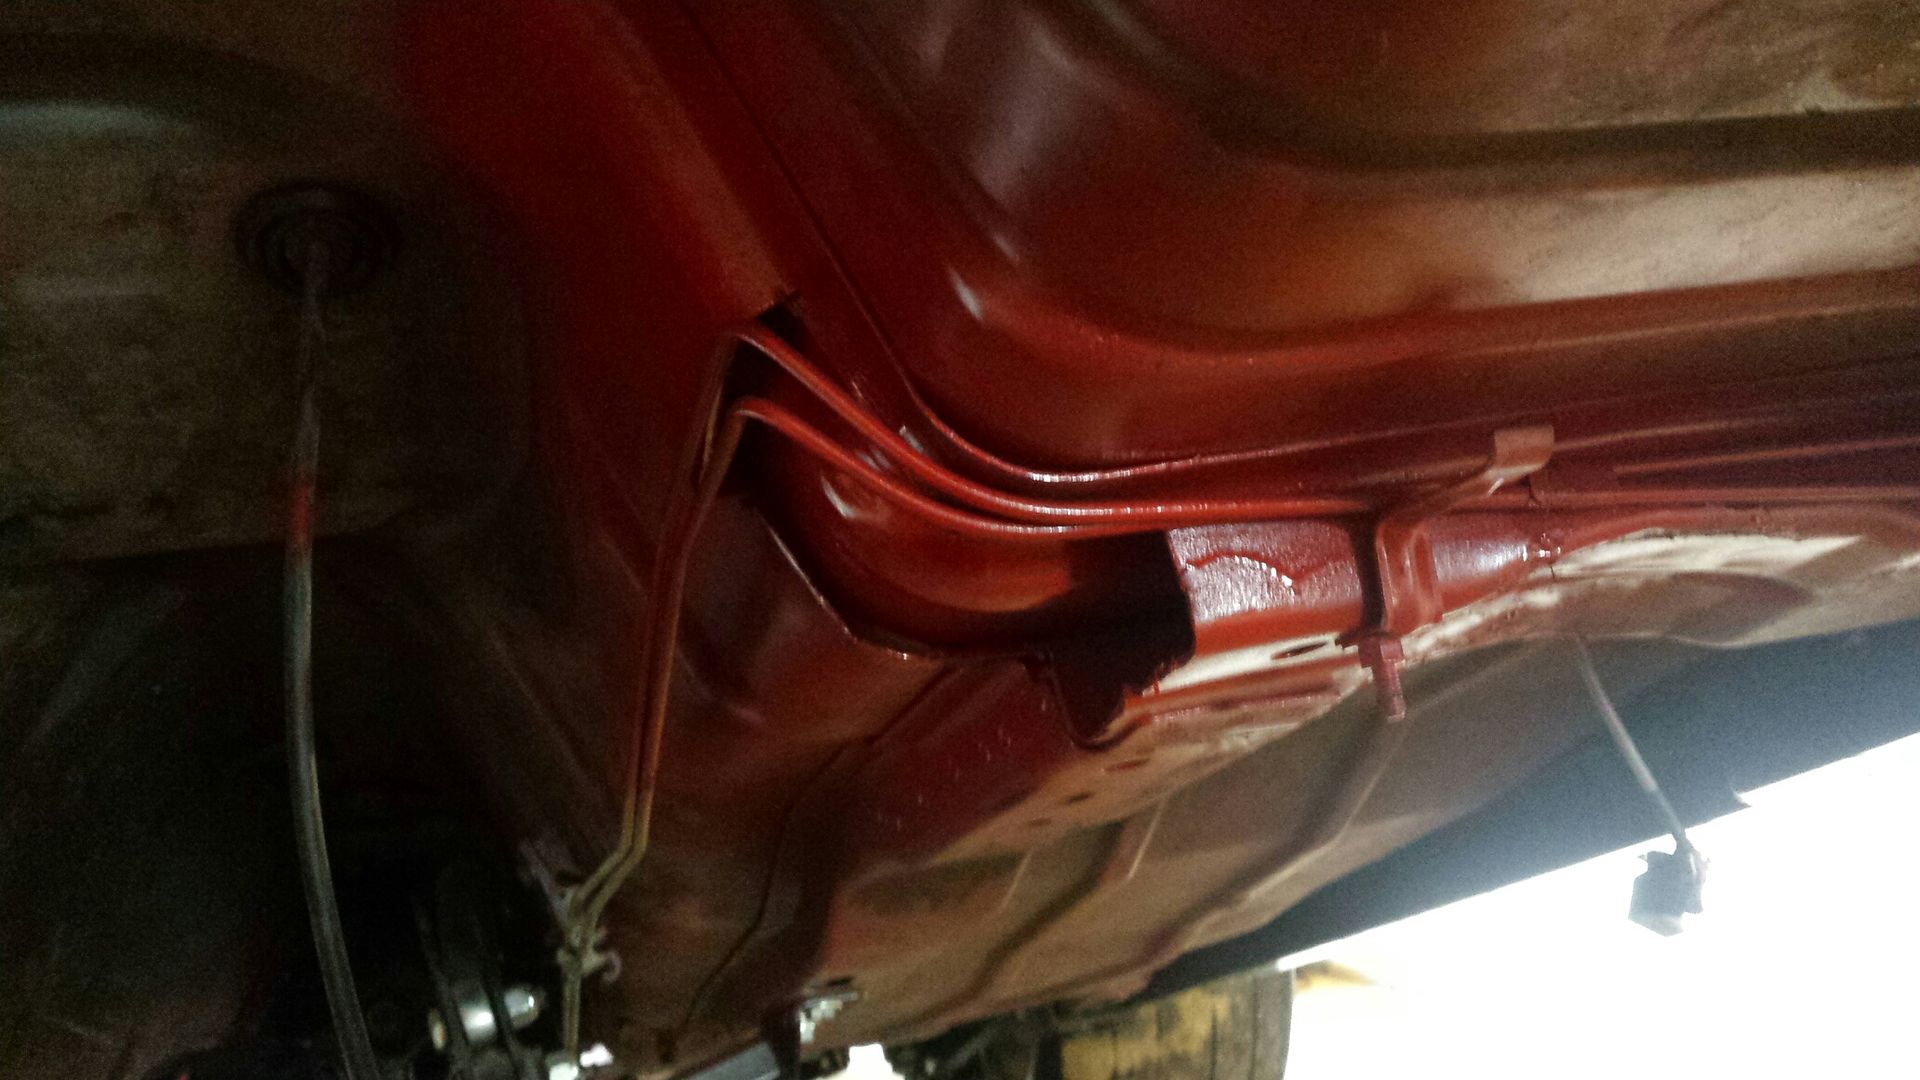
Got the manual master mounted, pulled the pedals out and redrilled the hole 1" higher on the pedal bracket for more leverage. Not an enjoyable job at all. Also, not in the pic, I did bend up new brake lines but wont attach them yet due to the k member needing to come out one more time. I originally cut the center cowl out with the motor in the car....and i could only go so far back. I may go ahead and finish it now.
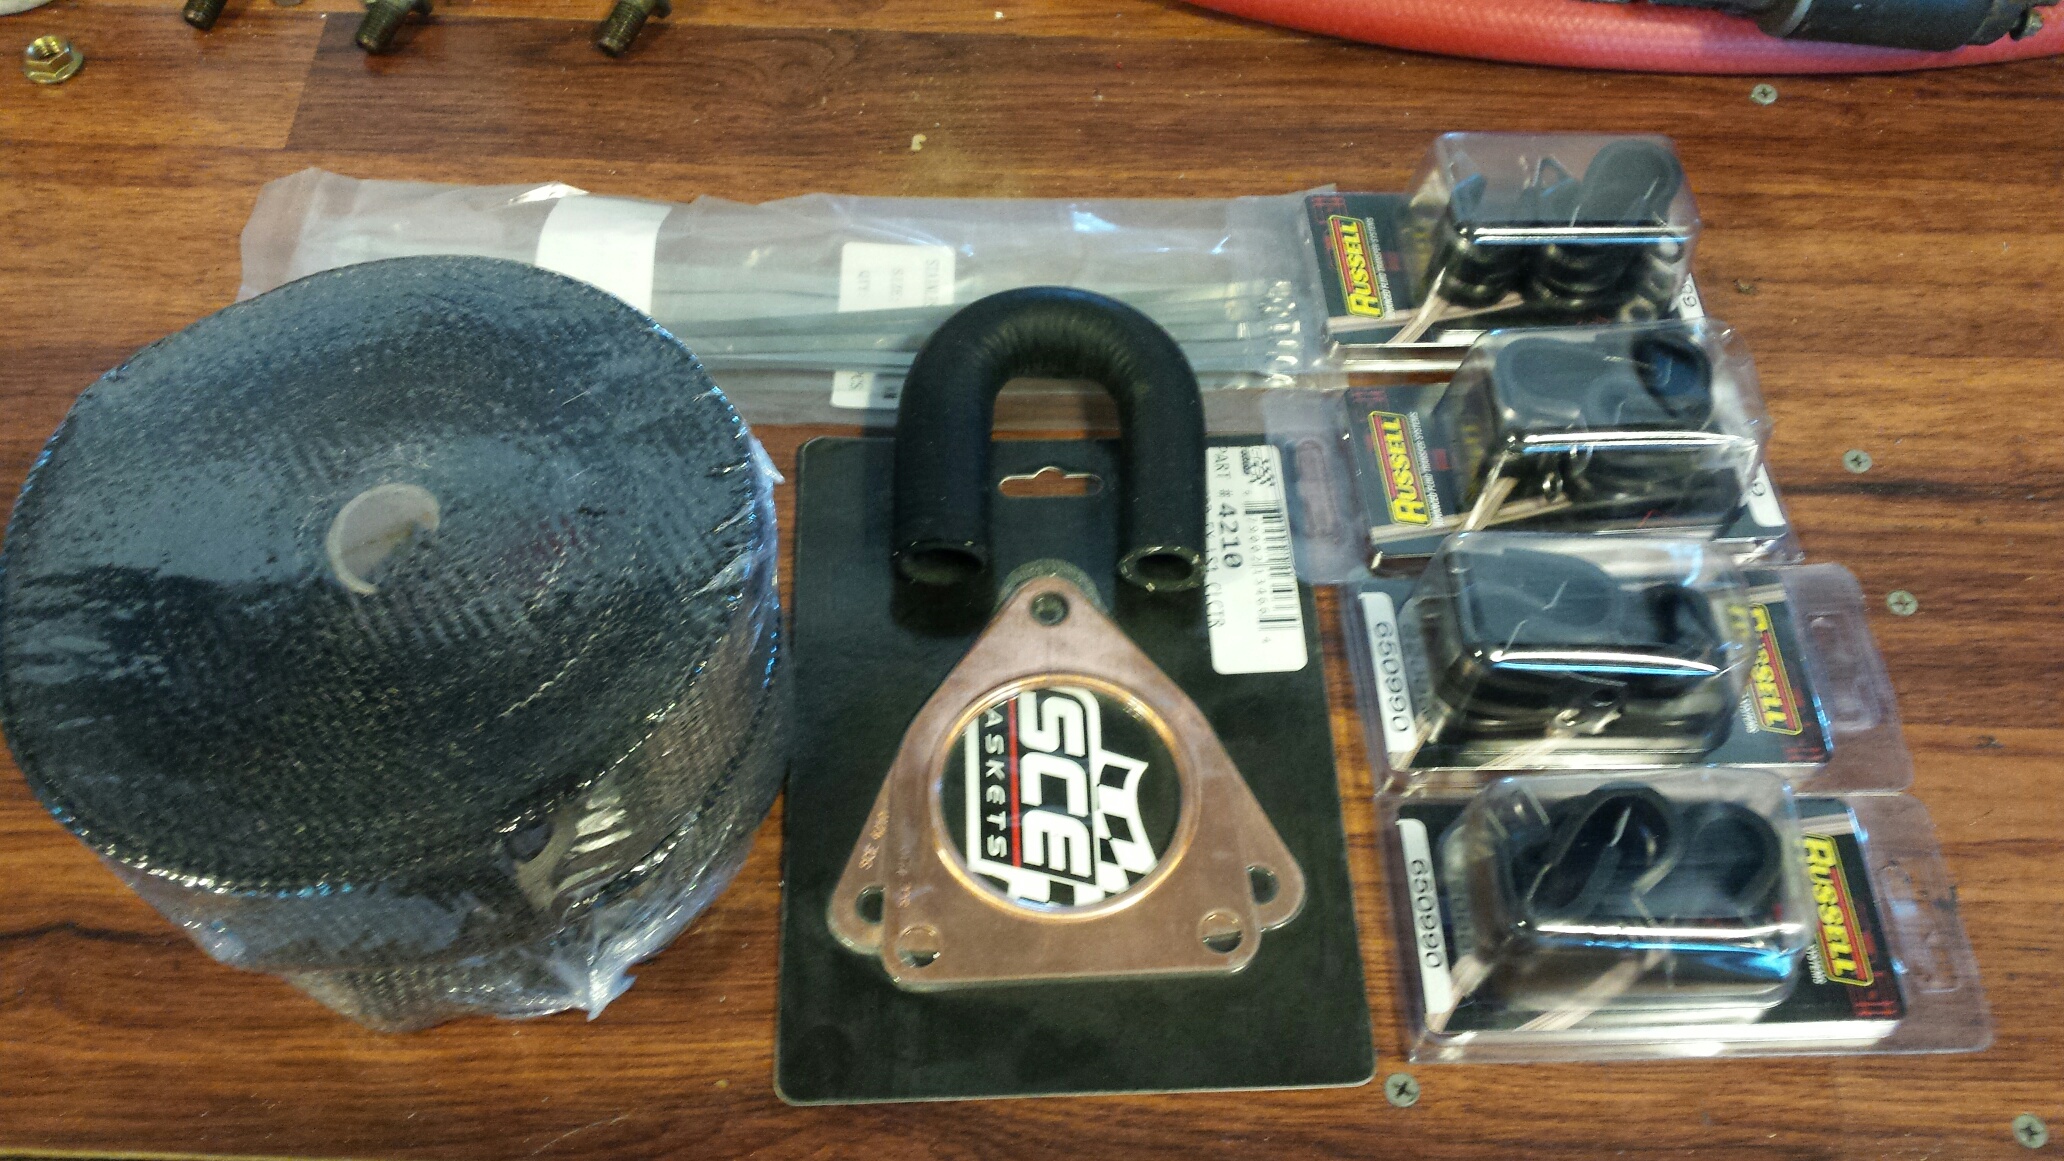
Got some stuff in, hotside wrap, fuel line clamps, copper collector gaskets, and a fitted waterpump heater delete.
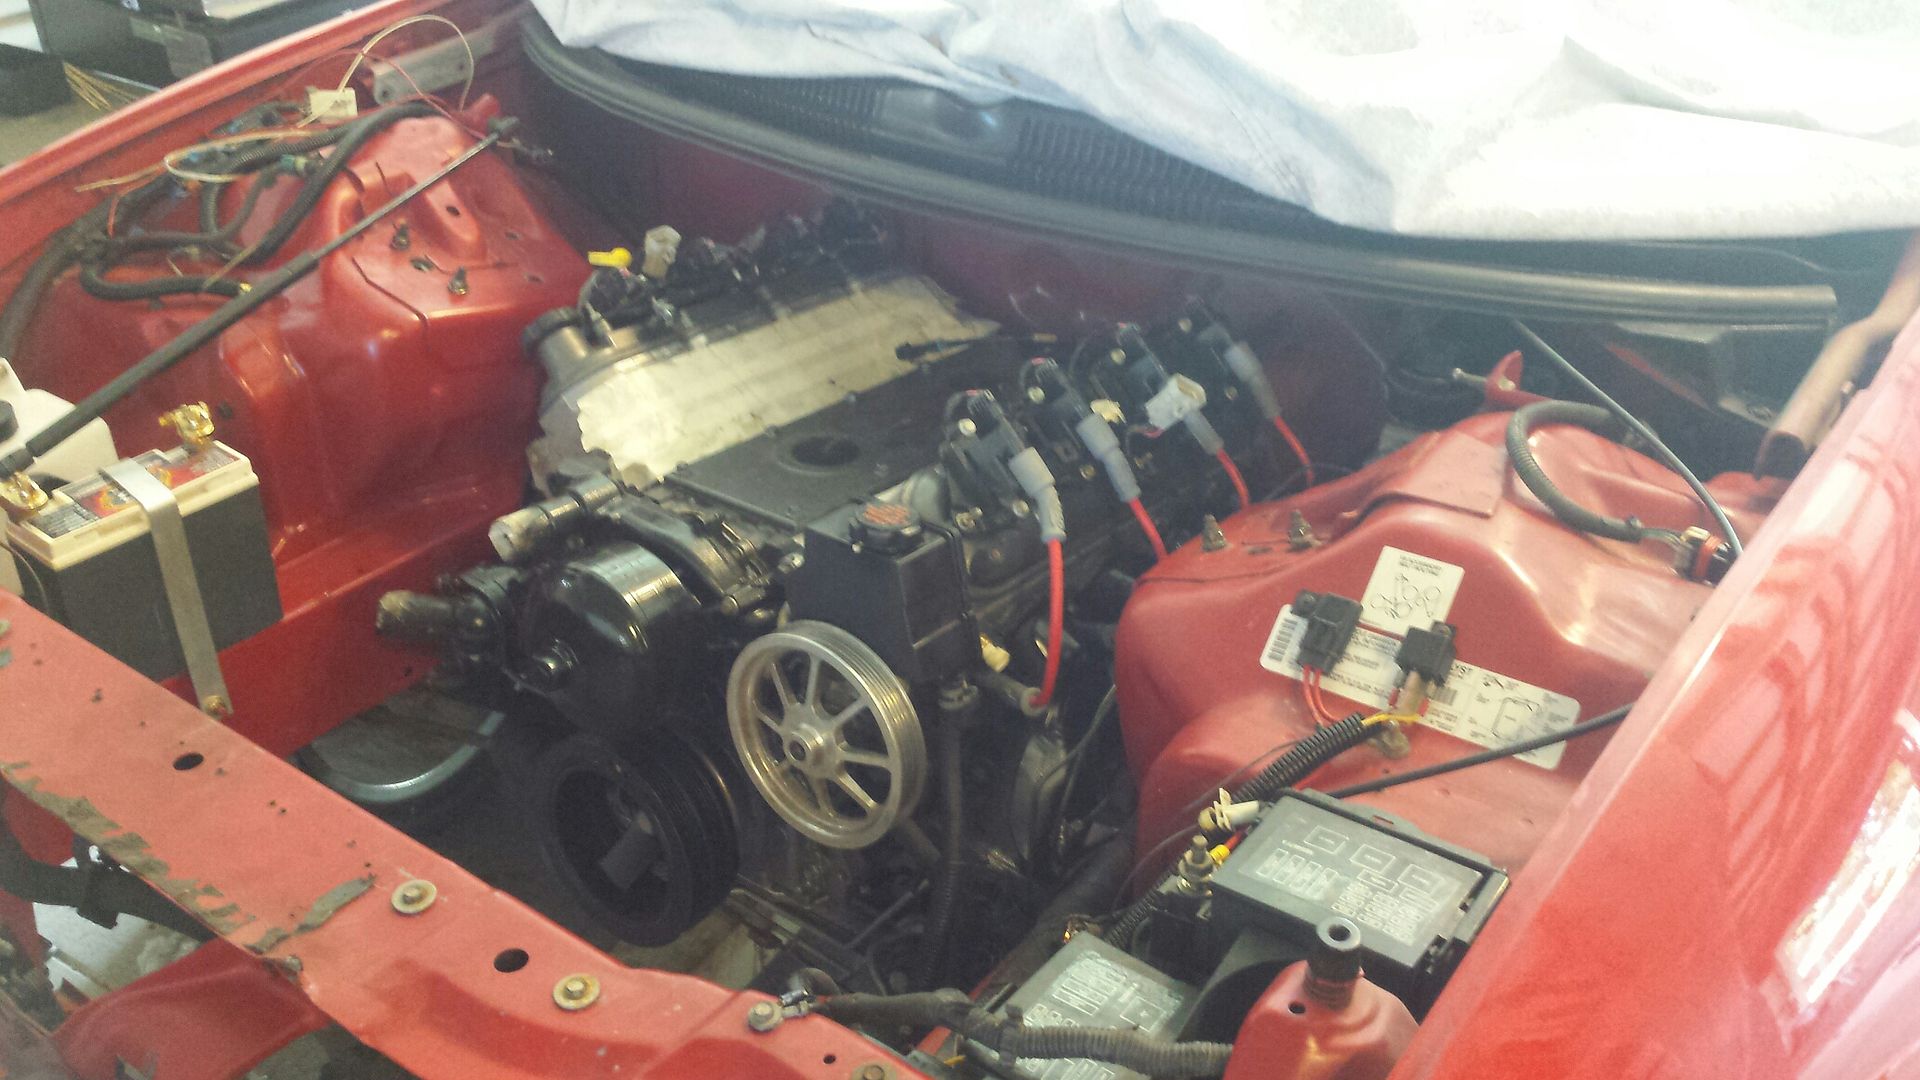
And here's how she sits currently. Couple of things, i do still have the horns on the framerail, so i will be removing those, and a mysterious vacuum canister in the same area, no clue how i missed that over all these years, that's going away also. I will have a chance to work on it again mid/late week so my plan is, pull the k member back out and mount the engine on it. Then finish removing exhaust heat shields and stock fuel lines from the body, and make my cut by the transmission connector for clearance. If all that goes well I may go ahead and roll the motor and trans under the car and bolt them up.....

Bent an aluminum strap to go over the battery and it attaches to the studs i welded on.

Looking from the front...You see the short bracket i made for the top of the coolant tank, and i went ahead and bolted it to the car so i could swap it easily if my recovery tank changes at any point.

Looking from the passenger side.

Got the manual master mounted, pulled the pedals out and redrilled the hole 1" higher on the pedal bracket for more leverage. Not an enjoyable job at all. Also, not in the pic, I did bend up new brake lines but wont attach them yet due to the k member needing to come out one more time. I originally cut the center cowl out with the motor in the car....and i could only go so far back. I may go ahead and finish it now.

Got some stuff in, hotside wrap, fuel line clamps, copper collector gaskets, and a fitted waterpump heater delete.

And here's how she sits currently. Couple of things, i do still have the horns on the framerail, so i will be removing those, and a mysterious vacuum canister in the same area, no clue how i missed that over all these years, that's going away also. I will have a chance to work on it again mid/late week so my plan is, pull the k member back out and mount the engine on it. Then finish removing exhaust heat shields and stock fuel lines from the body, and make my cut by the transmission connector for clearance. If all that goes well I may go ahead and roll the motor and trans under the car and bolt them up.....

#38
07-29-2017, 07:53 AM
Join Date: Aug 2010
Posts: 230
Likes: 0
Received 0 Likes
on
0 Posts
First thing i needed to do was remove the master cylinder (after bending new lines) and bench bleed it for final install. This is the contraption I made to cycle the fluid back into the reservoir. It took about 20 full pumps to remove all air bubbles.
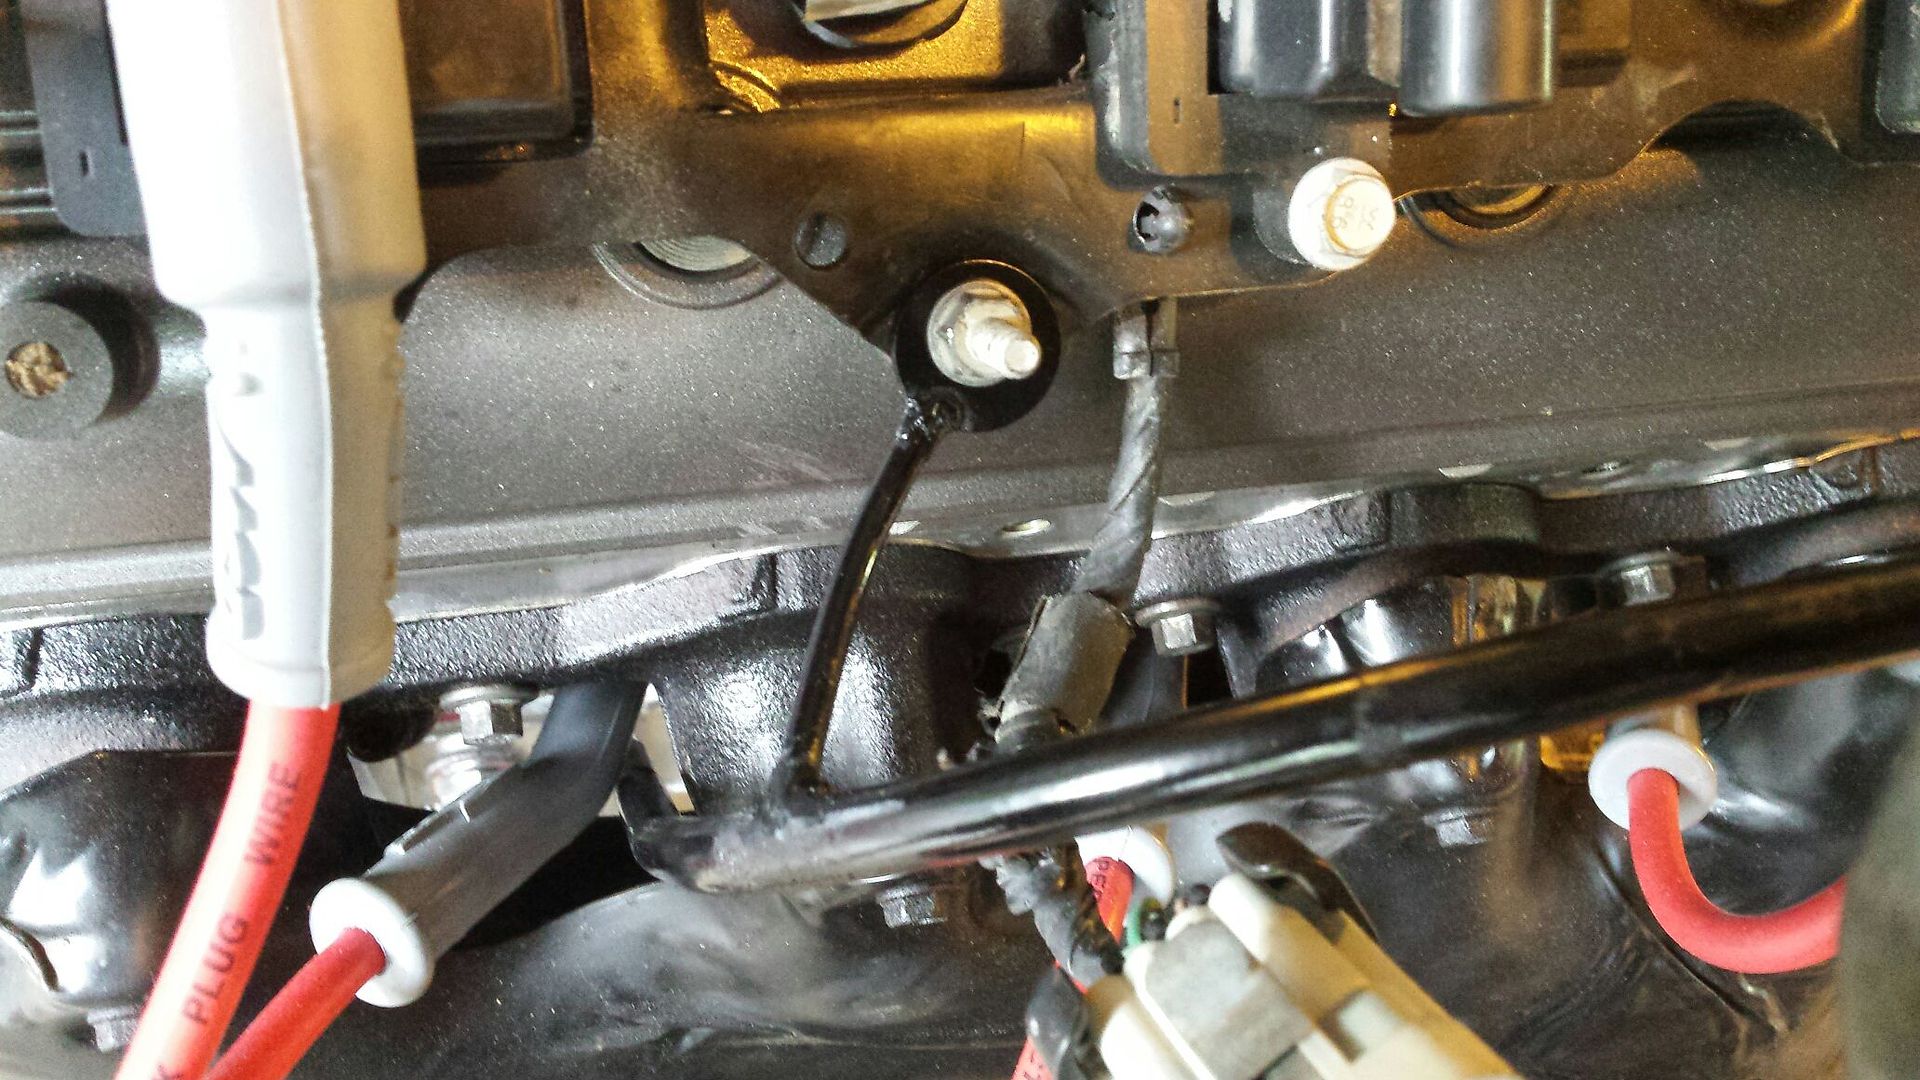
Not sure what happened to the oil dipstick bracket but all i had left was a tube with no way to stabilize it. I took a washer, and a small piece of (probably) 3/16th stainless rod, bent it, and welded them together to make a makeshift bracket that attaches to a coil pack bracket bolt.
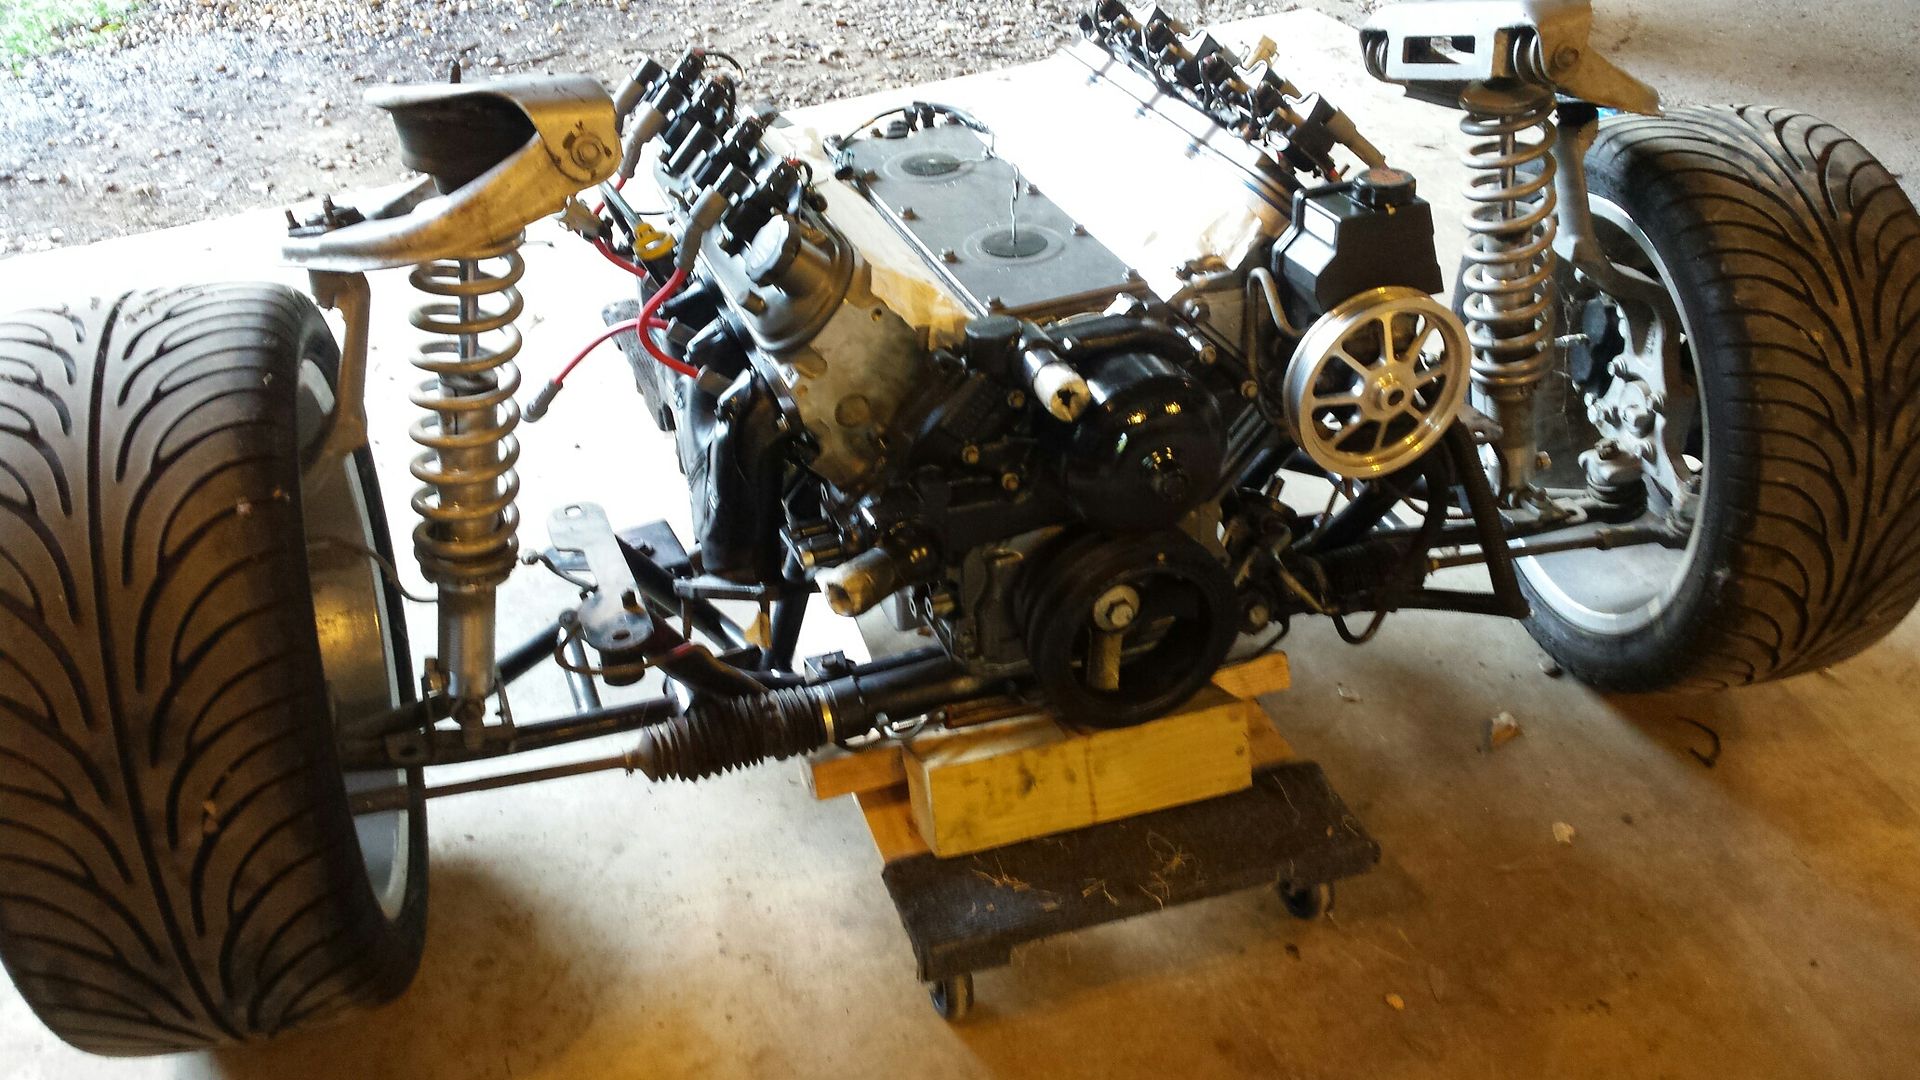
Dropped the motor on the k member
I originally took the wipers out and cut some of the cowl back (under the windshield). I did the best I could with the engine in the car. It was time consuming and I had to make a bunch of small cuts. Now that the engine is out I wasnt gonna waste the opportunity to complete the cut. My focus was the metal over the engine, and since i kept the plastic cowl cover, i have to leave some metal at the ends to support it. Here is what it looks like after we got through. This will make working on the top and rear of the engine so much easier.
Cut the floorboard for the trans plug and put some red paint on the cuts. Red brake lines never hurt nobody. This is required or you wont be able to plug the trans in.
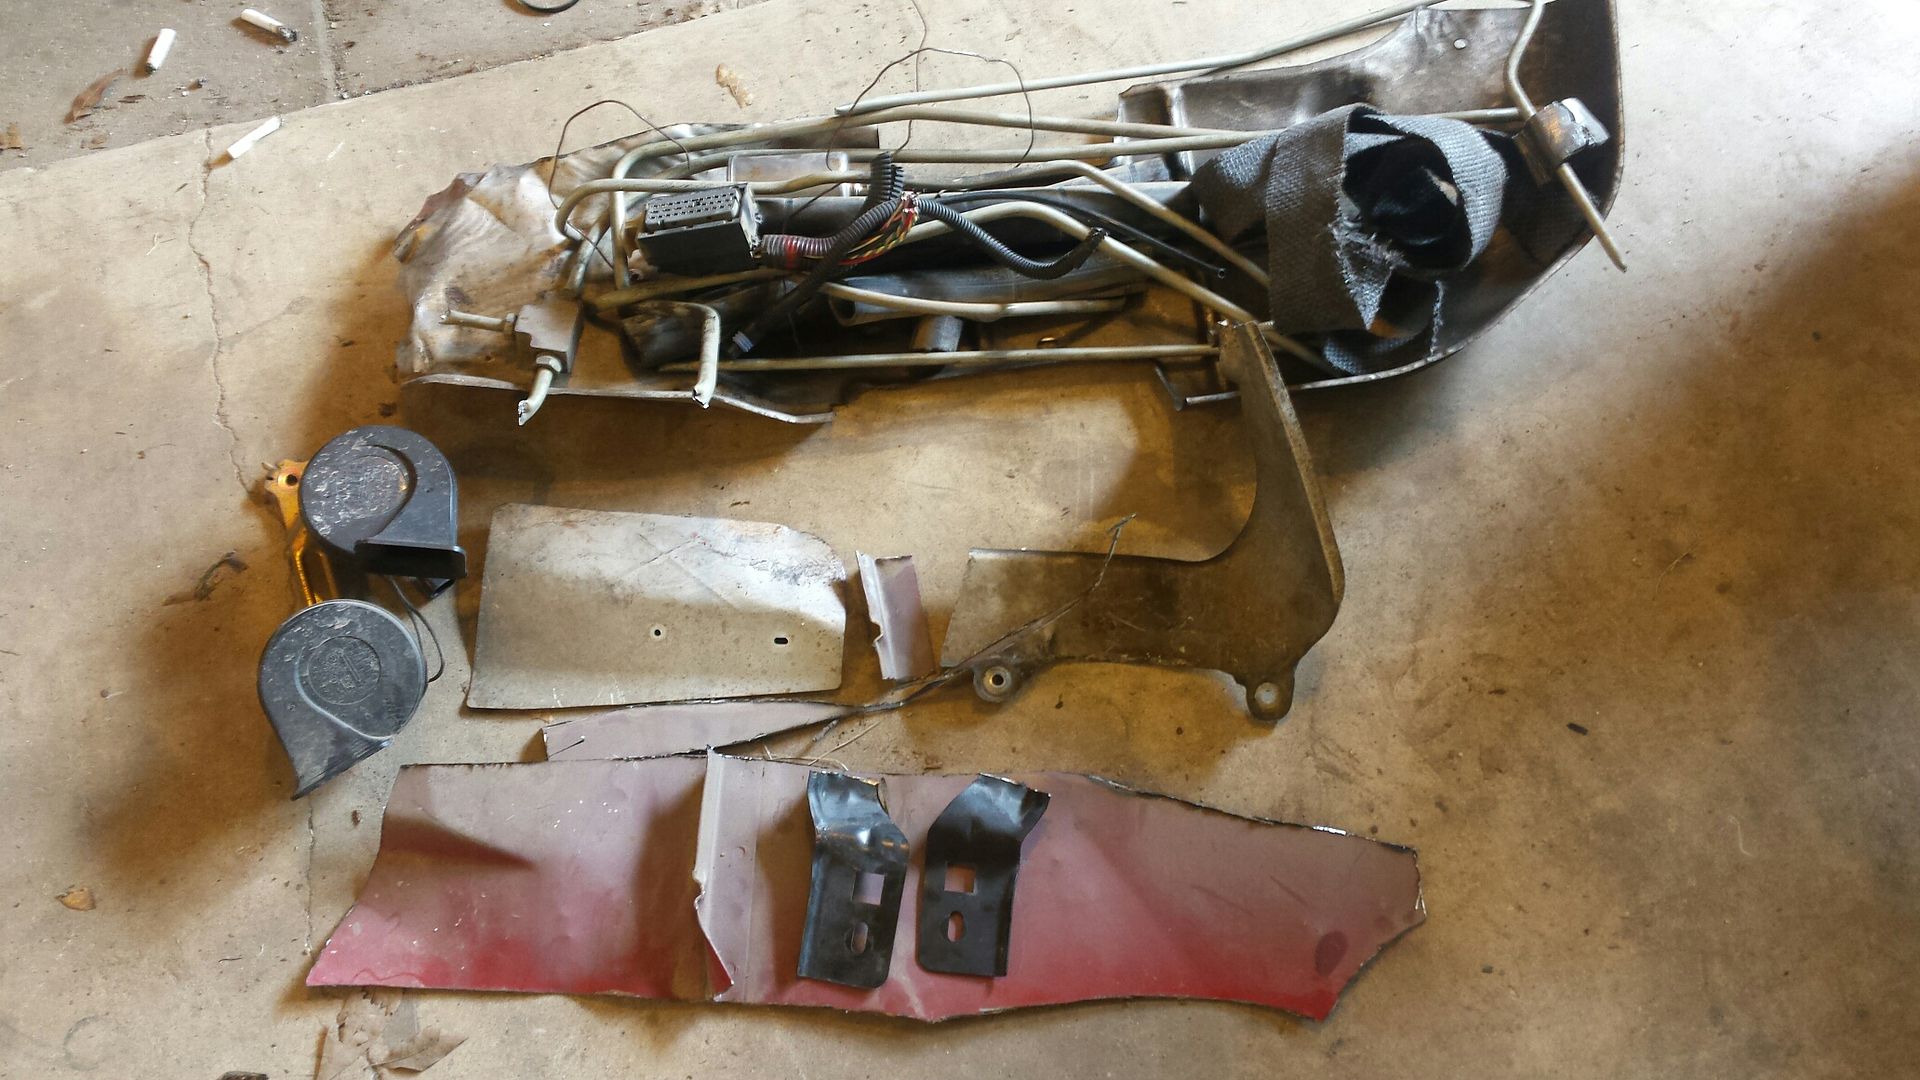
Here is most of the stuff I removed from the car. The red is the cowl, the black brackets are for fog lights, horns on the left, then you have metal fuel line and metal exhaust shields. I threw this whole pile behind my wife's bushes in the back yard.
A few cuss words and a couple hours later.....

Not sure what happened to the oil dipstick bracket but all i had left was a tube with no way to stabilize it. I took a washer, and a small piece of (probably) 3/16th stainless rod, bent it, and welded them together to make a makeshift bracket that attaches to a coil pack bracket bolt.

Dropped the motor on the k member

I originally took the wipers out and cut some of the cowl back (under the windshield). I did the best I could with the engine in the car. It was time consuming and I had to make a bunch of small cuts. Now that the engine is out I wasnt gonna waste the opportunity to complete the cut. My focus was the metal over the engine, and since i kept the plastic cowl cover, i have to leave some metal at the ends to support it. Here is what it looks like after we got through. This will make working on the top and rear of the engine so much easier.

Cut the floorboard for the trans plug and put some red paint on the cuts. Red brake lines never hurt nobody. This is required or you wont be able to plug the trans in.

Here is most of the stuff I removed from the car. The red is the cowl, the black brackets are for fog lights, horns on the left, then you have metal fuel line and metal exhaust shields. I threw this whole pile behind my wife's bushes in the back yard.

A few cuss words and a couple hours later.....


#40
08-02-2017, 07:57 AM
Join Date: Aug 2010
Posts: 230
Likes: 0
Received 0 Likes
on
0 Posts
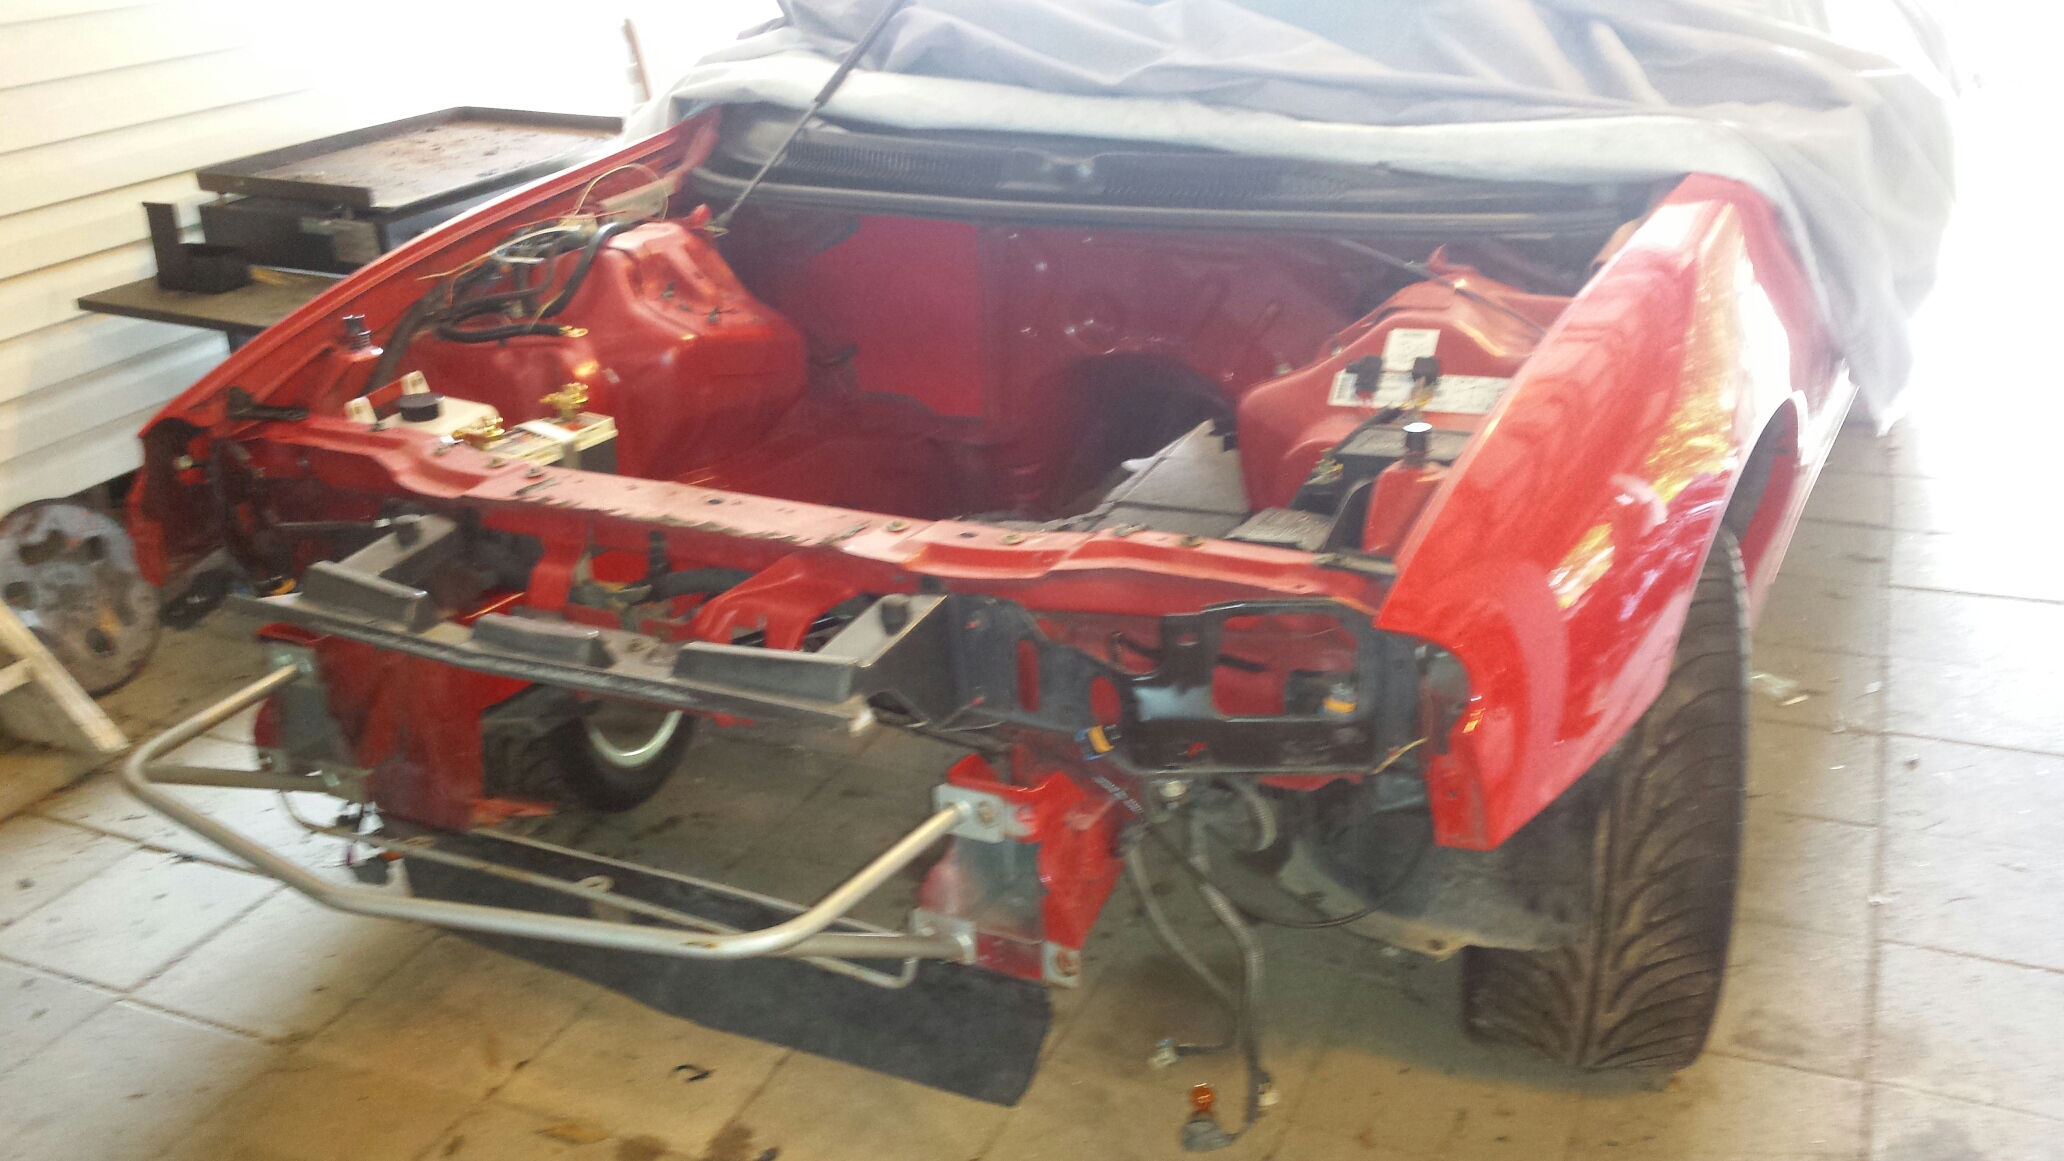
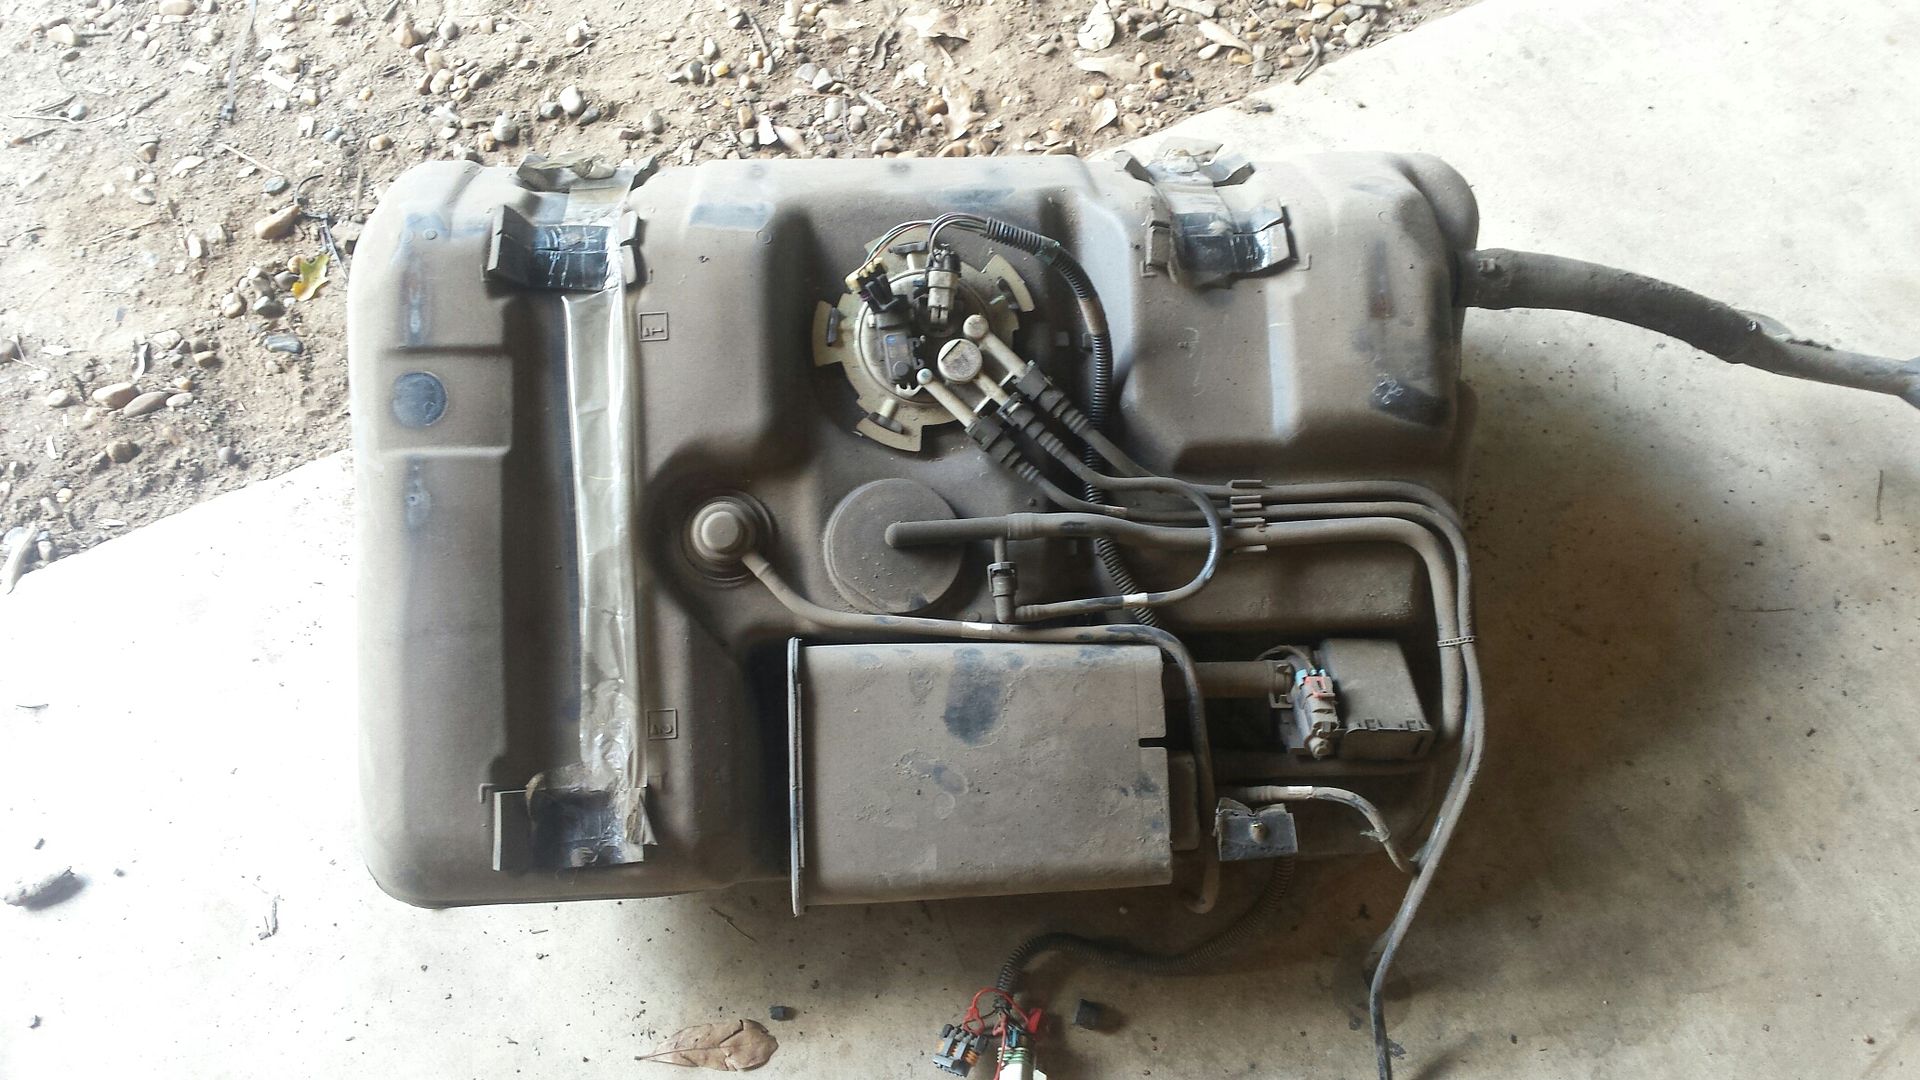
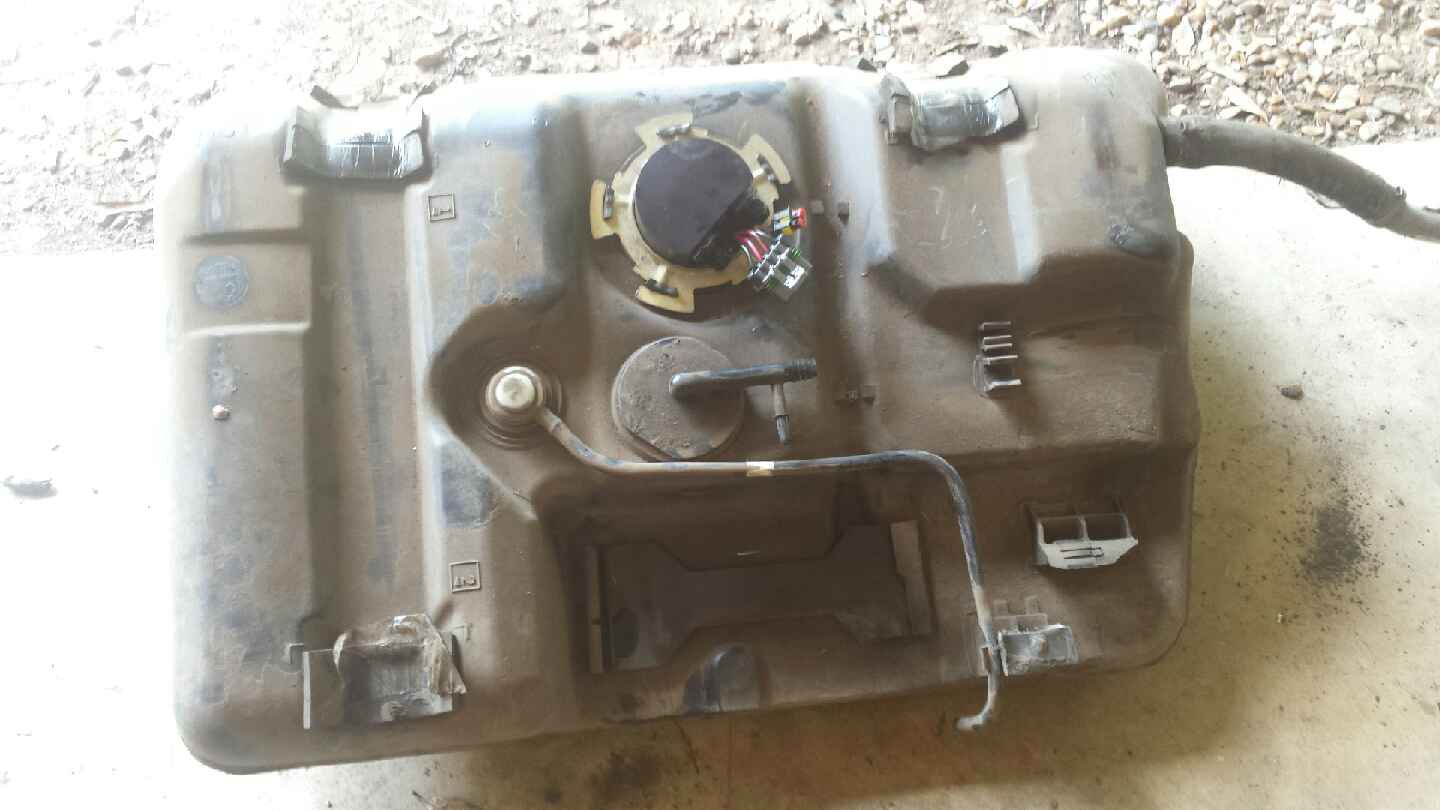
Figured as i STILL dont have the turbo piping i would move to the rear of the car and get a few things done there. I dropped the fuel tank.......you can see in this pic the excess lines and charcoal canister. Yep you guessed it, thats all going away.
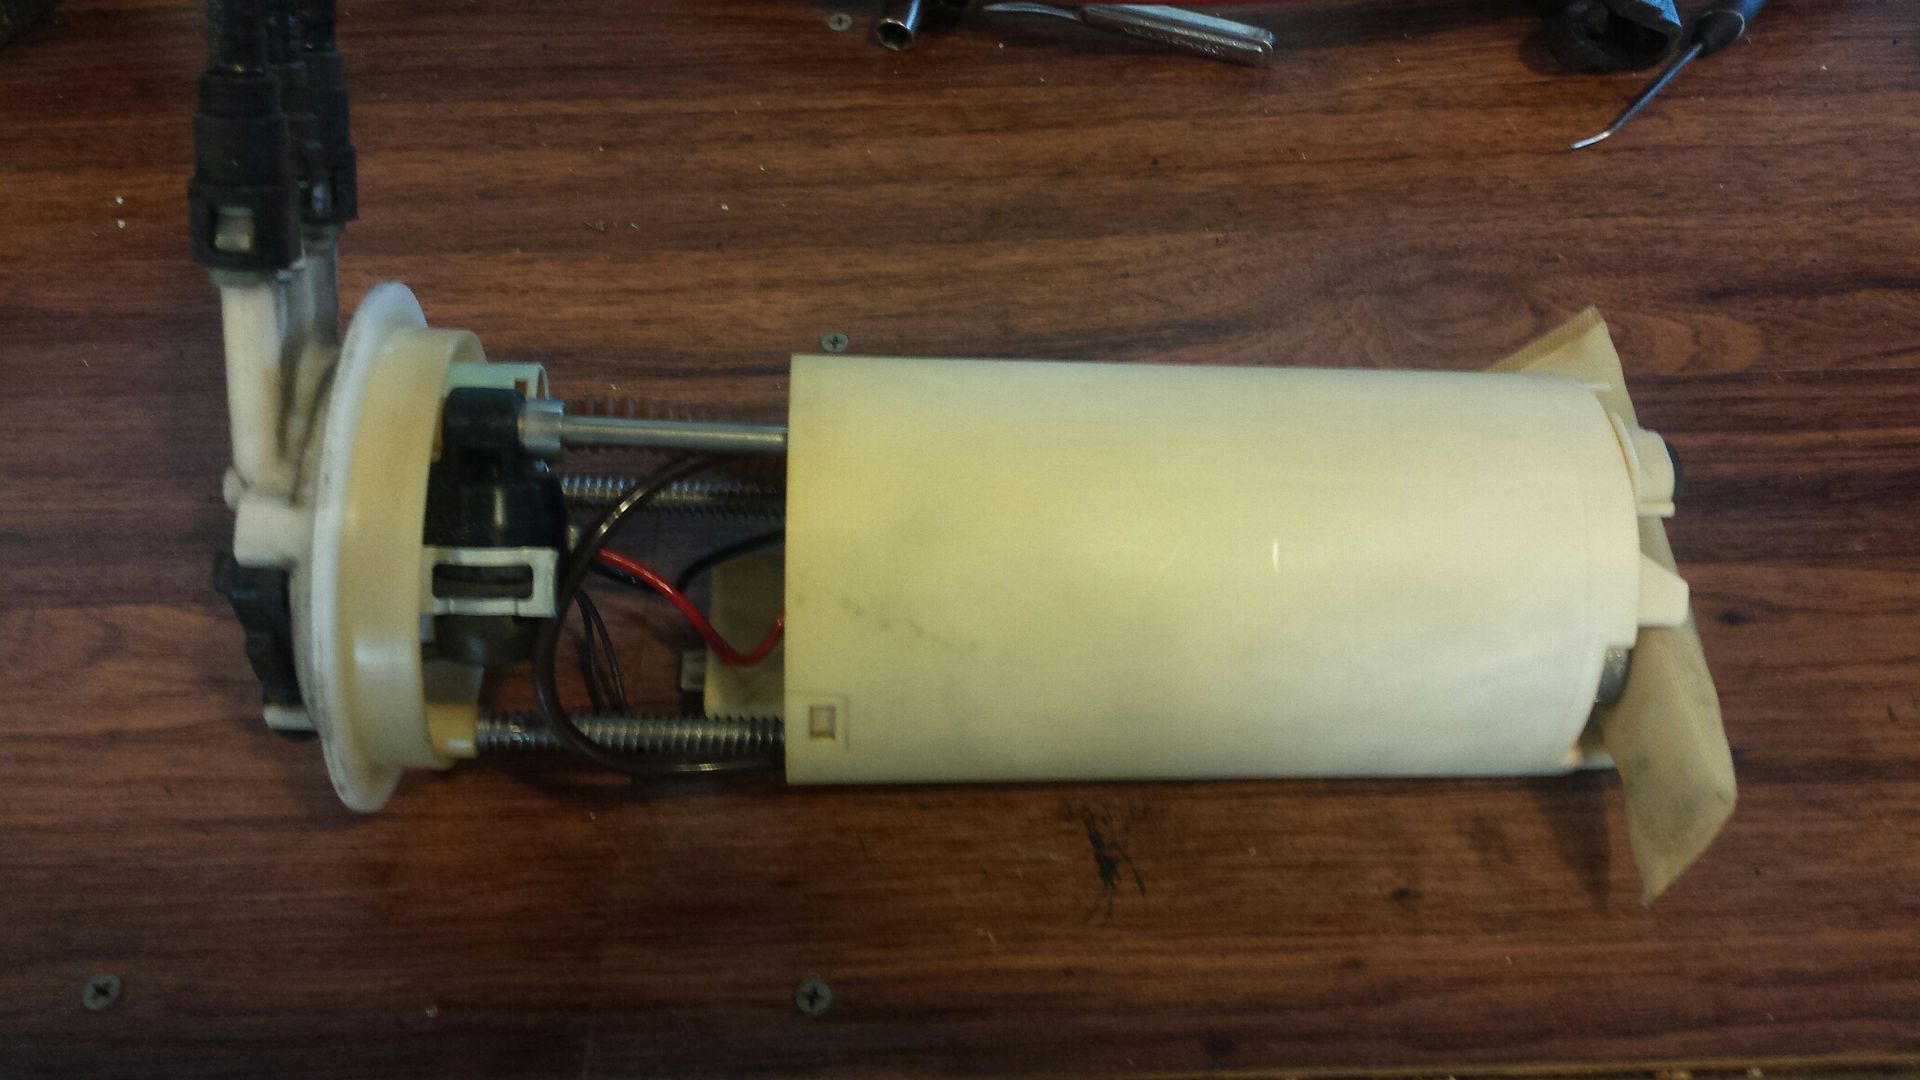
Stock bucket, and it has a Racetronix 255 pump installed. I had to remove the float assembly and transfer it to the dual pump setup. I was able to sell this locally on FB in like 4 hours!
Here's all the extra crap gone and the dual 450s installed. They were actually easier then I figured. This is basically ready to go back in the car.....but ah, not just yet, I've got something up my sleeve.
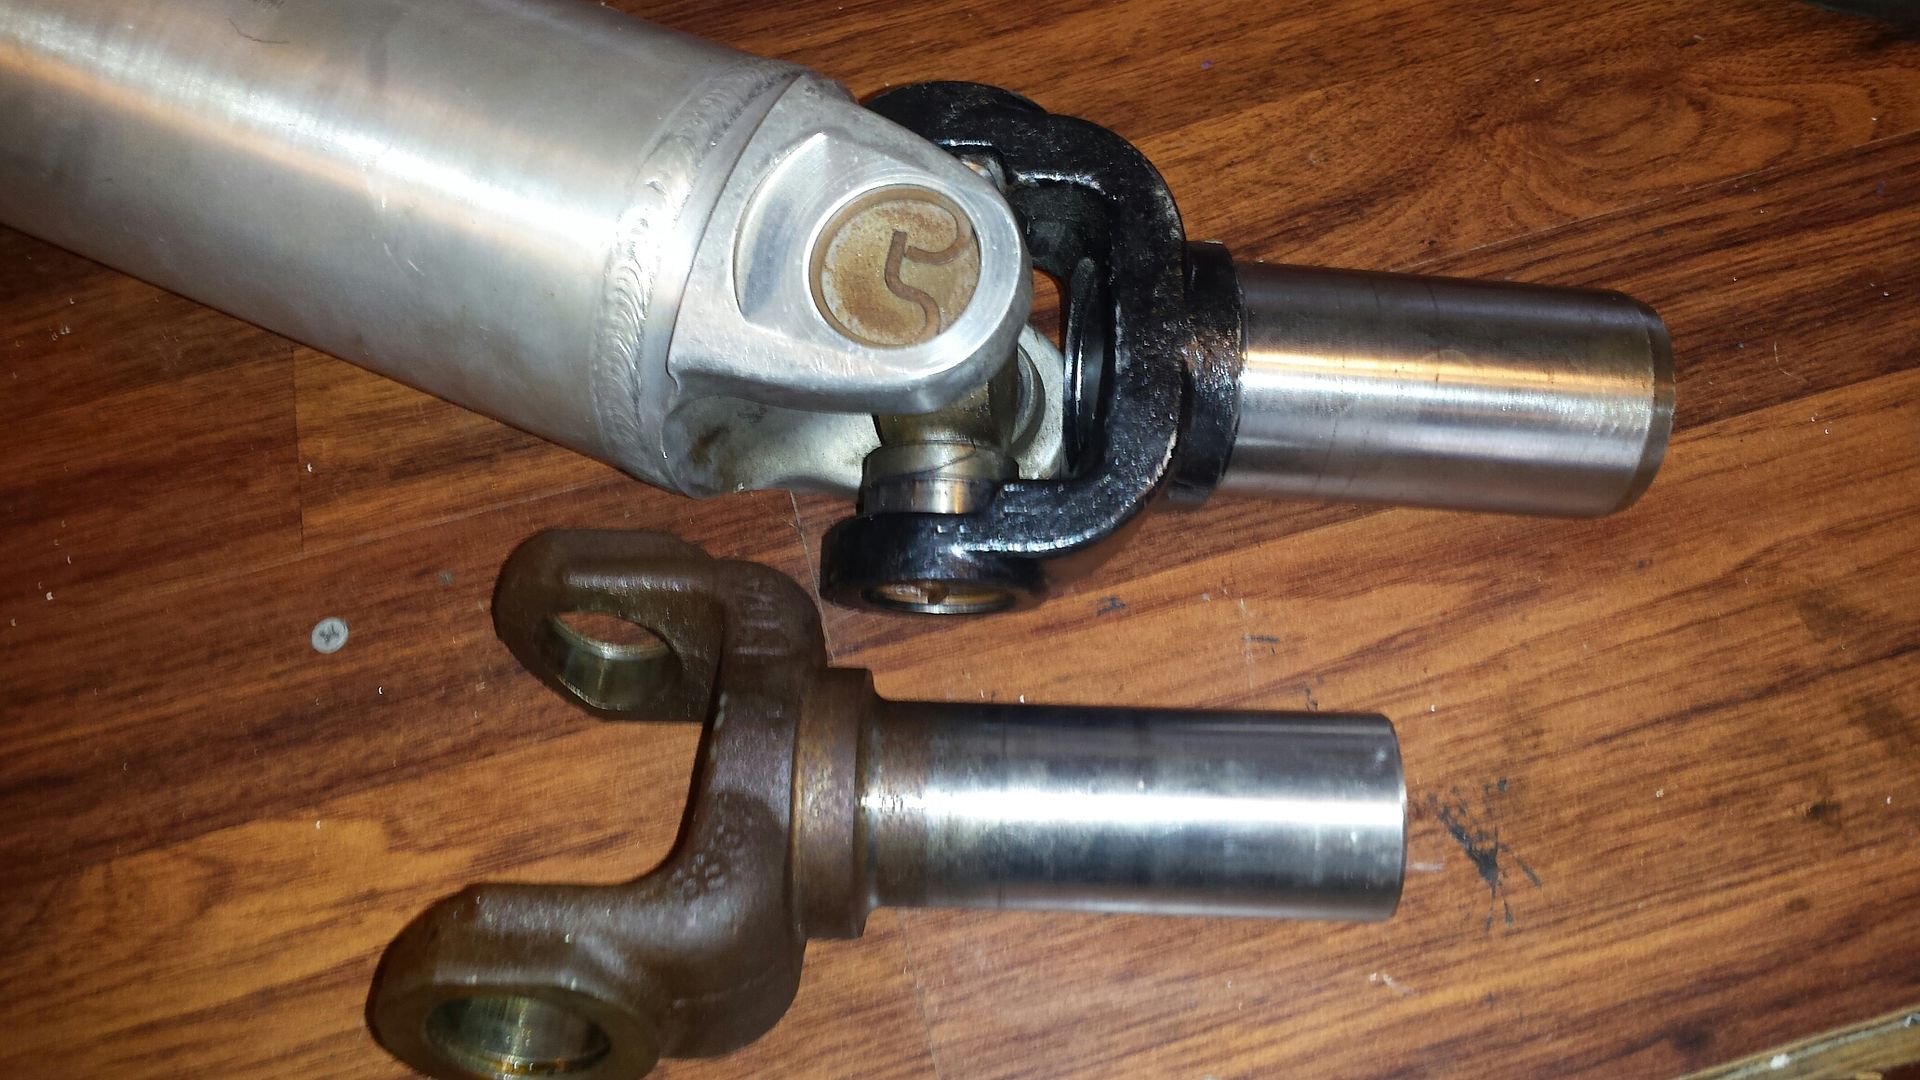
Here is the new PST forged yoke installed on my old DS, with the 4l60e yoke next to it for reference. Quick little mock up under the car seems its going to fit correctly.
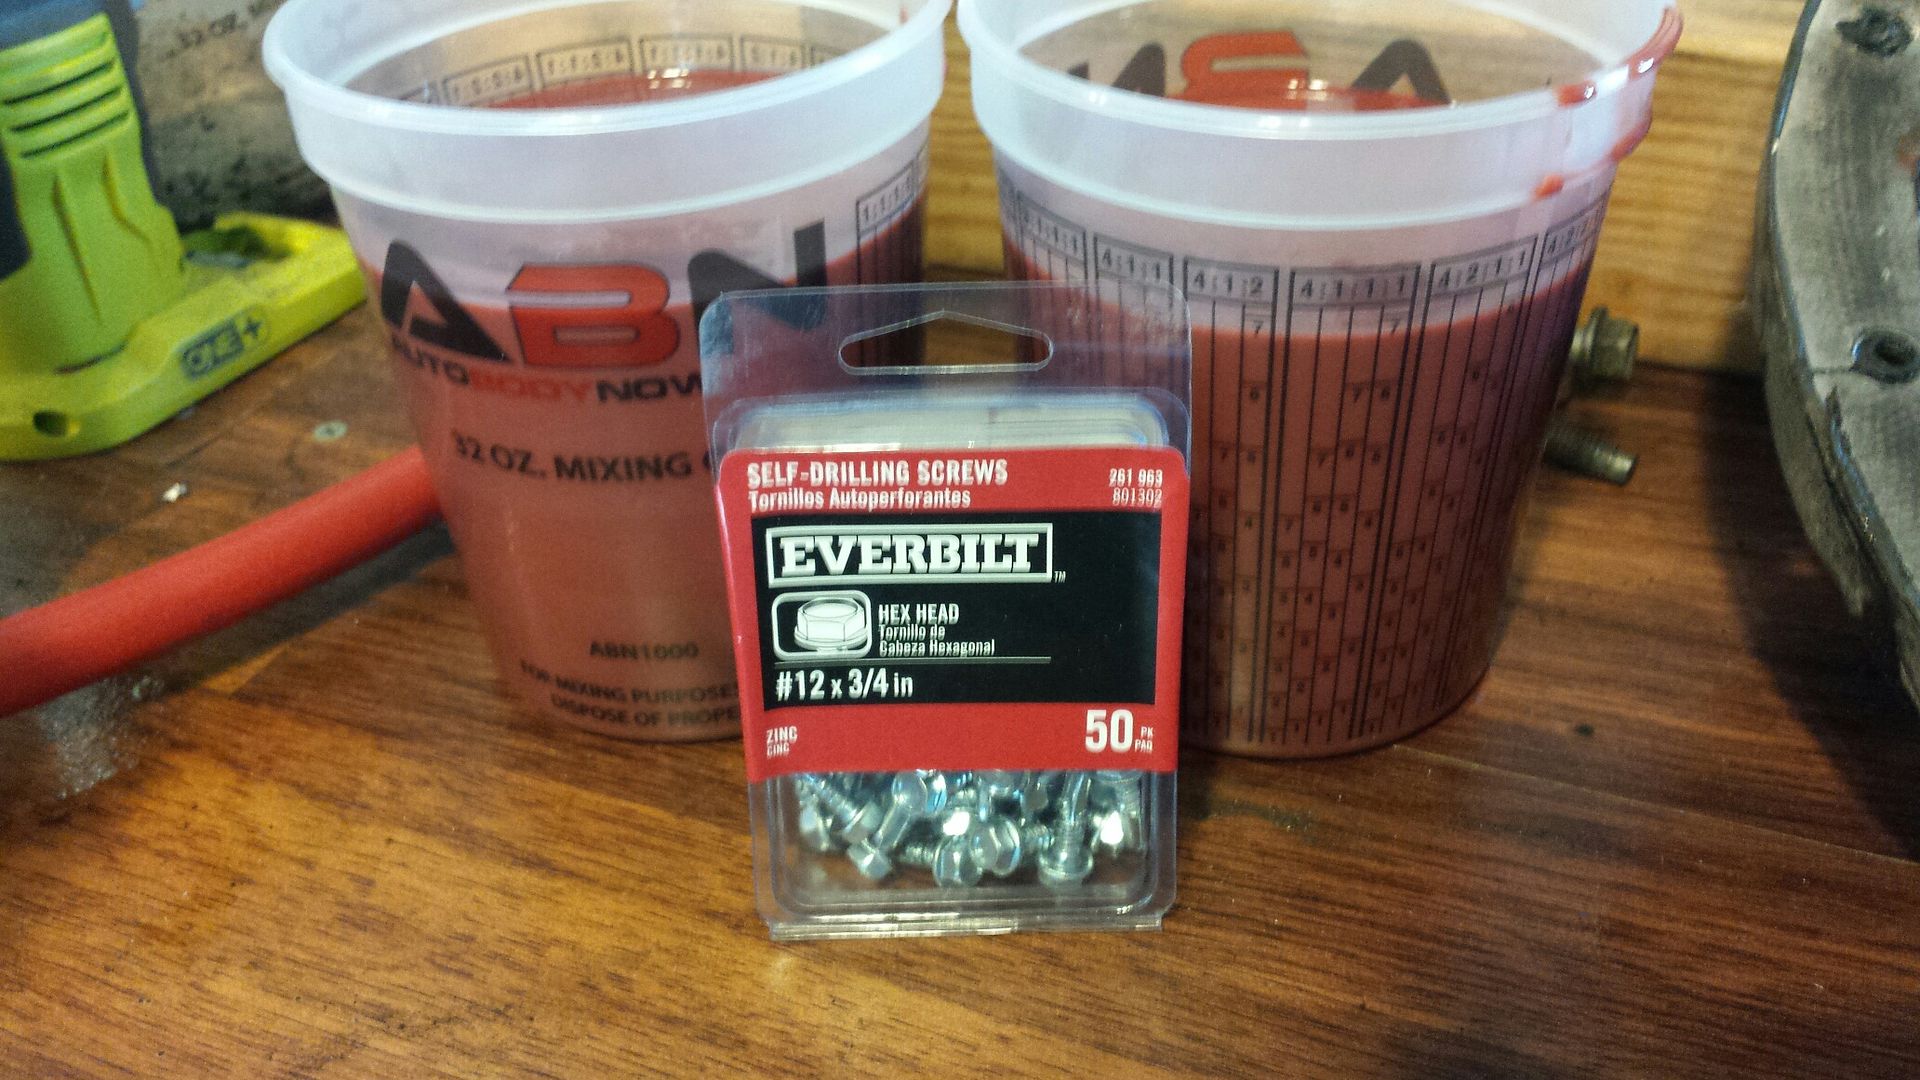
Went to home depot and picked up some screws that I think will work on the fuel line clamps, these should go right through the floor and hold well....but we shall see. Also, I drained the rear diff. That is redline shockproof oil I just put in it so I plan on reusing it since its $$.
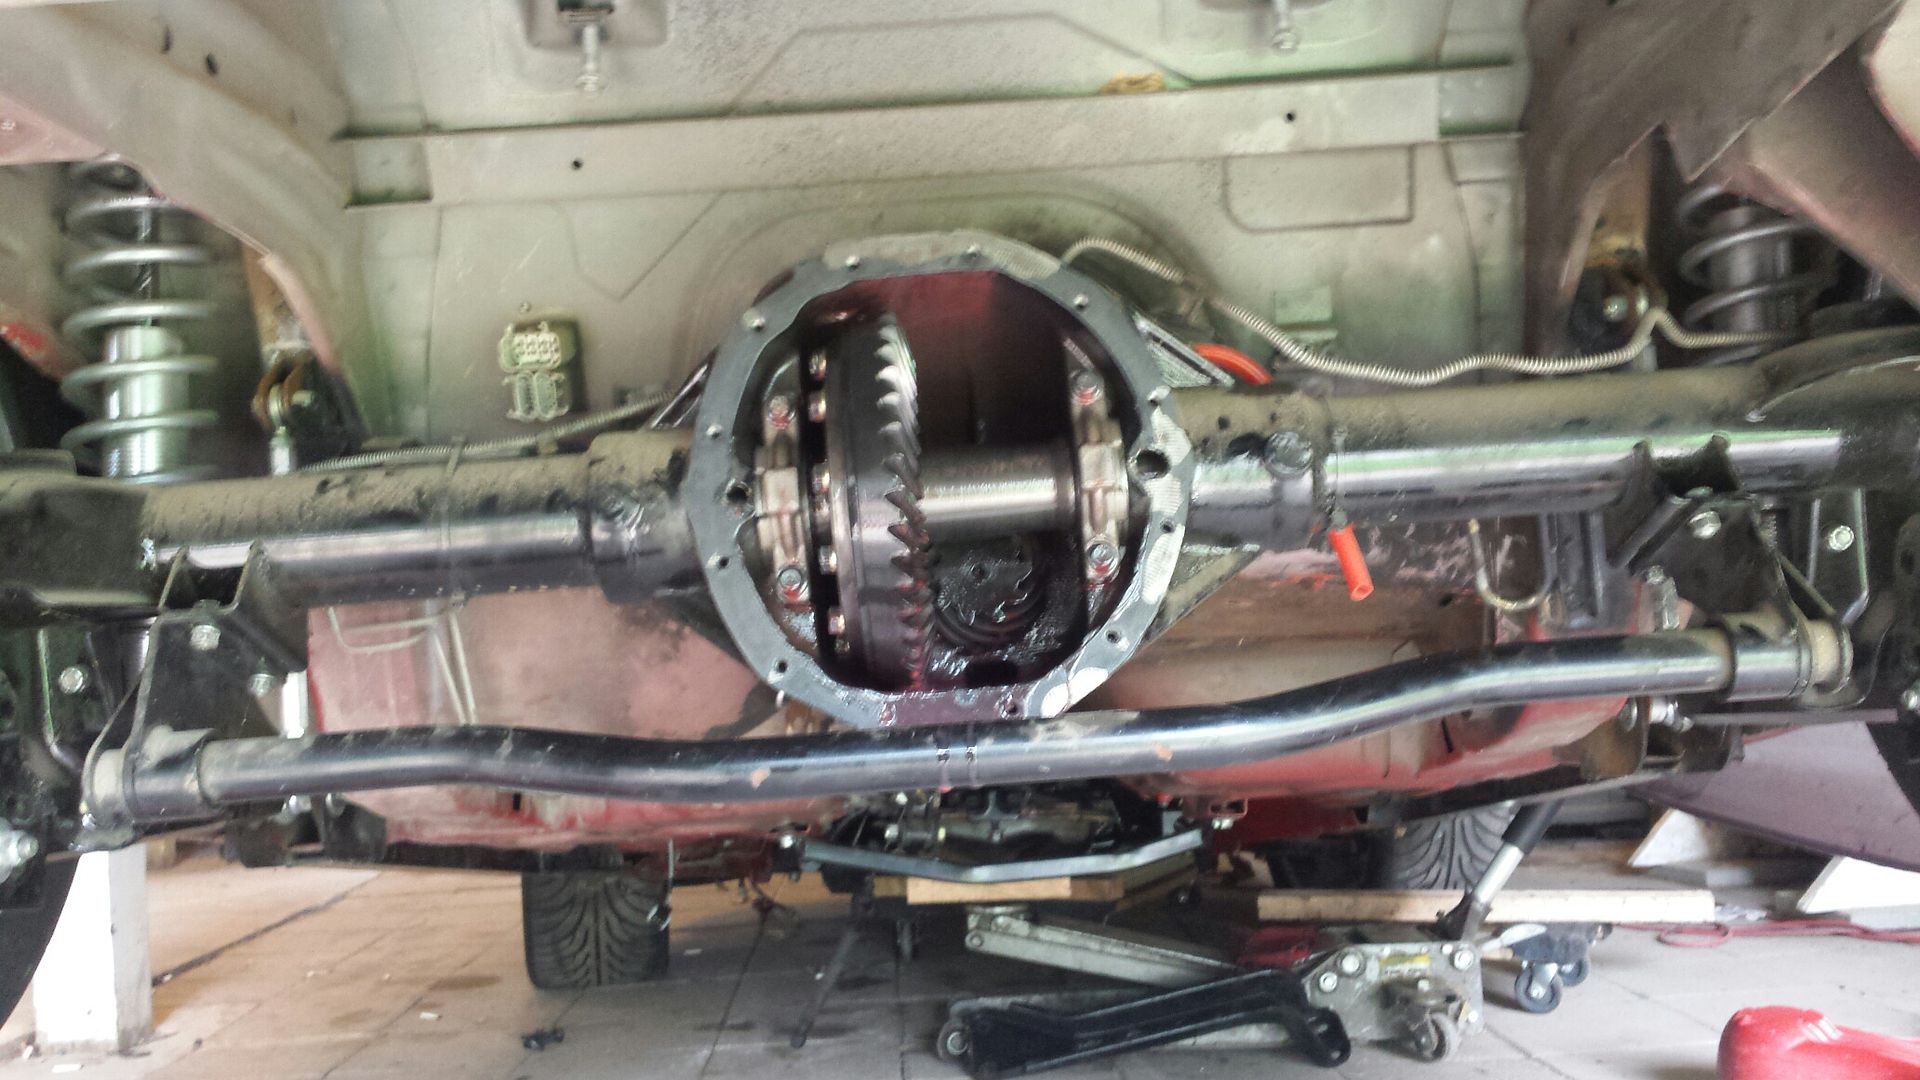
Here's where I stopped for the day. I also got the brake pedal rod installed, and adjusted so that I can go ahead and bleed these back brakes. Basically I am going to do a quick 4.10>3.73 gear swap. I had bought a new pinion seal but figured out yesterday I had no cover gasket and I'd like to replace the ring gear bolts, so I ordered those two things. Also, you can see the jack under the trans, the stock crossmember is nowhere close to working, and the rear oil port is almost against the floorpan in the tunnel. Since my cooler has 45 bends on it i ordered some 90s which will help, but Im still gonna have to alter the floor for the rear one and completely fab a crossmember from scratch. Stay tuned.

Stock bucket, and it has a Racetronix 255 pump installed. I had to remove the float assembly and transfer it to the dual pump setup. I was able to sell this locally on FB in like 4 hours!

Here's all the extra crap gone and the dual 450s installed. They were actually easier then I figured. This is basically ready to go back in the car.....but ah, not just yet, I've got something up my sleeve.

Here is the new PST forged yoke installed on my old DS, with the 4l60e yoke next to it for reference. Quick little mock up under the car seems its going to fit correctly.

Went to home depot and picked up some screws that I think will work on the fuel line clamps, these should go right through the floor and hold well....but we shall see. Also, I drained the rear diff. That is redline shockproof oil I just put in it so I plan on reusing it since its $$.

Here's where I stopped for the day. I also got the brake pedal rod installed, and adjusted so that I can go ahead and bleed these back brakes. Basically I am going to do a quick 4.10>3.73 gear swap. I had bought a new pinion seal but figured out yesterday I had no cover gasket and I'd like to replace the ring gear bolts, so I ordered those two things. Also, you can see the jack under the trans, the stock crossmember is nowhere close to working, and the rear oil port is almost against the floorpan in the tunnel. Since my cooler has 45 bends on it i ordered some 90s which will help, but Im still gonna have to alter the floor for the rear one and completely fab a crossmember from scratch. Stay tuned.
