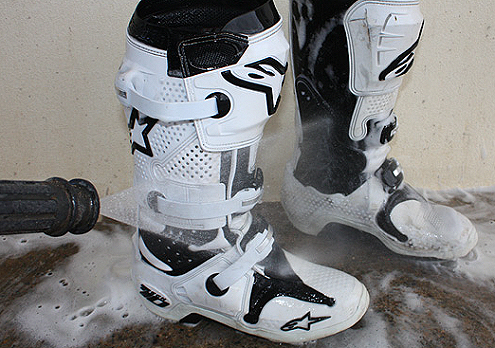
ATVC’s Ultimate Boot Cleaning Method Revealed

Generally speaking, moto boots are tough. Pretty expensive too. This is why keeping them clean and giving them a thorough inspection several times per season is always on your ATVC editors’ short list.
Throughout the years we’ve learned a thing or two about the cleaning process (some lessons the hard way, unfortunately). For the first time ever, we’re passing our step-by-step boot cleaning process.
Step 1: Timing
Believe it or not there is a perfect time to clean your boots and it has all to do with the state of the mud caked on them. Mud that is too watery tends to smear on the boots’ smooth surfaces and mud that has turned to concrete is all but impossible to remove. The perfect time is the in-between phase when it’s solid enough to come off in chunks.
Not to worry if conditions aren’t perfect- you can actually create ideal conditions either by letting them sit for a few hours after a sloppy ride or adding a little H2O from the garden hose to the concrete.
Step 2: Prep
Unfasten the buckles but leave the top (usually Velcro) gaiter closed. Next ball up a few plastic grocery bags lying under the cupboard and stuff them into each boot. How many you’ll need varies but the idea here is to make sure there are wadded up bags up the length of the boot, as close to the top as possible. These will act as water proofing for the boot interior.
Next tear off a nice square of cellophane (Saran Wrap) with which to pull taught across the top of each boot. Secure it with a rubber band around the still closed gaiter.
Step 3: Soak
Cover the exteriors with a nice even coat of water from the hose or pressure washer. High pressure is not necessary here. If your boots are particularly grimy or caked up, give a few squirts of a liquid degreaser like Simple Green or Greased Lightning and allow that to soak for 10-minutes. When you return, much of the much should have run freely onto the ground around your boots.

Step 4: Blast
Now feel free to apply some water pressure around the boots’ exterior, working the buckles & closures, outsoles and uppers.
Step 5: Inspect
You may actually be just about done here. If performed regularly, the soak and blast phases will likely have done the job. If that’s the case skip right on to step 7.
Step 6: Fine Detail
If your boots are still grimy or holding reservoirs of dirt in the cracks and crevices; time to grab an old toothbrush and some liquid dish soap. Brush hard to reach areas and stubborn spots then follow with another blast from the hose/ pressure washer to rinse away the soap.

Step 7: Dry
Remove the cellophane and plastic bags and if possible hang your boots upside down in as well ventilated an area as possible. Avoid leather-damaging direct sunlight.
Step 8: Treat
Most riders will be done with this process at the drying phase but those looking for maximum attention to detail before a big race (or those looking to make less work for themselves during the next cleaning) can now apply a good leather treatment to the boot exterior (or in a pinch, a wipe down with catcher’s mitt oil) and ArmorAll to the plastic bits. Finally a touch of WD-40 on the closures, fasteners and buckles will assure any water you may have forced in there can do no harm.

