ATV Tech – Changing Tires
Be Not Afraid
by Jason Giacchino
Like any machine with tires, the day is inevitable where you will have to perform a little maintenance on your ATV’s rubber. The good news is that the process should not be feared. Any backyard mechanic with a bit of skill and a few simple tools should be able to tackle the job in an afternoon’s time.
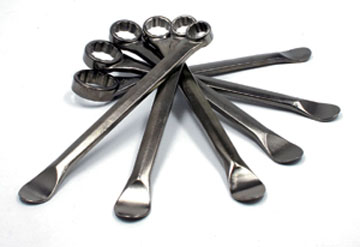
In this article we’ll break the process down into simple, manageable steps from start to finish. Sit back with a cup of coffee and have the tire irons at the ready.
REMOVAL
Step 1: Remove/ Deflate
Remove the wheel, tire and all, from the vehicle. We often find it easier to remove the valve stem core for instant deflation of the tire once it’s off the machine.
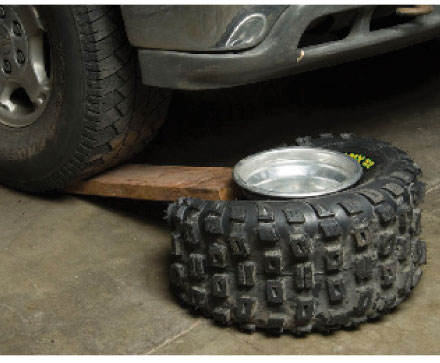
Step 2: Break that Bead
This step can be accomplished multiple ways. Dedicated bead breaking tools exist for the task but we’ve also had great success doing it the backyard engineering way: By placing the rim on a smooth flat surface, placing a 2×4 against the outside of the rim (where it meets the tire) then slowly driving your pick-up truck up the 2×4.
Step 3: Lube Job
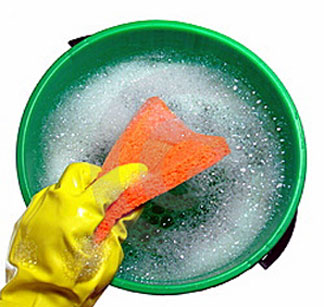
Apply soapy water along the area around the bead/ rim to help the tire to come off the rim more easily.
Step 4: Irons Man
Slide the curved end of your tire irons under the edge of the tire. Press down on the tire irons to stretch the edge of the tire over the lip of the rim and then rotate the irons around the rim until the inside of the tire is completely up and over the rim’s lip.
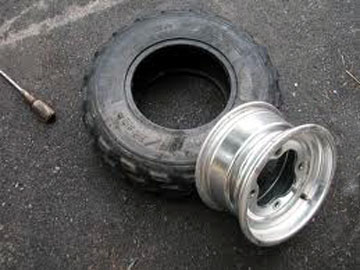
Now stand the tire on its side and repeat the approach to the other side of the wheel. This time the tire should come completely off the rim as you’re rotating your tire iron around the bead.
Naturally repeat this process for as many tires as you need changed.
REMOUNTING
Step 1: Back to the Soapy Water
Slime the inside lip of the new tire. Now work a portion of the edge of the new tire around the rim. Slide a flat blade screwdriver between the tire and rim and use a tire iron to pull the remaining lip of the tire onto the rim. Essentially the reverse of taking the old tire off.
Step 2: Patience
Working the tire around the rim can be a bit tricky, but take your time, keep the area you are about to stretch around the rim well lubricated with soapy water and let the tire irons do the work for you. Naturally both sides will require that you wrap the tire completely around the rim before inflation.
Step 3: Take a Seat
Seat the bead of your freshly mounted tire by adding air from the compressor without replacing the valve stem core. How will you know when you’ve succeeded? You should hear two pops: one for each side of the tire as the bead seals to the rim.
Detach your air hose and don’t fret about the air rushing from the yet-open valve stem. This should not affect the bead.
Step 4: Replace & Fill
Screw the threaded valve stem core back into place and inflate that tire once more, this time to the proper air pressure.
Reinstall the tire/wheel to the ATV and begin the process with the next tire on your agenda.