Pro Fab Timing Chain
| Pro Fab ATV
Heavy Duty Timing |
 |
 specialize in upgrading thumper Honda ATVs, building anything from play engines to full race engines. Pro Fab ATV also sells a variety of performance parts and accessories for your ATV. When speaking with Scott about our 426EX-engine kit, he informed us of a new heavy-duty timing chain that is available for a 400EX. Being an expert in Honda modifications, PRO FAB ATV told us that a 400EX timing chain has a tendency to stretch, especially with motor modifications. However, there tends to be a road around every obstacle in the path of ATV performance modifications. Thus, swapping in an extra heavy-duty timing chain in the 400EX motor would be the solution to any reliability concerns. In the paragraphs below you will find information guiding you through the installation steps for installing a timing chain in a do-it-yourself fashion.
 The new timing chain for the 400EX from PRO FAB ATV is an extra heavy-duty timing chain. It measures to be roughly an extra 1/8-inch thicker in size when compared to the stock timing chain. 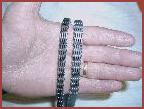
The installation process of the heavy-duty timing chain requires some allotted free time to do, so do not plan this installation the morning before a ride or you will be spending your riding time in the garage. First remove all plastics, gas tank, and heat shield for
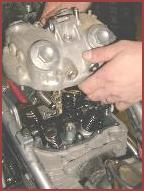
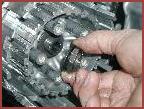
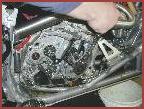
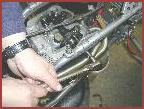
Return to the bottom end of the motor, take out the 10mm bolt holding the left timing chain guide (black), and slide out the guide. Remove the upper timing chain sprocket from the chain, and partially lowe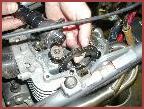
 the middle. Loosen the two bolts to increase slack in the timing chain, and slide the sprocket on the camshaft. Insert the two 6mm alan bolts in the sprocket, and then tighten the two timing chain tension bolts back into place. Begin installing all the parts you removed in an order of last off, first on, using the removal process paragraphs above as your reference guide.
Although the time consumption for installing Pro Fab ATV’s heavy duty timing chain may require you to sacrifice the duration of a few afternoon or evening hours to complete. Even more difficult, getting a partner to help you with an extra set of hands (which are always welcome when doing motor work) proves to be well worth the time expense. Our past six months of grueling evaluation time spent upon our higher compression 426ex, tested everything from MX races, hare scrambles, wide open throttle drag races, and local trail system joyrides. When the heavy-duty timing chain under went examination, its status of heavy-duty deemed to be tried and true, showing no signs of wear or tear from the added horsepower and abusive riding it has been subjected to. If you were planning on equipping you 400ex with a big bore kit, we would recommend installing this heavy-duty chain from Pro Fab ATV at the same time while the motor is already apart to save some time. Otherwise any time is just as good as the present to swap in the HD chain and have a safe assured piece of mind, knowing your motor’s non visible vitals are protected from harsh treatments that may arise internally, preventing a great day of riding.
