Project Sandtrax Set
(Page 3)
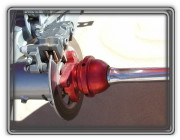
 We used a stock swingarm (’86 length, powdercoated silver) with a tapered bearing carrier and a LoneStar +4 axle with stock hubs. DeRisi Racing sent a red anodized aluminum brake hub/lock nut. This holds the Braking USA solid brake disc (with CM44 brake pads) secure along with eliminating the need for the huge wrench required to remove the stock axle lock nut. Simply tighten this locknut by hand and then use an Allen wrench to lock it into place. Very easy!
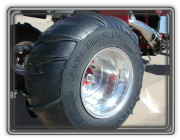
To keep this quad ‘scooting’ over the sand we chose Sand Tires Unlimited’s superior line of sand tires. For the front we chose RazorBacks which are made of a high quality rubber. These tires are lighter and wider than the cheaper imitations. In the rear we are using comp-cut Desert Mini Trak’s. Comp-cutting shaves the hull of the tire from 4 ply to 2 ply and takes about half the original weight off the tire. The paddles are then stagger cut to provide excellent turning ability along with decent ‘holeshot’ hook-up. We got ours from Joe at Fullerton Sand Sports. He is one of a handful of people who can properly cut these tires.
When not in the dunes we use ITP HoleShot XC tires on all 4 corners. Mounted on heavy duty ITP rims, the HoleShot XC’s hold up great to the abuse the desert can dish out while providing great traction.
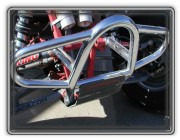
 Bumpers were another hard decision. We wanted it to look good as well as do their job. In the front we chose a chrome Ricky Stator desert bumper. This not only looks good but it also provides enough space to put a 2-quart jug of gas between the bumper and the frame for those extra long dune rides. We went to Home Depot and bought 4 basic metal caps that are used in bathrooms and inserted them over the bolt holes for a clean look. For a rear bumper we chose a standard 6-pack rack. The 6-pack rack is another must have in the dunes. You can carry a cooler with ice-cold refreshments or even extra gas for the extra long dune rides.
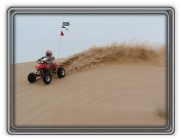
In the dunes it is a requirement to have a flag/whip. We contacted Gecko Glow whips for one of their all-new fully lighted whips. It is made of clear acrylic with a flexible light stick in the middle that runs the full length of the whip. It also has a steel cable that attaches to the top of the whip and the other end to your rear bumper. This is to keep the flexing of the whip backward to a minimum in heavy whoops. We were unsure how this would hold up but it held up incredibly well. The cable really helped control the whip from flexing backwards. We soon found out that when you get stopped dead in your tracks from hitting a witches eye (nasty hole on the backside of razorbacks that seems to pop up out of nowhere!) that this whip will flex forward too much and slap you on the helmet and then promptly break! We suggest that 2 cables be used to keep it from flexing forward as well as towards the rear. We ended up using a Buggy Whip. It is a very thick fiberglass flagpole with a light bulb at the top.
We topped it all off with a seat cover and carbon fiber accessories from Quad Tech ATV. The carbon fiber tank cover along with the custom seat cover really add that extra appeal to any quad. Using Quad Tech’s carbon fiber full glide plate works excellent in the sand. Your frame will drag in the sand while cresting razor backs in the dunes. With this glide plate it allows the quad to ‘glide’ over the razor back rather than digging in and slowing you down. See the full article for more details.
Rebuilding an ATV from the frame up is a great learning experience. If you have the time we highly suggest doing this to your ATV!
See you in the dunes!
