
SS Camaro - Track trips, build pics etc.
#111
 07-23-2018 | 07:56 AM
Thread Starter
|
Pro Rider
Joined: Aug 2010
Posts: 230
Likes: 0
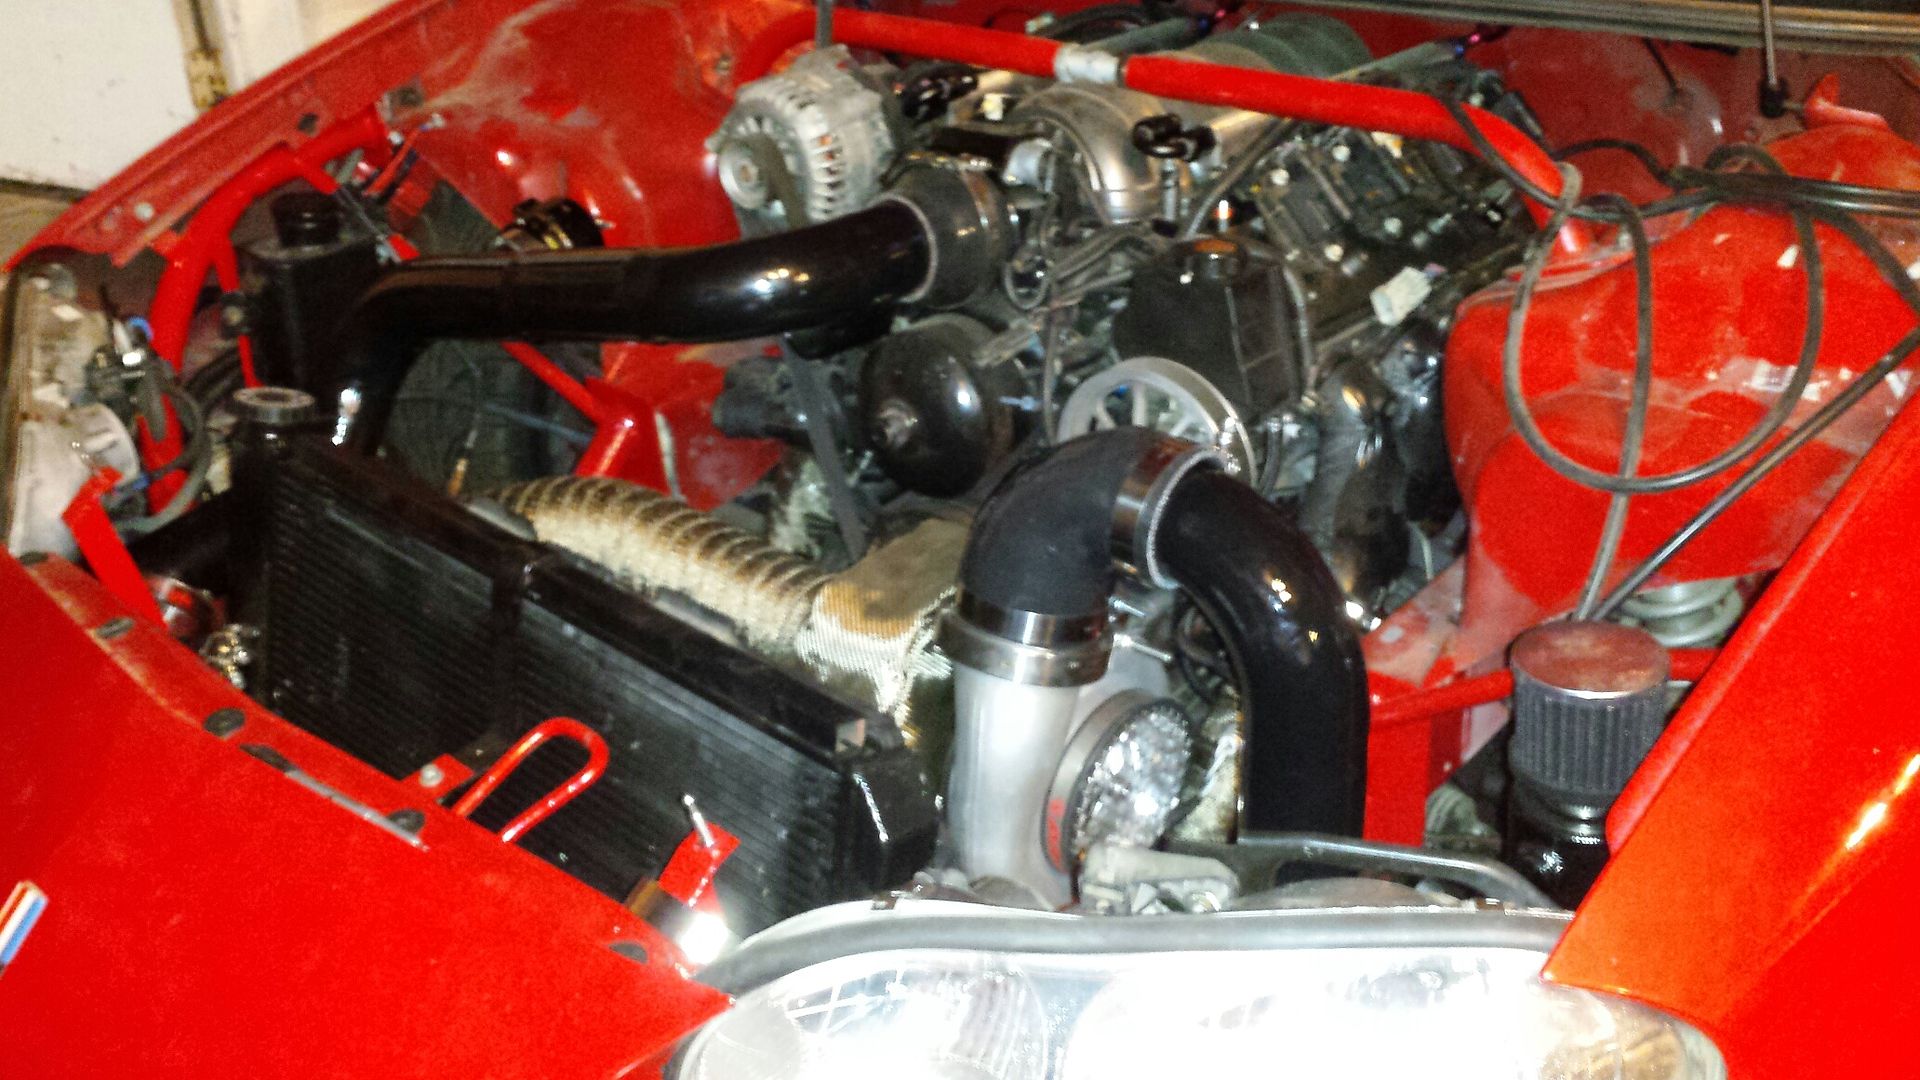
Bought a box of generic intercooler piping off ebay.
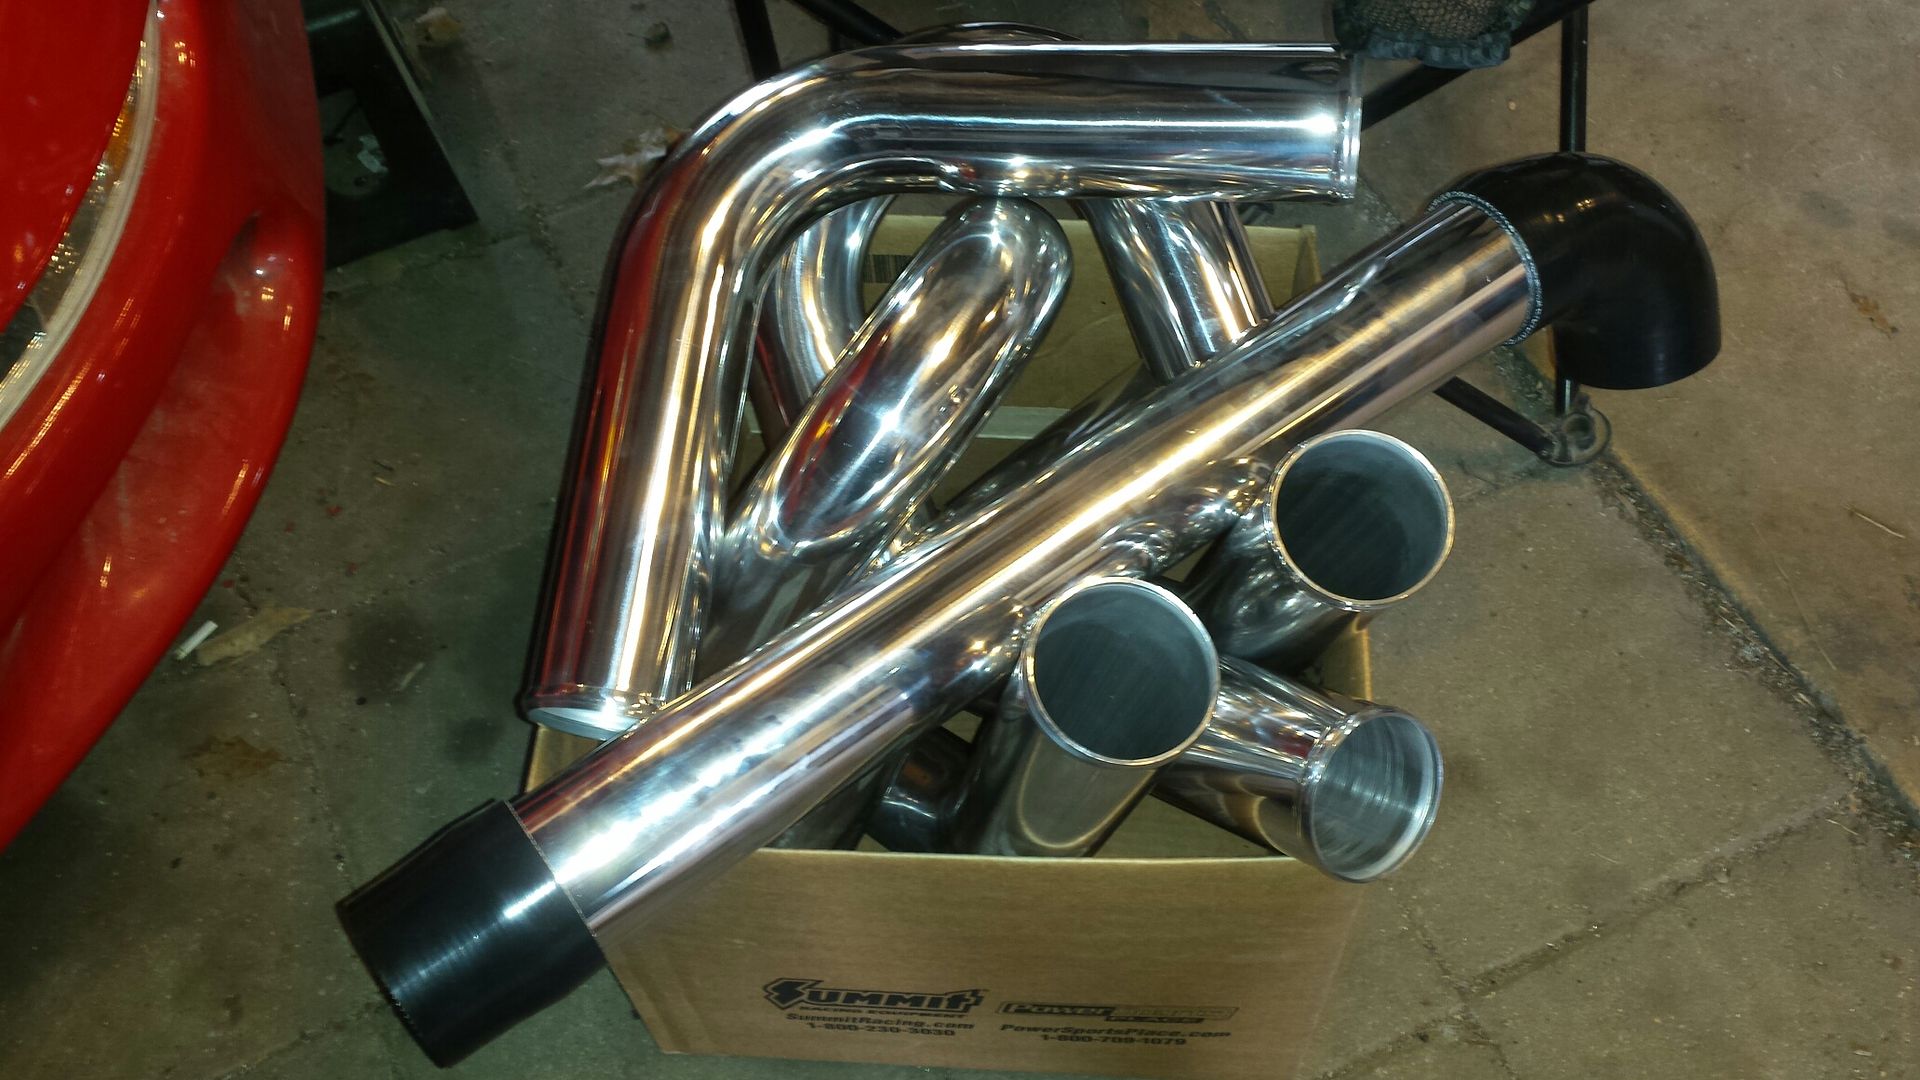
The goal is to have one solid piece from turbo to intercooler, then from intercooler to throttle body. Mocking the first piece up.
Woulda been nice if i could have pointed the turbo another direction but it didnt work out that way. Really didn't want silver piping this go round either so i decided to paint it.
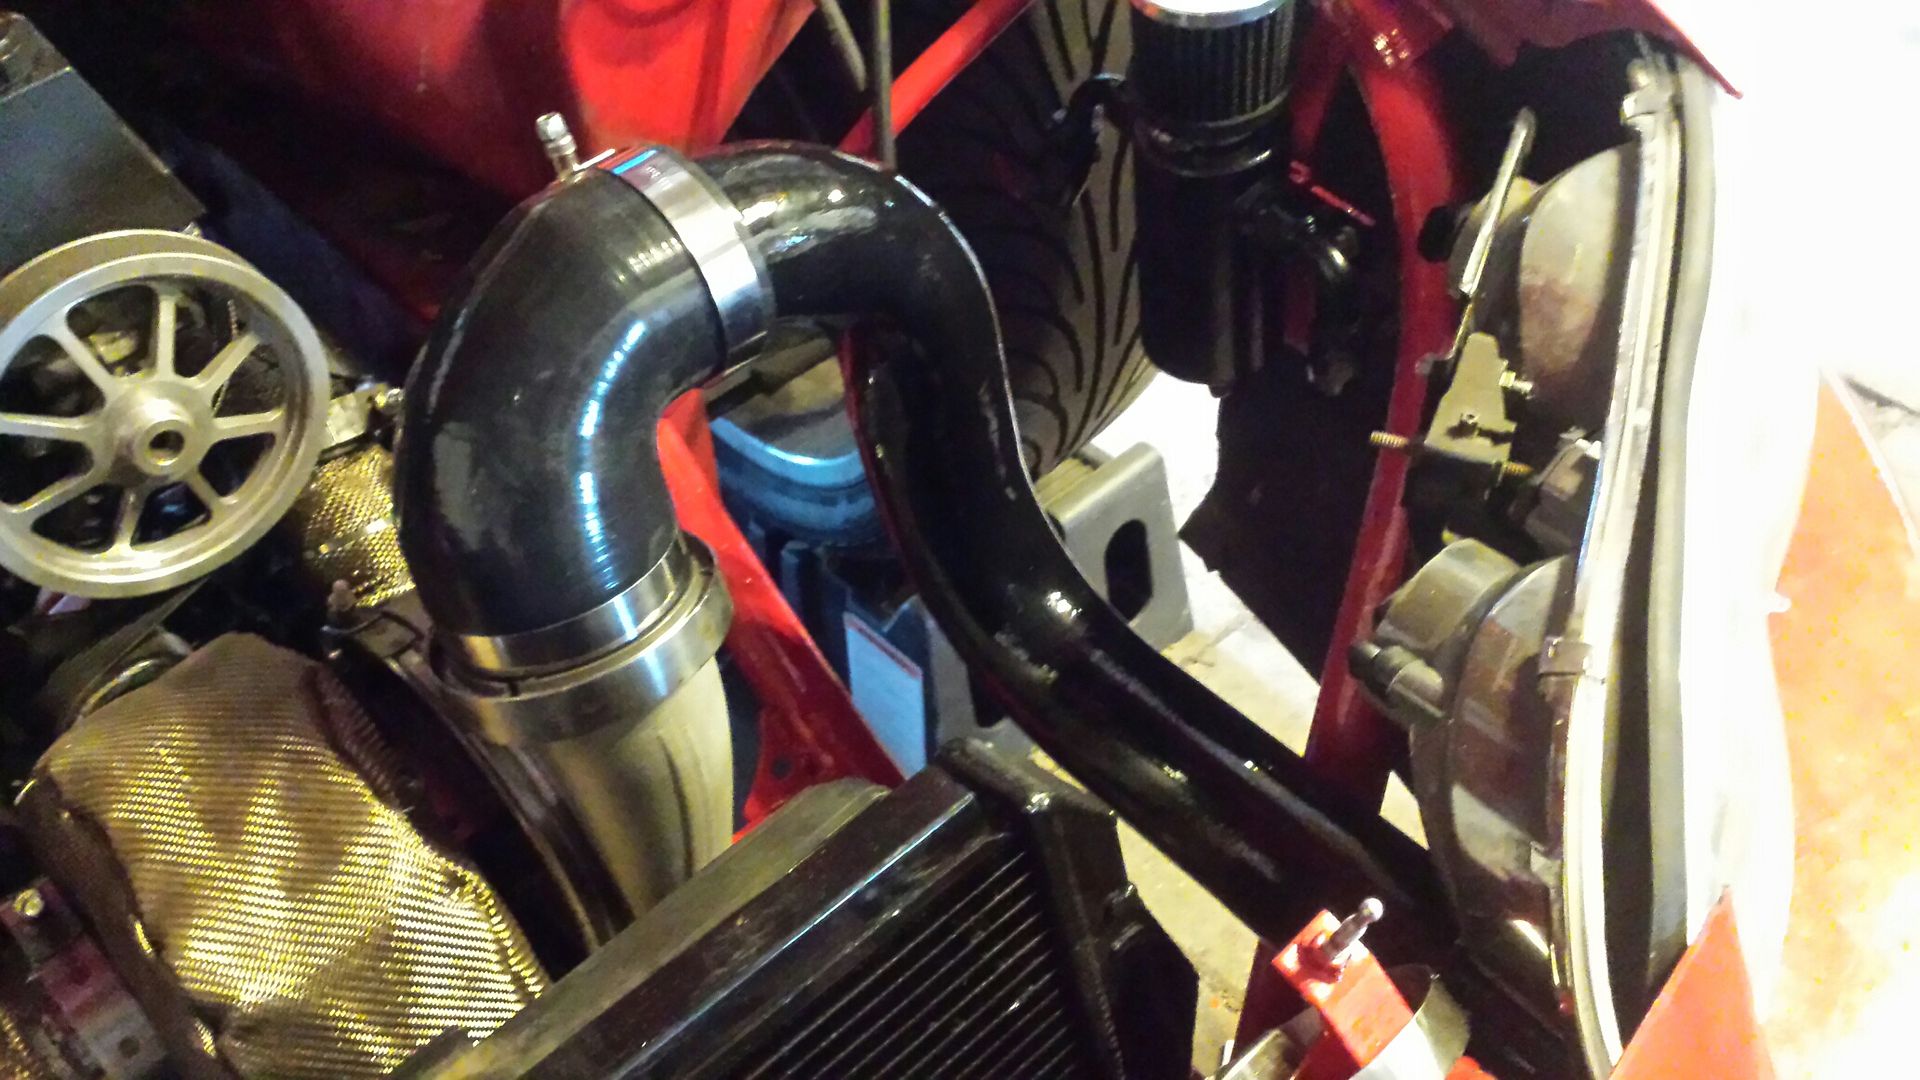
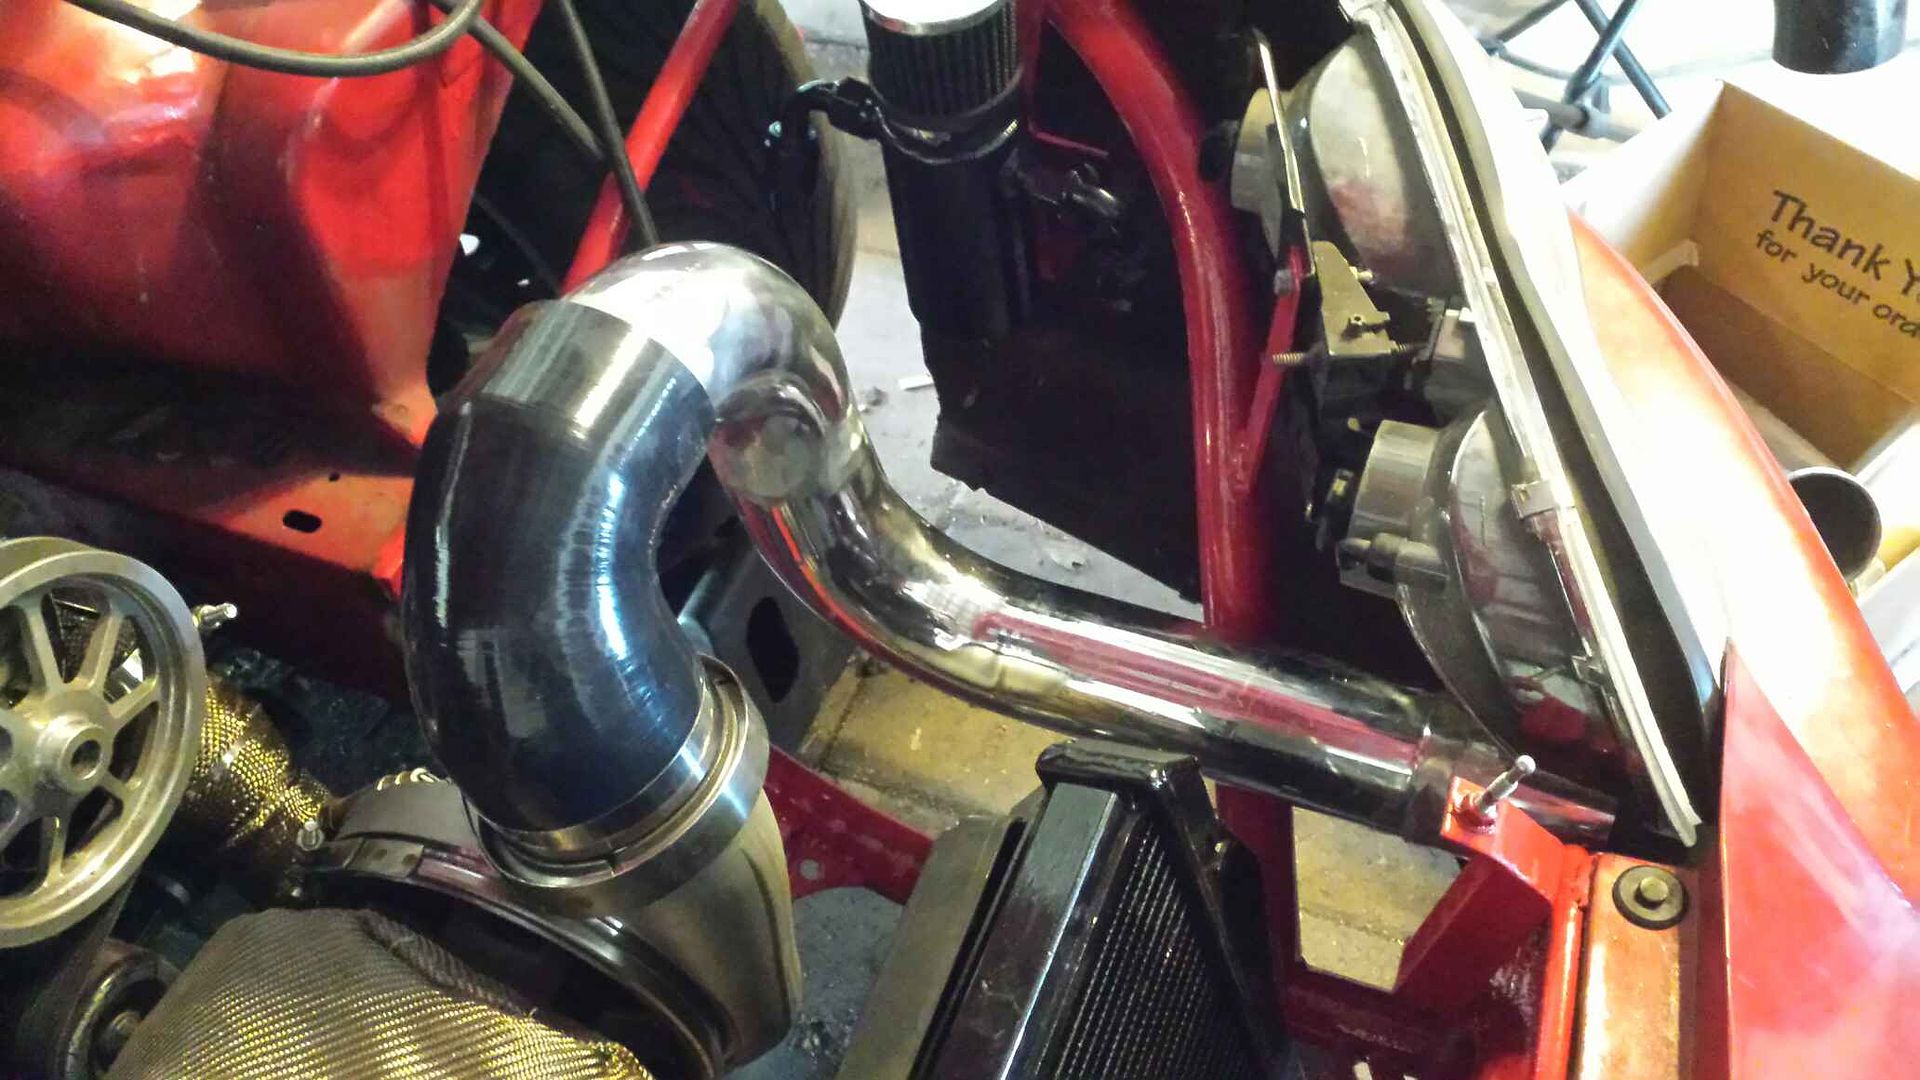
And through the magic of the internet we have a cold side!
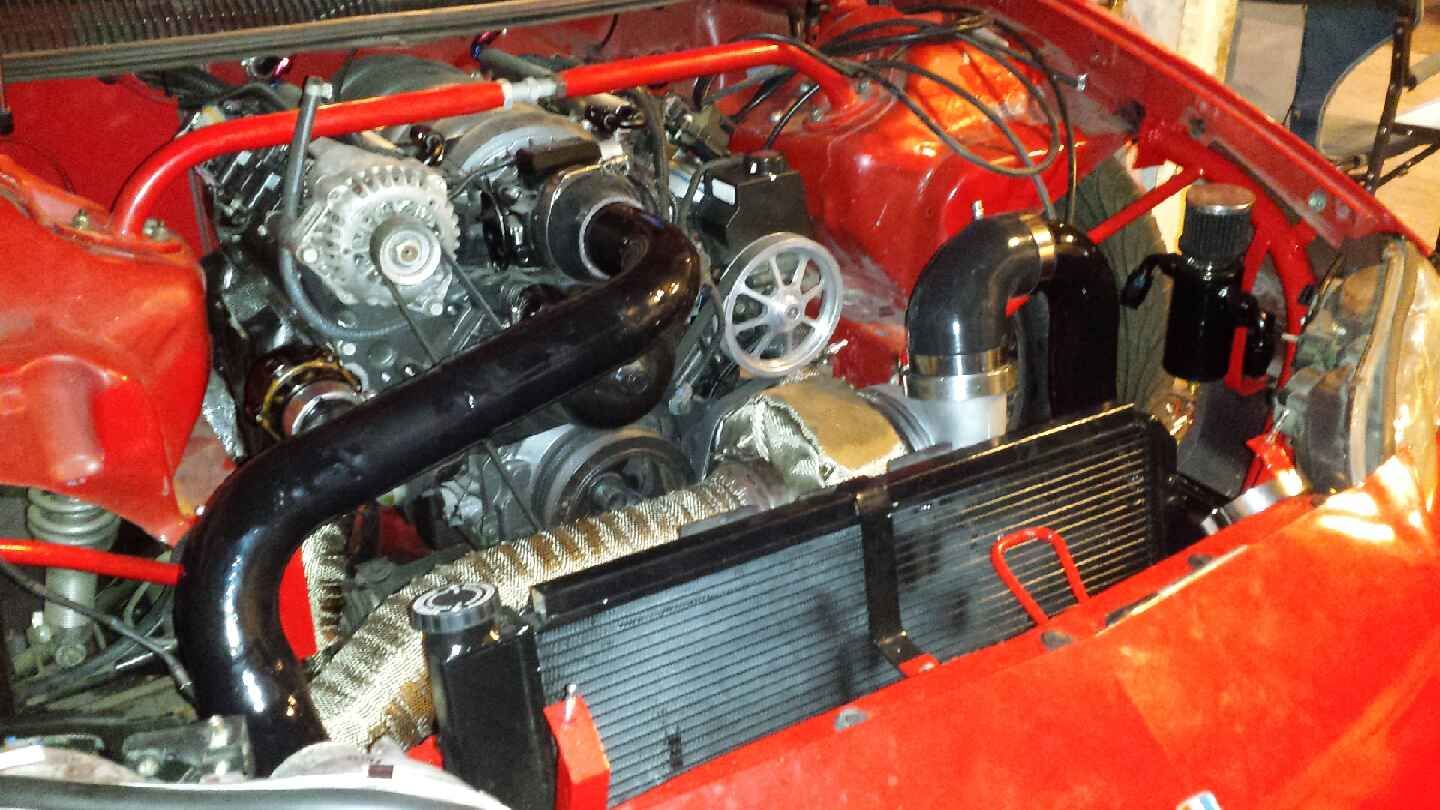
Overall I'm pretty happy with it considering i didnt really know what i was doing.
So the cage has fixed door bars. If you have a really good memory you'll remember i posted a pic of some very nice billet swingouts. I need to cut the fixed bar down to a length that it fits with the swingouts on the end. I ended up with a total length of 53.5"ish.
Once one swingout end is on, level it, then level your second one before you weld. You want them perfect so it doesn't bind when trying to come on and off the upper clasp.
Turned out pretty good I think.
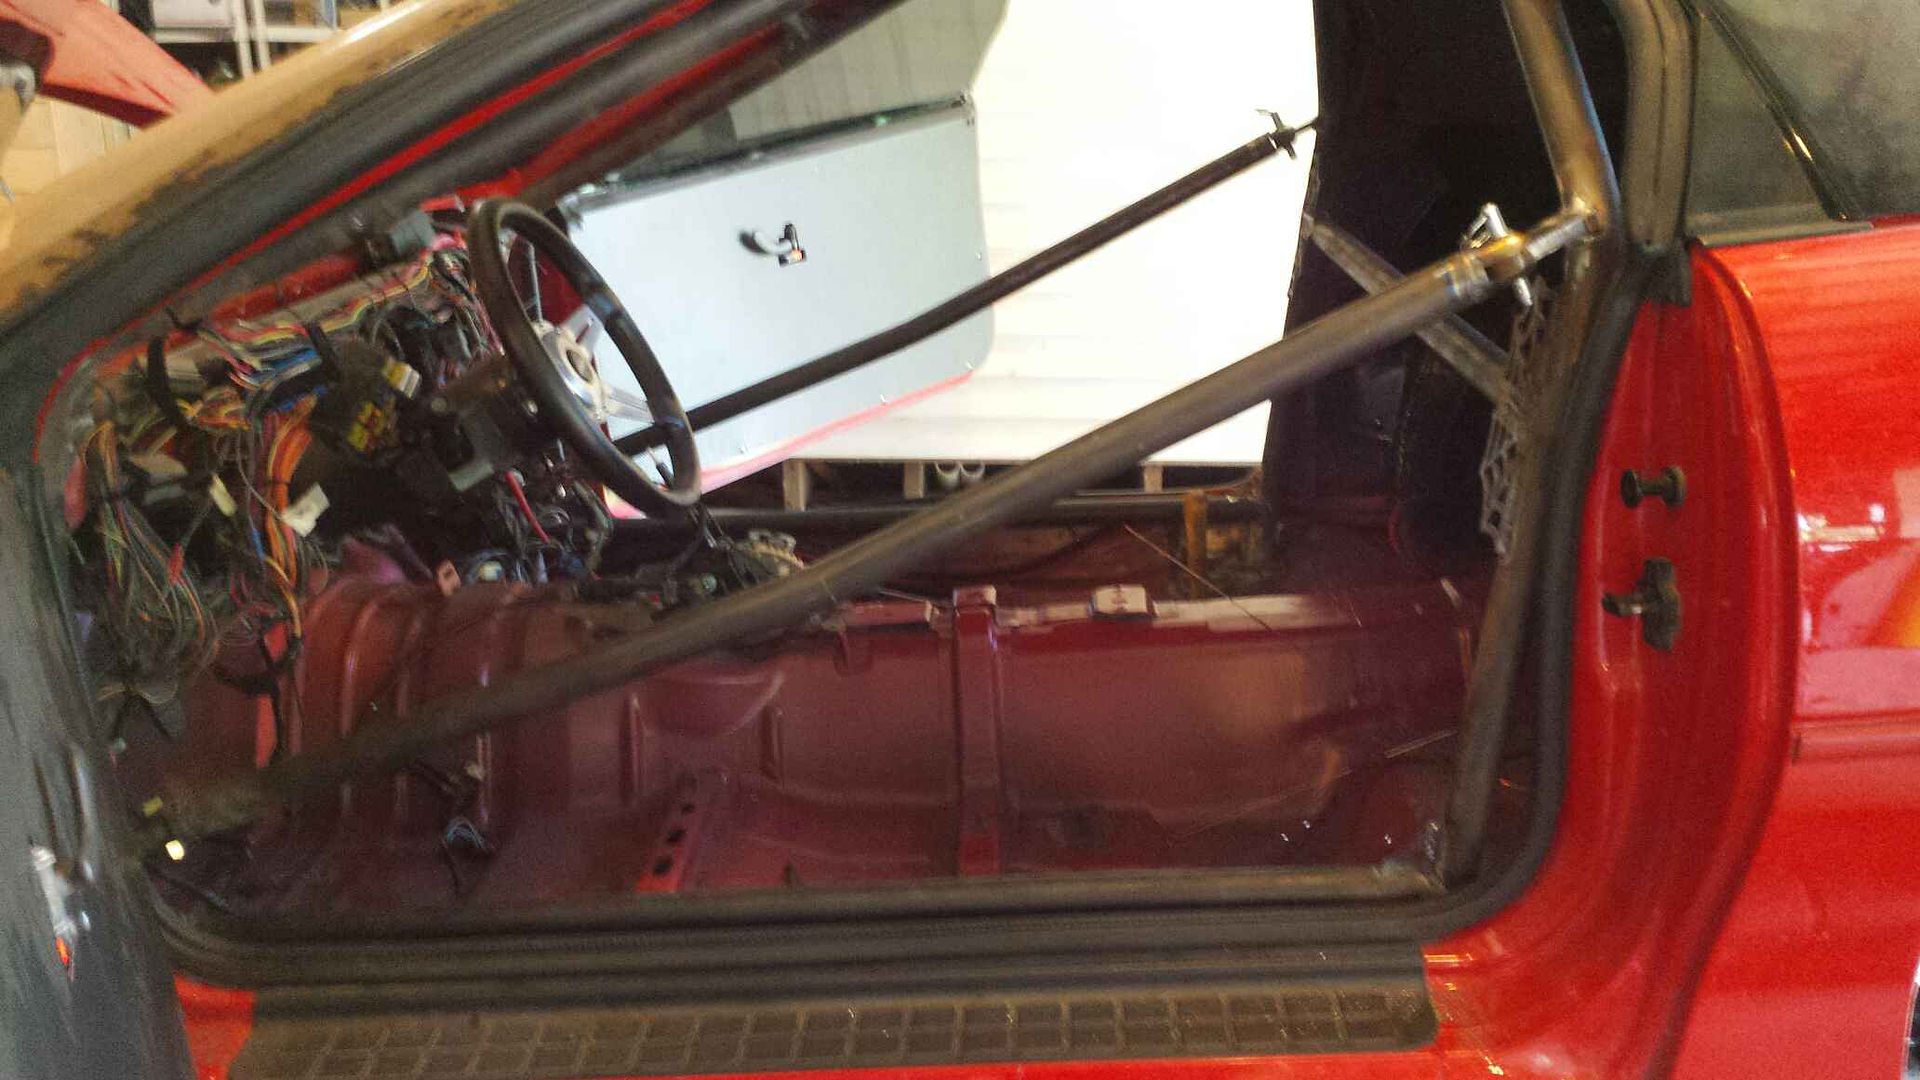
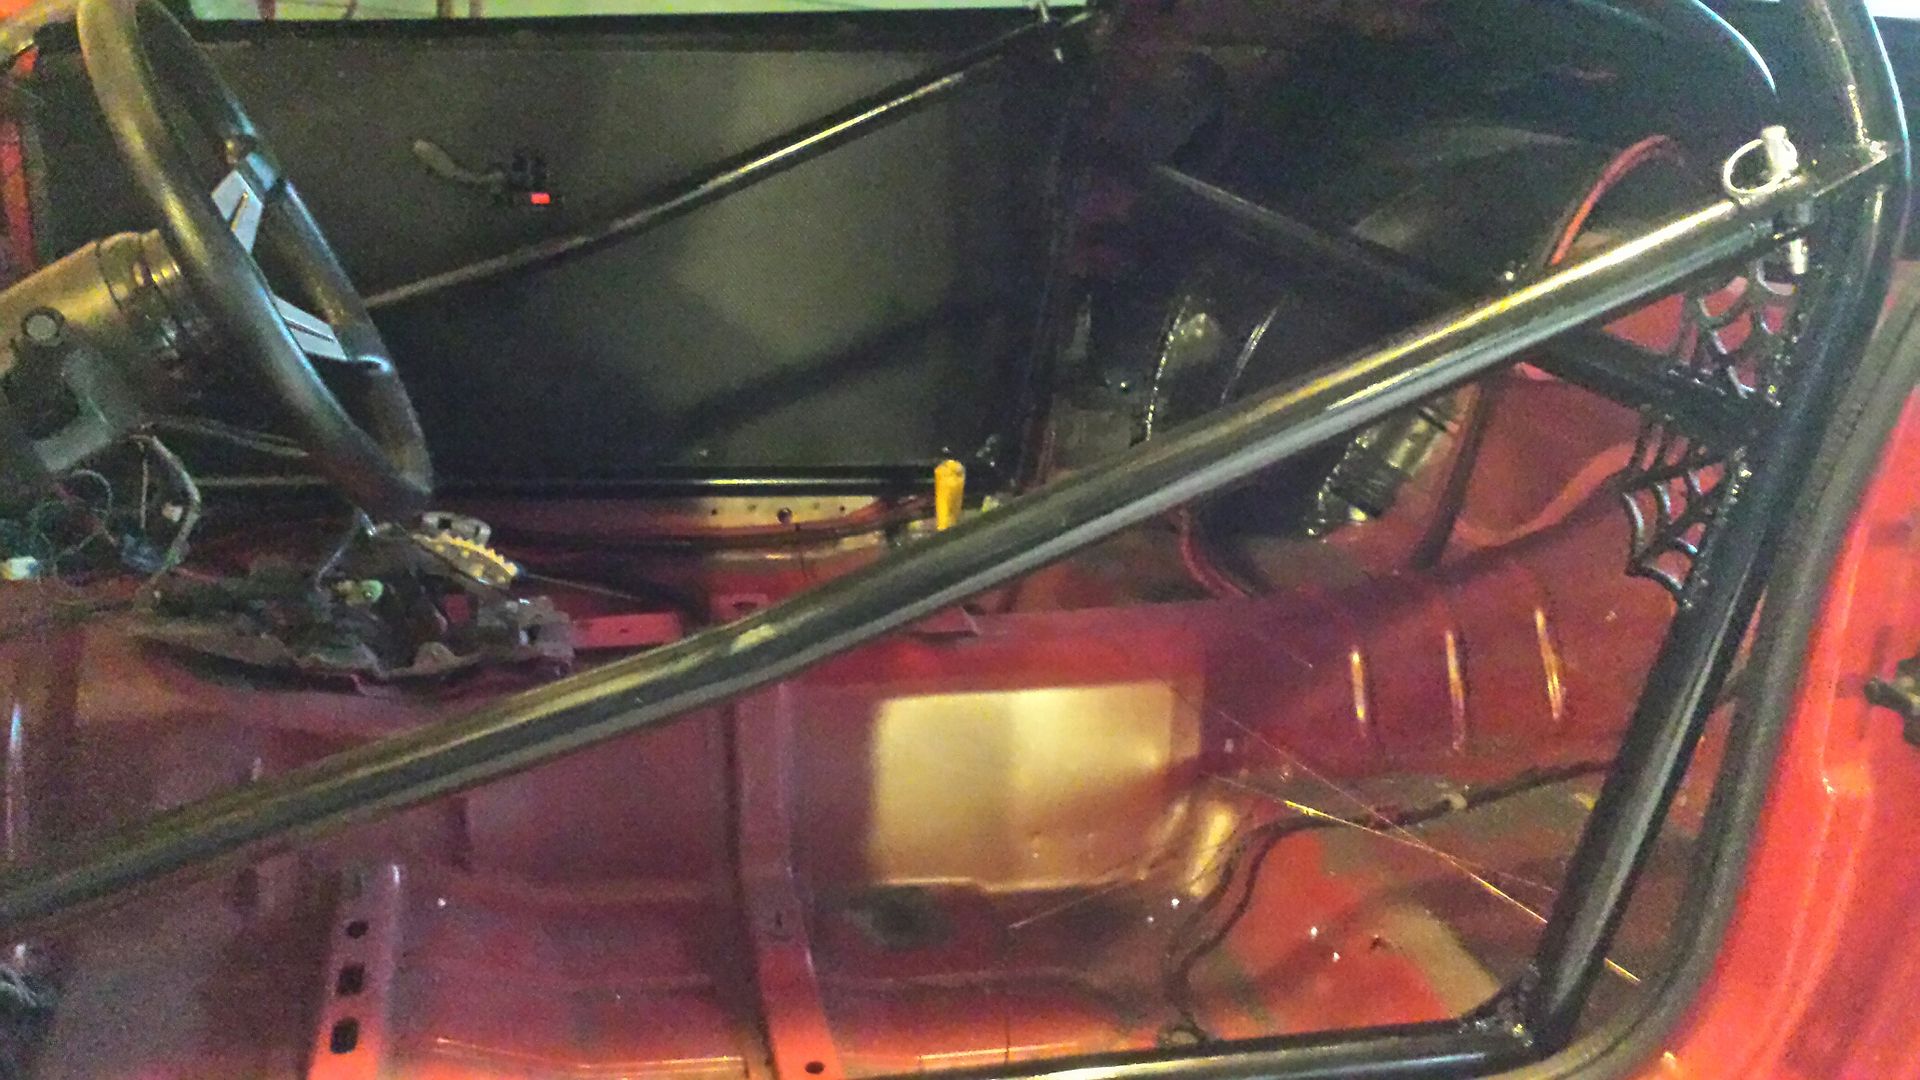
I do still have a tiny bit of welding to do but not in the door areas so i decided to start on paint. Seems easier to do it in sections and let it dry rather then trying to get the whole thing done at once. Also, if you notice the way i positioned the bars, they are slightly bent from Wolfe. They position the bend to come inward away from the door to clearance the stock door panel and armrest. Since I have flat door panels I decided to move the bend for max elbow room. I decided to put the bend in a way that reminded me of the low slung door bars, mostly cause i like the way it looks. You can also see where it hits in relation to the door handle.

The goal is to have one solid piece from turbo to intercooler, then from intercooler to throttle body. Mocking the first piece up.

Woulda been nice if i could have pointed the turbo another direction but it didnt work out that way. Really didn't want silver piping this go round either so i decided to paint it.

And through the magic of the internet we have a cold side!

Overall I'm pretty happy with it considering i didnt really know what i was doing.

So the cage has fixed door bars. If you have a really good memory you'll remember i posted a pic of some very nice billet swingouts. I need to cut the fixed bar down to a length that it fits with the swingouts on the end. I ended up with a total length of 53.5"ish.

Once one swingout end is on, level it, then level your second one before you weld. You want them perfect so it doesn't bind when trying to come on and off the upper clasp.

Turned out pretty good I think.

I do still have a tiny bit of welding to do but not in the door areas so i decided to start on paint. Seems easier to do it in sections and let it dry rather then trying to get the whole thing done at once. Also, if you notice the way i positioned the bars, they are slightly bent from Wolfe. They position the bend to come inward away from the door to clearance the stock door panel and armrest. Since I have flat door panels I decided to move the bend for max elbow room. I decided to put the bend in a way that reminded me of the low slung door bars, mostly cause i like the way it looks. You can also see where it hits in relation to the door handle.

#112
07-28-2018 | 08:08 AM
Thread Starter
|
Pro Rider
Joined: Aug 2010
Posts: 230
Likes: 0
Sometimes I have lots of pics to update and it didn't take me a lot of labor to get them. Other times I work a lot and only end up with a couple pics looking like i haven't done much. And I don't have much for you this go round but trust me I been busy. I'm pretty dedicated on getting this dumb cage finished. I finally couldn't stand not being able to get in the back of the car so I pulled the battery/battery box. I hate where it was, so it's getting moved (thinking rear passenger side seat area). Gas tank is back in and the pump power wires are shorter and repinned and routed in through the rear floor.
So I finished all the gussets at the intersecting joints, welded the drop bar plates in, and fit the short bars. Plates were a pain bc the floor is super thin in that location. Added some more paint also.
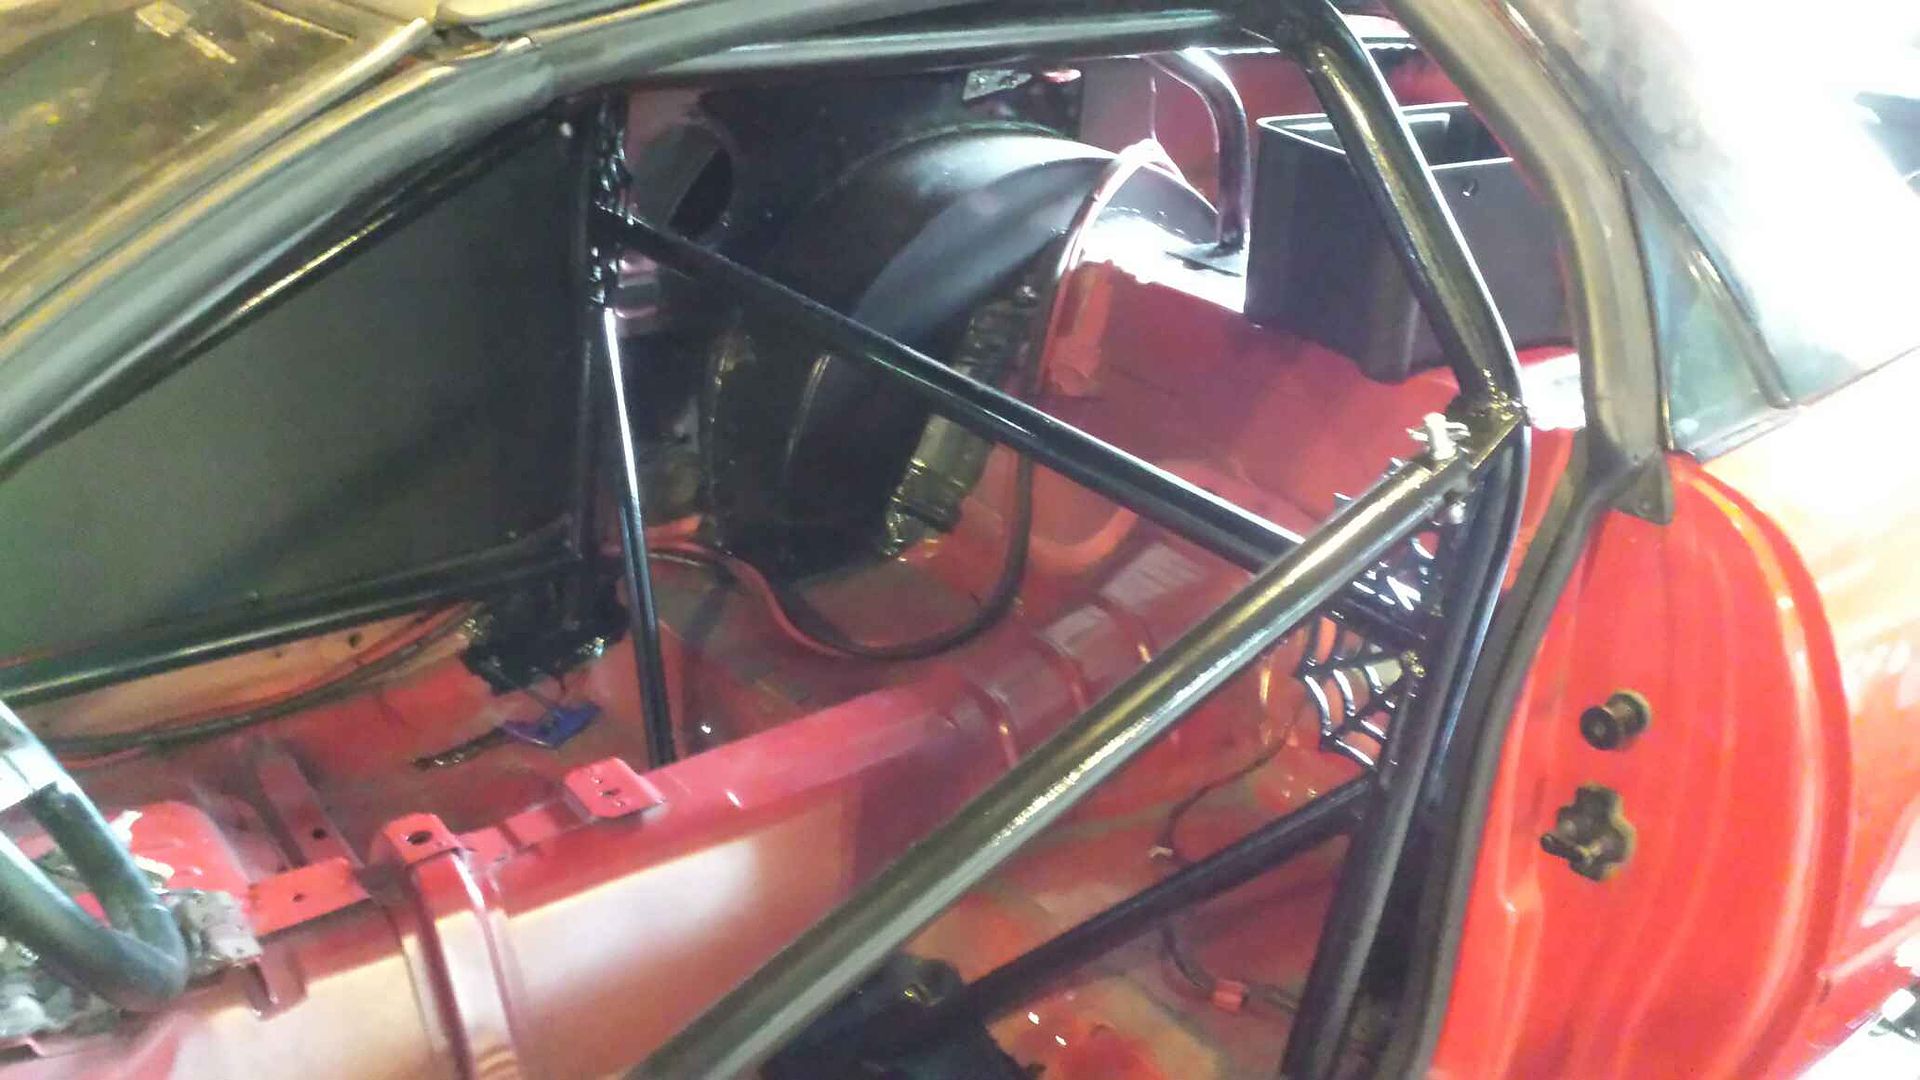
This parachute handle has got to be the single dumbest thing I've ever installed on the car. Not knowing what I was doing plus crappy instructions make me not a happy camper. After doing some google image searches and pondering for days the correct location here's what I decided. Bc the handle is maybe 8 inches long i took an idea i saw where the base is on one side of the bar, but you throw it on the other, effectively shortening how far it sticks out, towards your head or whatever. This is setup as push, meaning i will reach up and throw it towards the windshield. Also, i took me 4 dang attempts to make that t top bar, that was not included with the cage. I wanted a little extra roll over protection and was a little uneasy with how low the windshield bar turned out. Also, you can see a lot of why this is taking so long, all the gussets at every joint, several are visible here.
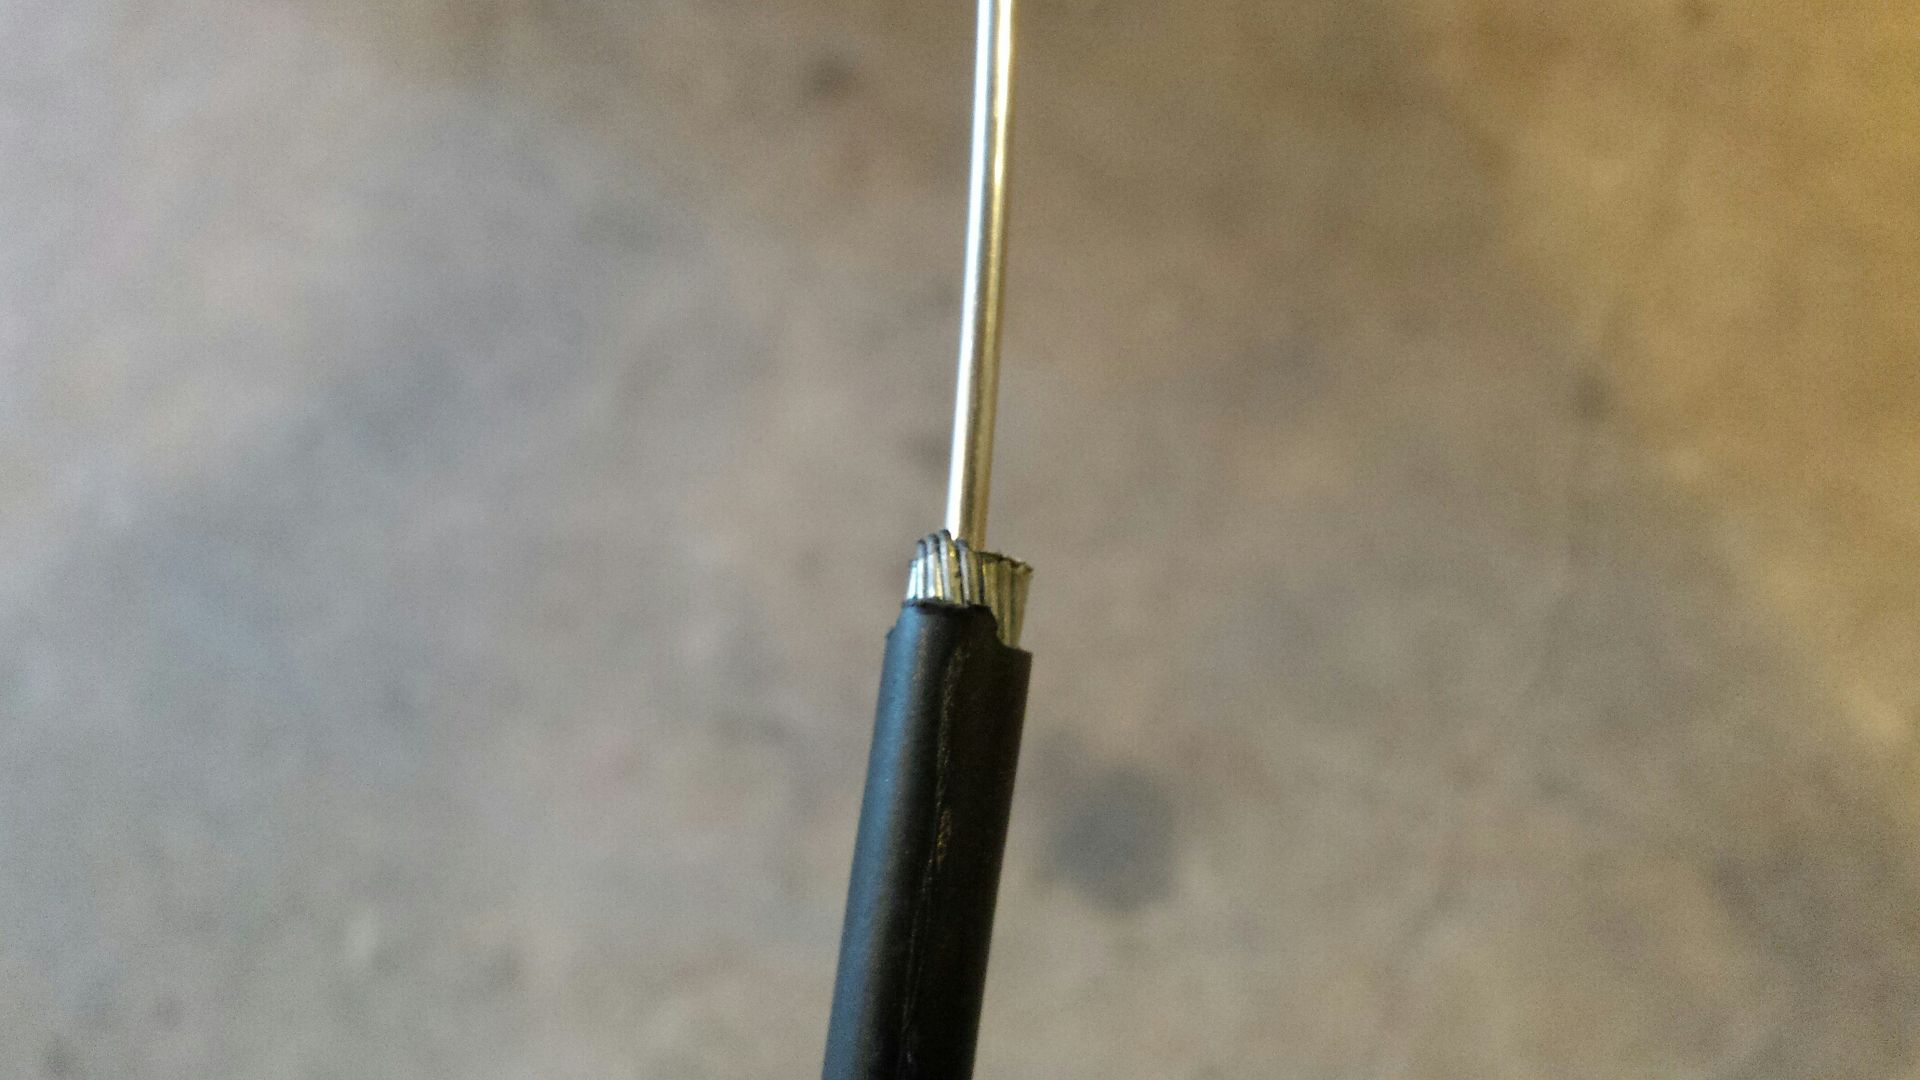
The chute cable ended up being like 4 foot too long, so it required trimming. Man that thing is hard to cut. Its several layers. But it is trimmed and installed correctly and the chute handle "should" work. No i'm not trying it in the garage.

#113
08-06-2018 | 08:20 AM
Thread Starter
|
Pro Rider
Joined: Aug 2010
Posts: 230
Likes: 0
Parts show up often, but I try to keep the parts pics relevant to what I'm working on at the time. A keen eye will see there is some interesting things here.
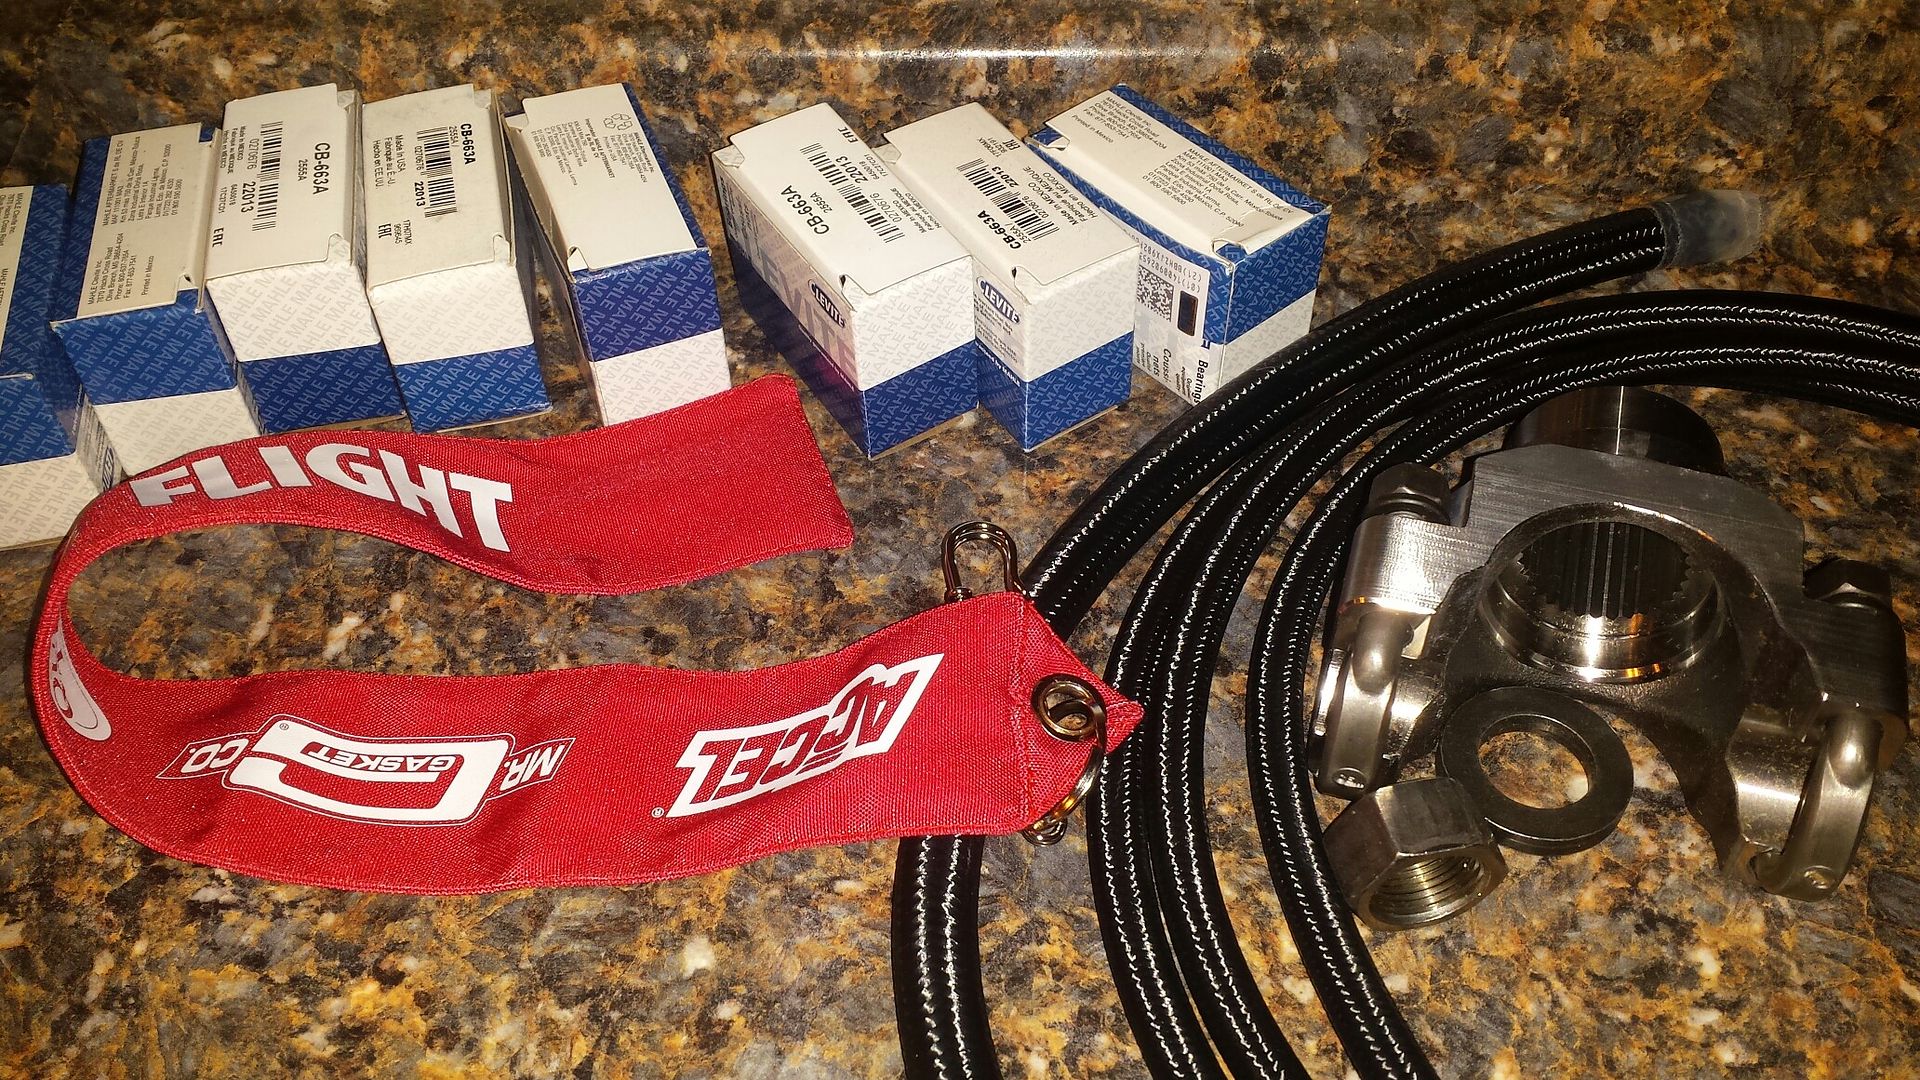
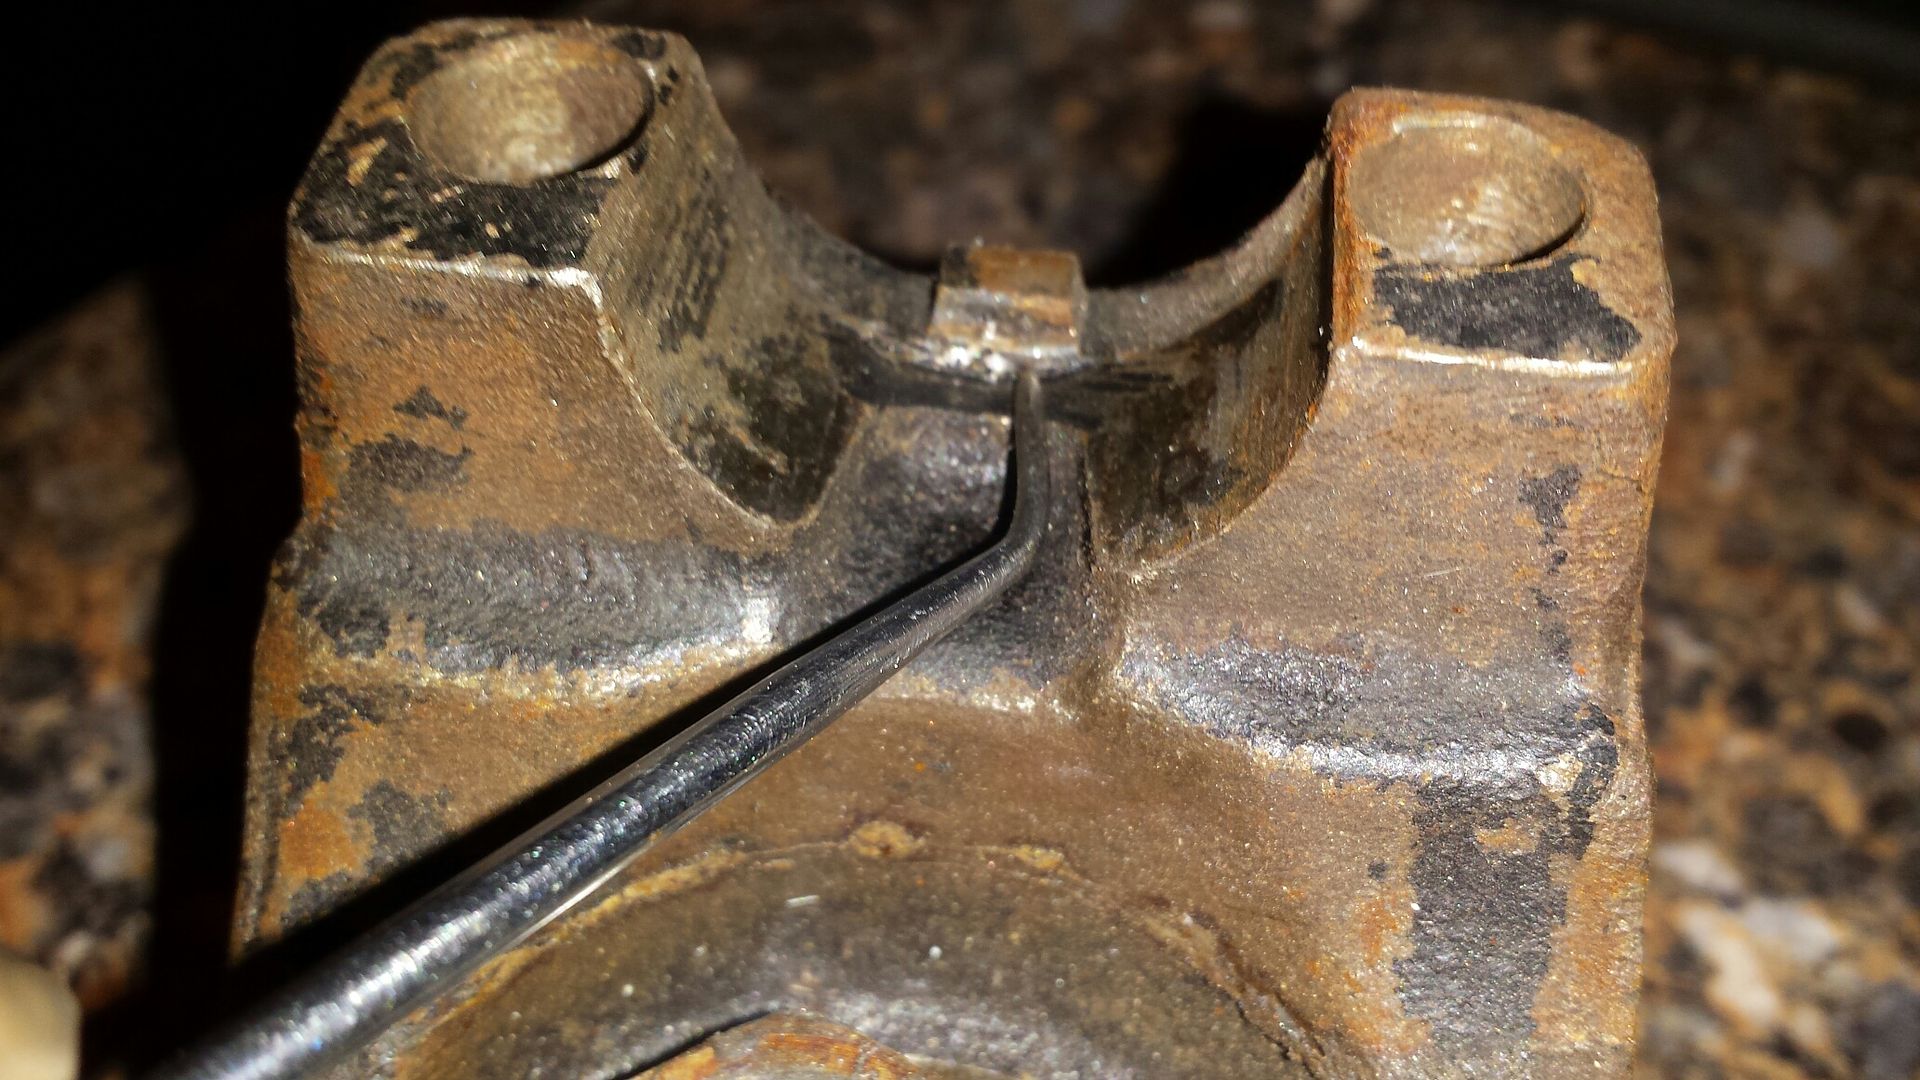
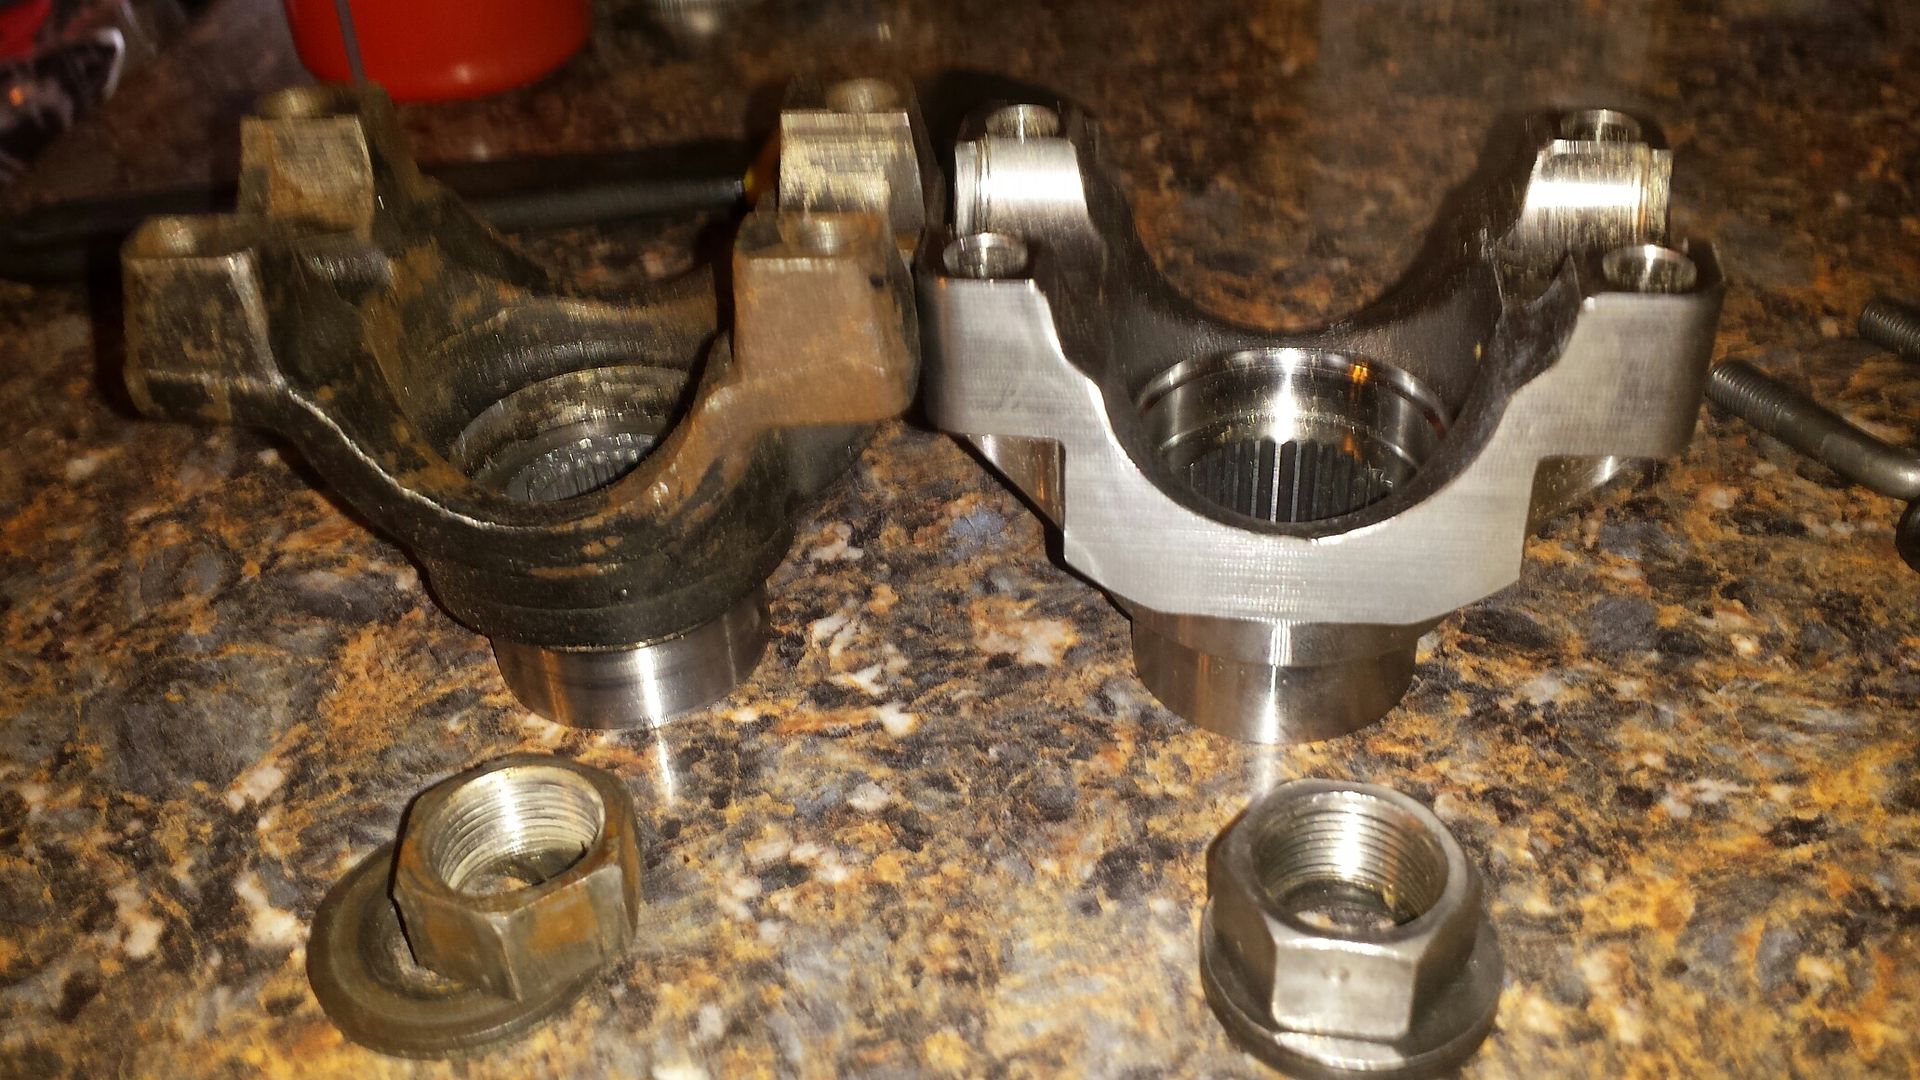
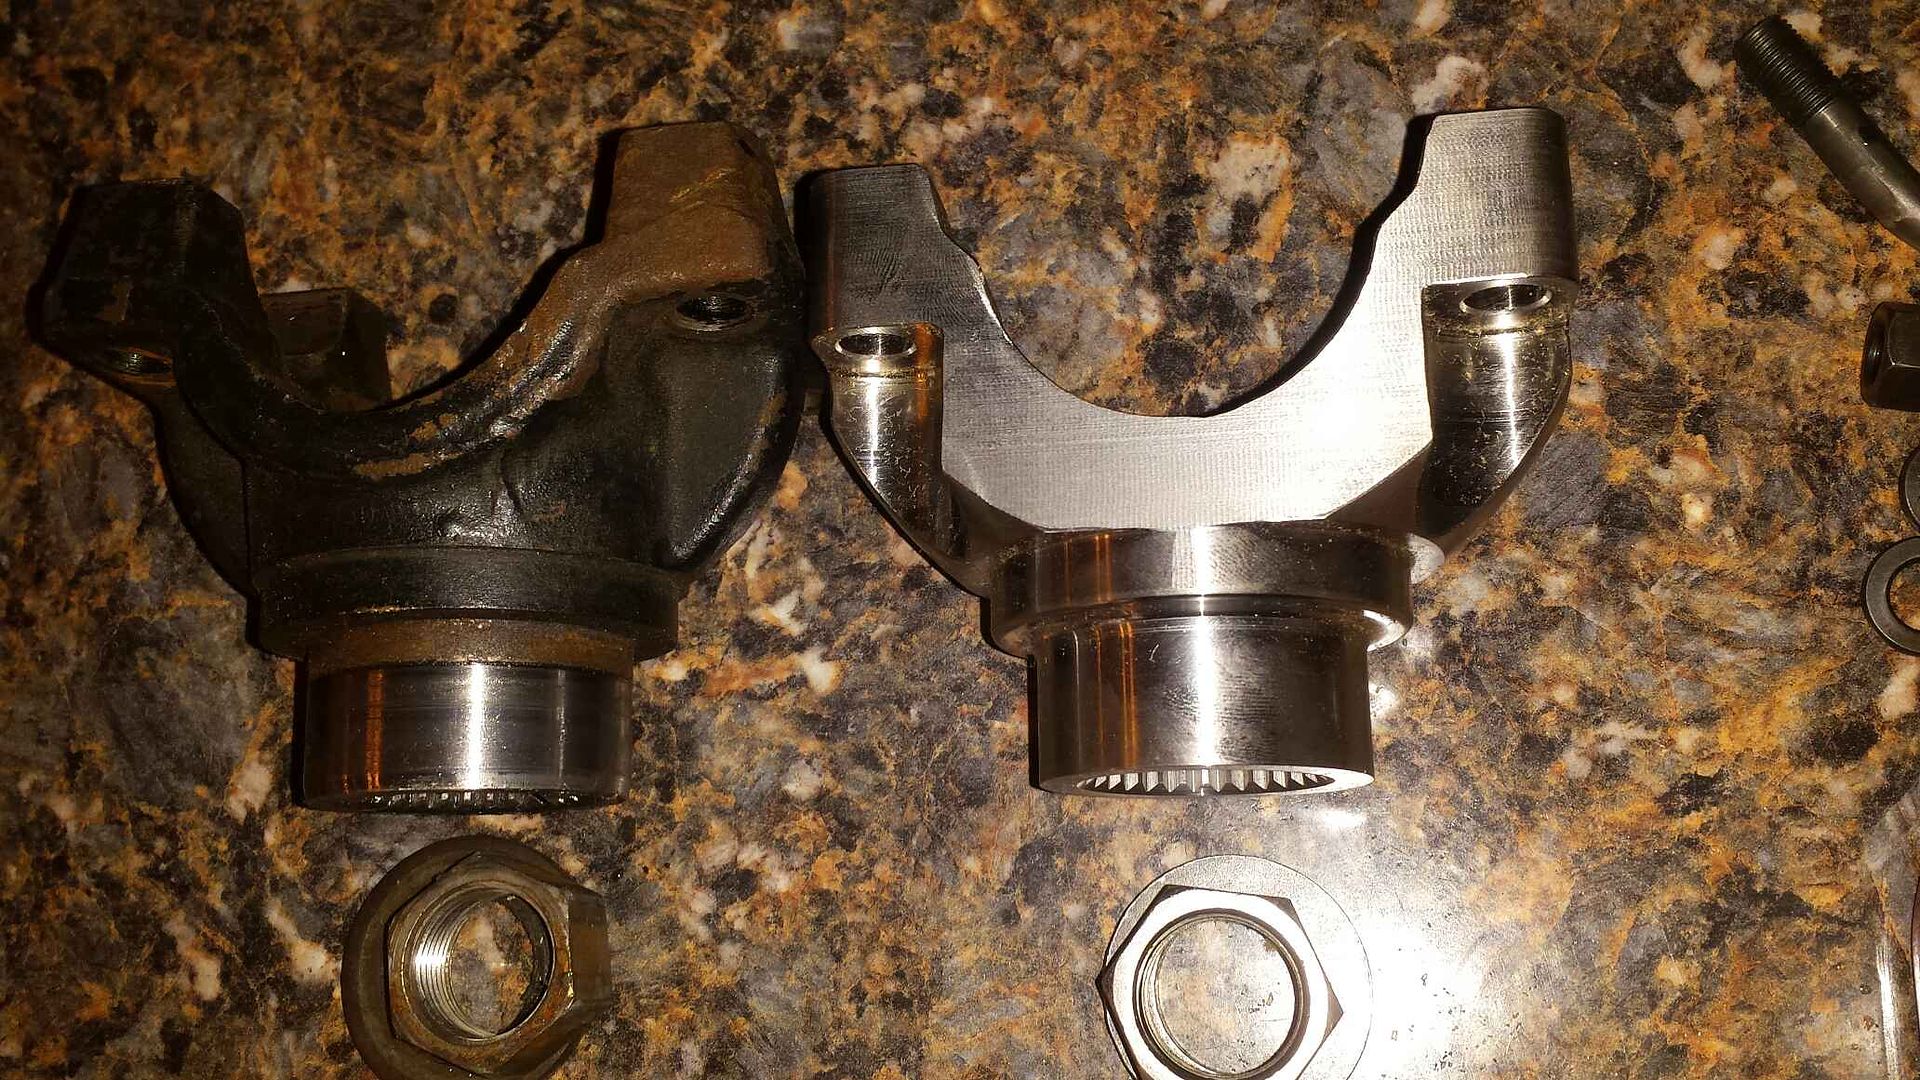
We will start with the yoke. When I assembled the 12 bolt I bought an ebay (non-branded basically) "forged" yoke. The issue with it was, the tabs that center the ujoint were't machined wide enough. So the ujoint would not fit it the cups properly. I did't realize this until the rear end was assembled and installed so naturally I ground them down till the ujoint fit. Now obviously in my mind I'm worried that the driveshaft may run slightly off center due to the non-precision grinding.
Here's the new one. I went with Moser due to Strange's yoke that was around the same price looked too much like the ebay one and their upgraded was quite a bit more expensive. So Moser looked like the best bang for the buck. Also, you can see it's gonna give me a little less trans yoke engagement by it being shorter, which is good cause I was almost bottomed out.
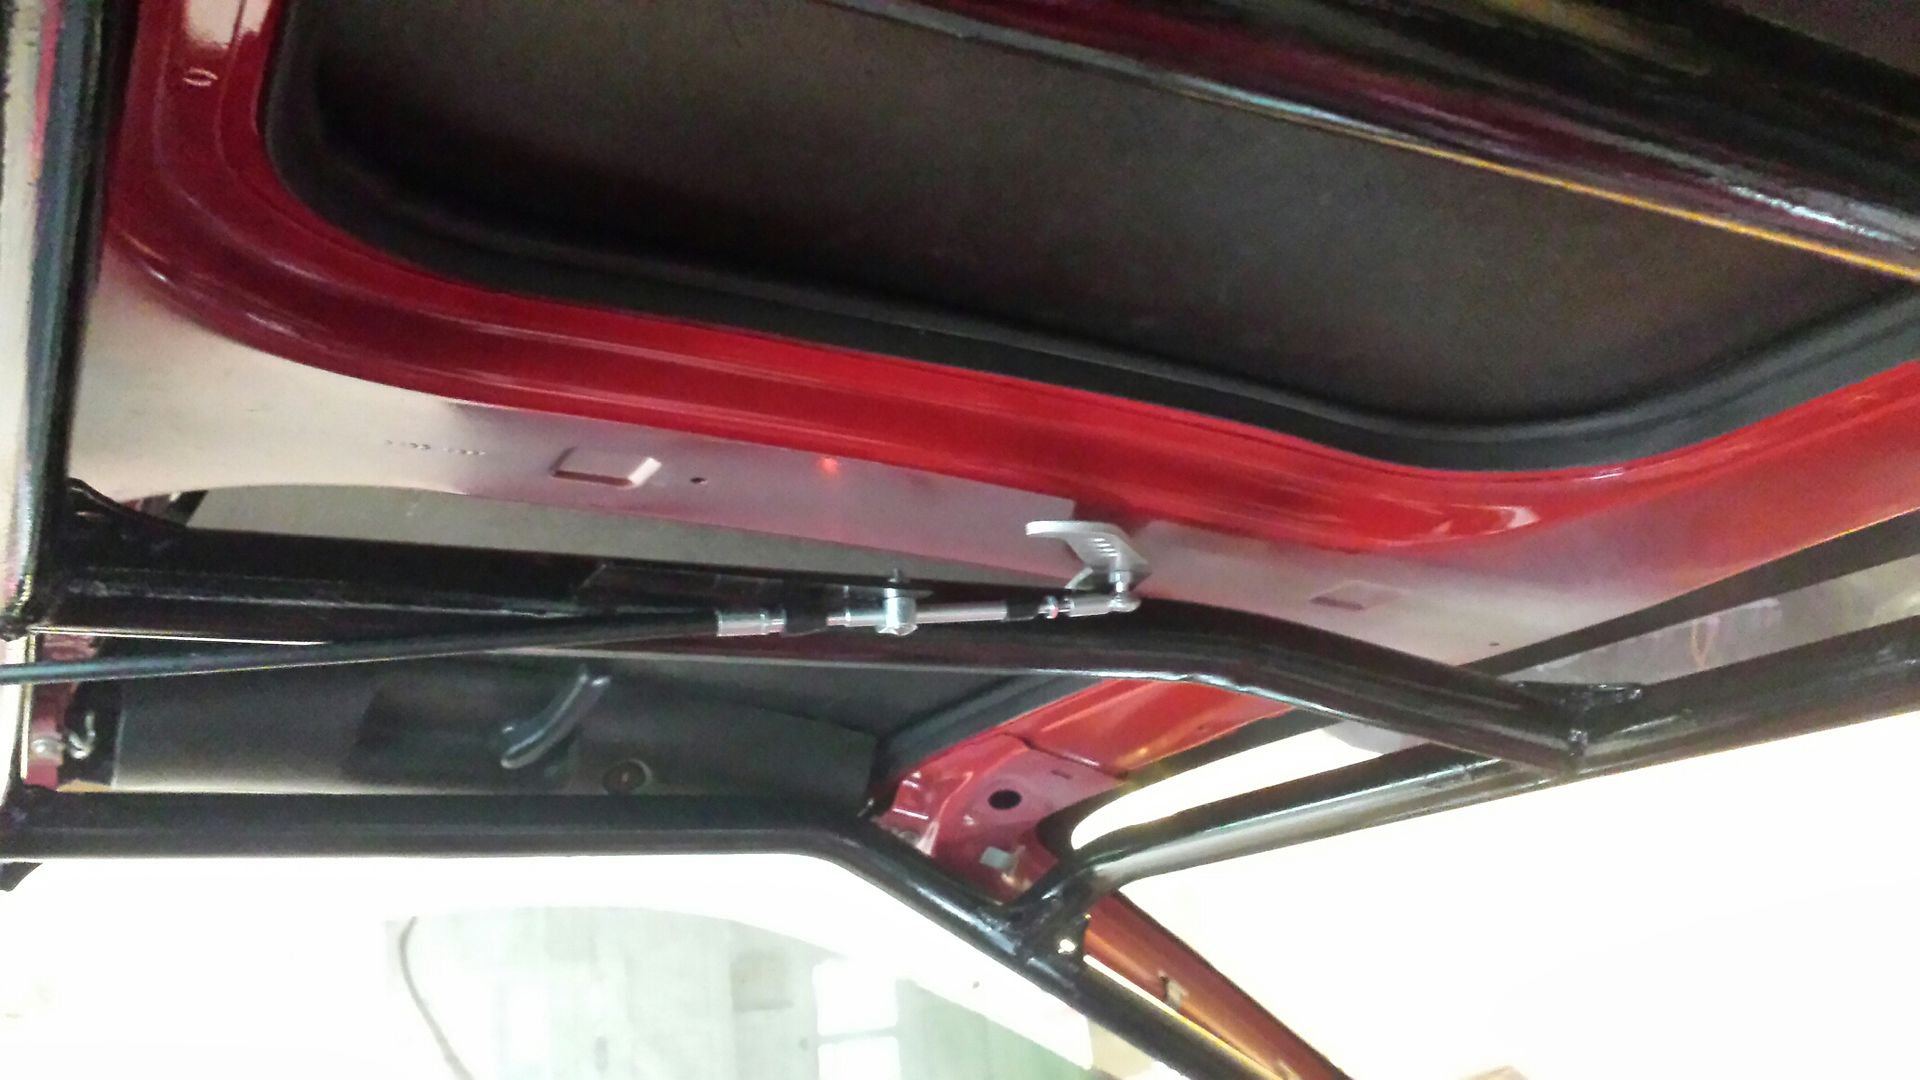
Sanded the kirkeys down and painted the backside of them black. Got em set in so I can see their clearance from the bars and get an idea about what type of backbrace Im gonna make for them. Also got the parachute cable fitted, and adjusted. One thing I dont remember in the instructions were that it needs a stop, it's easy to over throw the handle and extend the cable end out too far. Figured that out and it seems to be working as intended.

Bit the bullet, dropped the pan, got rid of the crappy bulkhead turbo drain fitting that was leaking and welded a new one in proper.
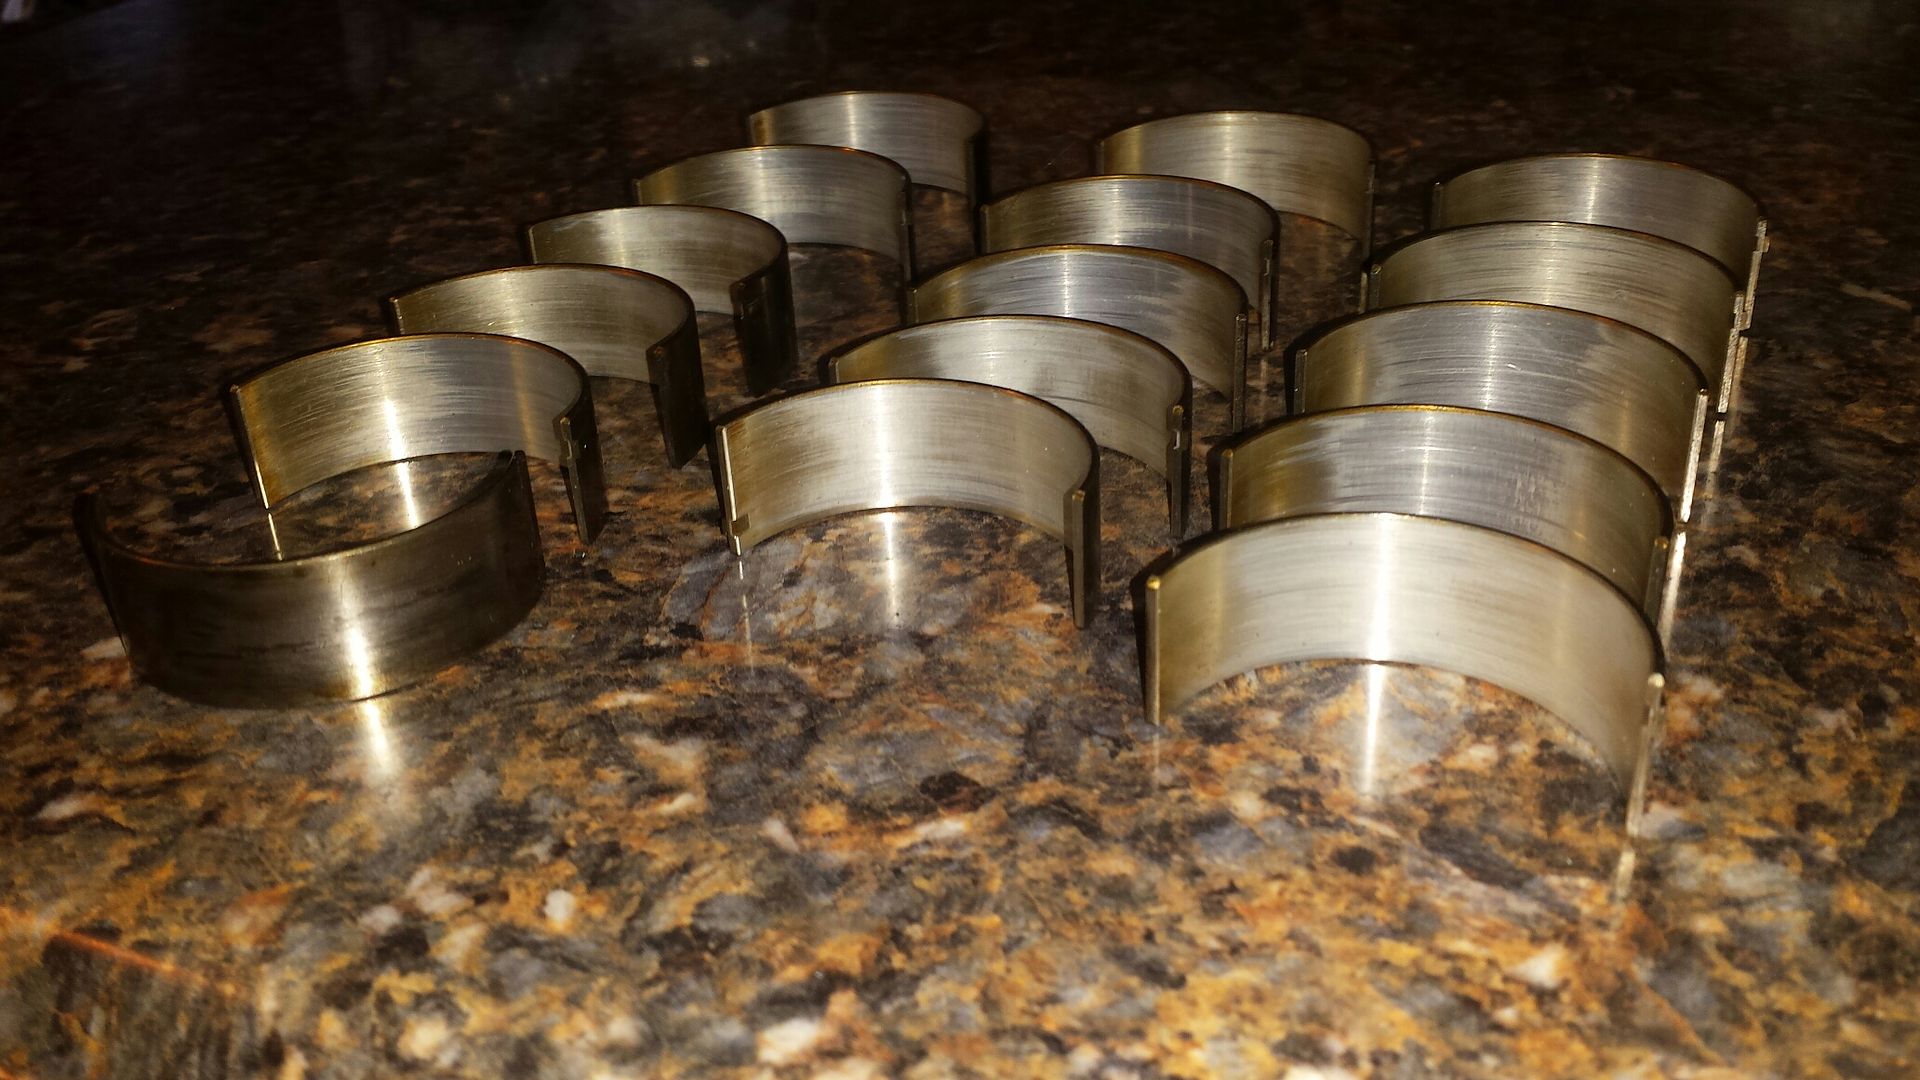
If you were good enough to recognize those blue and white boxes in the first pic, you'll know what comes next. We know the bearings took a little beating before I fixed the oil pump pickup clearance. How much? That's what I had to find out. Upon inspection I was happy to see the crank looked fantastic, with zero signs of wear or overheating. The bearings did their job and took the damage. They on the other hand are pretty gnarly looking, and I reversed one so you can see the heat marks on the back side (present on all). I do realize the cam and mains likely saw some damage as well but the rods are what gets literally hammered with HP so those are the ones that got replaced. The rest are just gonna have to tough it out.
As I sit here, thinking of the bearing clearances I didnt measure, will the first roll cage I ever installed save my life in the event of a crash, I'm distracted from serious matters and wonder why the hell do these cats love to climb up my lexan windows, and why won't I ever wash this car? Crack another cold one, those are all questions to sit and be pondered gentlemen.

We will start with the yoke. When I assembled the 12 bolt I bought an ebay (non-branded basically) "forged" yoke. The issue with it was, the tabs that center the ujoint were't machined wide enough. So the ujoint would not fit it the cups properly. I did't realize this until the rear end was assembled and installed so naturally I ground them down till the ujoint fit. Now obviously in my mind I'm worried that the driveshaft may run slightly off center due to the non-precision grinding.

Here's the new one. I went with Moser due to Strange's yoke that was around the same price looked too much like the ebay one and their upgraded was quite a bit more expensive. So Moser looked like the best bang for the buck. Also, you can see it's gonna give me a little less trans yoke engagement by it being shorter, which is good cause I was almost bottomed out.


Sanded the kirkeys down and painted the backside of them black. Got em set in so I can see their clearance from the bars and get an idea about what type of backbrace Im gonna make for them. Also got the parachute cable fitted, and adjusted. One thing I dont remember in the instructions were that it needs a stop, it's easy to over throw the handle and extend the cable end out too far. Figured that out and it seems to be working as intended.

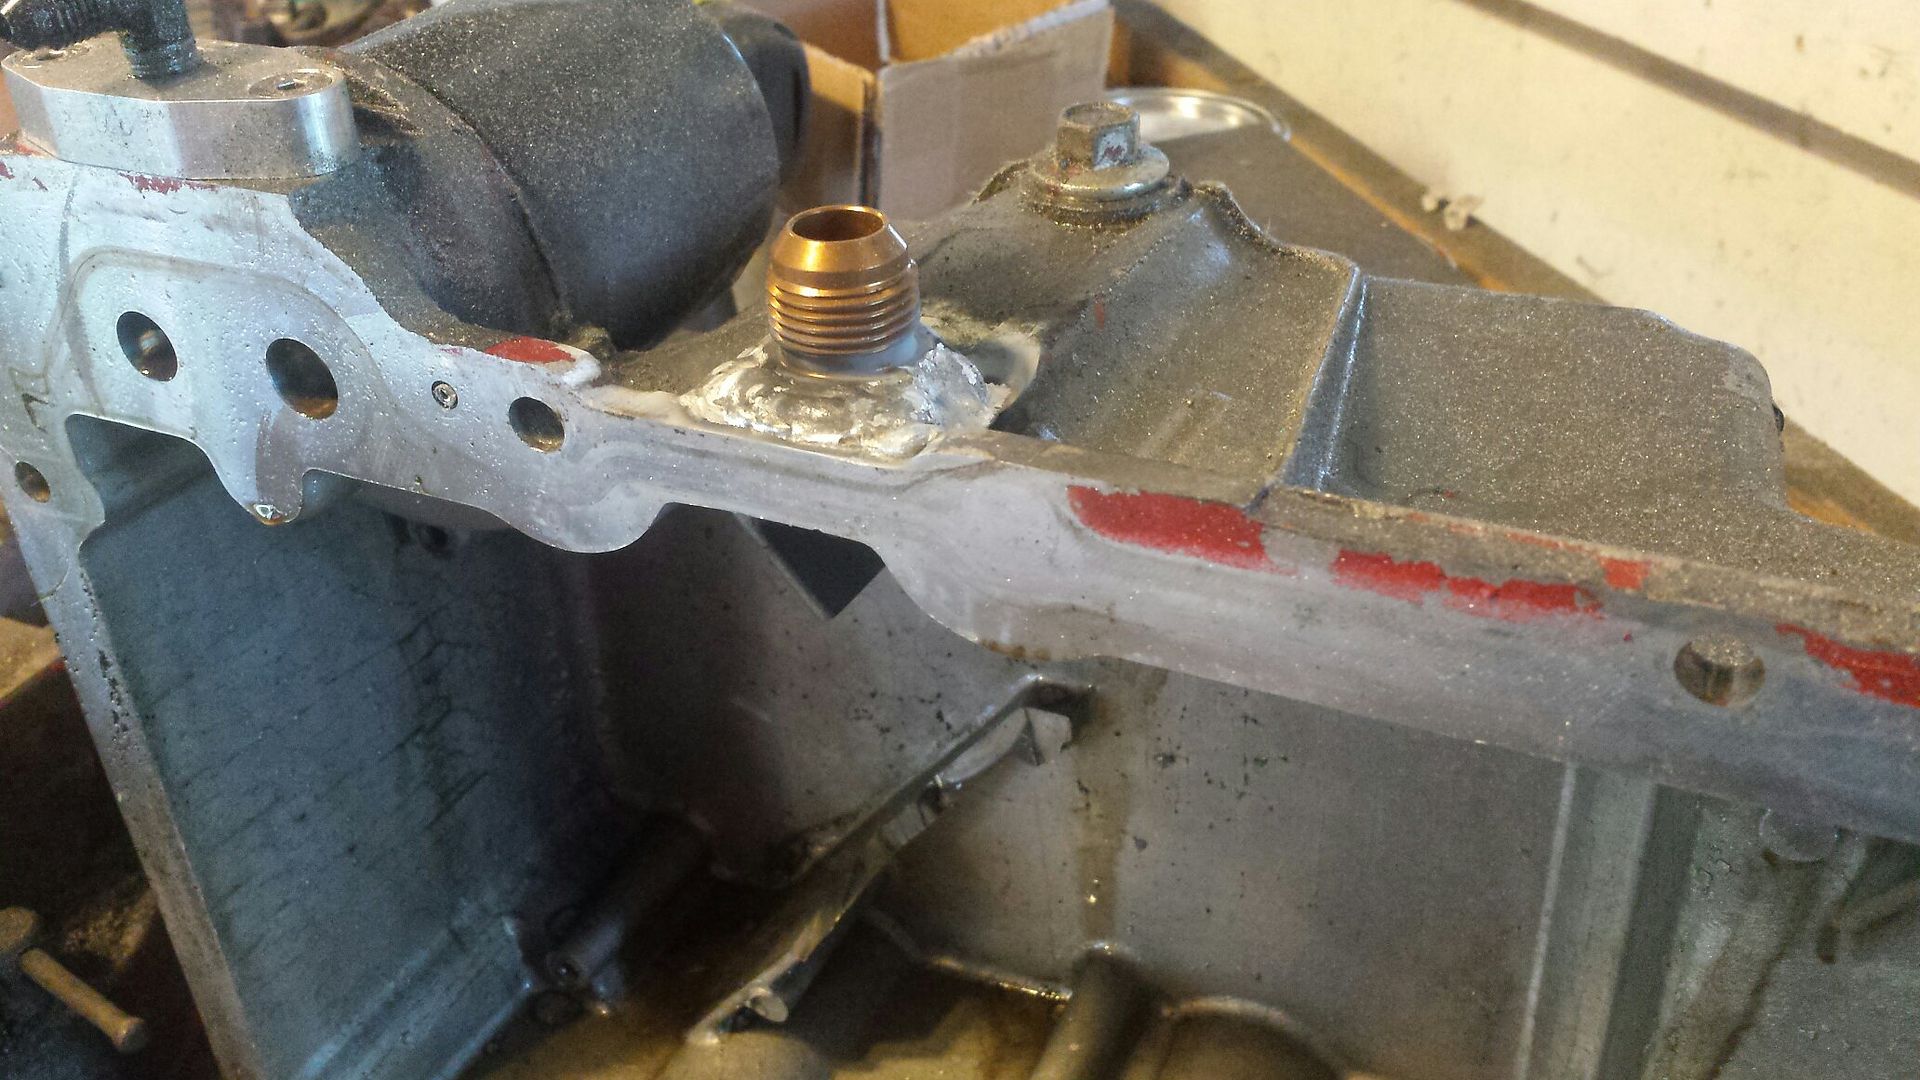
Bit the bullet, dropped the pan, got rid of the crappy bulkhead turbo drain fitting that was leaking and welded a new one in proper.

If you were good enough to recognize those blue and white boxes in the first pic, you'll know what comes next. We know the bearings took a little beating before I fixed the oil pump pickup clearance. How much? That's what I had to find out. Upon inspection I was happy to see the crank looked fantastic, with zero signs of wear or overheating. The bearings did their job and took the damage. They on the other hand are pretty gnarly looking, and I reversed one so you can see the heat marks on the back side (present on all). I do realize the cam and mains likely saw some damage as well but the rods are what gets literally hammered with HP so those are the ones that got replaced. The rest are just gonna have to tough it out.

As I sit here, thinking of the bearing clearances I didnt measure, will the first roll cage I ever installed save my life in the event of a crash, I'm distracted from serious matters and wonder why the hell do these cats love to climb up my lexan windows, and why won't I ever wash this car? Crack another cold one, those are all questions to sit and be pondered gentlemen.

#114
08-11-2018 | 07:46 AM
Thread Starter
|
Pro Rider
Joined: Aug 2010
Posts: 230
Likes: 0
Couple people asked for a startup video so I decided to focus on everything it took to make the car start and run and see if these new rod bearings were gonna spin or what. The smoke you see was coolant that was spilled earlier on the hotside. Whoops.
Where we are now, basically everything mechanically under the hood is done. Verified fans run, it doesn't seem to overheat at idle or anything weird. I do have a PS leak and one fuel leak that seems like its just a faulty fitting. During idling the car just randomly died and wouldn't crank back up. I narrowed it down to the fuel pump relays on the hotwire kit that came with the pumps. Yep, both relays were dead. I assume one died at some other time and i was only running on one pump and didn't know it. When the second one died it killed the car. It's highly likely I will be remaking most of that harness with heavier gauge wire and better relays. Not gonna lose an engine over a $5 relay. I finished the headlight wiring for the driver's side, started fitting the gauges up inside the car, and trimmed the kick panels to fit around the cage. 100 little details.
Where we are now, basically everything mechanically under the hood is done. Verified fans run, it doesn't seem to overheat at idle or anything weird. I do have a PS leak and one fuel leak that seems like its just a faulty fitting. During idling the car just randomly died and wouldn't crank back up. I narrowed it down to the fuel pump relays on the hotwire kit that came with the pumps. Yep, both relays were dead. I assume one died at some other time and i was only running on one pump and didn't know it. When the second one died it killed the car. It's highly likely I will be remaking most of that harness with heavier gauge wire and better relays. Not gonna lose an engine over a $5 relay. I finished the headlight wiring for the driver's side, started fitting the gauges up inside the car, and trimmed the kick panels to fit around the cage. 100 little details.
#115
08-15-2018 | 07:53 AM
Thread Starter
|
Pro Rider
Joined: Aug 2010
Posts: 230
Likes: 0
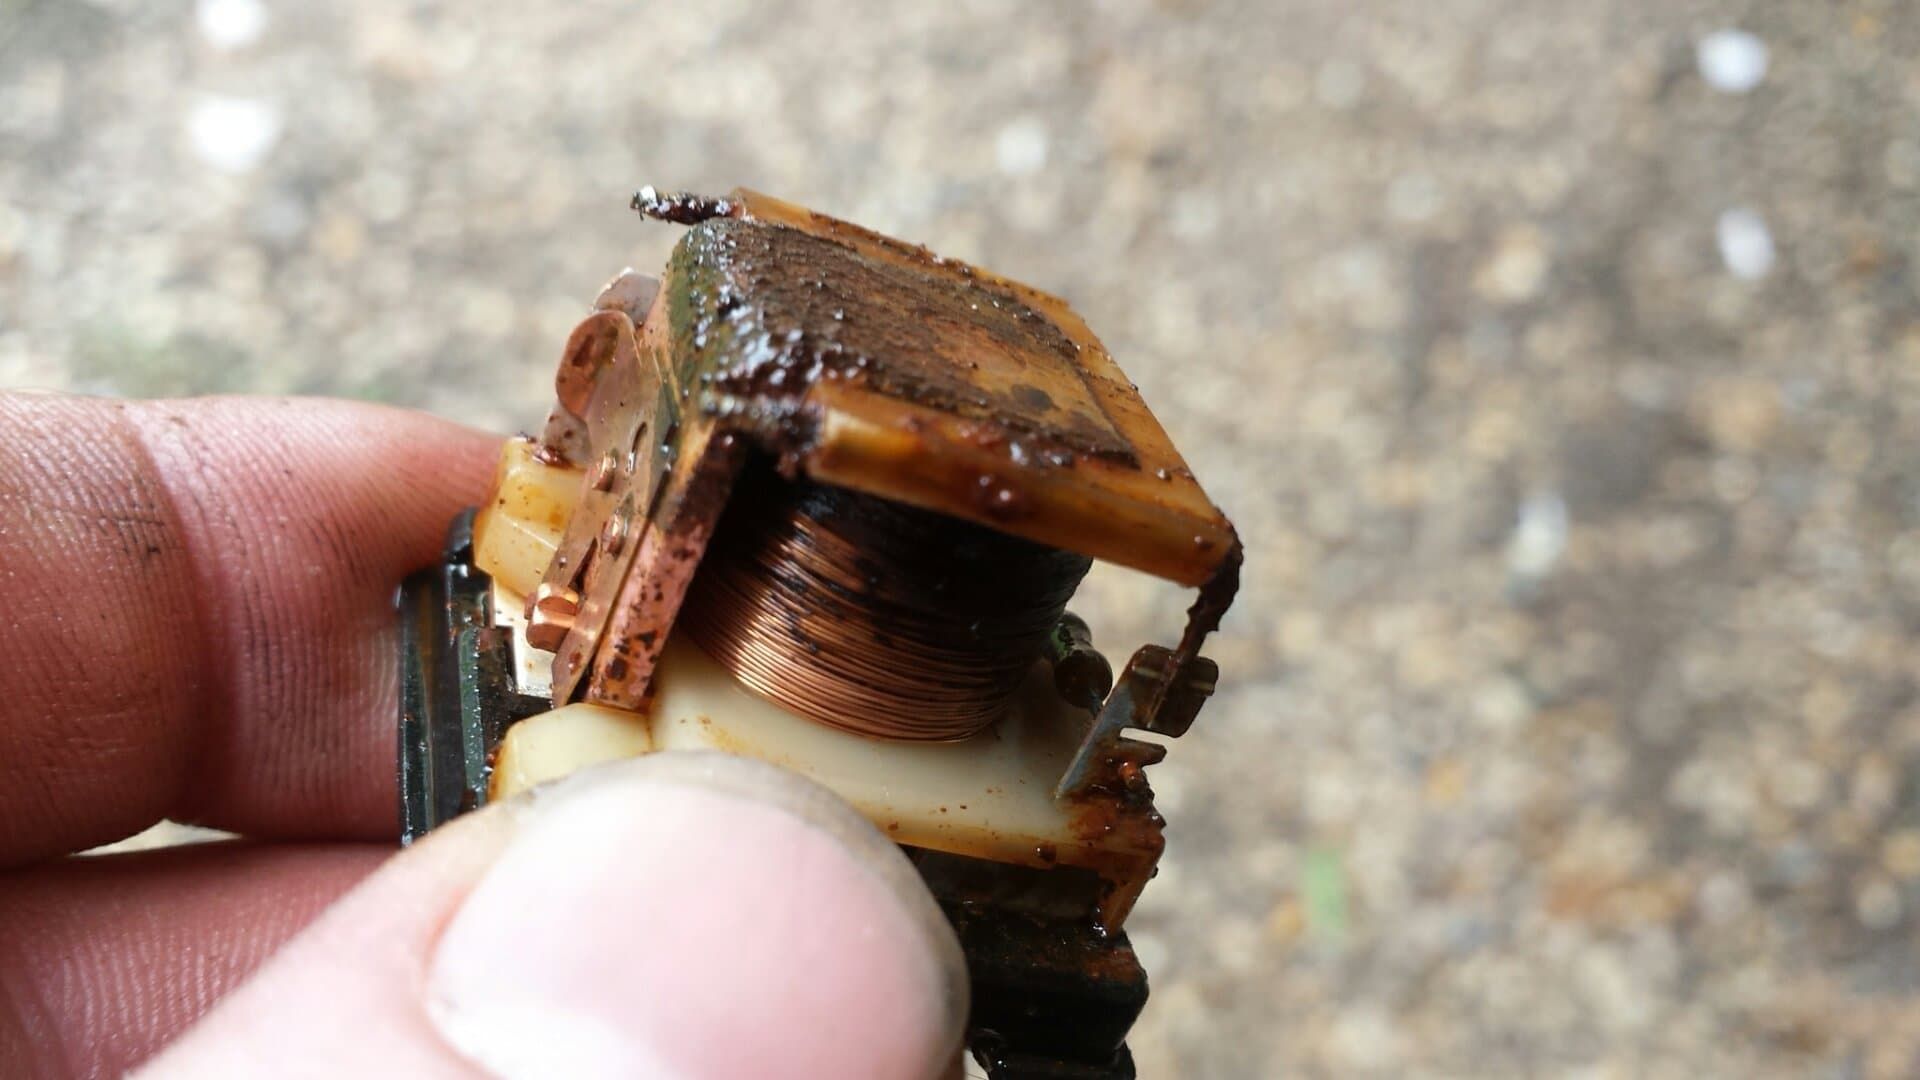
As I plan my rewiring of the fuel pumps, I decided to investigate further. I contacted the vendor and went over the details and we could find no reason for two relays to fail. They look fine right? No burnt contacts or anything.....
One hammer later we found our issue. Looking back I remember when the tank was out and on the ground we had a big rain and some water got in and puddled by the tank. The relays had to have been on the ground since I pulled the tank and wiring out together. Ah well, live and learn.
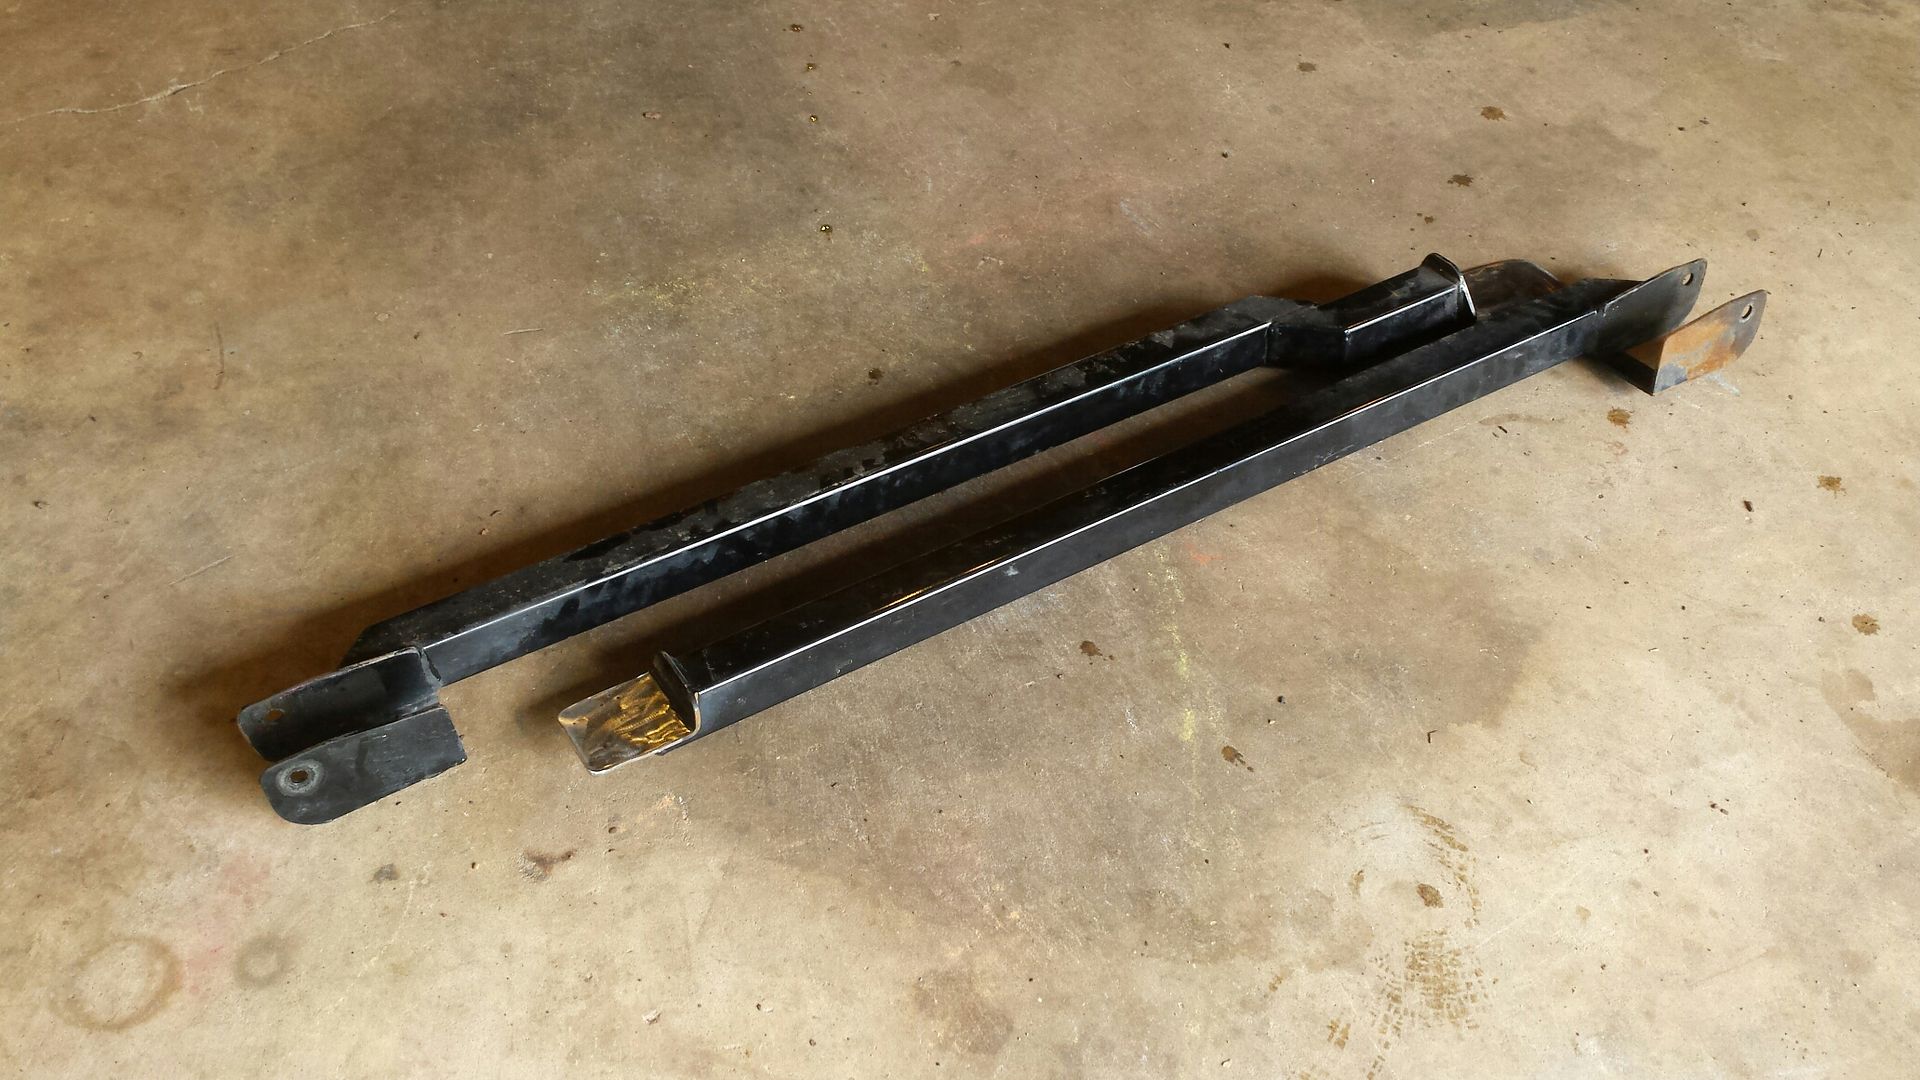
The consensus seems to be about 50/50, if you have an 8/10 point cage do you need subframe connectors? I say no, so, they got cut TF off.
This helps offset the weight of the cage also.
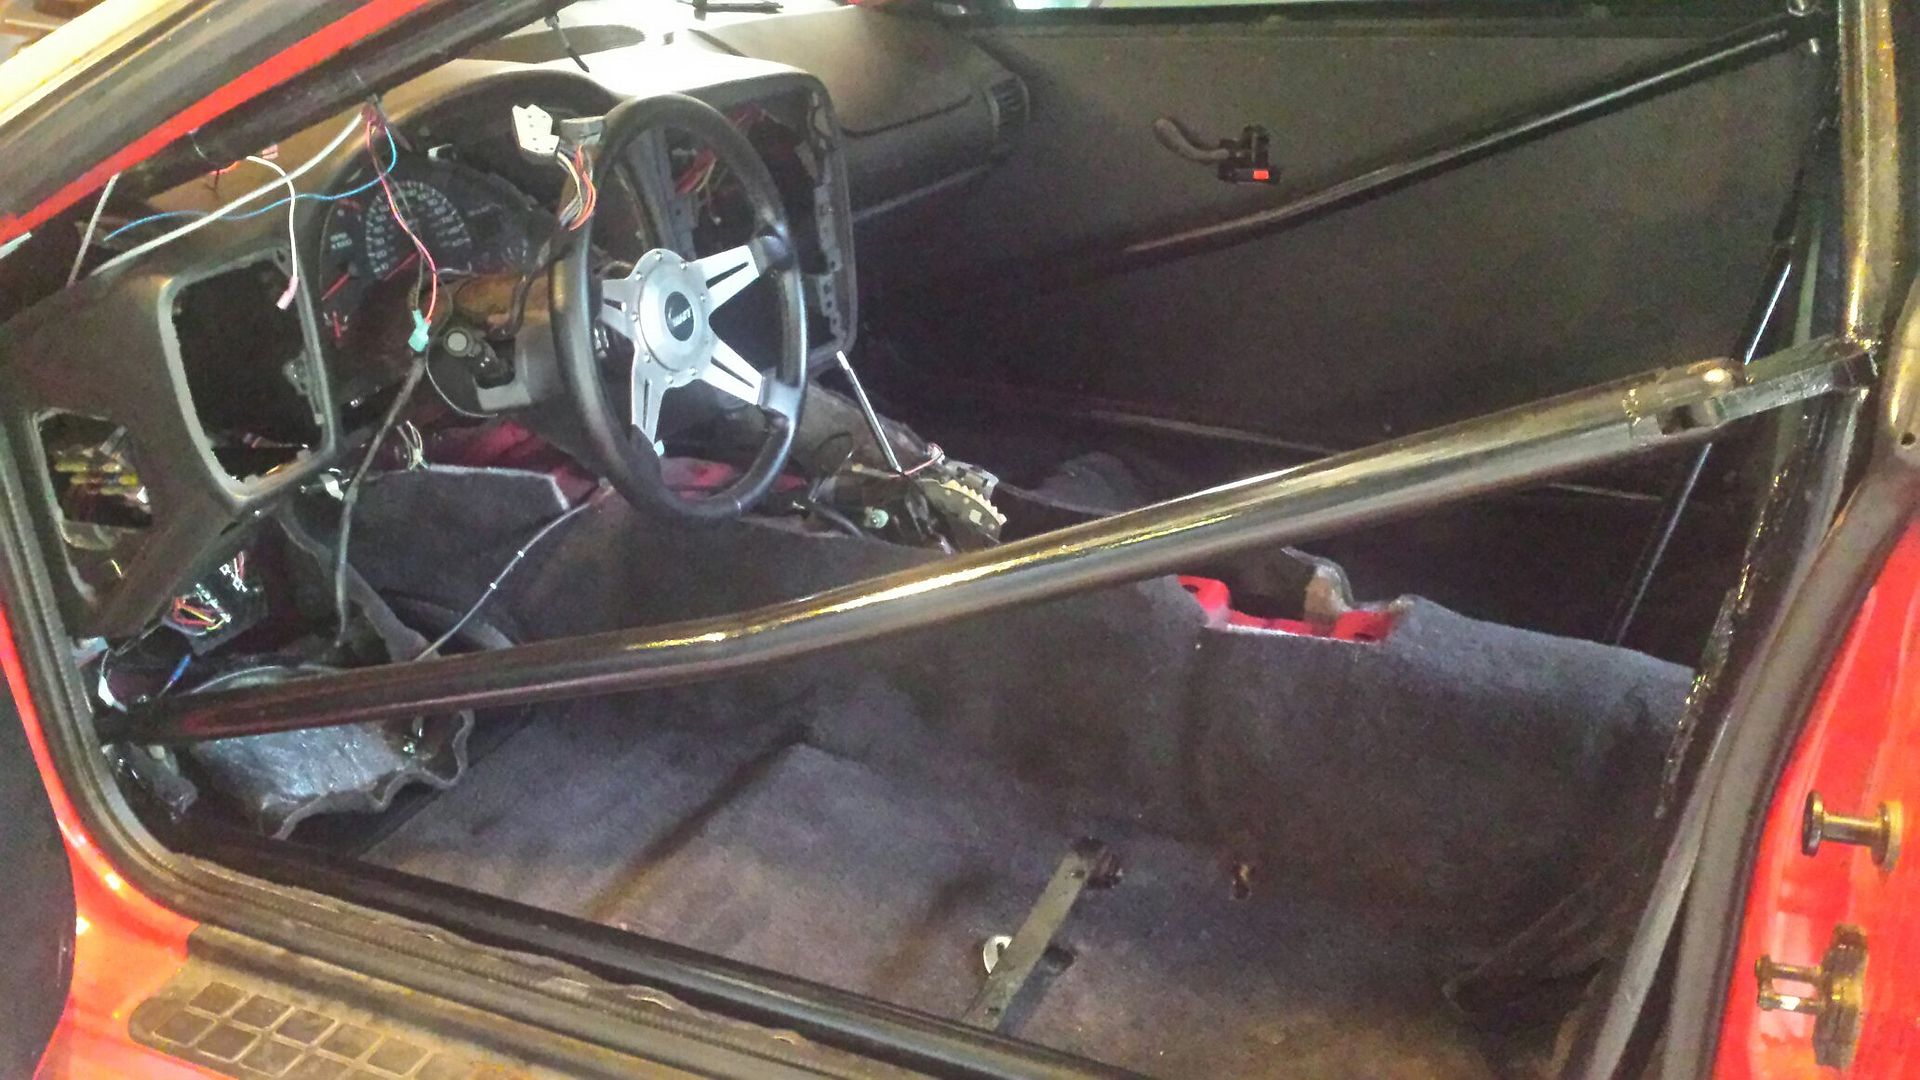
I was sorta dreading chopping up my (perfect) dash but knew I'd feel better once it was done and back together. So I started trimming.
Amazing my top dash pad did not break and only required minor nothing in the corners to clear the bar. Overall I'm happy with how it turned out.
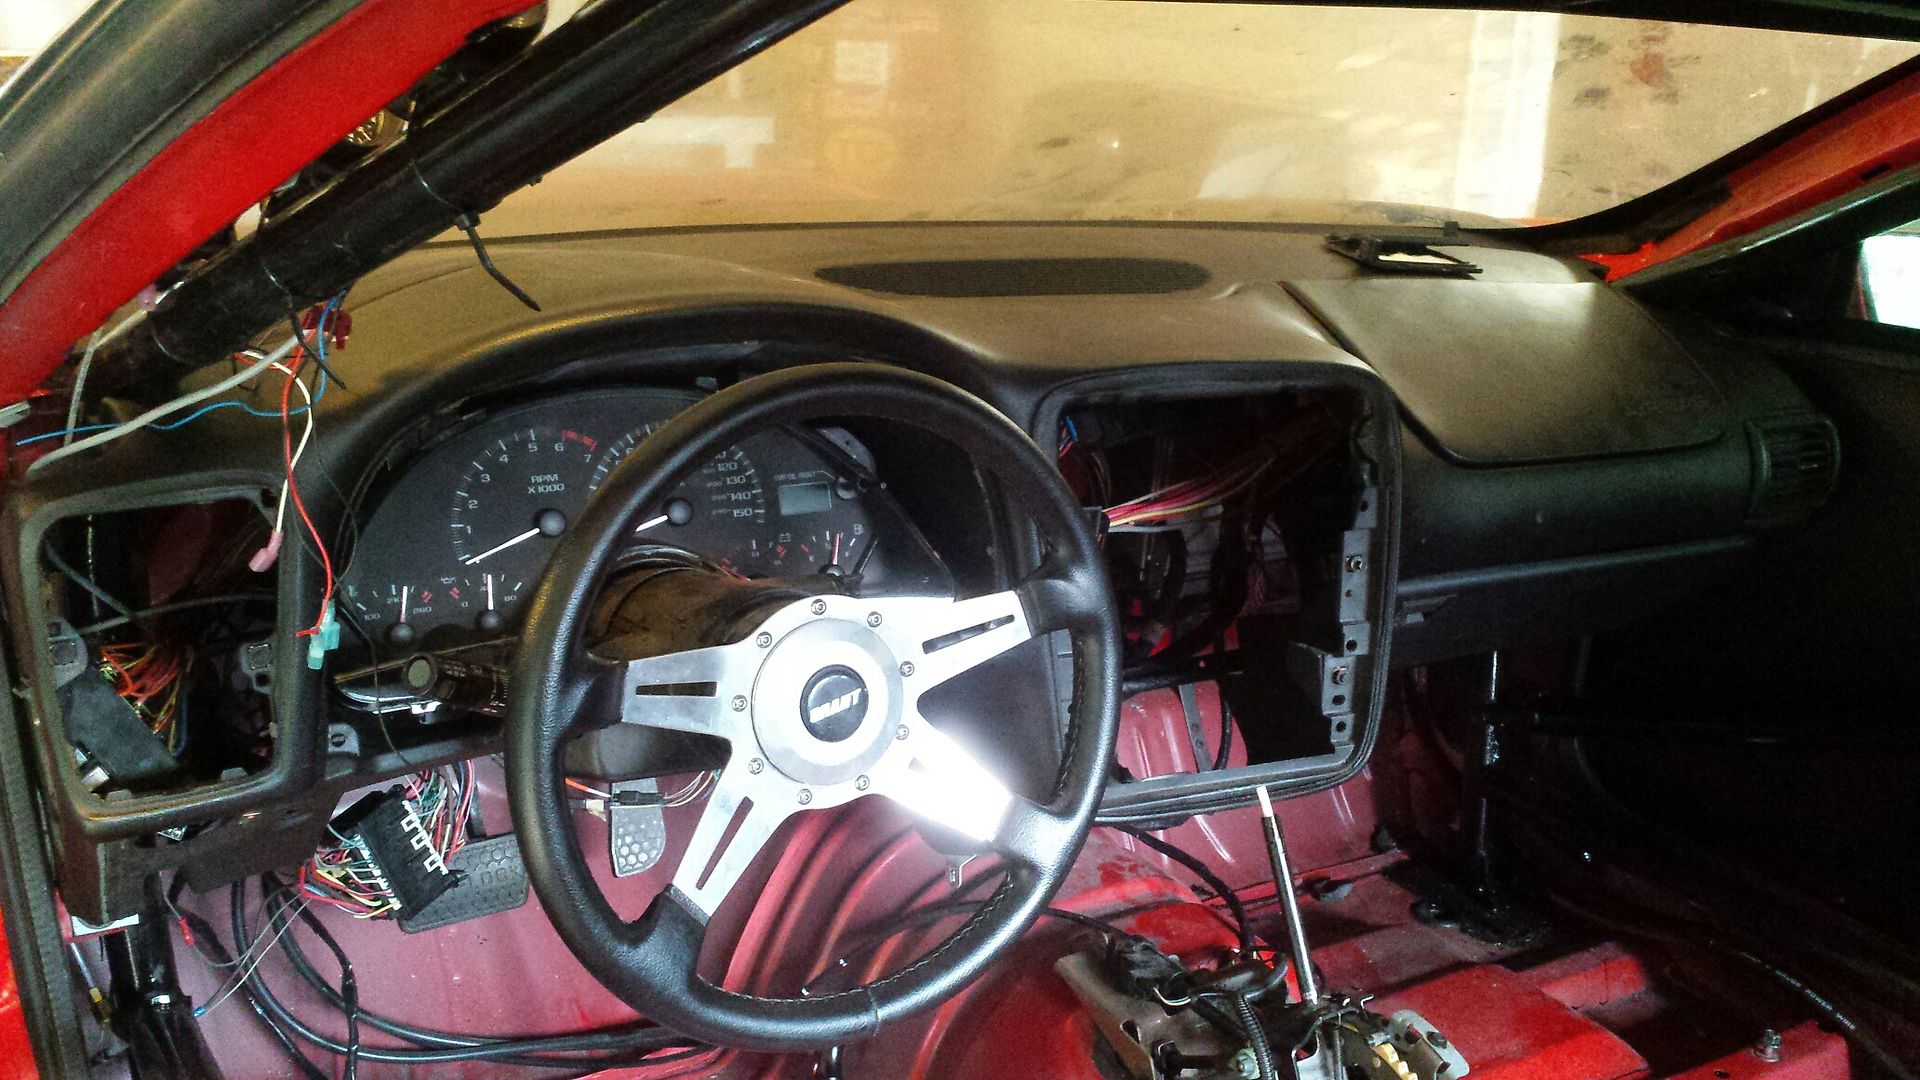
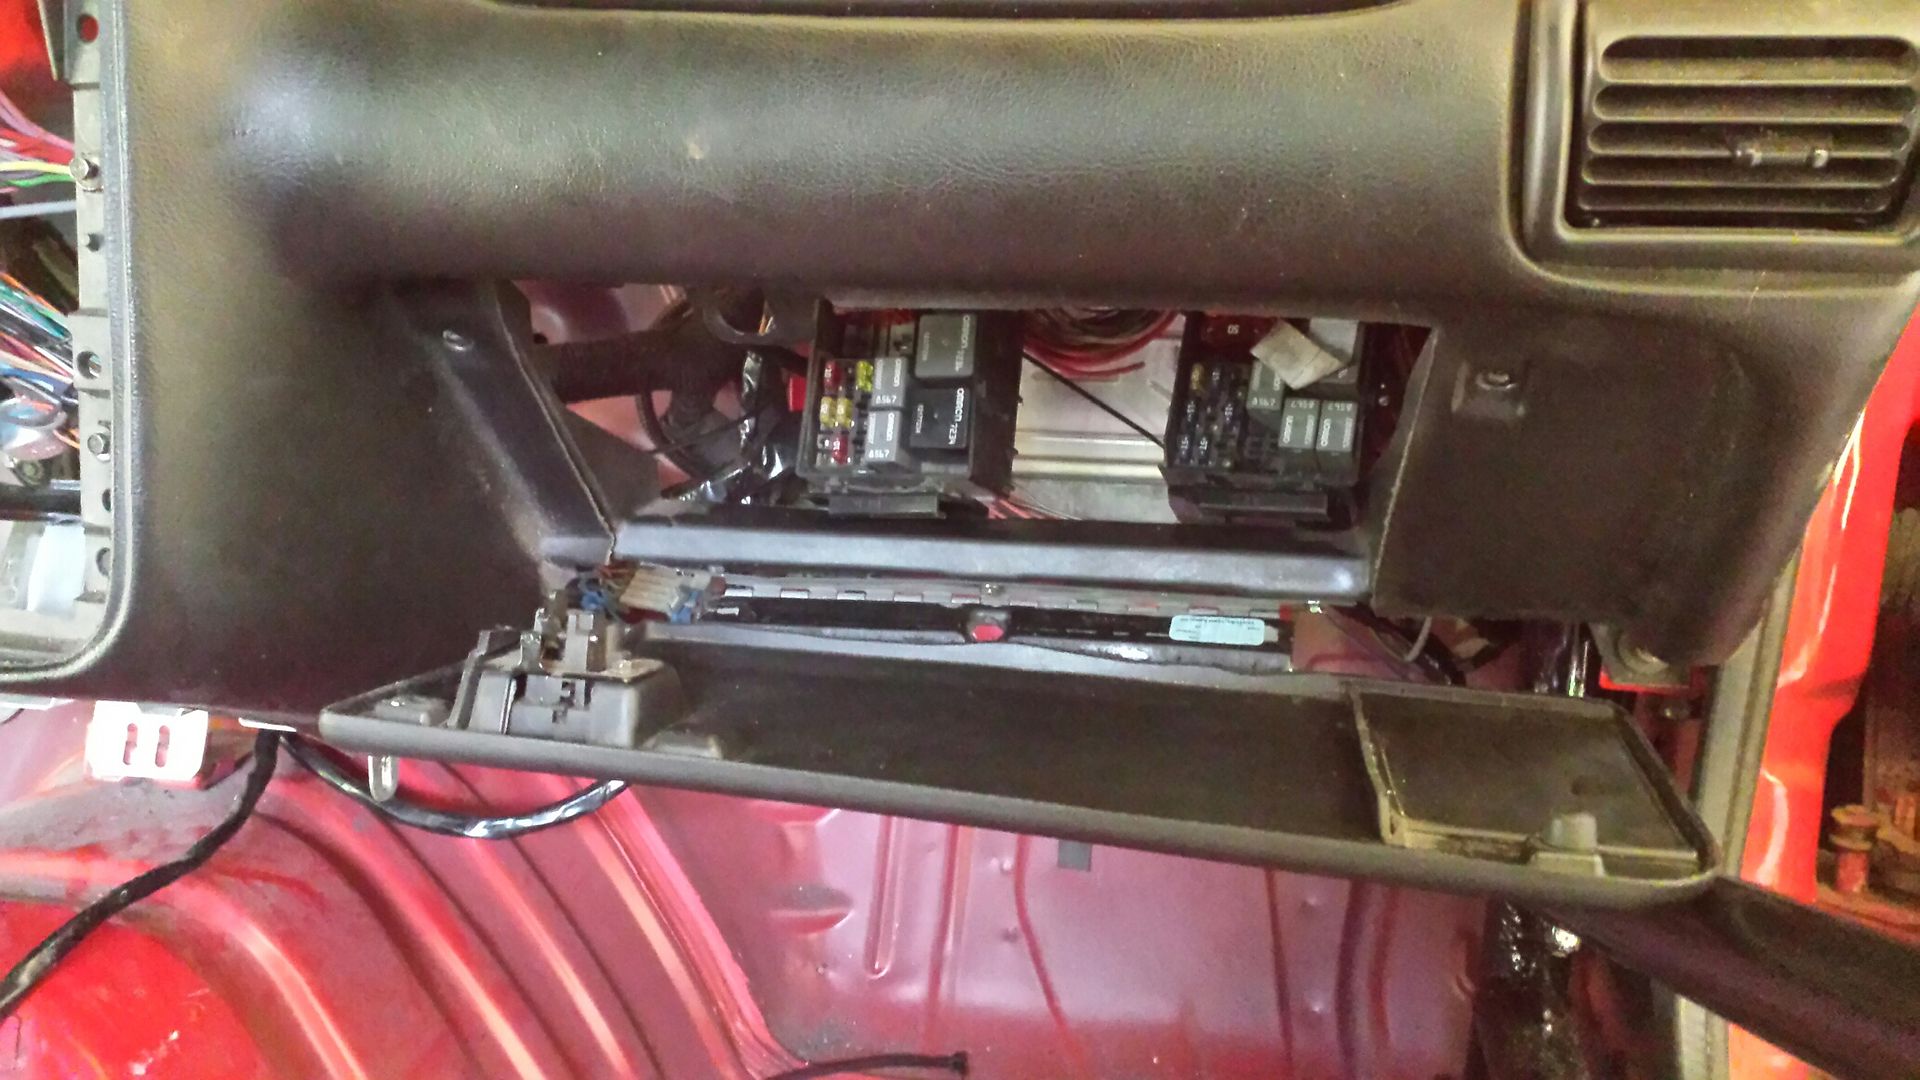
Call me crazy but i wanted to easily access the fuse boxes so I decided to trim the storage area off the glove box door. It is essentially for behind dash access at this point.....but looks stock when shut. Haven't quite decided how I'm gonna keep the fuse boxes from flopping around.

One hammer later we found our issue. Looking back I remember when the tank was out and on the ground we had a big rain and some water got in and puddled by the tank. The relays had to have been on the ground since I pulled the tank and wiring out together. Ah well, live and learn.

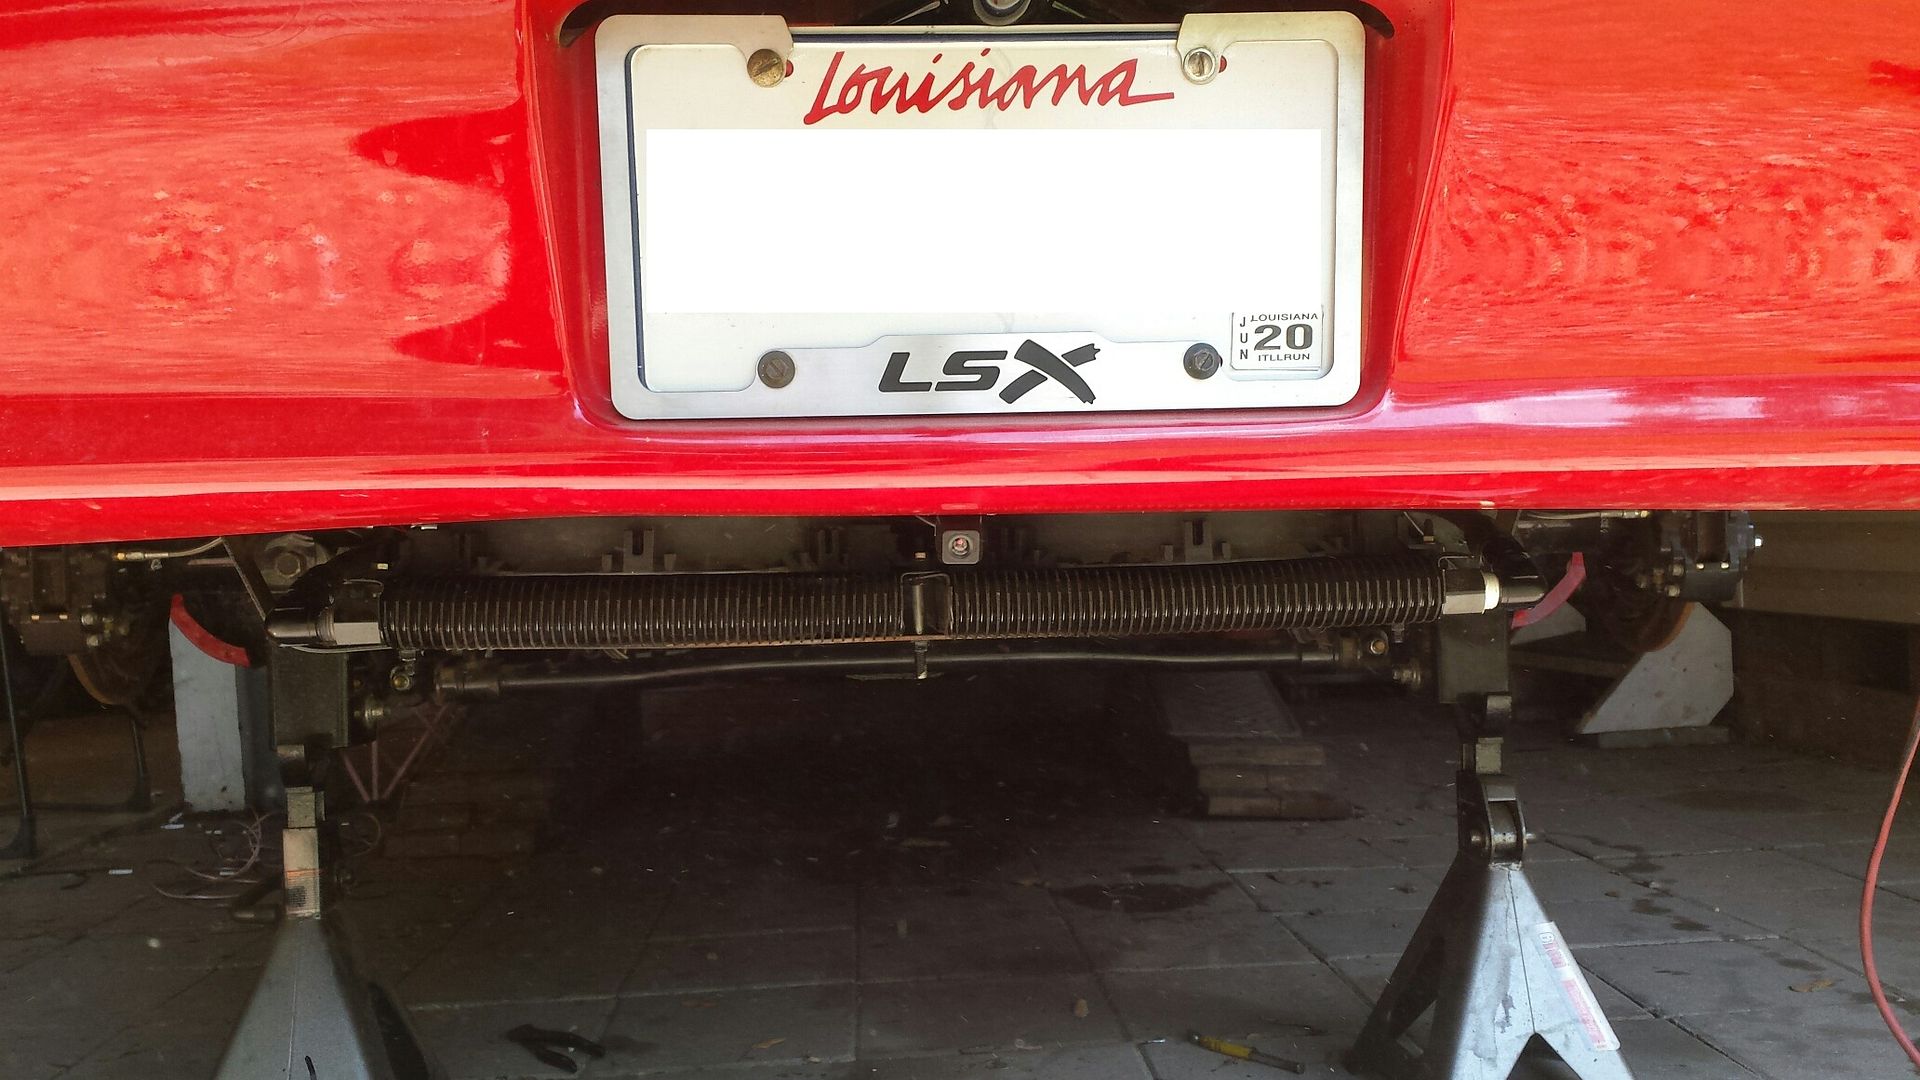
The consensus seems to be about 50/50, if you have an 8/10 point cage do you need subframe connectors? I say no, so, they got cut TF off.

This helps offset the weight of the cage also.

I was sorta dreading chopping up my (perfect) dash but knew I'd feel better once it was done and back together. So I started trimming.

Amazing my top dash pad did not break and only required minor nothing in the corners to clear the bar. Overall I'm happy with how it turned out.

Call me crazy but i wanted to easily access the fuse boxes so I decided to trim the storage area off the glove box door. It is essentially for behind dash access at this point.....but looks stock when shut. Haven't quite decided how I'm gonna keep the fuse boxes from flopping around.

#116
08-20-2018 | 10:54 AM
Thread Starter
|
Pro Rider
Joined: Aug 2010
Posts: 230
Likes: 0
We are in the belly of the beast now. Fixing screw ups, finding new issues, and doing really boring stuff like running new brake lines. I replaced the leaky fuel fittings and both fuel pump relays. All is well on the fuel side. Still waiting on one -10AN fitting to complete the PCV system. I think the boat driver got lost. PS pump is still leaking a puddle when running, haven't looked into that. And this turbo smokes like a freight train!!!
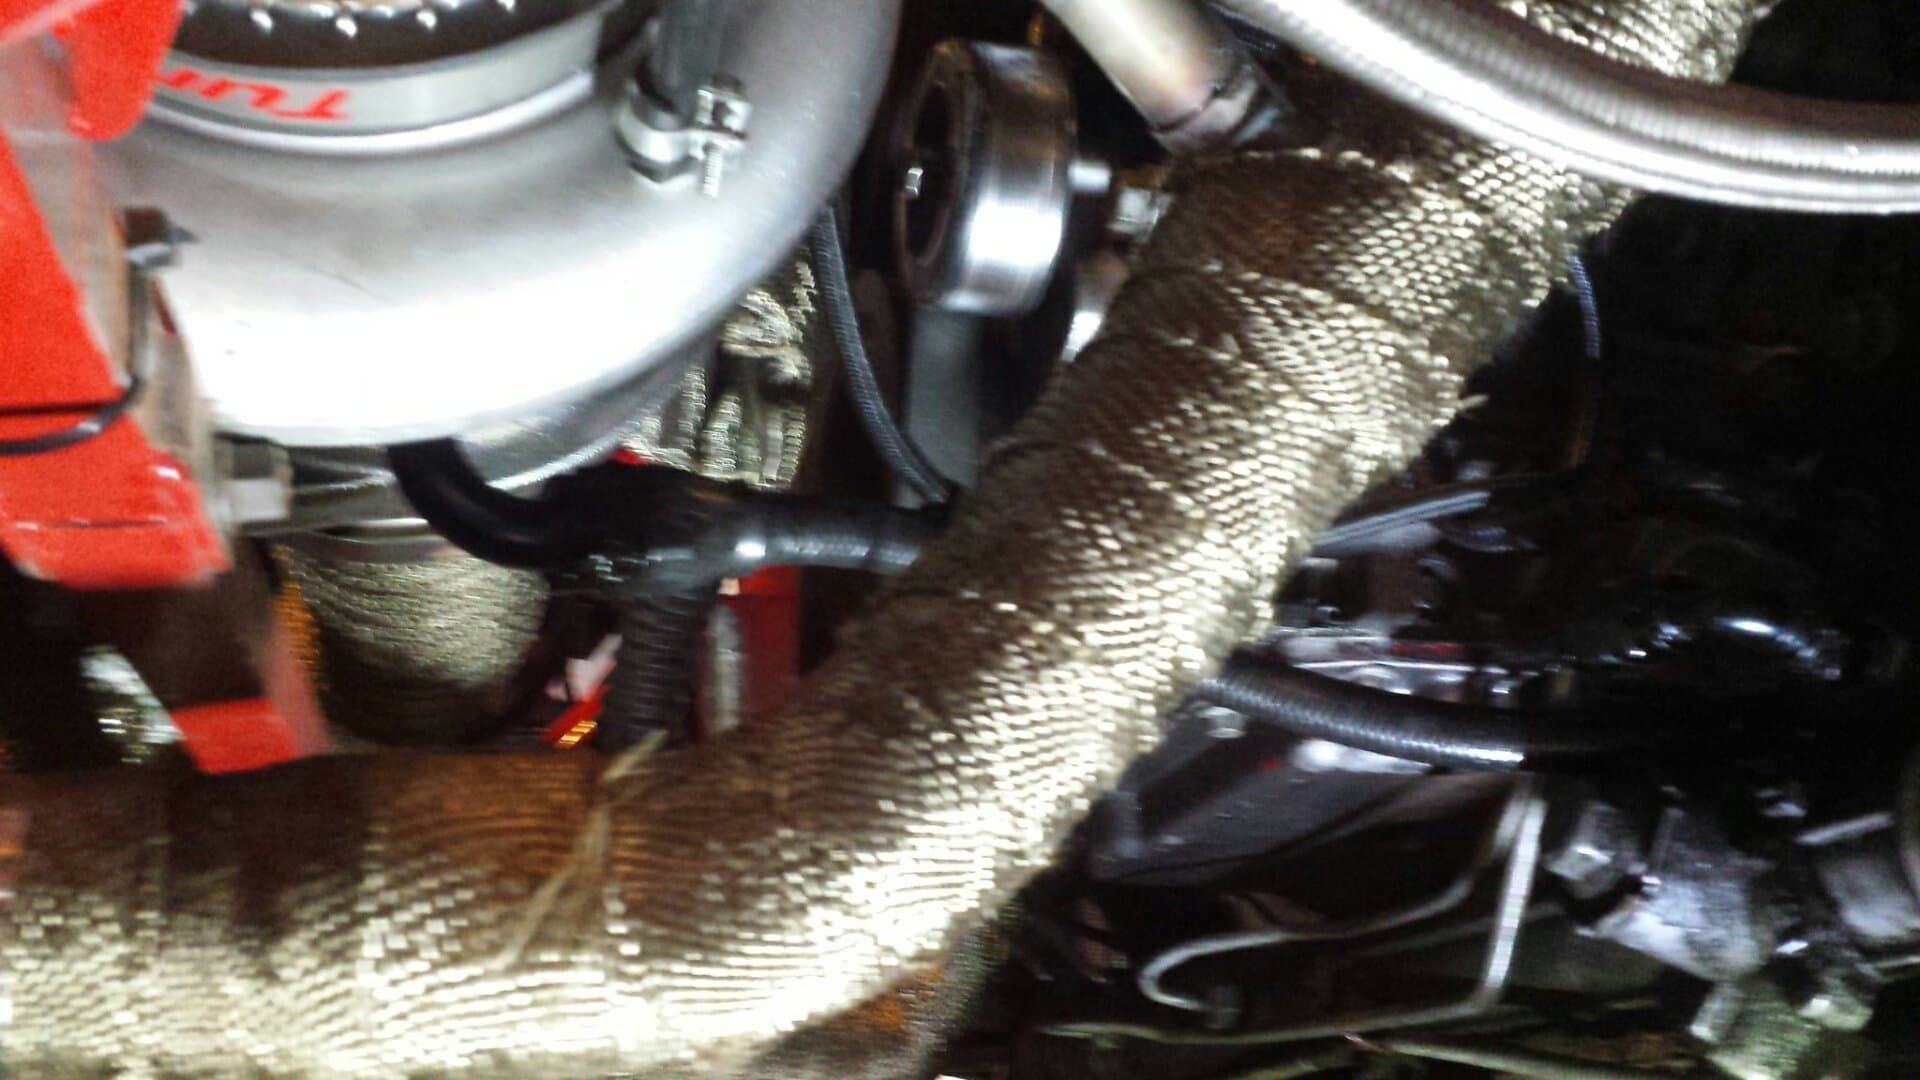
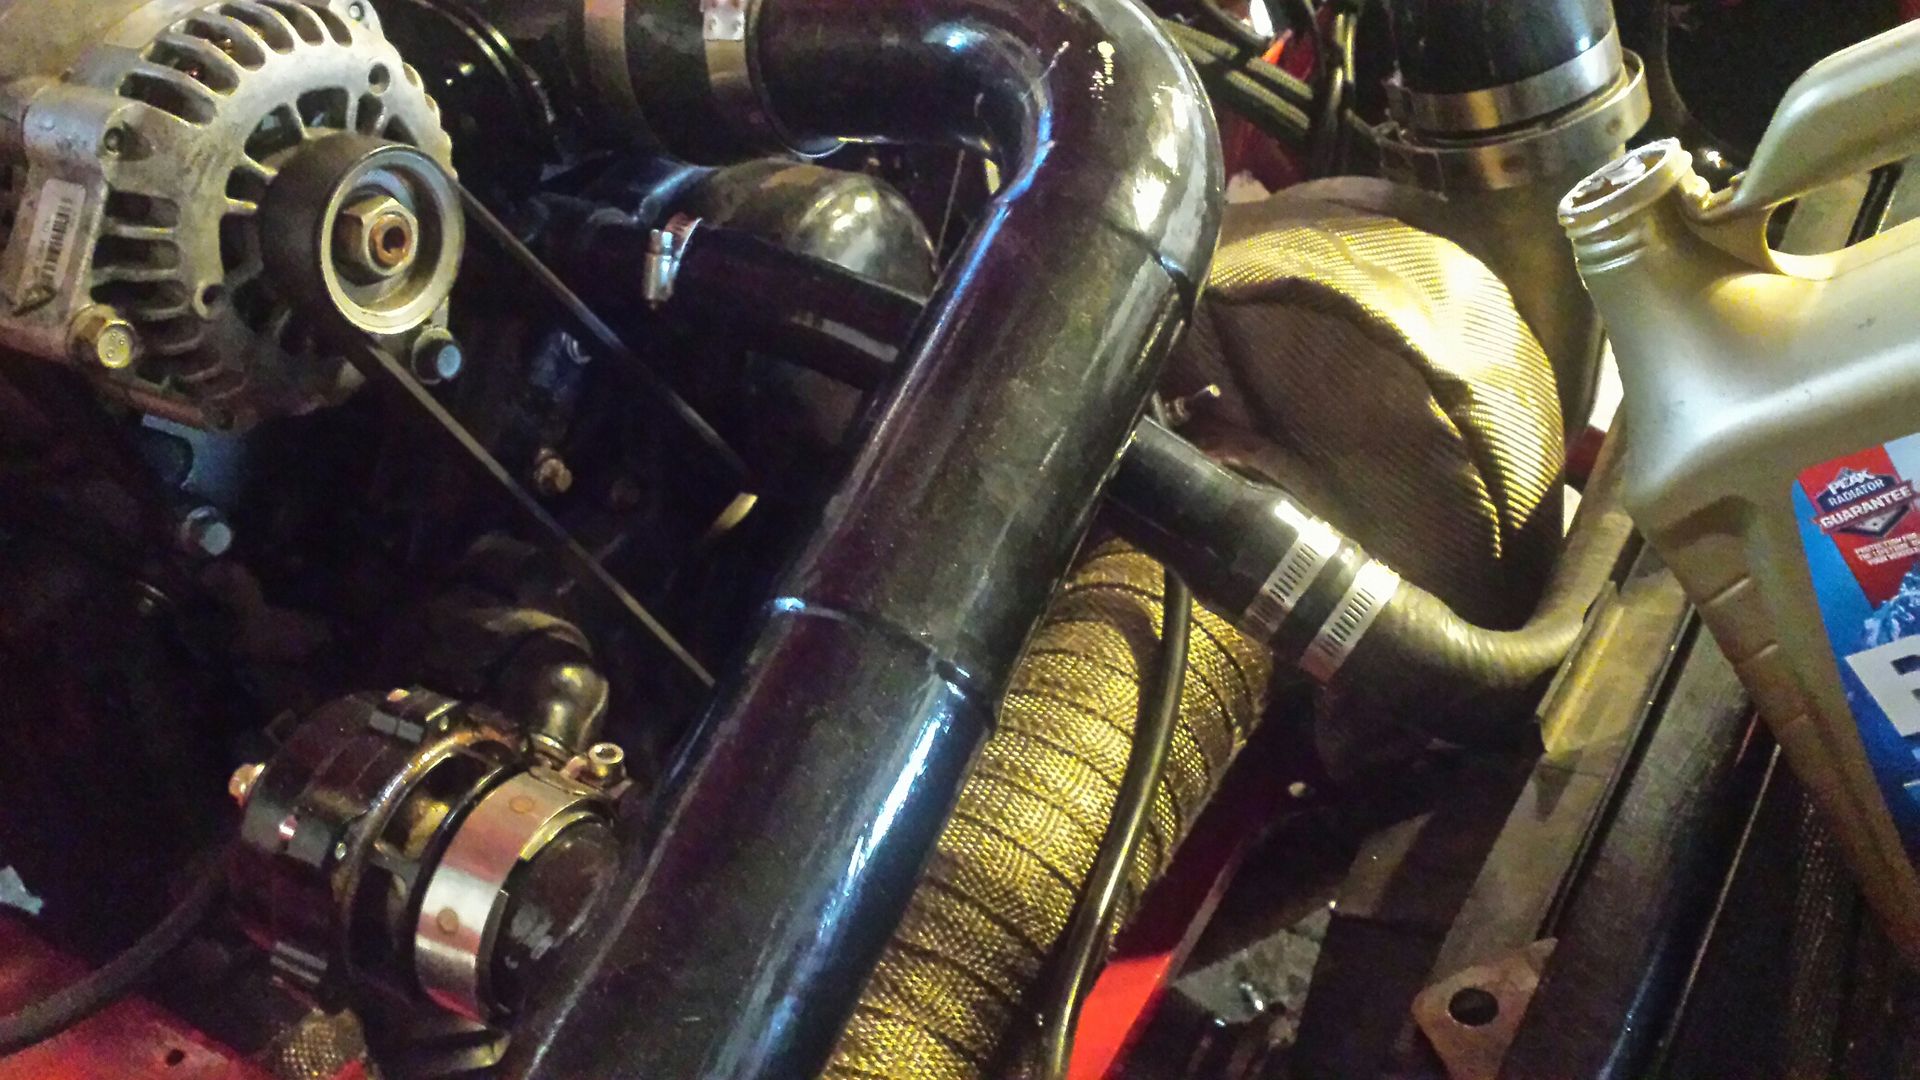
So I hit up Viren at VS Racing yesterday (Sunday) through PM. Didn't really care when he responded as this is no rush. He proceeded to have an entire conversation with me about my issues. Props to VS Racing for that. I sent him the two pics below of my drain line. He told me a couple things I didn't know. For one, he recommends a -12 drain, which I have a 10. He also does not like the 90 degree bend off the turbo. 45 would be better. I'm pretty sure that is a Teflon drain hose which even further reduces diameter. I also have some other things working against me, very little downward slope on the drain, and 70 psi of oil pressure at idle. I'm not moving the turbo, I'm not pulling the pan back off and putting in a -12 fitting, I can't change oil pressure. So we are gonna start with the easy stuff first.
Here is the 90 fitting, and an idea of the small amount of slope going back to the pan. Pretty sure the rest of the hose is about level. Understand, there is some force (residual pressure) coming down the drain line, it's not 100% dependent on gravity. But may be "sensitive" to it.
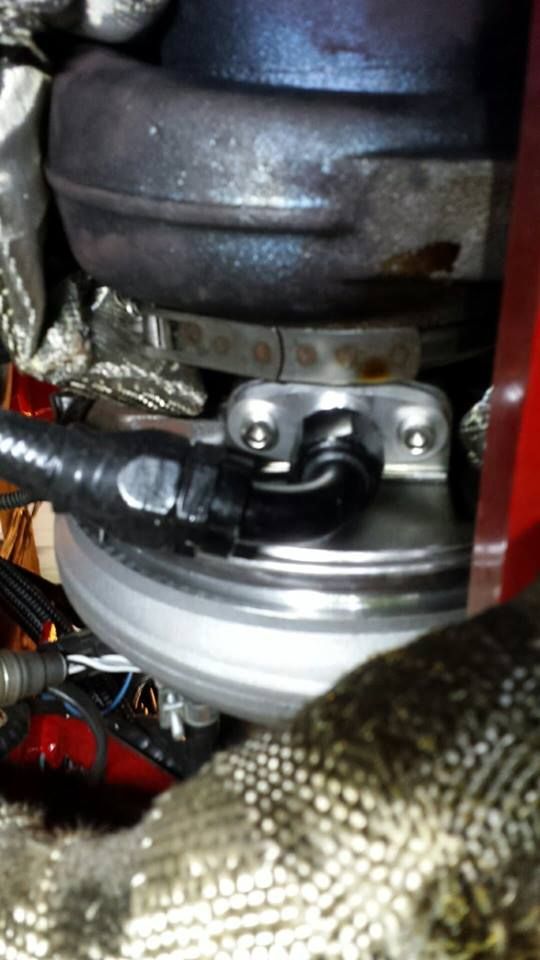
The wet leaking can be seen here. It's literally dripping inside and outside the turbo. This causes massive amounts of nasty smelling smoke.
So I'm changing the drain line from -10 teflon with 2x 90s, to -10 standard AN with 2x 45s. Not sure how much this will help but we are gonna see. Plan B is a restrictor. Turbos need oil so my plan is measure the inlet fitting, say its .250, weld it solid, then drill it back out to half so .125. Then keep stepping down (welding and re-drilling) till the smoke goes away. I want the minimum restriction possible to fix the issue.
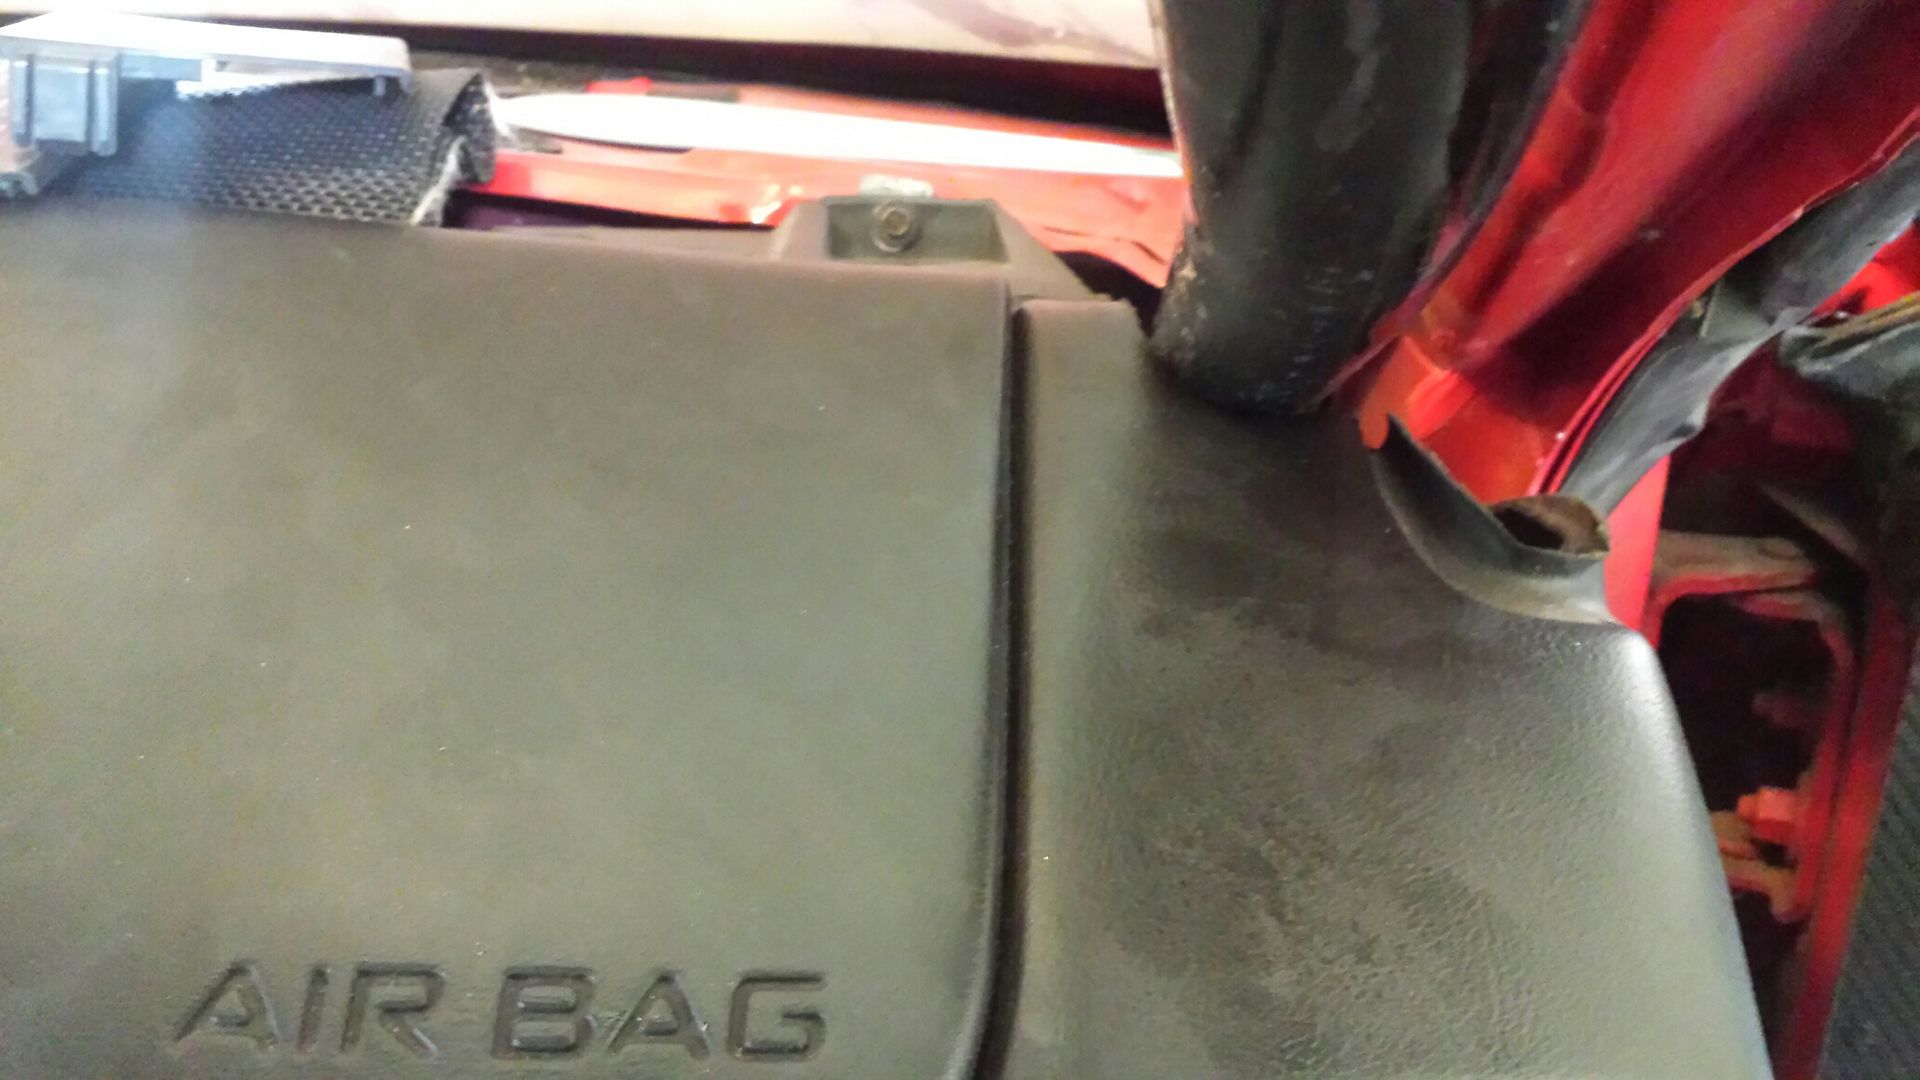
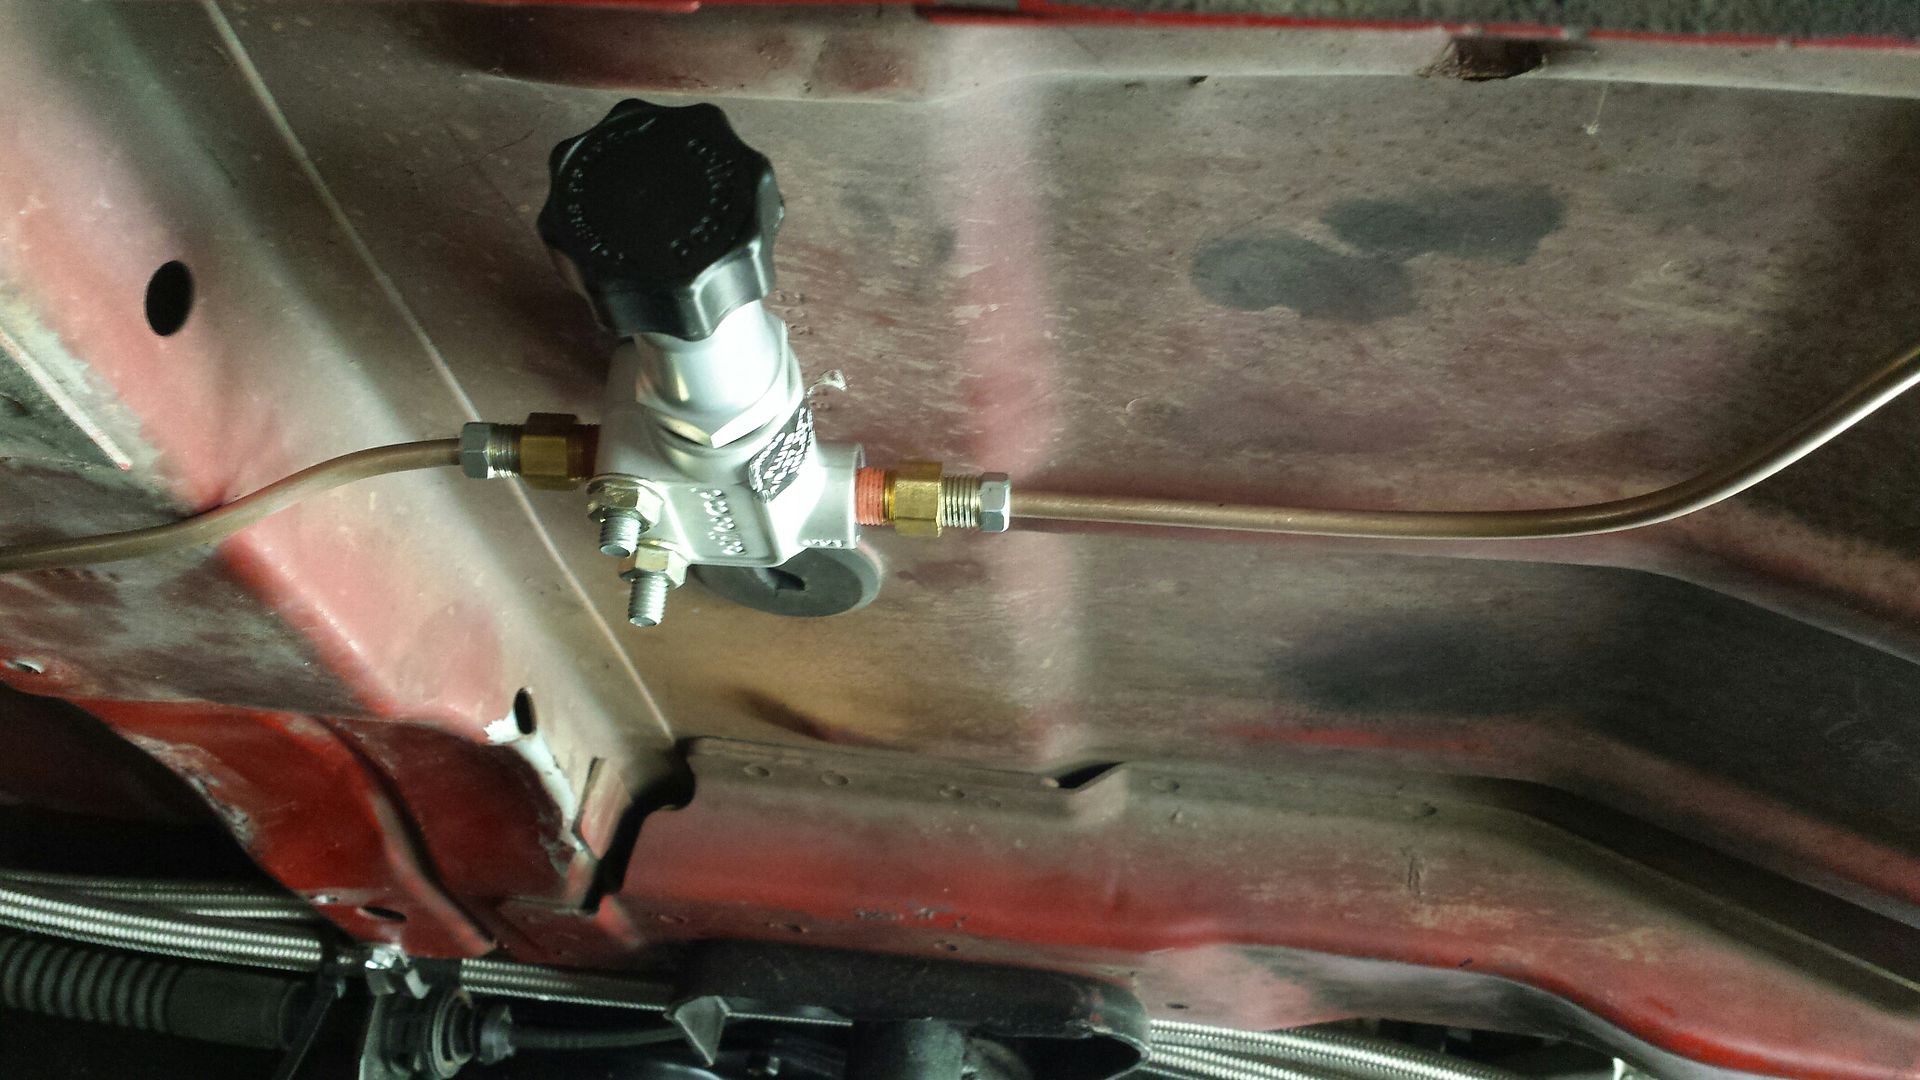
On a plus side the rear brakes are all done from scratch and finished. Well sort of, I had to order some brake line clips to hold the line to the body. Then final tweaking to avoid any contact where rubbing could occur like in this pic. I may go back and route the line through that crossmember hole. I put this under the driver front floorboard just to keep it out from under the hood for less clutter. I did not follow the stock routing to the driveshaft tunnel because I don't want the lines there in case the DS goes kapoot. The line and valve are nowhere near the lowest thing on the car so I'm not super worried about it. I'm pretty sure I will be redoing most of it because all my flares will leak. Oh well.
So I hit up Viren at VS Racing yesterday (Sunday) through PM. Didn't really care when he responded as this is no rush. He proceeded to have an entire conversation with me about my issues. Props to VS Racing for that. I sent him the two pics below of my drain line. He told me a couple things I didn't know. For one, he recommends a -12 drain, which I have a 10. He also does not like the 90 degree bend off the turbo. 45 would be better. I'm pretty sure that is a Teflon drain hose which even further reduces diameter. I also have some other things working against me, very little downward slope on the drain, and 70 psi of oil pressure at idle. I'm not moving the turbo, I'm not pulling the pan back off and putting in a -12 fitting, I can't change oil pressure. So we are gonna start with the easy stuff first.
Here is the 90 fitting, and an idea of the small amount of slope going back to the pan. Pretty sure the rest of the hose is about level. Understand, there is some force (residual pressure) coming down the drain line, it's not 100% dependent on gravity. But may be "sensitive" to it.

The wet leaking can be seen here. It's literally dripping inside and outside the turbo. This causes massive amounts of nasty smelling smoke.

So I'm changing the drain line from -10 teflon with 2x 90s, to -10 standard AN with 2x 45s. Not sure how much this will help but we are gonna see. Plan B is a restrictor. Turbos need oil so my plan is measure the inlet fitting, say its .250, weld it solid, then drill it back out to half so .125. Then keep stepping down (welding and re-drilling) till the smoke goes away. I want the minimum restriction possible to fix the issue.
On a plus side the rear brakes are all done from scratch and finished. Well sort of, I had to order some brake line clips to hold the line to the body. Then final tweaking to avoid any contact where rubbing could occur like in this pic. I may go back and route the line through that crossmember hole. I put this under the driver front floorboard just to keep it out from under the hood for less clutter. I did not follow the stock routing to the driveshaft tunnel because I don't want the lines there in case the DS goes kapoot. The line and valve are nowhere near the lowest thing on the car so I'm not super worried about it. I'm pretty sure I will be redoing most of it because all my flares will leak. Oh well.

#118
09-07-2018 | 10:08 AM
Thread Starter
|
Pro Rider
Joined: Aug 2010
Posts: 230
Likes: 0
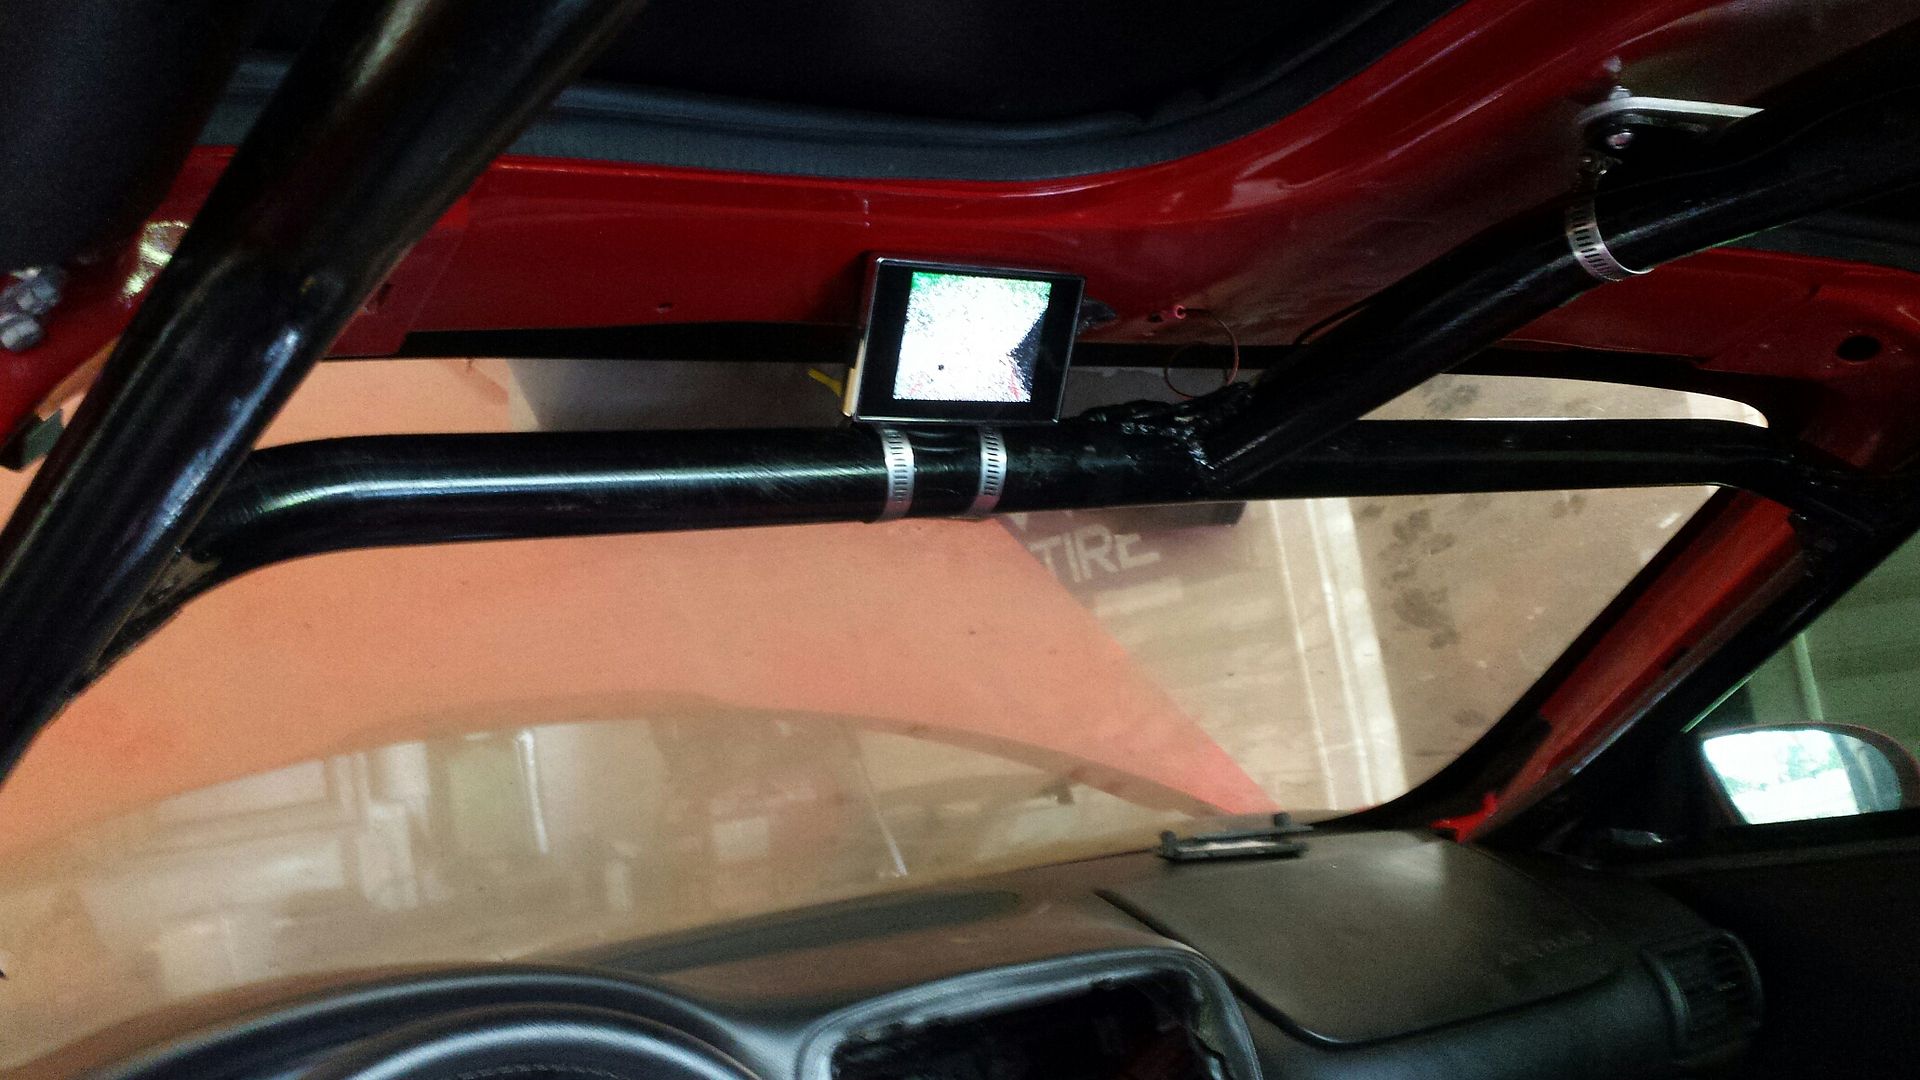
Quick little update, very little has been going on. I've enjoyed taking a little break from the car. It is time to get it finished though. So yeah I decided to go ahead and bite the bullet and order a scavenge pump. Leveling the car did improve the smoke but there is still too much for my liking. So that's on the way. Grabbed me a $25 LCD and camera setup on ebay, and at this point I'm not even sure if I'm gonna try and mount the rearview mirror, I plan to run this all the time.
I did have to go back and shim this up a little to get the distance behind the car I wanted while still remaining fairly hidden. Width/angle is equal to the width of the car at about 1 to 2 feet behind it, then widens out from there.
I tried sticking this to the roof and it fell off within an hour. So i just hose clamped it to the roll cage. Really dont want to weld a mount on the cage for an LCD screen. So this is gonna have to work for now. Not sure if its gonna be annoying there but it isnt in my line of sight.
I did have to go back and shim this up a little to get the distance behind the car I wanted while still remaining fairly hidden. Width/angle is equal to the width of the car at about 1 to 2 feet behind it, then widens out from there.

I tried sticking this to the roof and it fell off within an hour. So i just hose clamped it to the roll cage. Really dont want to weld a mount on the cage for an LCD screen. So this is gonna have to work for now. Not sure if its gonna be annoying there but it isnt in my line of sight.


#120
09-11-2018 | 11:42 AM
Thread Starter
|
Pro Rider
Joined: Aug 2010
Posts: 230
Likes: 0
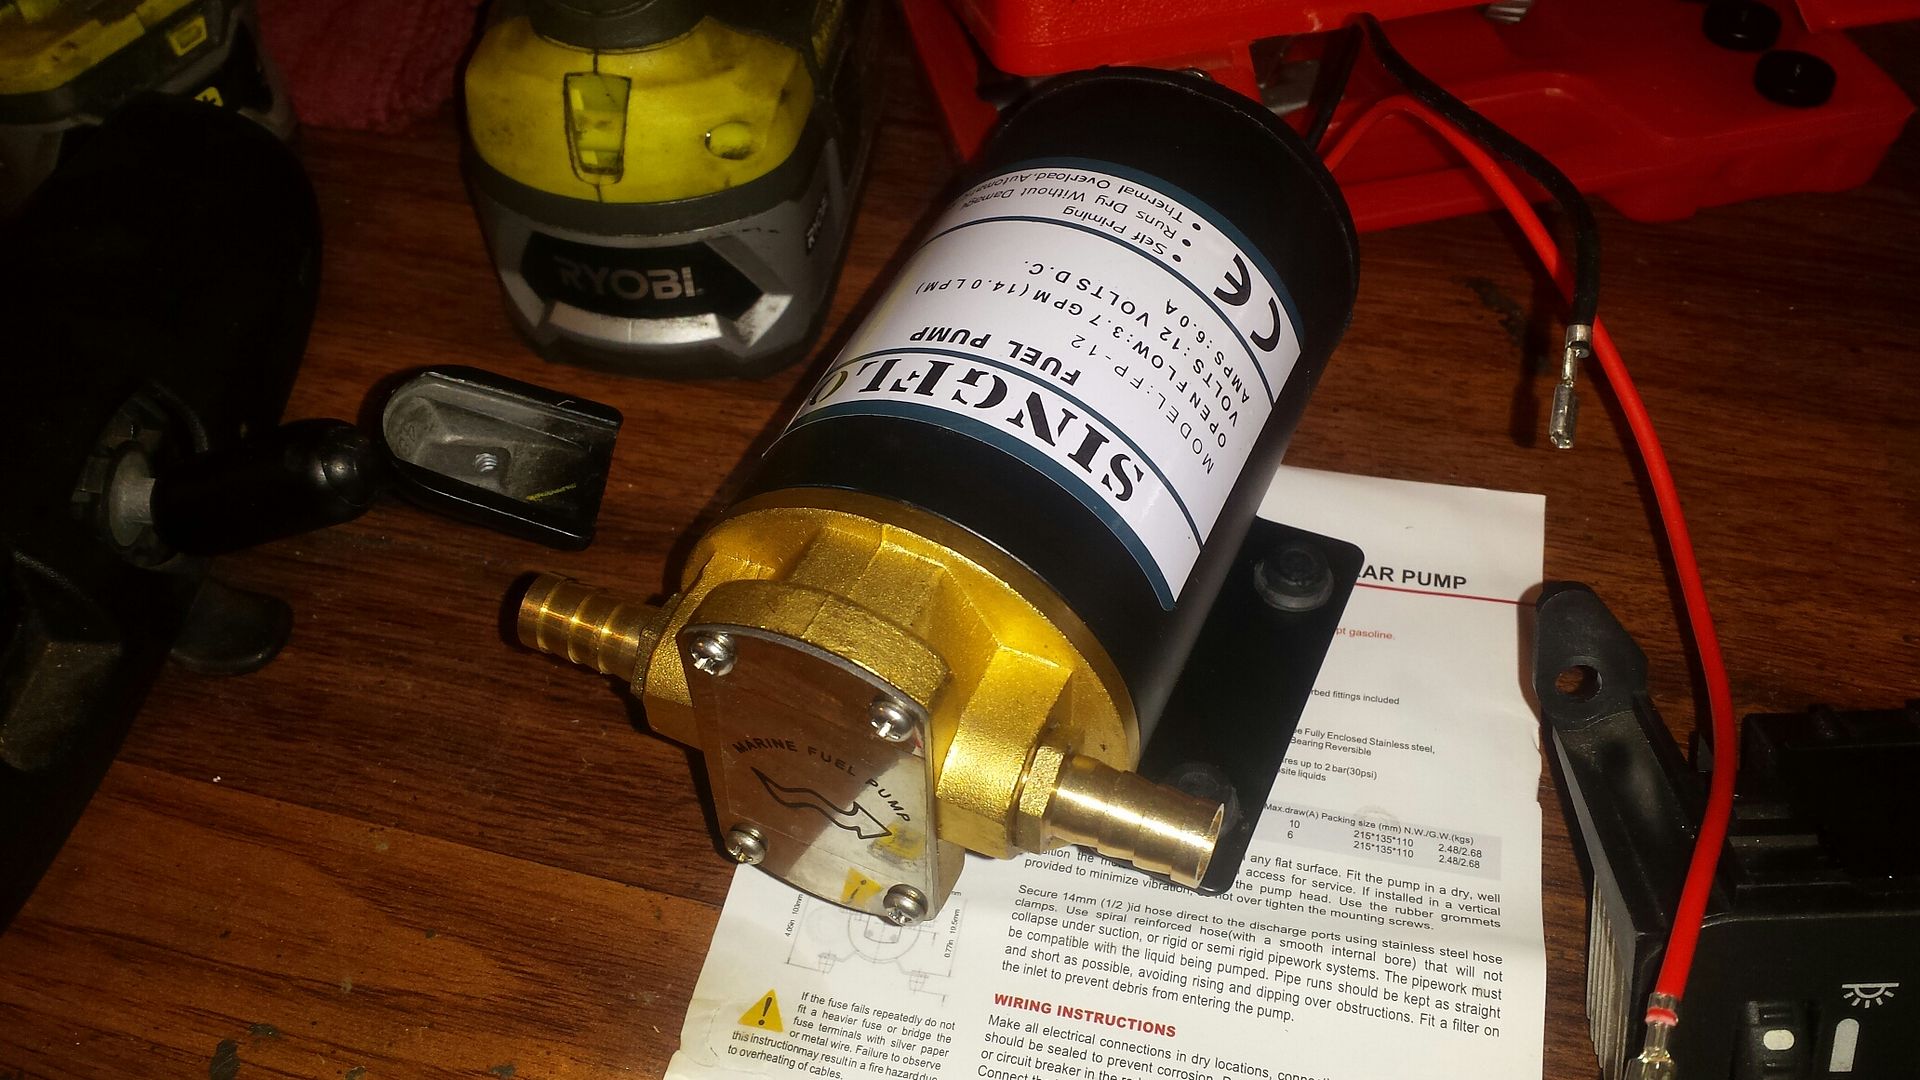
Brand new POS chinaman scavenge pump. It's big, it's probably gonna be loud, no clue what the fittings are going into it, but it should work well.
So looking back I never posted pics of the upper radiator hose in-place. I bought a flex hose and it was a tad too short. So I decided the stock hose was perfect, just needed to be longer. I originally added a straight adapter, and a 6" piece of 1.25 silicone. It worked fine but dangled the hose right over the turbo. So I decided try #3 would be a charm.
1.25" listed adapter measured 1.50". Dang you Summit.
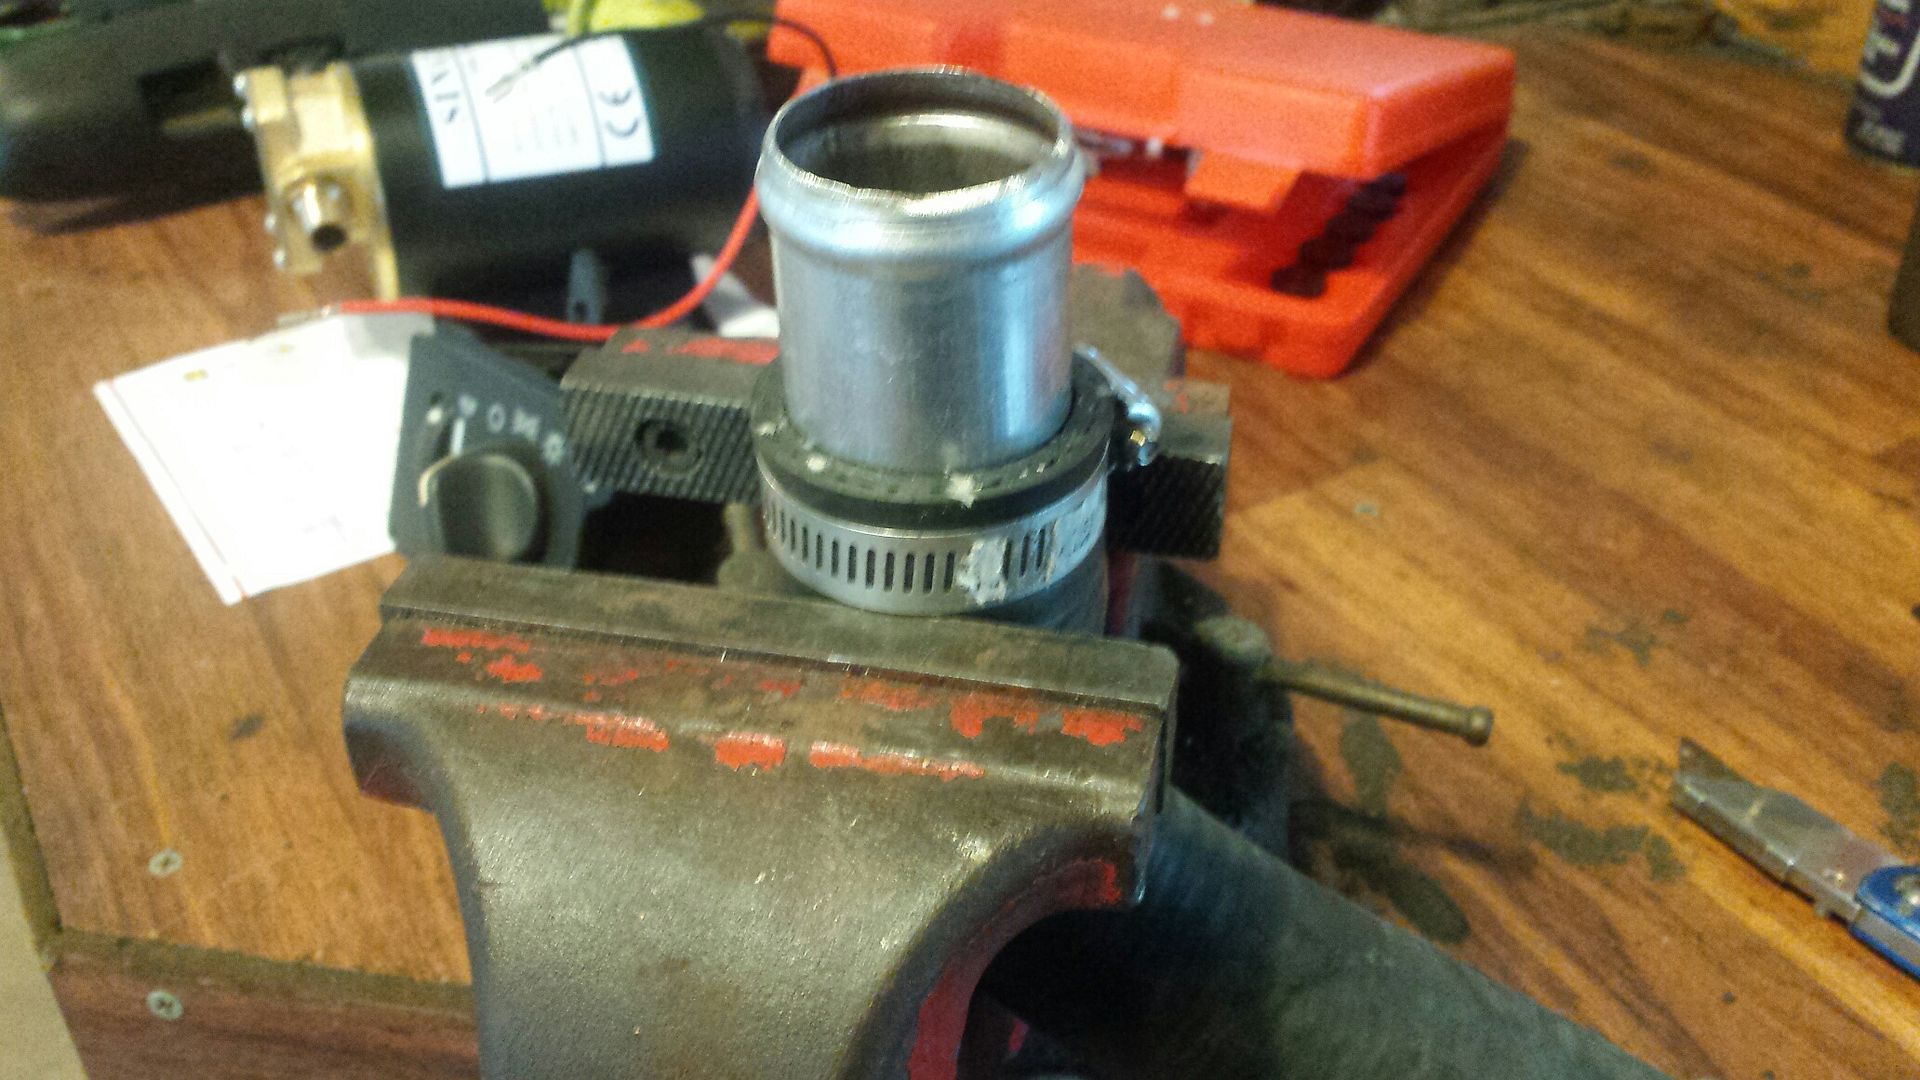
Had to go old school.
After some profanity and some wrenches being thrown i got it on. You can see how buldged it is over the fitting. It sits really nice above the fan so I dont think it needs a brace or anything.
Was gonna replace all the carpet then scratched that idea. I'm just gonna add a rear section.......at some point. Right now this will do. Did some quick trimming just to see how it fit with the cage in the way.
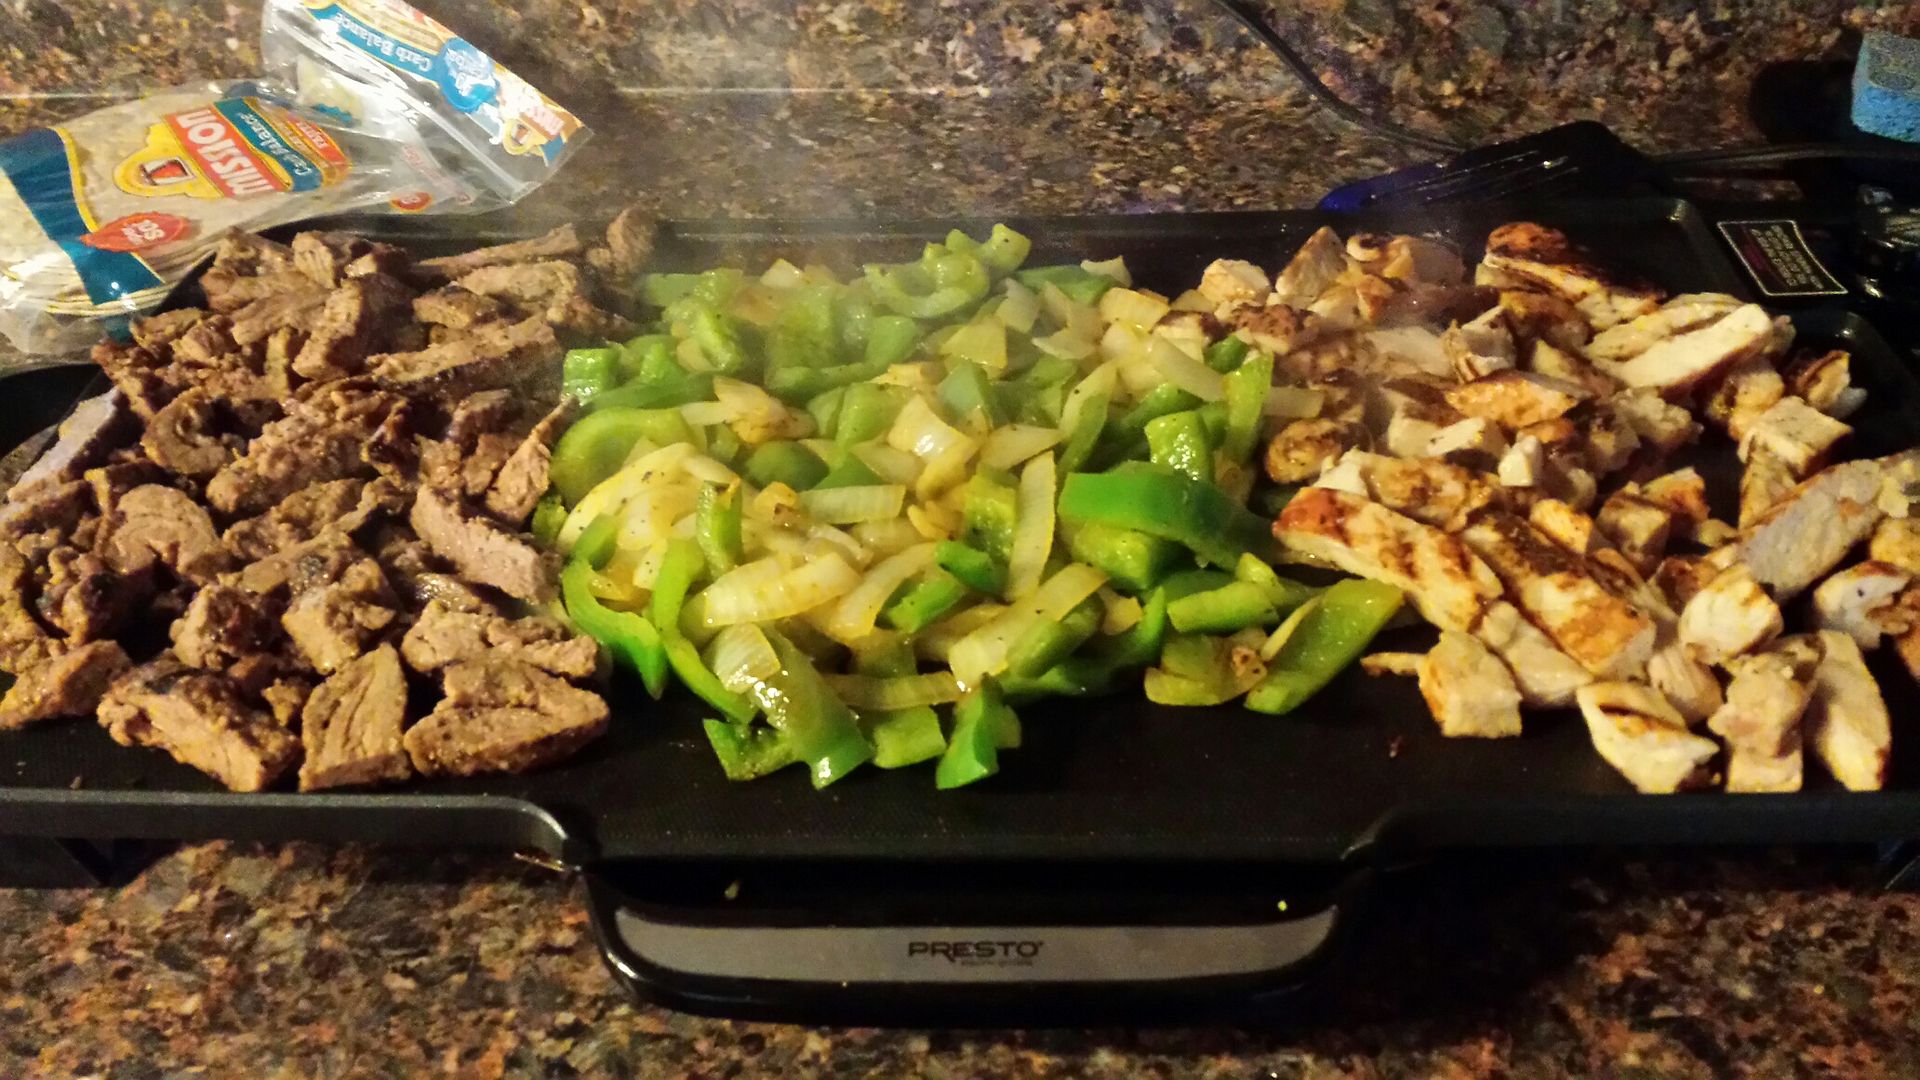
Next stop, fajitas and cold beer in the garage.

So looking back I never posted pics of the upper radiator hose in-place. I bought a flex hose and it was a tad too short. So I decided the stock hose was perfect, just needed to be longer. I originally added a straight adapter, and a 6" piece of 1.25 silicone. It worked fine but dangled the hose right over the turbo. So I decided try #3 would be a charm.
1.25" listed adapter measured 1.50". Dang you Summit.

Had to go old school.

After some profanity and some wrenches being thrown i got it on. You can see how buldged it is over the fitting. It sits really nice above the fan so I dont think it needs a brace or anything.

Was gonna replace all the carpet then scratched that idea. I'm just gonna add a rear section.......at some point. Right now this will do. Did some quick trimming just to see how it fit with the cage in the way.

Next stop, fajitas and cold beer in the garage.
