SS Camaro - Track trips, build pics etc.
#41
 08-07-2017, 07:47 AM

Join Date: Aug 2010
Posts: 230
Likes: 0
Received 0 Likes
on
0 Posts
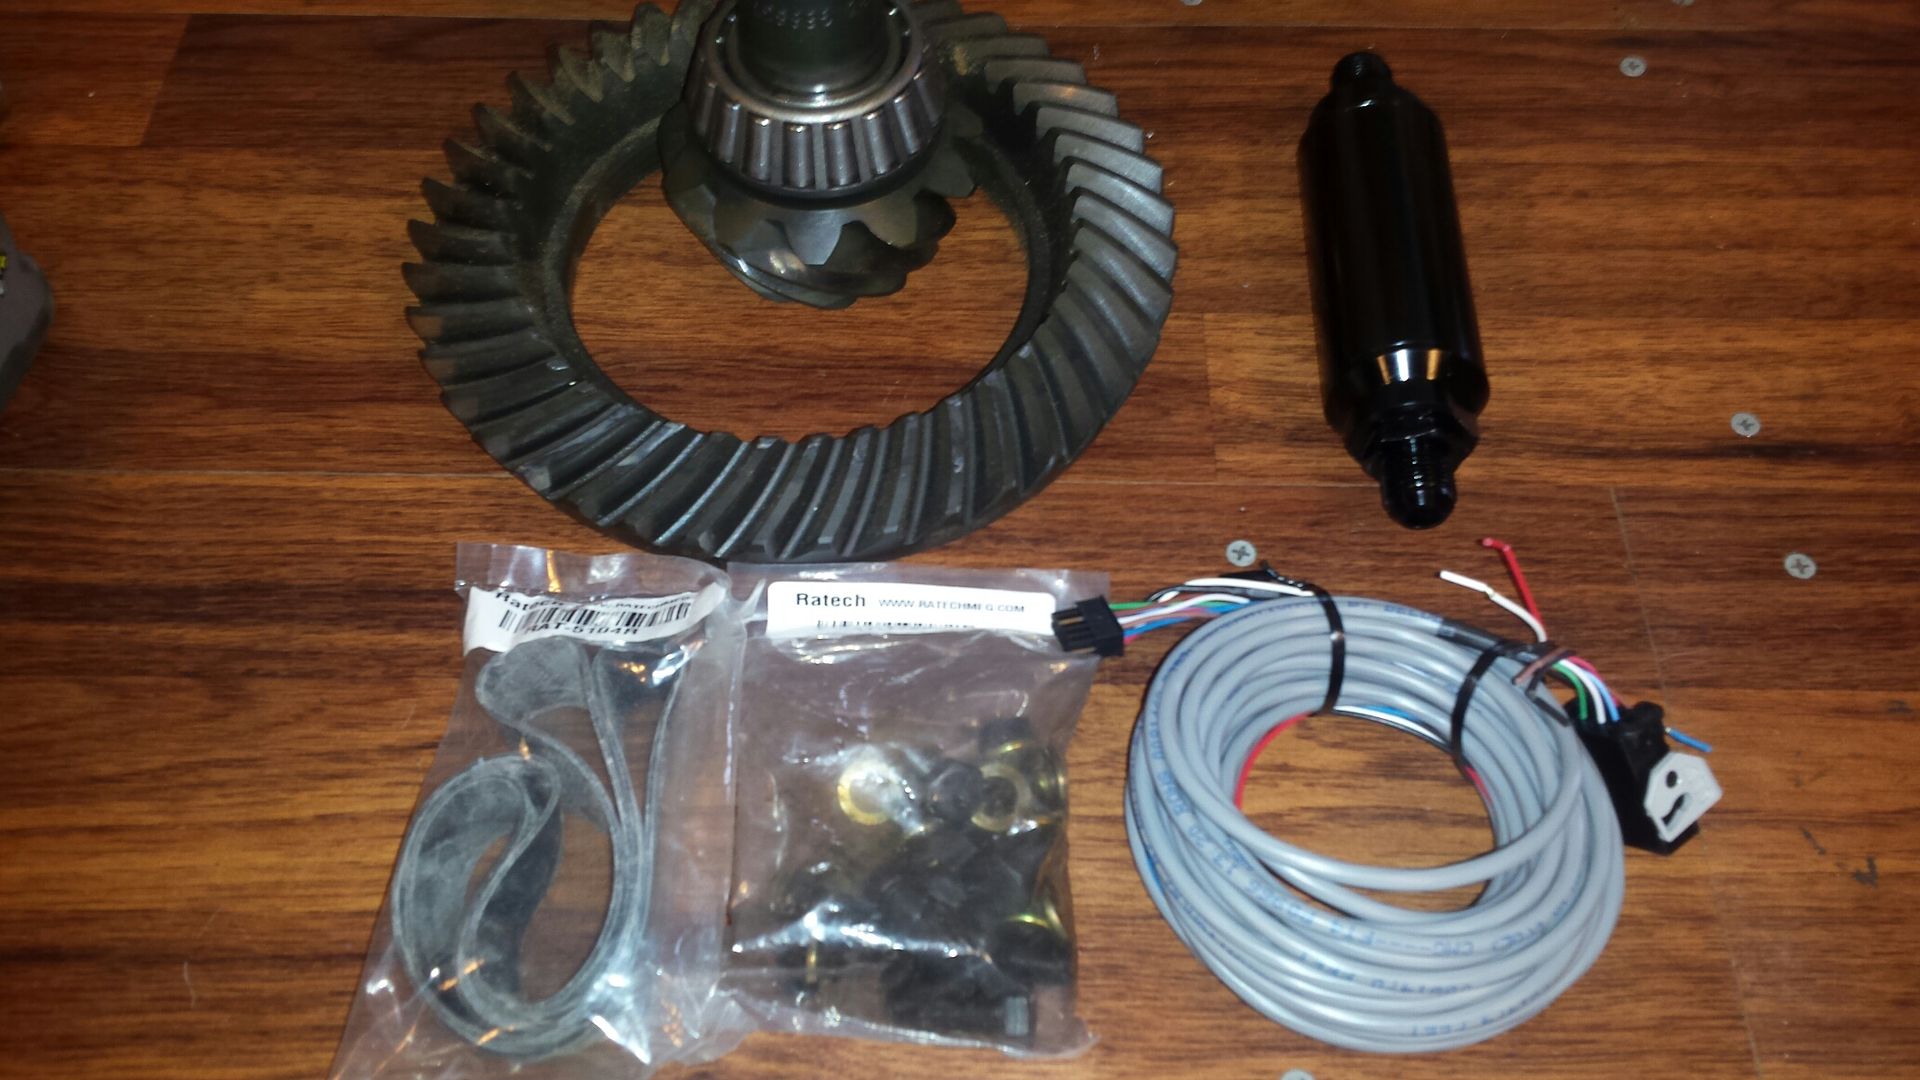
Got some parts in, bottom left is the new ring gear bolts and cover gasket for the 12 bolt, bottom right is wideband o2 harness extension, top right is a fuel filter with the stainless washable element, left is the 3.73 gears I'm reinstalling.
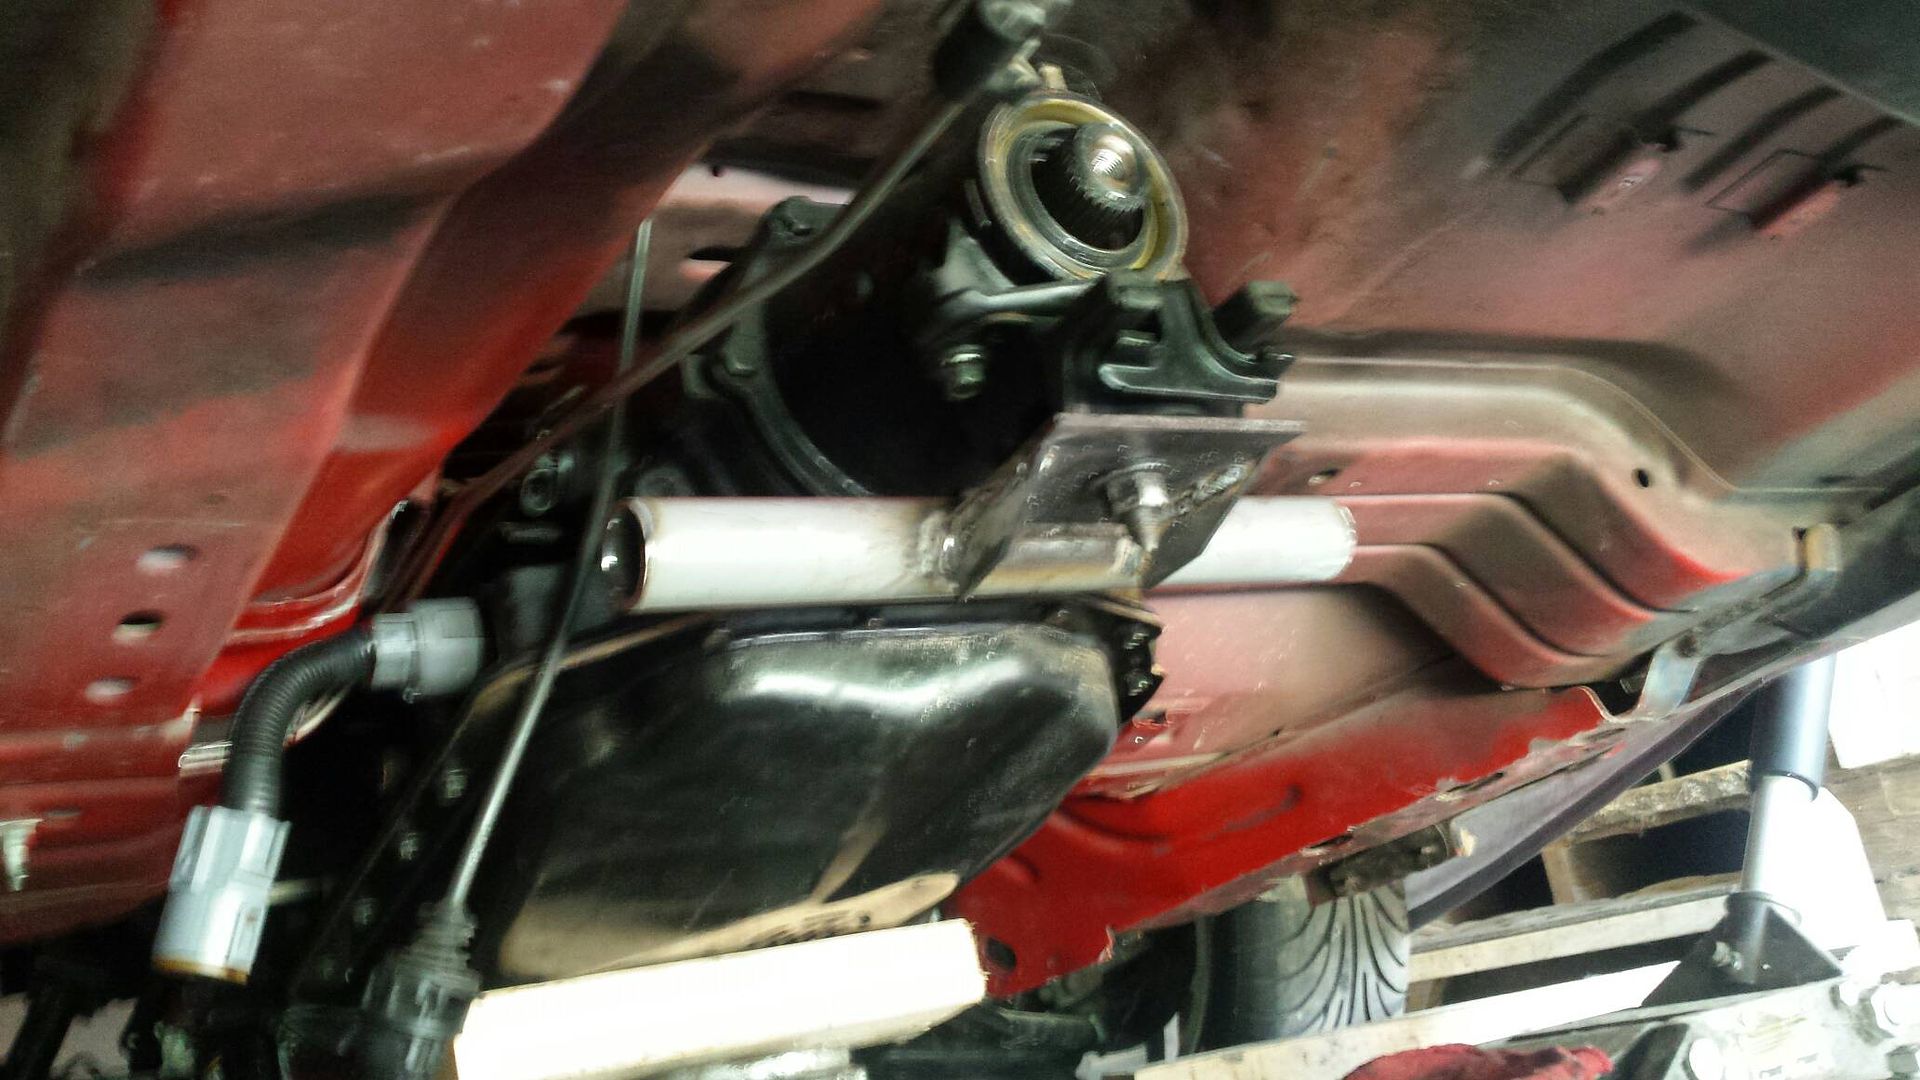
Wasn't gonna buy a prefab crossmember to the tune of $180 dollars so I decided I'd make one. As I sat there thinking about material size, type, thickness I spied the driver door bar I pulled out earlier in the year. Its about 1.5" seemless steel tube with a decent wall thickness, that should do the trick and the best part is, it was zero dollars. I made a mount for the trans out of maybe 5/16 plate I had, then cut a 1 foot section of the door bar, welded them together and add small gussets under the plate for extra strength.....also, in this pic you can see the clearance and why i cut for the electrical connector.
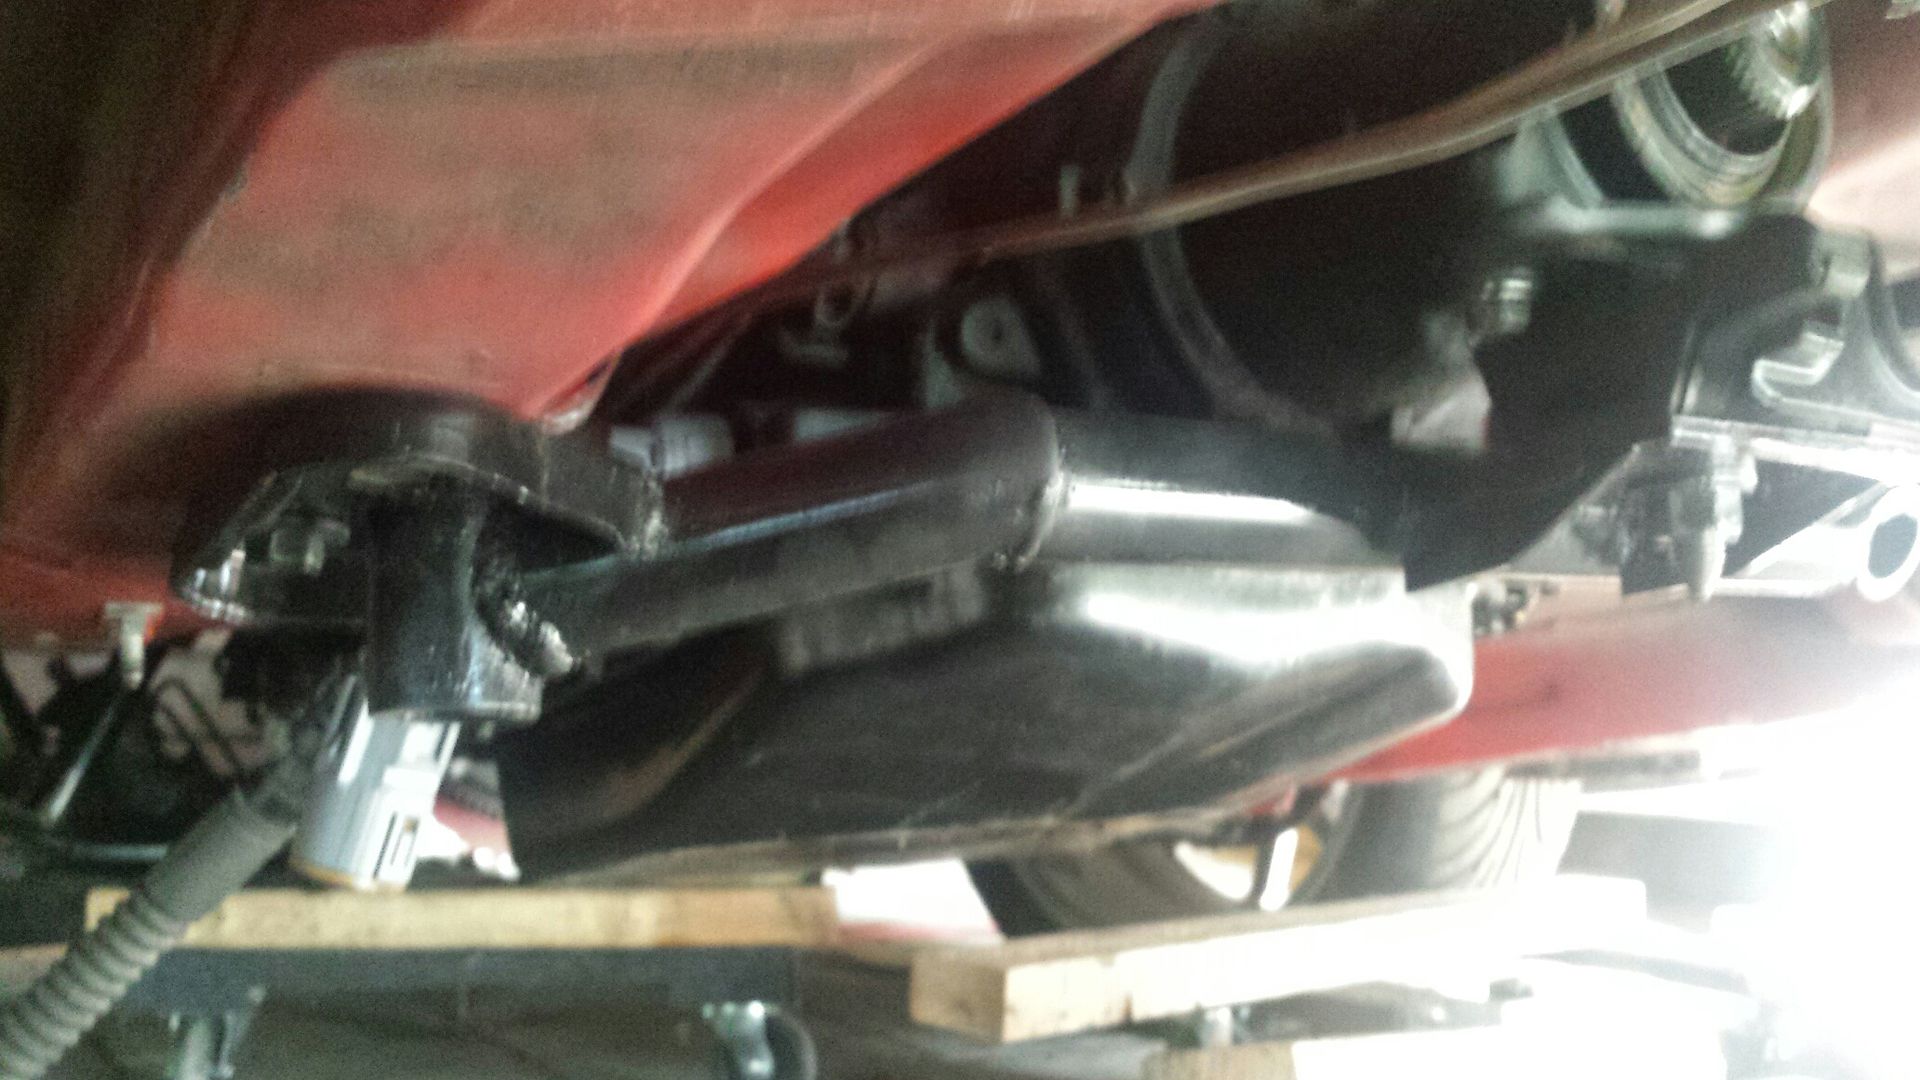
Late evening pic (washout), but you get the idea of the finished product. I was going to make new sides plates where this bolts to the car but after looking at the stock crossmember I was like **** it i will just cut the ends off and make it work. In this pic you can see I used a small section to drop down vertically, then I hand notched the tubing to get a decent fit going back to the original 12" piece. Got the trans in place and this thing didnt budge as i set the weight down on it, it should be fine.
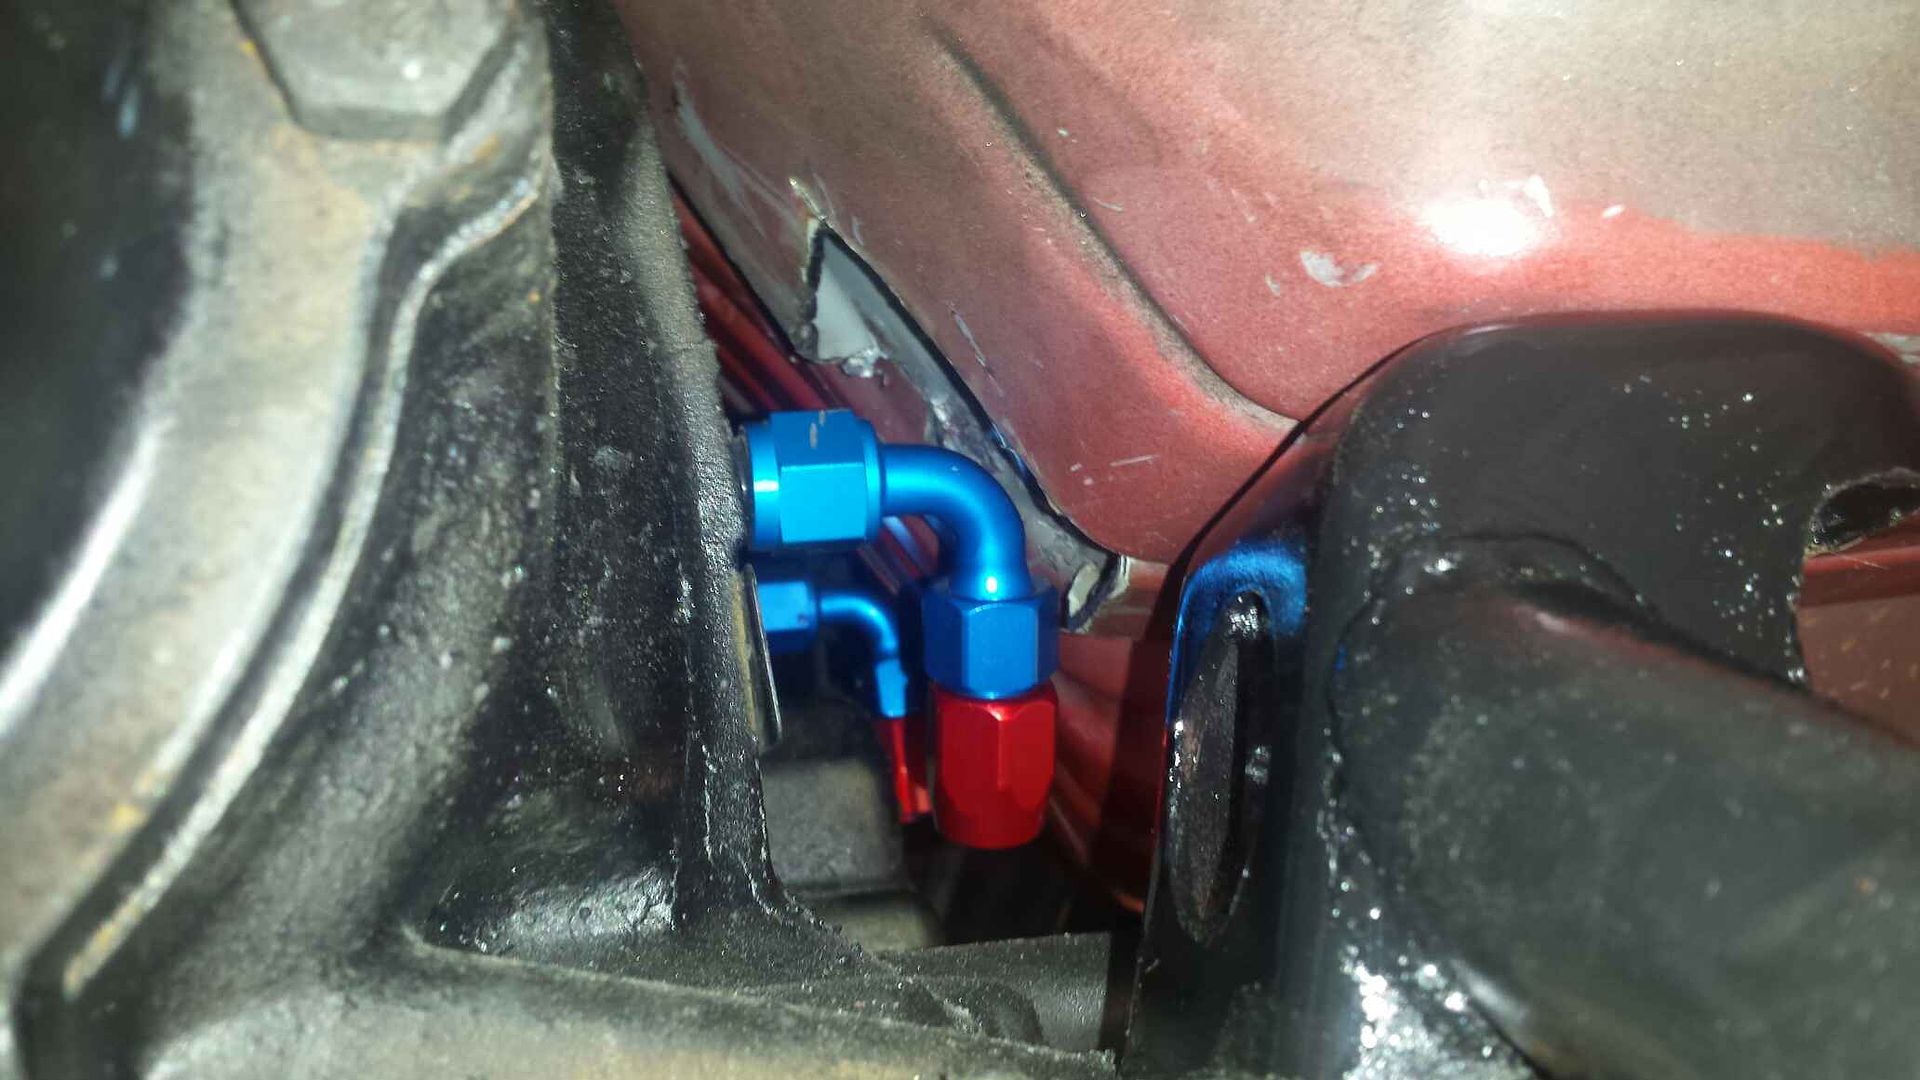
My cooler lines have 45s on them. I knew that wouldn't fit so I ordered 90s. I was wondering if they would clear so I put them on the trans to give me an idea. The front line has about 1/4" clearance from the body, the rear one, no chance in hell getting it on there. I quickly lowered the trans tail and snuck my grinder in there. After some hot sparks it does fit, but I only have about 30 degrees of rotation, looking at the trans and fitting it will swivel from about 2 to 5 oclock.....so the rear line will have to exit towards the front and loop back around. You can see both fittings in this pic.

#42
08-12-2017, 07:58 AM
Join Date: Aug 2010
Posts: 230
Likes: 0
Received 0 Likes
on
0 Posts
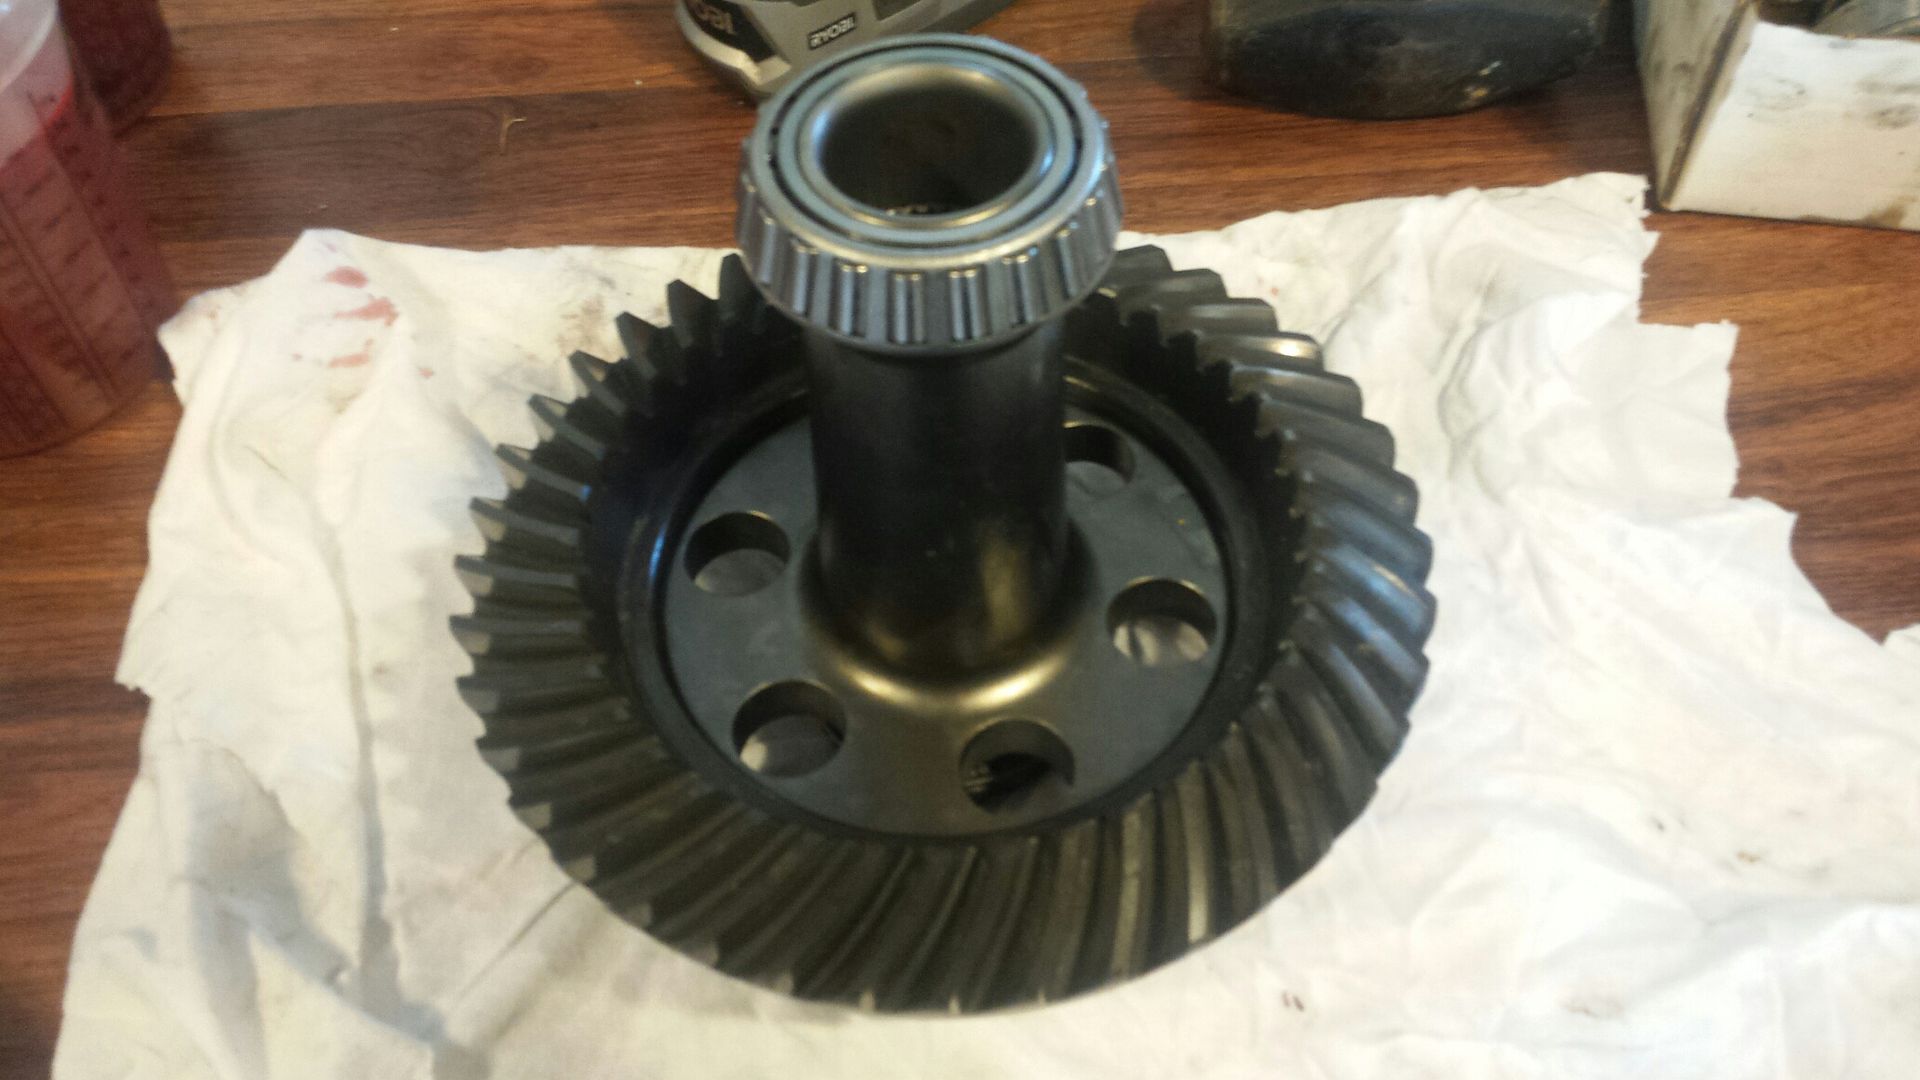
First thing first I had to finish the 4.10 to 3.73 gear swap. Here is the 3.73 mounted to the Strange lightweight steel spool.
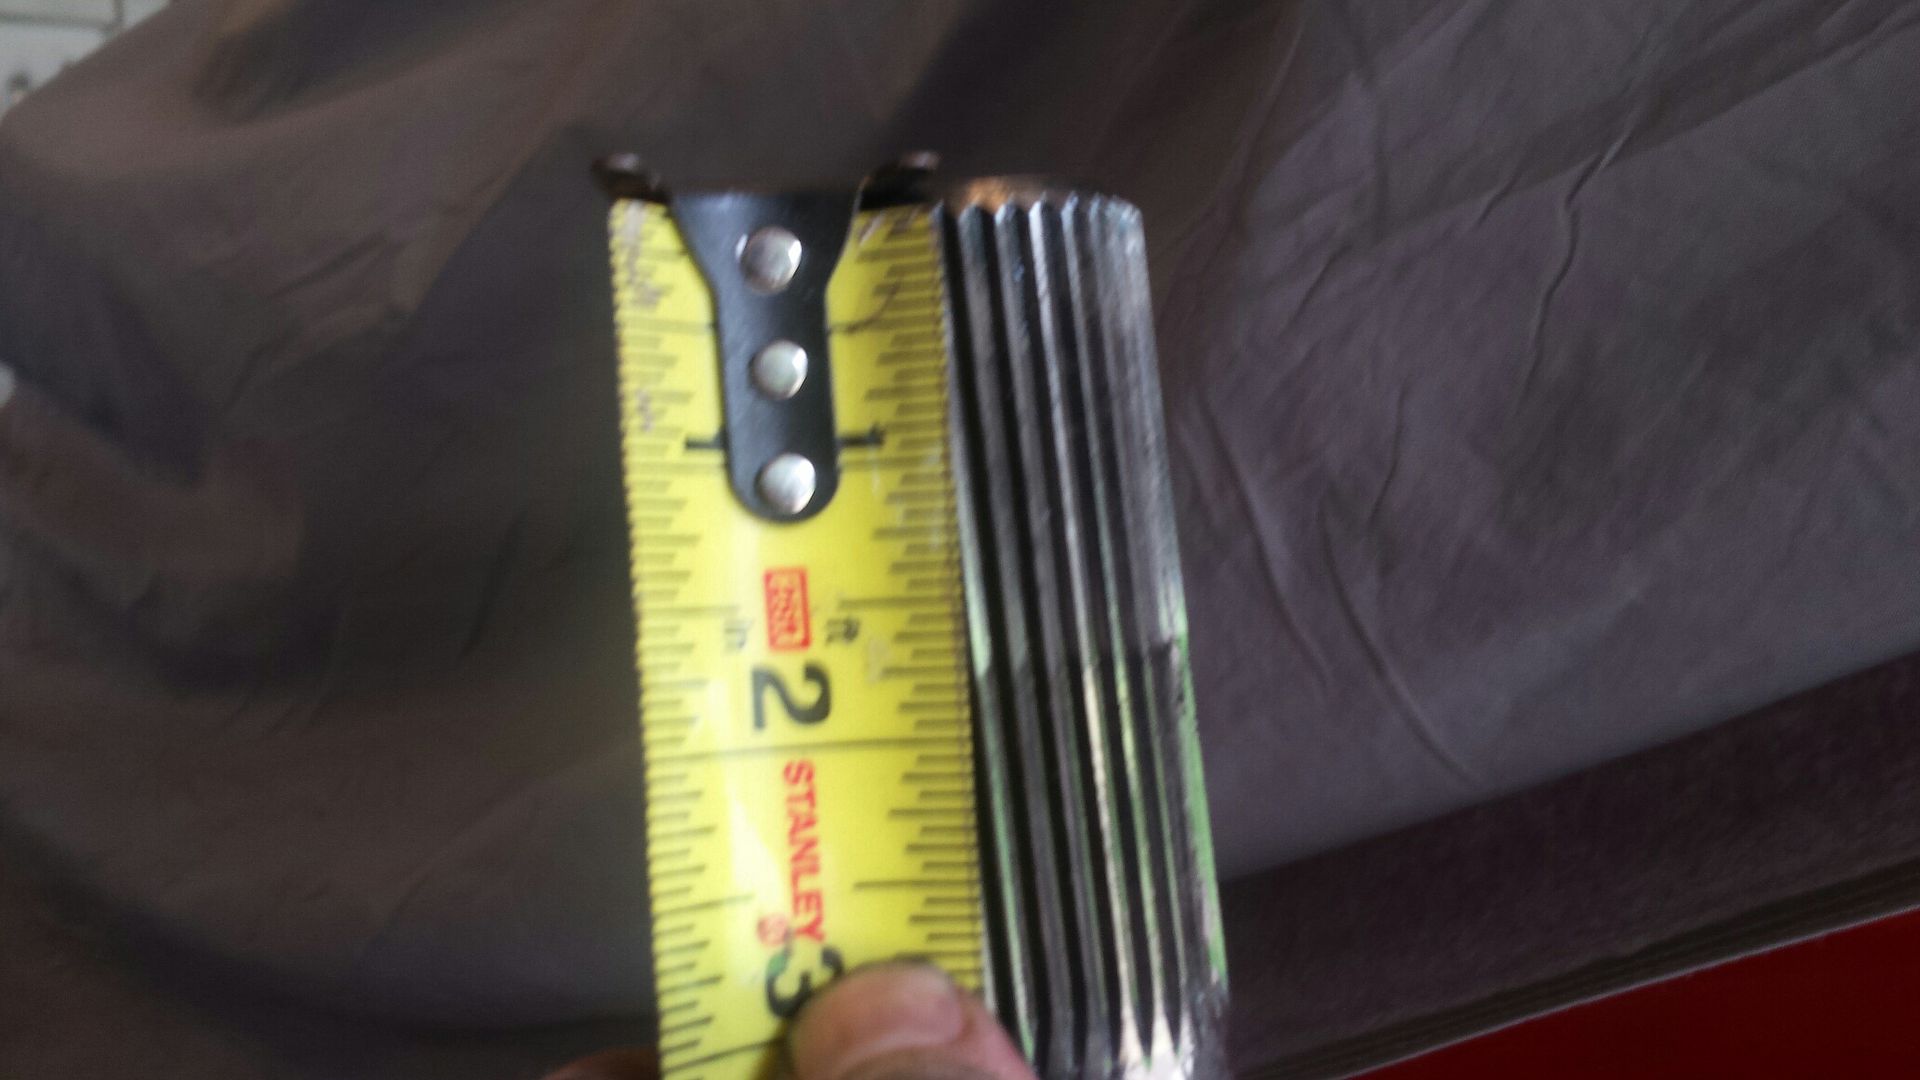
Before final assembly I inspected the axles closely, I also measured engagement just due to curiosity. No damage and everything looked good.
Once the rear end was reassembled I wanted to test fit the driveshaft. Even bottomed out in the trans it wouldn't fit, it was too long. I had pulled the rear end forward to fit (center) the 28" slicks. I made a quick adjustment and moved the rear end back about an inch and had plenty of room to get the DS in. I also reset pinion angle to -2. Im planning on trimming some on the back bumper for the tires (since I moved them back) but this may need a final adjustment later.
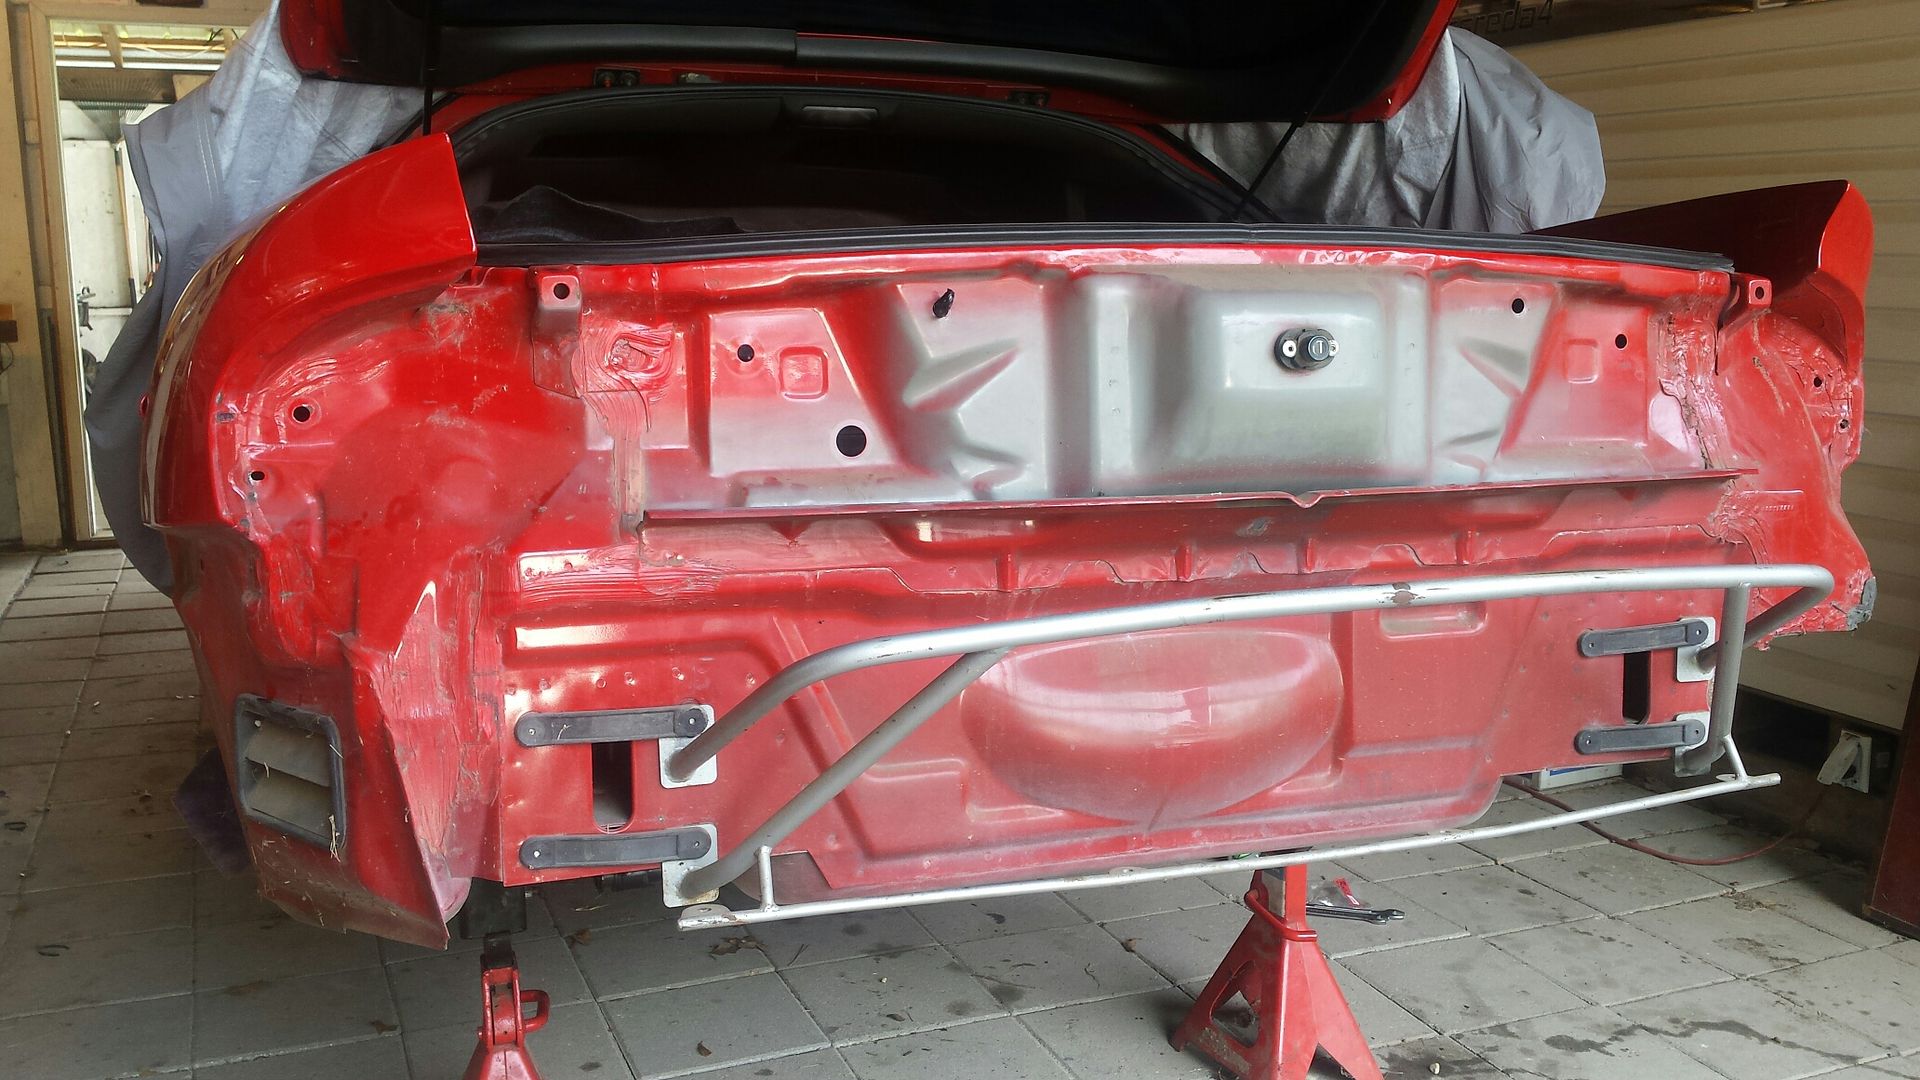
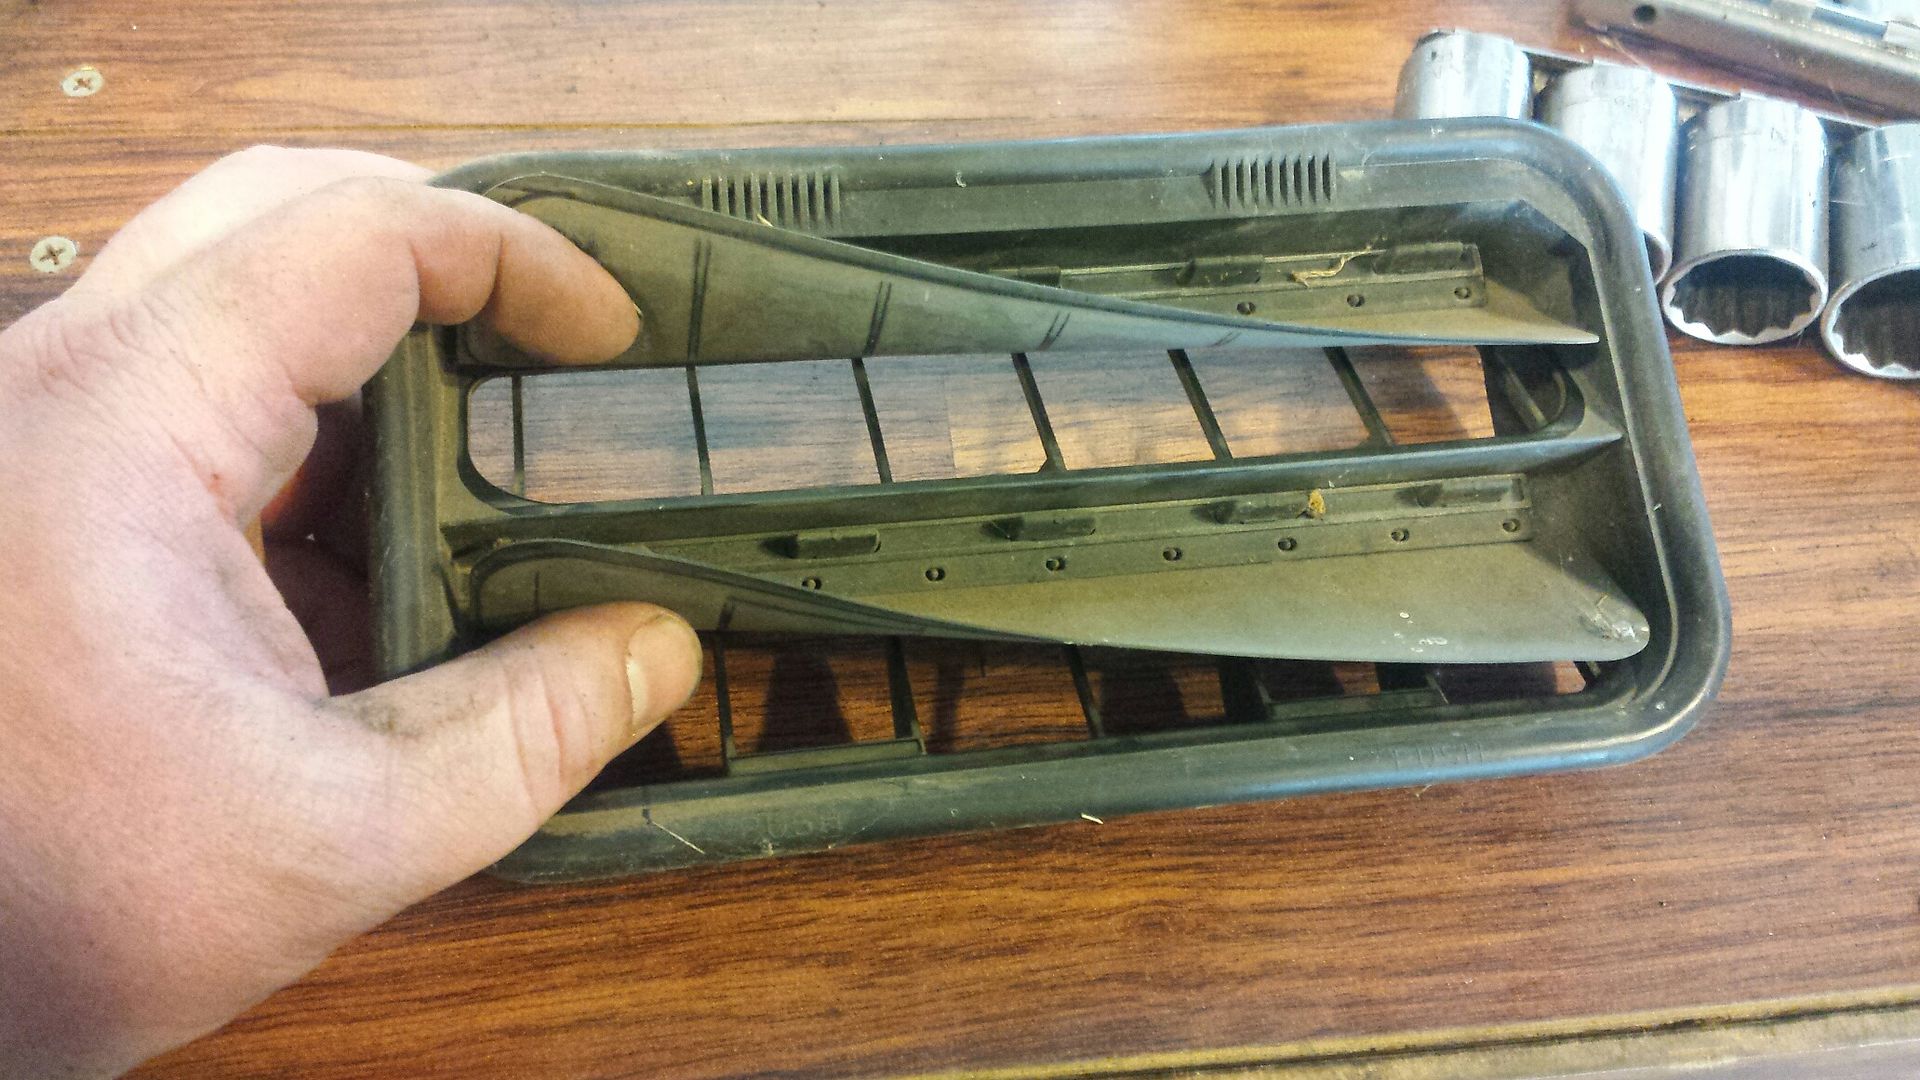
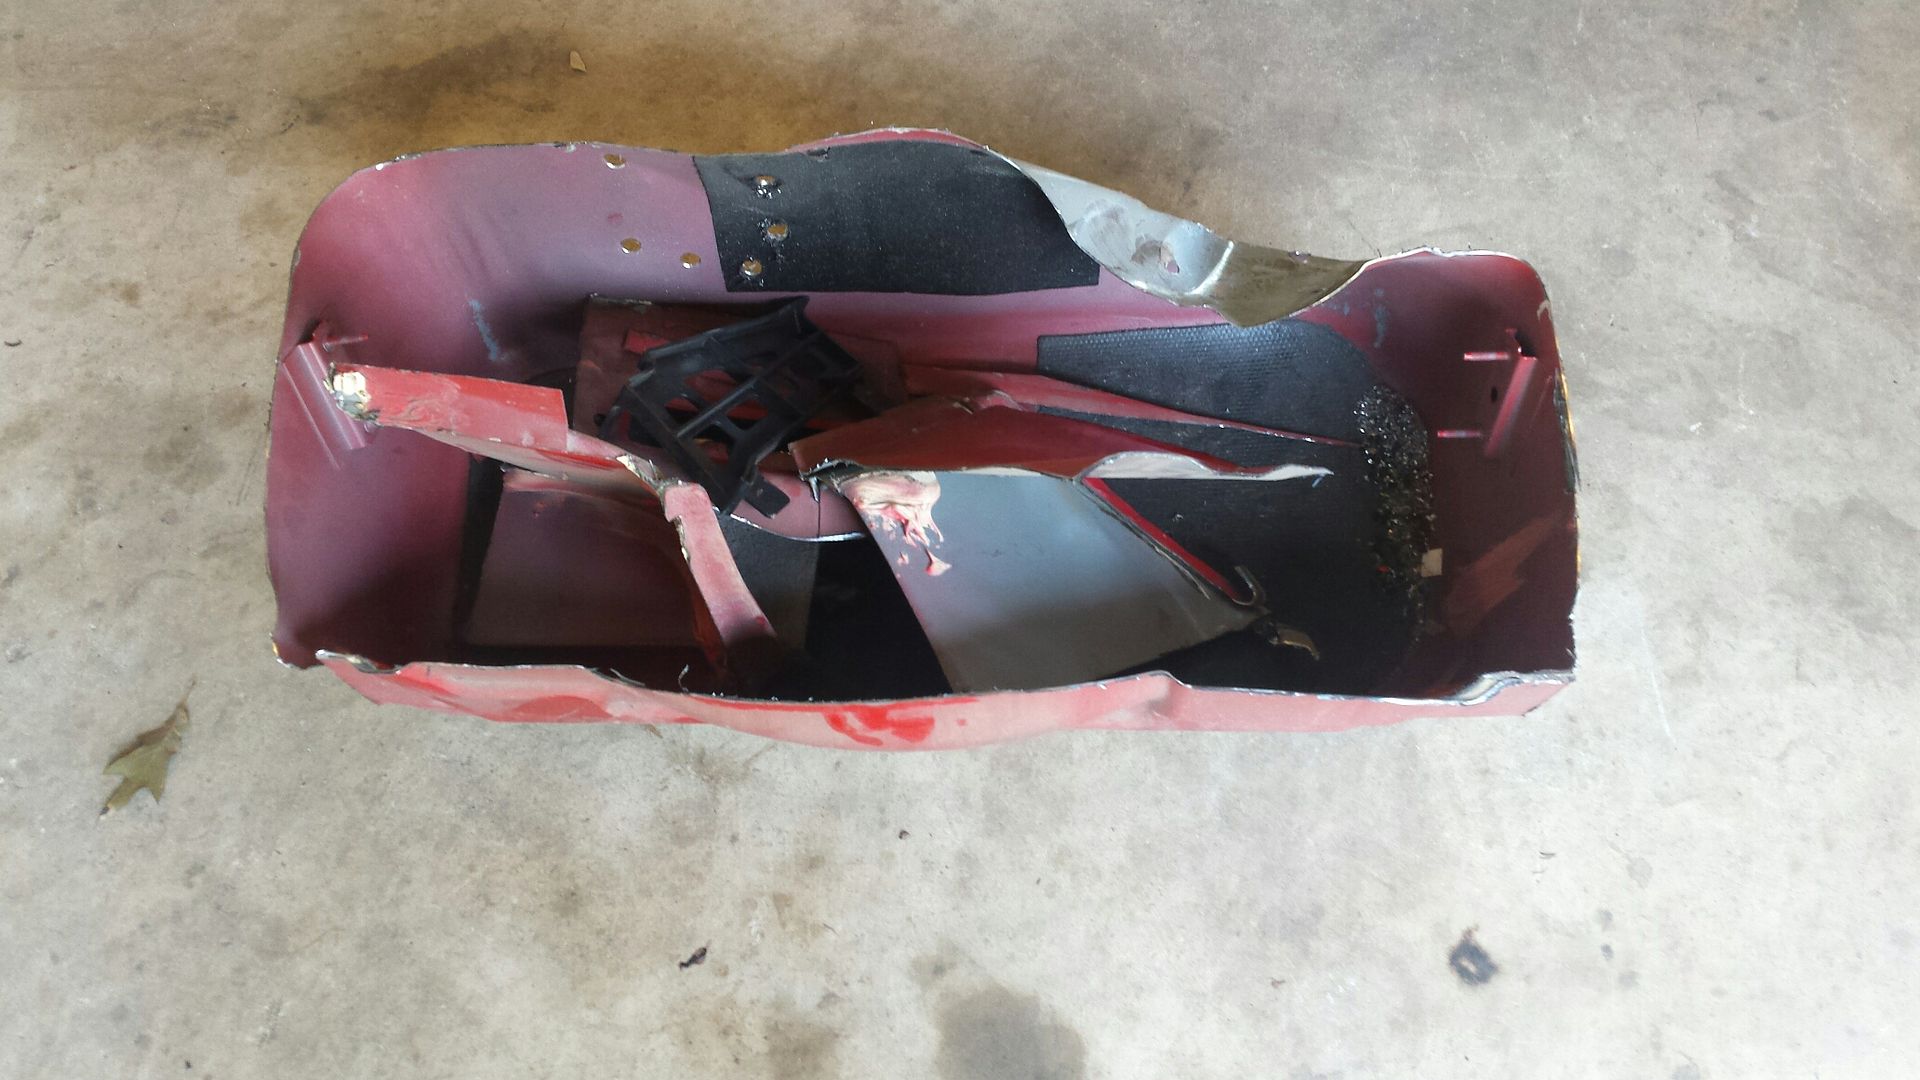
Bring on the grinder!!!! Notice on the driver's side that black flapper thingy, that's a cab vent that prevents air lock in the cab when you shut the door. I'm gonna try and reinstall it.
A closer look.
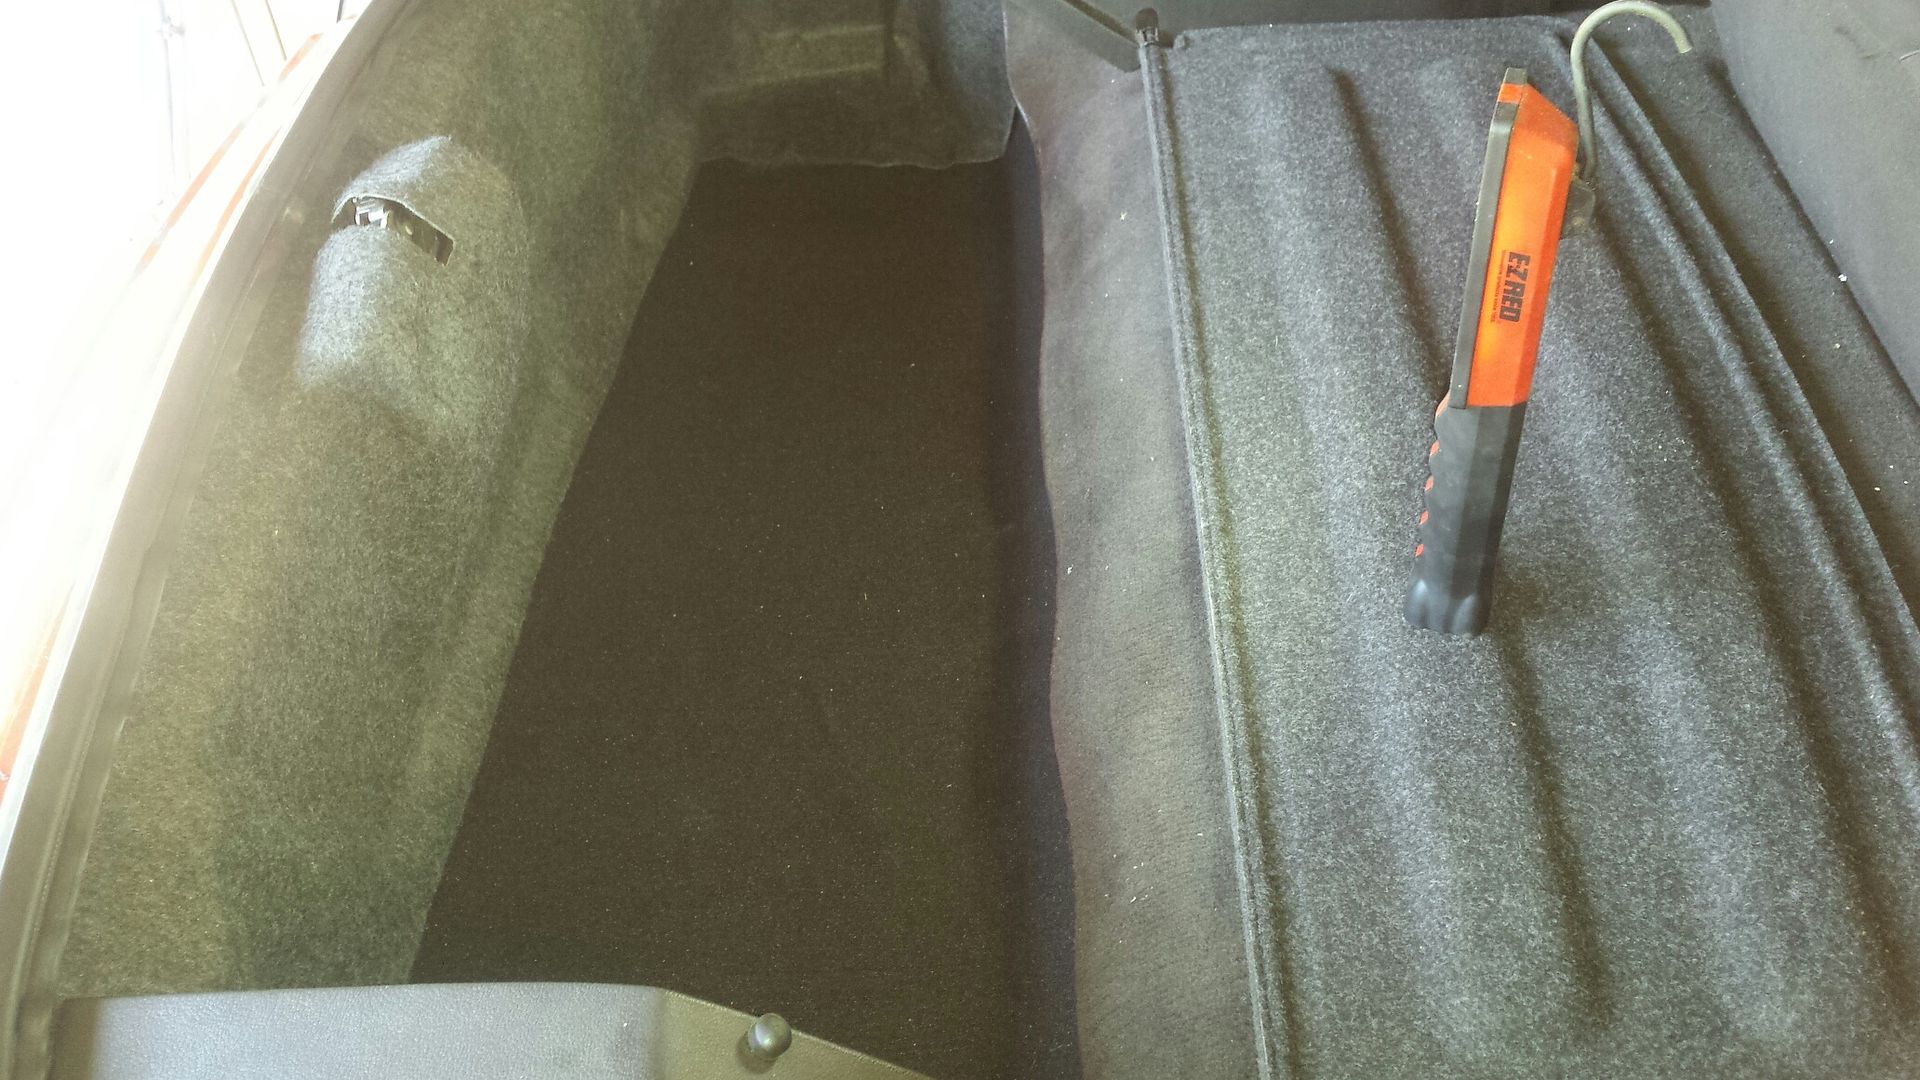
T top well and driver cubbie. I removed he passenger side tub (spare tire well) about a year or two ago.
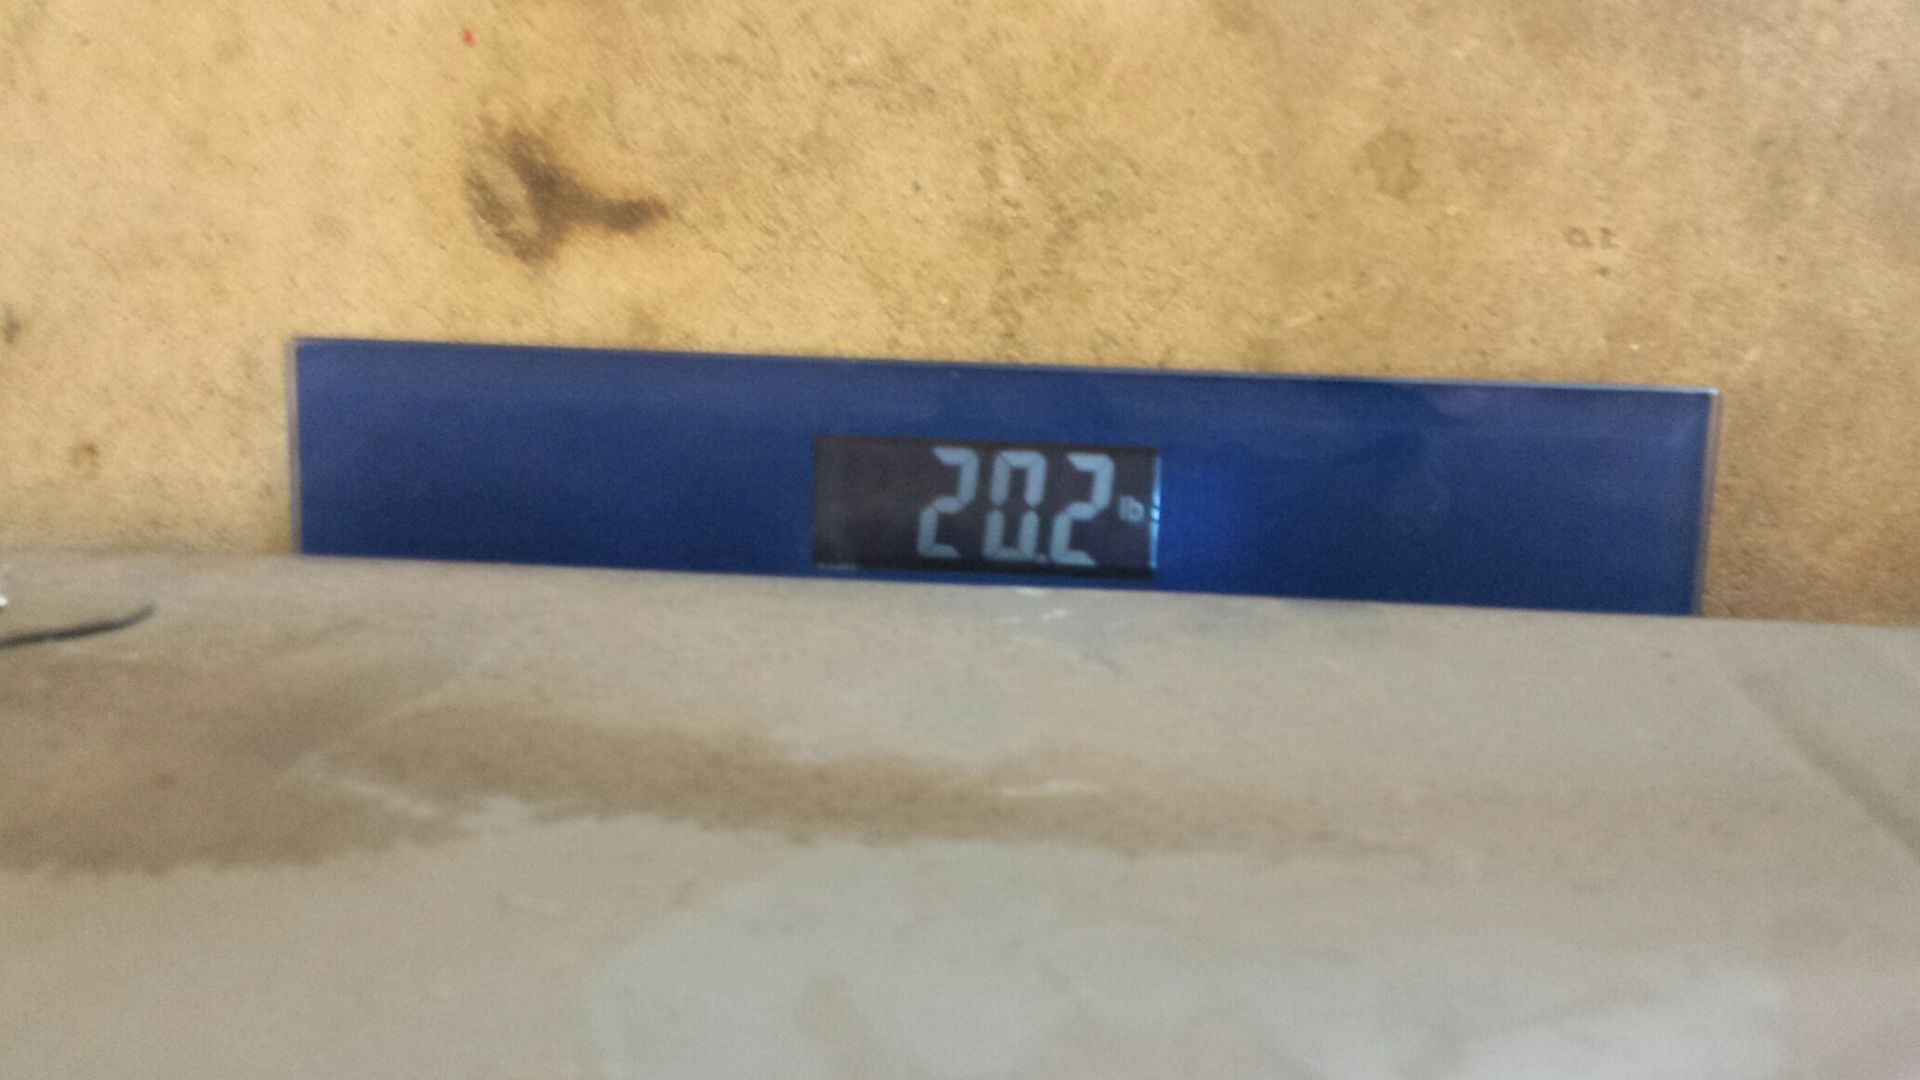
On the scale, 20.2 pounds
All the cuts will be covered by the bumper. Ive got the main replacement panel rough cut but i ran out of time so I didnt get a chance to get it fitted. I will be relocating the trans cooler to the rear bumper area to make room for the intercooler up front.

Before final assembly I inspected the axles closely, I also measured engagement just due to curiosity. No damage and everything looked good.

Once the rear end was reassembled I wanted to test fit the driveshaft. Even bottomed out in the trans it wouldn't fit, it was too long. I had pulled the rear end forward to fit (center) the 28" slicks. I made a quick adjustment and moved the rear end back about an inch and had plenty of room to get the DS in. I also reset pinion angle to -2. Im planning on trimming some on the back bumper for the tires (since I moved them back) but this may need a final adjustment later.
Bring on the grinder!!!! Notice on the driver's side that black flapper thingy, that's a cab vent that prevents air lock in the cab when you shut the door. I'm gonna try and reinstall it.

A closer look.

T top well and driver cubbie. I removed he passenger side tub (spare tire well) about a year or two ago.

On the scale, 20.2 pounds

All the cuts will be covered by the bumper. Ive got the main replacement panel rough cut but i ran out of time so I didnt get a chance to get it fitted. I will be relocating the trans cooler to the rear bumper area to make room for the intercooler up front.

#43
08-16-2017, 08:49 AM
Join Date: Aug 2010
Posts: 230
Likes: 0
Received 0 Likes
on
0 Posts
Driver bucket I finished off with 22G sheetmetal. I painted the bottom black and sides red to make it appear somewhat factory.
16g center panel, 2.5 tubes of seam sealer, and yes it is strong enough for me to stand on it. Total weight that went back IN the car is about 10. So this saves me 10 pounds however we are killing two birds with one stone...
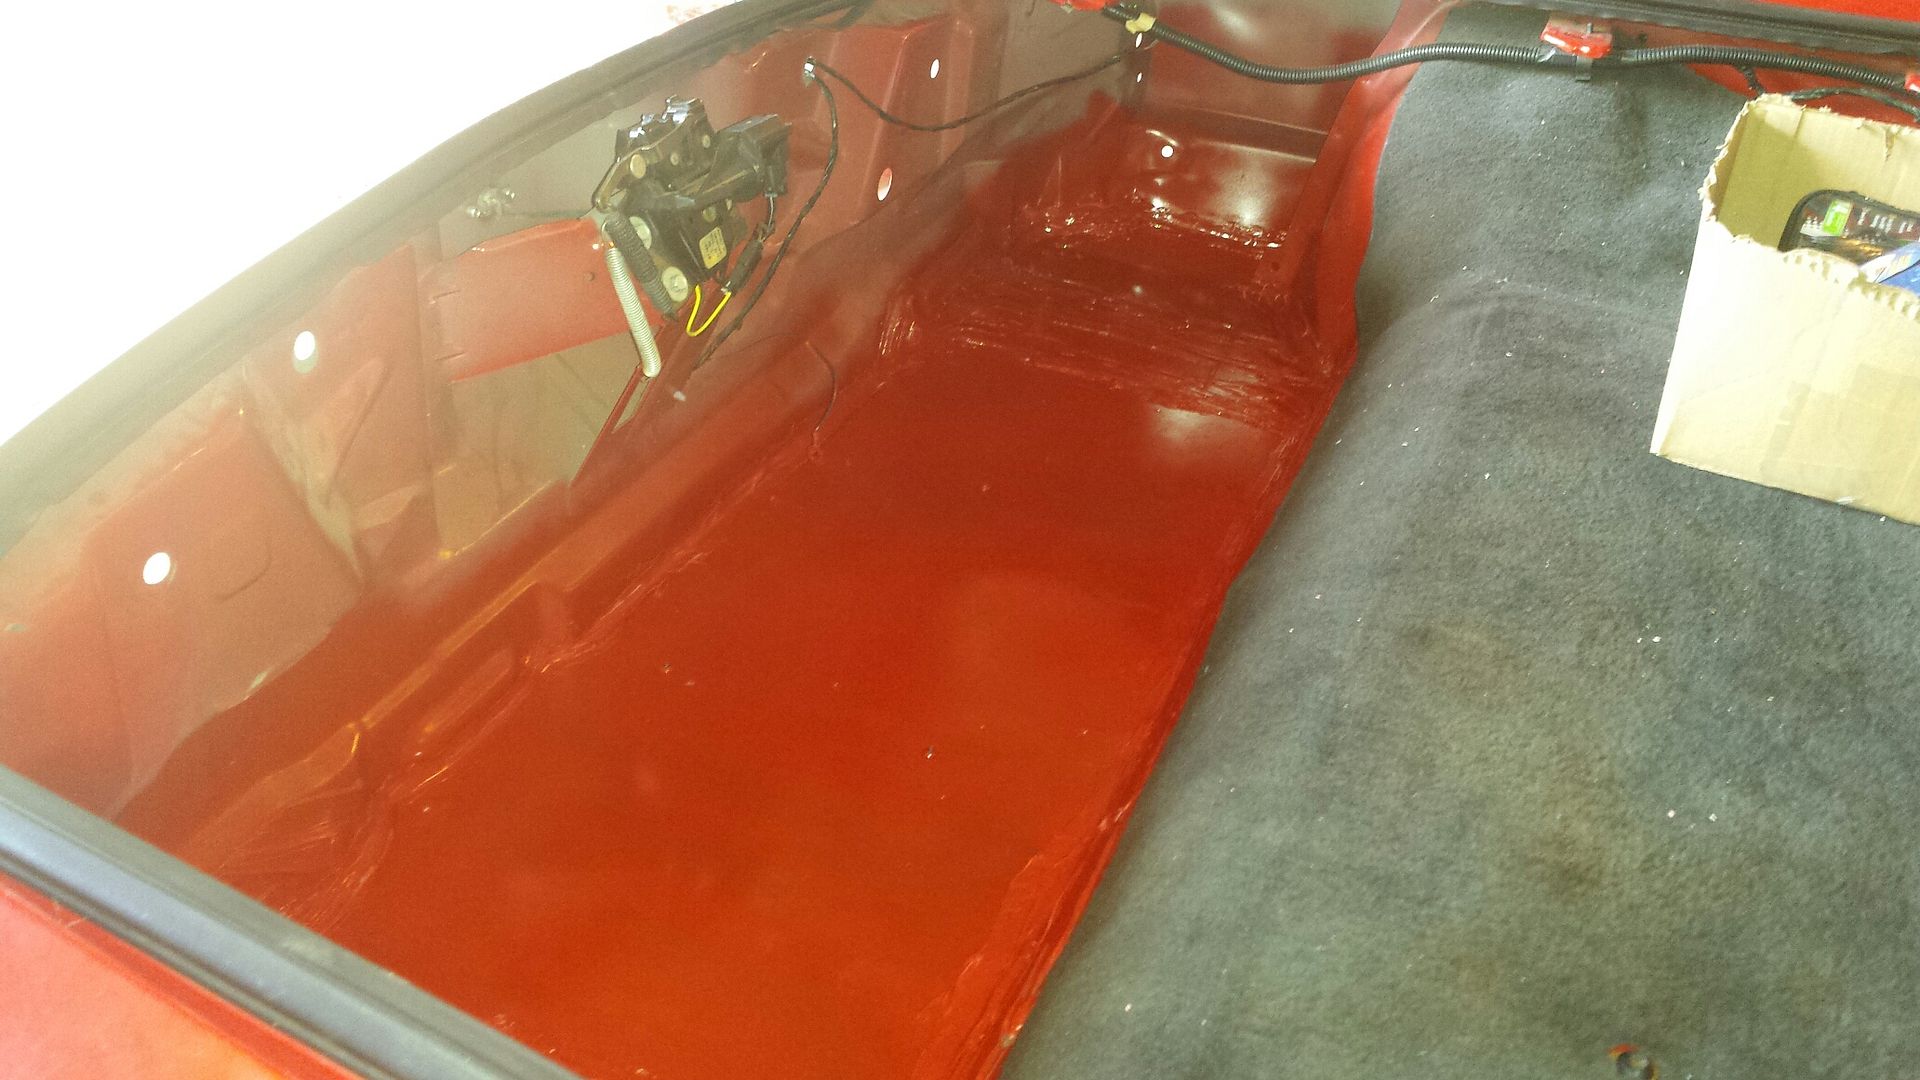
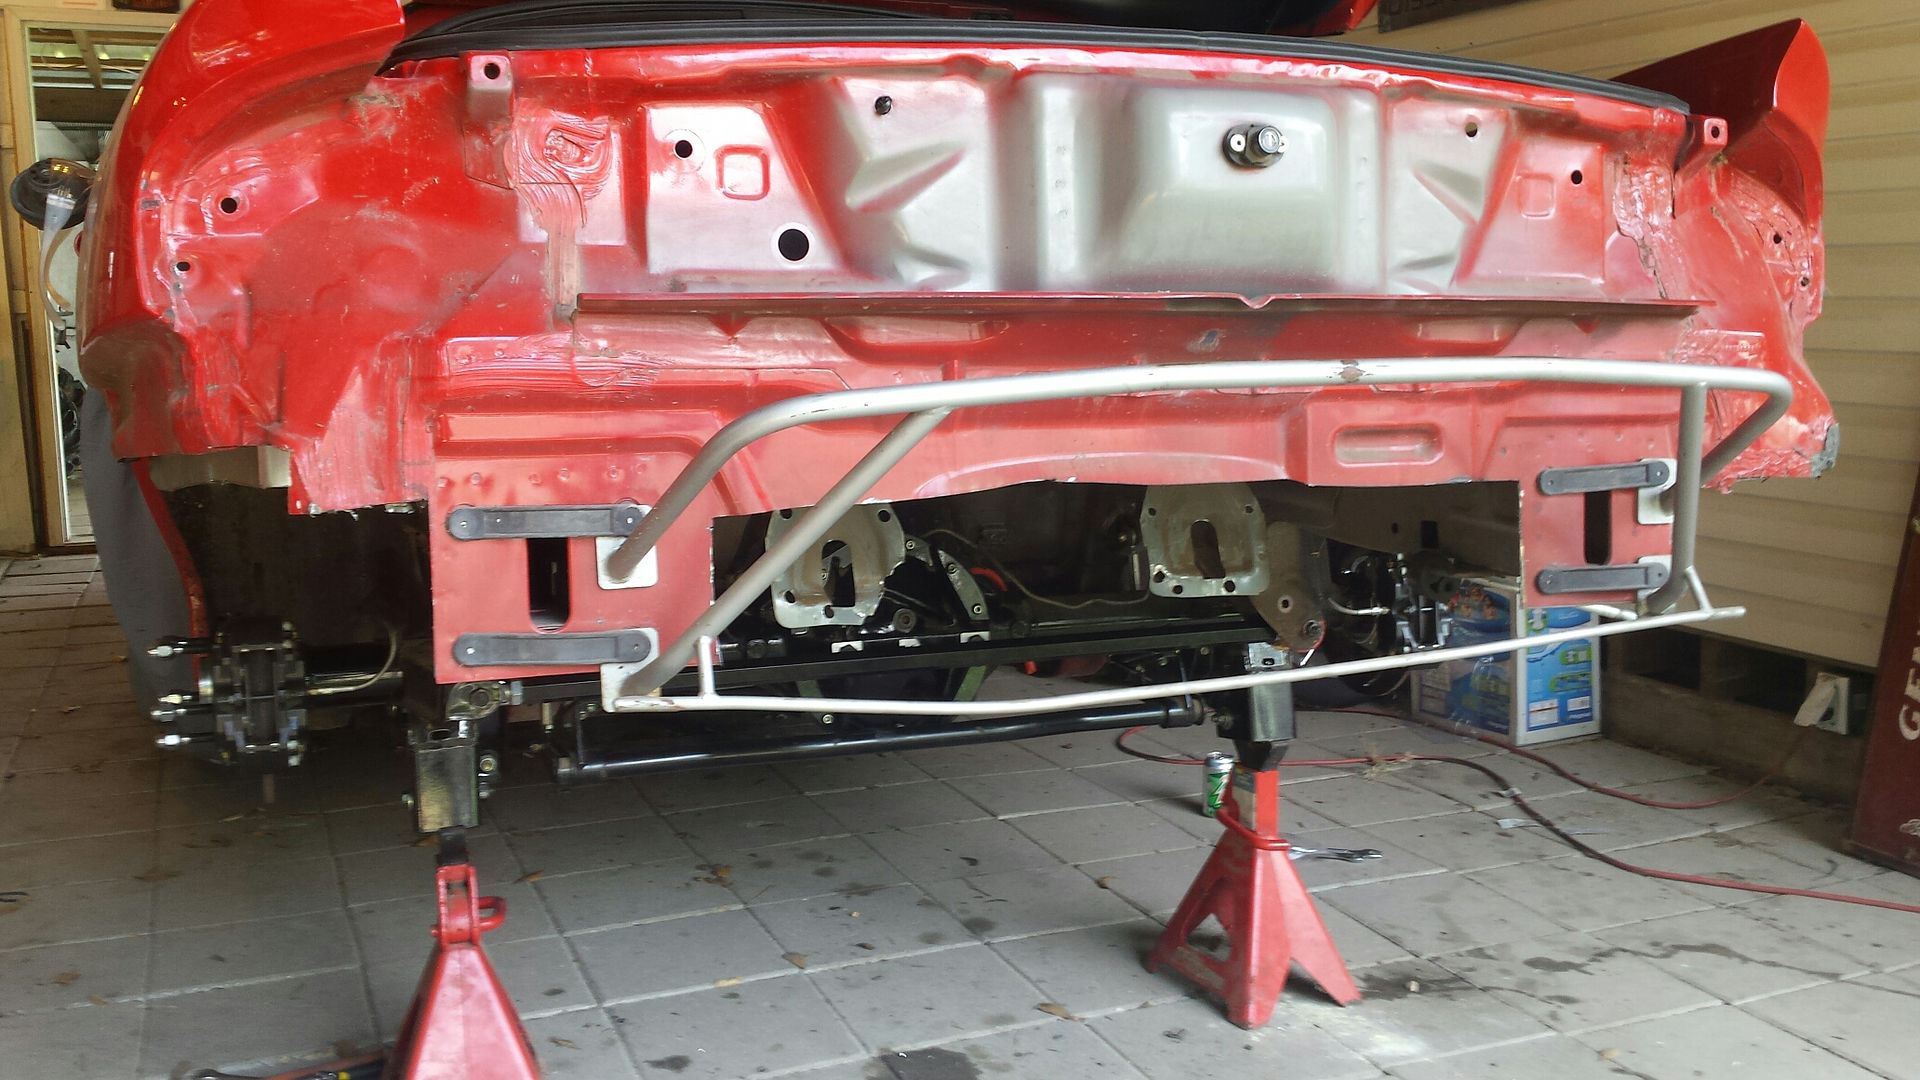
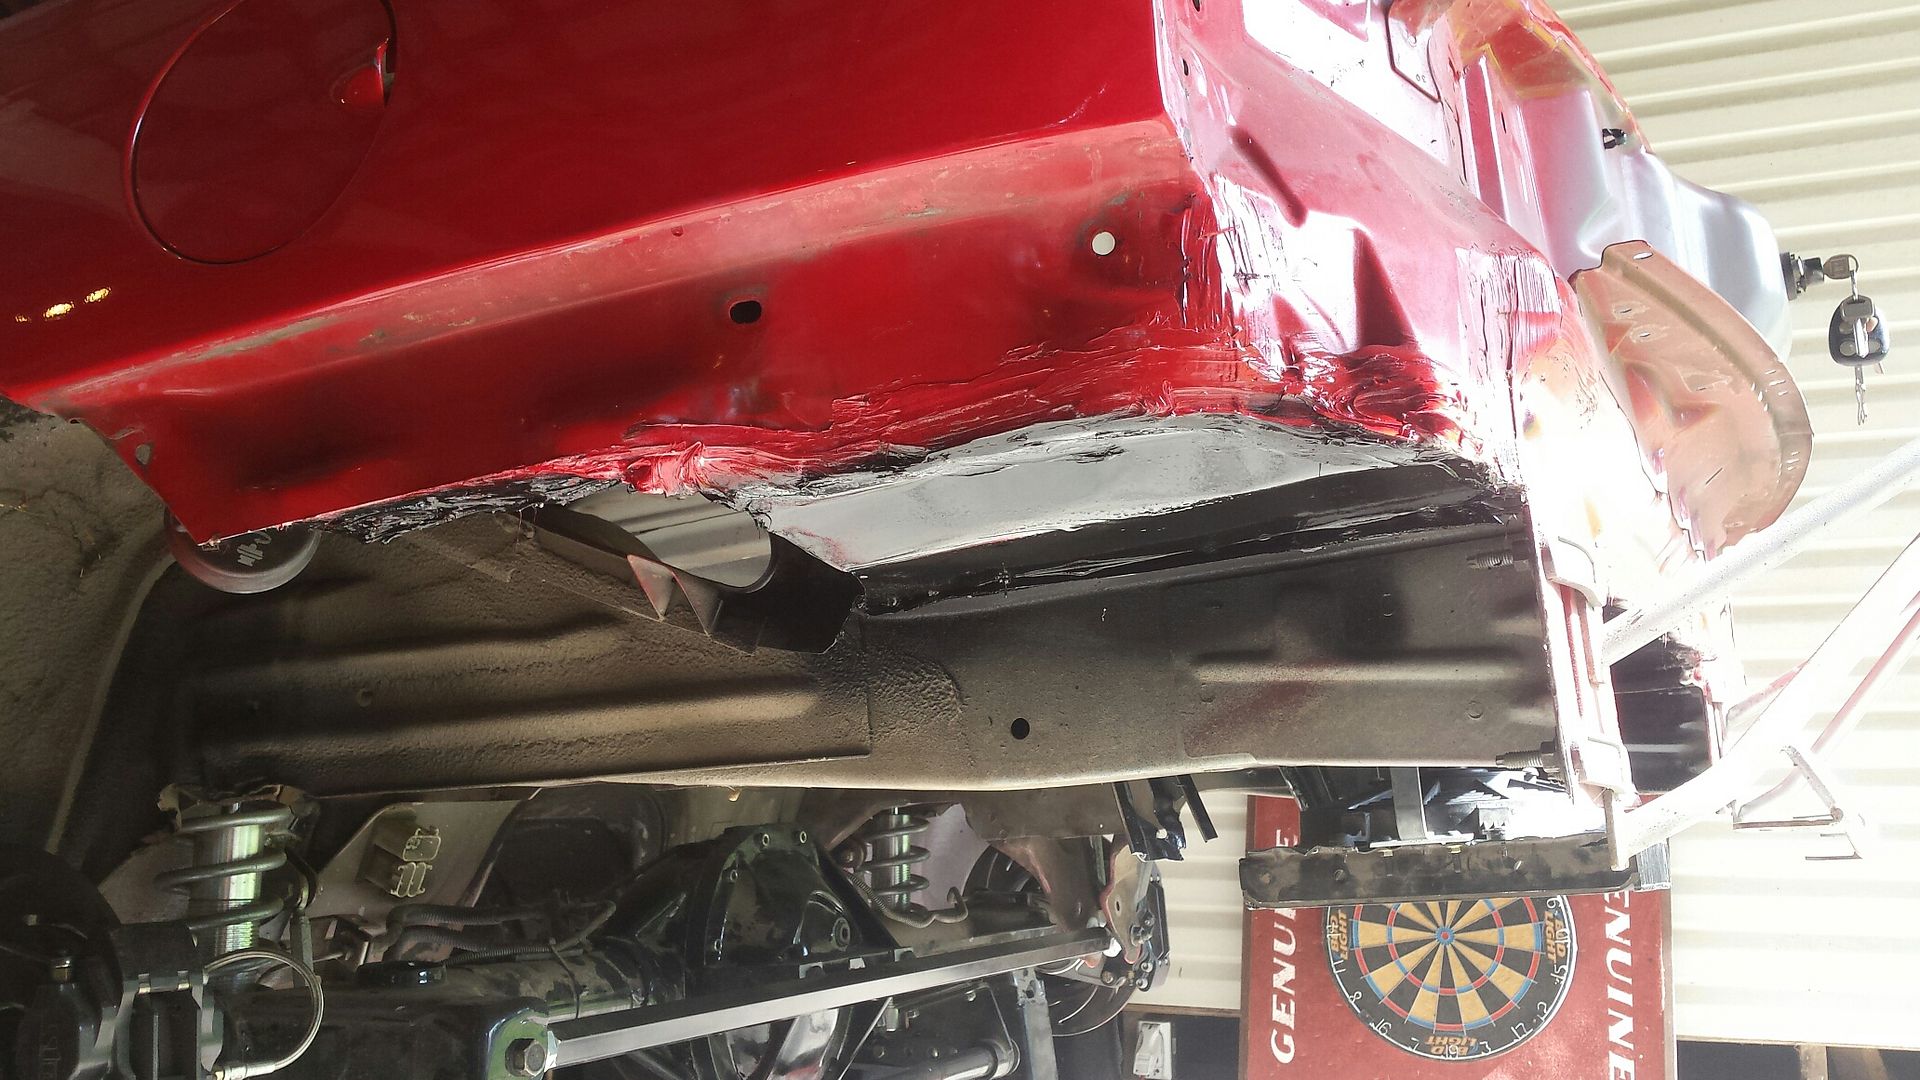
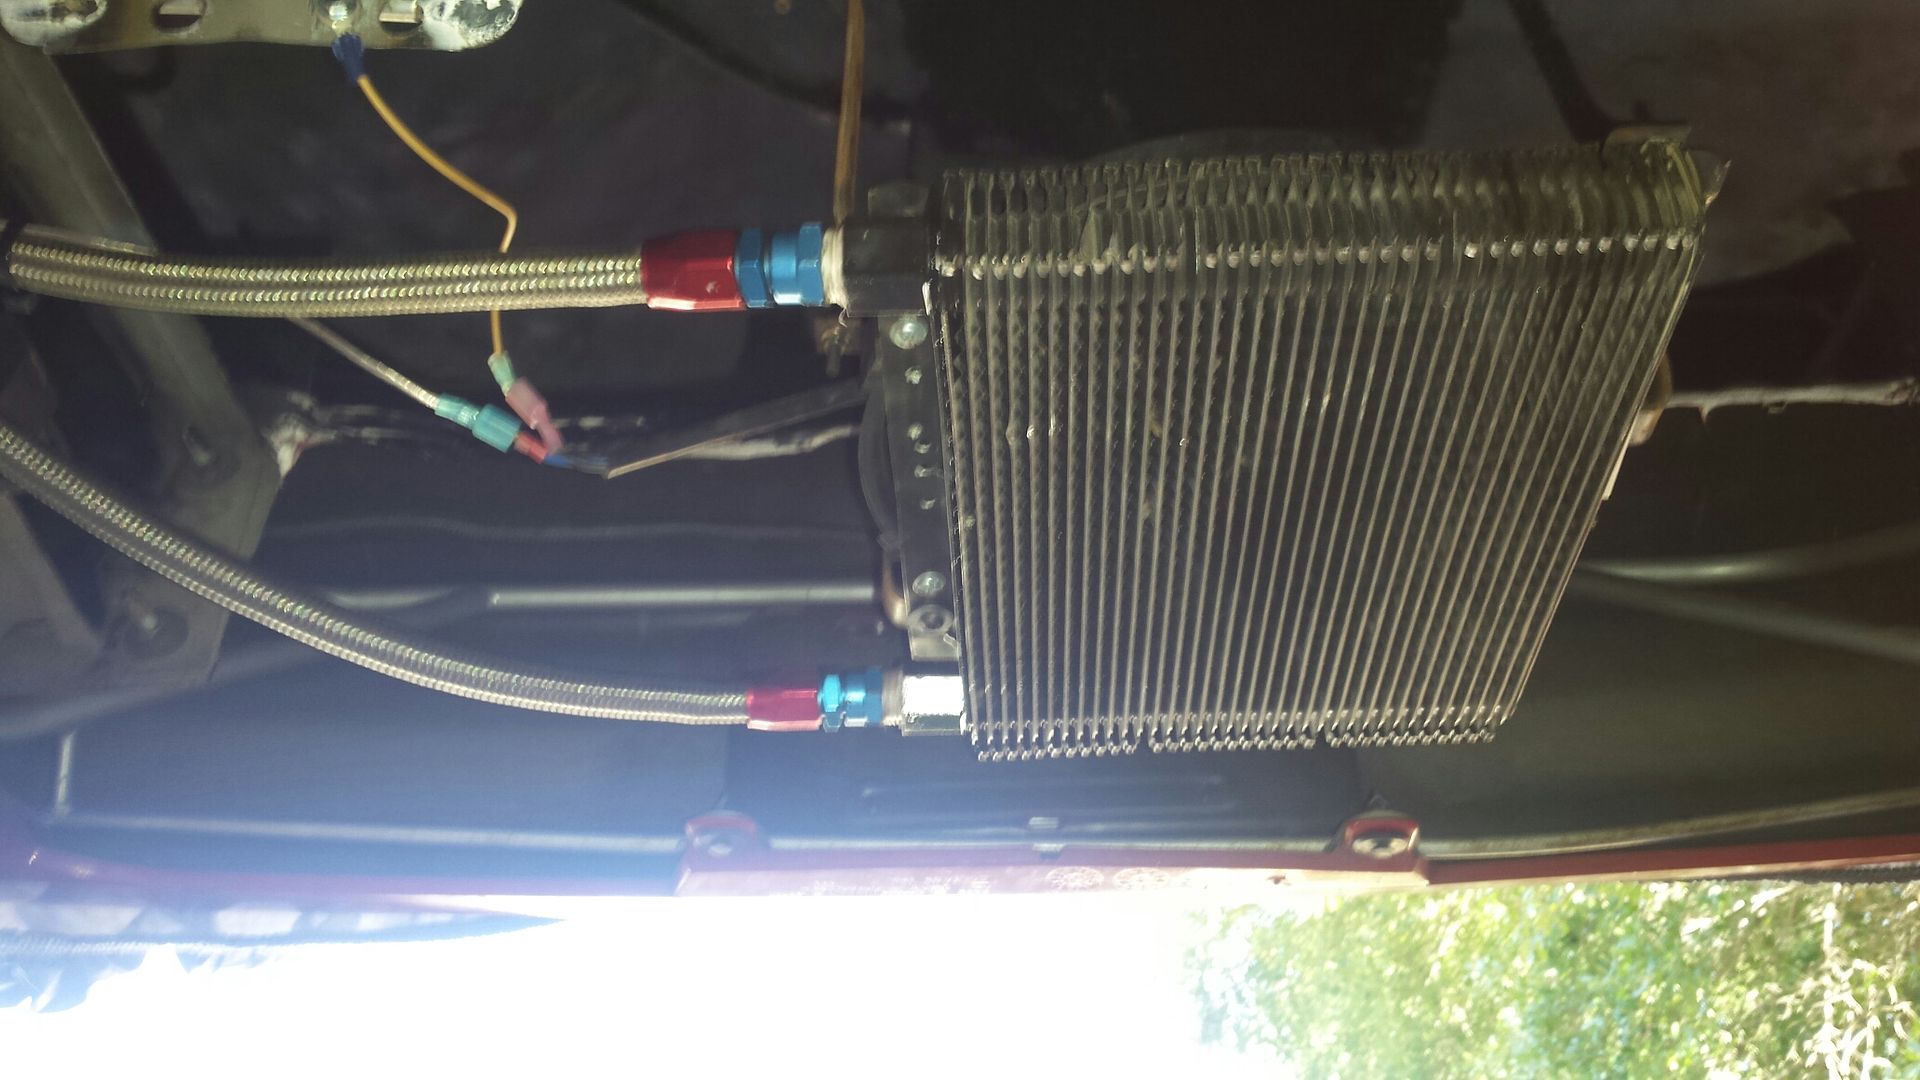
There she is, I left as much of an air gap without leaving it hanging under bumper level. I did not want it to be visible from the rear.
In this pic you can see i made 3 S shaped brackets out of flat bar to attach it to the floor. Its all bolted so if i change coolers at some point i don't have brackets welded to the floor. Also, you can see the L shaped brackets i used to brace the stock gas tank strap holder thingys.

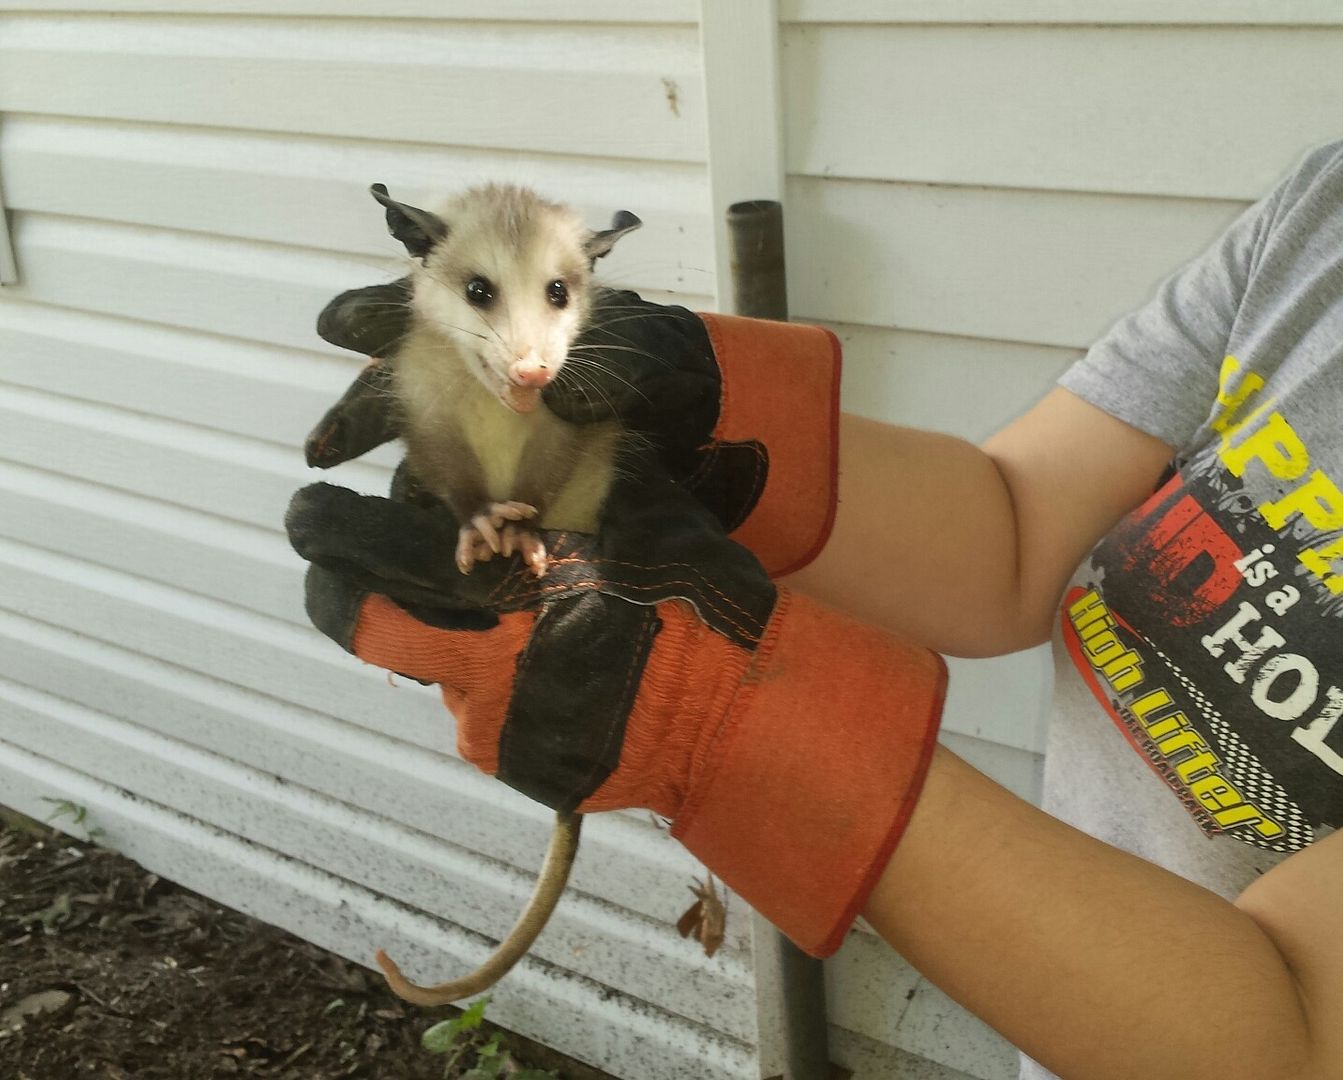
Found this guy wandering around the shop. Old lady asked if she could pick him up, I said sure! Take my welding gloves.
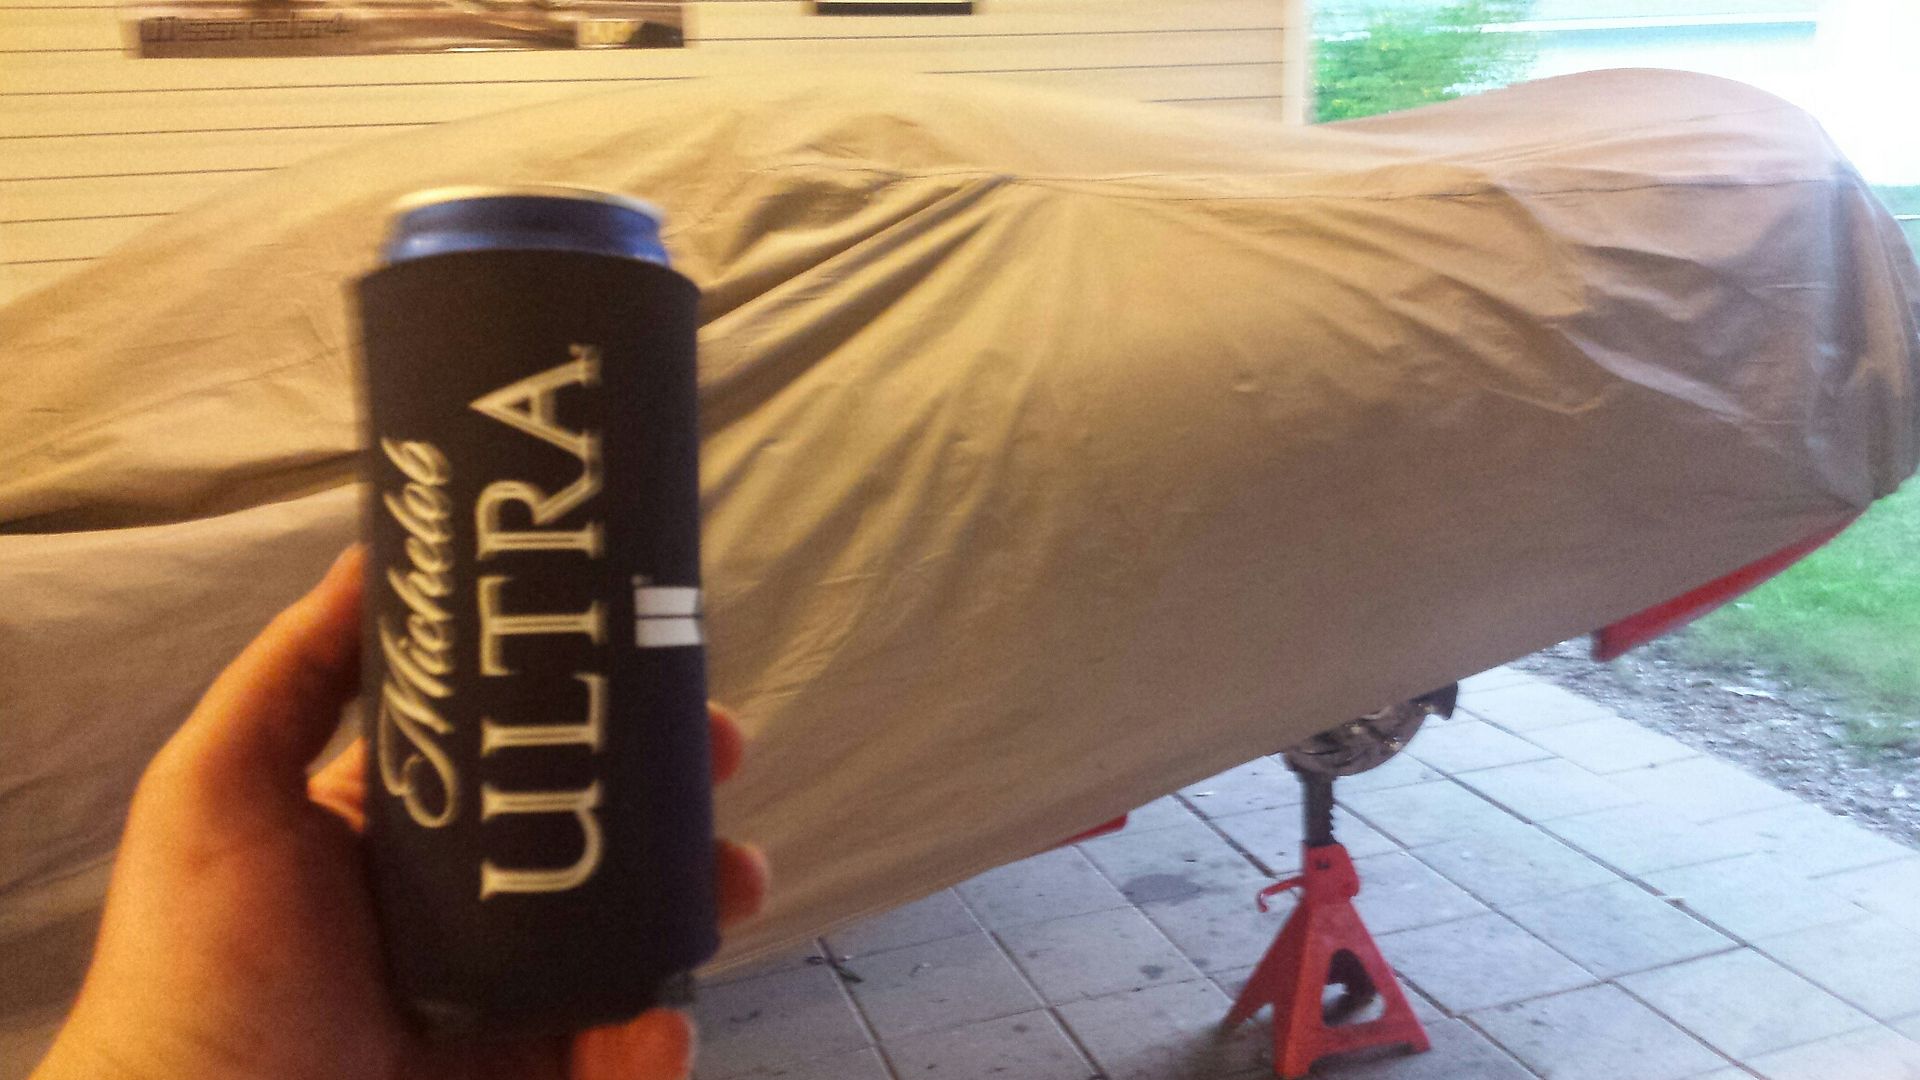
Long two afternoons of work. She is put to bed, time to relax.
So the panels are done, cooler is done except for the lines needing to be run. I reinstalled the fuel tank (boo no pic), got the hot wire relays mounted, and got fuel lines and fuel filter mounted and run up to about the tail of the trans and got the rear bumper/lights reinstalled. I also bled the brakes. First thing next go round is to get the cooler lines done (and fan wiring), then I will be working towards the front of the car where i have a list of things a mile long to do.....but we are making good progress. I still have no piping for the turbo kit so.....should be here soon though.

16g center panel, 2.5 tubes of seam sealer, and yes it is strong enough for me to stand on it. Total weight that went back IN the car is about 10. So this saves me 10 pounds however we are killing two birds with one stone...

There she is, I left as much of an air gap without leaving it hanging under bumper level. I did not want it to be visible from the rear.

In this pic you can see i made 3 S shaped brackets out of flat bar to attach it to the floor. Its all bolted so if i change coolers at some point i don't have brackets welded to the floor. Also, you can see the L shaped brackets i used to brace the stock gas tank strap holder thingys.

Found this guy wandering around the shop. Old lady asked if she could pick him up, I said sure! Take my welding gloves.

Long two afternoons of work. She is put to bed, time to relax.

So the panels are done, cooler is done except for the lines needing to be run. I reinstalled the fuel tank (boo no pic), got the hot wire relays mounted, and got fuel lines and fuel filter mounted and run up to about the tail of the trans and got the rear bumper/lights reinstalled. I also bled the brakes. First thing next go round is to get the cooler lines done (and fan wiring), then I will be working towards the front of the car where i have a list of things a mile long to do.....but we are making good progress. I still have no piping for the turbo kit so.....should be here soon though.
#44
08-21-2017, 08:47 AM
Join Date: Aug 2010
Posts: 230
Likes: 0
Received 0 Likes
on
0 Posts
Dont you have a home to go to little Spam wordSpam word�Spam wordSpam word�Spam wordSpam word�Spam wordSpam word�Spam wordSpam word�Spam wordSpam word�.....guess he likes hanging around race cars.

Swapped the trans AN fittings to 90 bends, and got under the car and attached the lines. They were barely long enough at 10ft. Added a ground and am running a 12v+ turn on wire for the fan up front.
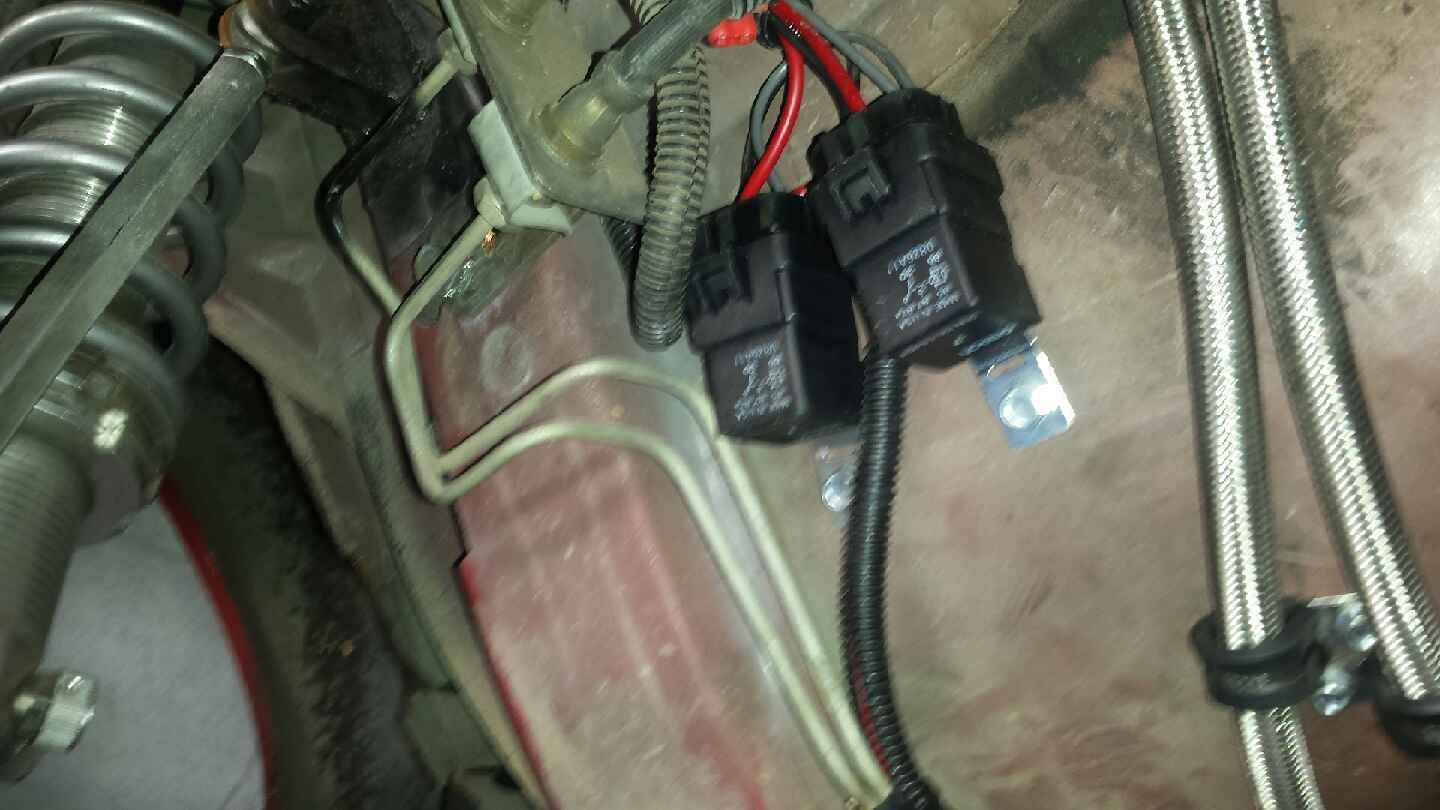
Hot wire relays, they need a ground, and plug into existing wiring to turn on, but both also need 12v+ from the battery so I will be running those up front as Im doing the fuel lines.
I had black carpet. The car is sorta charcoal/black. **** it I'm putting it in there anyway.
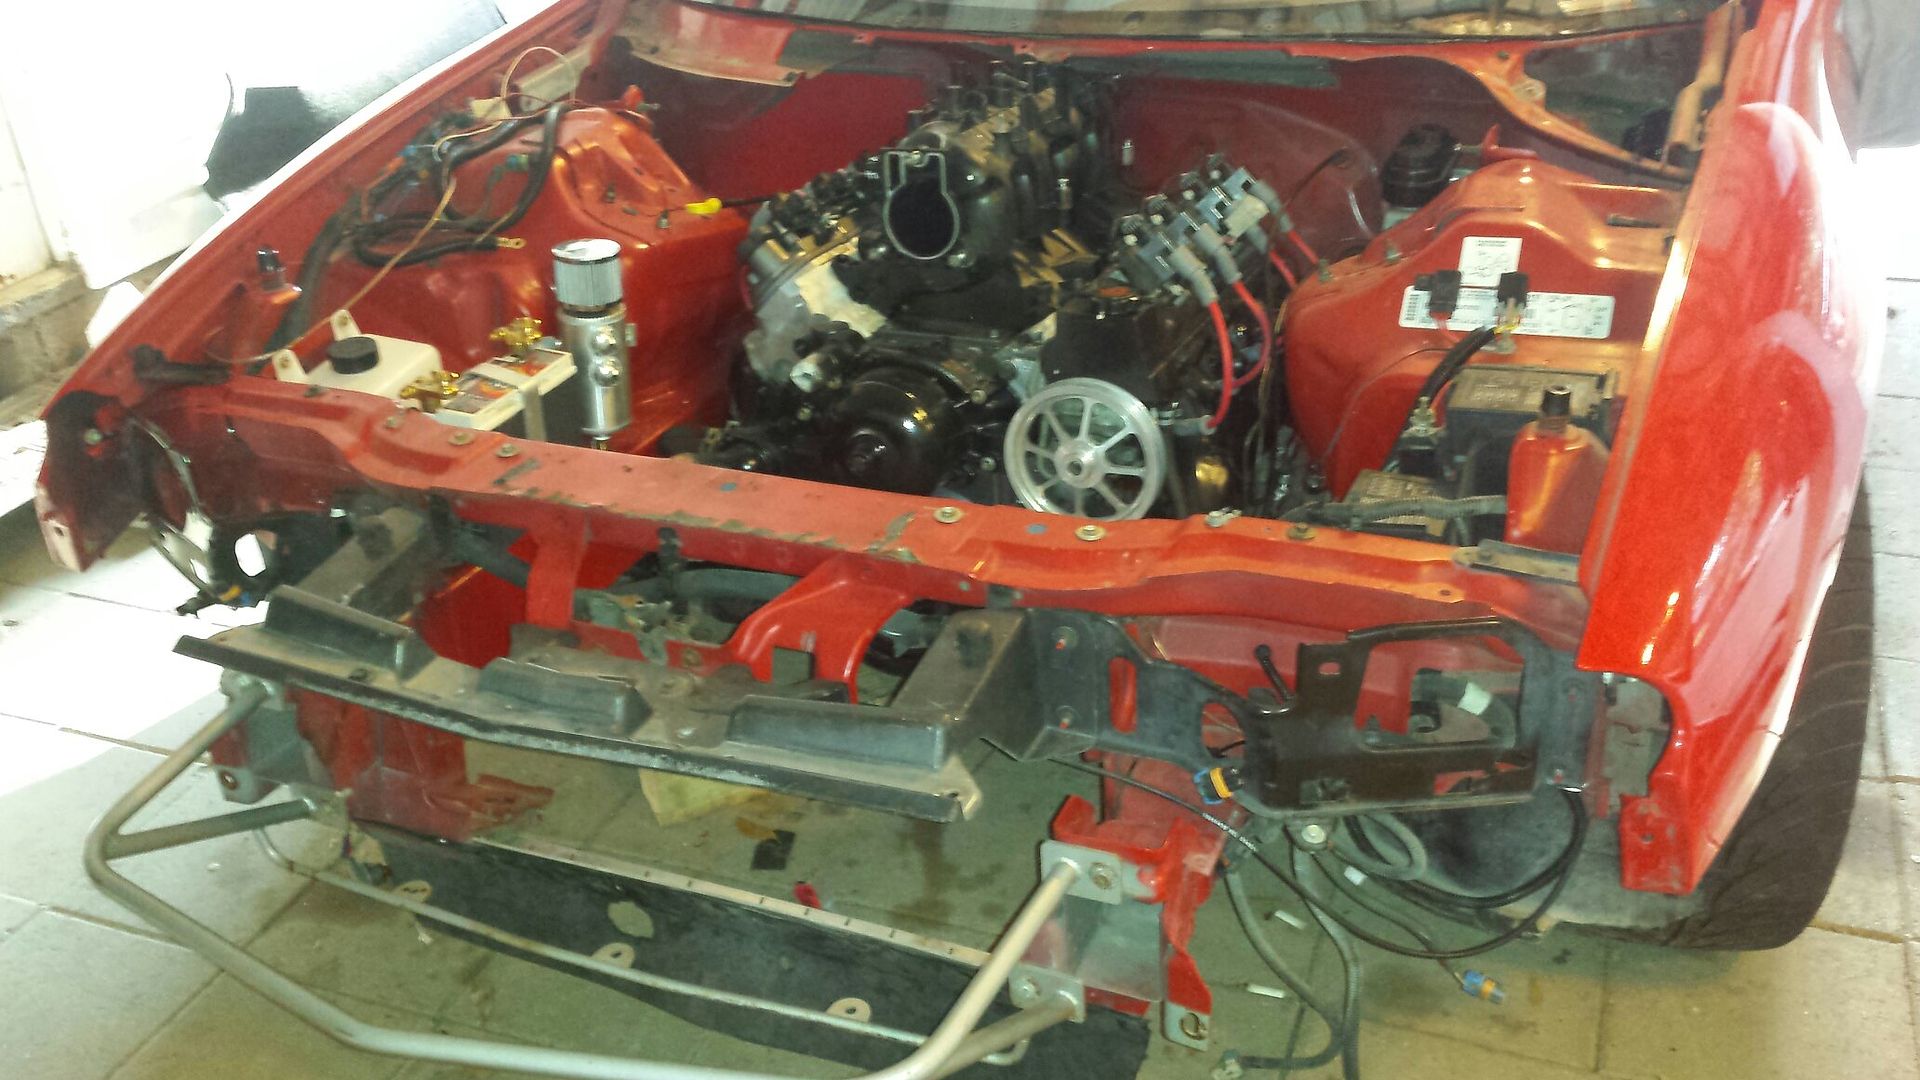
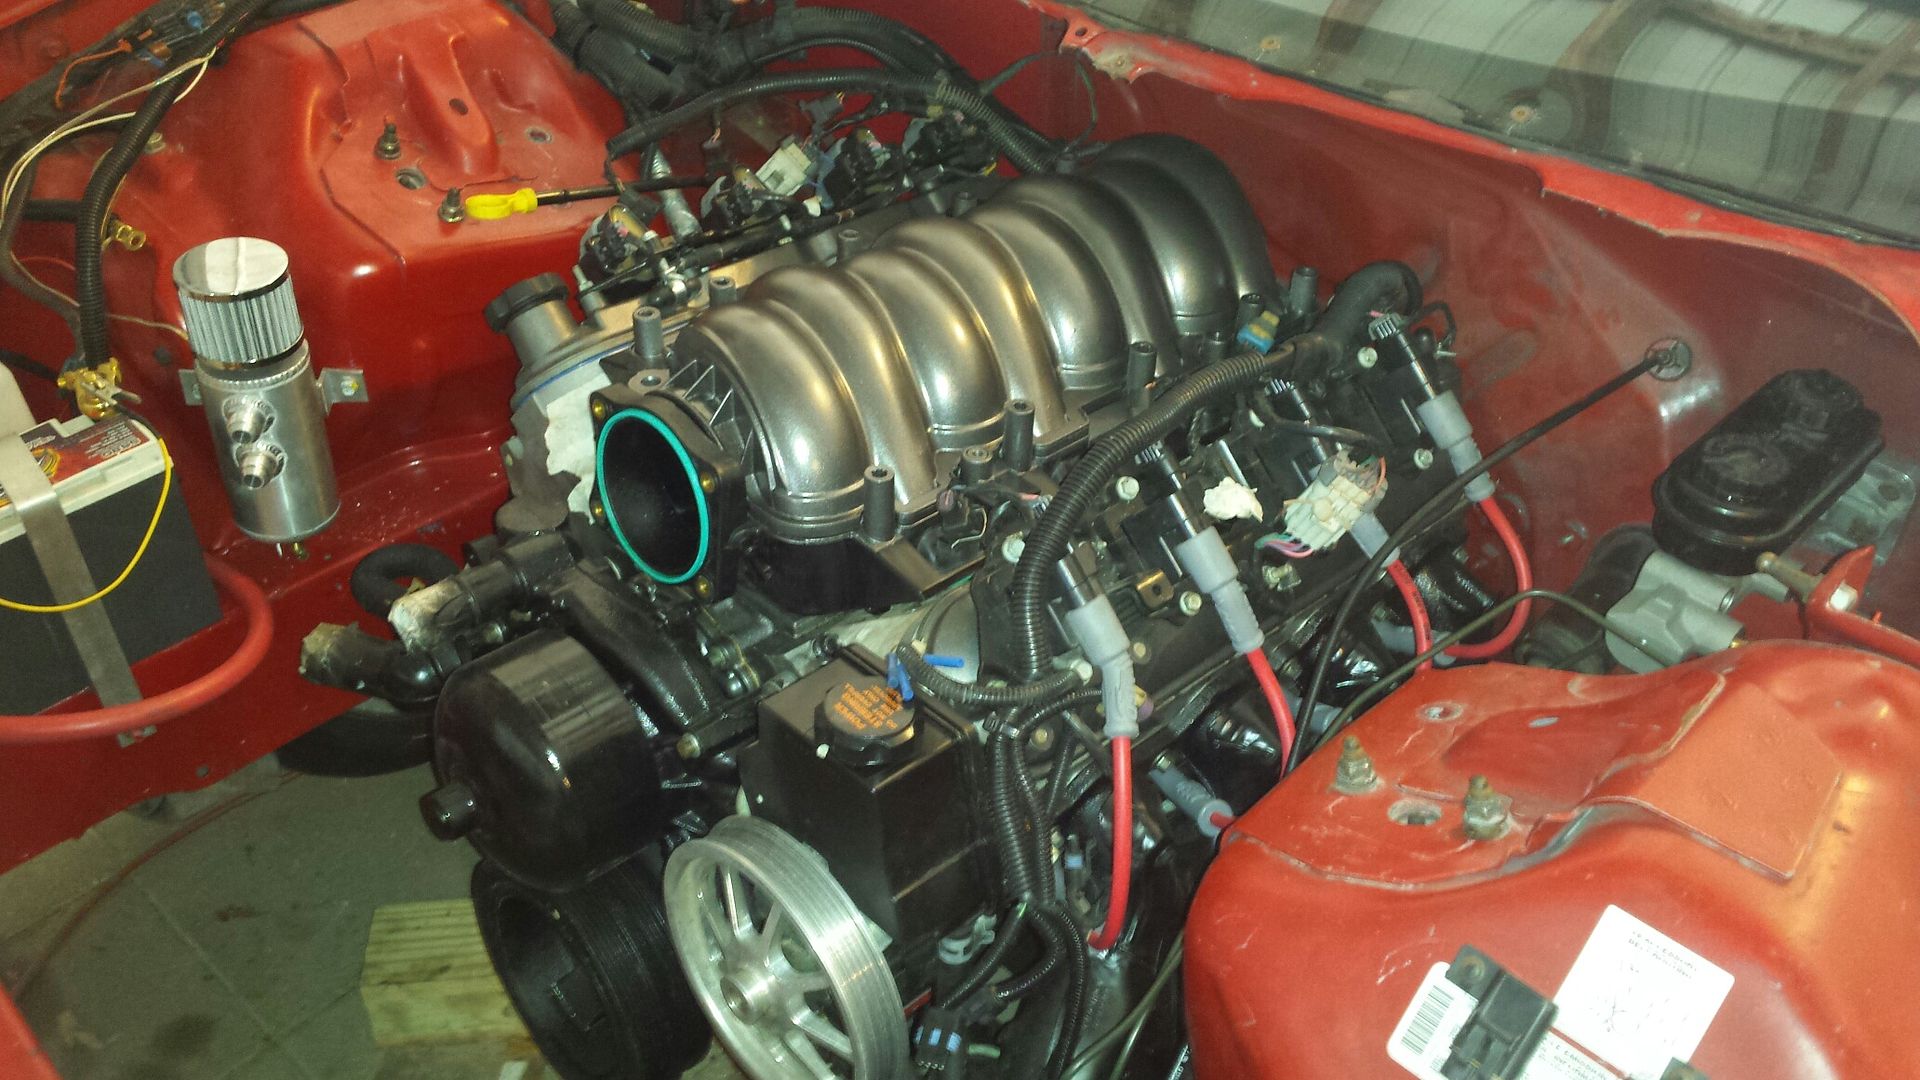
Mounted the catch can on the passenger fender, and test fit the intake. With a little plastic trimmed it went right in. Then I realized no way in hell the hood will close.....So back to the drawing board for intakes, the truck intake is OUT. Also, Ive decided to mount the vacuum block in that cubbie space where the wiper motor used to be on the drivers side.
Got the harness/PCM out. Install these into slots 22 and 23. They read the front input speed sensor on the 4l80e.

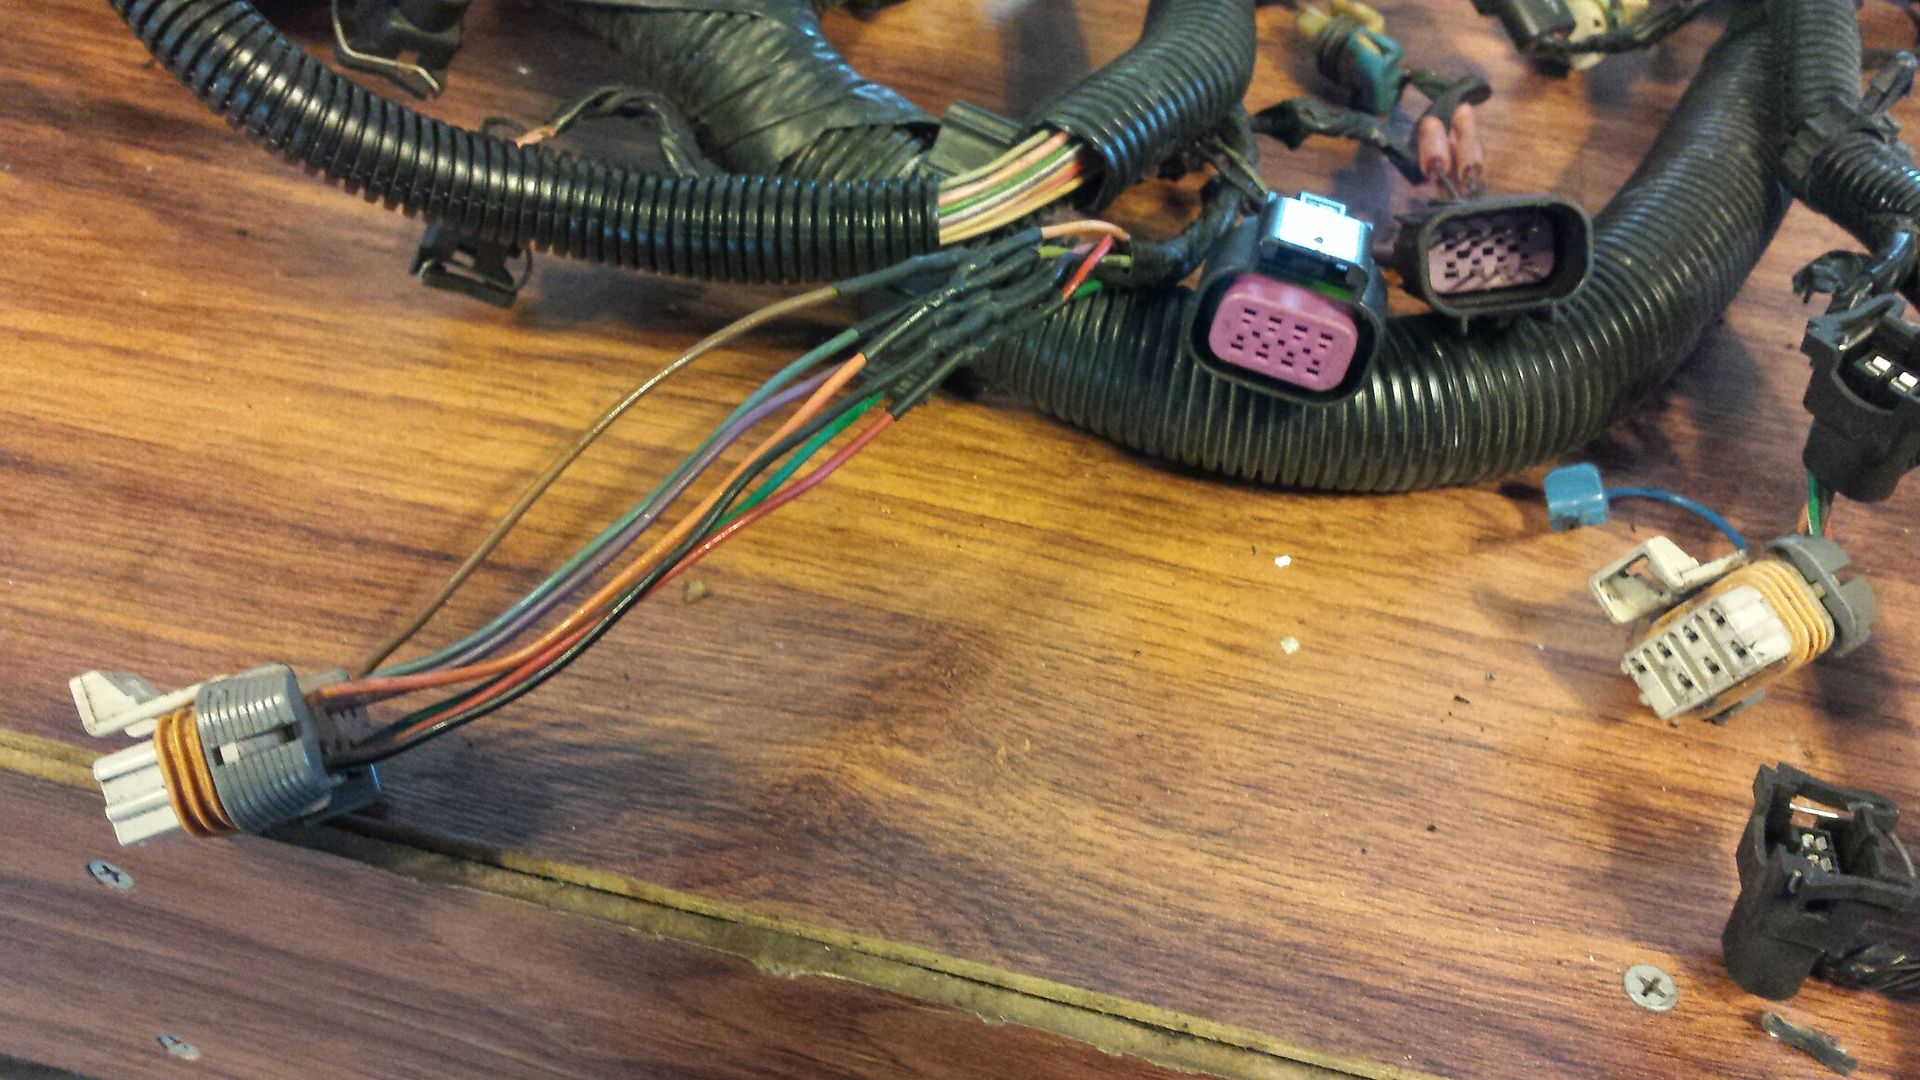
The purple connectors in this pic WERE my driver's side coil pack connector. Why these were spliced (by previous owner) onto this harness I have no clue. I cut the coil side off the coils before I sold the motor bc I knew the poor guy couldn't plug them into anything. I soldered him a regular connector (white ones seen here) so he could use any LS harness. I had a buddy cut me a harness side off a junkyard truck, so I needed to remove this goofy purple connector and replace with the correct one. All soldered and heat shrunk and we are in business. I had the purple ones just laying there so you can see them.
I got the harness laid on the motor and will start getting things plugged in soon. I'm gonna solve this intake dilemma by the end of the week and have a few things on order like vacuum line and oil pressure sensor since the truck version is different, my -10 line for the catch can, a few more fuel fittings etc. Got an update today from Huron speed, we are still 10-15 days out on the turbo kit due to a production delay. Rats.

Swapped the trans AN fittings to 90 bends, and got under the car and attached the lines. They were barely long enough at 10ft. Added a ground and am running a 12v+ turn on wire for the fan up front.

Hot wire relays, they need a ground, and plug into existing wiring to turn on, but both also need 12v+ from the battery so I will be running those up front as Im doing the fuel lines.

I had black carpet. The car is sorta charcoal/black. **** it I'm putting it in there anyway.

Mounted the catch can on the passenger fender, and test fit the intake. With a little plastic trimmed it went right in. Then I realized no way in hell the hood will close.....So back to the drawing board for intakes, the truck intake is OUT. Also, Ive decided to mount the vacuum block in that cubbie space where the wiper motor used to be on the drivers side.

Got the harness/PCM out. Install these into slots 22 and 23. They read the front input speed sensor on the 4l80e.

The purple connectors in this pic WERE my driver's side coil pack connector. Why these were spliced (by previous owner) onto this harness I have no clue. I cut the coil side off the coils before I sold the motor bc I knew the poor guy couldn't plug them into anything. I soldered him a regular connector (white ones seen here) so he could use any LS harness. I had a buddy cut me a harness side off a junkyard truck, so I needed to remove this goofy purple connector and replace with the correct one. All soldered and heat shrunk and we are in business. I had the purple ones just laying there so you can see them.

I got the harness laid on the motor and will start getting things plugged in soon. I'm gonna solve this intake dilemma by the end of the week and have a few things on order like vacuum line and oil pressure sensor since the truck version is different, my -10 line for the catch can, a few more fuel fittings etc. Got an update today from Huron speed, we are still 10-15 days out on the turbo kit due to a production delay. Rats.
#45
08-26-2017, 09:06 AM
Join Date: Aug 2010
Posts: 230
Likes: 0
Received 0 Likes
on
0 Posts
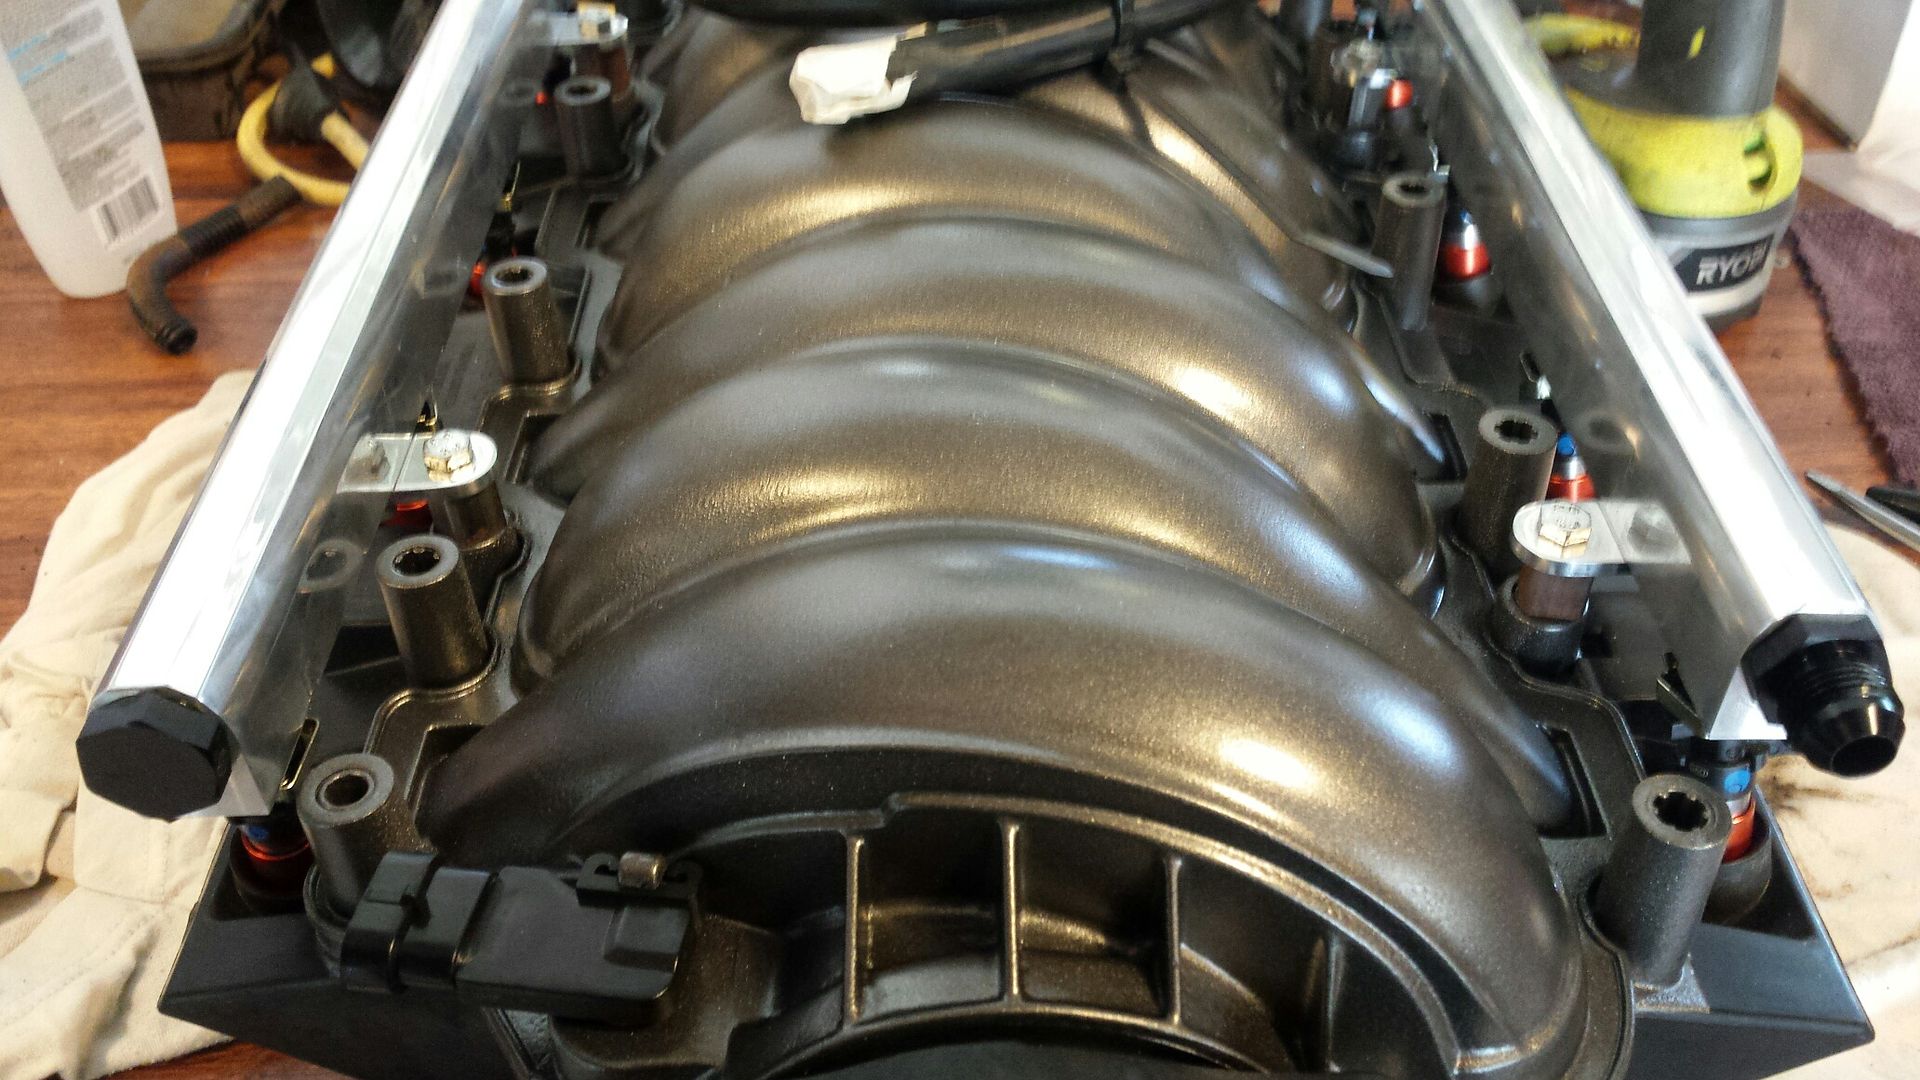
Quick update, I was on the hunt for an intake and my buddy (thanks Randy C) had an LS2 laying around for cheap so I went and grabbed it. I decided to give it a "fast" type look and only paint the upper shell. Just went with the same graphite color i been using.
Had to use an alternative set of fuel rail brackets and trim my spacers down by about 1/3 but everything seems to fit nice. Also, I ordered the FAST fat orings for the bottom of the injectors since everything LS2 and later have bigger injector holes then LS1 stuff. 146020COR is the part number. 3 bar MAP sensor is in place, and the stock wiring is gonna have to be extended.
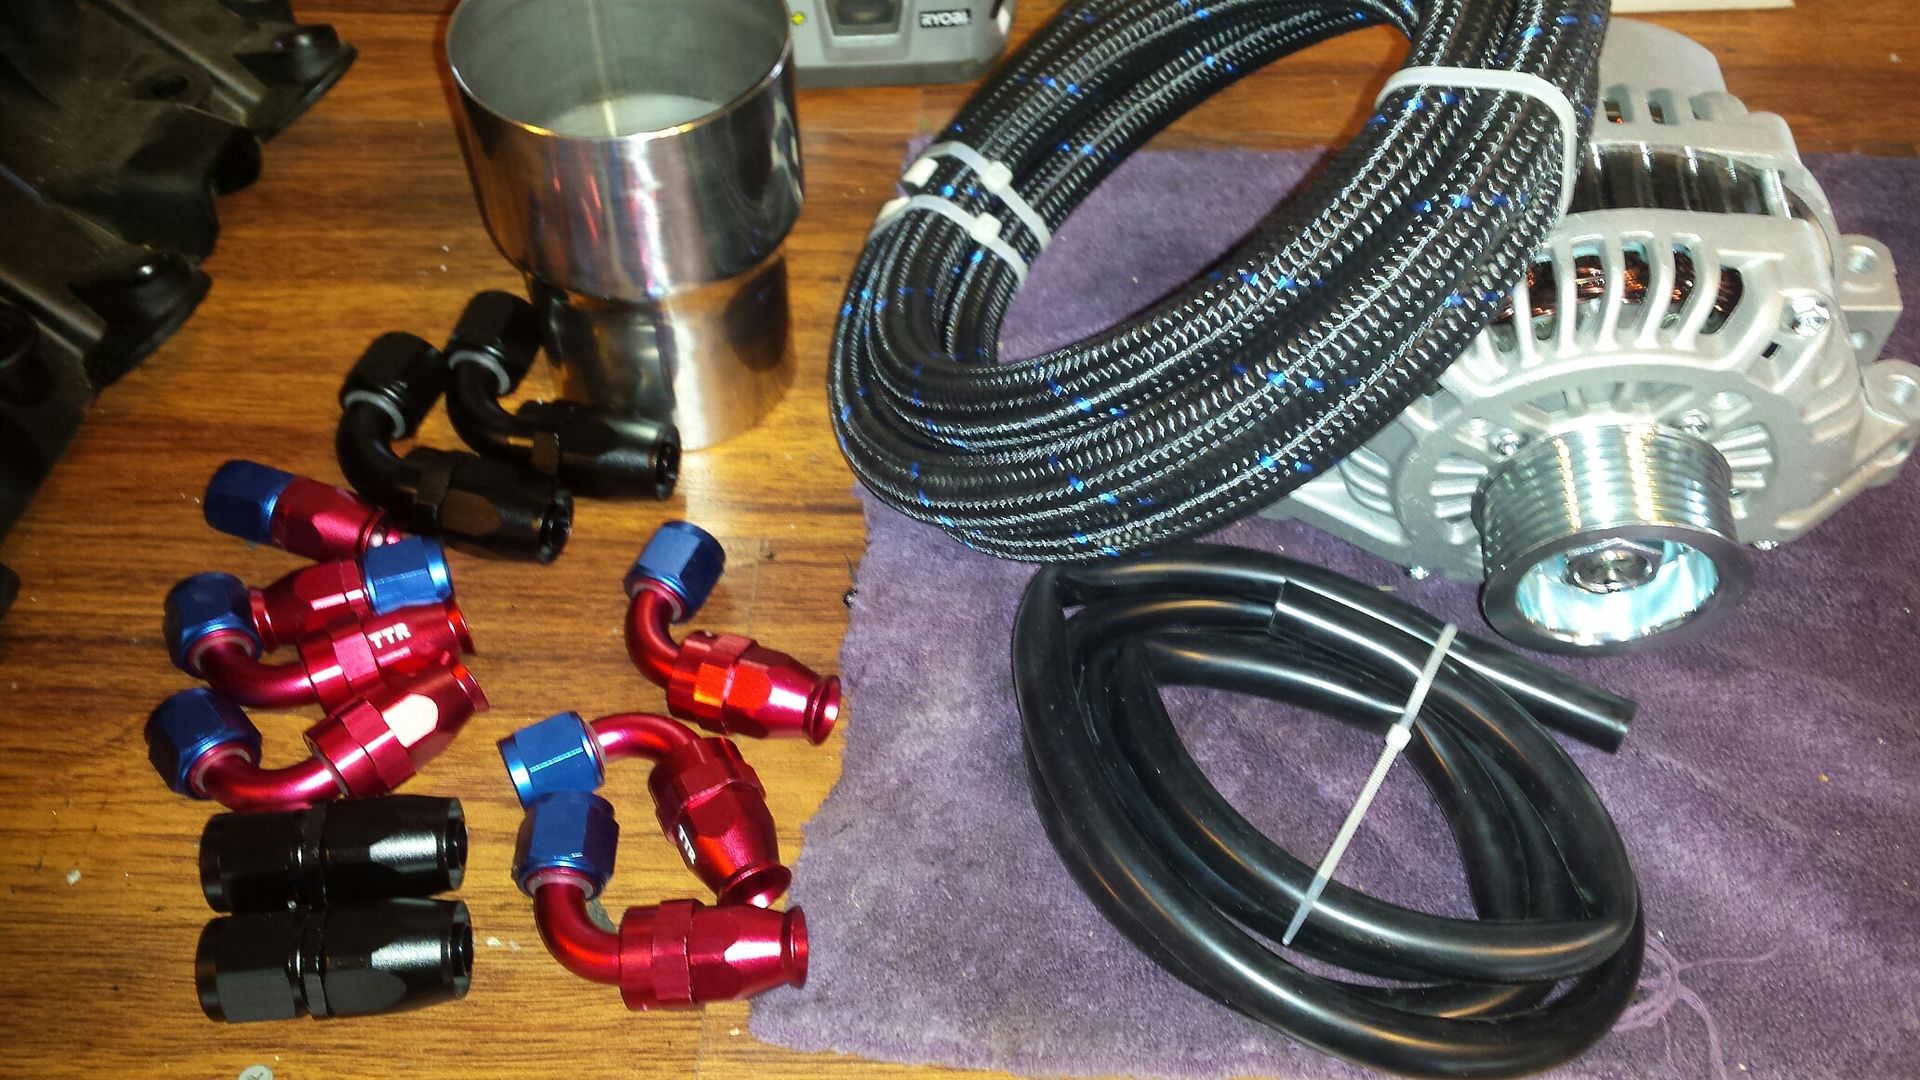
The black fittings are -10 for the catchcan to valve covers, along with matching -10 black nylon lined hose, and the rest of the fittings are the elbows to come off the rails, then random vacuum line, an exhaust reducer (more on that later) and the Honda alternator. Yep my daily is down so I will be fixing it instead of doing race car stuff.
Super fast delivery....this is the PCV delete model, no vent tube. 92mm.
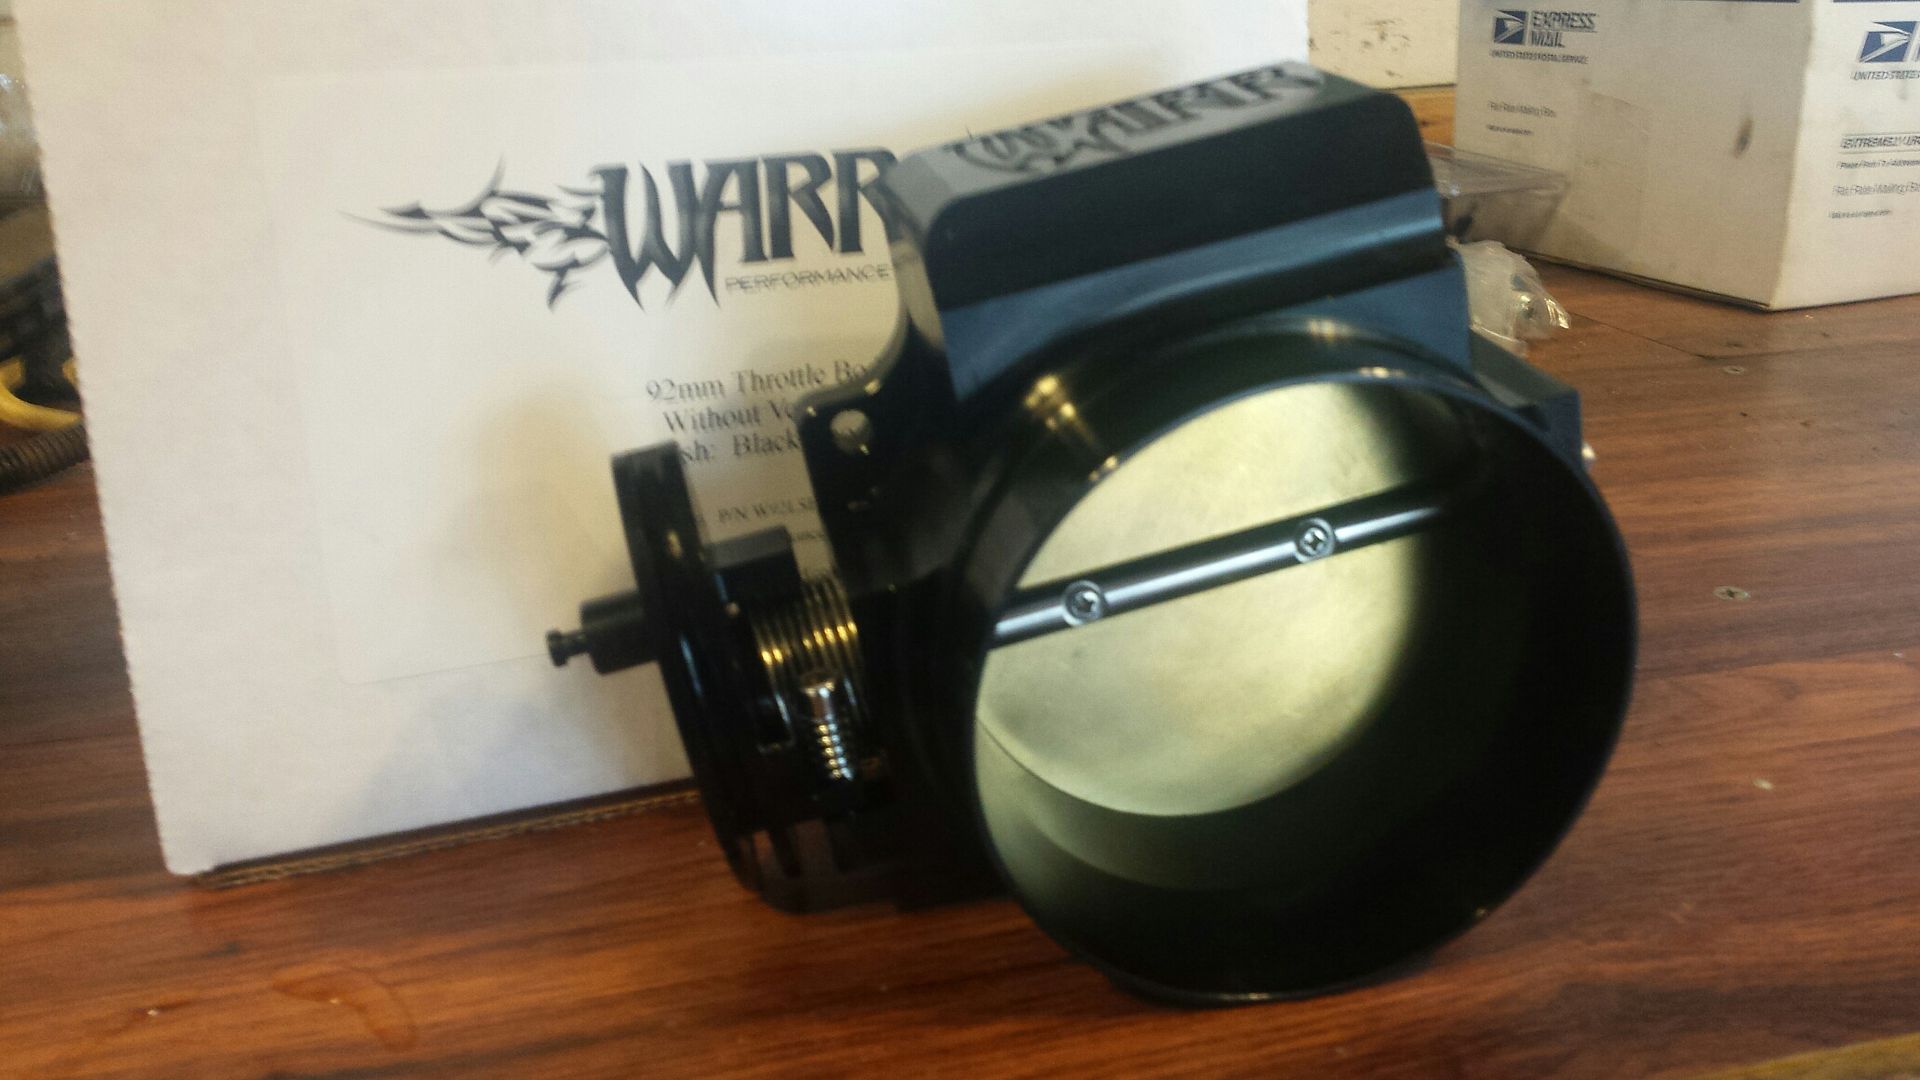
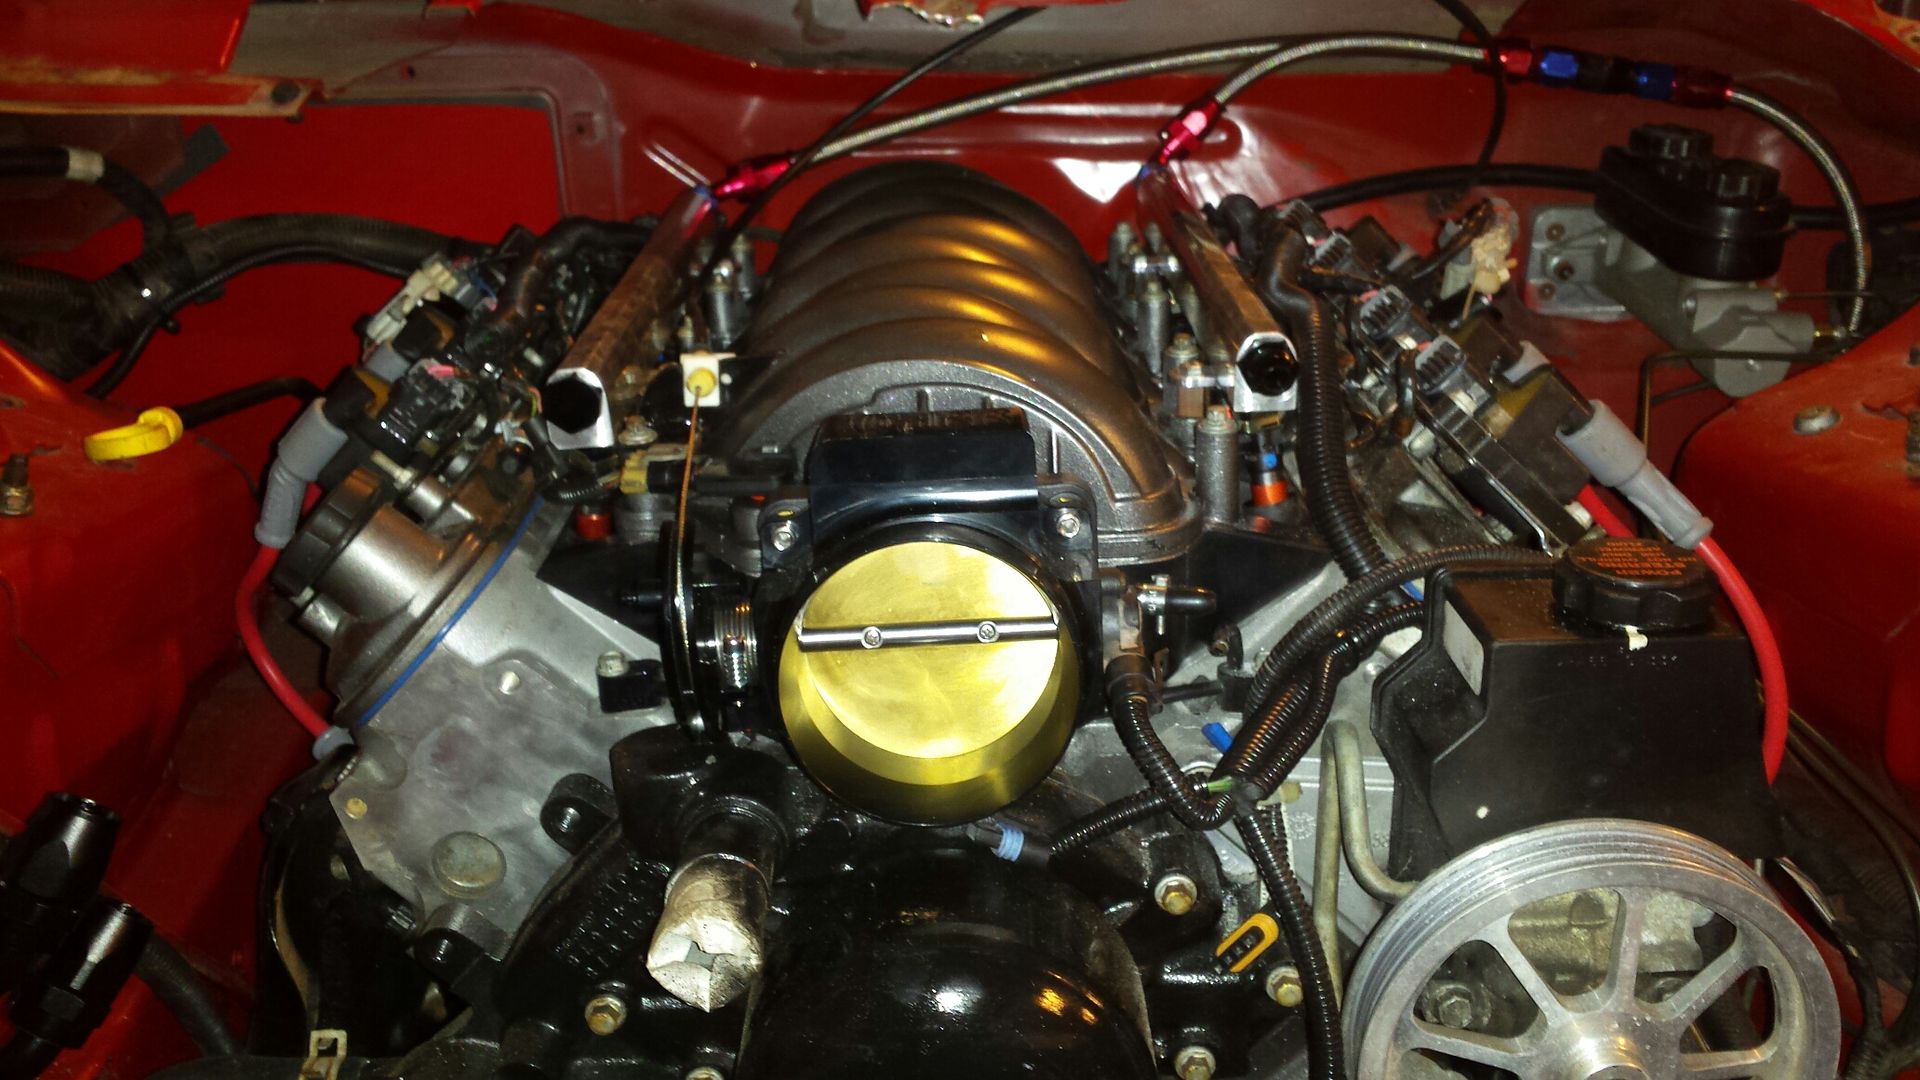
But that intake has no provisions for a cable throttle body, what do you do? You make one, no other choice. Also, I installed a car oil pressure sending unit and attached the main vacuum line to the rear of the intake. After I swap the injector orings we are ready to do a final install on the intake. I've got the elbows on the catchcan in this pic, but until I see where the alternator is gonna end up I can't exact figure out the routing. Come on Huron Speed!!!!
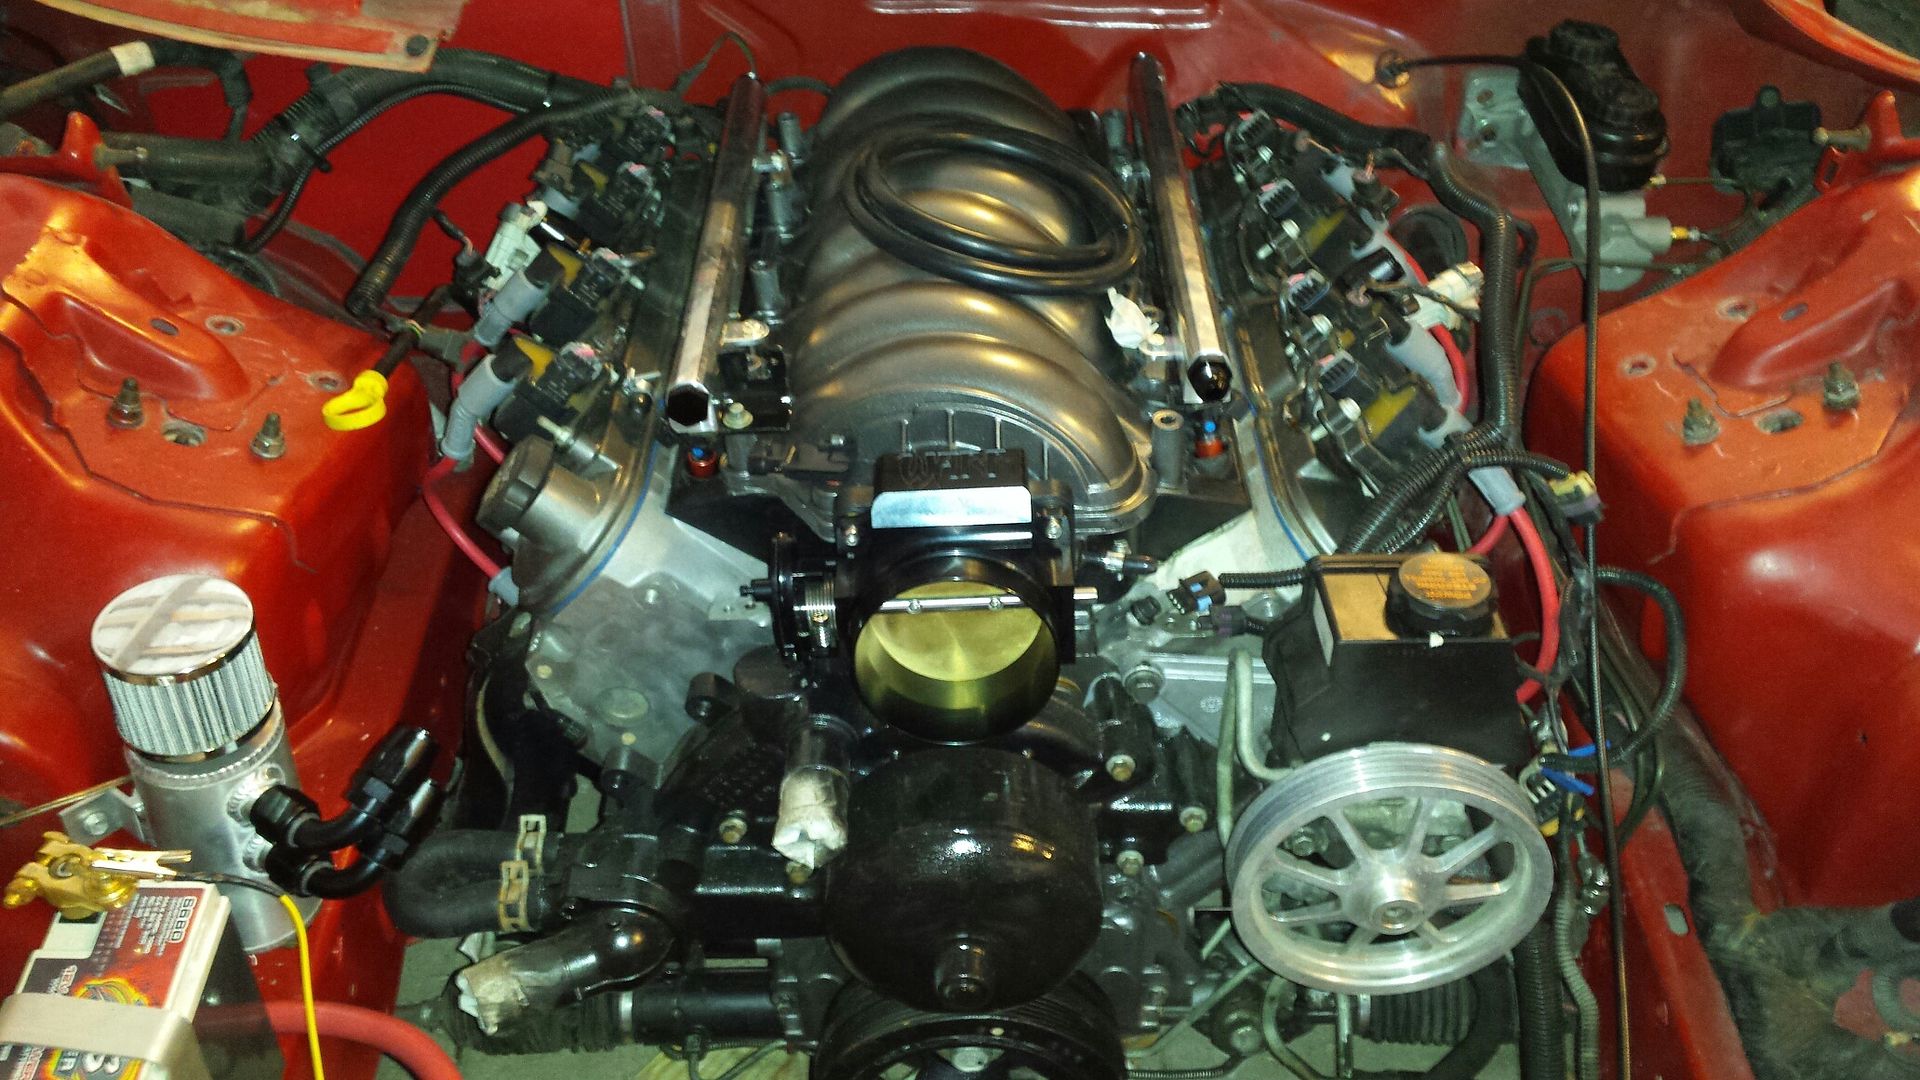

Had to use an alternative set of fuel rail brackets and trim my spacers down by about 1/3 but everything seems to fit nice. Also, I ordered the FAST fat orings for the bottom of the injectors since everything LS2 and later have bigger injector holes then LS1 stuff. 146020COR is the part number. 3 bar MAP sensor is in place, and the stock wiring is gonna have to be extended.

The black fittings are -10 for the catchcan to valve covers, along with matching -10 black nylon lined hose, and the rest of the fittings are the elbows to come off the rails, then random vacuum line, an exhaust reducer (more on that later) and the Honda alternator. Yep my daily is down so I will be fixing it instead of doing race car stuff.

Super fast delivery....this is the PCV delete model, no vent tube. 92mm.

But that intake has no provisions for a cable throttle body, what do you do? You make one, no other choice. Also, I installed a car oil pressure sending unit and attached the main vacuum line to the rear of the intake. After I swap the injector orings we are ready to do a final install on the intake. I've got the elbows on the catchcan in this pic, but until I see where the alternator is gonna end up I can't exact figure out the routing. Come on Huron Speed!!!!

#46
08-30-2017, 11:54 AM
Join Date: Aug 2010
Posts: 230
Likes: 0
Received 0 Likes
on
0 Posts
Don't have a lot of pics this update but I did get some stuff done on my two days off. Basically I started with the intake, I scrapped my L shaped throttle cable bracket and made a new one that utilized the front two intake bolts instead of the previous one. It is also as far over as it can be to help keep the cable better lined up with the throttle body. After that I did the final bolt down of the intake, I added about 12 inches (solder and heatshrink) to the MAP sensor wires since it is now on the front of the intake, can see it right under the throttle cable. Ran the main vacuum line to the vacuum block that's where the wiper motor used to sit. I did have to grind the water pump, which i previously did not have to do for my fast 92 or 102 setup. The entire harness is basically hooked up, trans stuff from Nelson performance worked great and fit perfect. I had to lower the rear of the trans to get the back cooler line on but that was no big deal. Other then a dipstick (cover that soon) it is ready for trans fluid, which i purchased monday. Installed the Kent Moore flywheel tool and tightened the ARP crank bolt until the 24" breaker bar was making a smiley face. Then installed the block ground on the starter side and installed the starter. I have been trimming the harness like crazy, cutting off everything thats not present anymore (like rear 02s, wiper motor, ac stuff, abs plug etc). I ran feed and return fuel lines under the hood and also the hot wires for the pumps. Mounted them on the driver inner fender and they will power off that 12+ stud that's by the fuse block. I got the feed line ran to the rails, which you can see in the pic, there is a y split by the brake booster, and i will dual feel the lines then return them to the FPR. These feed lines will be hidden by the cowl once its re-installed. This weekends goal is to fill with fluids (solve the dipstick issue), test fit the radiator with fans on the front, flip the pins in the connectors so they push instead of pull, finish the fuel lines, and probably run vacuum lines to the wastegate location and in cab for boost control and boost gauge. I'm also a couple fuel fittings short so i ordered those plus an IAC valve which i dont have. I'm one vacuum port plug short for the intake neck so I ordered that also. I may fire on motor this weekend if all this gets done....Turbo kit is one week out.

#47
09-04-2017, 07:51 AM
Join Date: Aug 2010
Posts: 230
Likes: 0
Received 0 Likes
on
0 Posts
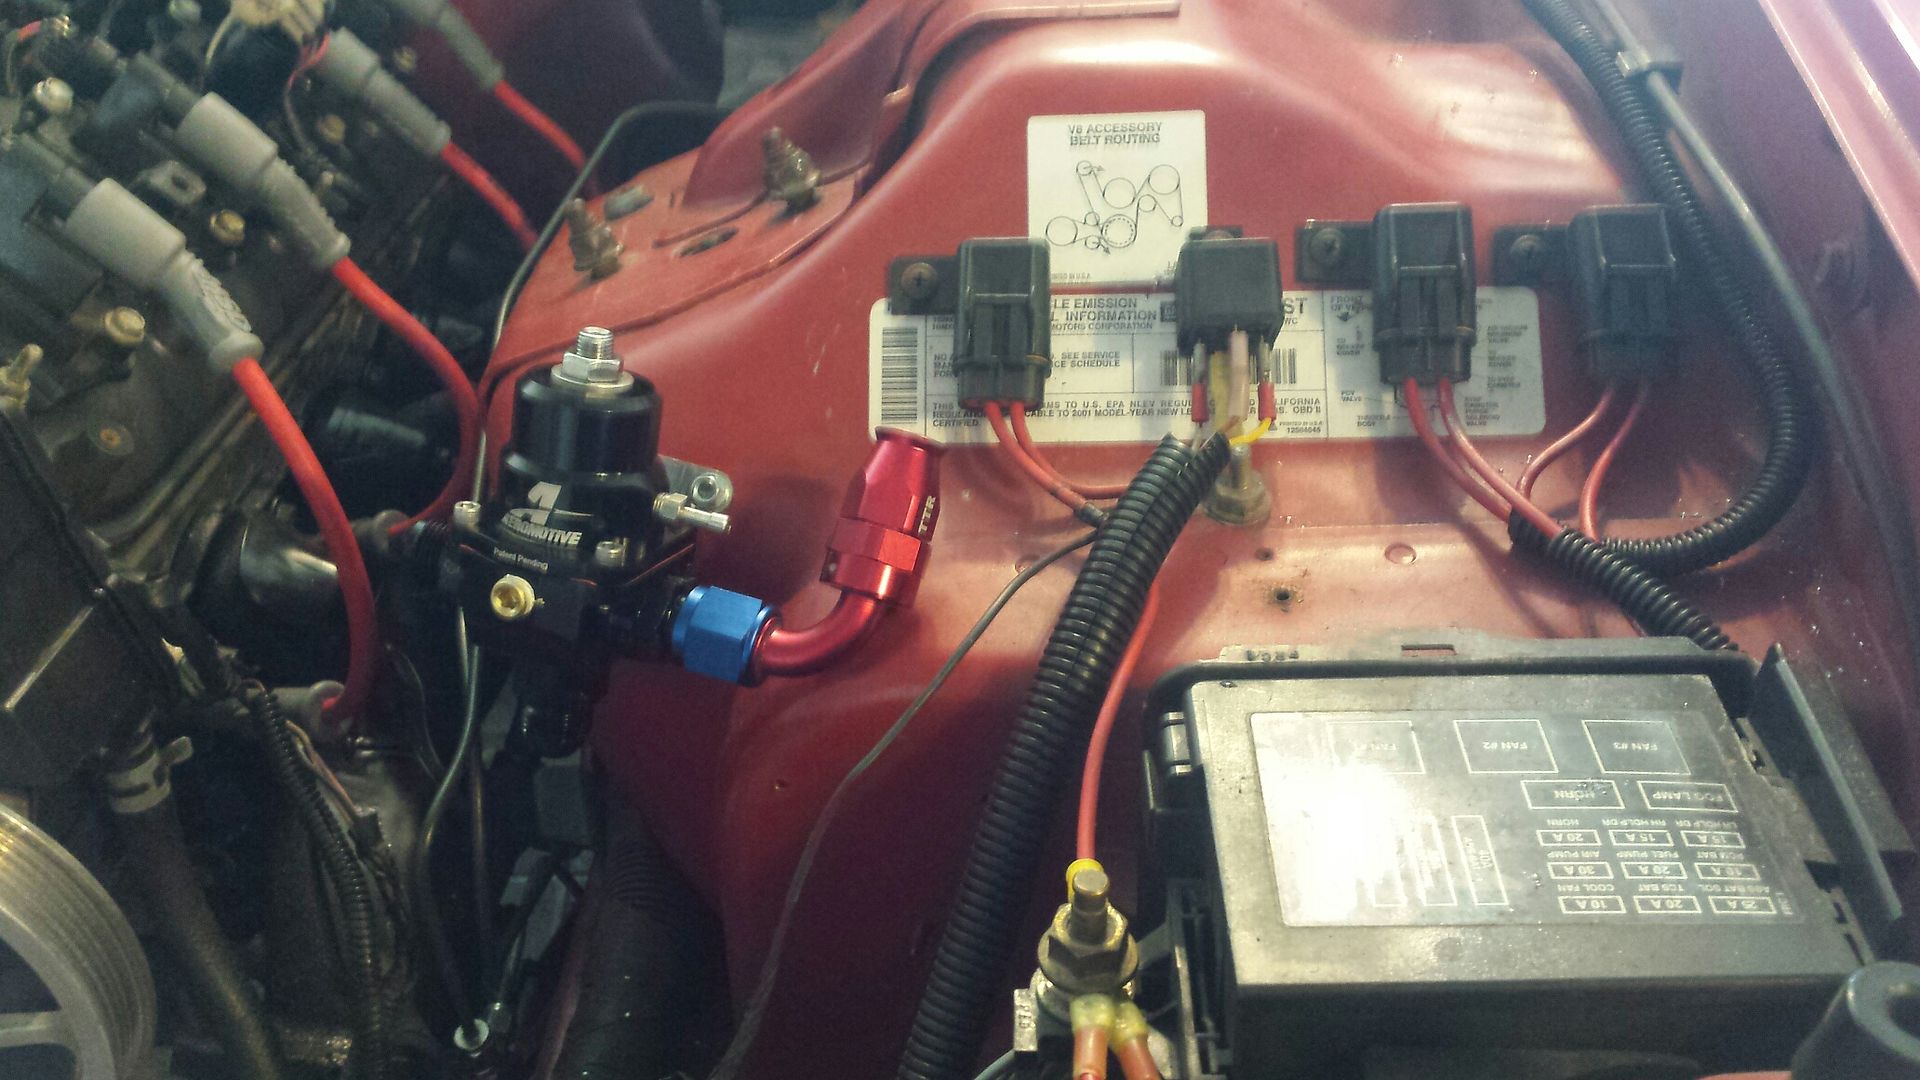
Quick pic of the fuel pump wiring. All the way to the left is a fuse and relay for the trans cooler fan, that's been there. I add the two fuse holders to the right. I also mounted the fuel pressure regulator and am currently waiting on a couple more fittings and that will be 100% complete.
I went and purchased 16.5 gallons on e85 an put some in the tank so I could flush the lines before i do the final hook up to the rail. I didnt get a chance to test the E content but will. Random pic of trans fluid.
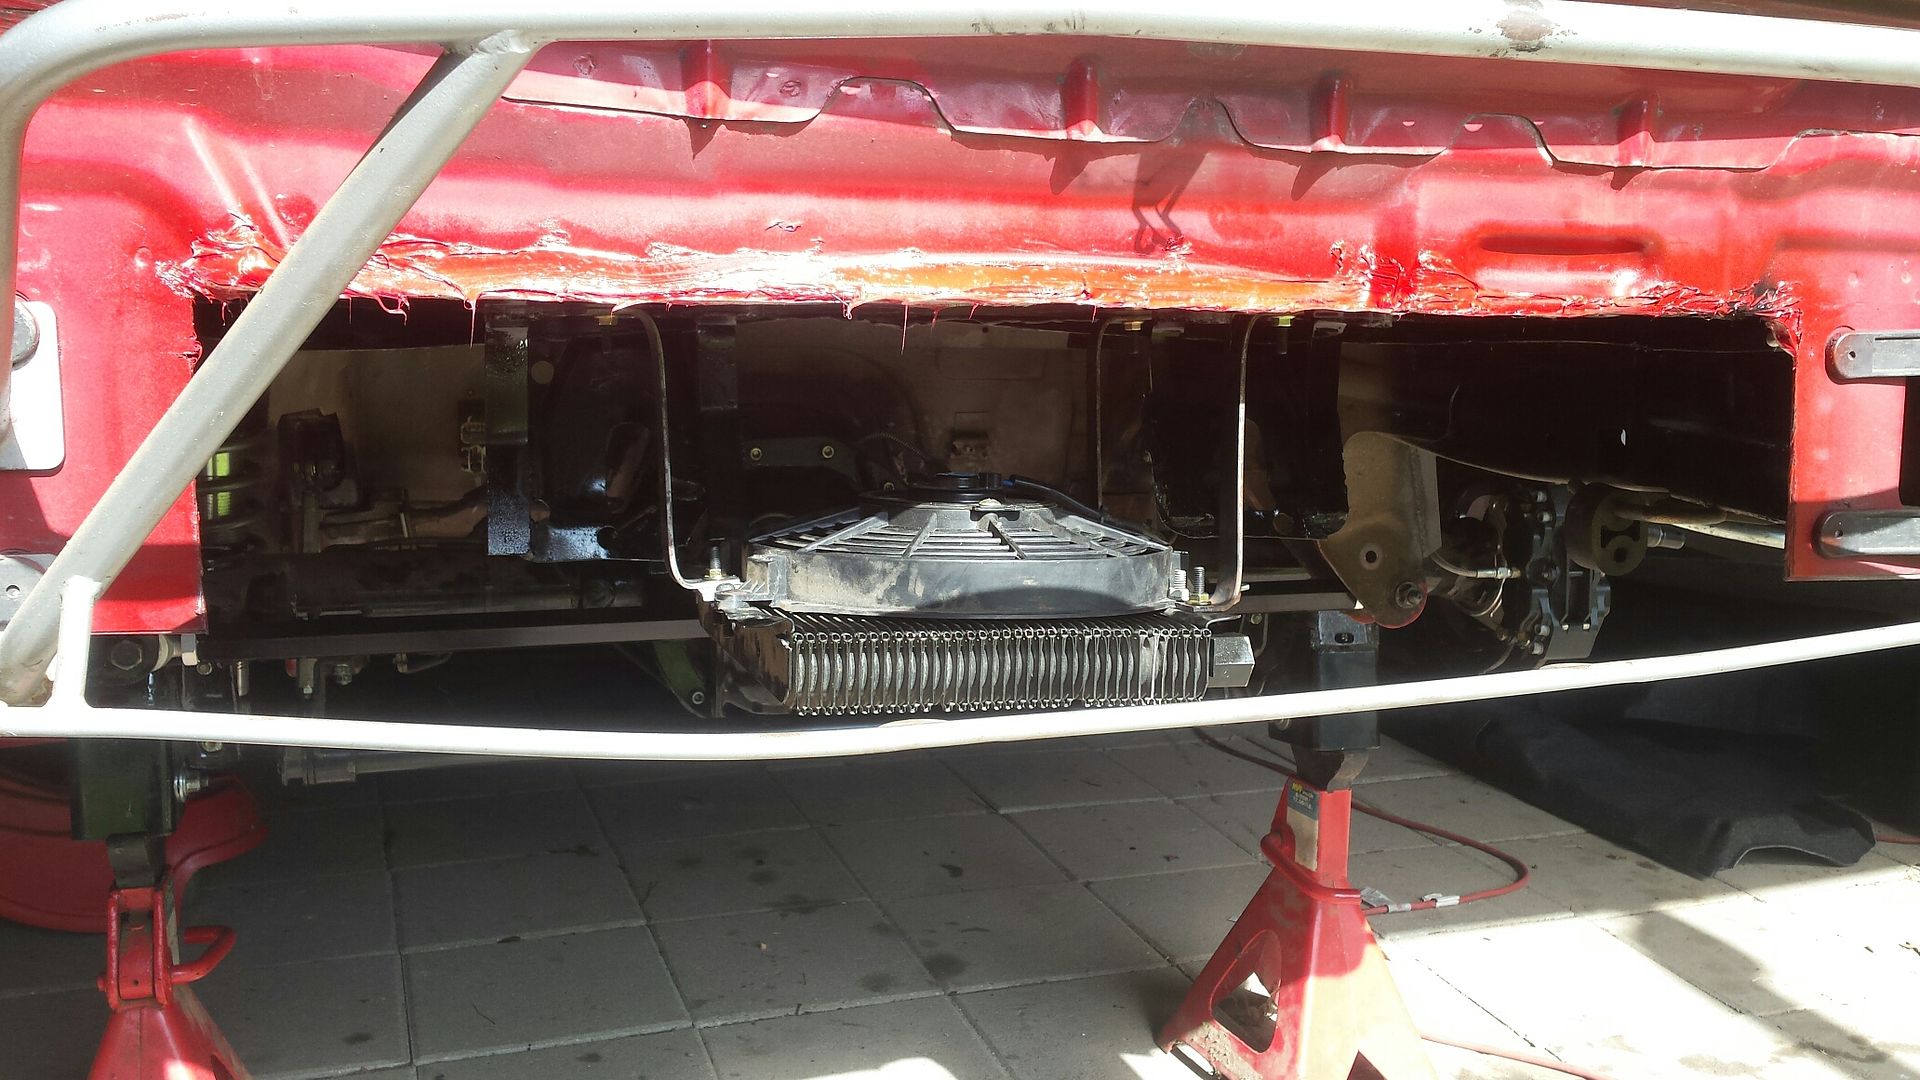
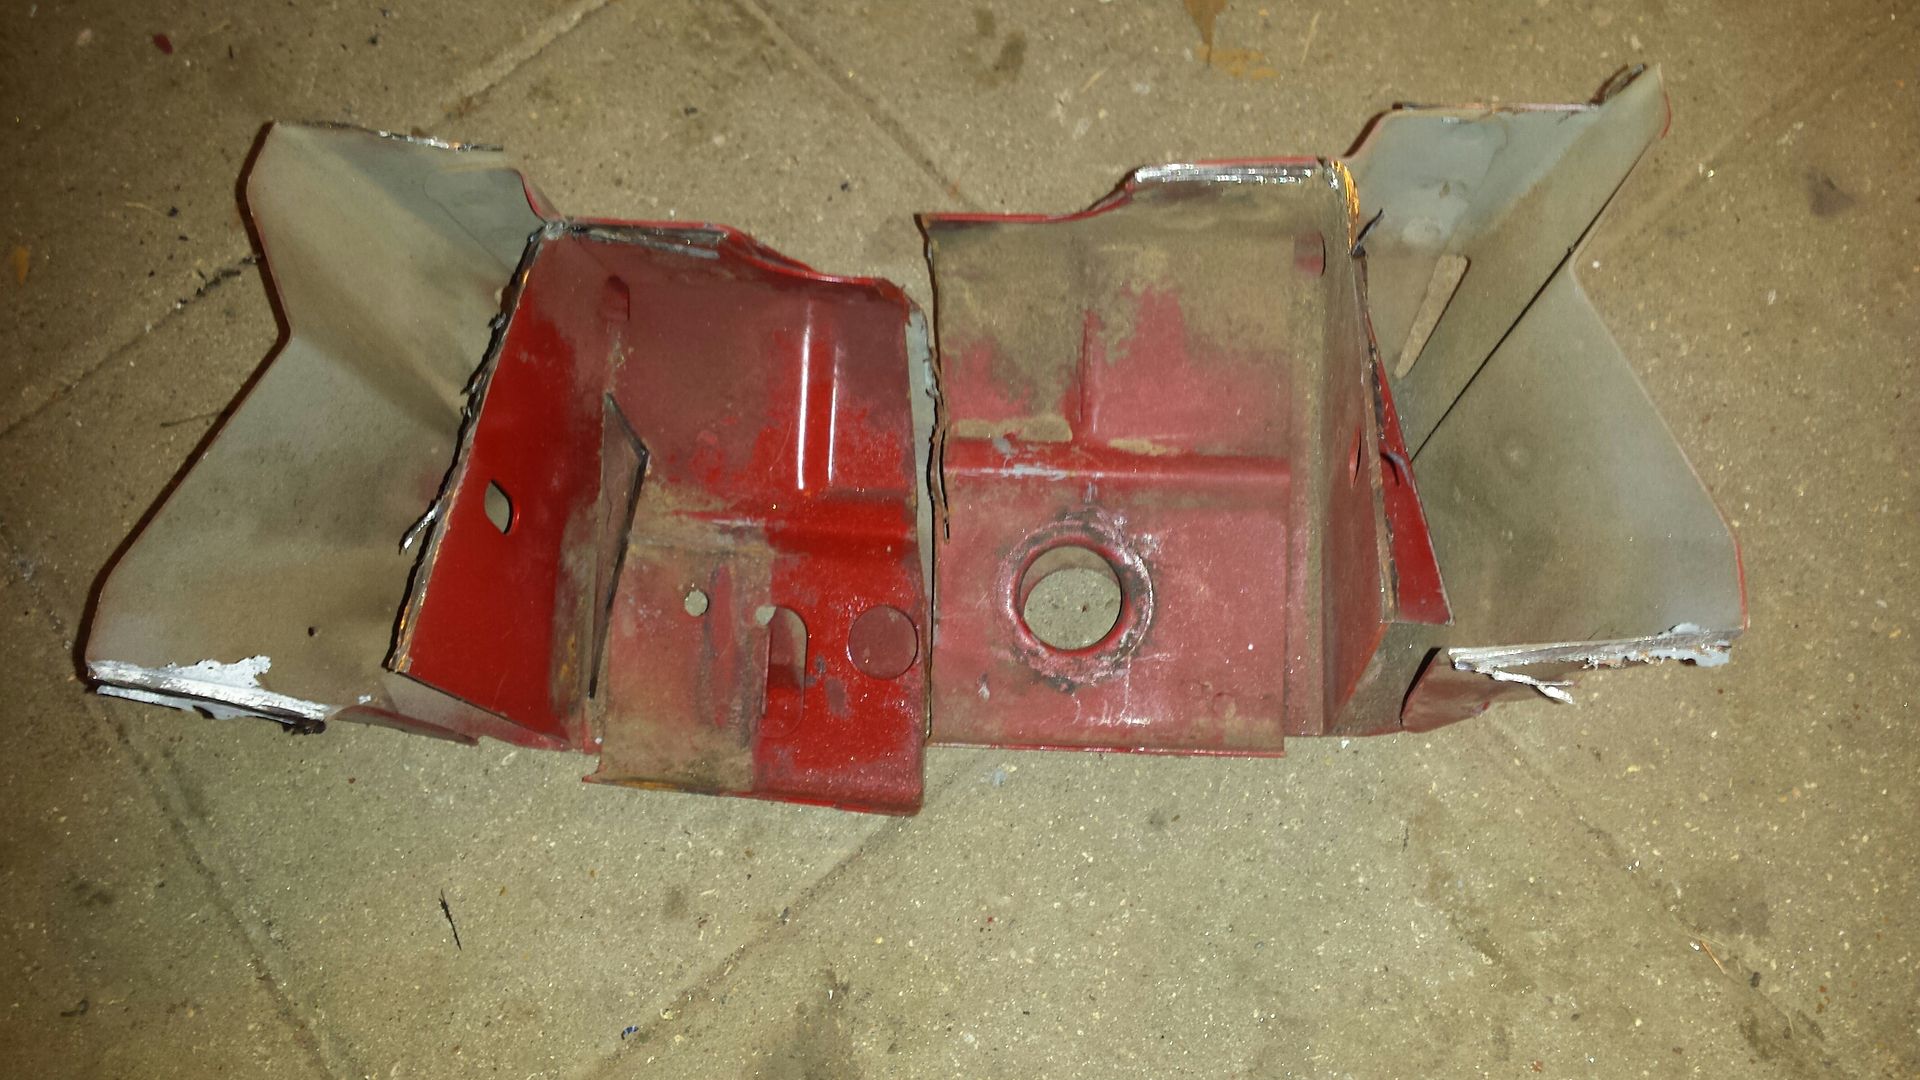
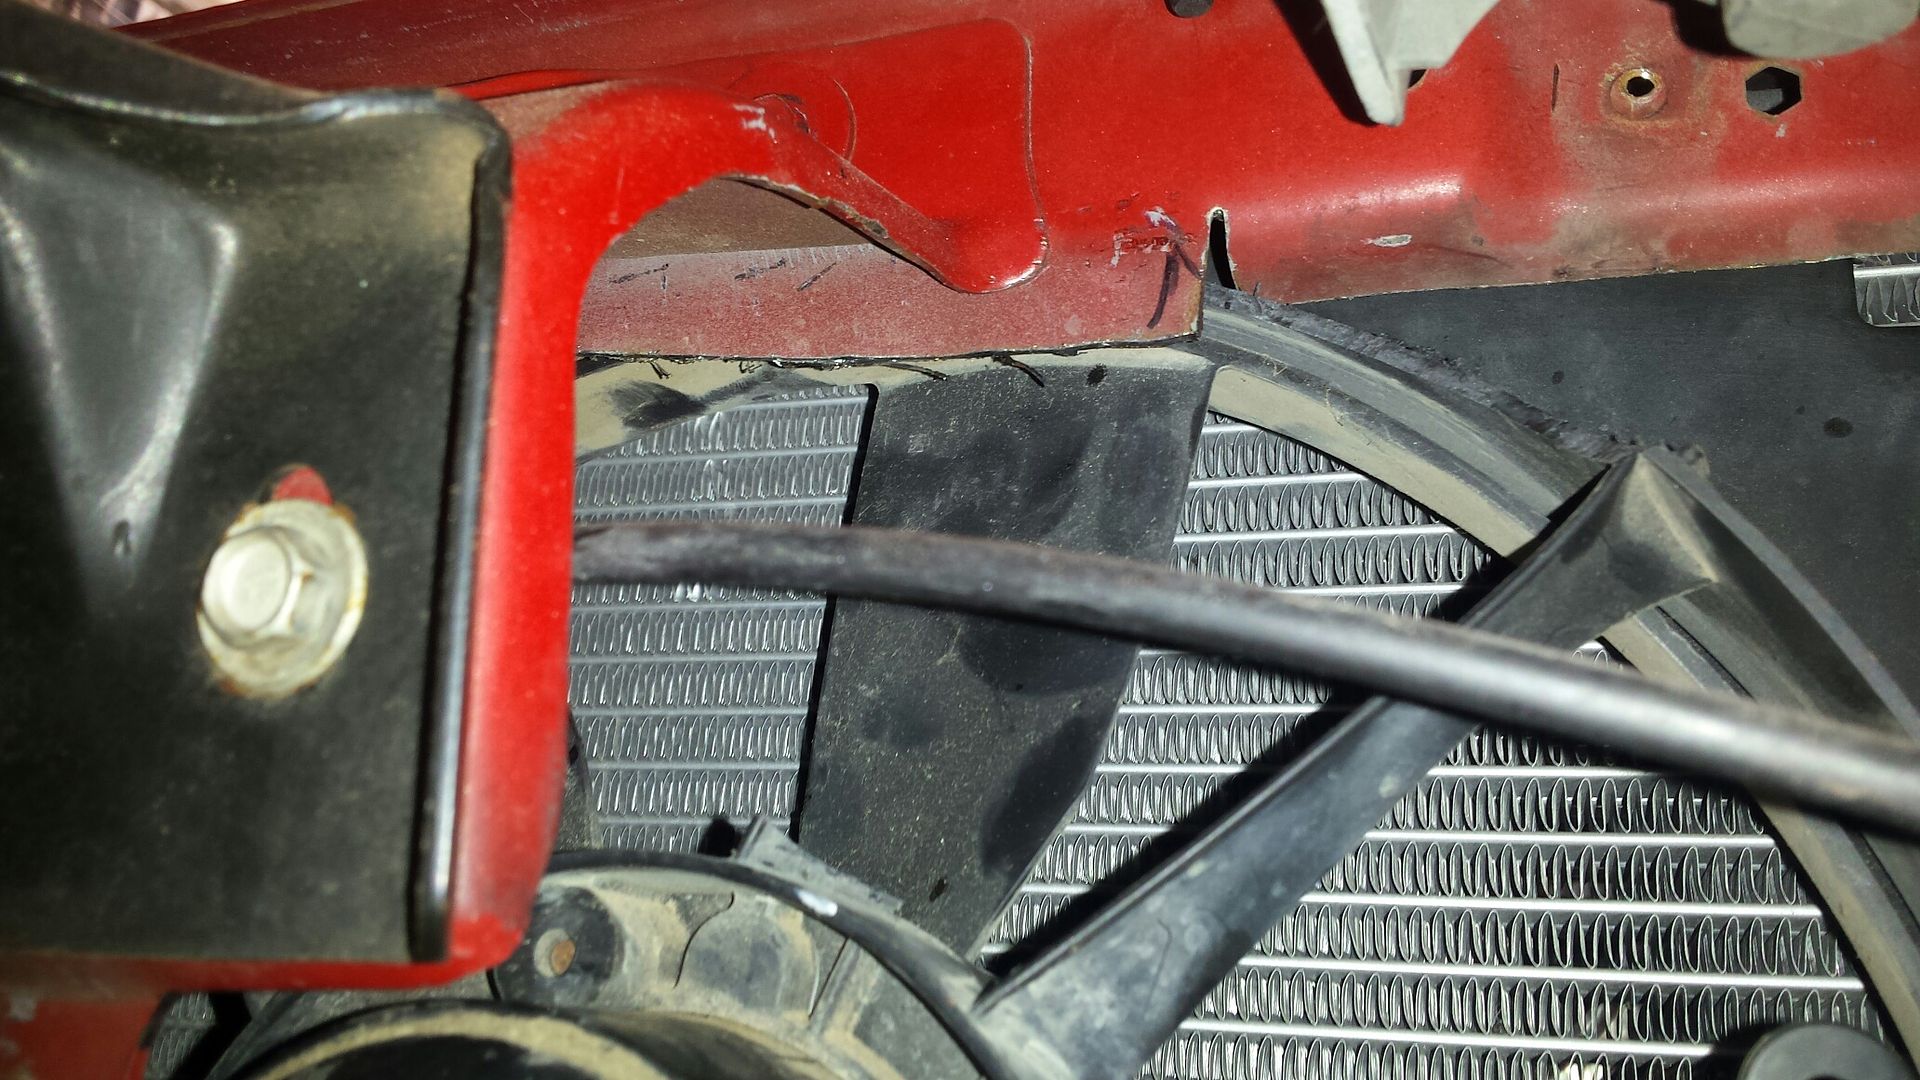
I initially started working on the fan wiring. While reversing polarity on the wires I thought, if the fans are on the front, will this wiring even fit? So I decided to stop, and test fit the radiator, fans, and wiring. Huron speed confirmed this kit will work with the radiator in the stock position, and mid last week i ordered an LT1 radiator cover. On initial fit I could tell clearance to the turbo was gonna be ****, and the stock fans flipped to the front weren't even gonna be close to working, the fan motors were pointed right at the upper radiator support. So i thought im either going to order slimline fans and fab a shroud, or cut the upper support. So I got out the cut off wheels. This is a pic of a previously cut lower support. I cut the entire center section out a year or two ago for weight savings.
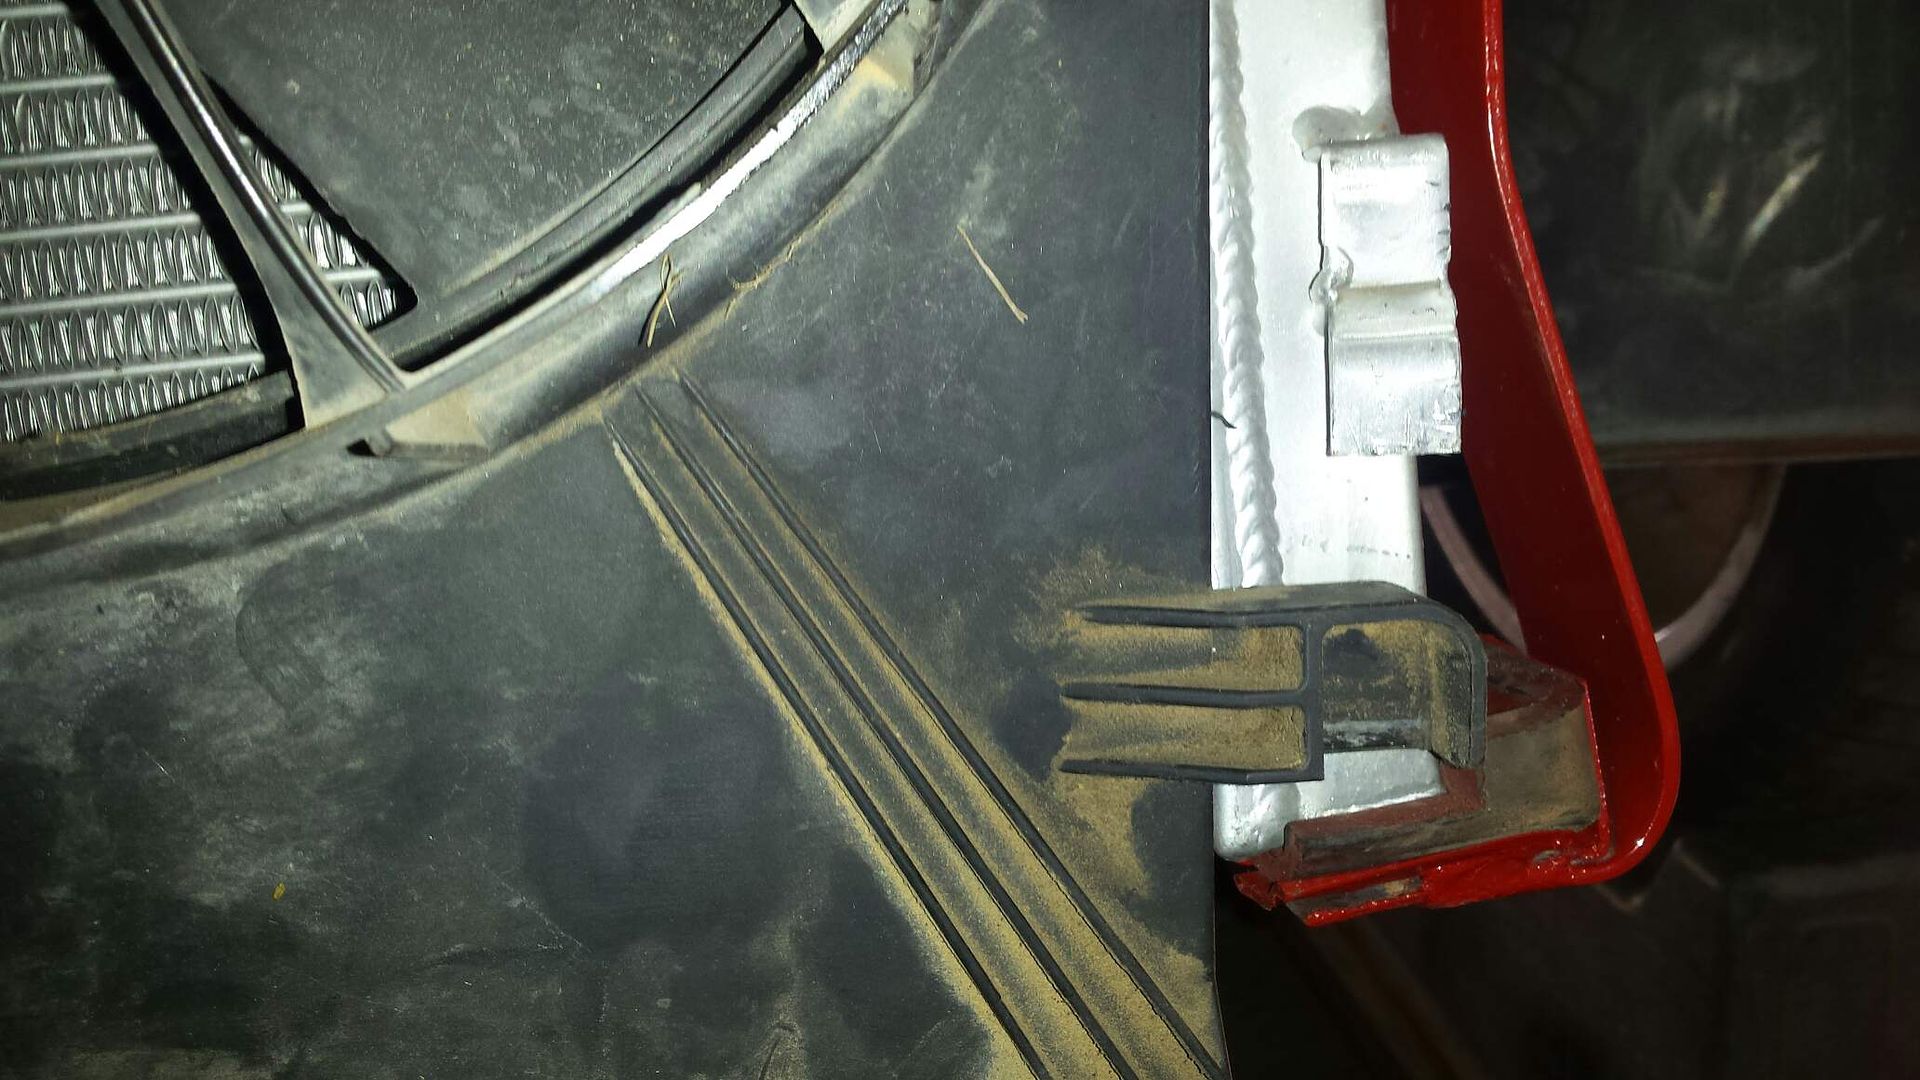
Here's a close up of the lower radiator support. You can see its three full sheets of metal in a triangle. The original piece I cut out of the car was like 6 pounds.
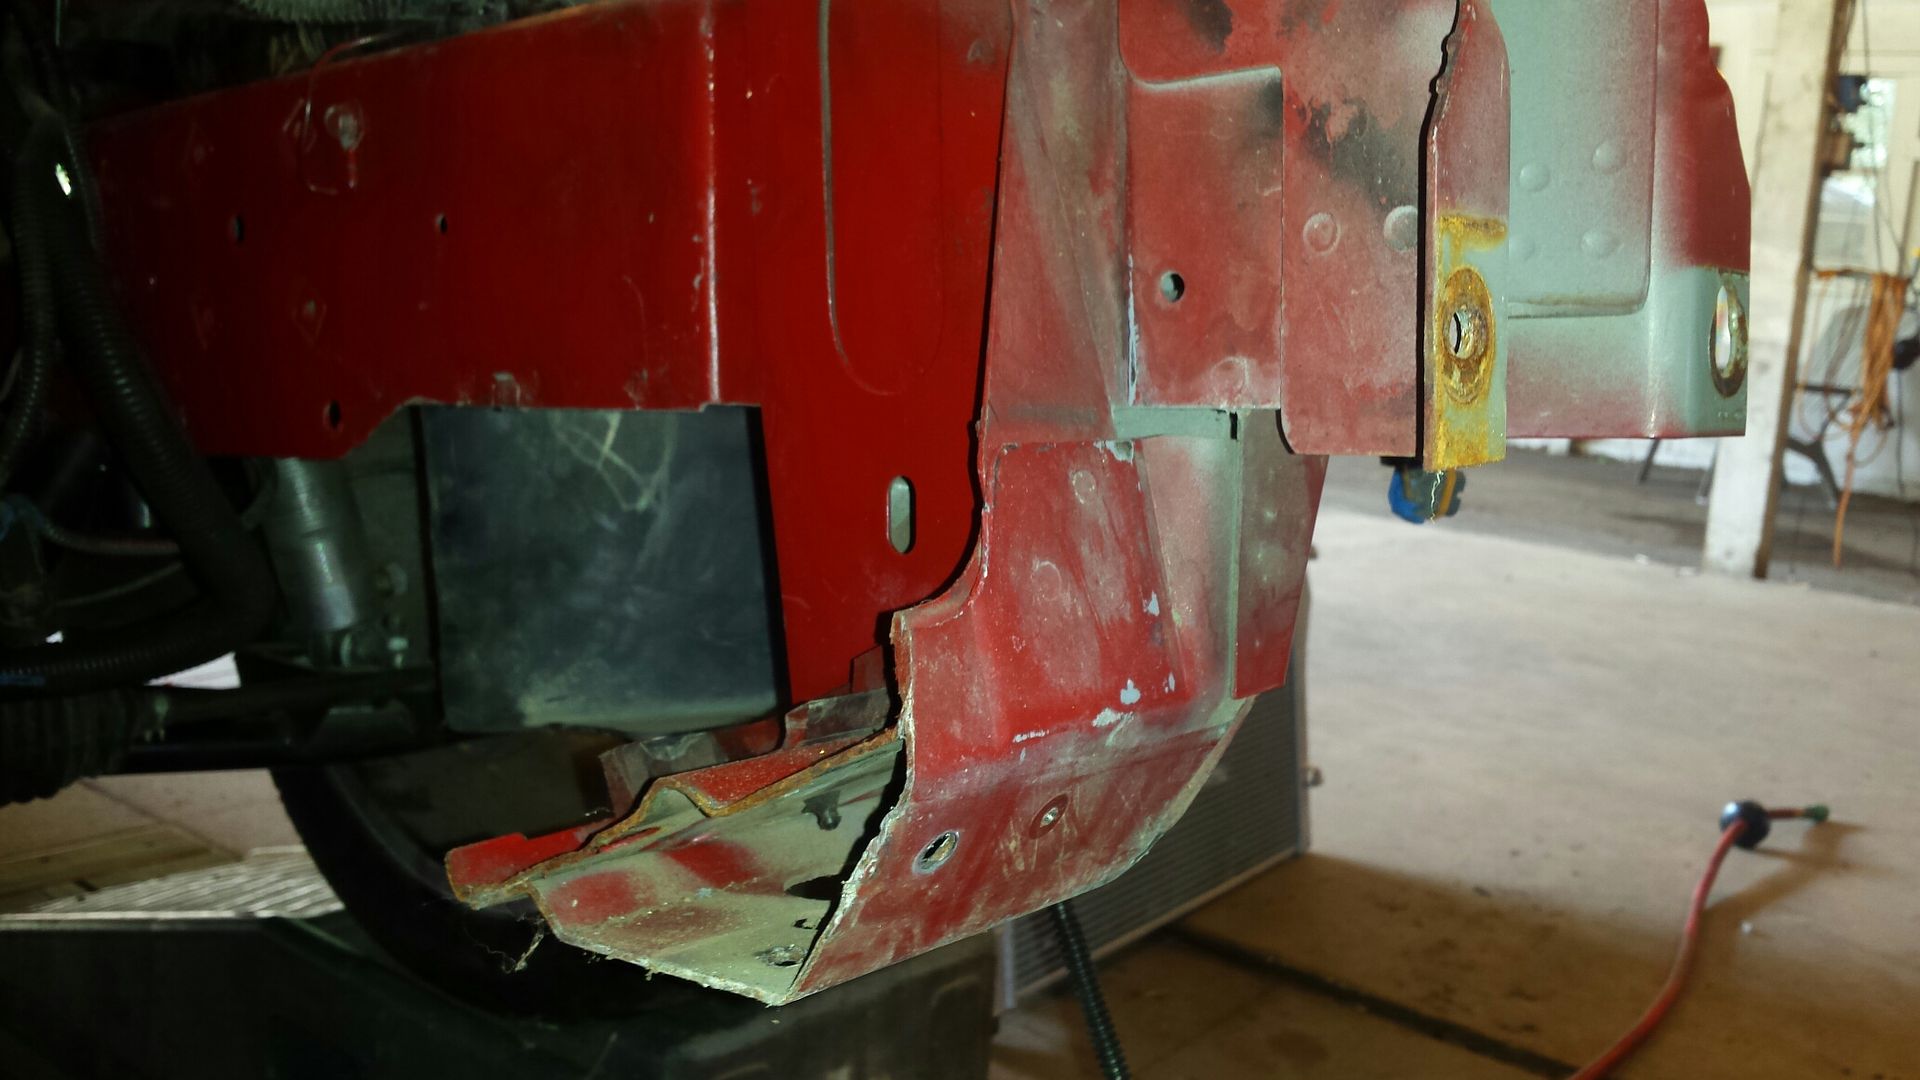
So just cut those babies off, or the whole thing if you still have it.
Throw these in the bushes.
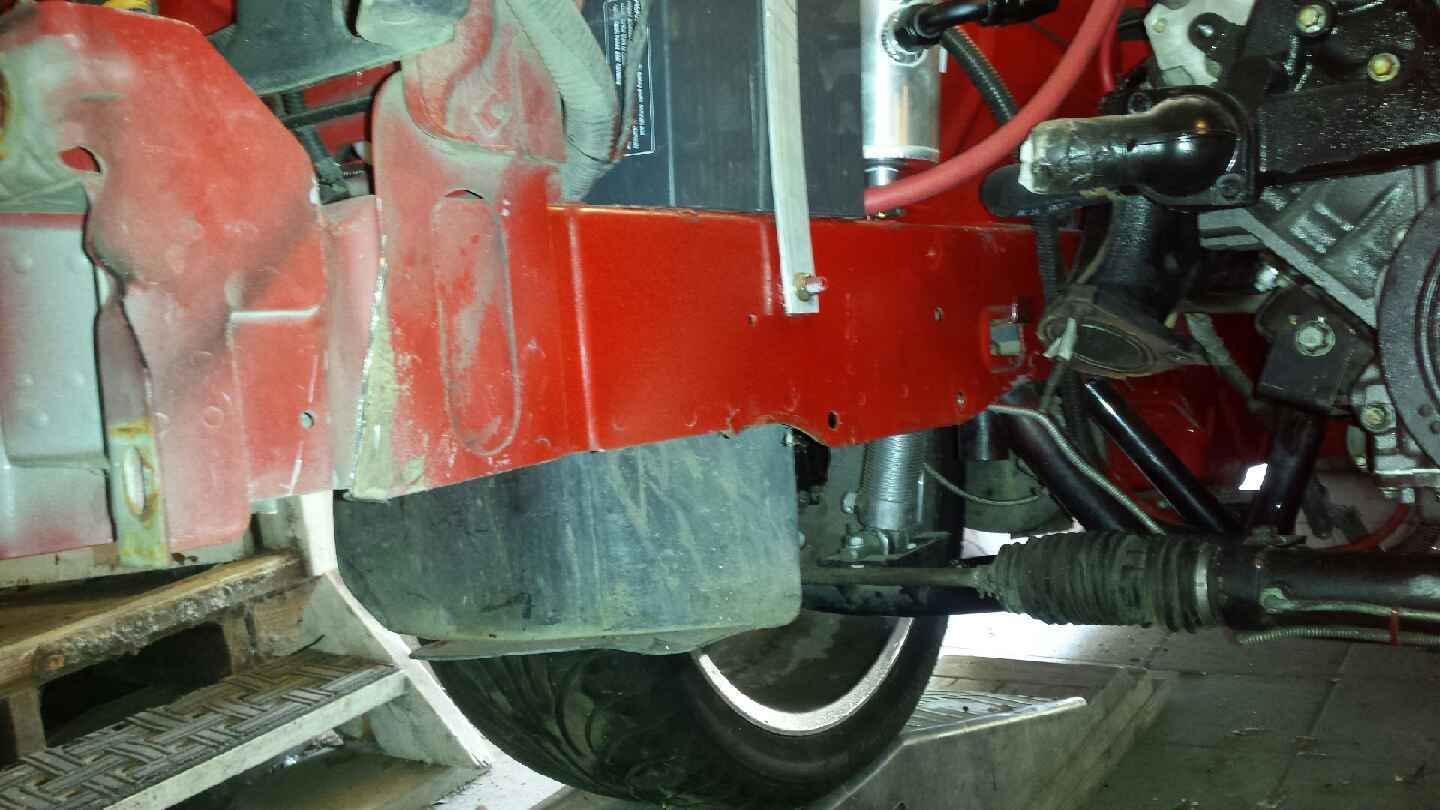
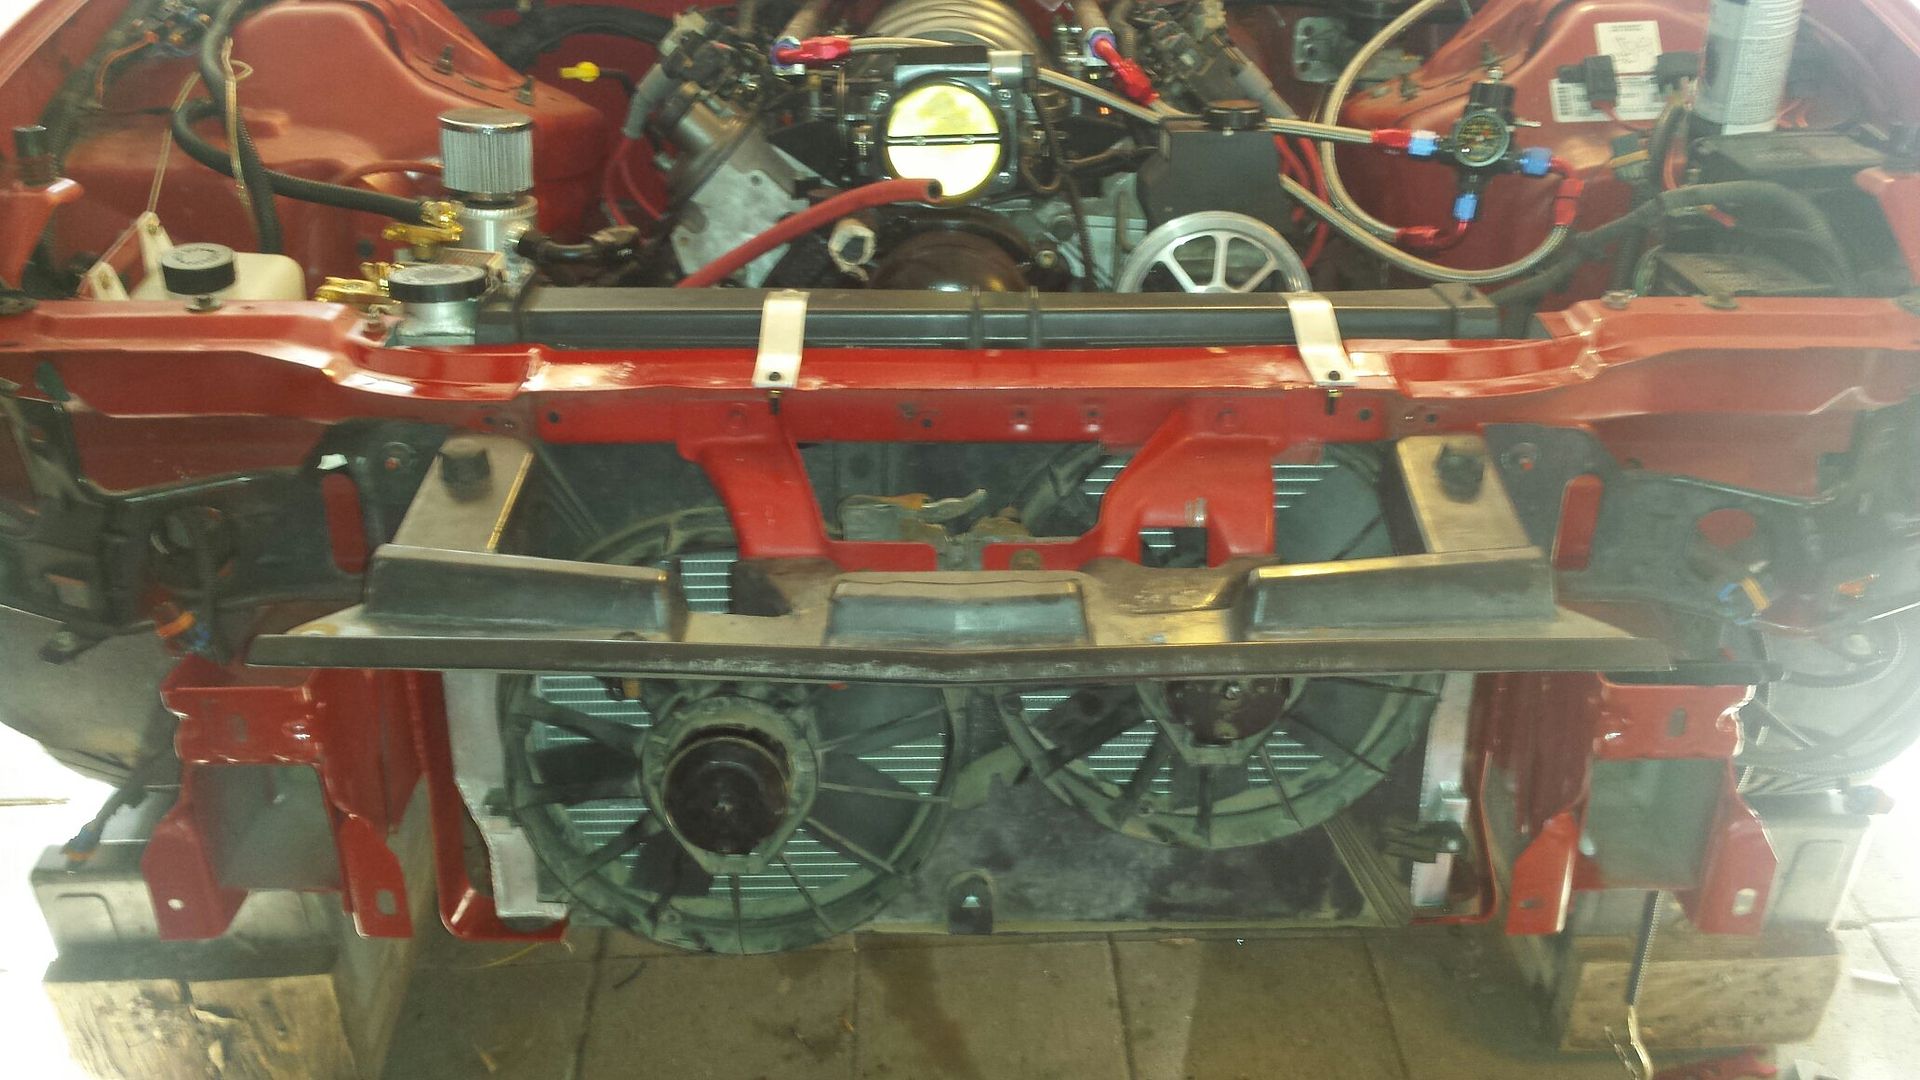
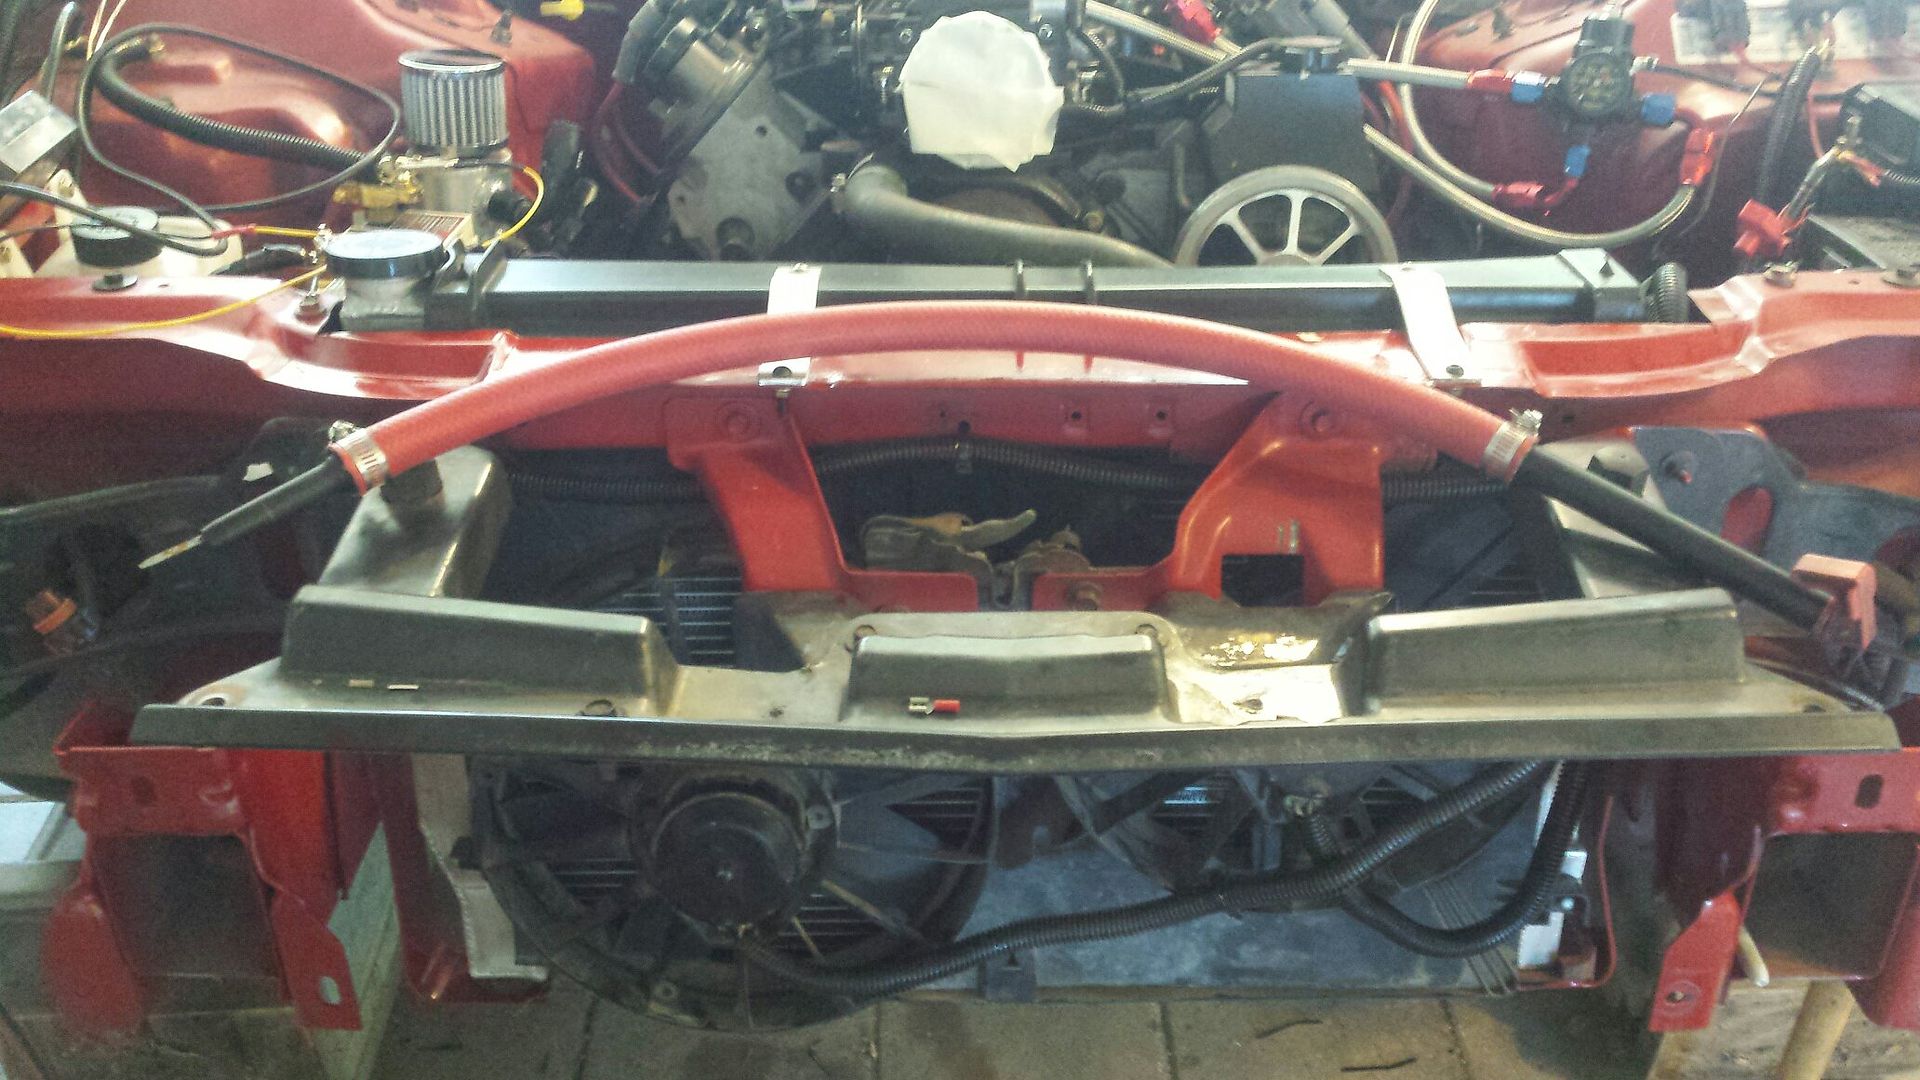
Couple pieces of flat bar, 2 90 degree bends later we have brackets. The drivers side has a flat square rubber bushing and the passenger side has a thick round bushing. They are different thicknesses which is why you can see the height difference in the mounts. Also, this mounts the radiator completely straight up and down with no slant, and approx 2 inches lower then stock. The upper support has to be trimmed in from the rear a full 2 inches. Im not sure if Im going to run the factory plastic air dam anymore, have to see once its all together.
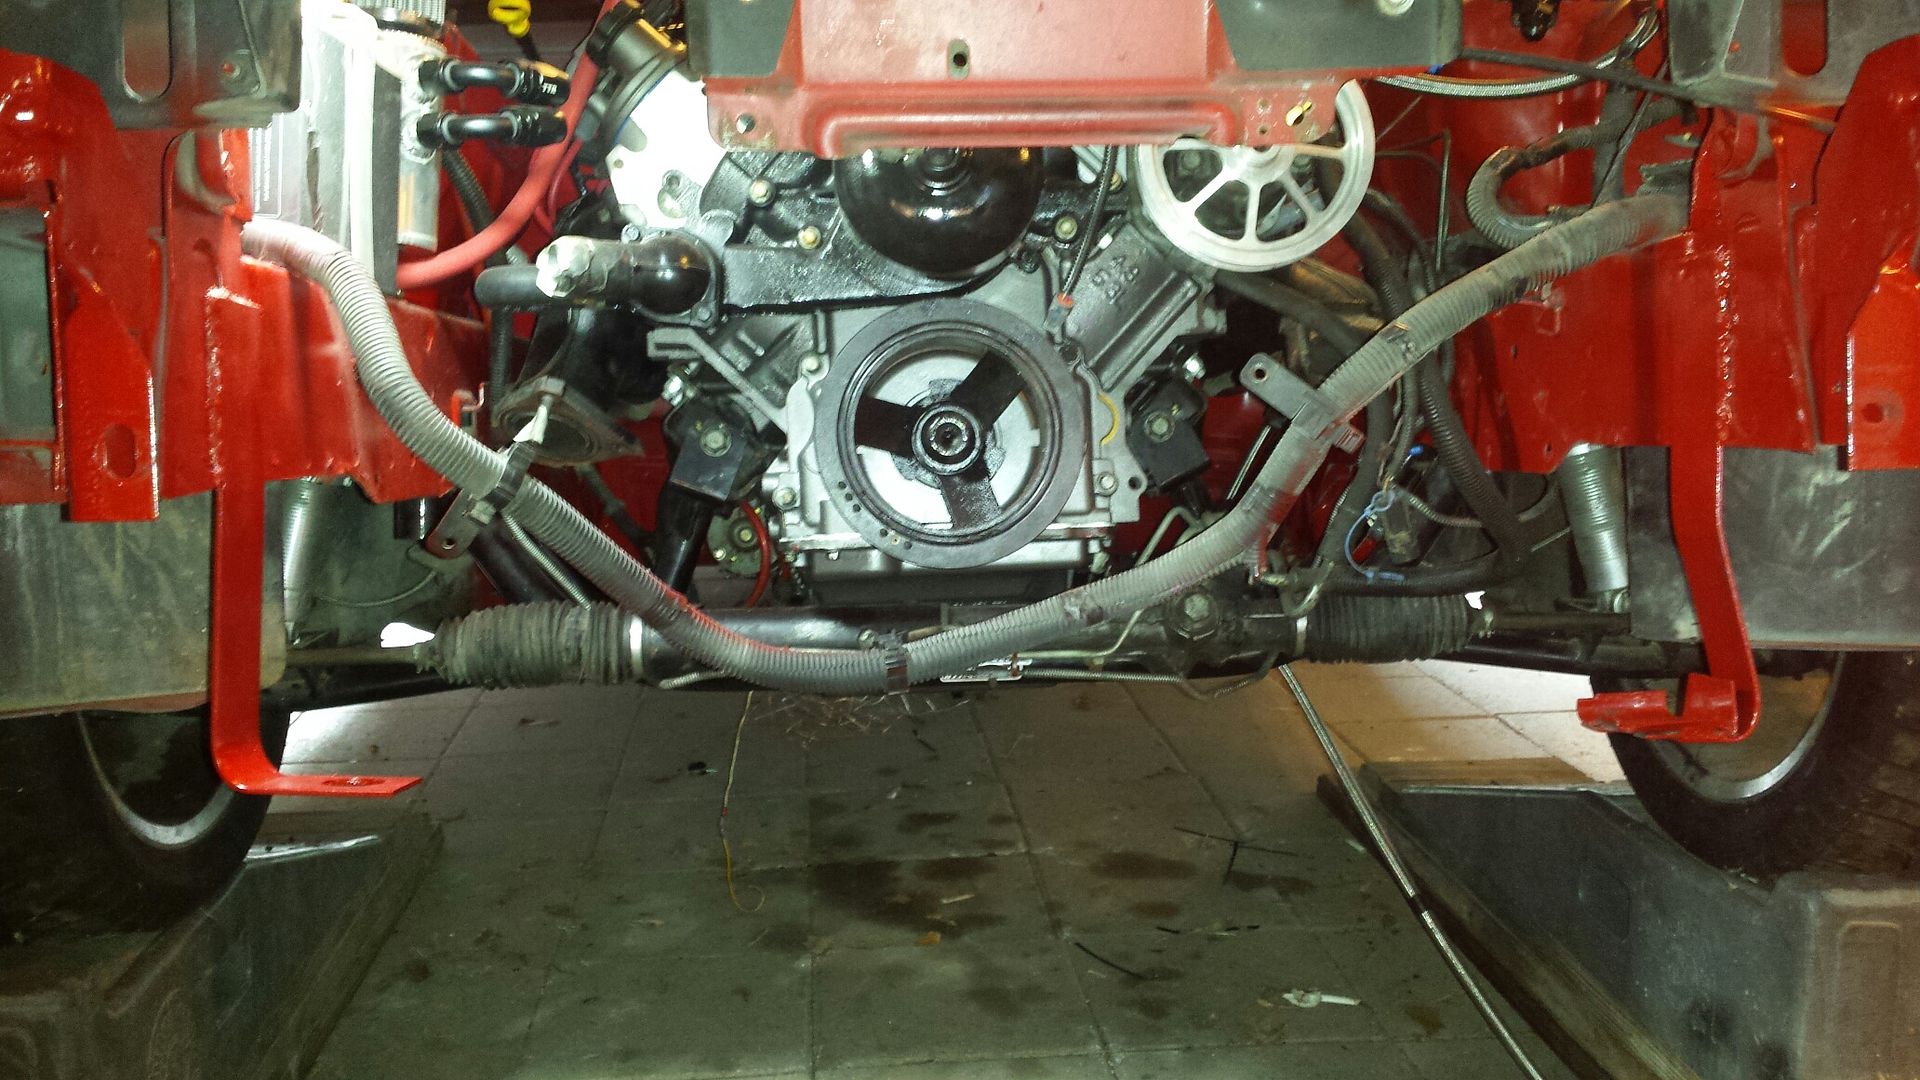
There she is in place. After I figure our what Im going to do with the top and I get the radiator exactly where i want it, I believe Im going to go back and add some triangle gussets to the brackets.
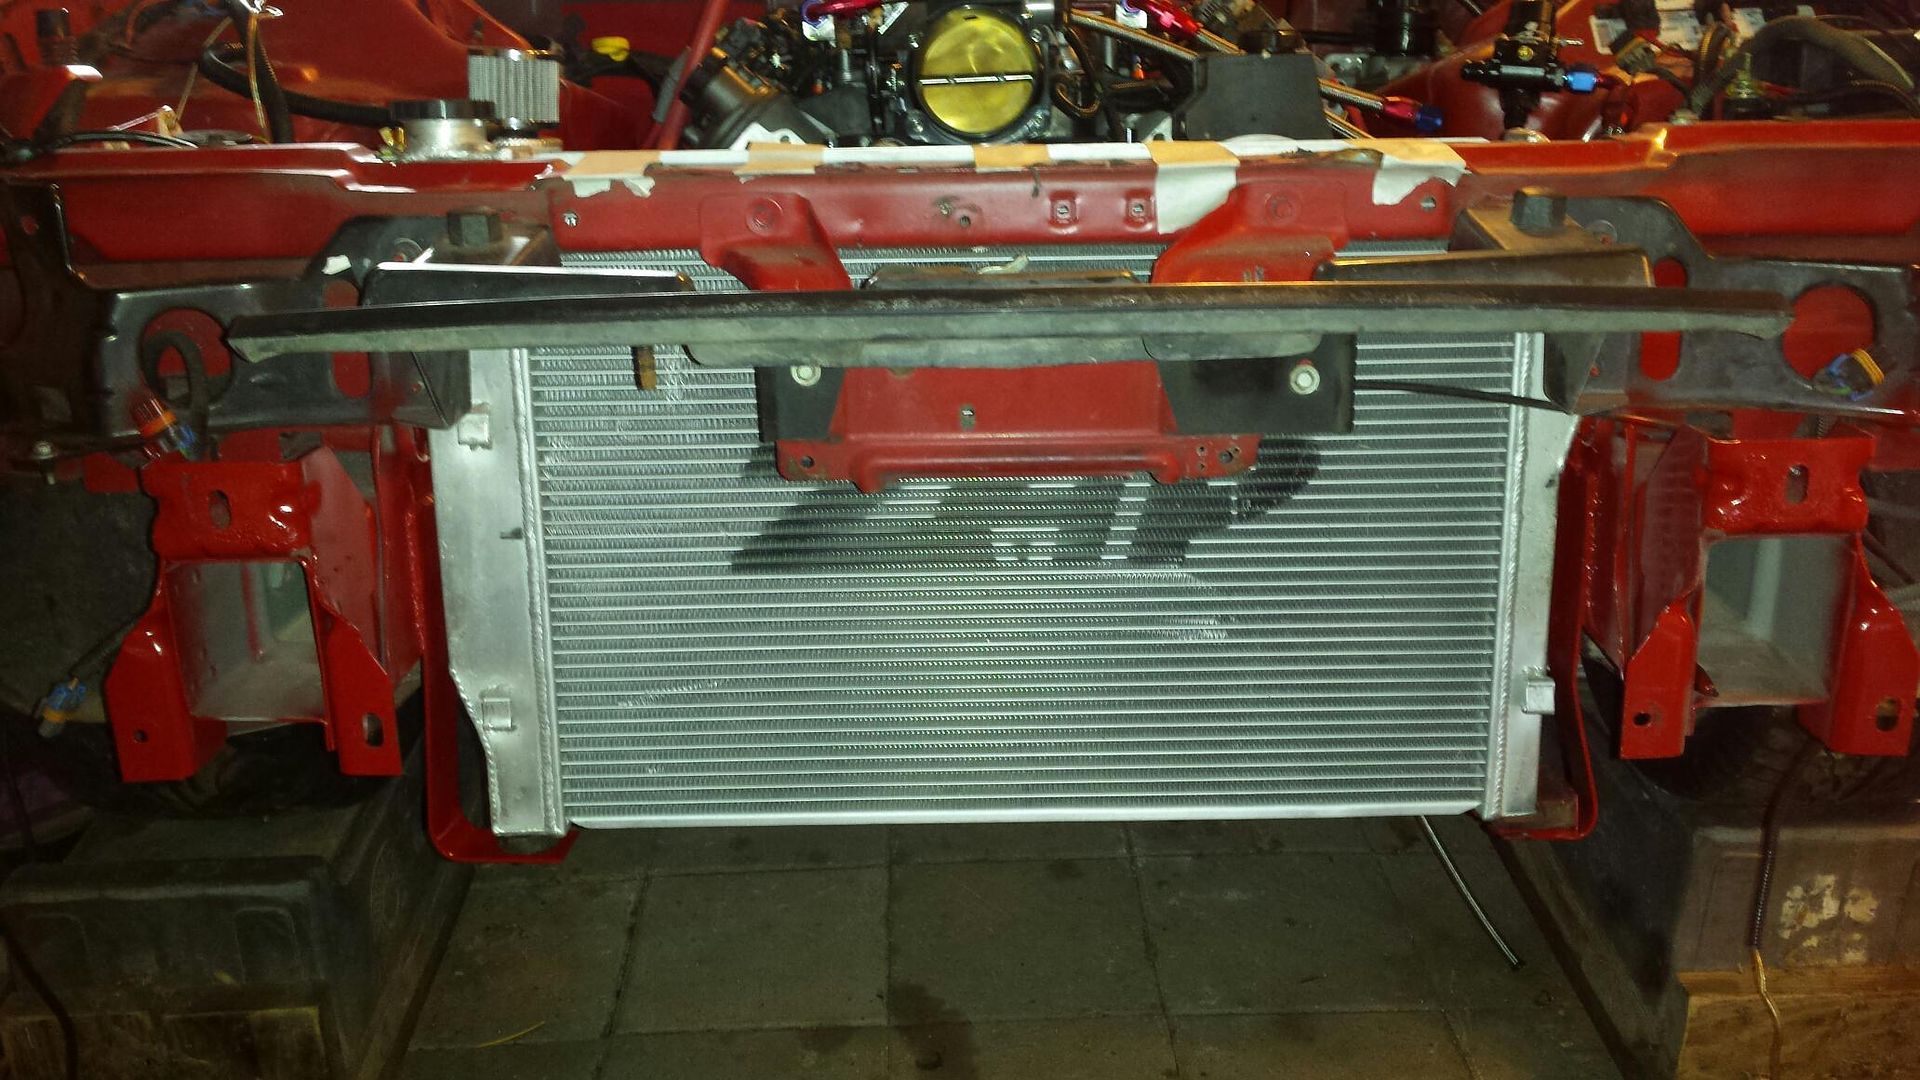
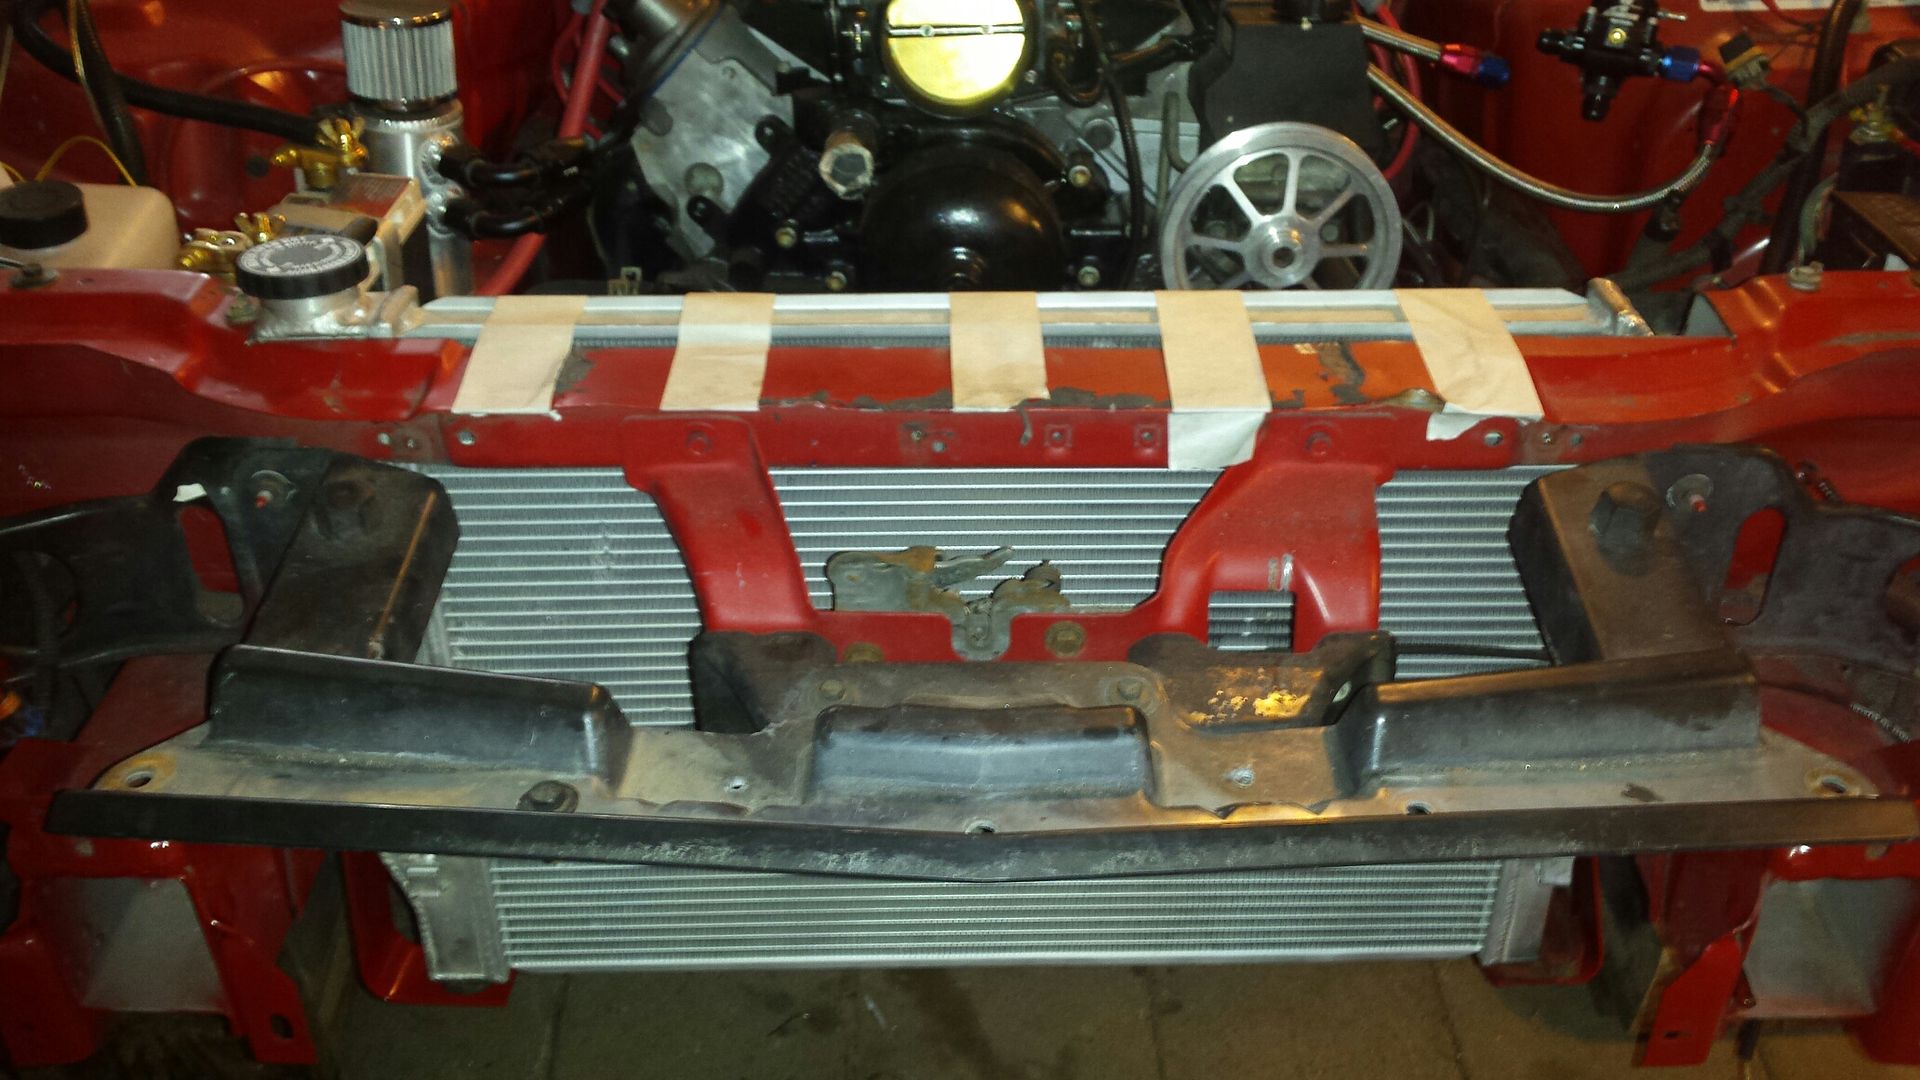
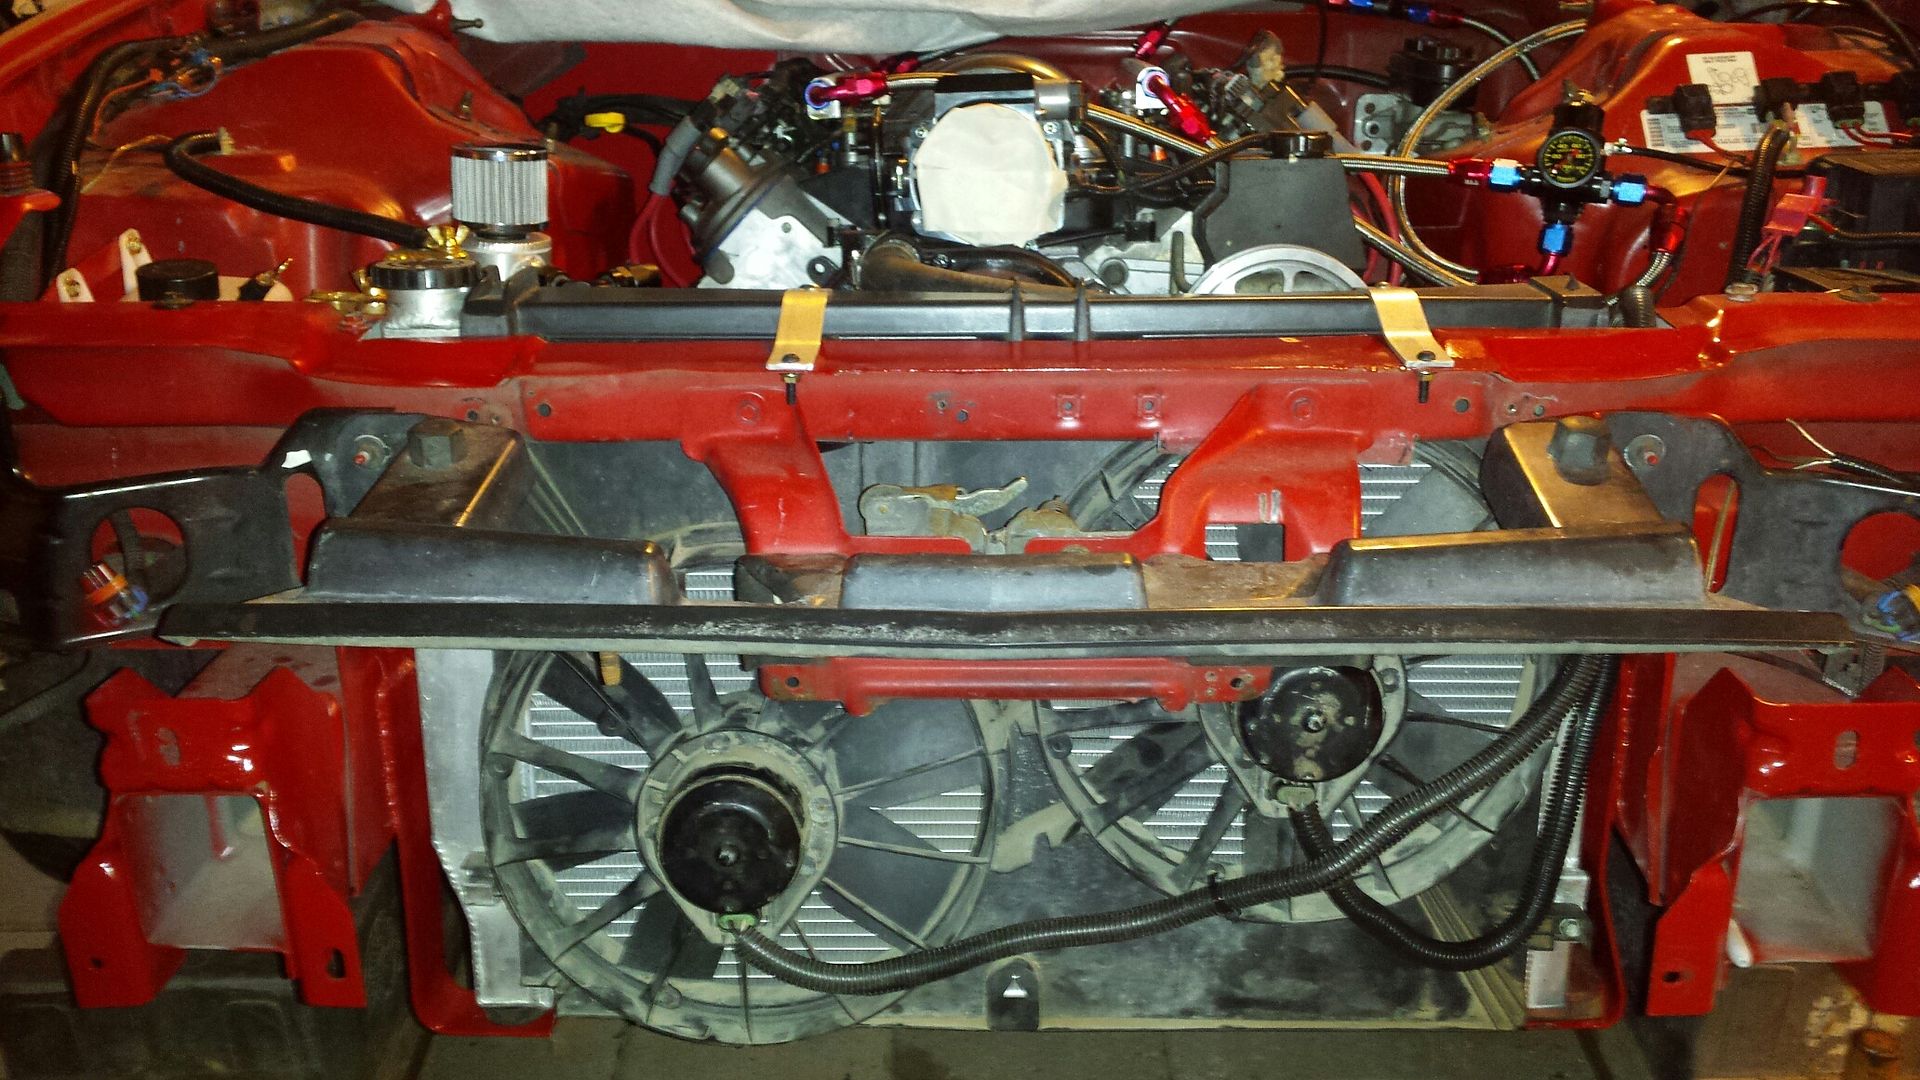
Had to tape it because Im not sure what I'm going to do to the top......and I ran out of daylight. As a sidenote there is tons of room for a turbo now......and even, maybe a bigger turbo down the road (insert evil grin). Quickly fit the fans, wow they almost bolt up with no modification.....and the wiring is going to reach.

I went and purchased 16.5 gallons on e85 an put some in the tank so I could flush the lines before i do the final hook up to the rail. I didnt get a chance to test the E content but will. Random pic of trans fluid.

I initially started working on the fan wiring. While reversing polarity on the wires I thought, if the fans are on the front, will this wiring even fit? So I decided to stop, and test fit the radiator, fans, and wiring. Huron speed confirmed this kit will work with the radiator in the stock position, and mid last week i ordered an LT1 radiator cover. On initial fit I could tell clearance to the turbo was gonna be ****, and the stock fans flipped to the front weren't even gonna be close to working, the fan motors were pointed right at the upper radiator support. So i thought im either going to order slimline fans and fab a shroud, or cut the upper support. So I got out the cut off wheels. This is a pic of a previously cut lower support. I cut the entire center section out a year or two ago for weight savings.

Here's a close up of the lower radiator support. You can see its three full sheets of metal in a triangle. The original piece I cut out of the car was like 6 pounds.

So just cut those babies off, or the whole thing if you still have it.

Throw these in the bushes.

Couple pieces of flat bar, 2 90 degree bends later we have brackets. The drivers side has a flat square rubber bushing and the passenger side has a thick round bushing. They are different thicknesses which is why you can see the height difference in the mounts. Also, this mounts the radiator completely straight up and down with no slant, and approx 2 inches lower then stock. The upper support has to be trimmed in from the rear a full 2 inches. Im not sure if Im going to run the factory plastic air dam anymore, have to see once its all together.

There she is in place. After I figure our what Im going to do with the top and I get the radiator exactly where i want it, I believe Im going to go back and add some triangle gussets to the brackets.

Had to tape it because Im not sure what I'm going to do to the top......and I ran out of daylight. As a sidenote there is tons of room for a turbo now......and even, maybe a bigger turbo down the road (insert evil grin). Quickly fit the fans, wow they almost bolt up with no modification.....and the wiring is going to reach.

#48
09-09-2017, 08:01 AM
Join Date: Aug 2010
Posts: 230
Likes: 0
Received 0 Likes
on
0 Posts
So we left off with the radiator mounted but taped to hold up top. I originally ordered an LT1 top cover because my plan was to keep the radiator in the stock position, and this was the cheapest route to do that. Now that I moved the radiator I had no game plan. The radiator has moved down almost a full 2 inches so there is no bolt on solution here. I started with trying to fit the fans. The shroud above the drivers side fan must be trimmed some. You also must take off about 1.5 inches across the entire top.

I had to notch and bend just a tad of the upper support for the fans to slide all the way up in position.
Passenger side tab lines up with the condenser mount, driver side i looked for a simple solution since they didn't line up. I folded the condenser bracket down, then just hold the fan in position, drill a hole through the plastic and aluminum, and put a bolt there. You can see it here folded over.
That was pretty easy. I decided to trim down the LT1 top cover and make two short aluminum straps to hold it. Turned out pretty good considering.....The brackets are offset because there were holes already in the plastic so i used them instead of drill more.
Wiring done. It will need to be extended.
E85=E70
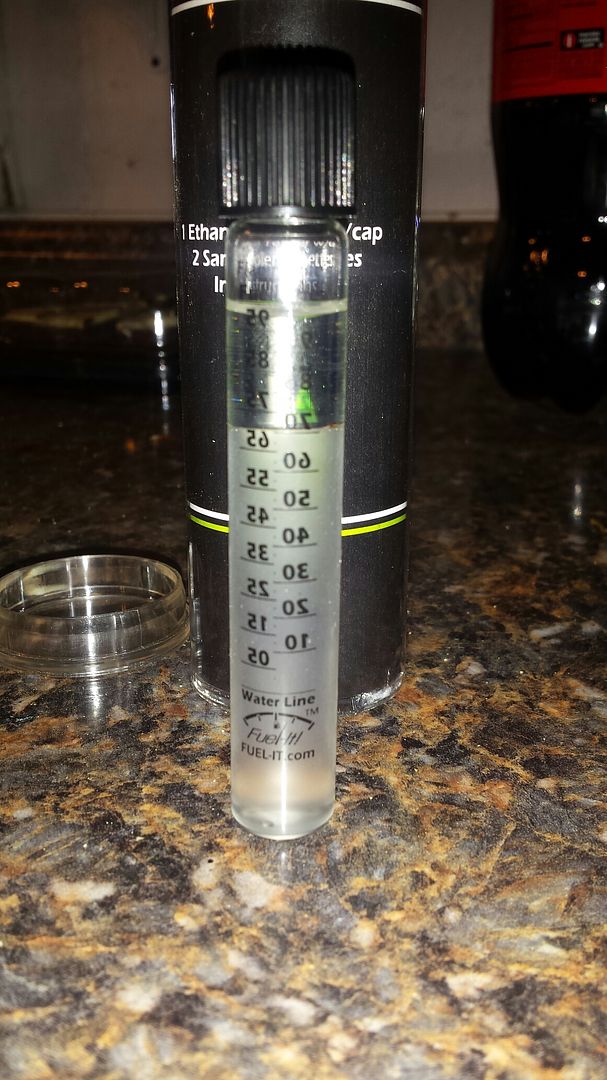
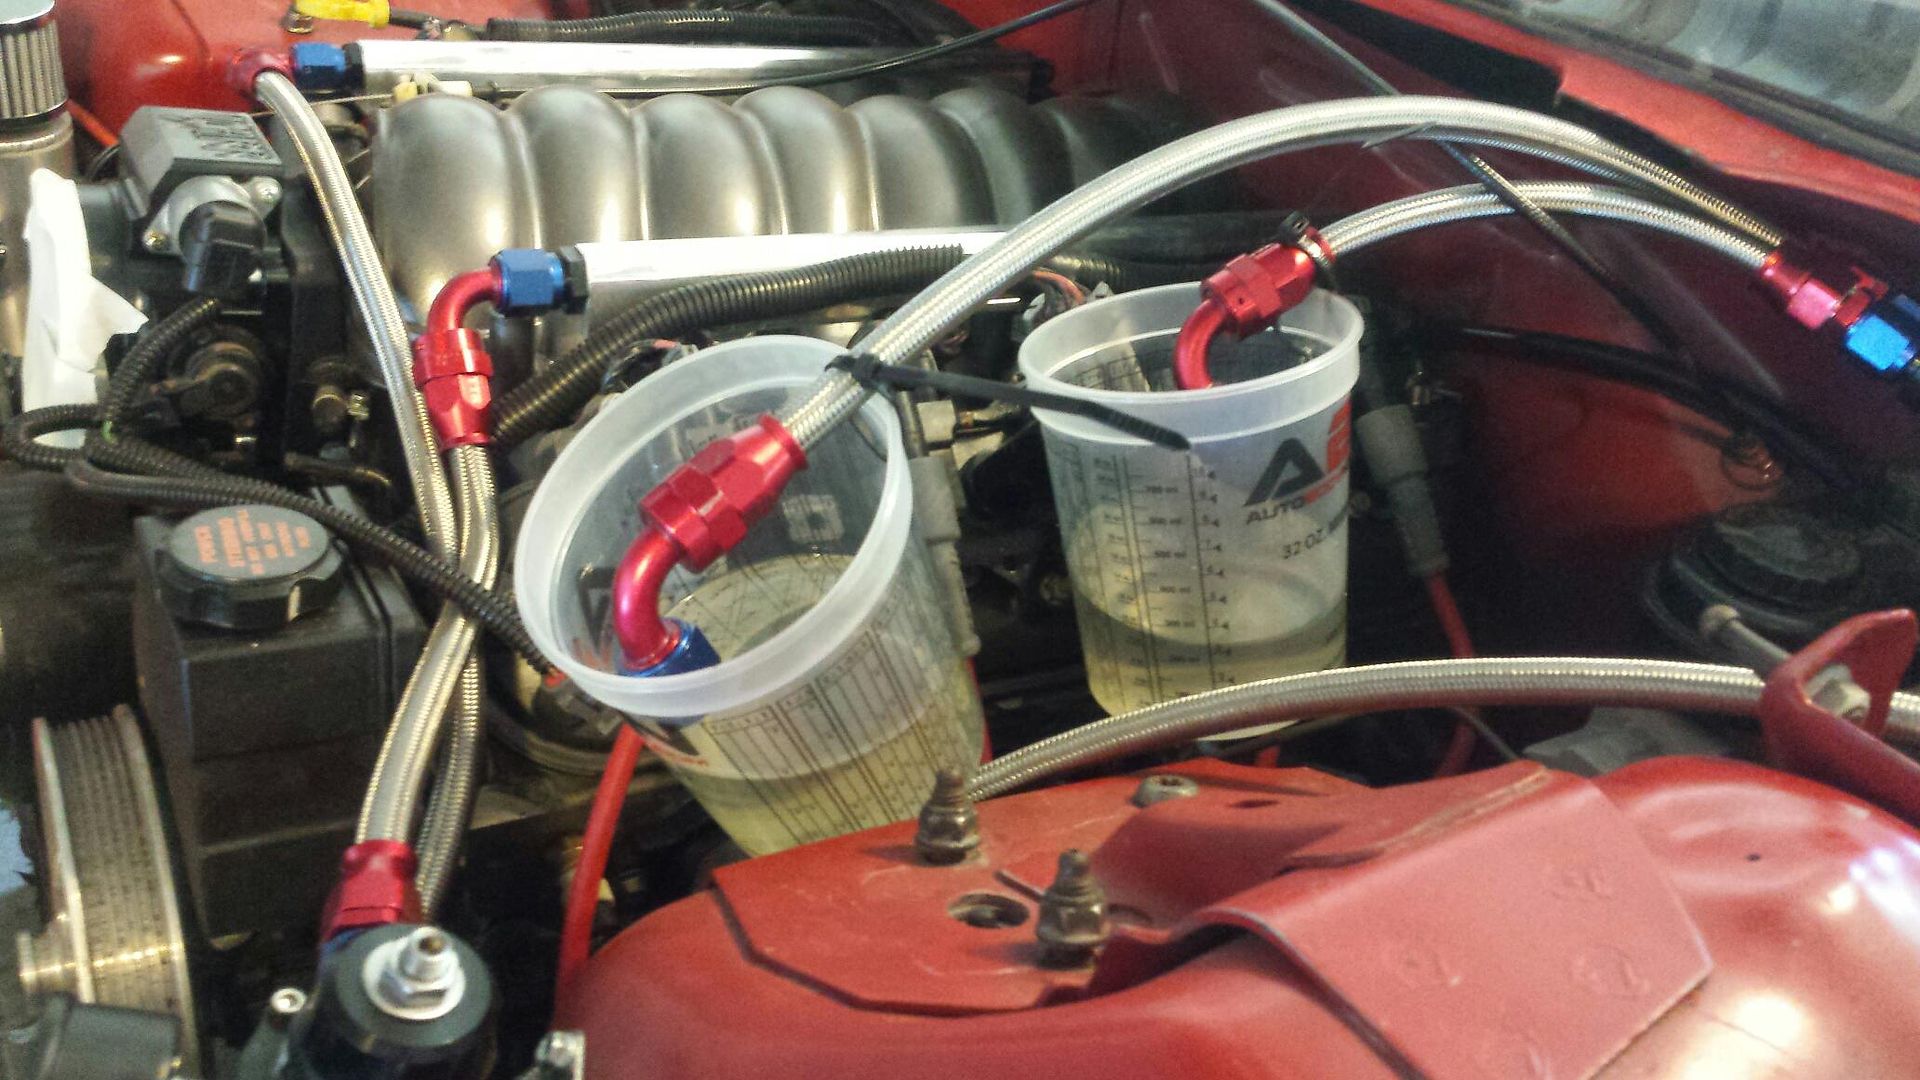
Holy mother these pumps move some fuel!!! Went ahead and mocked this up to do a line flush. Good thing i did cause there was crap down in the cups, dont want that getting into my injectors. Quick math fun, stock pump 190 gph, typical Walbro upgrade 255 gph, these are dual 450s, so at 900 gallons per hour its capable of moving 1 gallon every 4 seconds, wowzers! You dont need the key or PCM installed to prime the pumps, pull the fuel pump relay and jump the corner terminals, #30 and #87.
Dialed in pressure to 60psi, and no leaks. I went ahead and hooked up the boost reference line.

So basically everyone bitches about the Lokar flexible dipstick. My buddy offered a solution (cause there was no way in hell the dipstick and tube was fitting this car), measure stickout, cut the tube, replace with 3/4 hose. So thats what i did. I was able to slide this in and the stick will be hidden under the cowl. I probably wont even make a mount for it.
I also got some of the wiring cleaned up under the hood, hooked up the trans cooler fan, and decided to redo the coolant crossover line. Turbo kit "should" ship monday, I still need a belt and to add the boost gauge inside the cab. We are getting dang close!

I had to notch and bend just a tad of the upper support for the fans to slide all the way up in position.

Passenger side tab lines up with the condenser mount, driver side i looked for a simple solution since they didn't line up. I folded the condenser bracket down, then just hold the fan in position, drill a hole through the plastic and aluminum, and put a bolt there. You can see it here folded over.

That was pretty easy. I decided to trim down the LT1 top cover and make two short aluminum straps to hold it. Turned out pretty good considering.....The brackets are offset because there were holes already in the plastic so i used them instead of drill more.

Wiring done. It will need to be extended.

E85=E70

Holy mother these pumps move some fuel!!! Went ahead and mocked this up to do a line flush. Good thing i did cause there was crap down in the cups, dont want that getting into my injectors. Quick math fun, stock pump 190 gph, typical Walbro upgrade 255 gph, these are dual 450s, so at 900 gallons per hour its capable of moving 1 gallon every 4 seconds, wowzers! You dont need the key or PCM installed to prime the pumps, pull the fuel pump relay and jump the corner terminals, #30 and #87.

Dialed in pressure to 60psi, and no leaks. I went ahead and hooked up the boost reference line.

So basically everyone bitches about the Lokar flexible dipstick. My buddy offered a solution (cause there was no way in hell the dipstick and tube was fitting this car), measure stickout, cut the tube, replace with 3/4 hose. So thats what i did. I was able to slide this in and the stick will be hidden under the cowl. I probably wont even make a mount for it.

I also got some of the wiring cleaned up under the hood, hooked up the trans cooler fan, and decided to redo the coolant crossover line. Turbo kit "should" ship monday, I still need a belt and to add the boost gauge inside the cab. We are getting dang close!
#49
09-13-2017, 07:54 AM
Join Date: Aug 2010
Posts: 230
Likes: 0
Received 0 Likes
on
0 Posts
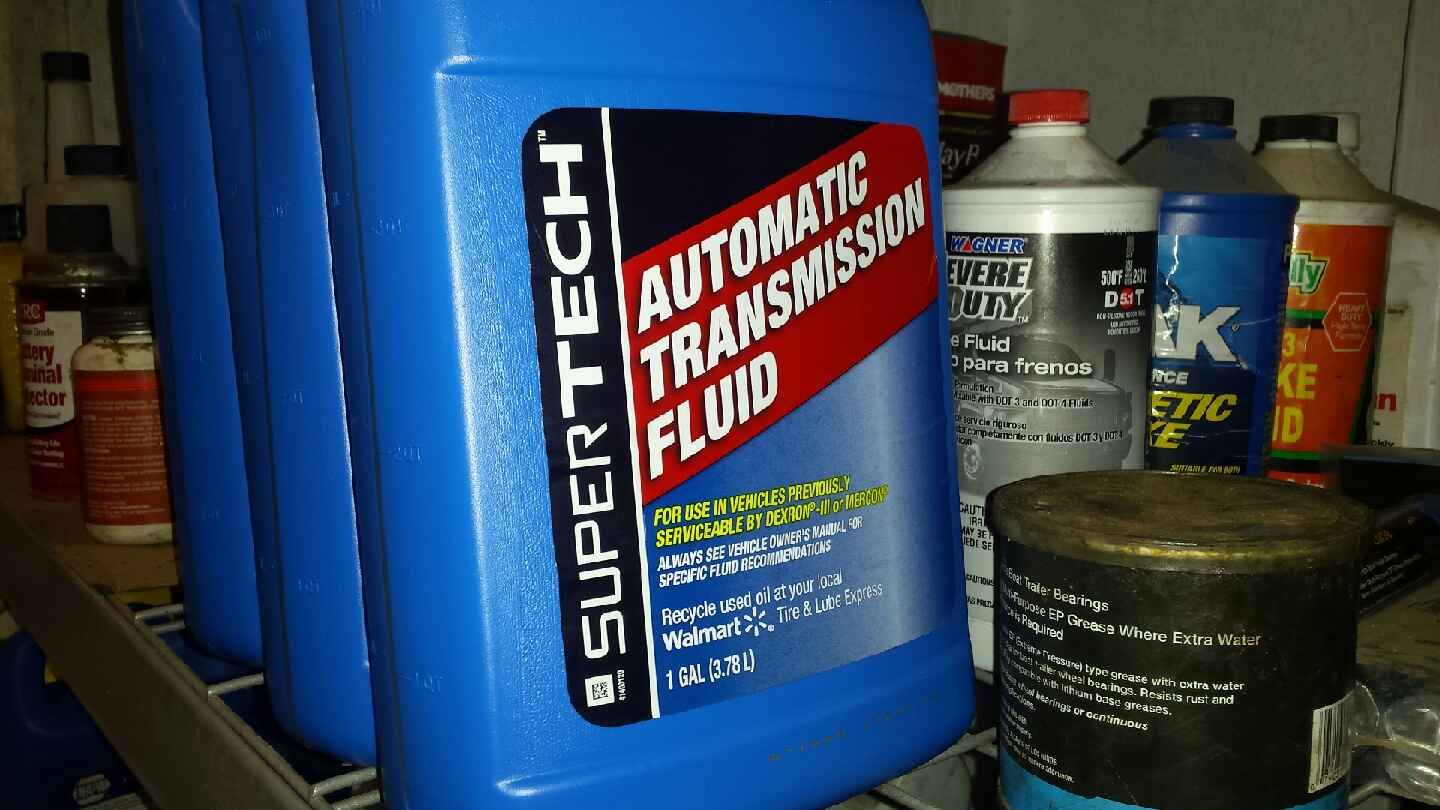
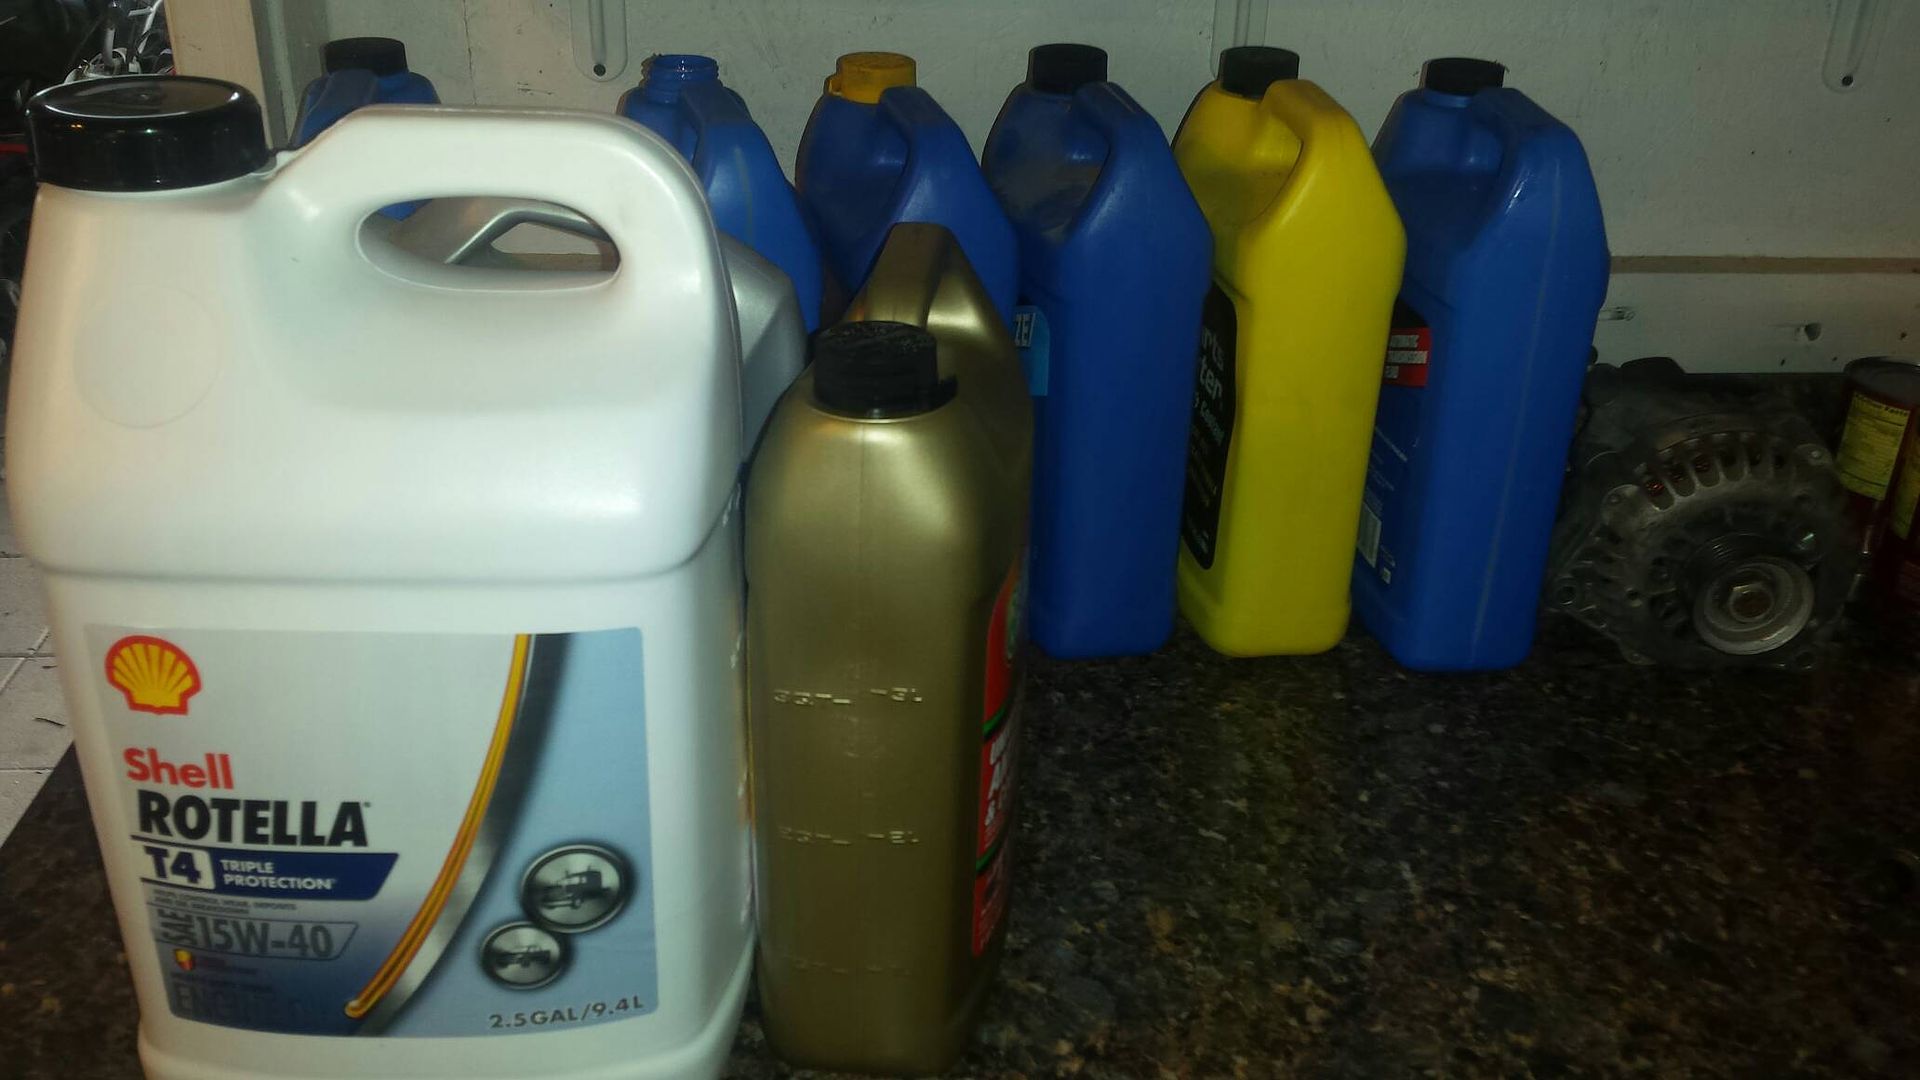
Had to tie up some loose ends, needed some coolant line for the radiator connections but got all that handled so I figured I would go ahead and fill up the fluids since it will be starting up soon enough. I plan to run Rotella oil but went ahead and used some pennzoil this time and i plan on doing the first change pretty quick. Grabbed the Rotella when i saw it at the store yesterday, the rest of the bottles are empty.
Removed my trans temp gauge from the middle and replaced it with the boost gauge. I hate two are digital and one is analog but i liked the 65 dollar price tag of this analog gauge. Bottom one is engine temp.

Needed a spot for the trans temp gauge, I had the nitrous panel left over from before so i went ahead and installed it. Its obviously custom made for me, but I may contact the guy and get him to make me a new one with turbo stuff on it, or blank under the switches? Also I got the boost controller mounted where i can reach it.

Jack: 1, oil filter: 0. Whoops, minor miscalculation.....I'm building a turbo car I never said I was any good at it!
Still waiting on this raggedy *** turbo kit. Starting to get a little irritated. The original estimate was 6-8 weeks and we are now at TWELVE weeks. He says he has the kit in hand but is waiting on a turbo filter and oil lines. I say ship what you got so i can get things fit up and the exhaust made am i right?

Removed my trans temp gauge from the middle and replaced it with the boost gauge. I hate two are digital and one is analog but i liked the 65 dollar price tag of this analog gauge. Bottom one is engine temp.

Needed a spot for the trans temp gauge, I had the nitrous panel left over from before so i went ahead and installed it. Its obviously custom made for me, but I may contact the guy and get him to make me a new one with turbo stuff on it, or blank under the switches? Also I got the boost controller mounted where i can reach it.

Jack: 1, oil filter: 0. Whoops, minor miscalculation.....I'm building a turbo car I never said I was any good at it!

Still waiting on this raggedy *** turbo kit. Starting to get a little irritated. The original estimate was 6-8 weeks and we are now at TWELVE weeks. He says he has the kit in hand but is waiting on a turbo filter and oil lines. I say ship what you got so i can get things fit up and the exhaust made am i right?
#50
09-18-2017, 07:48 AM
Join Date: Aug 2010
Posts: 230
Likes: 0
Received 0 Likes
on
0 Posts
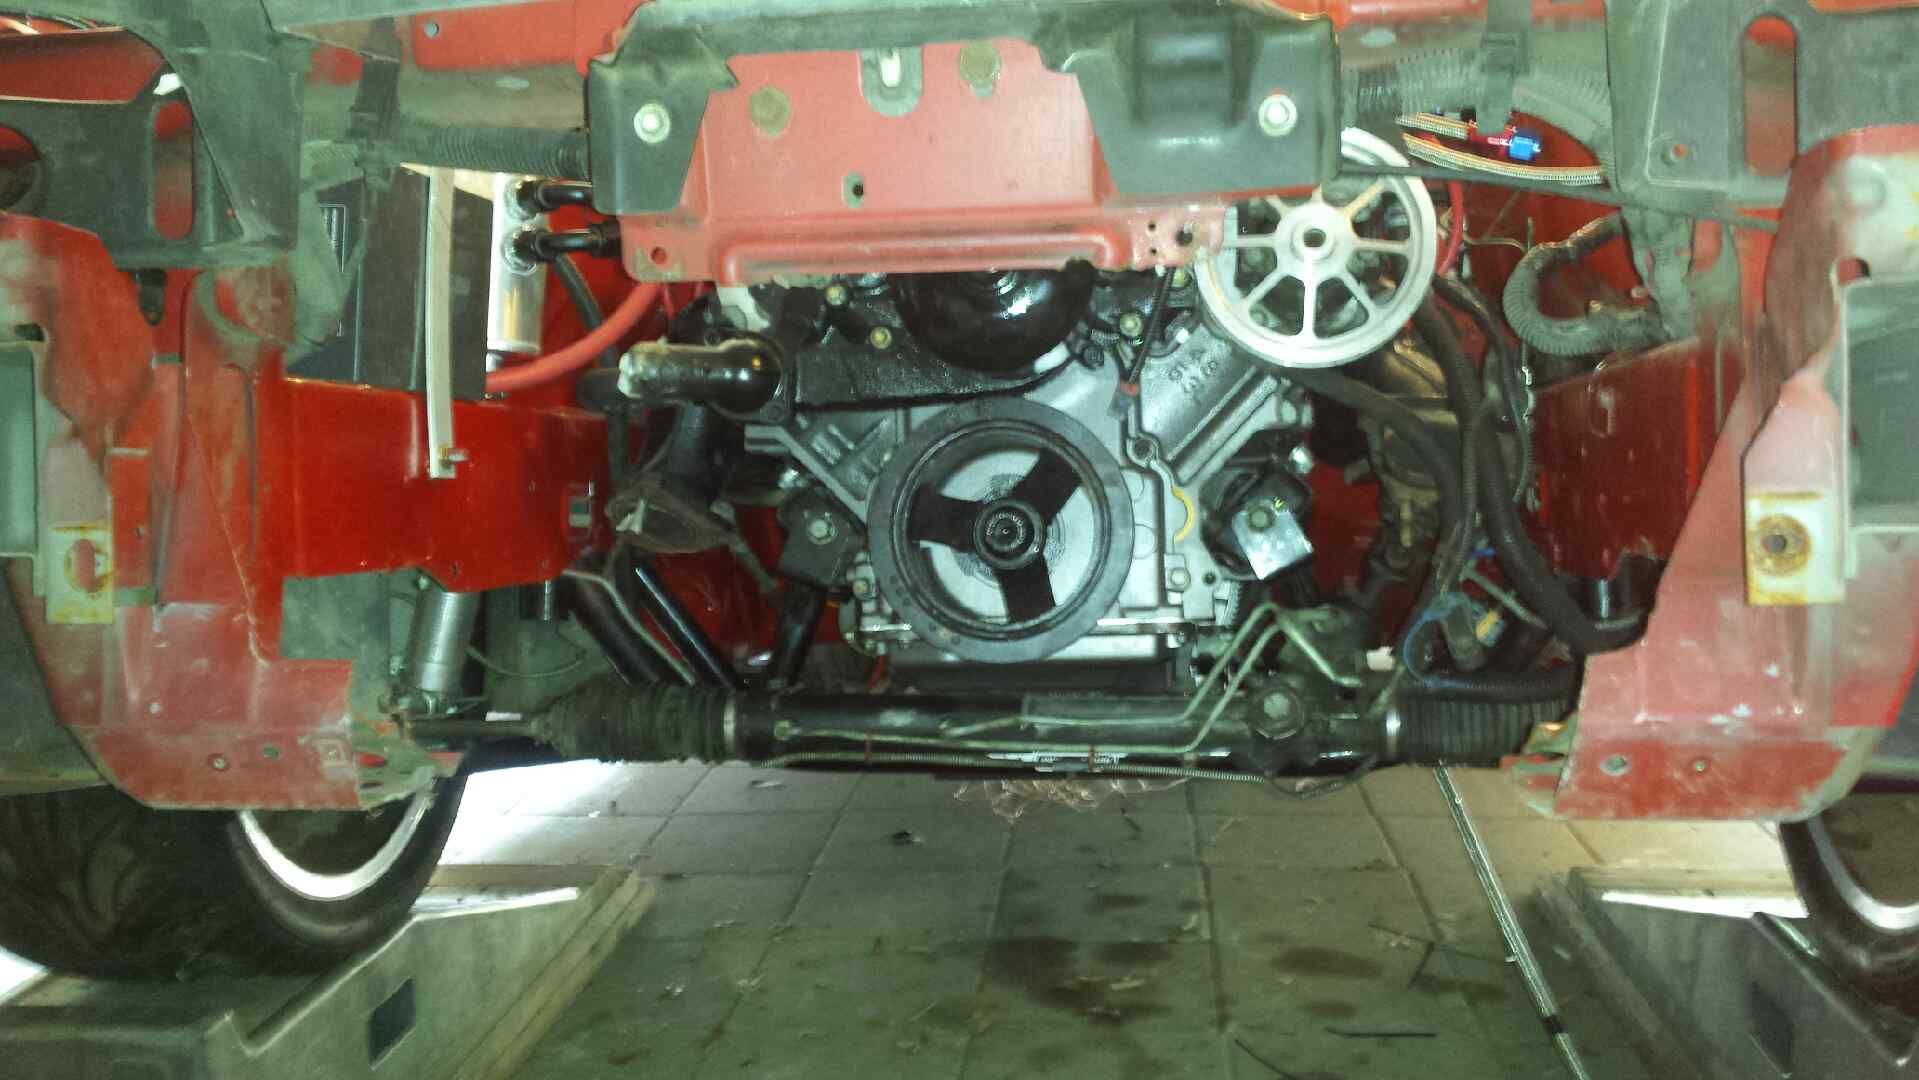
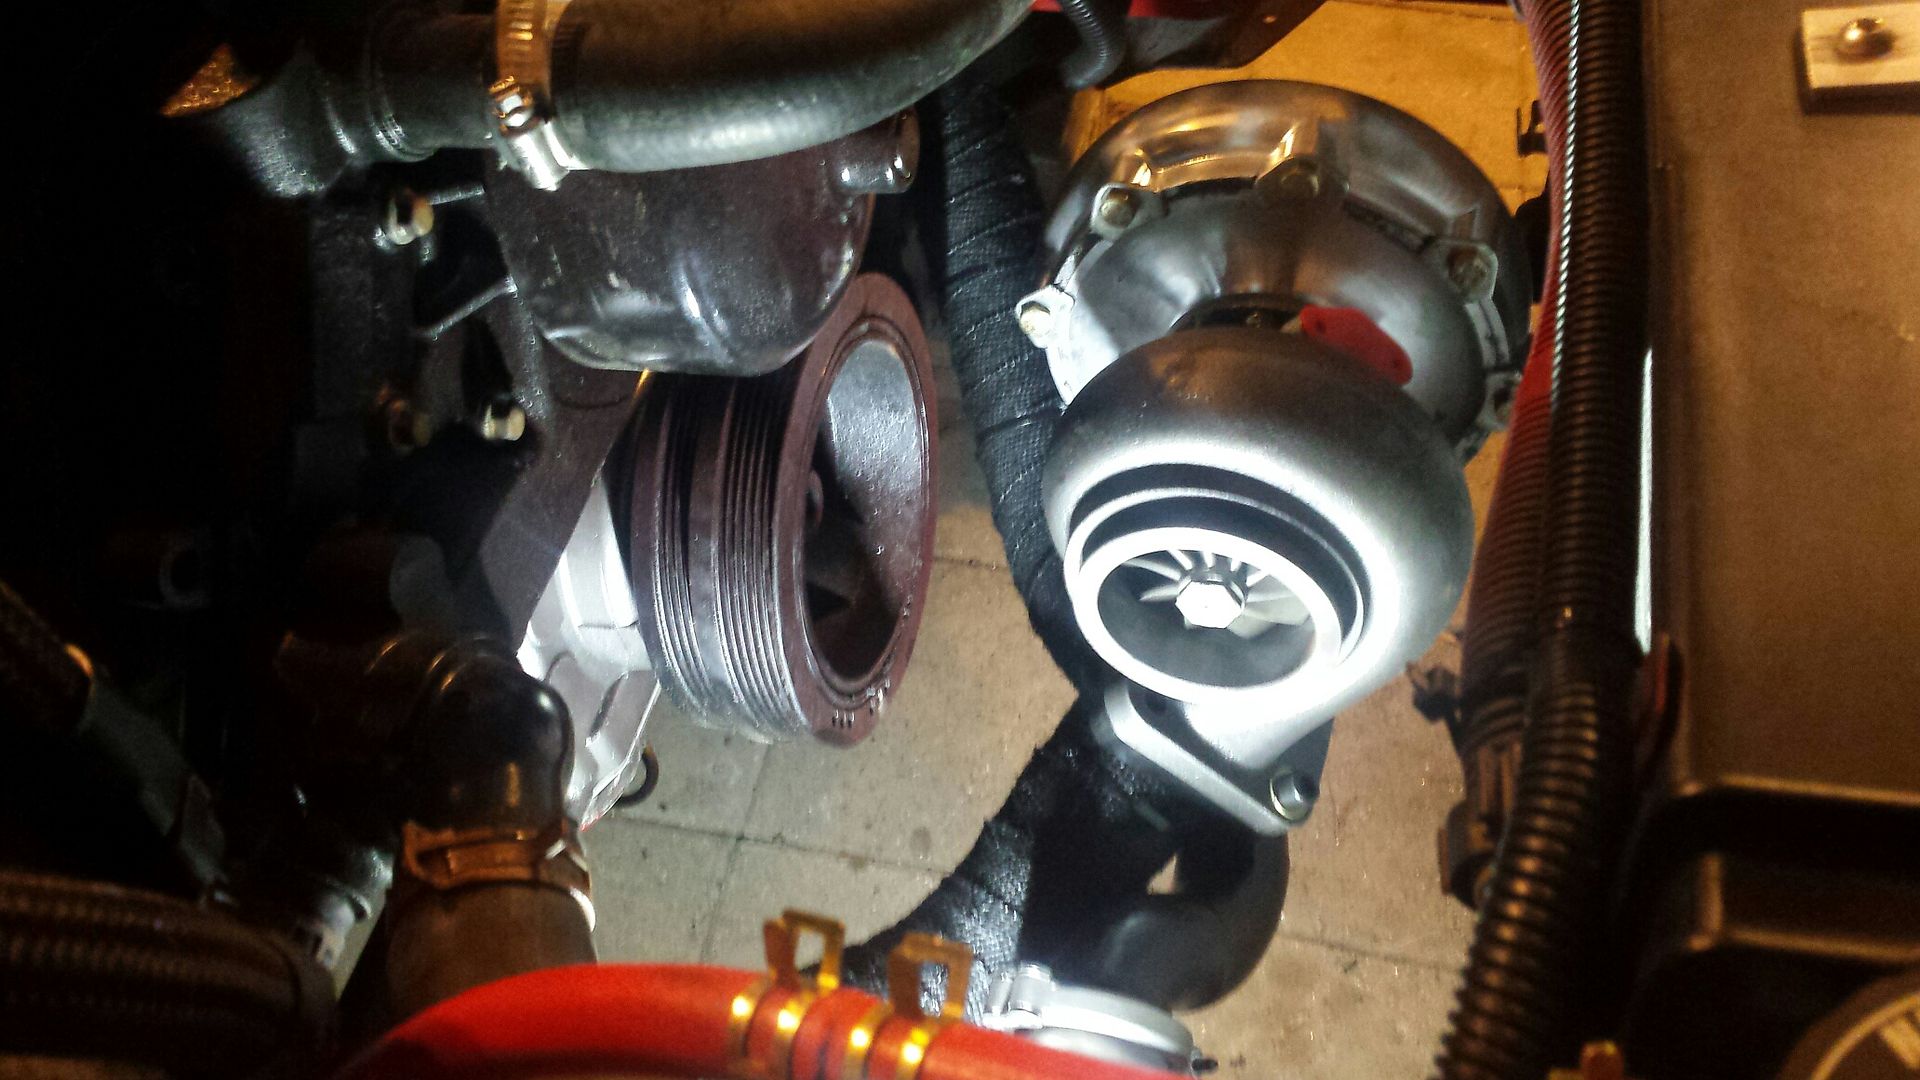
Didn't get a ton done this weekend. Had a buddy who needed his 10 bolt rebuilt so I did that for him as a favor. I did get to do a few things, the kit came in late Saturday evening minus intercooler. Randy wrapped the hot-side with fiberglass wrap. I threw some high heat paint on it. Whether it will bake into it, or turn into a smoky mess when it heats up I couldn't tell you. Guess we will find out. I also clocked the turbo where the output faces correctly (forward and down) and drilled and tapped the outlet for the wastegate feed. Huron Speed said just pull the signal from the manifold but that doesn't seem to be recommended so I added one on the turbo outlet. I did a quick mock up, slightly bent the PS lines, and the hotside pipe fit fantastic. Love the extra room standing the radiator up gave me.
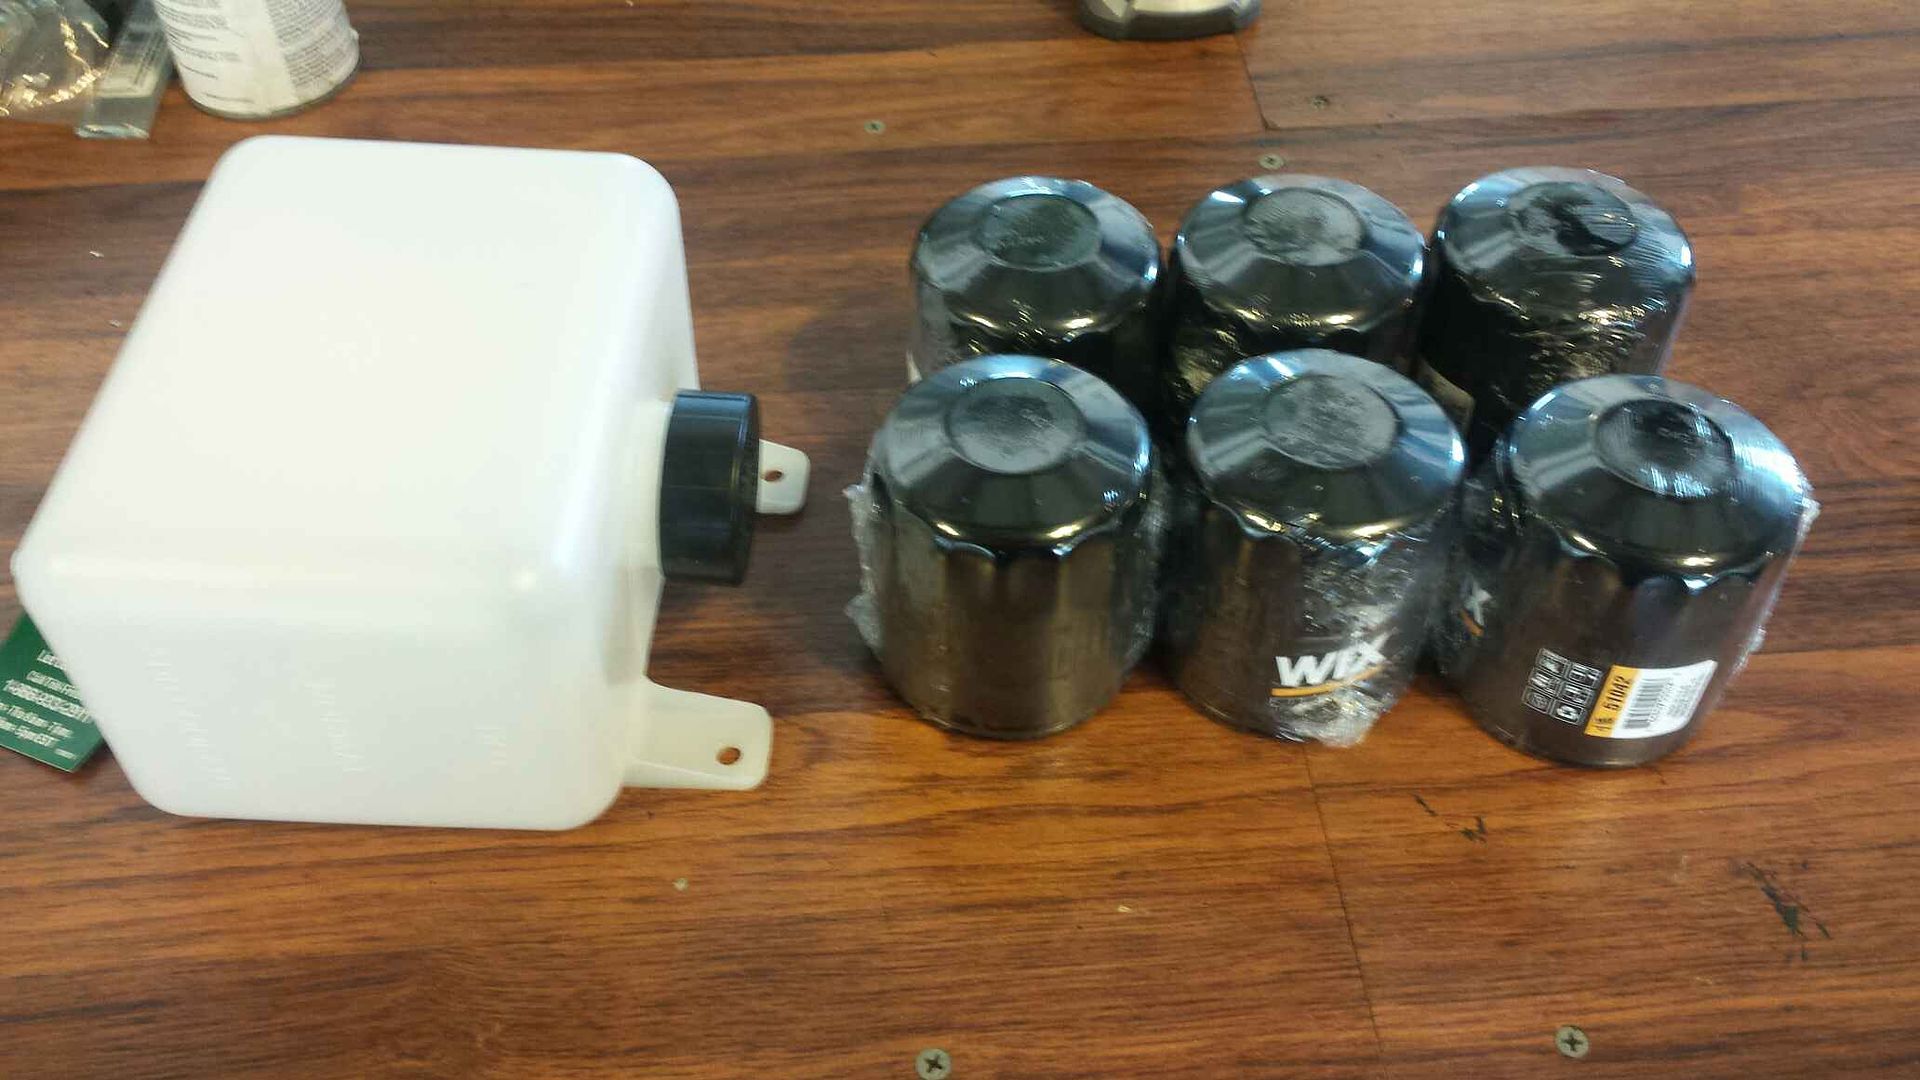
I ordered some filters and plan on swapping to the rotella oil after a few heat cycles and before any heavy boost. Also have to replace the coolant tank due to the extra thick hose putting pressure on it and cracking the bottom. I am also going to a lighter duty hose to prevent this error in the future.
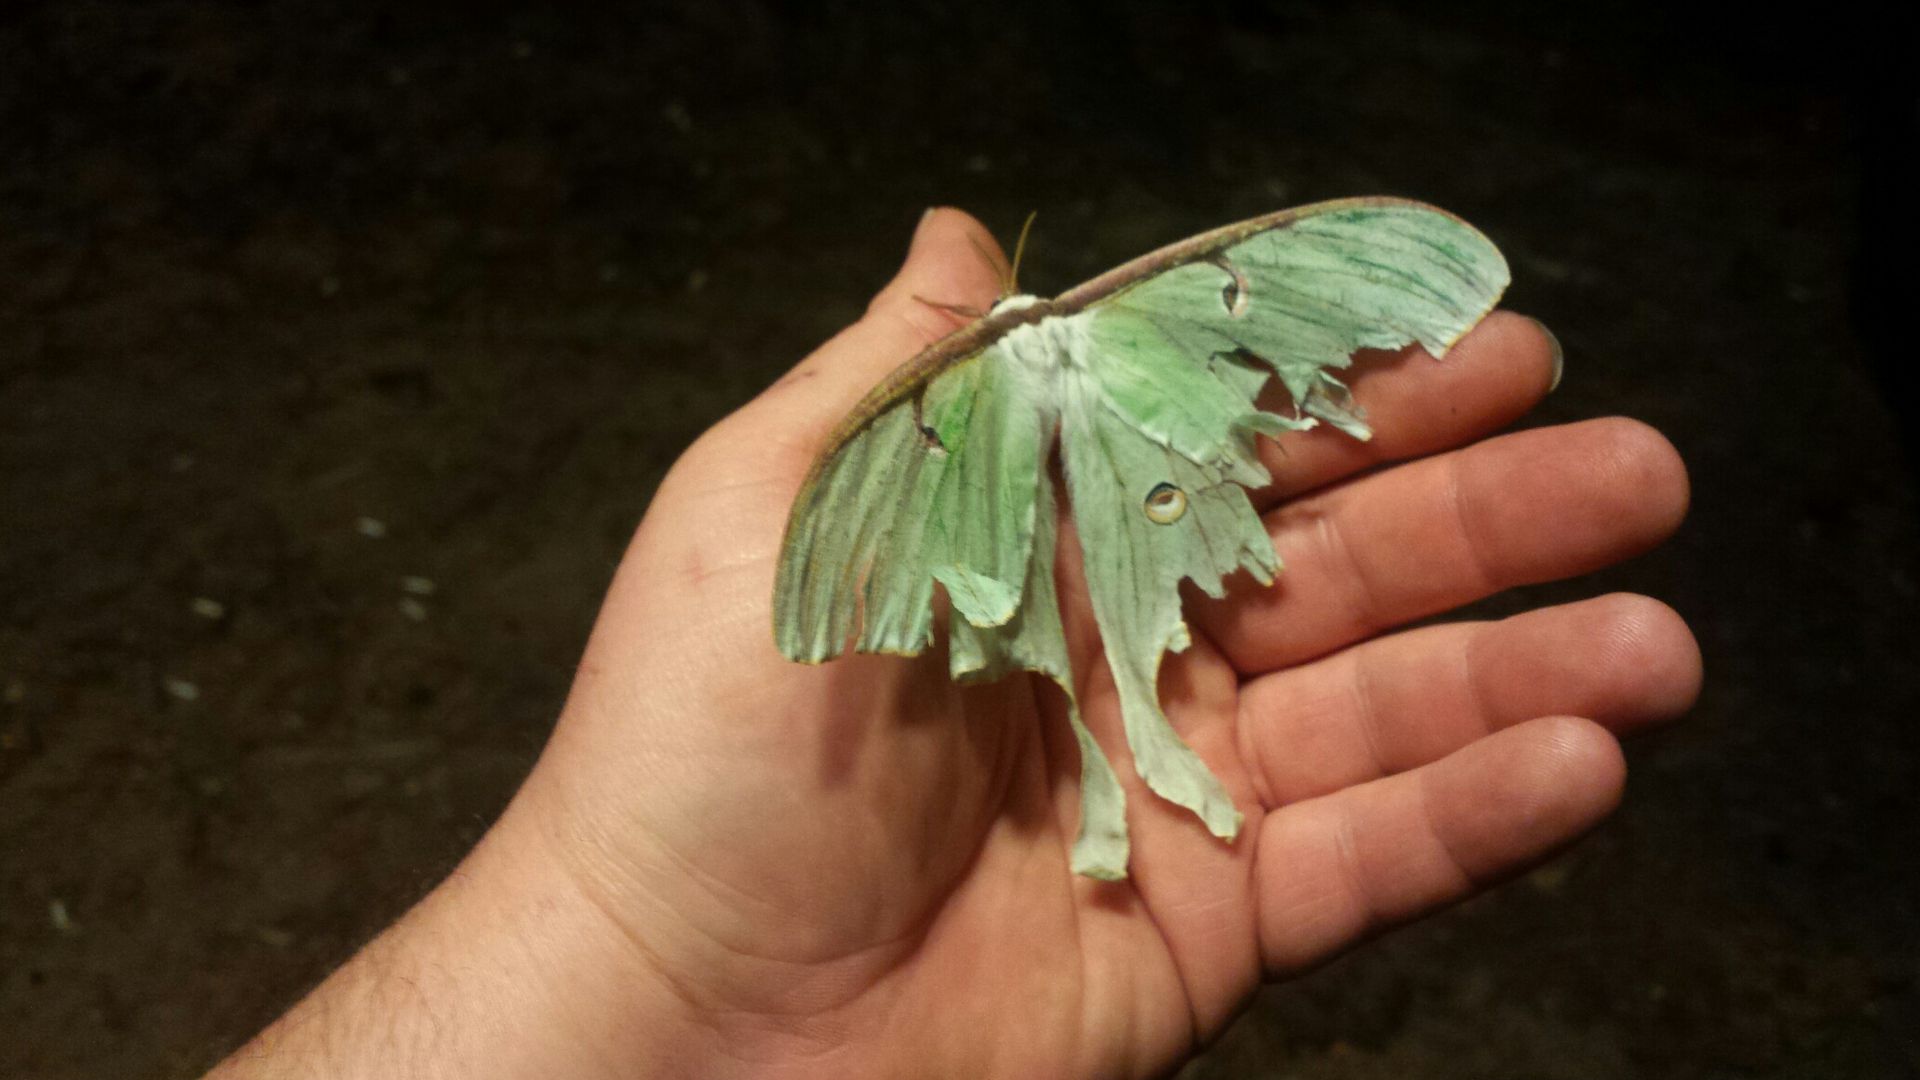
Found this guy wandering around. No clue how his wings got so messed up.
Intercooler "should" be here any day and i still need to build the exhaust (likely wrap it as well) and buy a belt. It will be running and driving very soon!

I ordered some filters and plan on swapping to the rotella oil after a few heat cycles and before any heavy boost. Also have to replace the coolant tank due to the extra thick hose putting pressure on it and cracking the bottom. I am also going to a lighter duty hose to prevent this error in the future.

Found this guy wandering around. No clue how his wings got so messed up.

Intercooler "should" be here any day and i still need to build the exhaust (likely wrap it as well) and buy a belt. It will be running and driving very soon!