SS Camaro - Track trips, build pics etc.
#61
 10-21-2017, 08:07 AM

Join Date: Aug 2010
Posts: 230
Likes: 0
Received 0 Likes
on
0 Posts
Stick it into its hole and clamp your drill onto the stem so you can use the drill to spin the valve in the head.

Use the slow speed setting on your drill, and move it in and out (on and off the seat). Wow what a difference 20 seconds makes.
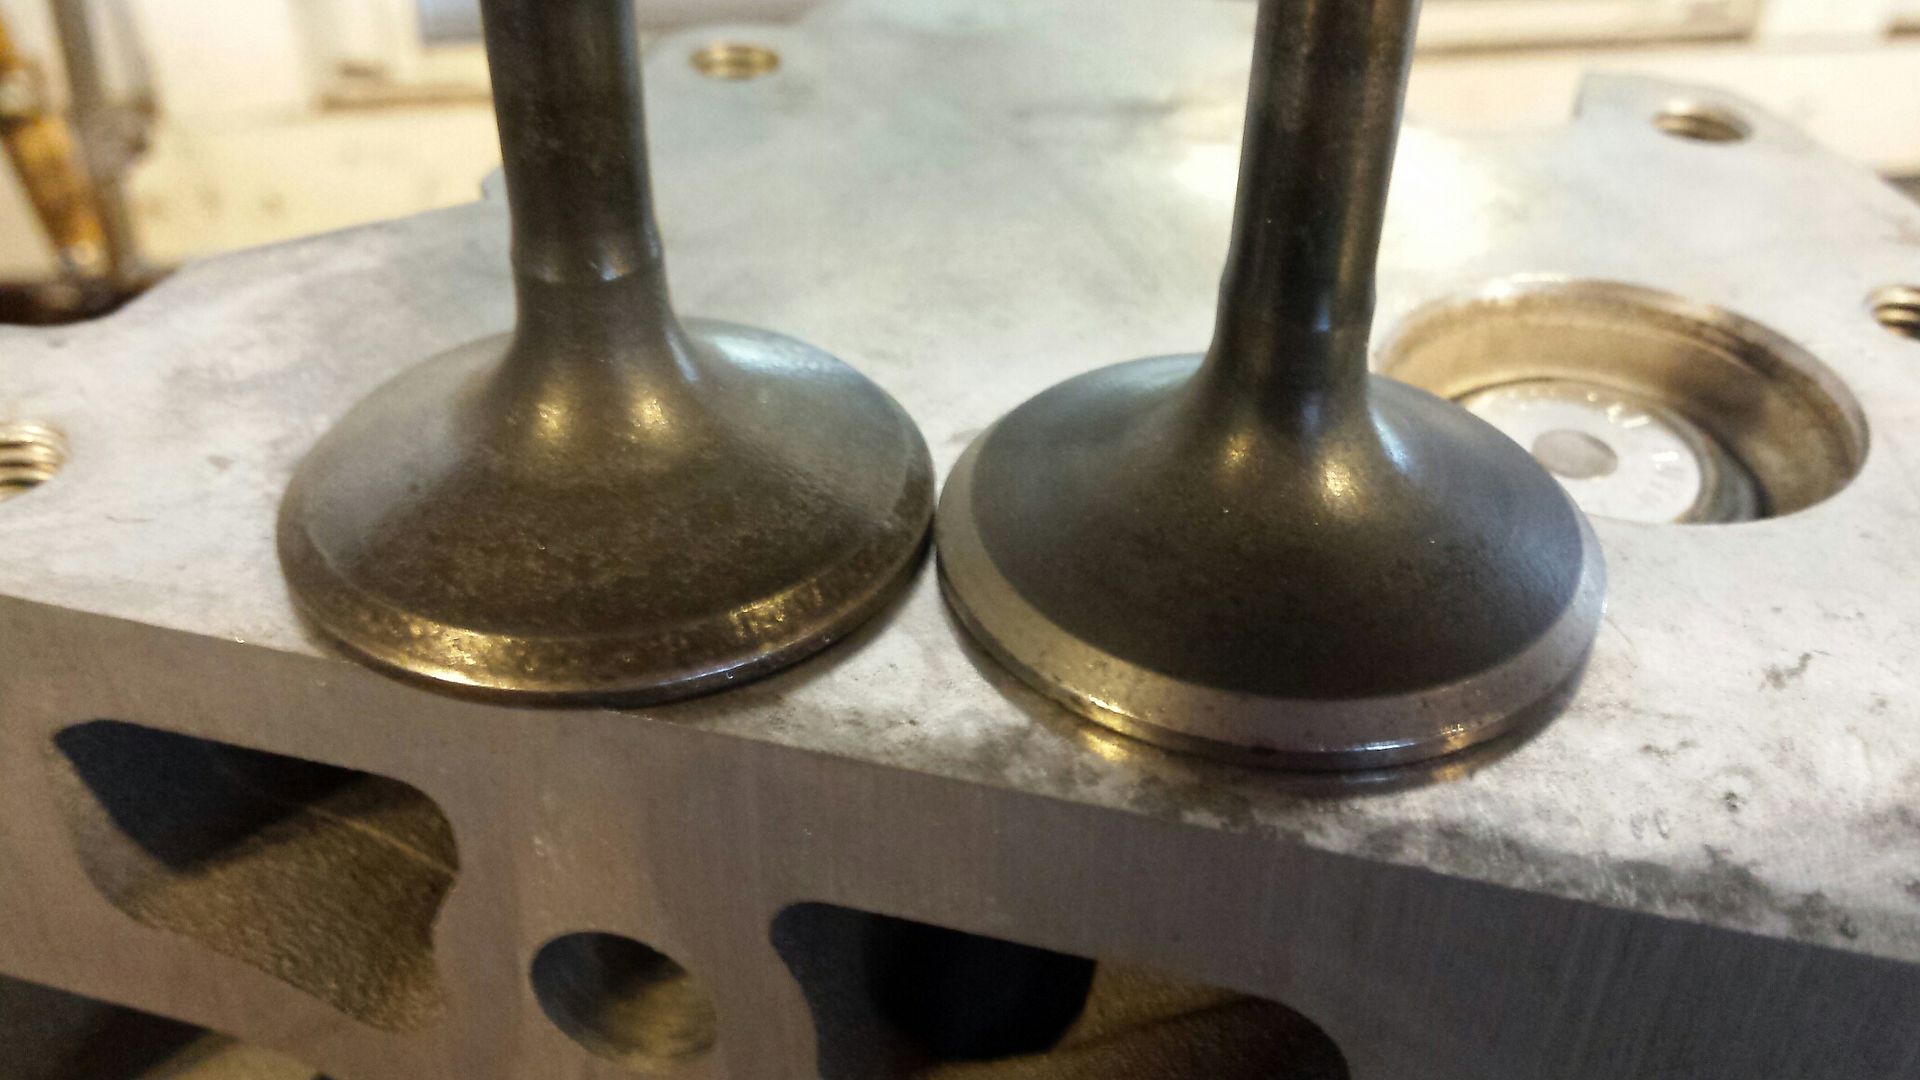
Comparison.
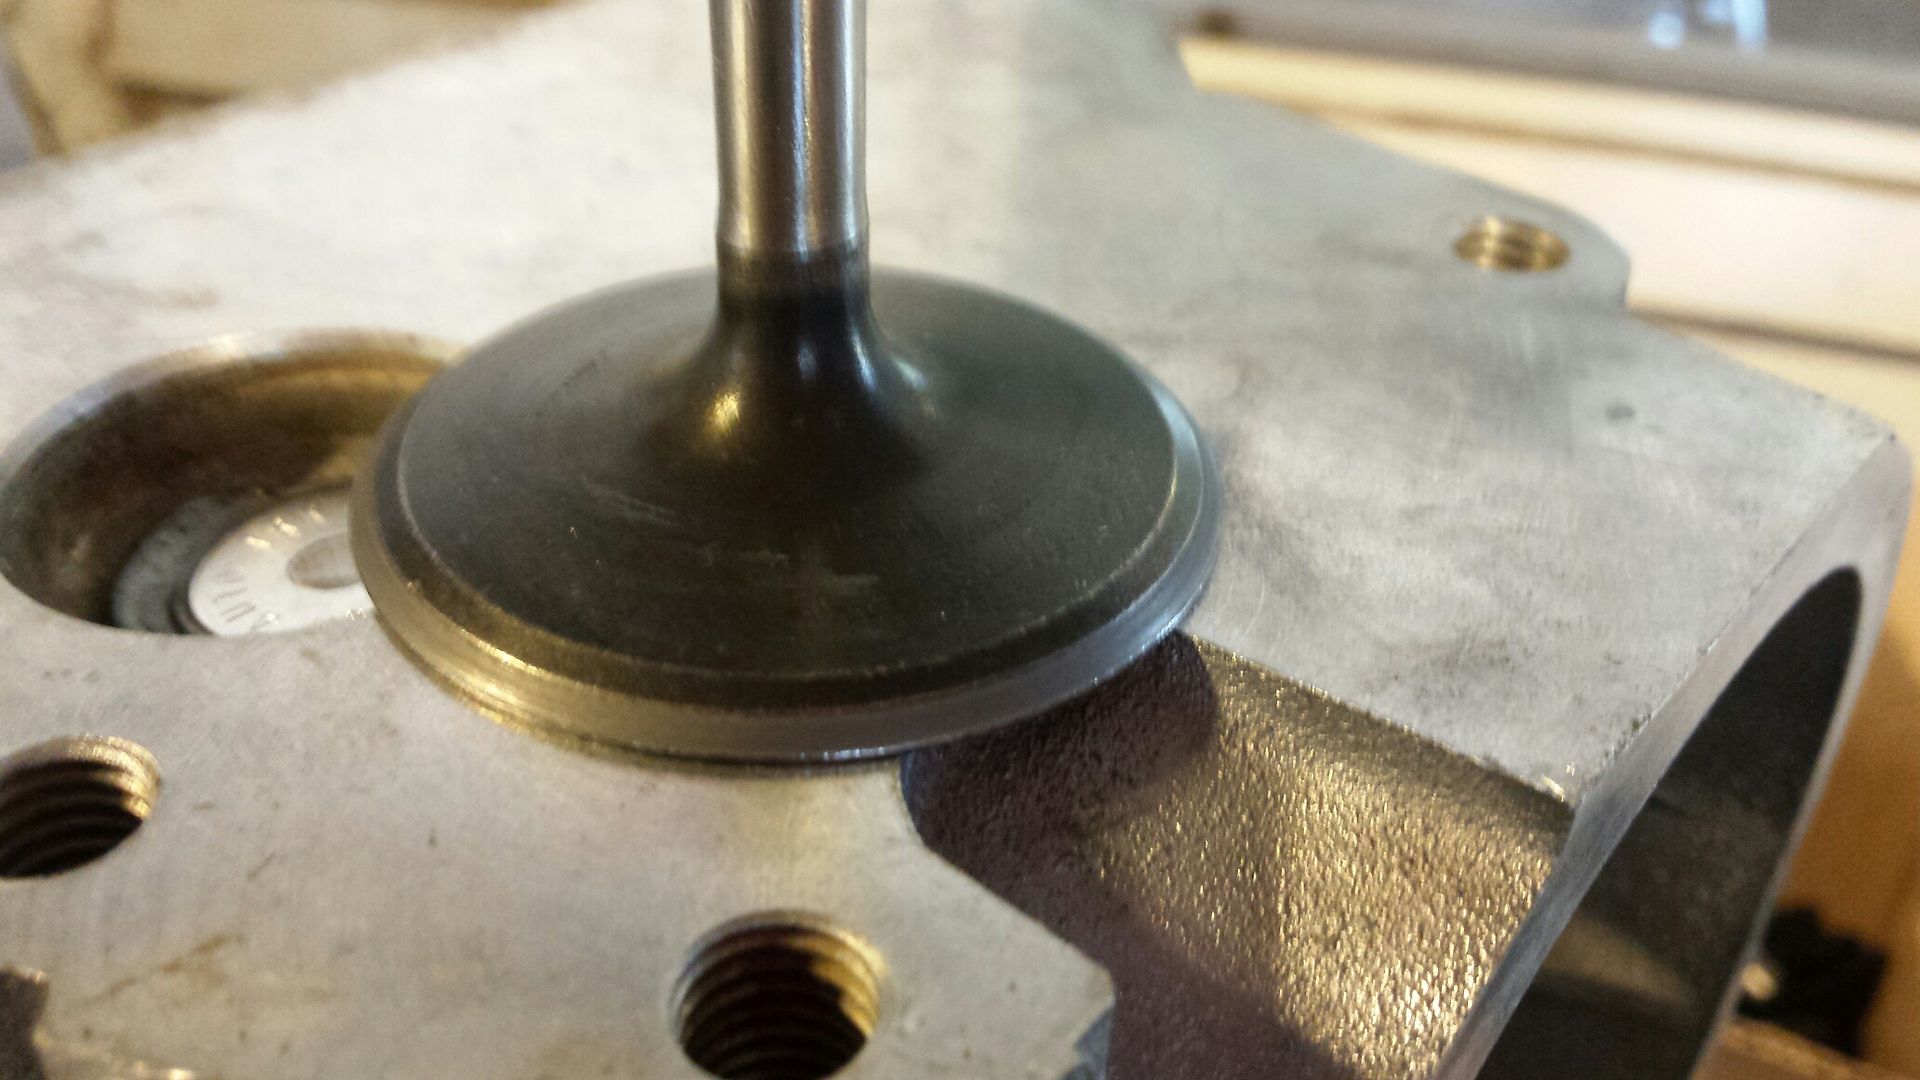
The sealing surface in the head.

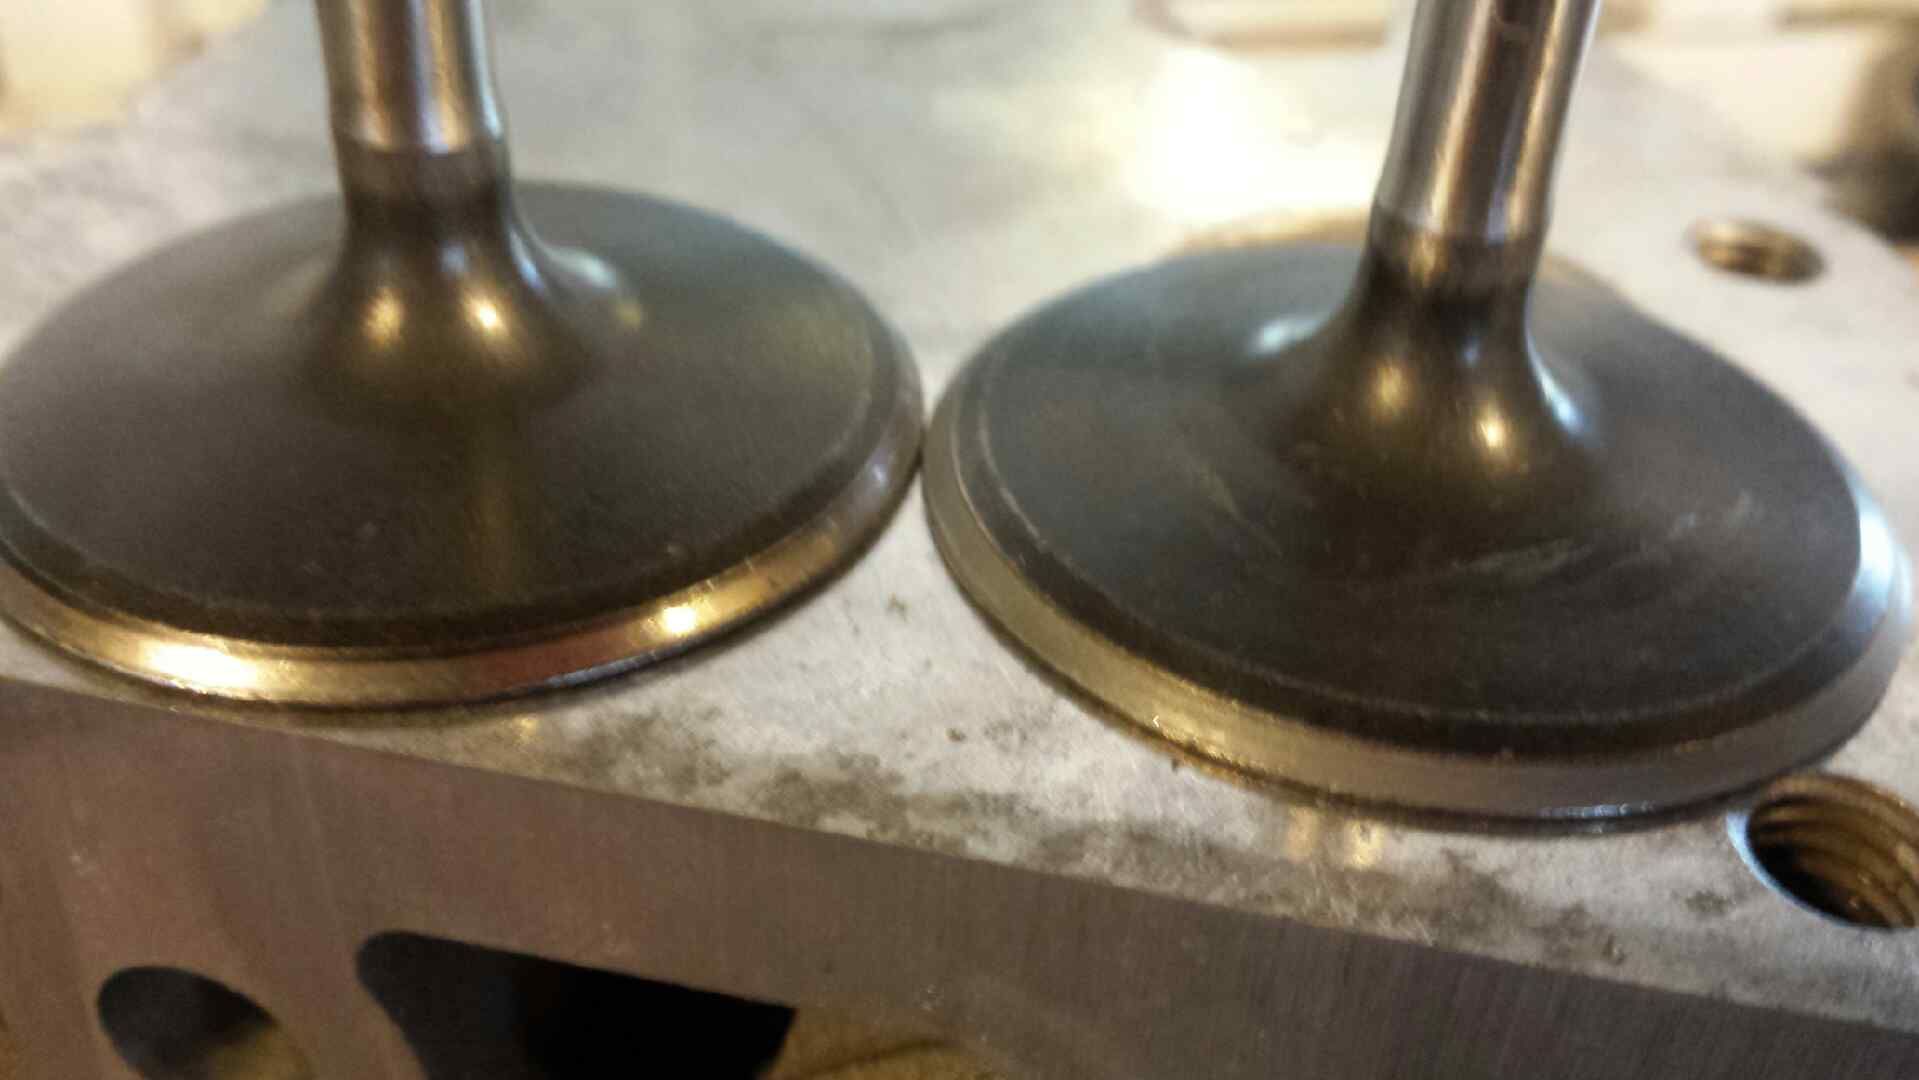
Exhaust valve comparison. A little pitting on them is normal and nothing to worry about. Once i mate a valve to a hole, it stays there. I dont move it around once its been ground in. Also make sure you wipe as much of the compound off the head and valve as you can when youre done and hit the valve stem with some wd40 to help it slide in the valve guide easier.
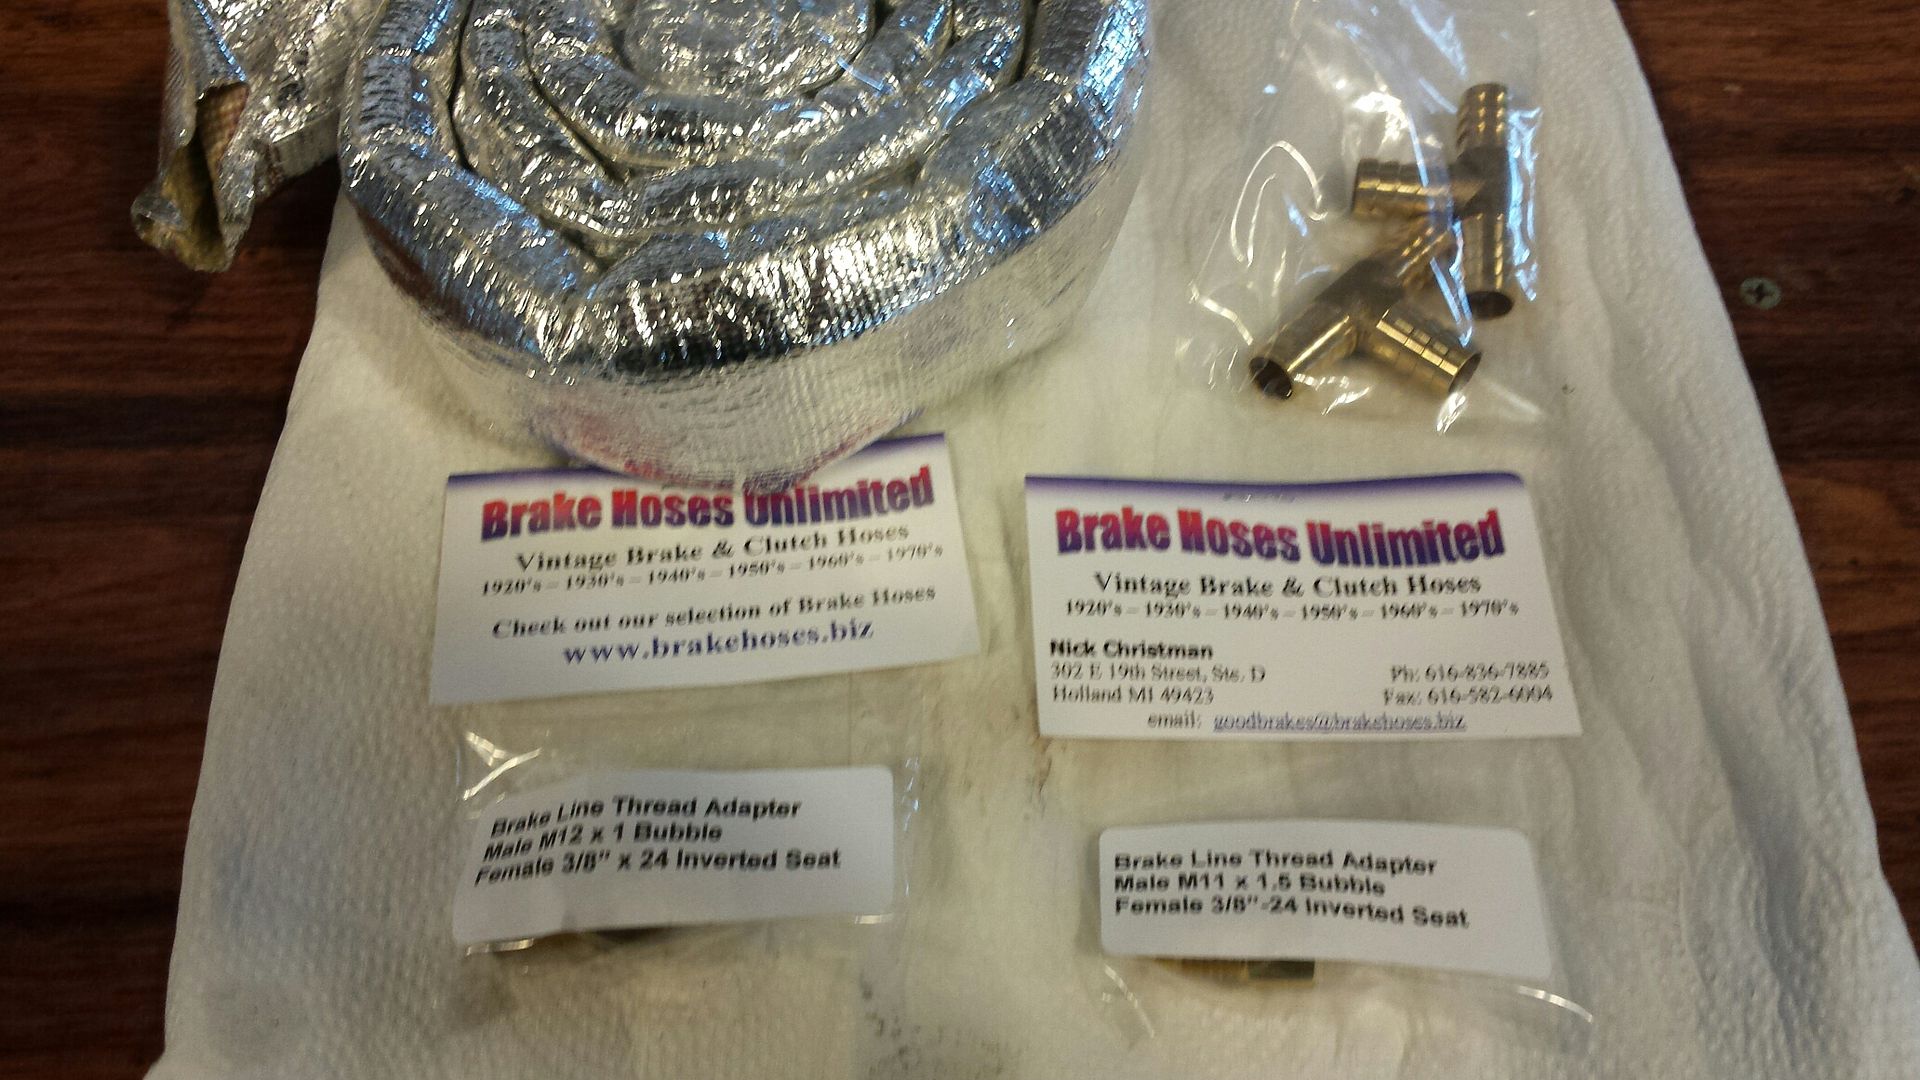
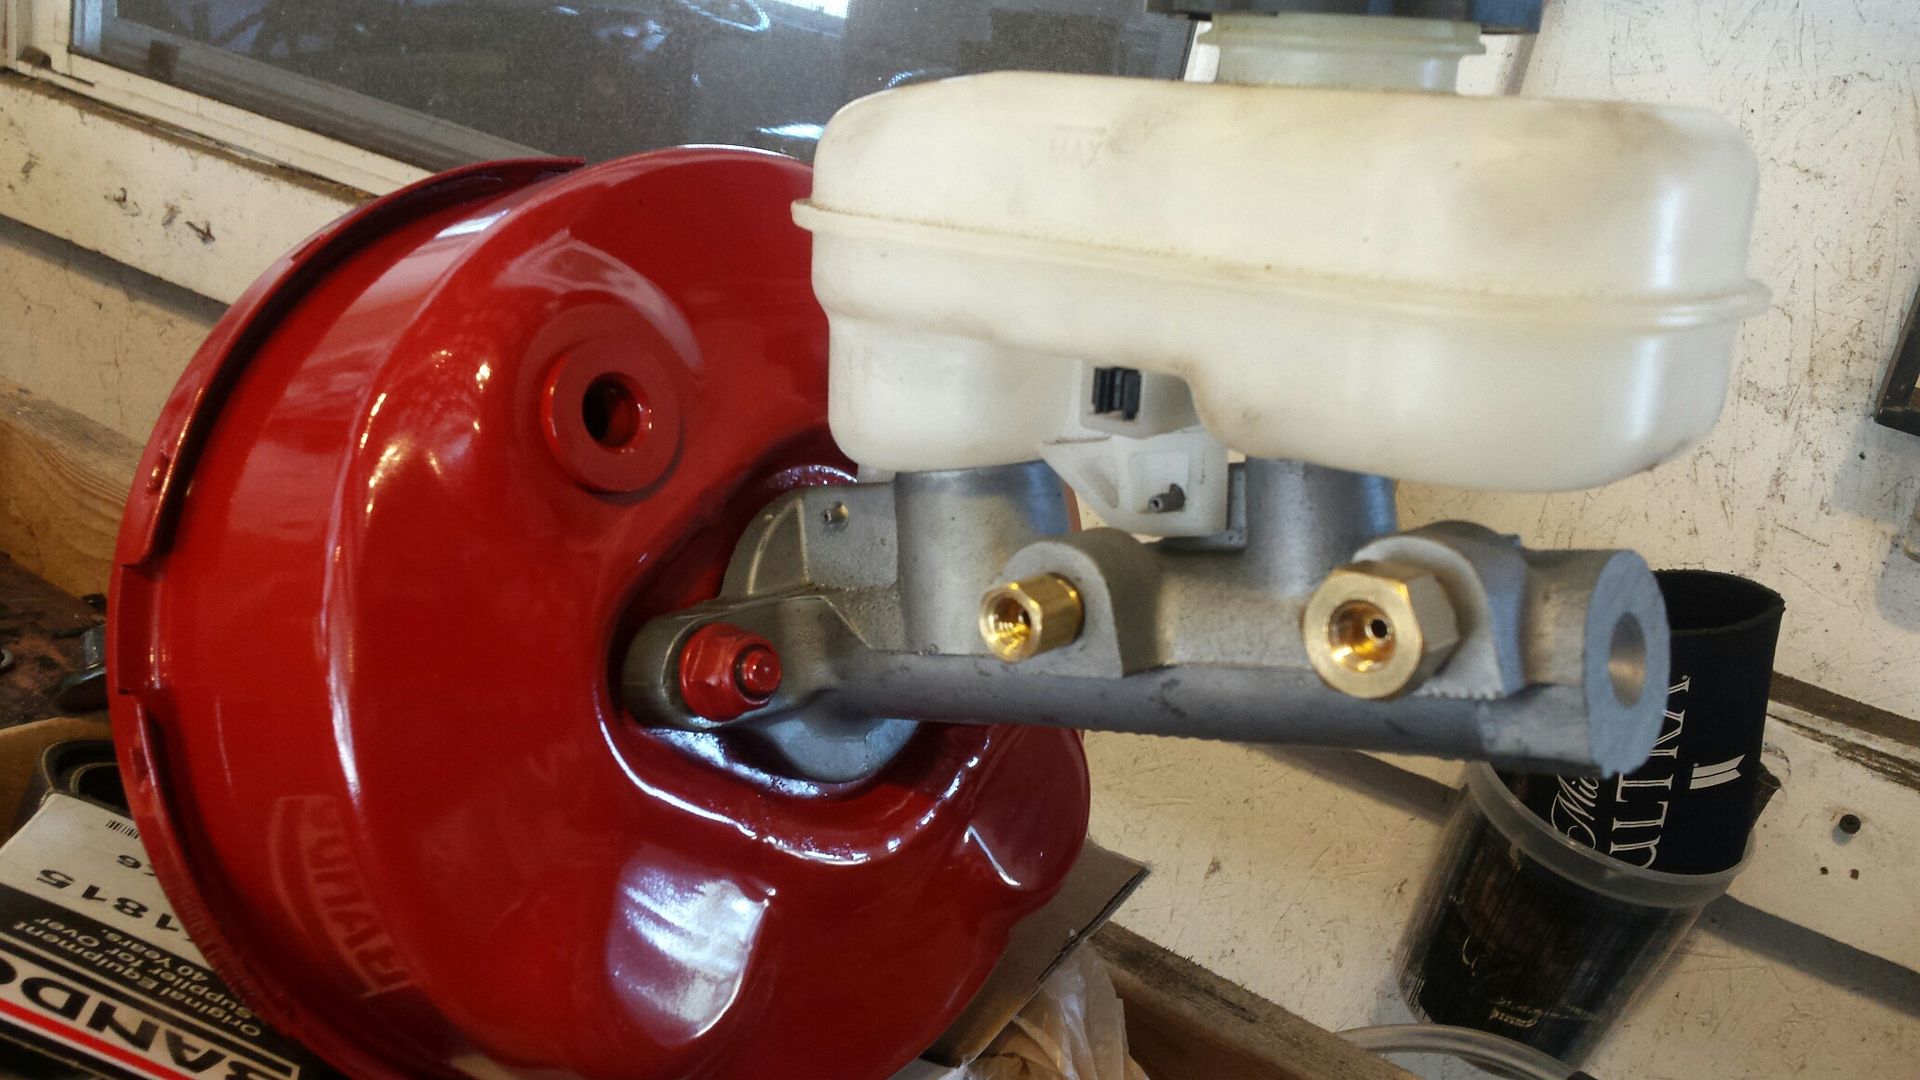
During the car disassembly I found some melted plastic looming on the block's main ground wire so I got some heat shield for that and the starter wire that run down the passenger side of the engine. Don't want or need any sparks unless they are in the combustion chamber. I also have a brass T for the brake booster that's returning to service, and the brake line adapters since I sold my stock lines and will be remaking new ones from scratch.......again.
-8 line for the new cooler setup, beautiful TCI SFI flexplate and a starter heat shield.....for the battery. Yep, its the perfect size to insulate the battery and keep some heat off of it.
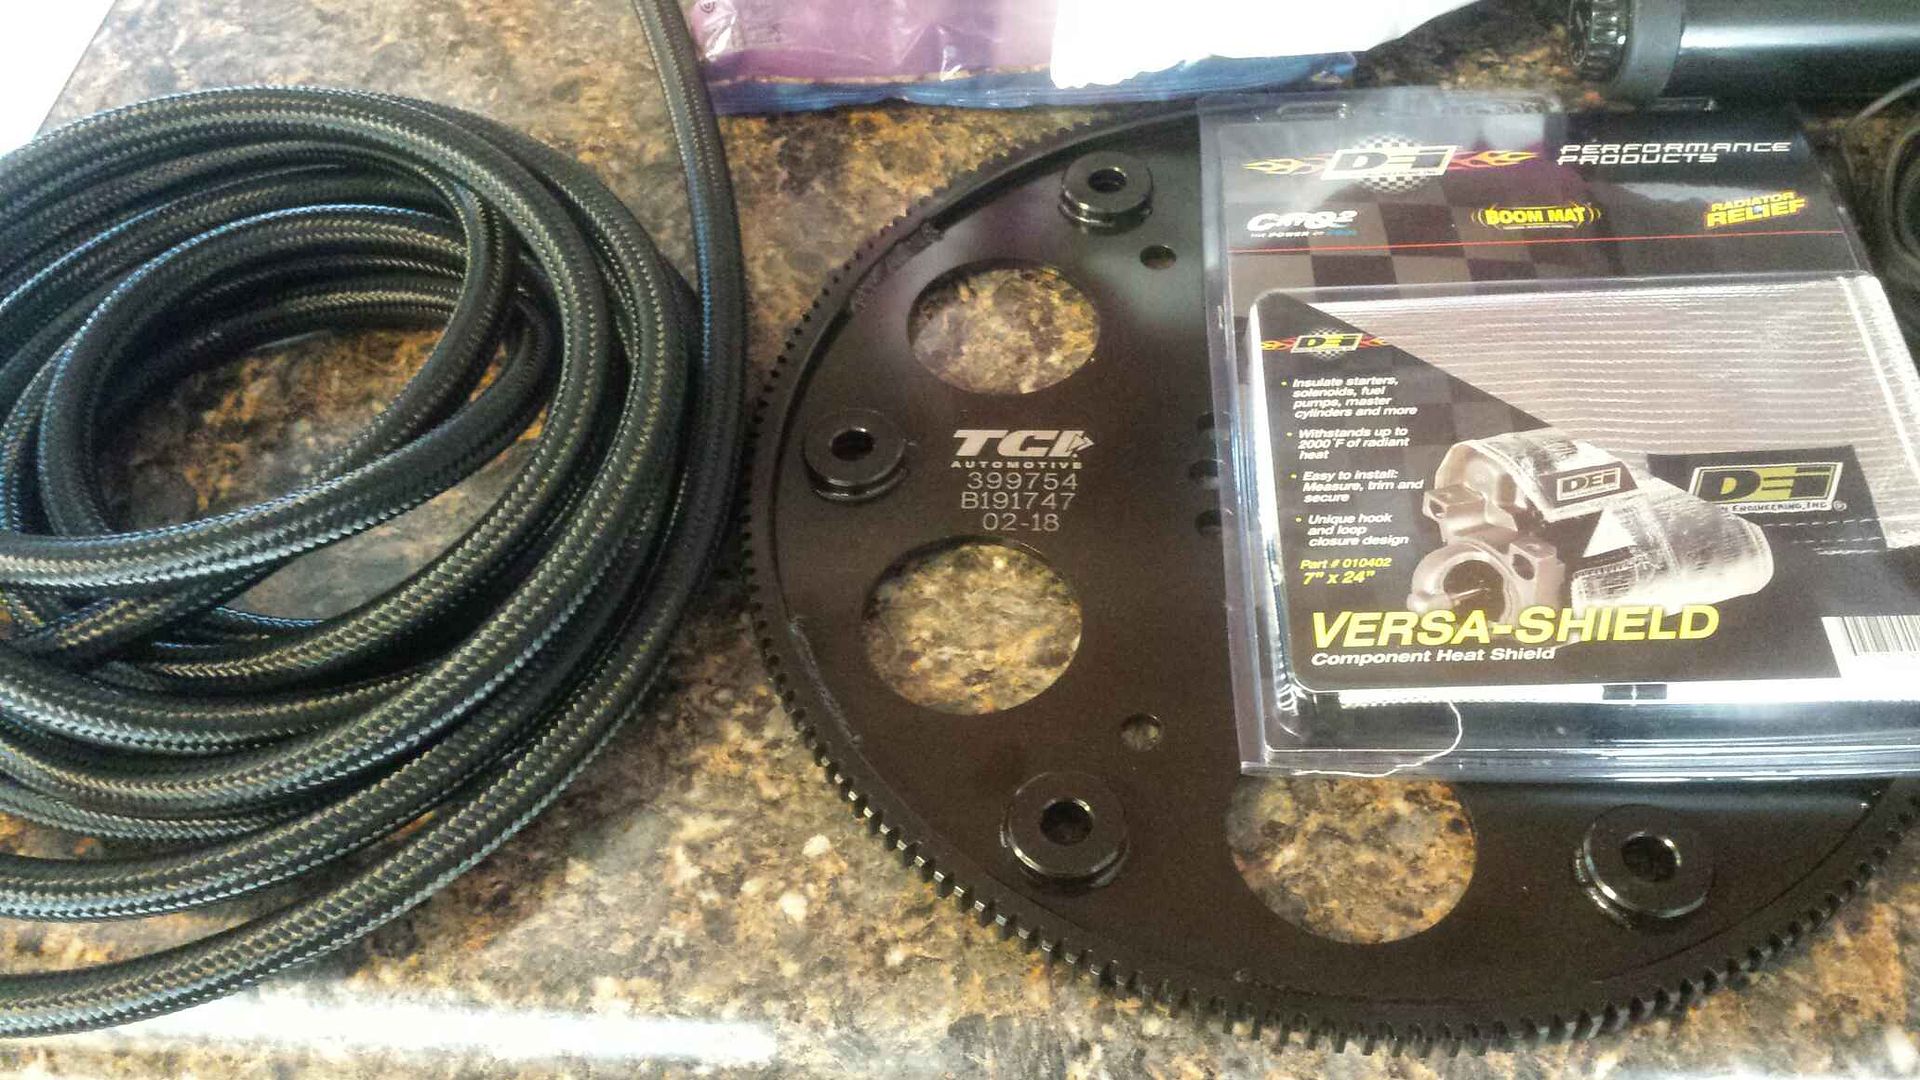
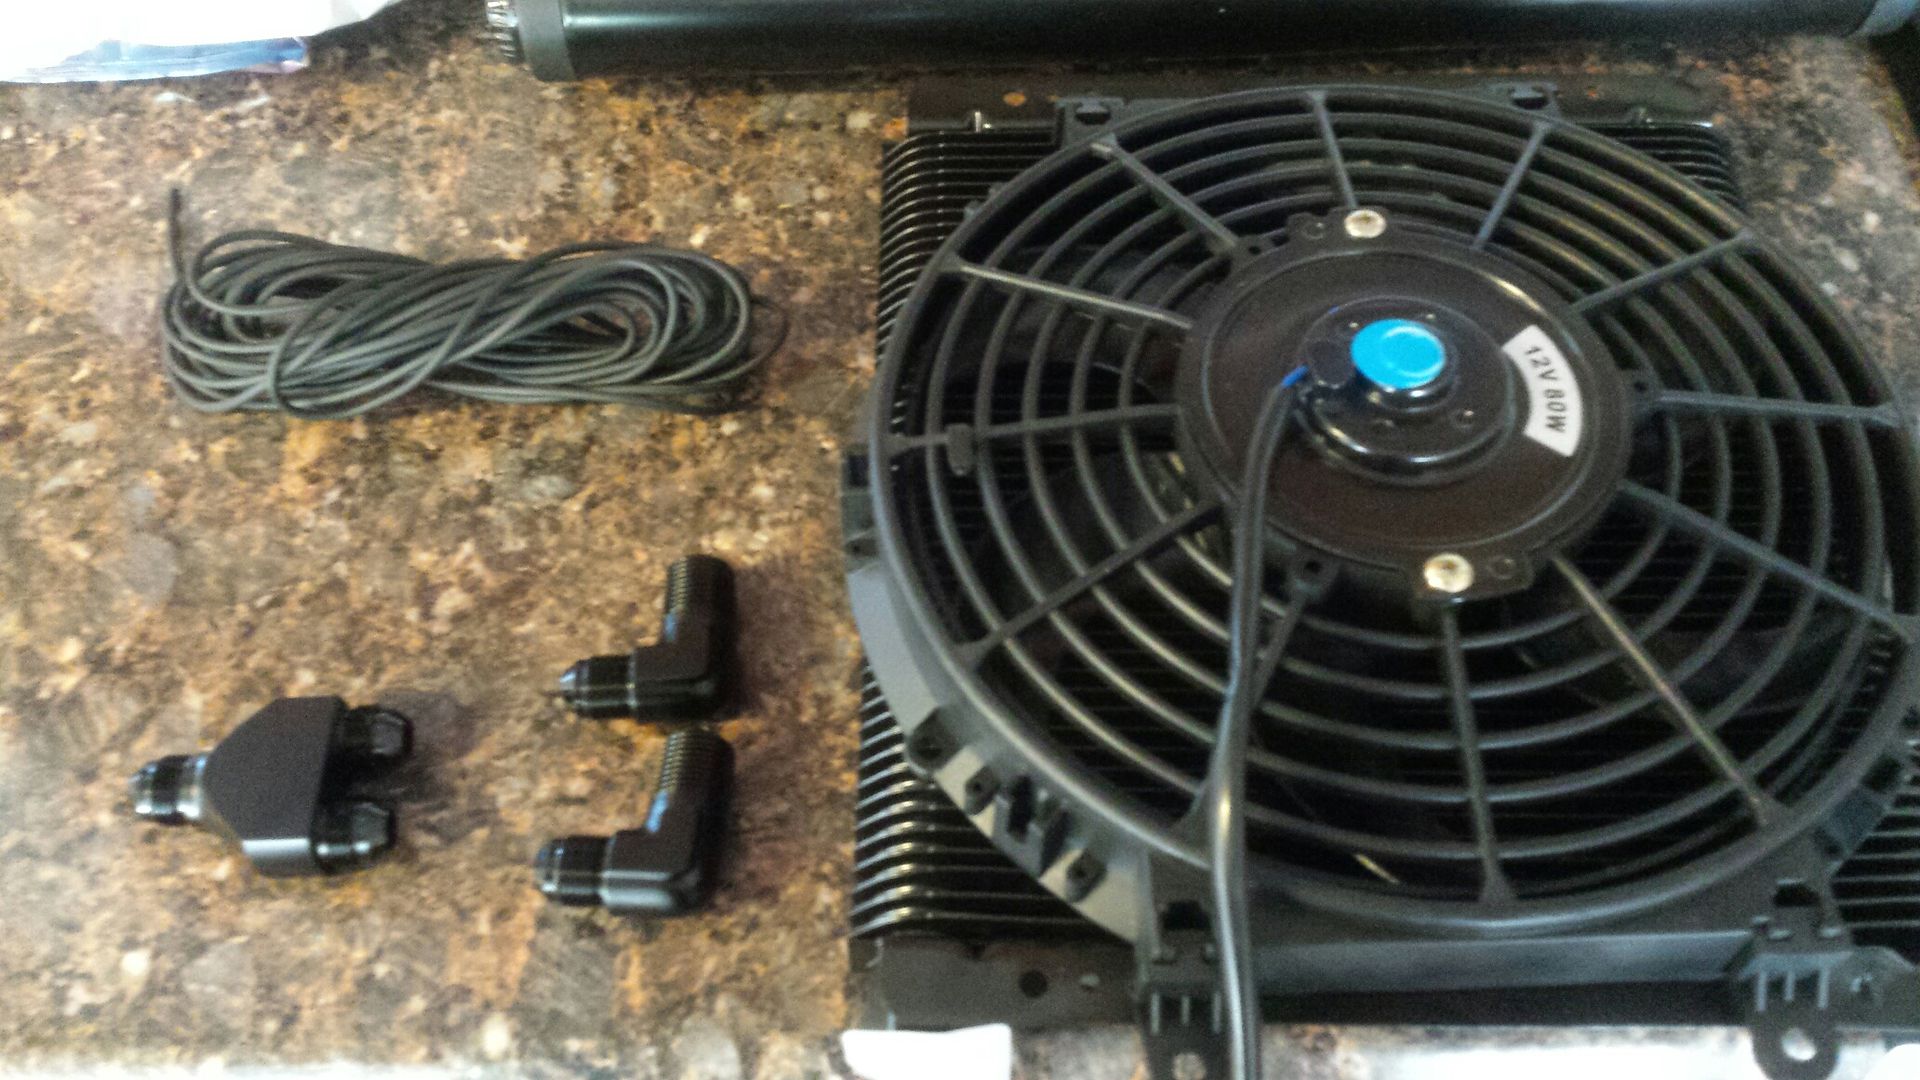
Since Im doubling the fans Im going to run a new power feed to the back. New fan and cooler, and you can see the Y block and elbow feeds. The idea is.....well **** you'll see when i get to that point.
Im stuck on the engine due to no valve seals (slow shipping). Figured since I was bored I would paint something. Meh, it turned out ok.
Well that turned out a little brighter then expected.
Much better. Ive always thought that corner under the hood was dark and needed something to spruce it up, maybe this will help....or just look silly. Either way it should be fun.
Things are clicking right along.....motor should be complete and back together soon.

Use the slow speed setting on your drill, and move it in and out (on and off the seat). Wow what a difference 20 seconds makes.

Comparison.

The sealing surface in the head.

Exhaust valve comparison. A little pitting on them is normal and nothing to worry about. Once i mate a valve to a hole, it stays there. I dont move it around once its been ground in. Also make sure you wipe as much of the compound off the head and valve as you can when youre done and hit the valve stem with some wd40 to help it slide in the valve guide easier.

During the car disassembly I found some melted plastic looming on the block's main ground wire so I got some heat shield for that and the starter wire that run down the passenger side of the engine. Don't want or need any sparks unless they are in the combustion chamber. I also have a brass T for the brake booster that's returning to service, and the brake line adapters since I sold my stock lines and will be remaking new ones from scratch.......again.

-8 line for the new cooler setup, beautiful TCI SFI flexplate and a starter heat shield.....for the battery. Yep, its the perfect size to insulate the battery and keep some heat off of it.

Since Im doubling the fans Im going to run a new power feed to the back. New fan and cooler, and you can see the Y block and elbow feeds. The idea is.....well **** you'll see when i get to that point.

Im stuck on the engine due to no valve seals (slow shipping). Figured since I was bored I would paint something. Meh, it turned out ok.

Well that turned out a little brighter then expected.

Much better. Ive always thought that corner under the hood was dark and needed something to spruce it up, maybe this will help....or just look silly. Either way it should be fun.

Things are clicking right along.....motor should be complete and back together soon.
#62
10-25-2017, 12:55 PM
Join Date: Aug 2010
Posts: 230
Likes: 0
Received 0 Likes
on
0 Posts
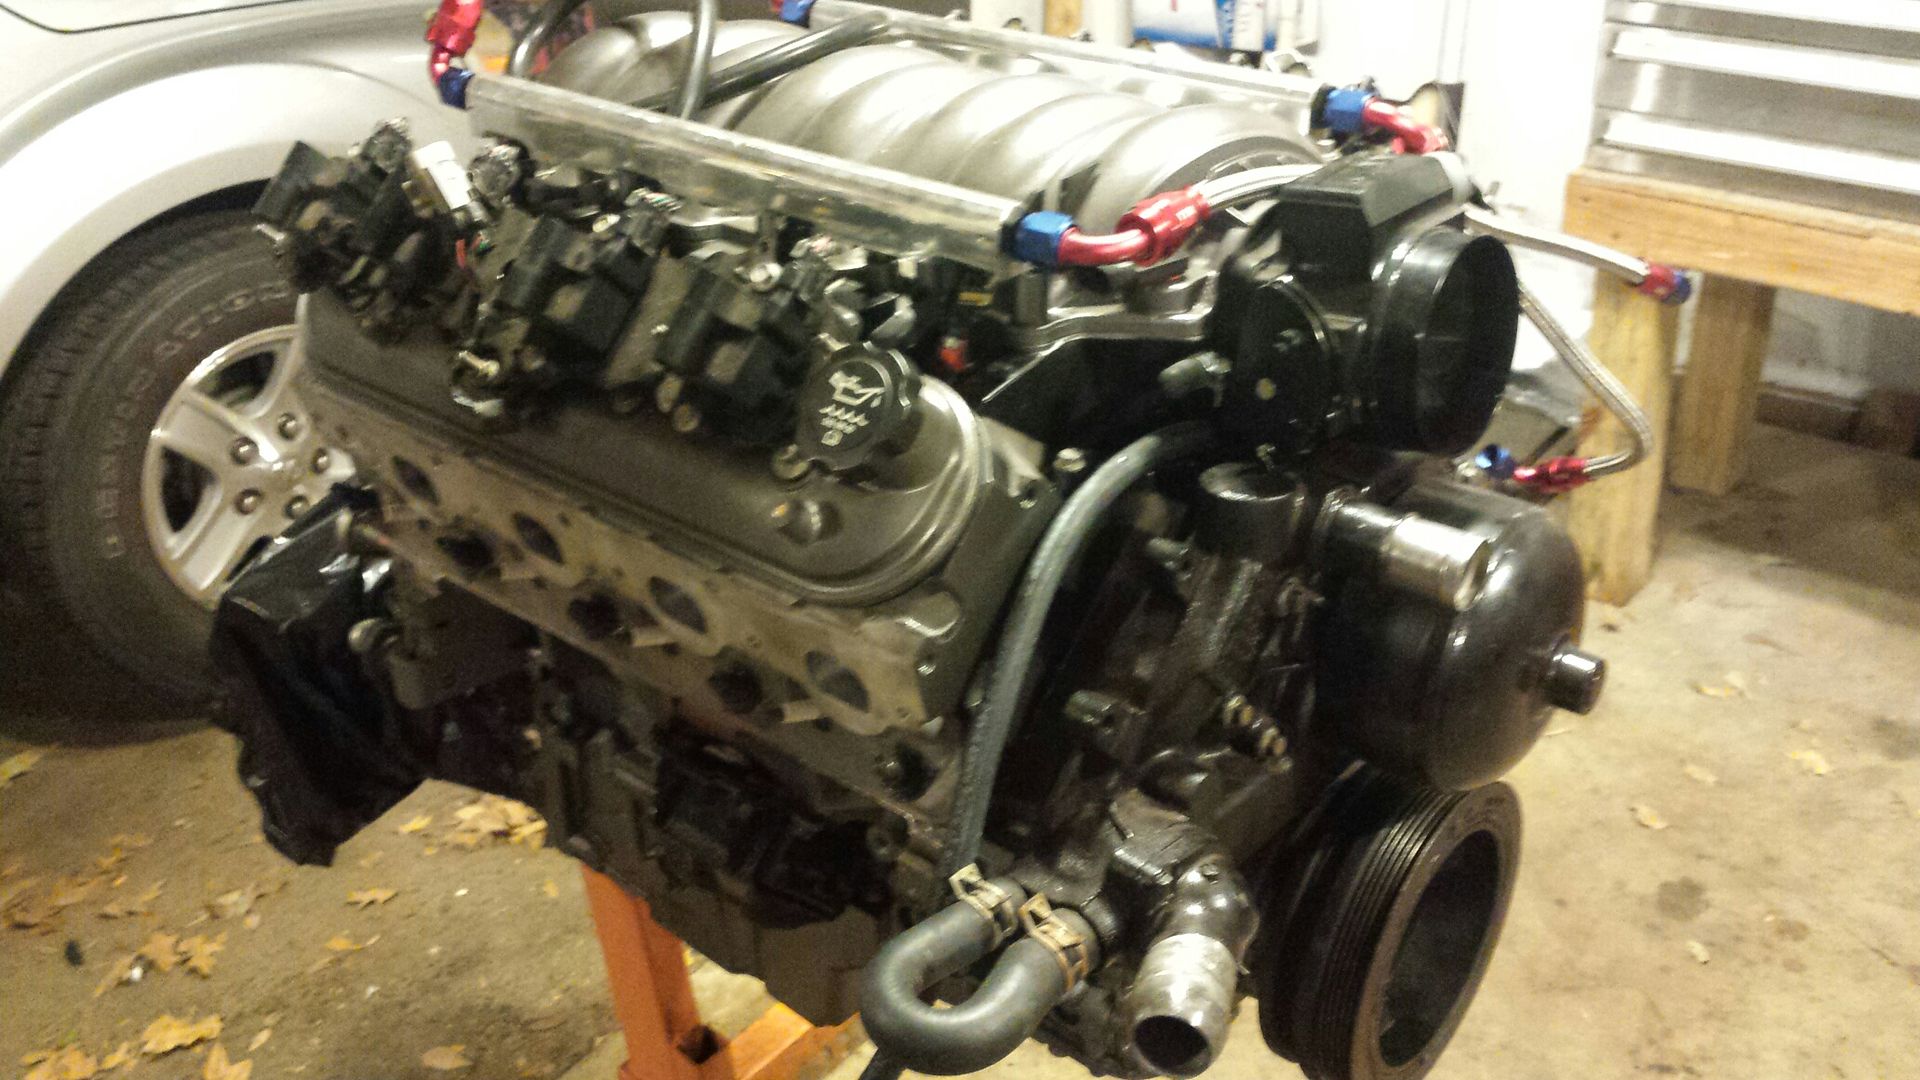
So we left off with an assembled short block, I stole the dual springs off the old 862 heads and installed them along with new valve seals on the new to me 799 castings. Cleaned all the block holes with an ARP thread tap, and copper coated the new LS9 head gaskets. I used ARP moly lube on the china studs and torqued in three passes, 25, 50, 75. No drama.
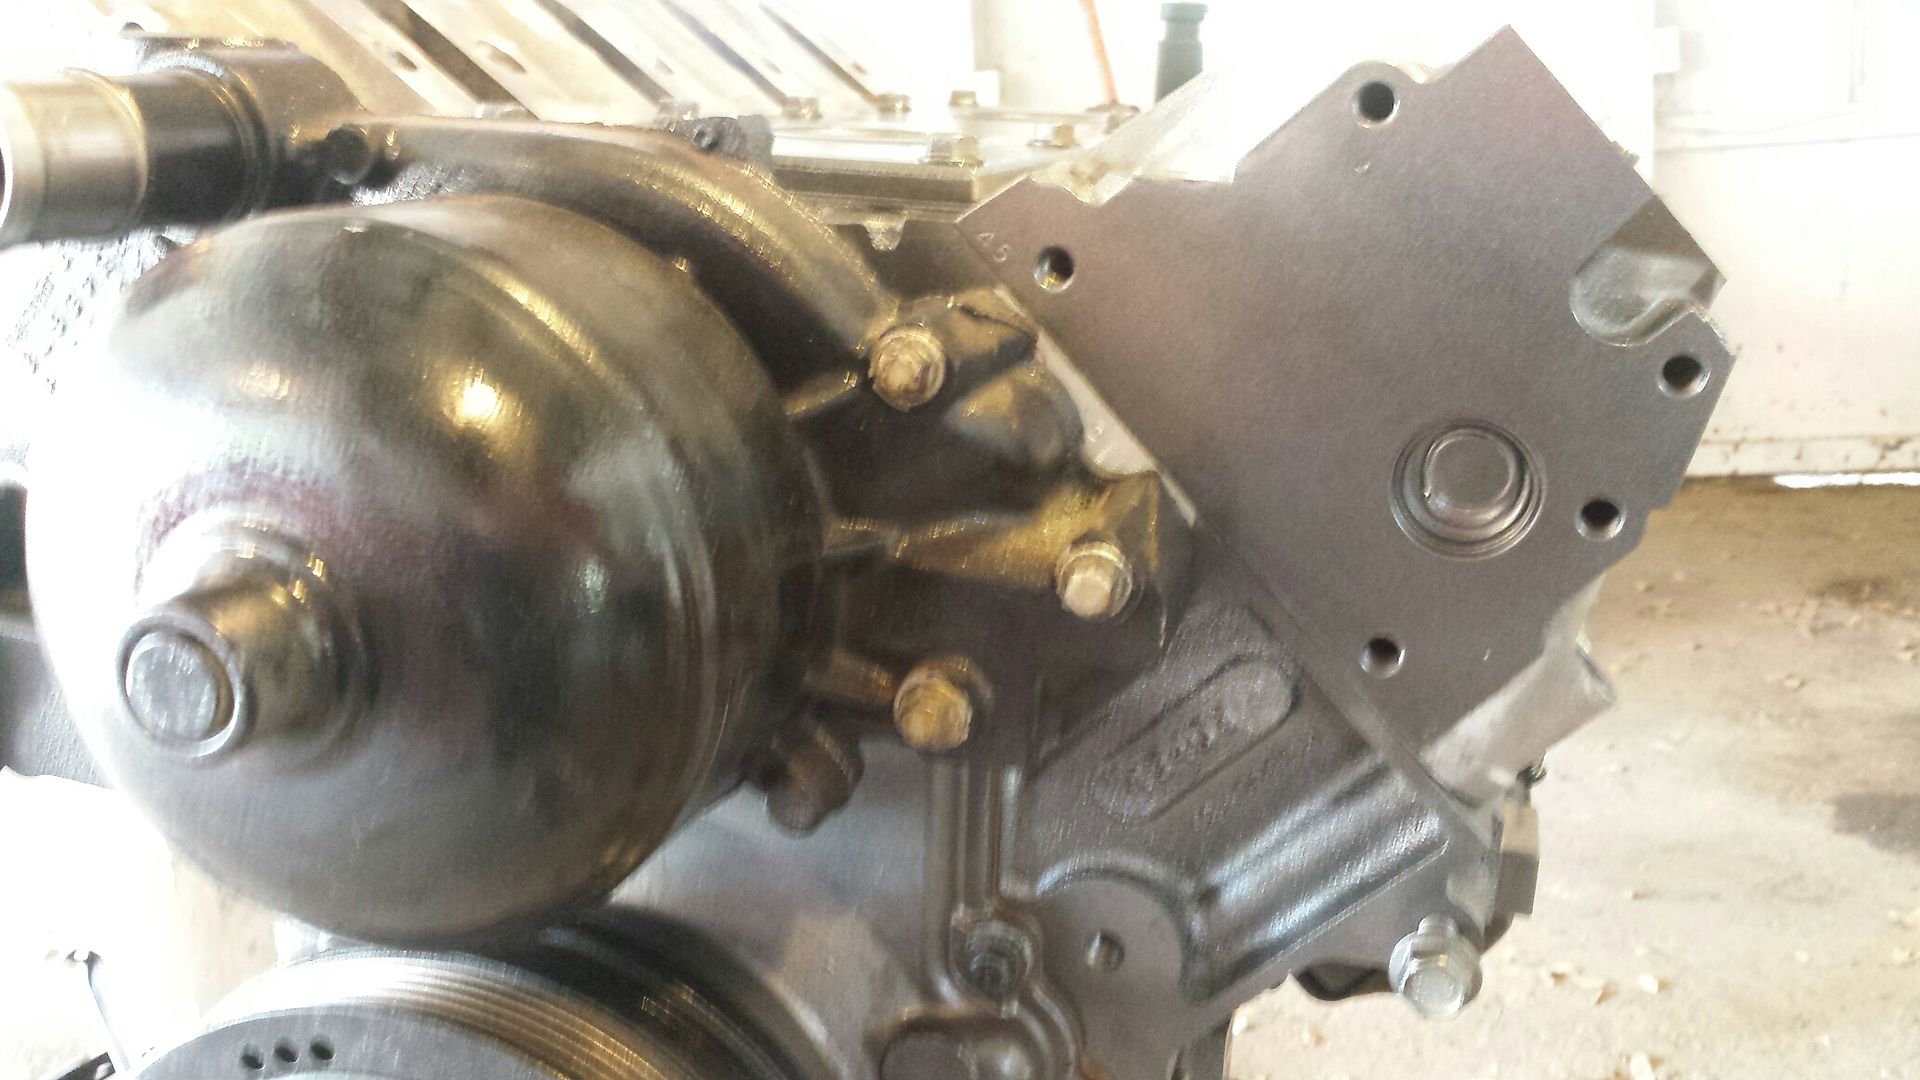
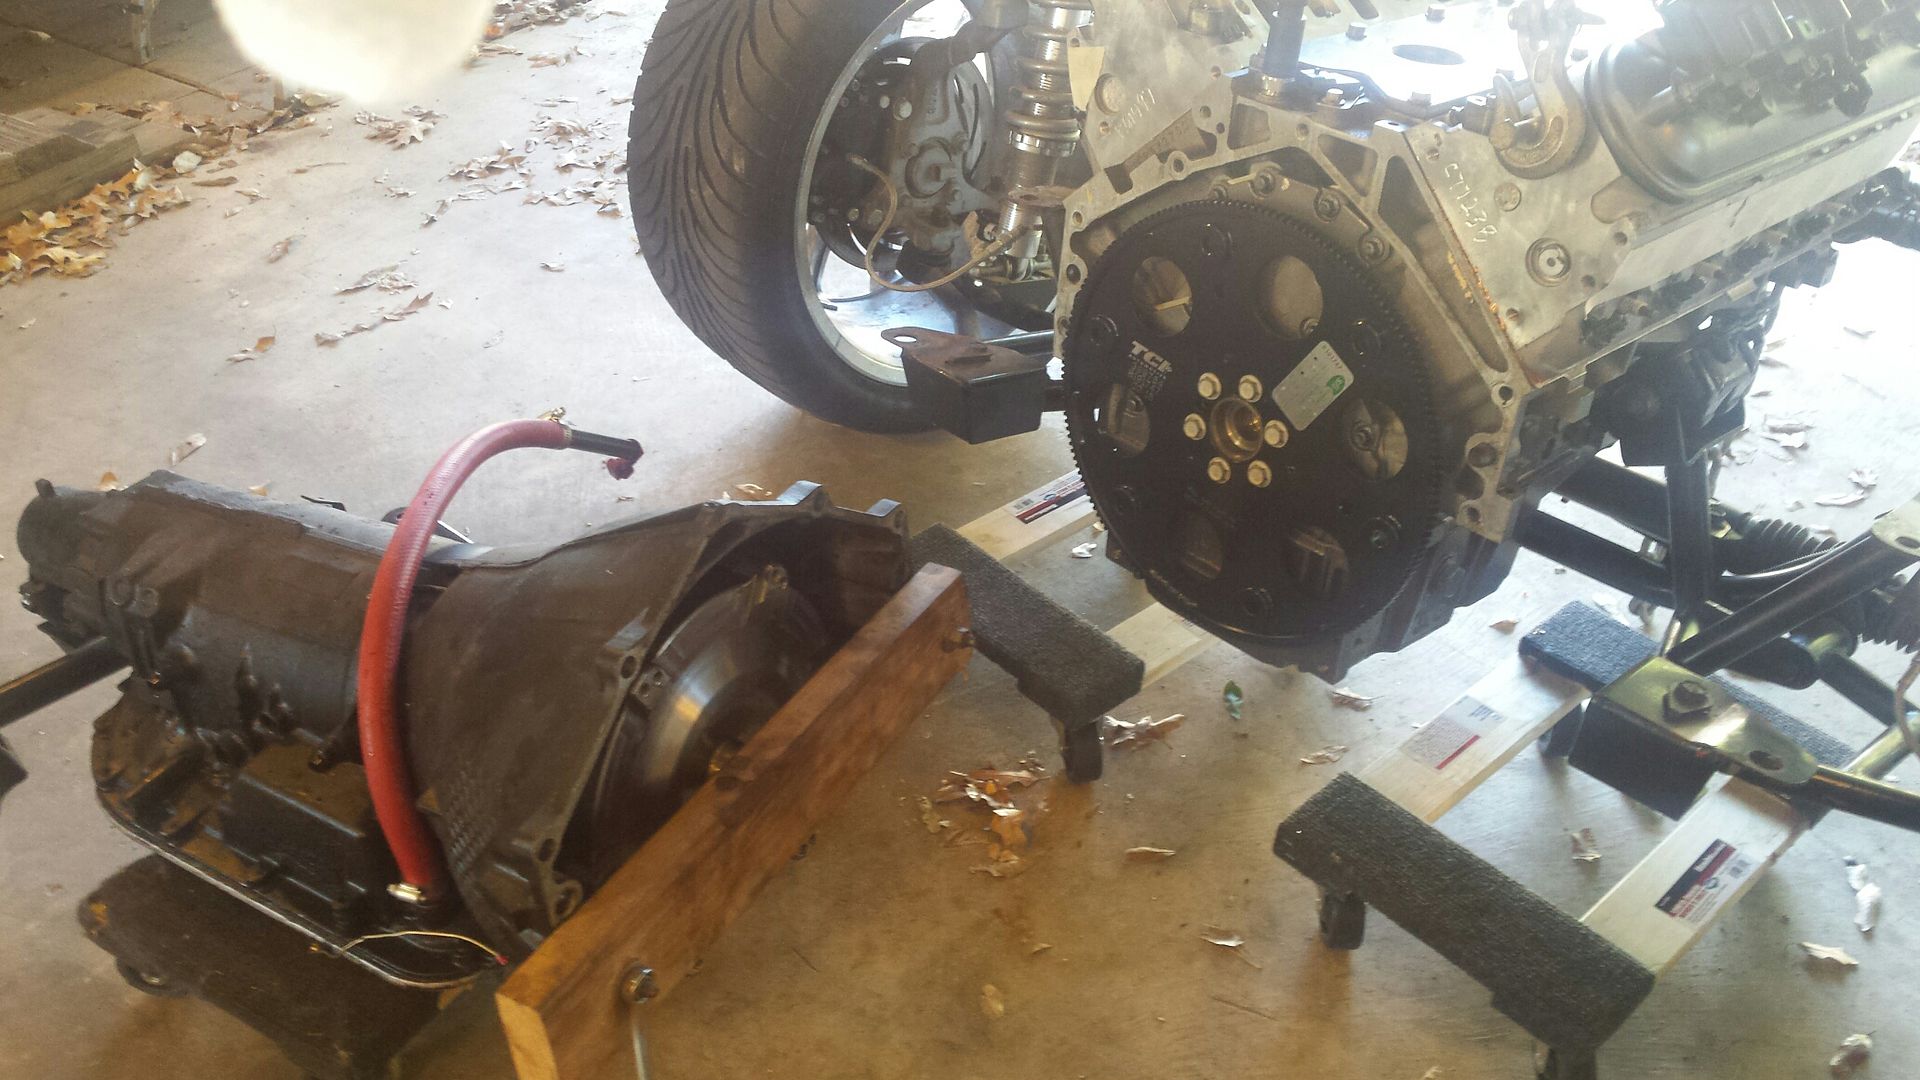
Got the engine mounted to the K member and rolled the trans over to it. Notice my super sophisticated "converter keeper" bolted to the front of the trans. Keeps that beauty from falling out and hitting the ground while it rolls around in the garage. Patented pending. Also, got the TCI flexplate mounted, fit fantastic, very nice piece. I removed the intake temporarily so that my chain didnt scuff it or the fuel rails.
Mounted the hotside and accs up and that was about the end of the playtime for me. I pushed it over closer to the car just to remind myself that this is close to being over with.
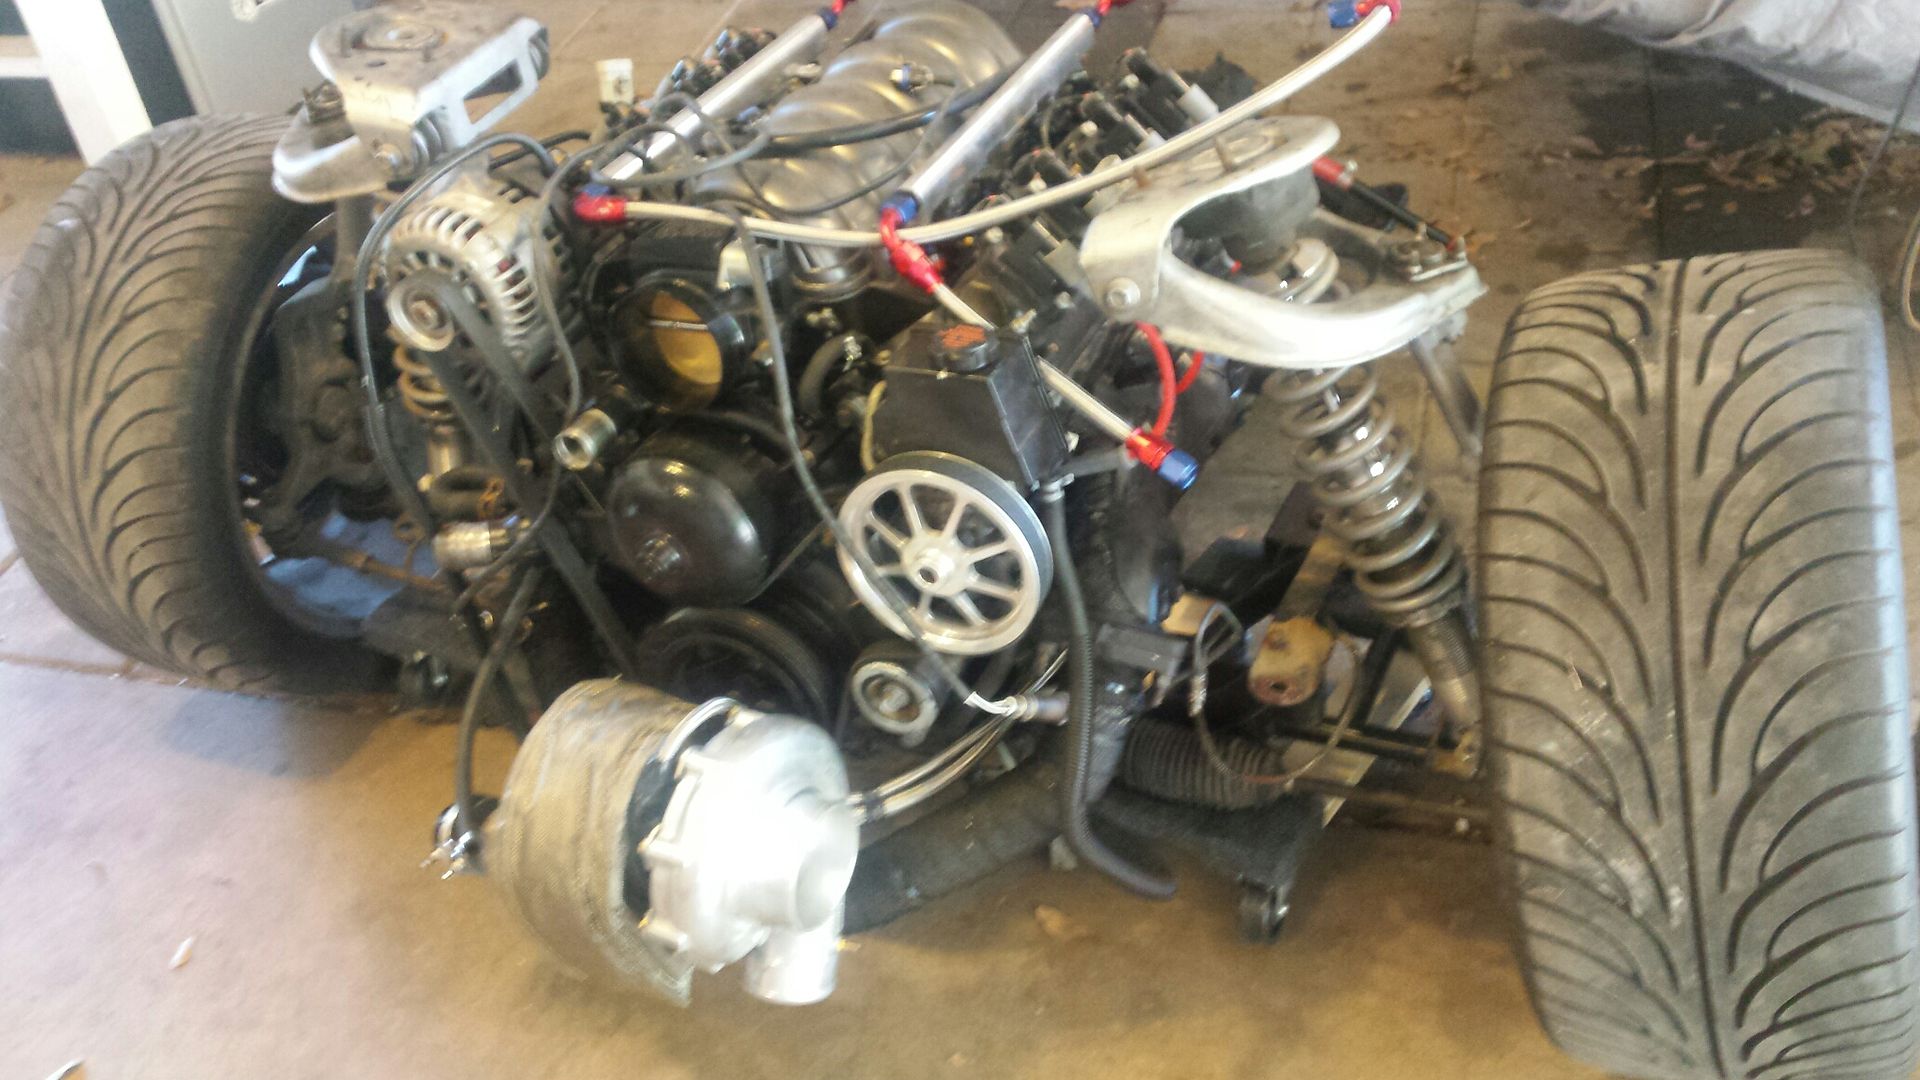
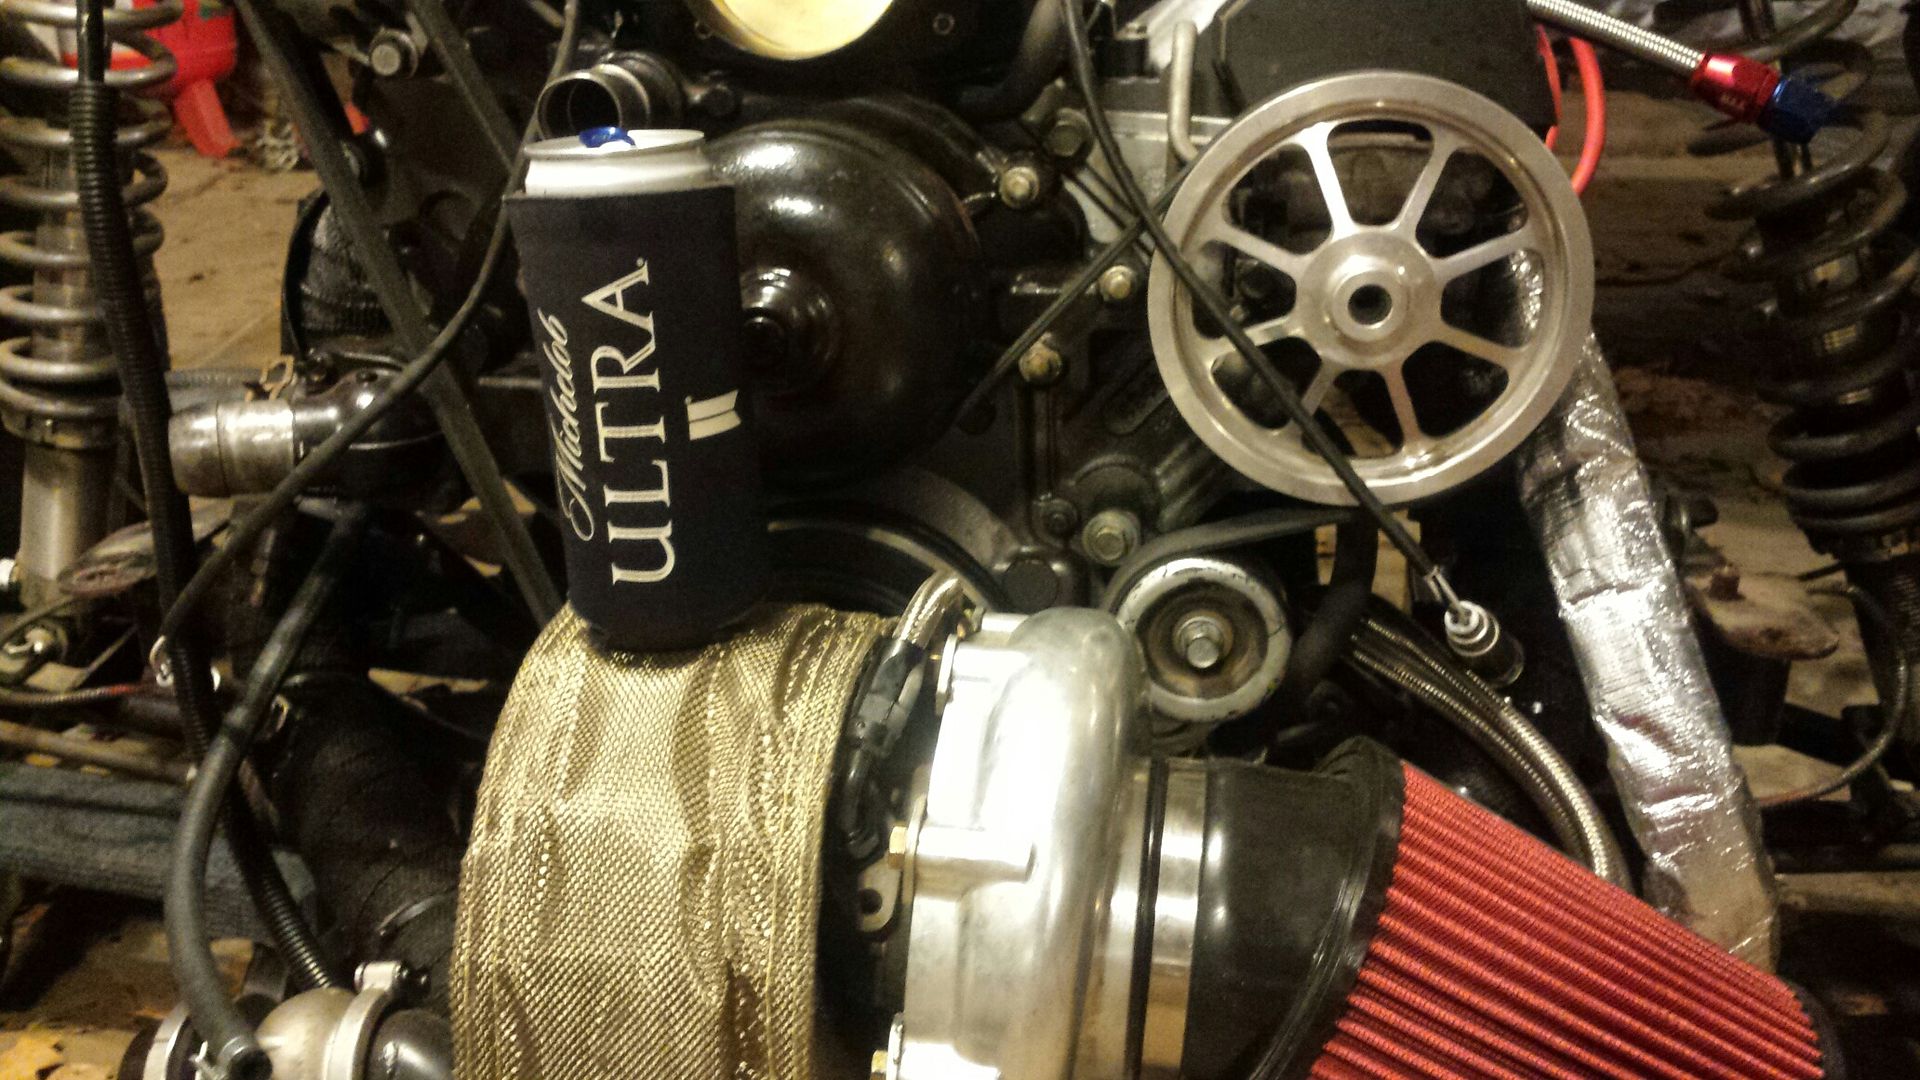
The loudest and fastest beer coaster I know of. You'll also notice i used some of that heat shield wrap on the PS lines. Dont wanna blow those on a hot turbo going down the road. And if you have a sharp eye, you can see i removed the heat shields on the manifolds, wrapped them, and reinstalled the shields. Since they kick off a ton of heat I figured why not. Catching a few of these little details this go round.

Got the engine mounted to the K member and rolled the trans over to it. Notice my super sophisticated "converter keeper" bolted to the front of the trans. Keeps that beauty from falling out and hitting the ground while it rolls around in the garage. Patented pending. Also, got the TCI flexplate mounted, fit fantastic, very nice piece. I removed the intake temporarily so that my chain didnt scuff it or the fuel rails.

Mounted the hotside and accs up and that was about the end of the playtime for me. I pushed it over closer to the car just to remind myself that this is close to being over with.

The loudest and fastest beer coaster I know of. You'll also notice i used some of that heat shield wrap on the PS lines. Dont wanna blow those on a hot turbo going down the road. And if you have a sharp eye, you can see i removed the heat shields on the manifolds, wrapped them, and reinstalled the shields. Since they kick off a ton of heat I figured why not. Catching a few of these little details this go round.

#63
10-30-2017, 09:15 AM
Join Date: Aug 2010
Posts: 230
Likes: 0
Received 0 Likes
on
0 Posts
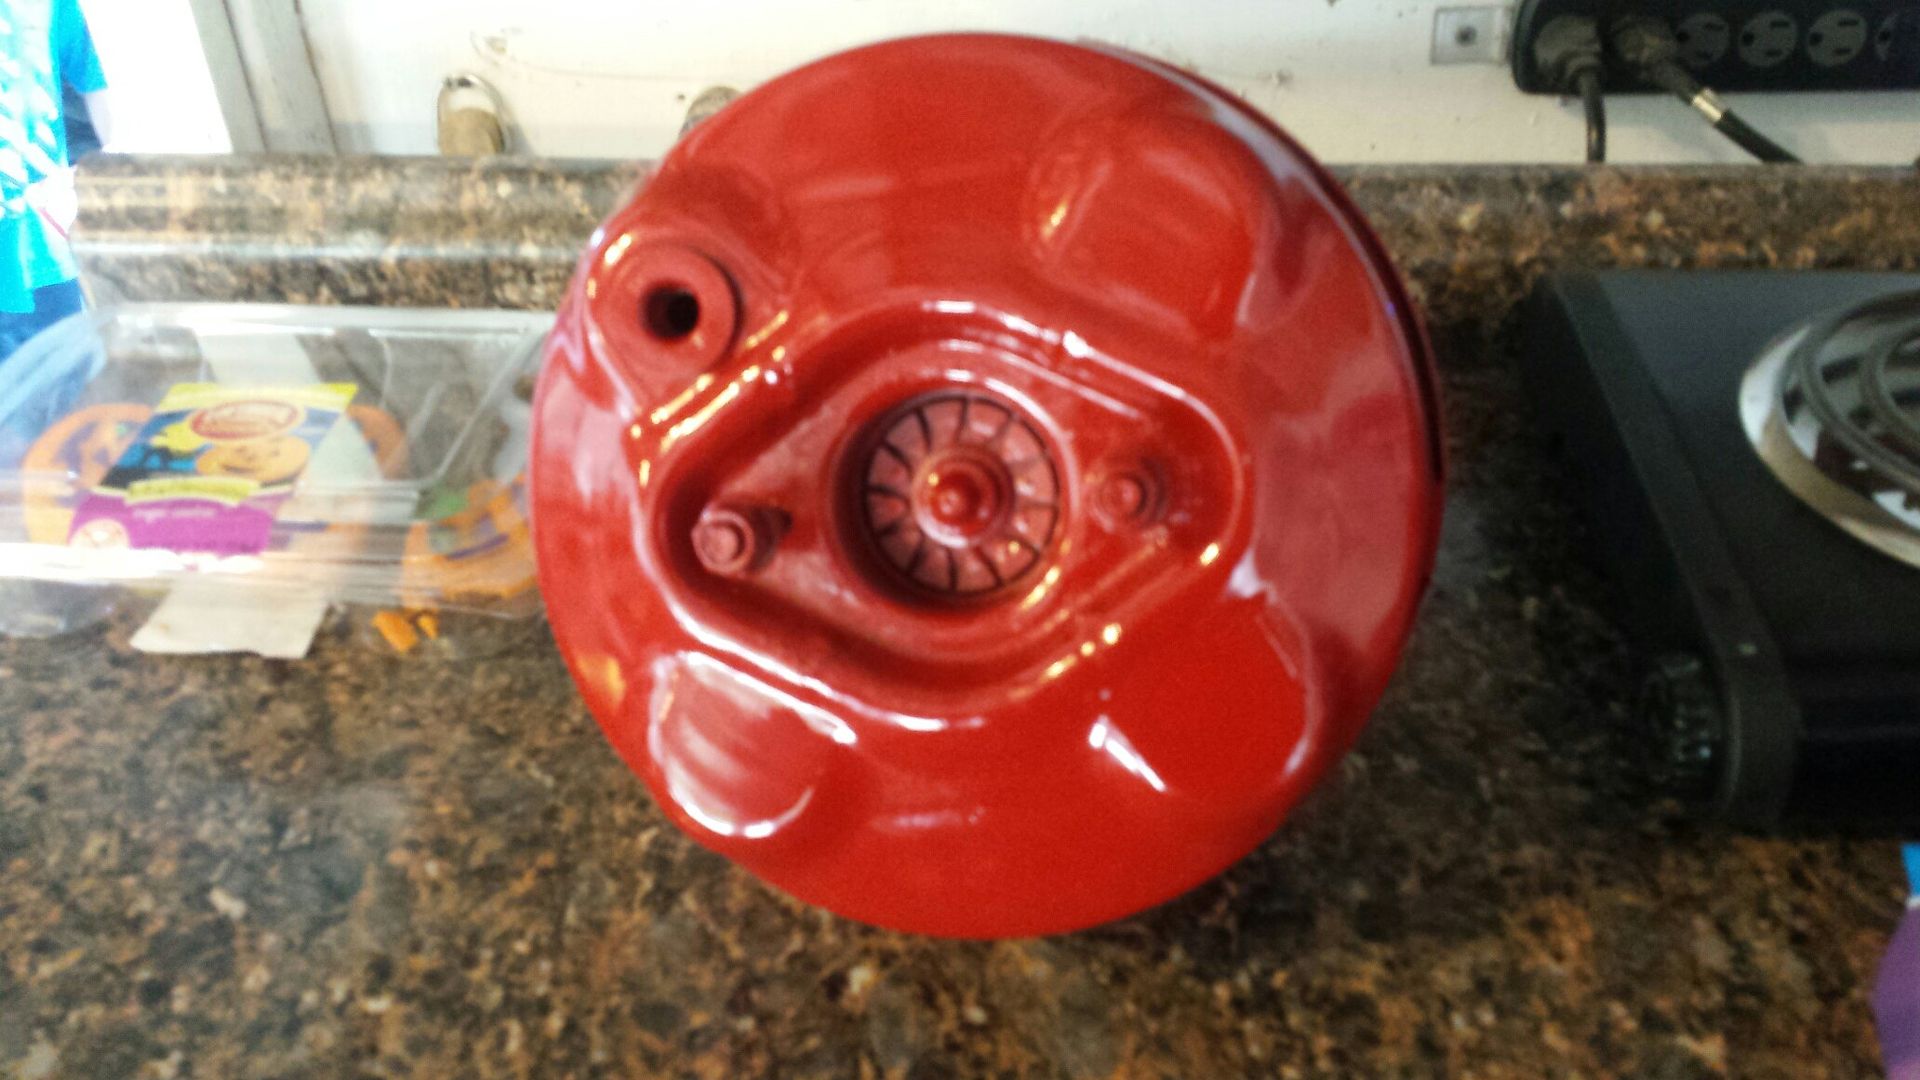
Well I cant catch a damn break to save my life. Lets start at the beginning, motor was ready to be rolled under. I draped the harness over it, then moved on to the car. I cut more clearance in the tunnel for the rear trans cooler line (which ended up not helping a ton), and trimmed the passenger side lower radiator bracket (the cold side pipe was resting against it), reinstalled the stock booster (looked for half an hour for the little retaining clip that holds the rod on the pedal) and made up the rear brake line AWAY from the manifolds. Rolled her under and it went real smooth.....I lifted the car by the ceiling joists. Red booster blends right in back there, not an eyesore at all.
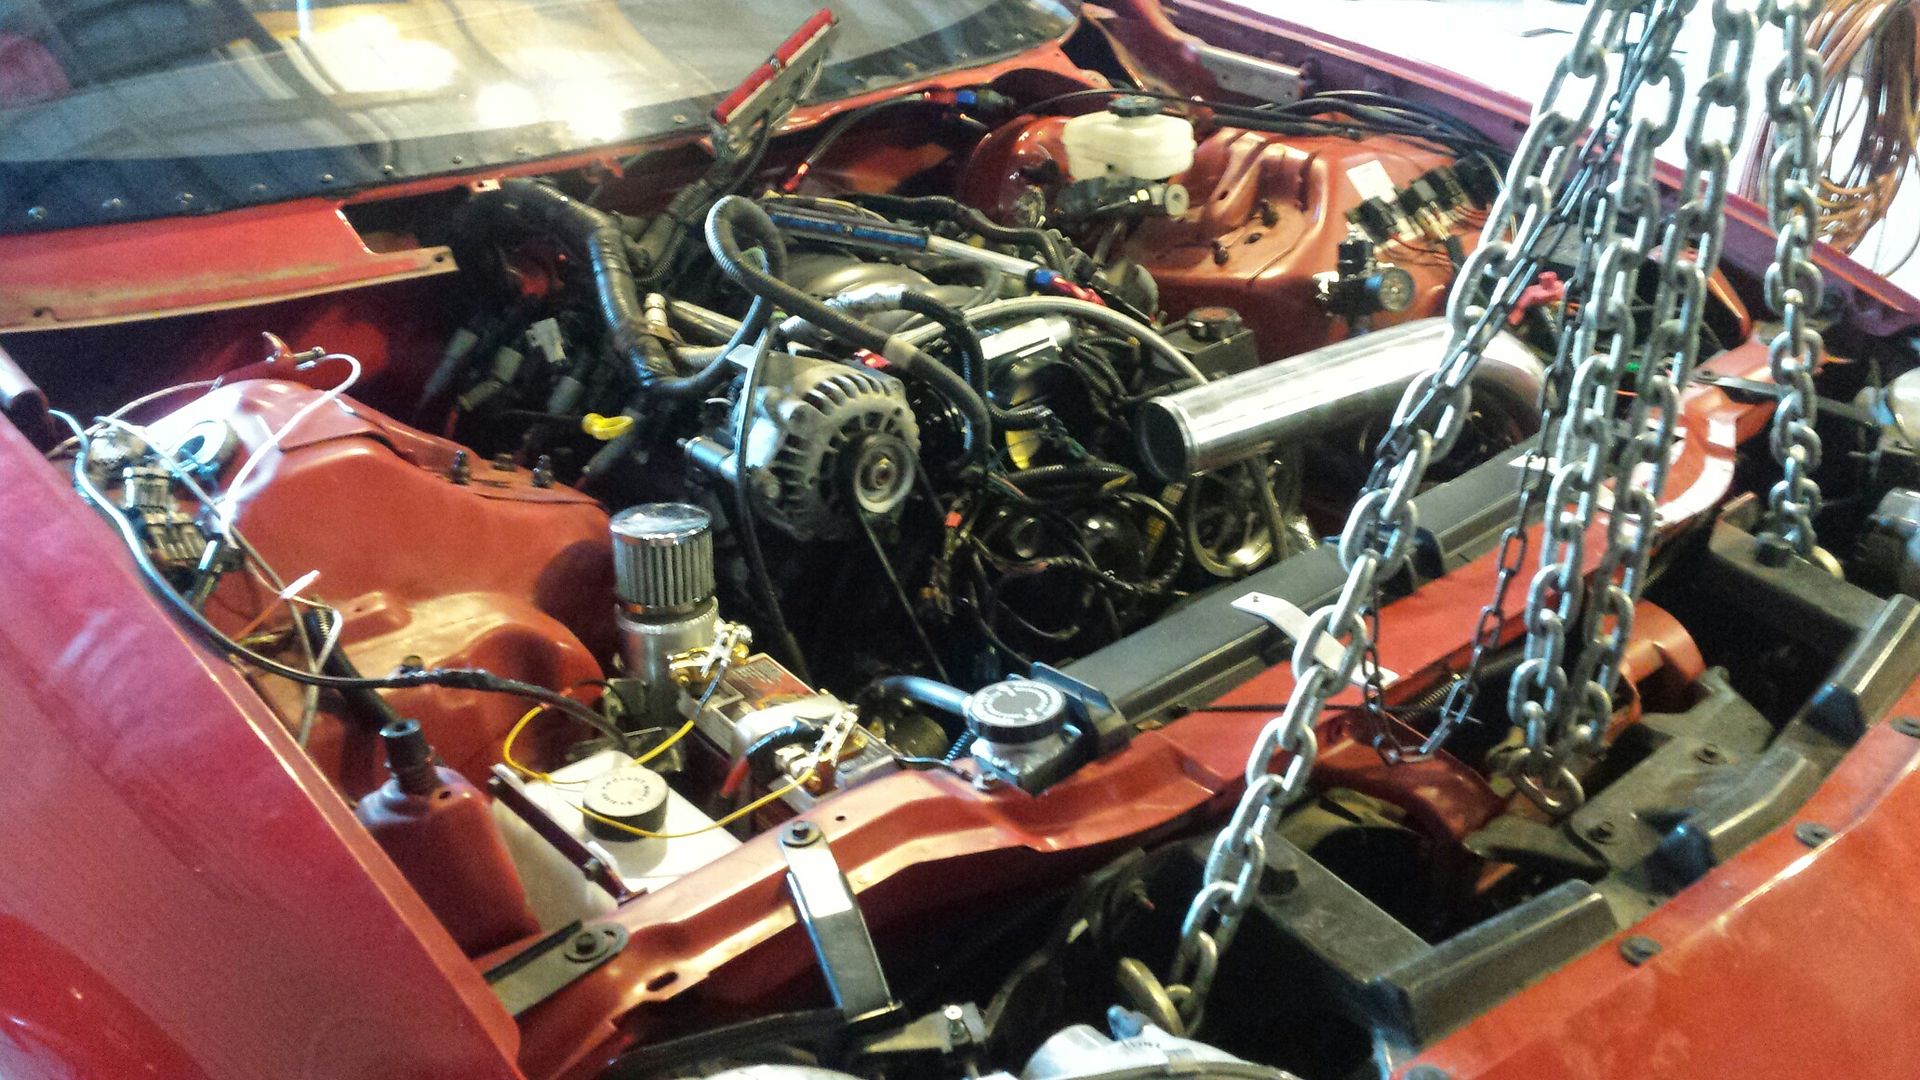
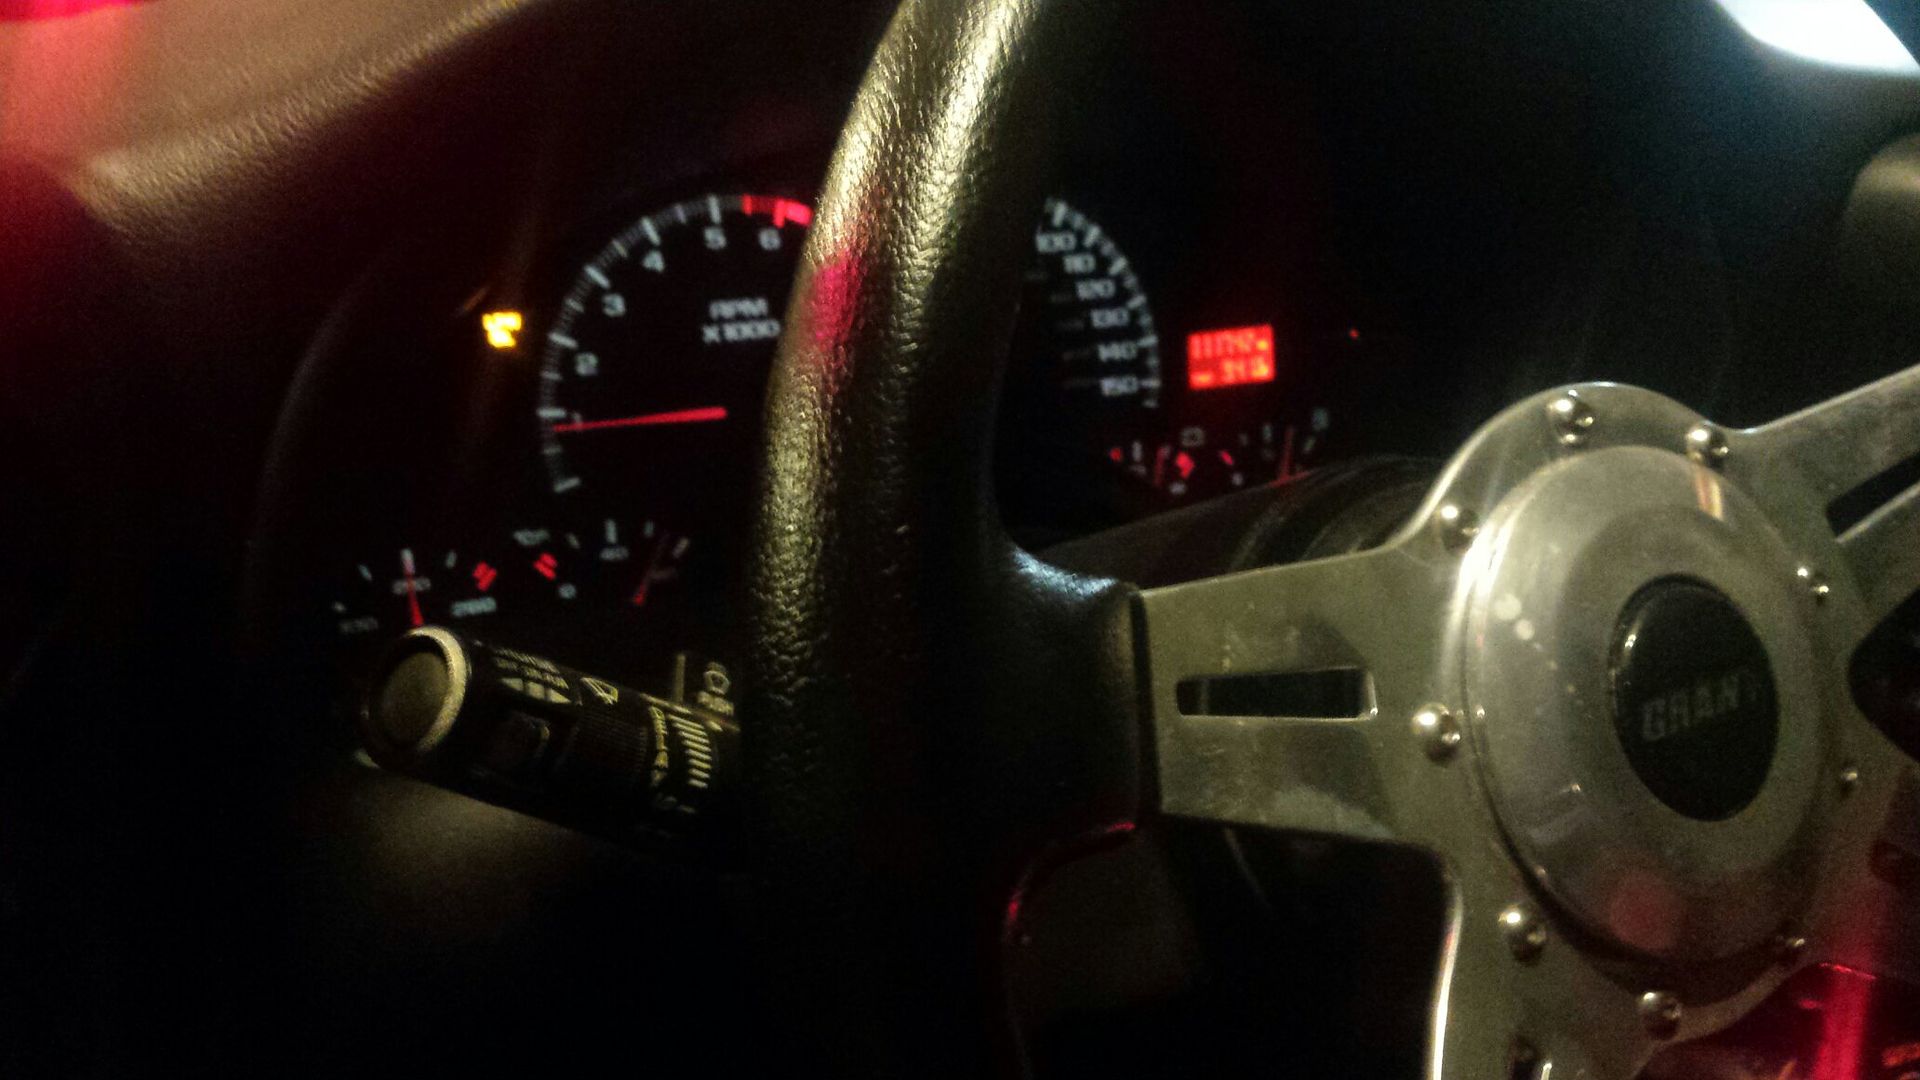
I got under and shortened the turbo drain line (it was about 10 inches too long and had to be looped around), hooked everything up and went to fire. Just a click. After scratching my head for a bit I decided to clean the block ground on the starter side. Well that worked and i got it to turn over but no fire. After some more scratching and a cold beer i determined in my infinite wisdom i did not plug the crank sensor in. Doh. Crappy pic but look at that oil pressure!
Still need to make the new front brake line, bleed the brakes, and add the 2nd trans cooler/fan. For the bad, lost all forward gears in my yukon today, Im sure I broke the pump in the transmission. So unfortunately the camaro has to go on the backburner for a few until i get that sorted out. Fall weather is quickly going away and was wanting to make a track pass this year.......I am happy this motor sounds healthy with no apparent issues. I ran it about a half hour last night.

I got under and shortened the turbo drain line (it was about 10 inches too long and had to be looped around), hooked everything up and went to fire. Just a click. After scratching my head for a bit I decided to clean the block ground on the starter side. Well that worked and i got it to turn over but no fire. After some more scratching and a cold beer i determined in my infinite wisdom i did not plug the crank sensor in. Doh. Crappy pic but look at that oil pressure!

Still need to make the new front brake line, bleed the brakes, and add the 2nd trans cooler/fan. For the bad, lost all forward gears in my yukon today, Im sure I broke the pump in the transmission. So unfortunately the camaro has to go on the backburner for a few until i get that sorted out. Fall weather is quickly going away and was wanting to make a track pass this year.......I am happy this motor sounds healthy with no apparent issues. I ran it about a half hour last night.
#64
10-30-2017, 12:24 PM
#66
11-13-2017, 07:59 AM
Join Date: Aug 2010
Posts: 230
Likes: 0
Received 0 Likes
on
0 Posts
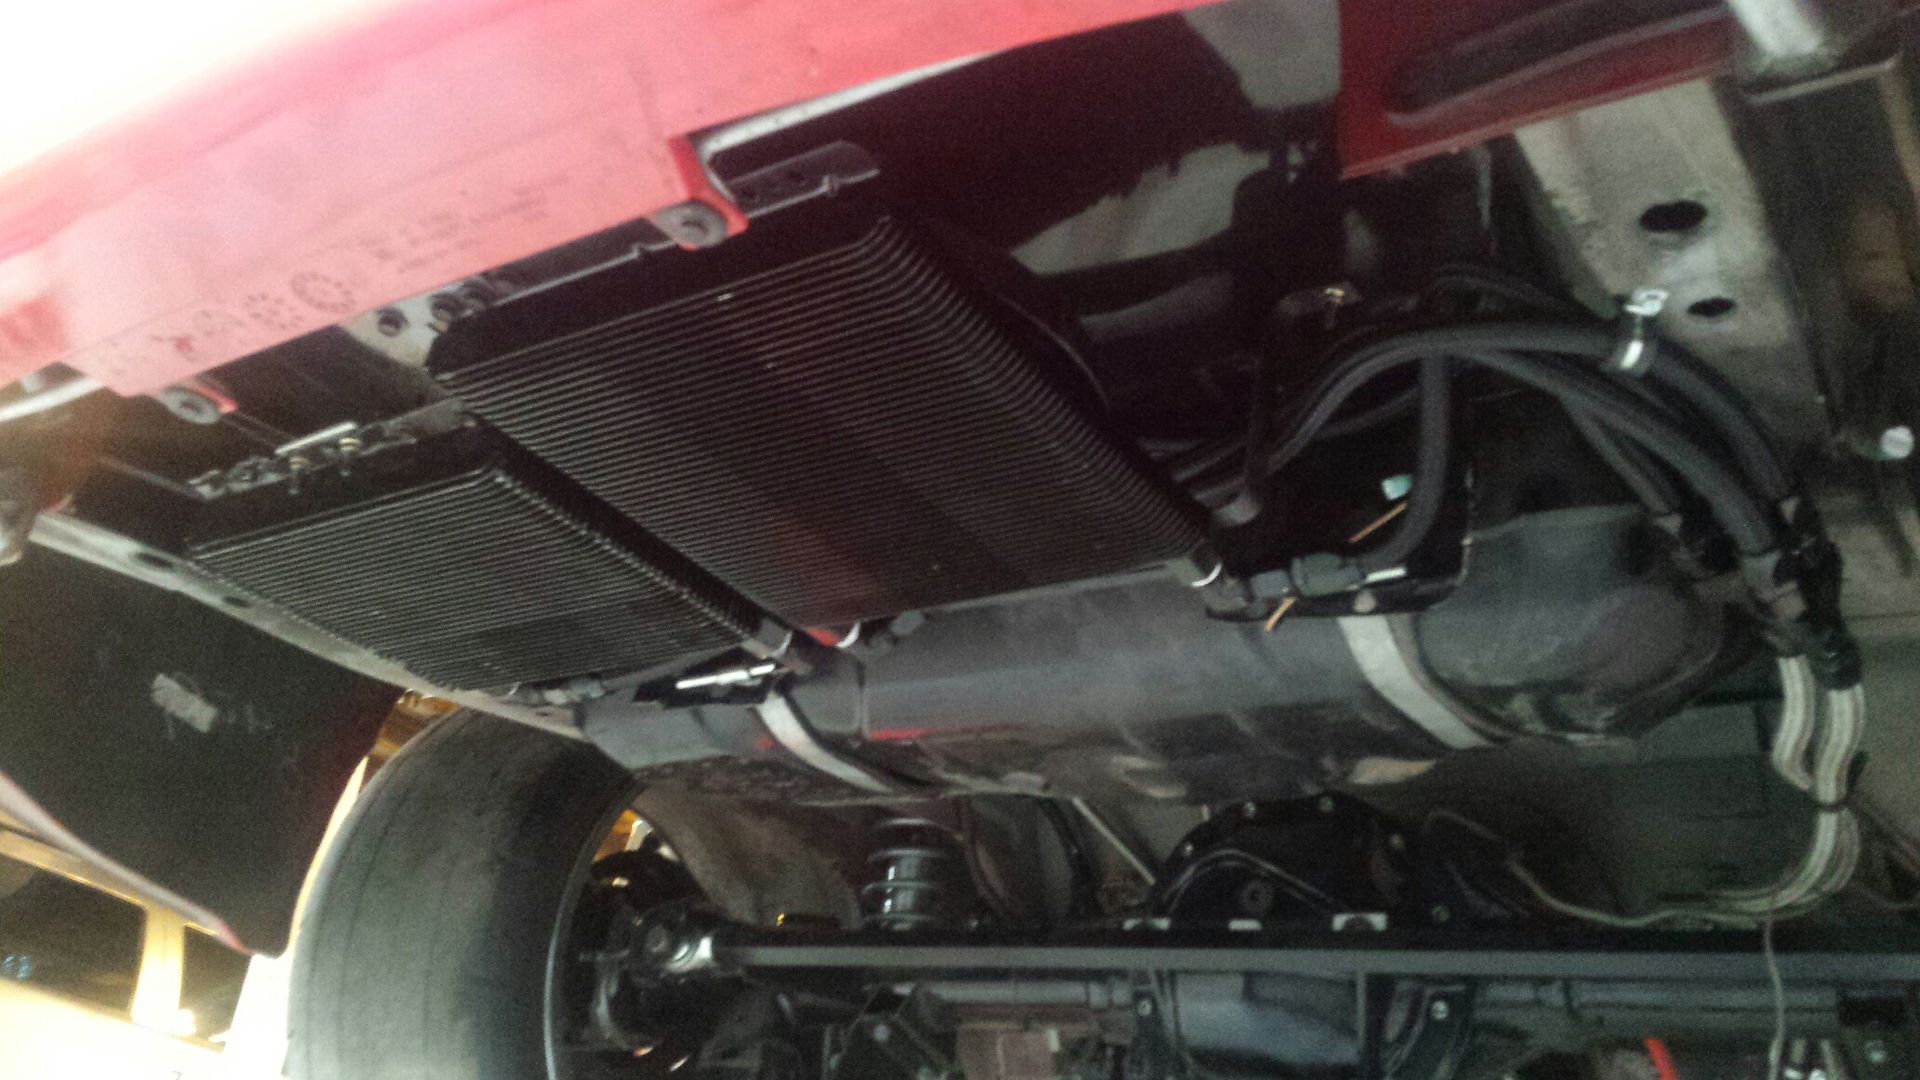
Here is a pic of the coolers, i thought i bought a matching one in size but it turns out it was about 1/3 bigger. Oh well, they fit. The new one is in the center and notice the Ys on the framerail. I changed to black nylon hose and will be buying that from now on, that stainless mesh line is ****, pokes the heck out of your fingertips.
My heel isnt even healed yet and now this. Always wear your gloves gentlemen.....sike I dont wanna die without any scars!!!! This cut was down into the meat LOL.
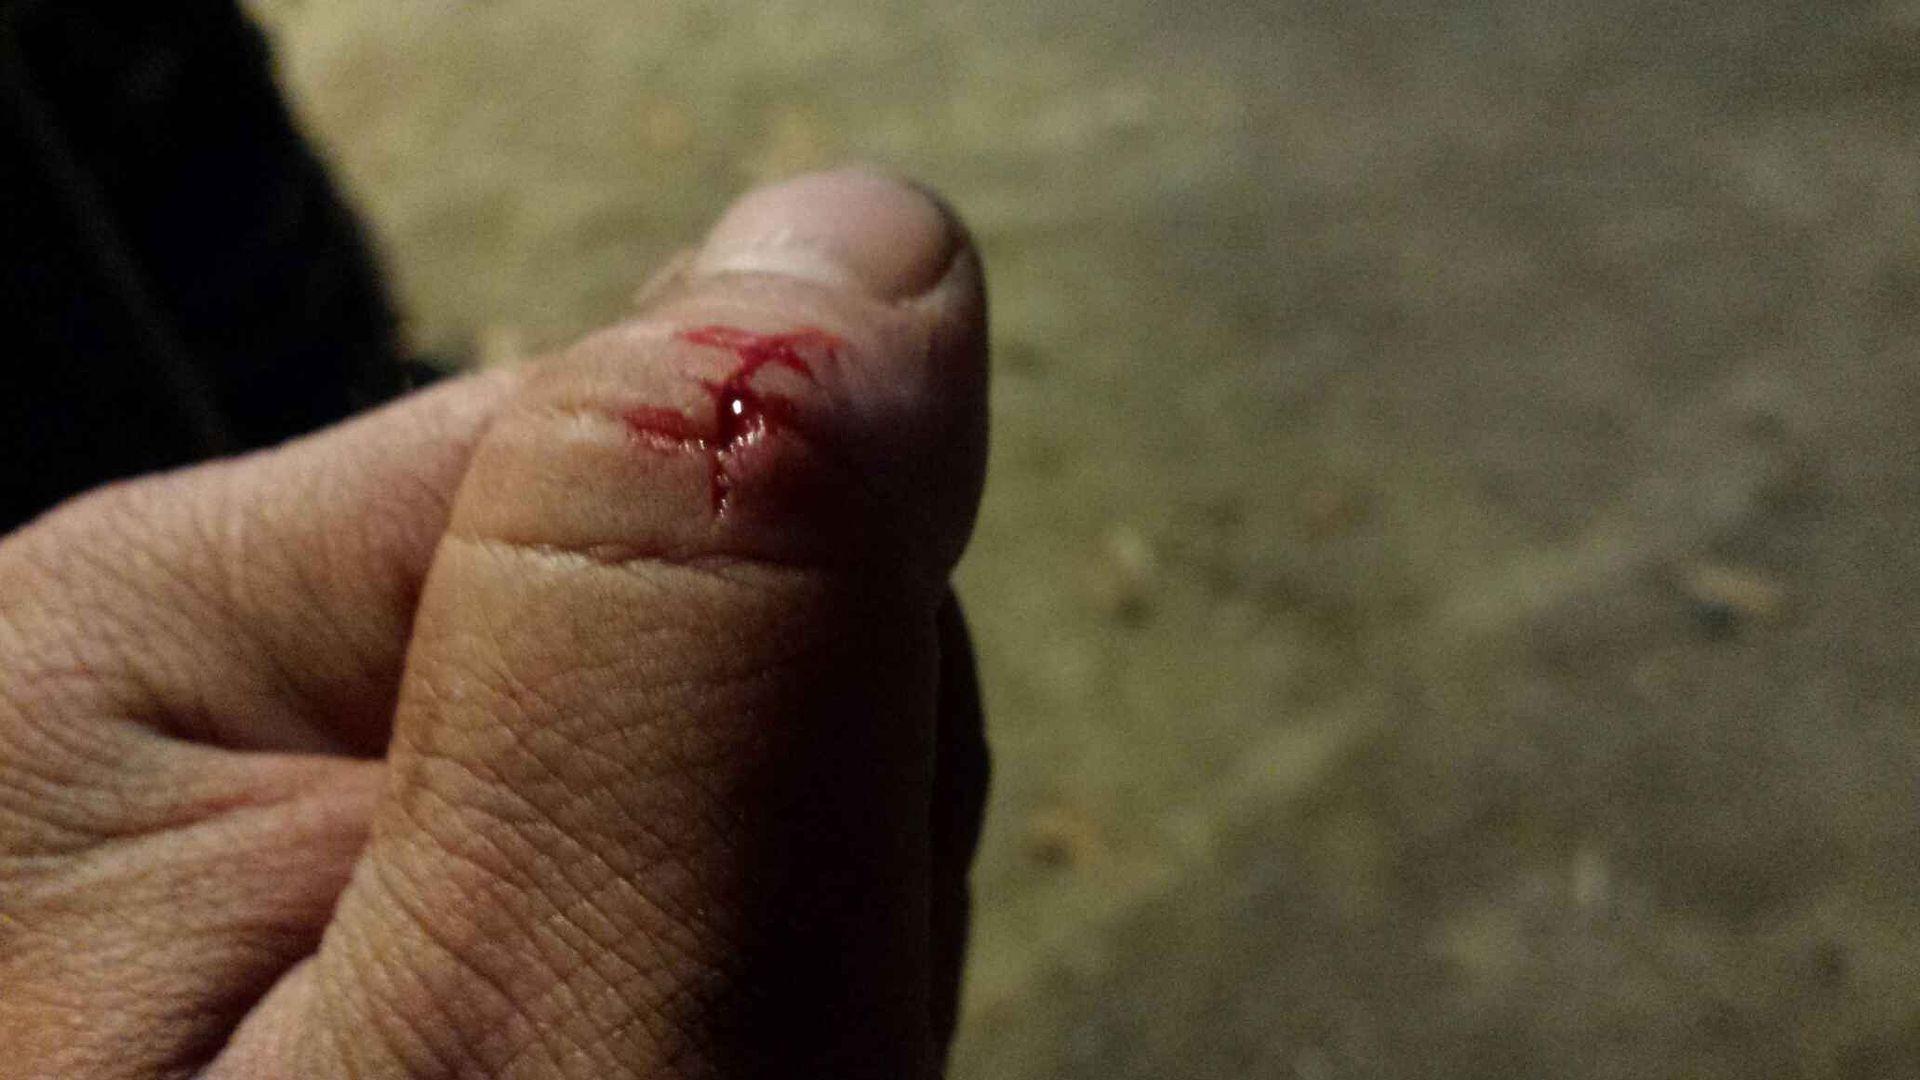

My heel isnt even healed yet and now this. Always wear your gloves gentlemen.....sike I dont wanna die without any scars!!!! This cut was down into the meat LOL.

#67
12-30-2017, 08:08 AM
Join Date: Aug 2010
Posts: 230
Likes: 0
Received 0 Likes
on
0 Posts
Been a while since my last update. Been building this for a buddy....
https://ls1tech.com/forums/forced-in...-75-build.html
Not much been going on with mine other then the usual crank up and maybe drive around the yard. Long story short, things appeared great (dont they always) and after bringing the motor to temp one day last week......the oil pressure dropped to 30. Checked the dipstick and yep, it had bearing material on it. It was time for some real soul searching. I chose not to replace engines every 15 miles!!! I also noticed the cylinder heads seemed dry (but no lifter noise). My conclusion is very obviously this motor, as well as the last one, has an oiling issue. But what is it, it eats bearings at 70 psi of pressure. After careful examination of the LS oiling system, Ive concluded the oil is being picked up and pumped at least to the sending unit at the rear top of the engine, but somewhere in the upper galley isnt making the pressure to force it up the pushrods OR down to the rods which are the last two things to get oil. I cant see the rods but if i can get oil to the cylinder heads the rods are getting it too. So how is 70 psi being lost so quickly, internal leak, front cam plate maybe. Once I realized I had installed a new cam plate I said lets keep it simple. You have an oiling system issue, you altered the oil pan/pickup, the oil pan has been on both engines. Lets reinstall a stock pan setup THEN go from there. Well when my buddy brings over a stock pan I look it over. Front of the pan is 5.5" deep, rear is 5", I estimate stock pickup clearance is 3/8"ish. I maintained height when i moved the pickup back :bang: So the pickup is literally laying flat on the pan floor if you subtract those measurements, which is causing massive cavitation. I opted to shorten the pickup i had instead of go back to a front sump. You can see how much i cut out here in this pic. I also upgraded to an ICT Billet turbo feed just because i liked the way it looked. And yeah its shooting oil out of the pushrods now Hope i caught it in time.
https://ls1tech.com/forums/forced-in...-75-build.html
Not much been going on with mine other then the usual crank up and maybe drive around the yard. Long story short, things appeared great (dont they always) and after bringing the motor to temp one day last week......the oil pressure dropped to 30. Checked the dipstick and yep, it had bearing material on it. It was time for some real soul searching. I chose not to replace engines every 15 miles!!! I also noticed the cylinder heads seemed dry (but no lifter noise). My conclusion is very obviously this motor, as well as the last one, has an oiling issue. But what is it, it eats bearings at 70 psi of pressure. After careful examination of the LS oiling system, Ive concluded the oil is being picked up and pumped at least to the sending unit at the rear top of the engine, but somewhere in the upper galley isnt making the pressure to force it up the pushrods OR down to the rods which are the last two things to get oil. I cant see the rods but if i can get oil to the cylinder heads the rods are getting it too. So how is 70 psi being lost so quickly, internal leak, front cam plate maybe. Once I realized I had installed a new cam plate I said lets keep it simple. You have an oiling system issue, you altered the oil pan/pickup, the oil pan has been on both engines. Lets reinstall a stock pan setup THEN go from there. Well when my buddy brings over a stock pan I look it over. Front of the pan is 5.5" deep, rear is 5", I estimate stock pickup clearance is 3/8"ish. I maintained height when i moved the pickup back :bang: So the pickup is literally laying flat on the pan floor if you subtract those measurements, which is causing massive cavitation. I opted to shorten the pickup i had instead of go back to a front sump. You can see how much i cut out here in this pic. I also upgraded to an ICT Billet turbo feed just because i liked the way it looked. And yeah its shooting oil out of the pushrods now
Hope i caught it in time.
#68
01-23-2018, 07:59 AM
Join Date: Aug 2010
Posts: 230
Likes: 0
Received 0 Likes
on
0 Posts
She's been on the back burner for a bit, other then the pickup tube repair, due to the turbo TA i was building for a buddy. But she went home Sunday so its time to get back on this car and get ready for some personal best springtime ETs. And we know these cars are never done right?
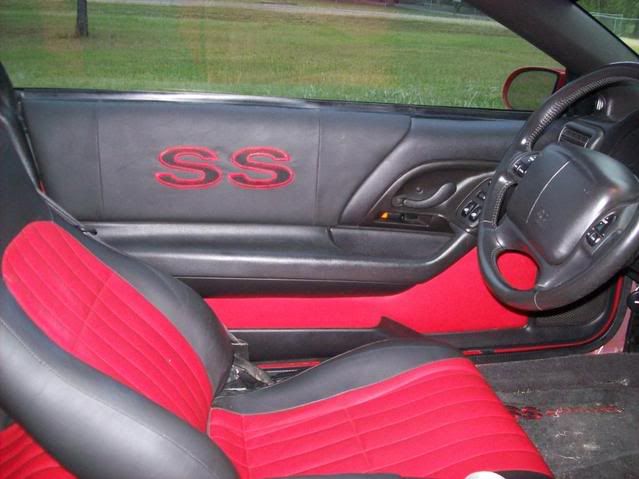
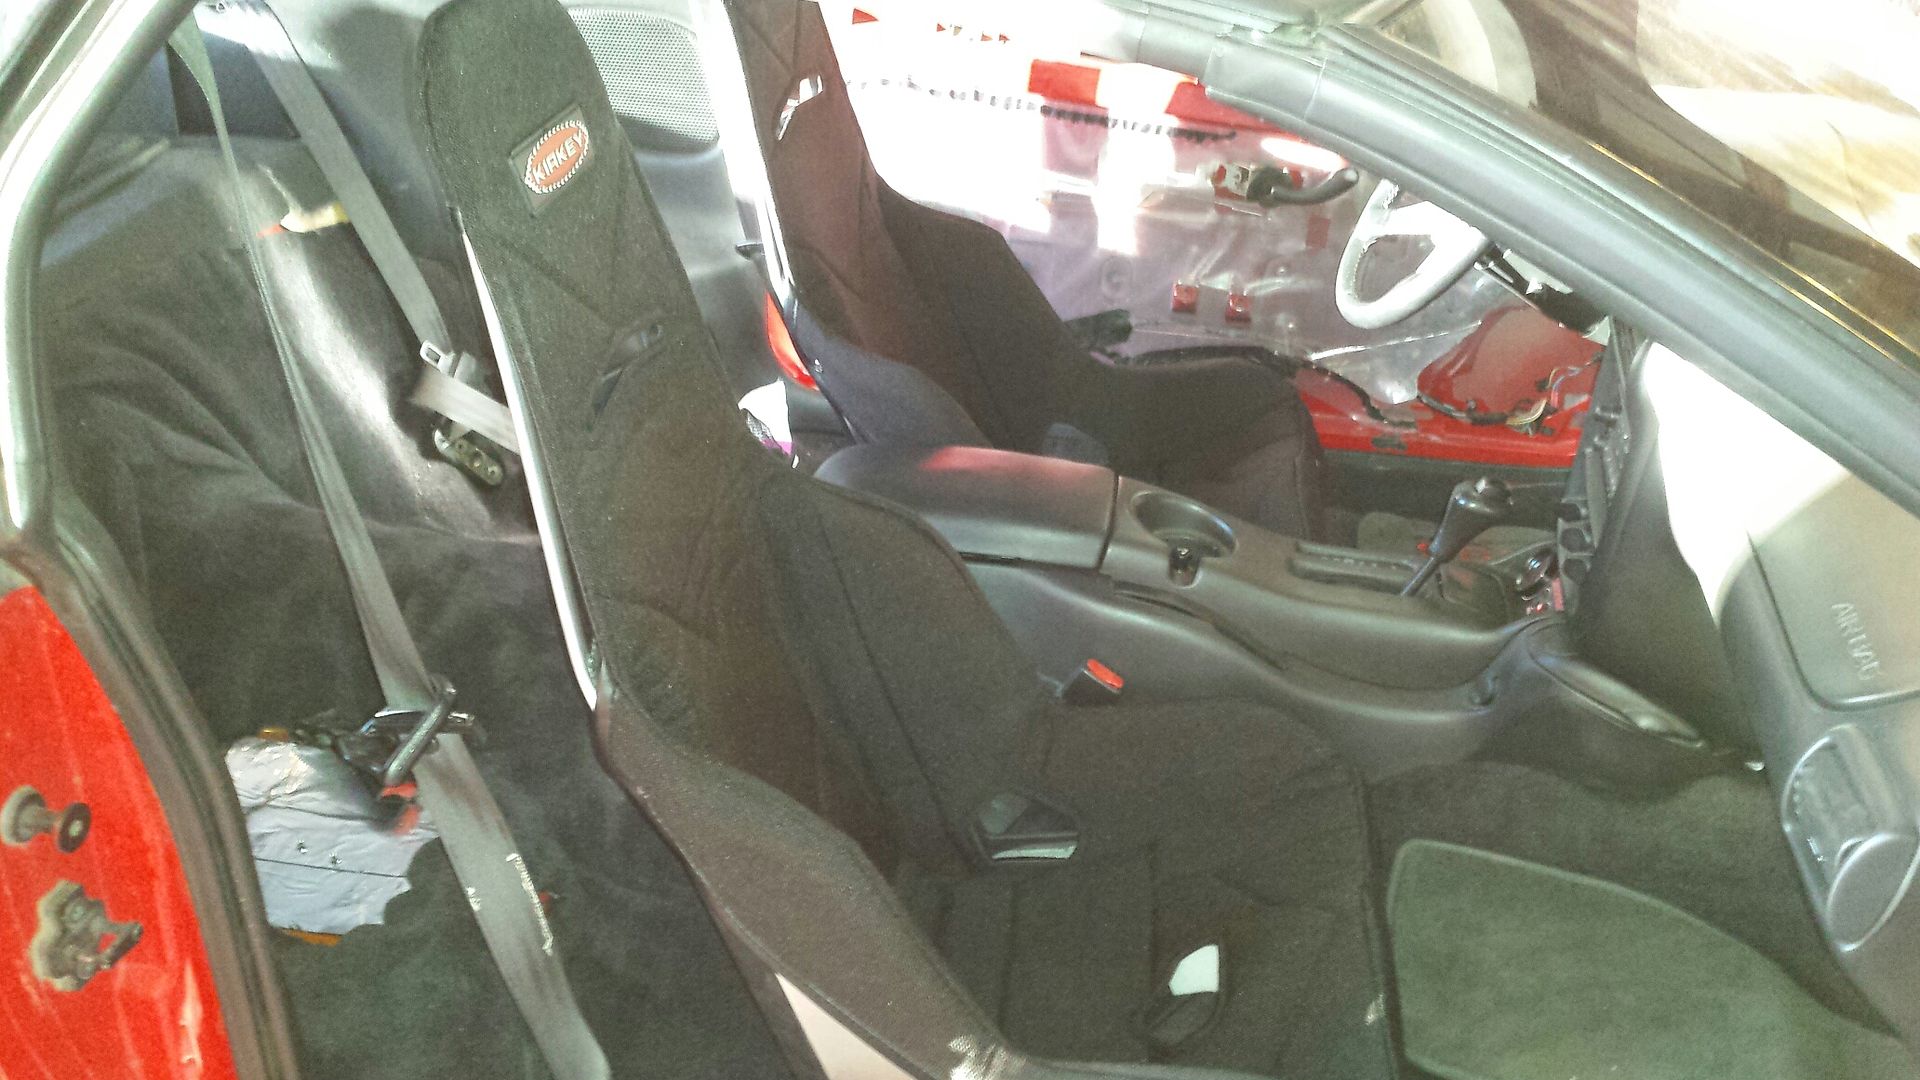
So I had a pretty nice interior in the car, sewed it years and years ago. It still looked new bc of how little I drive my car. As luck would have it I just happen to find someone local who was wanting to refresh their interior......so we struck up a deal. It's time to move on and let someone else enjoy it.
Here's what the guy bought, all 4 seats, and both door panels.
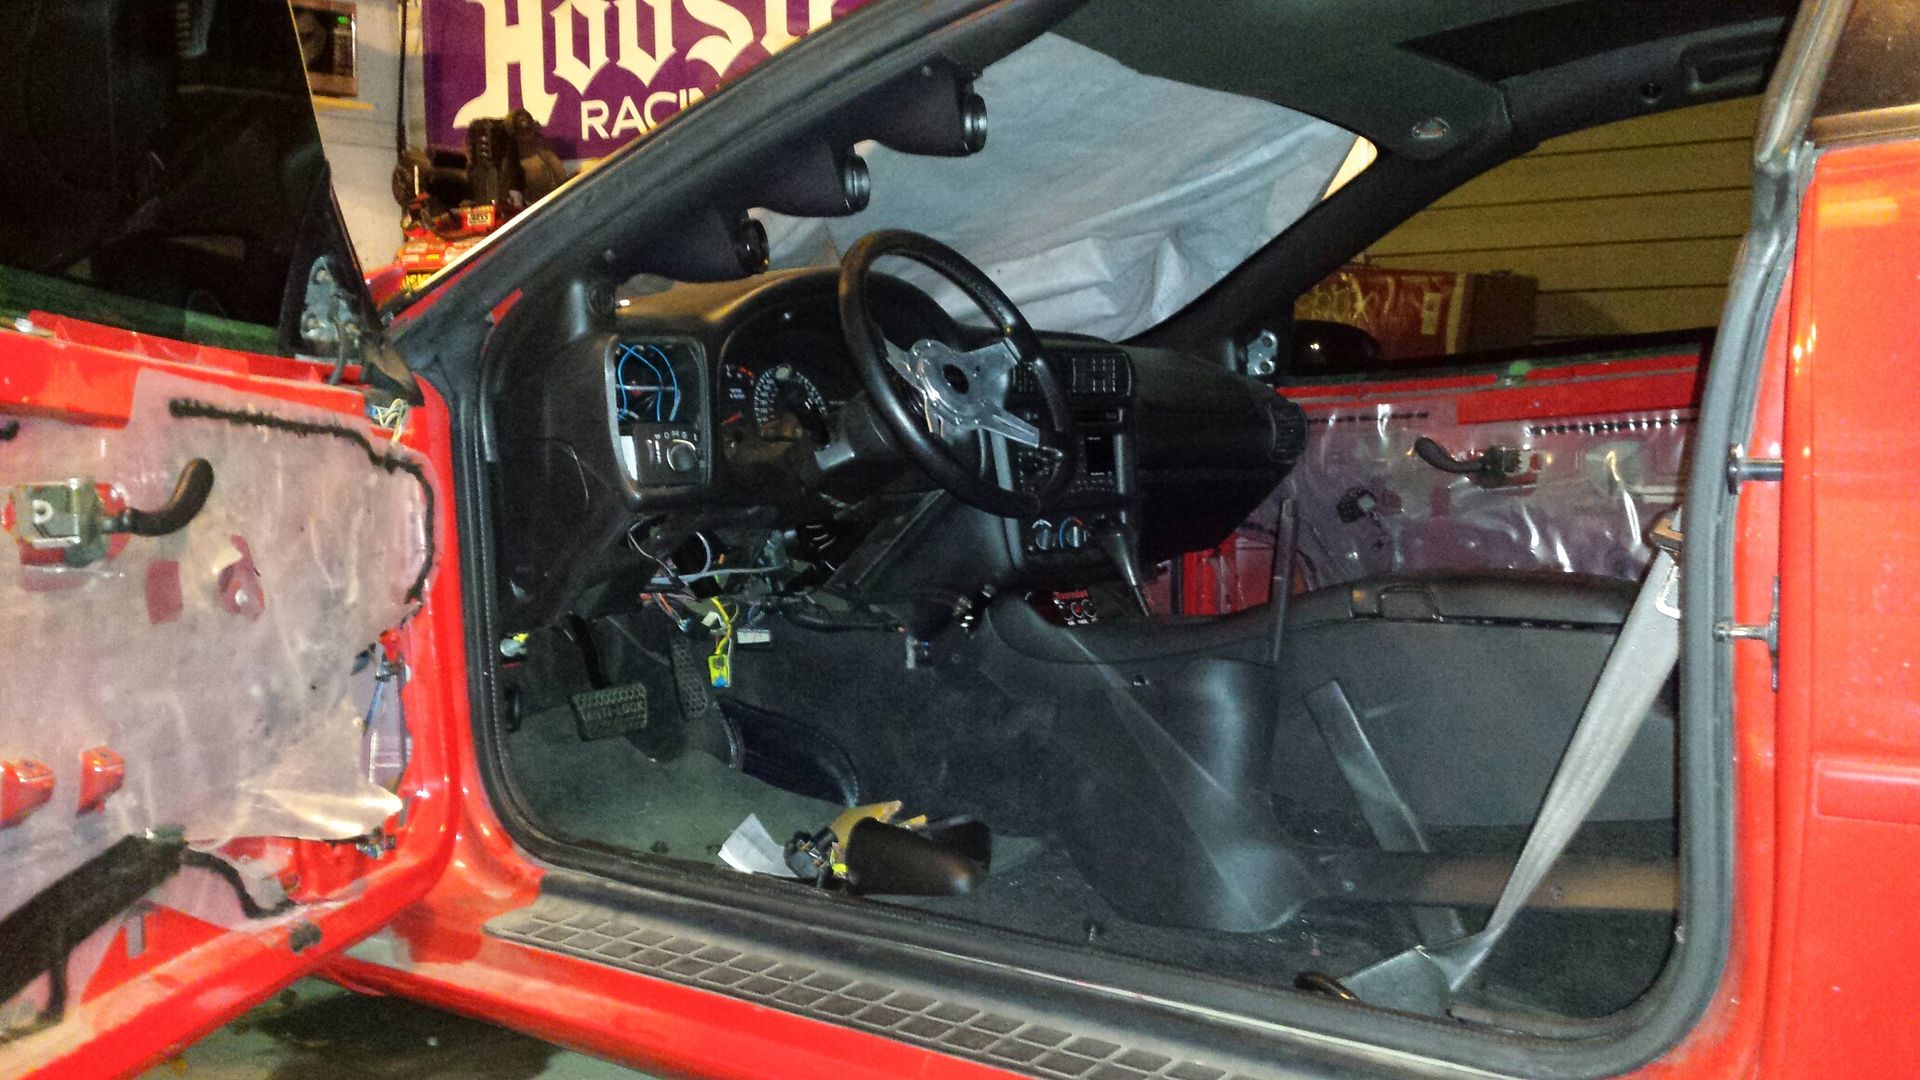
And here's how she sits today.
Not sure if you remember awhile back when i did the lexan windows, and the front and back glass was busted, but when pulling the seats out for the buyer i found this:
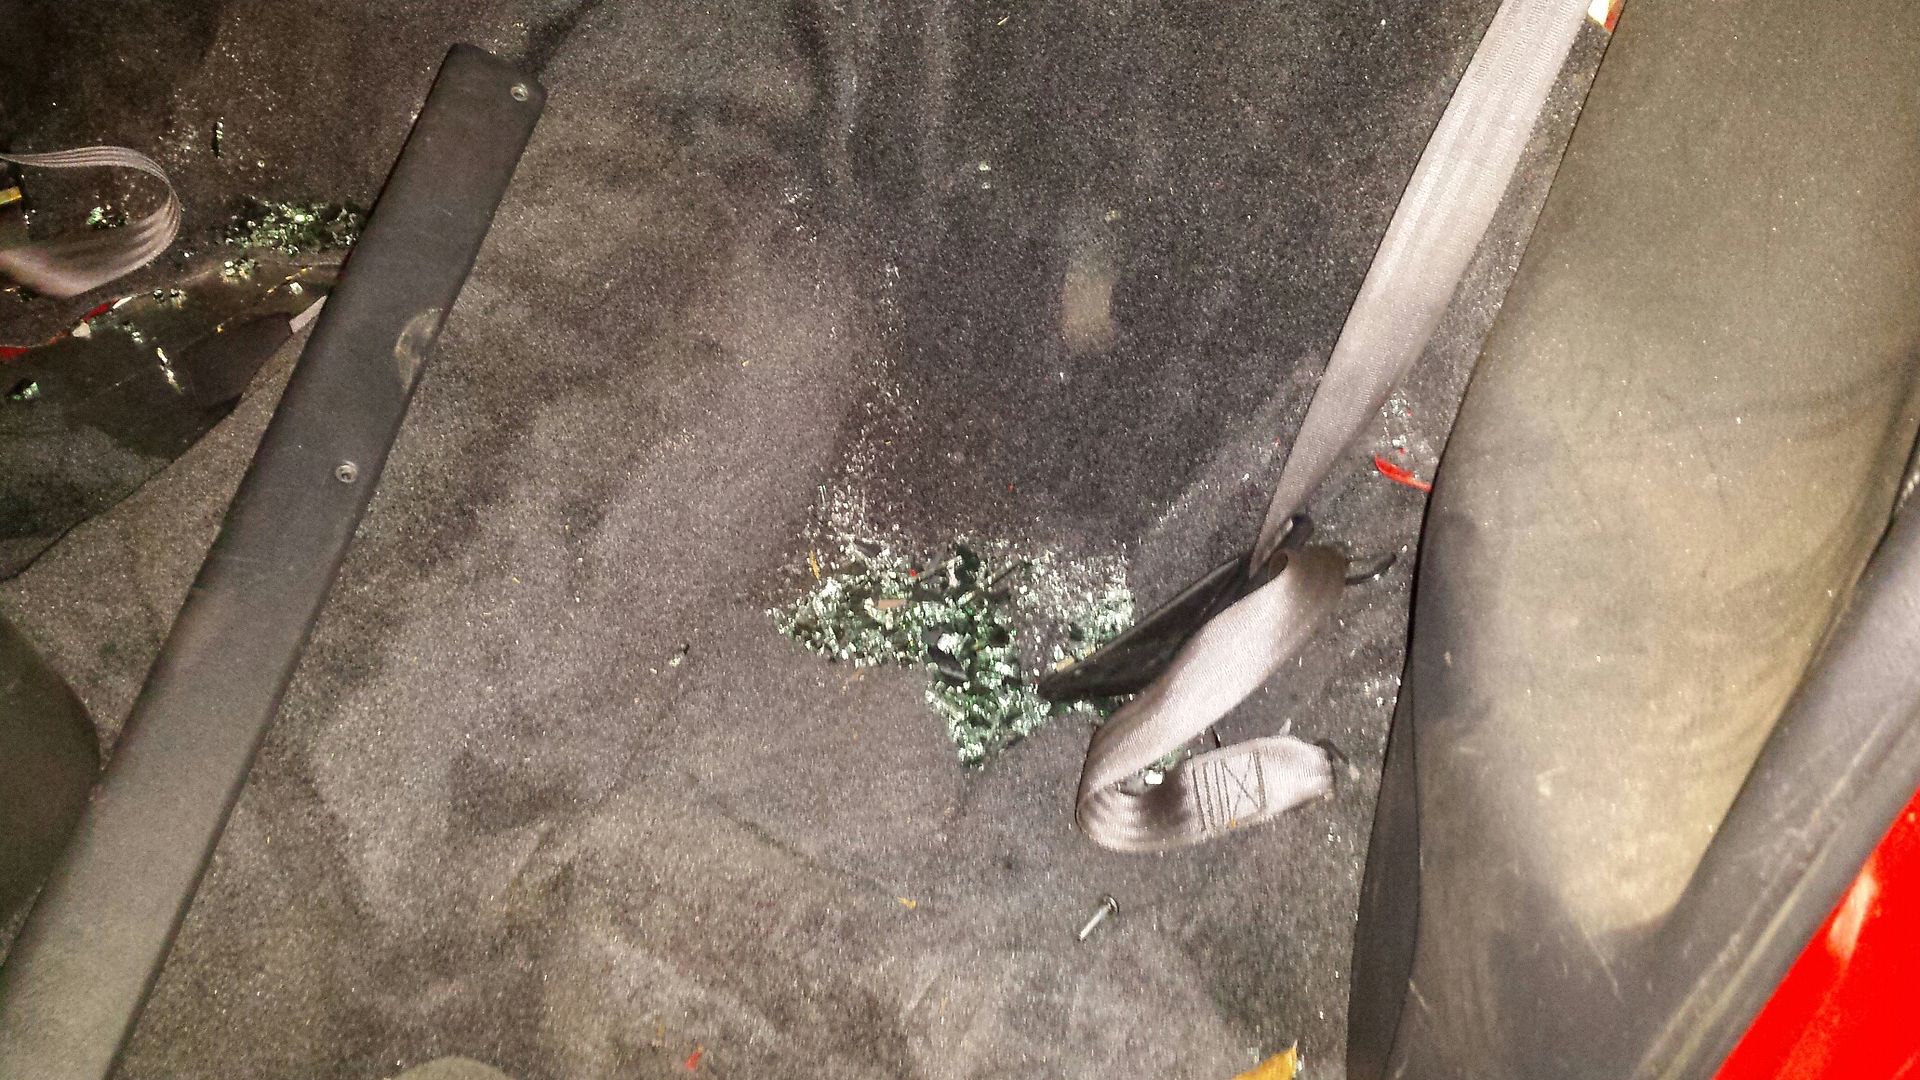
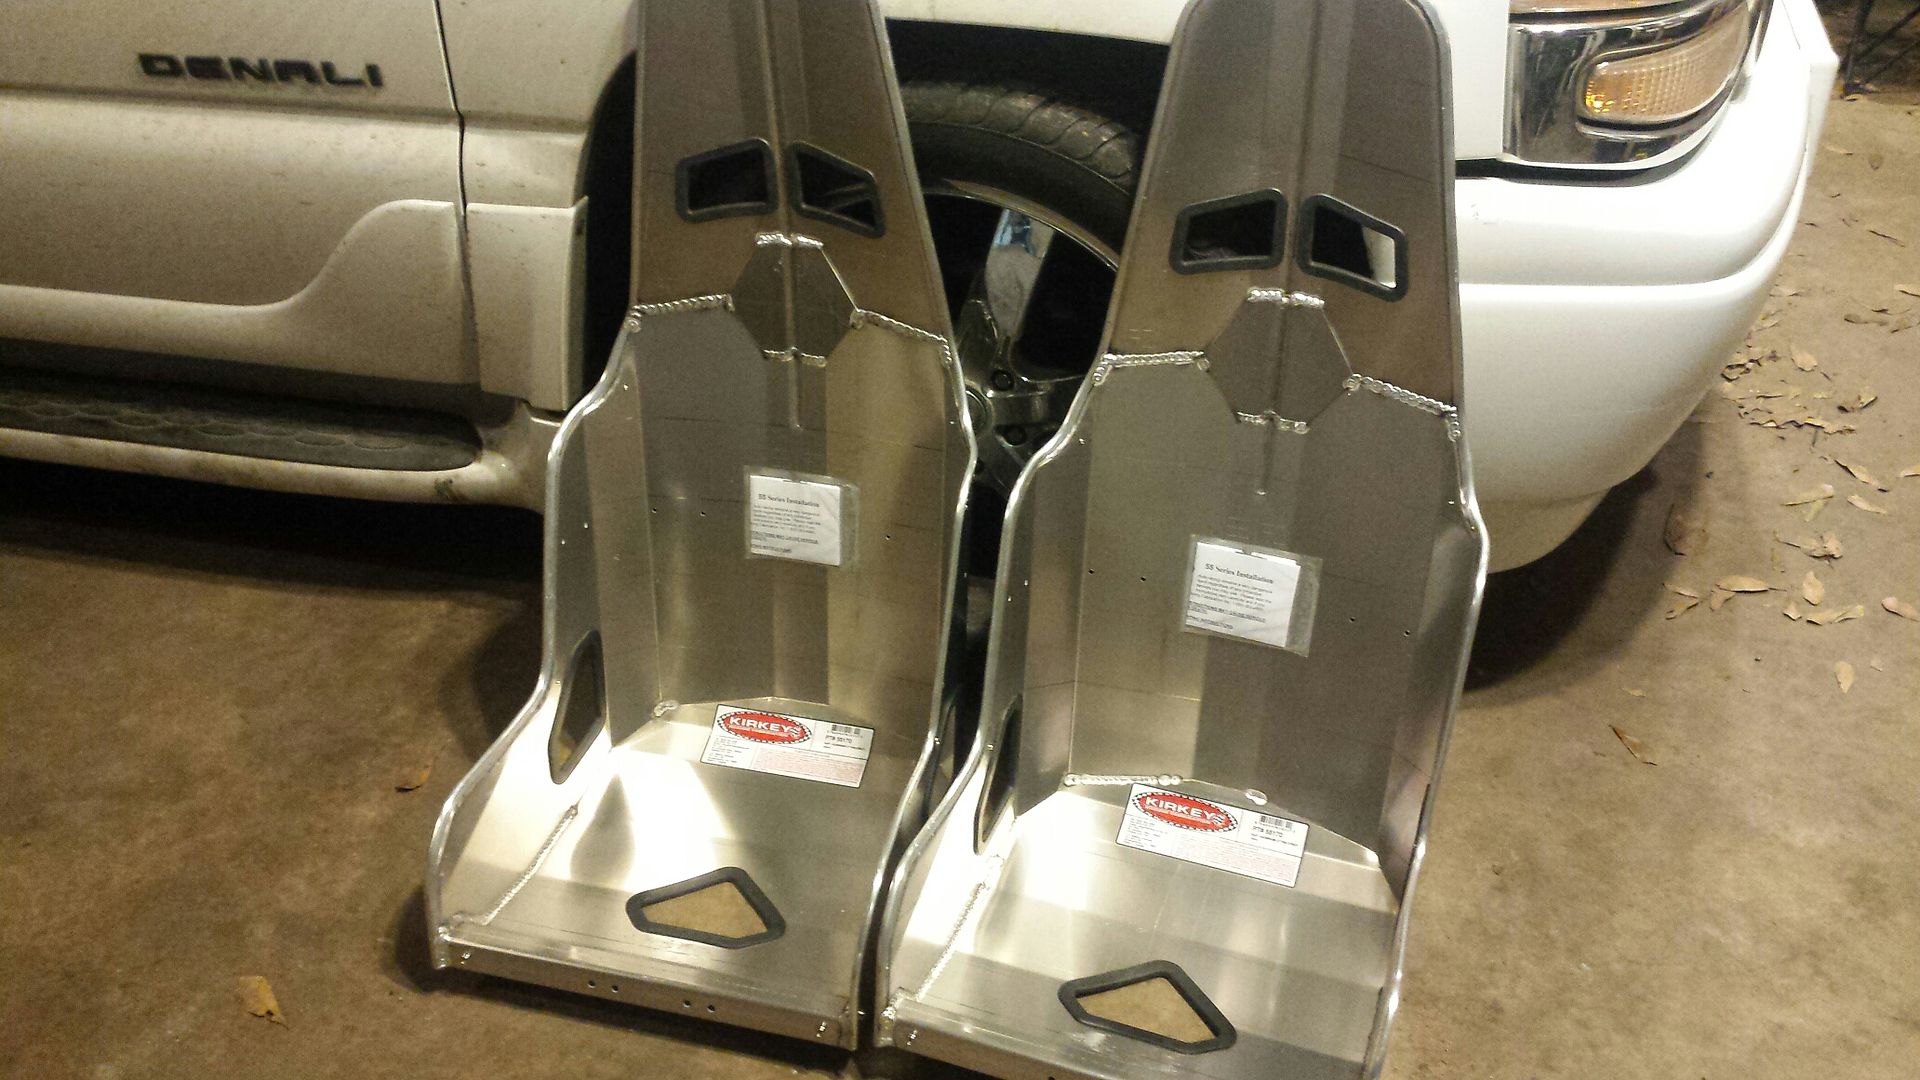
Whoops! Well I've got some clean-up to do. On the agenda: (in no particular order) 17" kirkey prostreet drag x2 with the black tweed covers, Wolfe aluminum door panels wrapped in carbon fiber 3m, a custom back seat delete including cutting holes in the floor and flattening it out, remove the passenger door bar which i never got around to doing, may replace that window motor also since its been in my tool box for about 4 years (works but its a little slow), ZR1 MAP sensor, and also gonna ditch the stock PS lines and make up new -6AN lines that route completely away from the hotside. Stay tuned, should be a fun little transformation!
So I had a pretty nice interior in the car, sewed it years and years ago. It still looked new bc of how little I drive my car. As luck would have it I just happen to find someone local who was wanting to refresh their interior......so we struck up a deal. It's time to move on and let someone else enjoy it.
Here's what the guy bought, all 4 seats, and both door panels.

And here's how she sits today.

Not sure if you remember awhile back when i did the lexan windows, and the front and back glass was busted, but when pulling the seats out for the buyer i found this:

Whoops! Well I've got some clean-up to do. On the agenda: (in no particular order) 17" kirkey prostreet drag x2 with the black tweed covers, Wolfe aluminum door panels wrapped in carbon fiber 3m, a custom back seat delete including cutting holes in the floor and flattening it out, remove the passenger door bar which i never got around to doing, may replace that window motor also since its been in my tool box for about 4 years (works but its a little slow), ZR1 MAP sensor, and also gonna ditch the stock PS lines and make up new -6AN lines that route completely away from the hotside. Stay tuned, should be a fun little transformation!
#69
01-23-2018, 04:08 PM
I'm sure I still have glass I can't see in my truck. I locked my keys in my truck and knew right away that I screwed up. I broke out the passenger side window and had to cover it with a plastic bag or something, I can't remember what. I had to hit the glass pretty hard to break it. It takes almost no effort with a glass breaker which of course no one had.
#70
01-27-2018, 08:01 AM
Join Date: Aug 2010
Posts: 230
Likes: 0
Received 0 Likes
on
0 Posts
Summit dropped off a surprise.
Spent the morning making some simple brackets out of 1.5" wide flatbar. Though the seats are very stable, I think I going to add a backbrace to them temporarily until there is a cage to support the backrests.
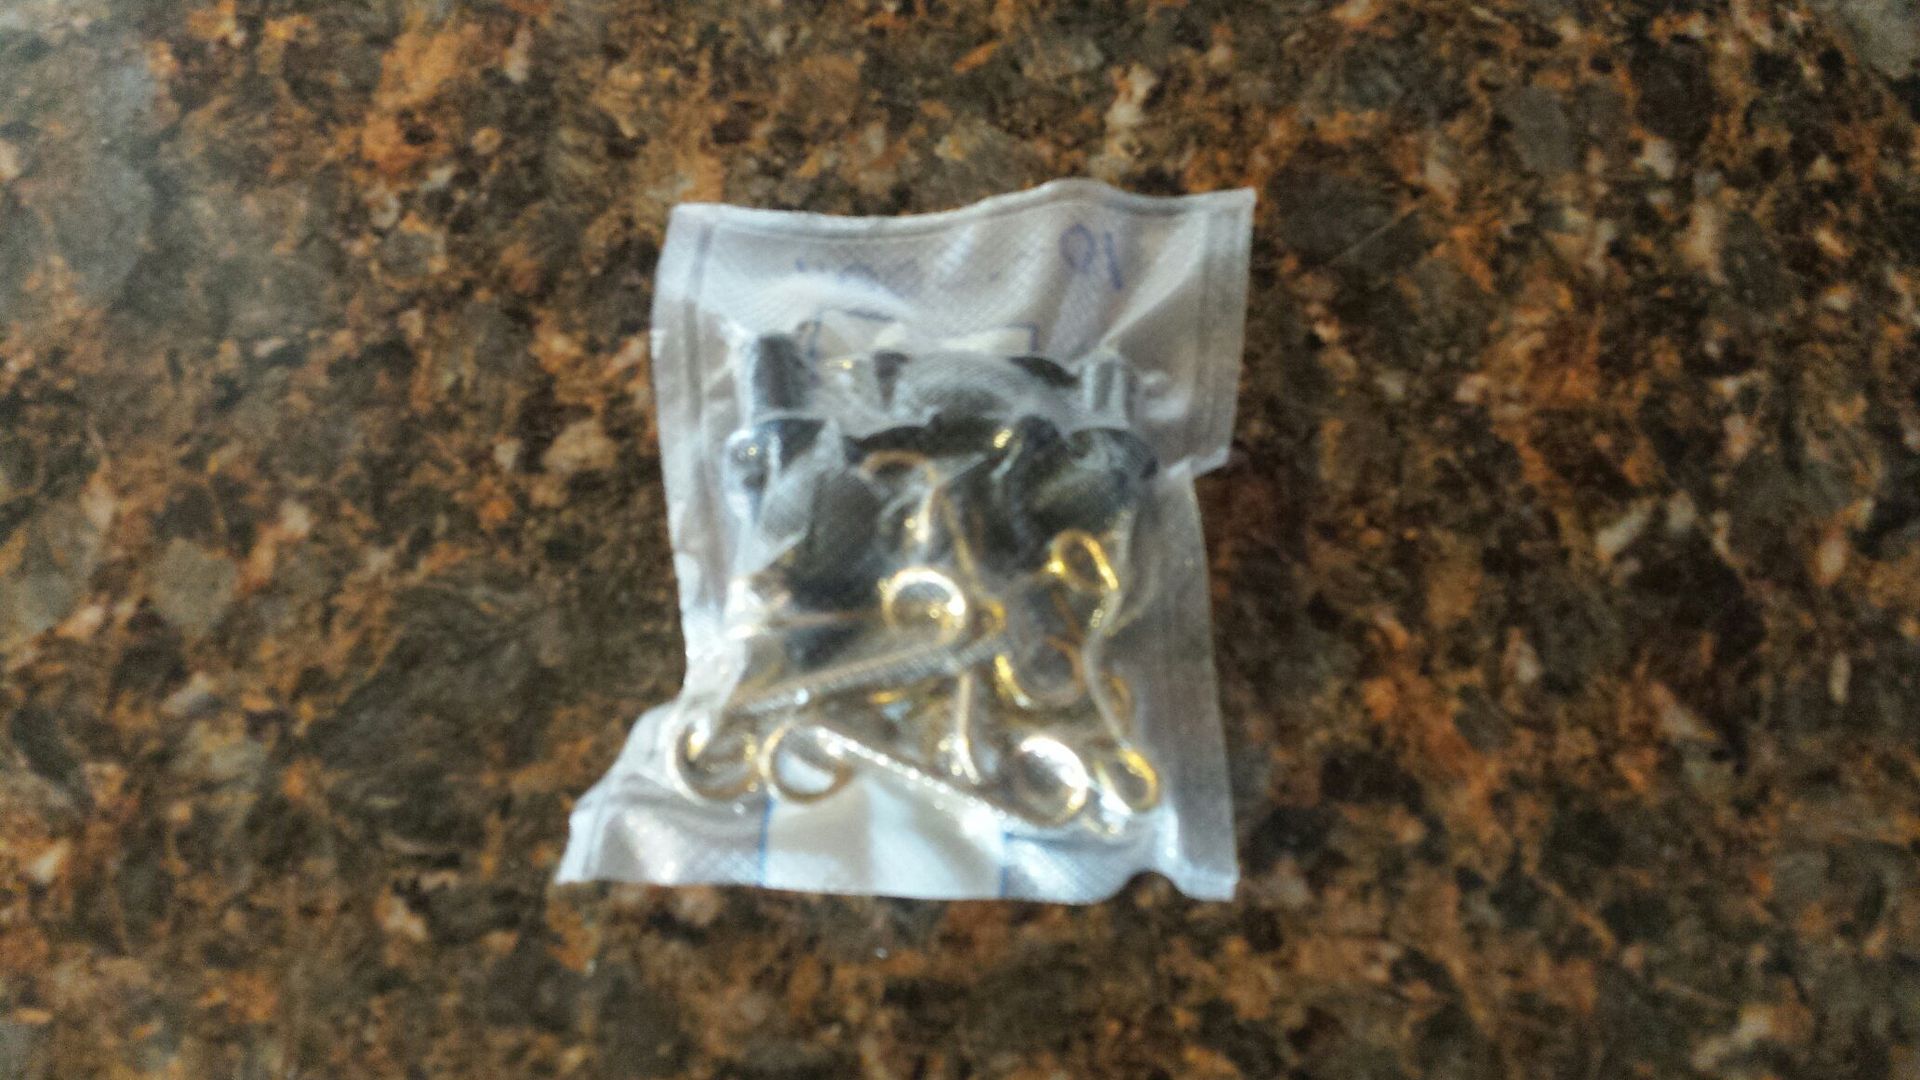
After an hour of cussing i got the passenger door bar out. Weighs 8 lbs. Here's the dzus fasteners Im gonna use to hold the new door panels on.
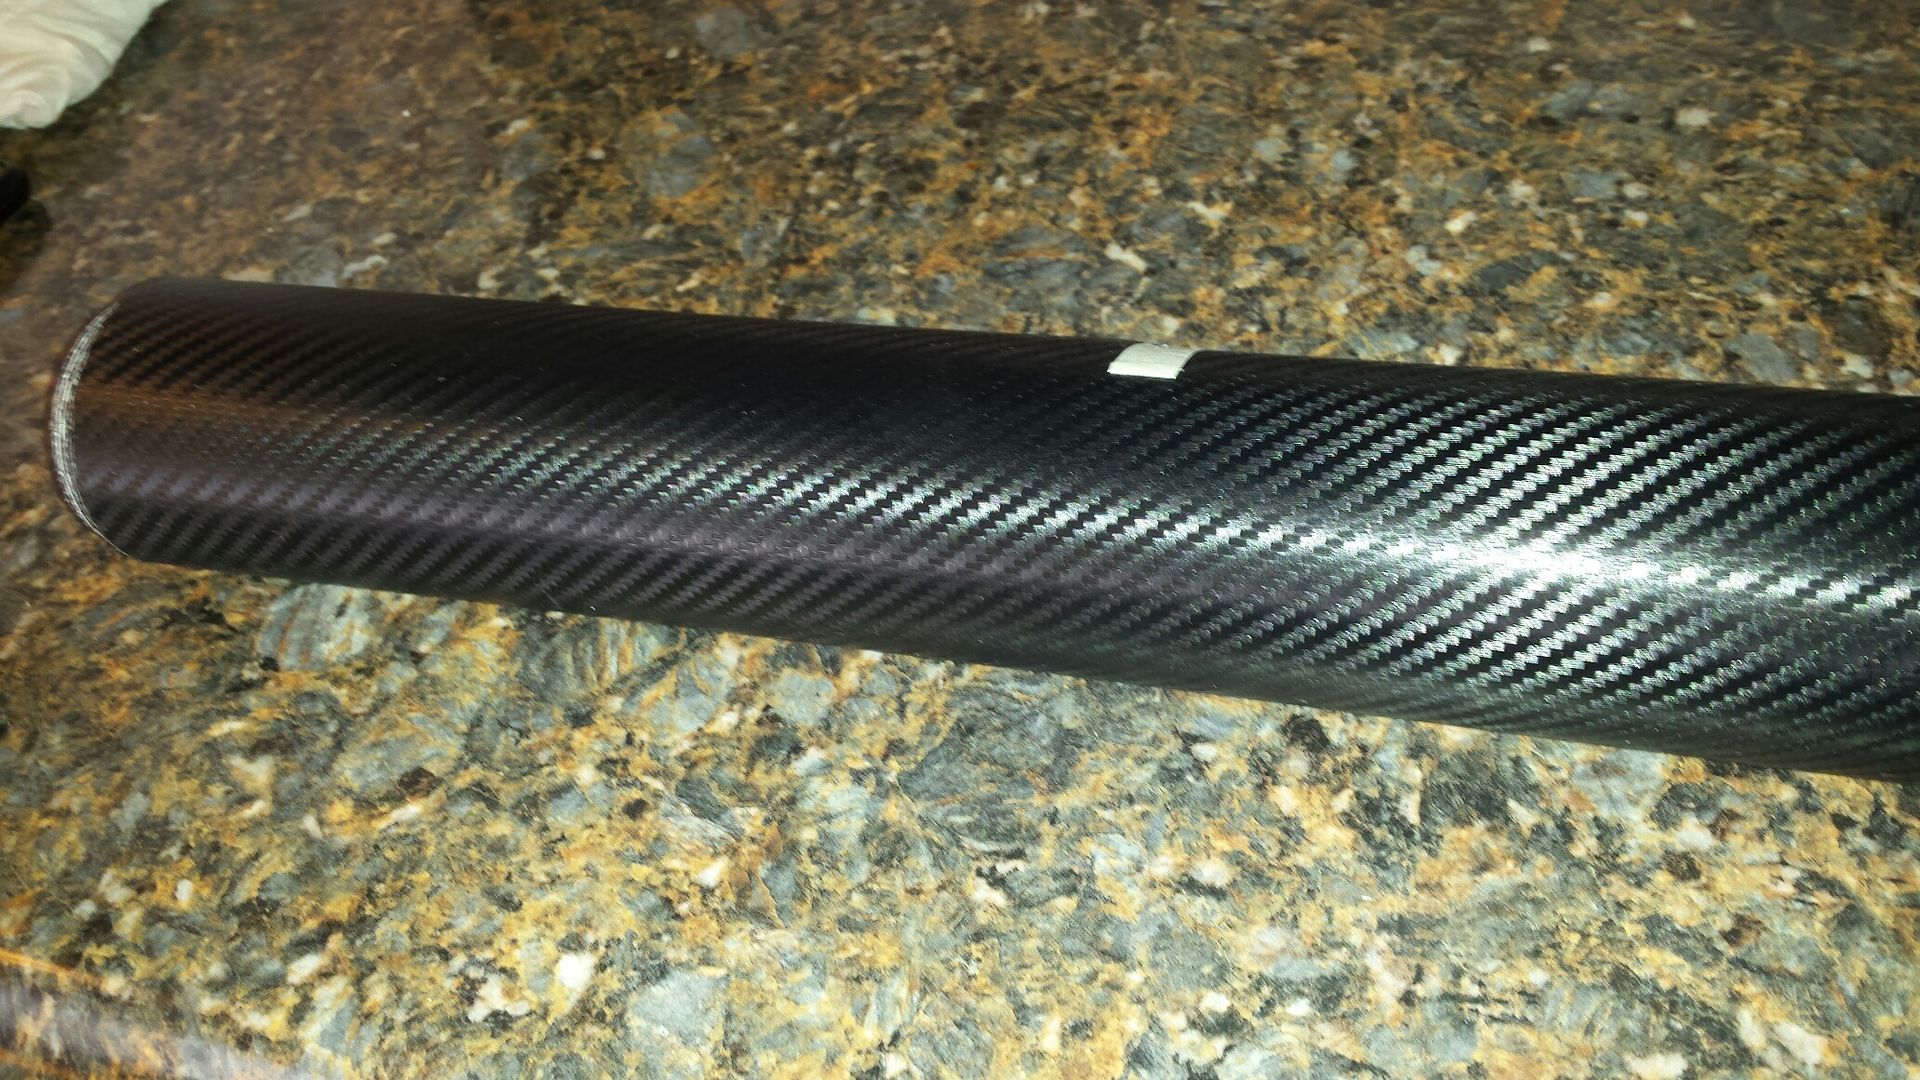
What i will wrap the door panels with....
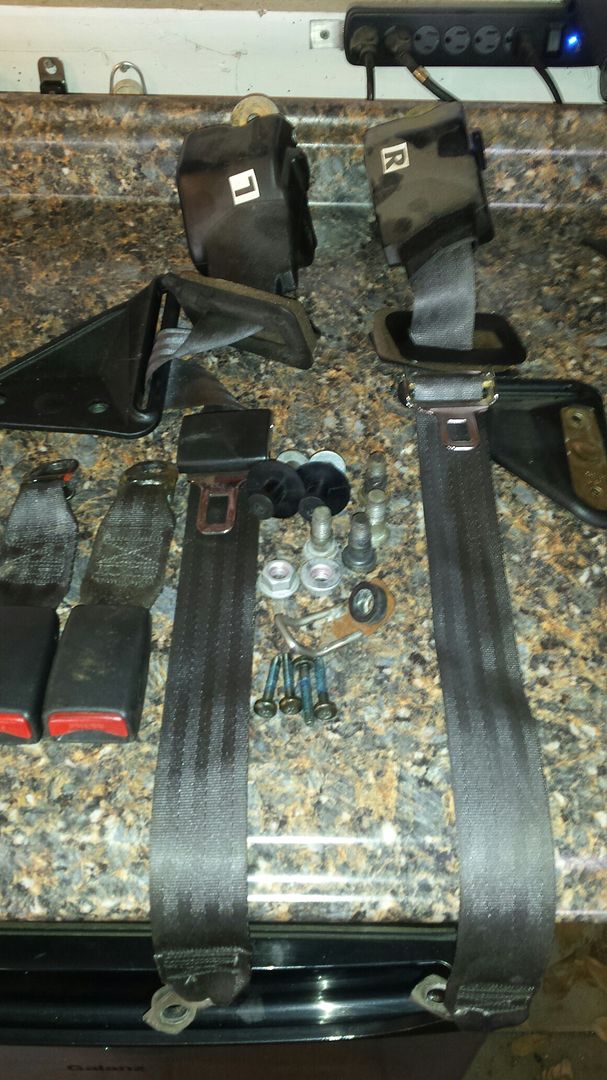
Rear seatbelts and the little bit of stock carpet in the hatch was 18 lb per my shitty bathroom scale.
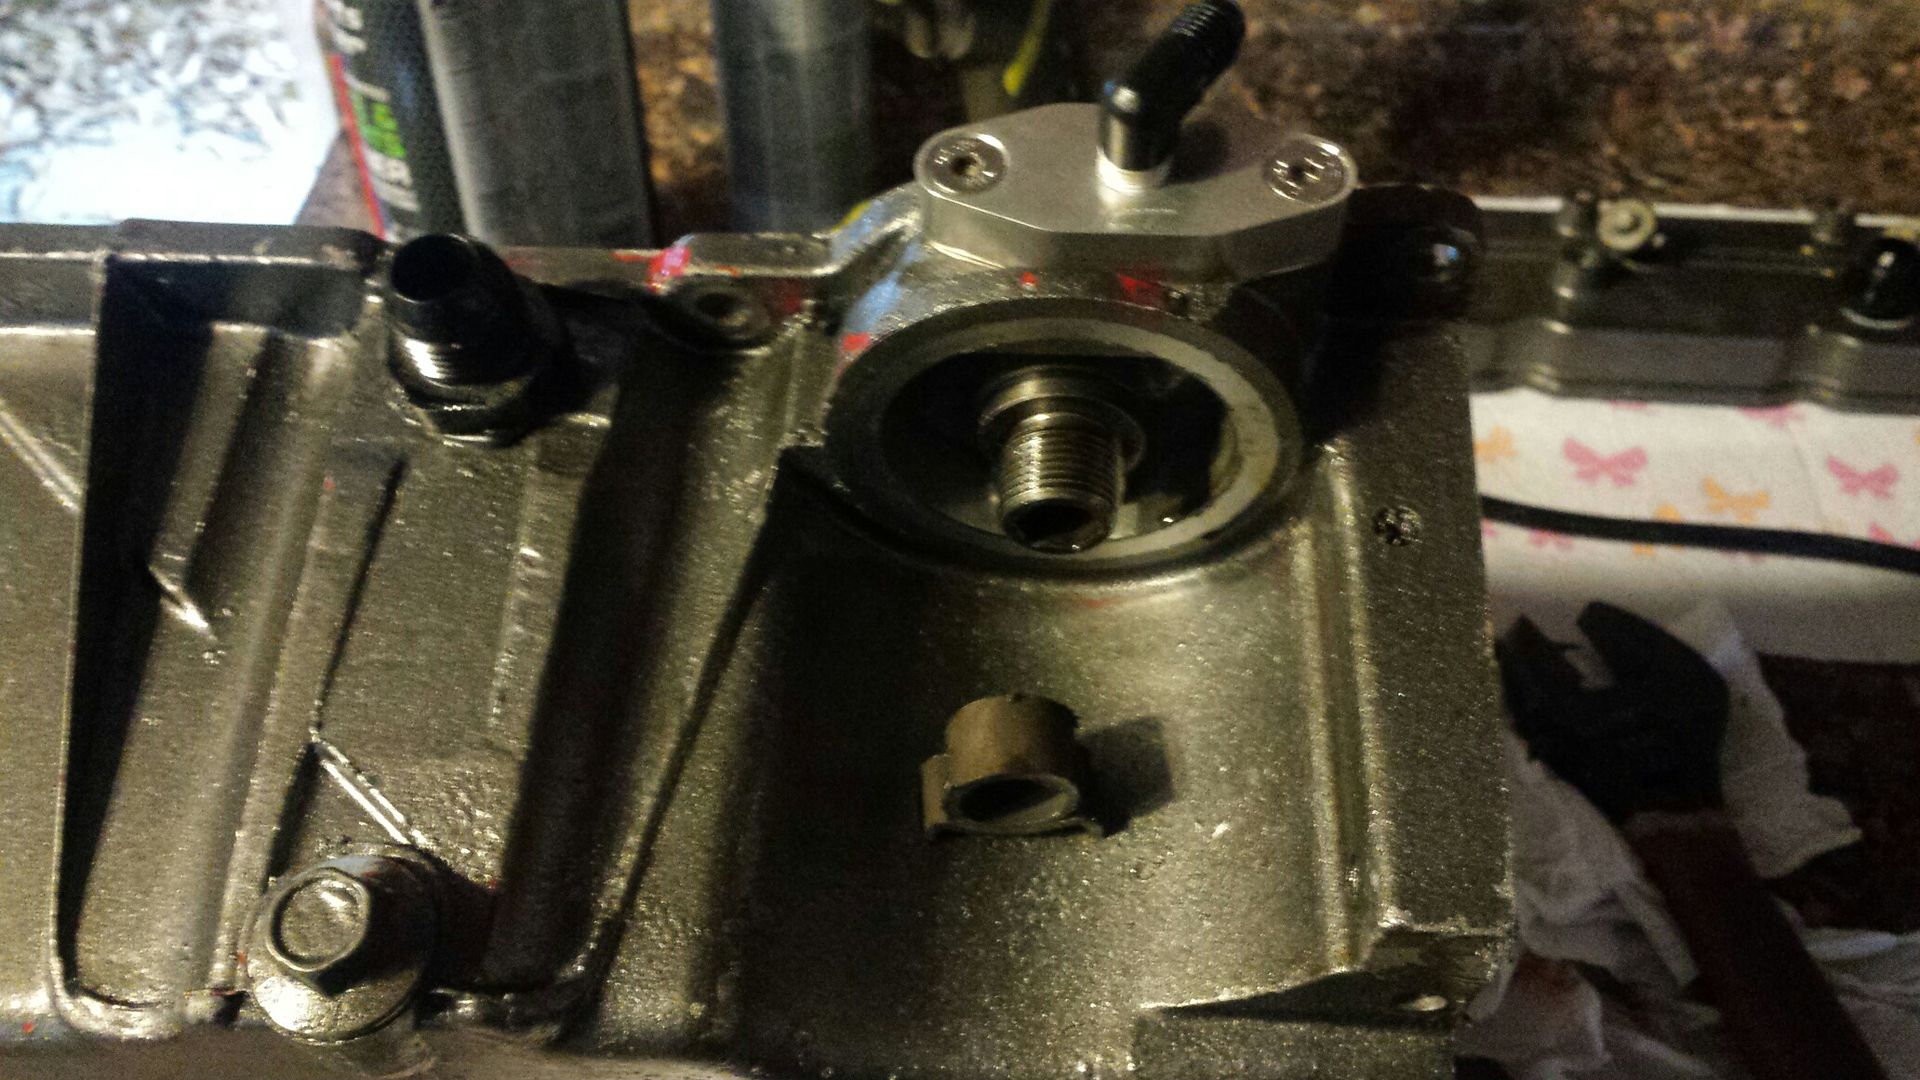
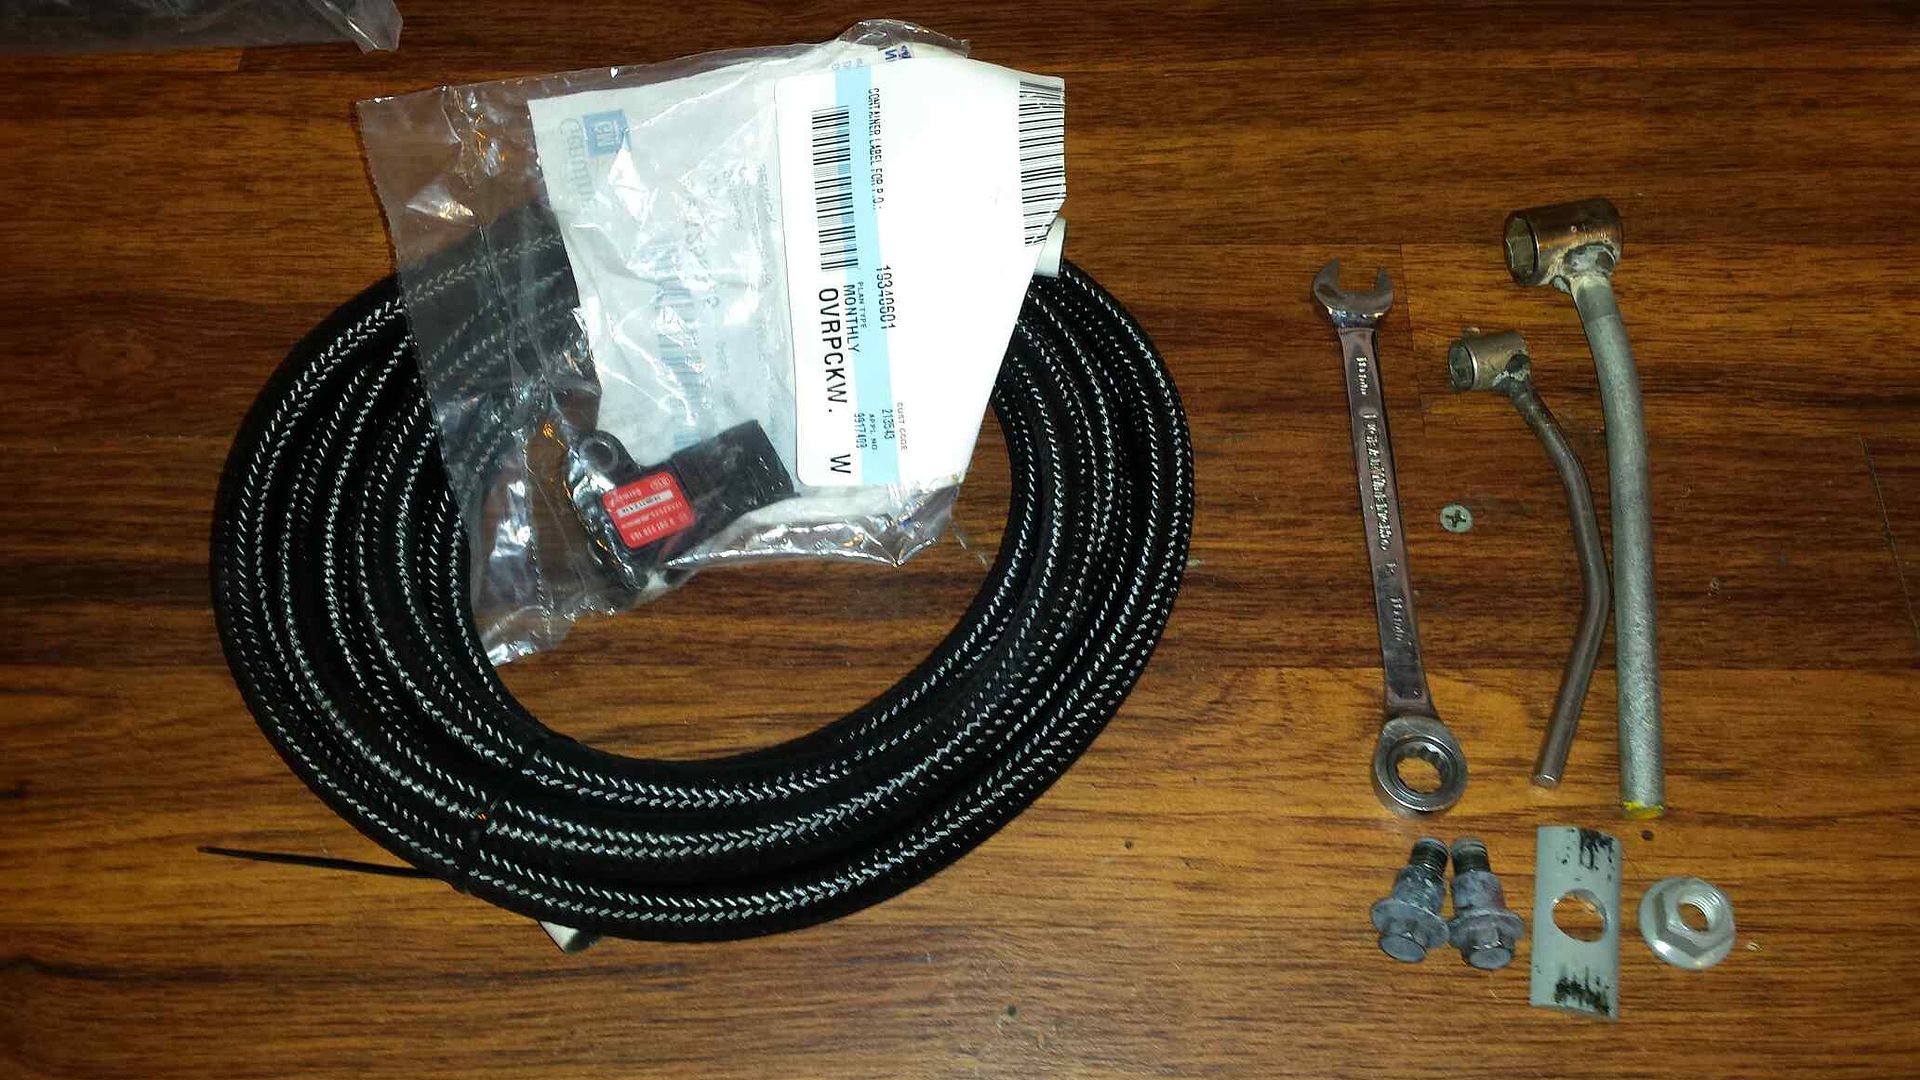
The tools I used to get the door bars out, the new -6 line that will be PS hose, and the ZR1 map. You must drill the intake out to 15/32 for it to fit, it is slightly larger.
MAP is installed (waiting on the harness adapter), there is no panels or carpet in the car from the backseat back. Took the seats back out so i can work in the rear. Going to modify the floor and start cutting off brackets I dont need.

Spent the morning making some simple brackets out of 1.5" wide flatbar. Though the seats are very stable, I think I going to add a backbrace to them temporarily until there is a cage to support the backrests.

After an hour of cussing i got the passenger door bar out. Weighs 8 lbs. Here's the dzus fasteners Im gonna use to hold the new door panels on.

What i will wrap the door panels with....

Rear seatbelts and the little bit of stock carpet in the hatch was 18 lb per my shitty bathroom scale.

The tools I used to get the door bars out, the new -6 line that will be PS hose, and the ZR1 map. You must drill the intake out to 15/32 for it to fit, it is slightly larger.

MAP is installed (waiting on the harness adapter), there is no panels or carpet in the car from the backseat back. Took the seats back out so i can work in the rear. Going to modify the floor and start cutting off brackets I dont need.