My rotopax gas pack mountin to the front rack
#1
 06-04-2009, 03:24 PM

Join Date: Nov 2008
Location: eden valley mn
Posts: 1,232
Likes: 0
Received 0 Likes
on
0 Posts
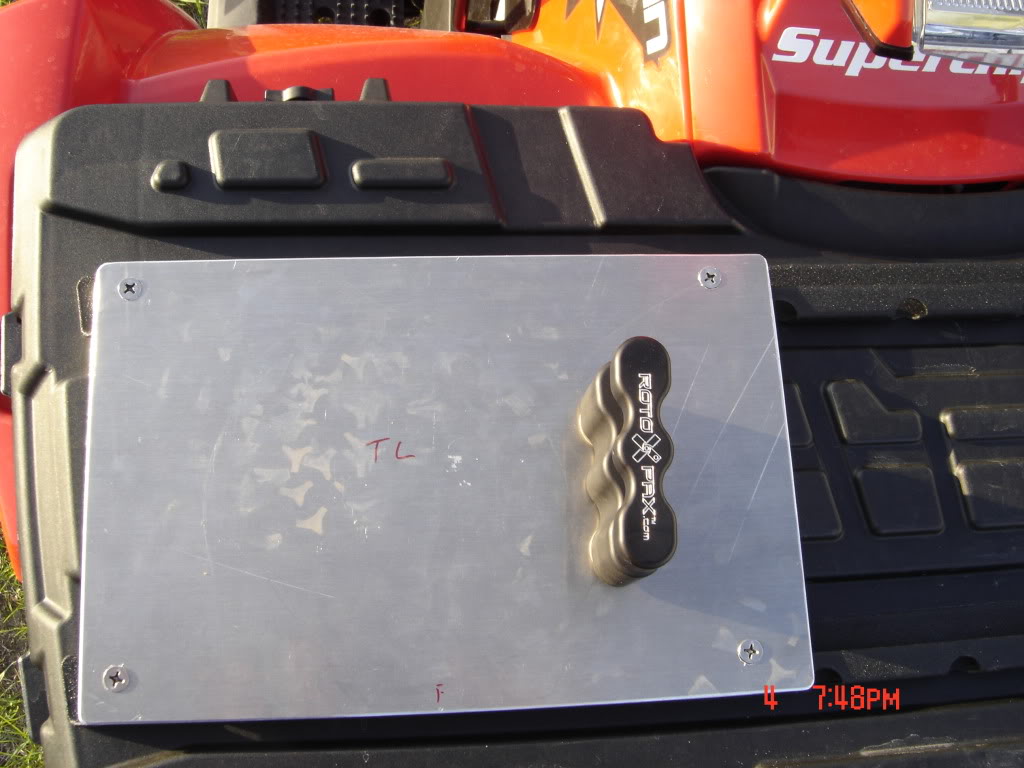
i ordered my rotopax gas packs on sat night along with the alum mounts. i got them today. vary nice i may add. im gona mount them to the front rack. my idea is a bit differnt. but pretty much the same idea. i whent and got 2 sheets of alum today. costed $7.50ea.... i got a great deal on them i may add.
but now that i look at the pic. i wonder if i can get by with one alum piece. guess im gona have to check today.
anyways. i dont like to drill any more hole than is already in there. i prefer to use oem holes. this way if i want to change my mind. there wont be holes in spots i dont want them to be. plus it wont leak.
im gona get 8 stainless steel bolts to replace the oem screws holding the black rails on the rack and use the oem hols to mount the alum to the rack. i will also use spacers to hold the alum off the rack to prevent wear on the plactic. im also gona remove the bases on the rotopax mounts so i can mount them right to the alum. this way it will be a nice clean look. and i wont have a bolt head on one side and a nut on the other.
i do wish the packes were 2 1/2 gal so it adds up to 5gal or 3gal ea to add up to 6gal. but quess the 500 arent as big of a pig on gas as the bigger atvs.
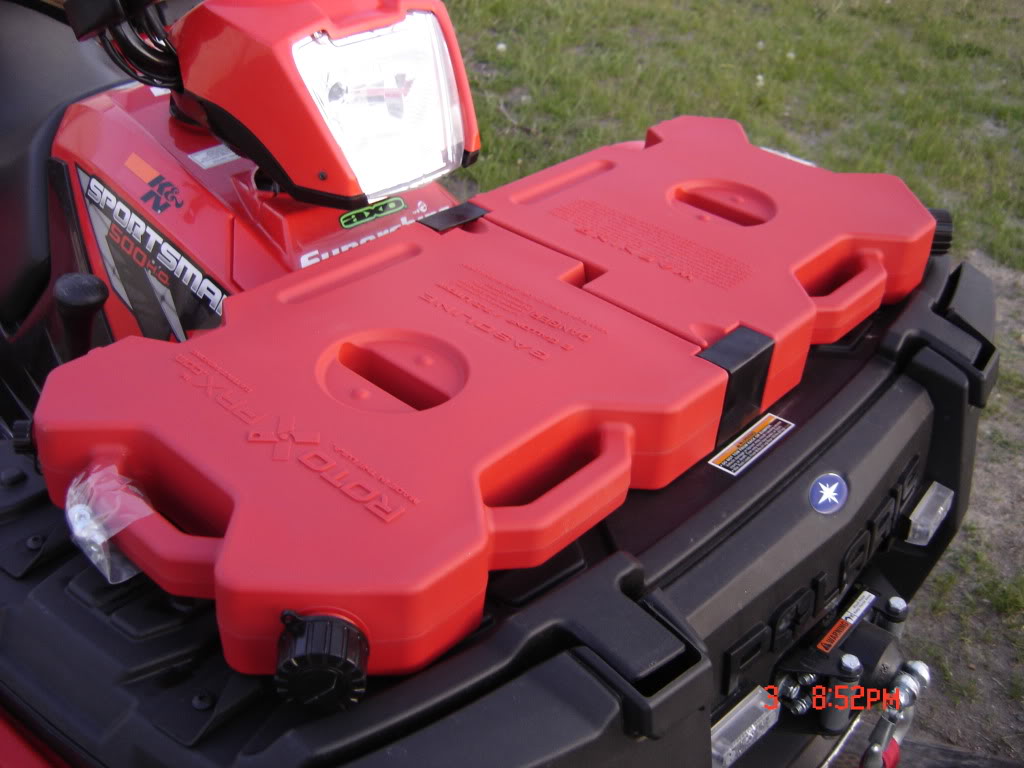
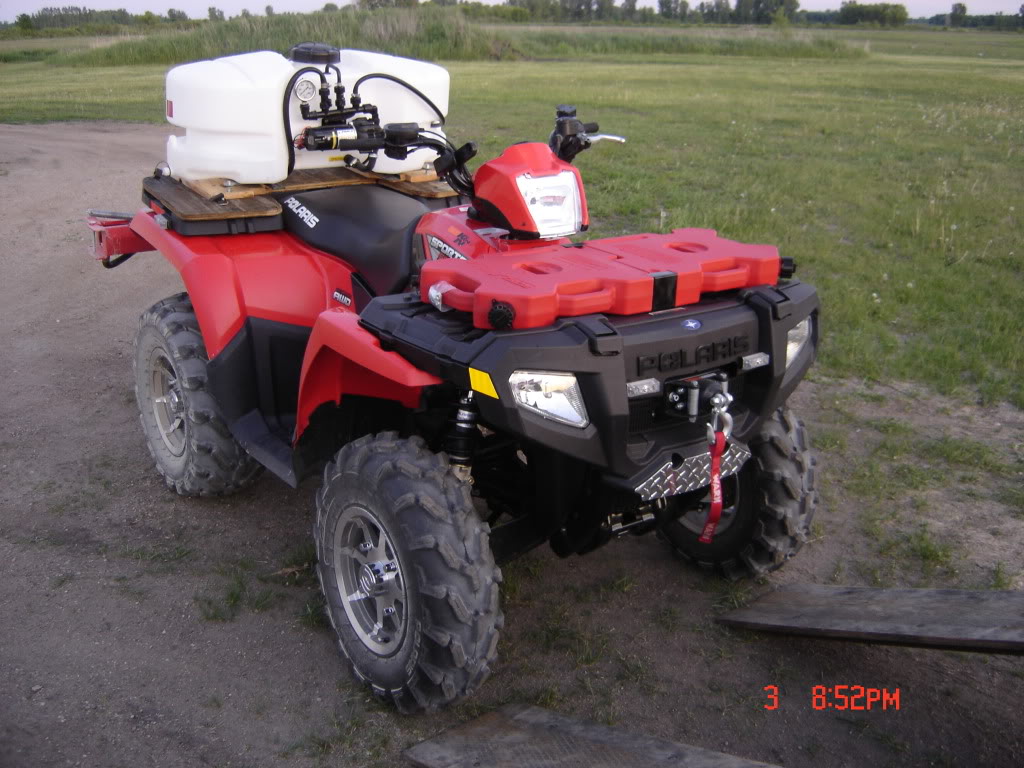
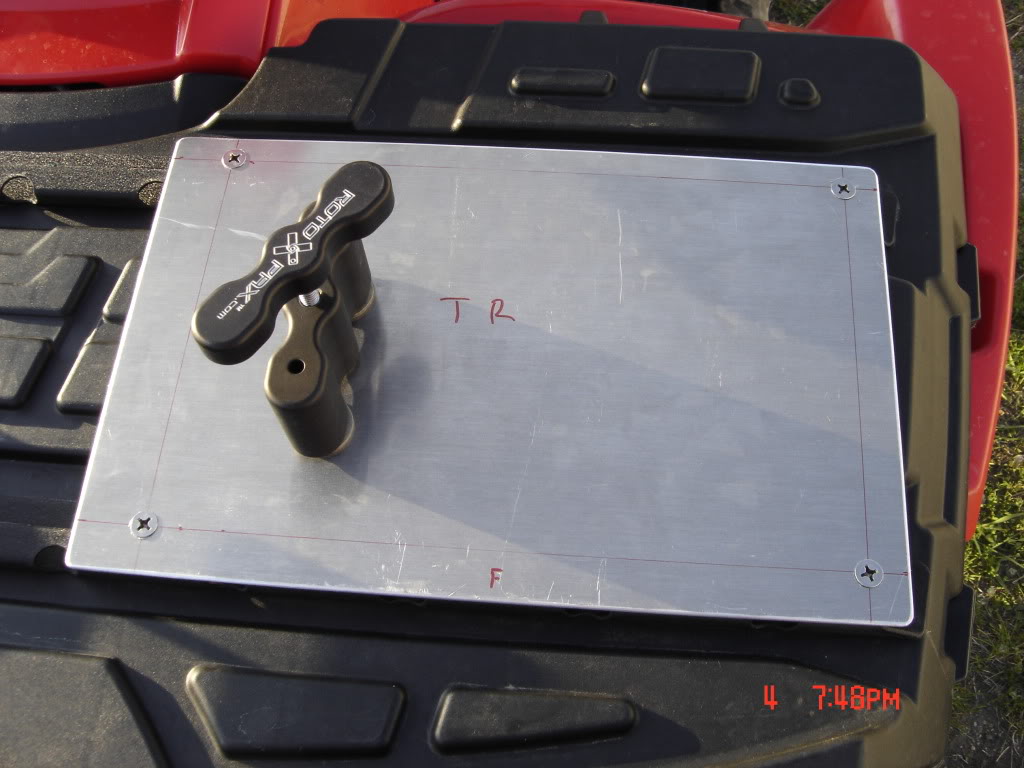
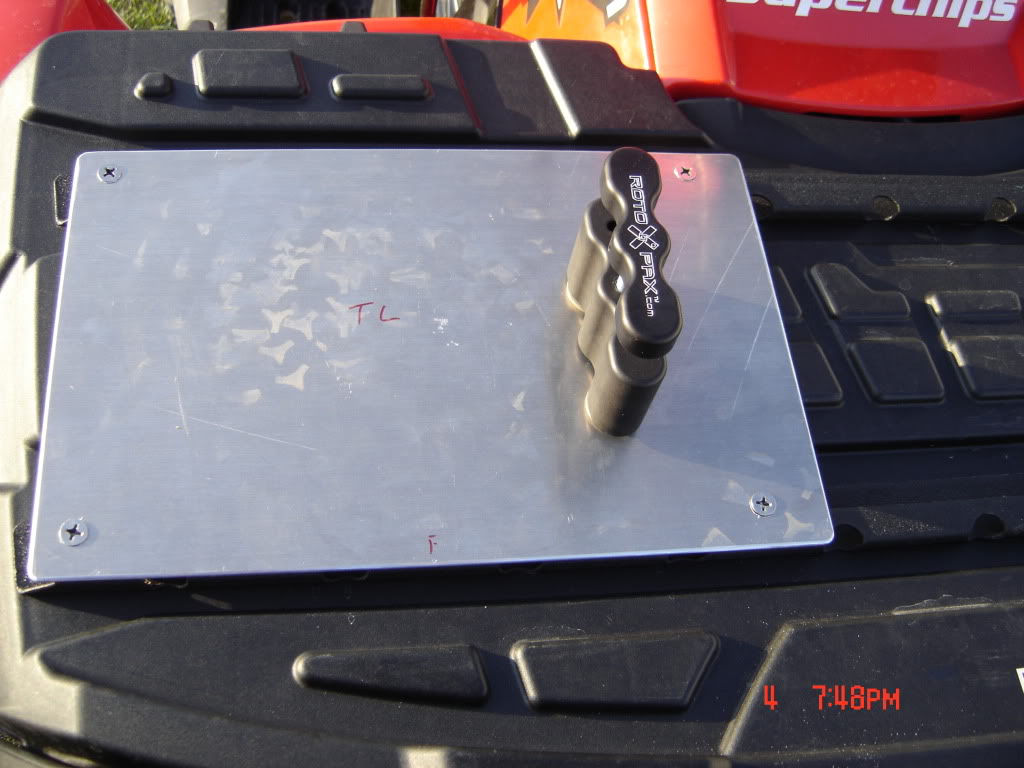
heres a look at it just sitting on the rack. lookes better than a regular 5gal gas can.

but now that i look at the pic. i wonder if i can get by with one alum piece. guess im gona have to check today.
anyways. i dont like to drill any more hole than is already in there. i prefer to use oem holes. this way if i want to change my mind. there wont be holes in spots i dont want them to be. plus it wont leak.
im gona get 8 stainless steel bolts to replace the oem screws holding the black rails on the rack and use the oem hols to mount the alum to the rack. i will also use spacers to hold the alum off the rack to prevent wear on the plactic. im also gona remove the bases on the rotopax mounts so i can mount them right to the alum. this way it will be a nice clean look. and i wont have a bolt head on one side and a nut on the other.
i do wish the packes were 2 1/2 gal so it adds up to 5gal or 3gal ea to add up to 6gal. but quess the 500 arent as big of a pig on gas as the bigger atvs.
heres a look at it just sitting on the rack. lookes better than a regular 5gal gas can.
#2
06-04-2009, 03:26 PM
Join Date: Nov 2008
Location: eden valley mn
Posts: 1,232
Likes: 0
Received 0 Likes
on
0 Posts
#3
06-04-2009, 04:23 PM

The only thing I would change would be the placement of the aluminum plates. I would mount them under the plastic rack, rather than on top. That allows the weight of the packs to be spread across the aluminum plate, and keeps the bolts from tearing through the plastic rack.
Other than that, looks good.
Other than that, looks good.

#7
06-04-2009, 11:36 PM

Trending Topics
#8
06-05-2009, 01:18 AM
Join Date: Nov 2008
Location: eden valley mn
Posts: 1,232
Likes: 0
Received 0 Likes
on
0 Posts
i thought about that. but i was scared that the ribes in the dimond plate would wear indents into the gas packs. and im shure that rotopacks wouldnt warranty it if it stated to leak. i also never checked on price on dimond plate. it would look cool tho. but i whent to 2 differnt place for the alum i got. one was $28 + tax for the 2. i check at a local welding shop. they had just the width i need but had to be cut for lenght. i askef for a price they said $15 for both. no tax. i held back the "great" and said "i supose" lol....
i spent a whole $5 at the local fastnal place. i was exspecing least $10. but i got 8 stainless phillup head flared 1/4" x 1 3/4" long screws to mount the alum to the rack and replace the oem screws. then i got 4 5/8" x 1" long stainless phillup head flared screws to replace the rotopax oem hex bolts. this way the screws sit flush on the under side of the alum so if it is close to the plastic rack it wont wear a hole in it. i also 88 nylon plastic washers to use a spacers they were about $.02ea. since they didnt have spacers. well they did but they were chrome at $2 ea. and ida needed about 16. thats way more than i wanted to pay. and stainless washers costed about $.04 ea
im not worryed about it pulling though. just because im useing the oem holes that hold the steel channel to the rack. and the bolts go though a thicker plastic ribs. i also wanted the gas pack to sit flat and not on the plastic. if i were to do your idea id need 2 more sheets. but im more worryied about the weight of the gas packs brakeing the plastic hinges on the rack. so im either thinking of useing small aircraft cable on each side of the rack, or rachet strap straps. ill use two. and i can cut some off the rachet straps i got since ther way to long anyways. think this is the best idea. and easyier to mount. then ill use one bolt on each side with a fender washer that hold the front storeage box down, and one bolt on each side that hold the steel rails and gas packs down. this way it wont fly open and brake something. like i said i dont want to drill more holes than needed.
pics will be added when photobucket is done loading them.
thanks for the comments guys.
The only thing I would change would be the placement of the aluminum plates. I would mount them under the plastic rack, rather than on top. That allows the weight of the packs to be spread across the aluminum plate, and keeps the bolts from tearing through the plastic rack.
Other than that, looks good.
Other than that, looks good.
pics will be added when photobucket is done loading them.
thanks for the comments guys.
#9
06-05-2009, 03:25 AM
Join Date: Nov 2008
Location: eden valley mn
Posts: 1,232
Likes: 0
Received 0 Likes
on
0 Posts
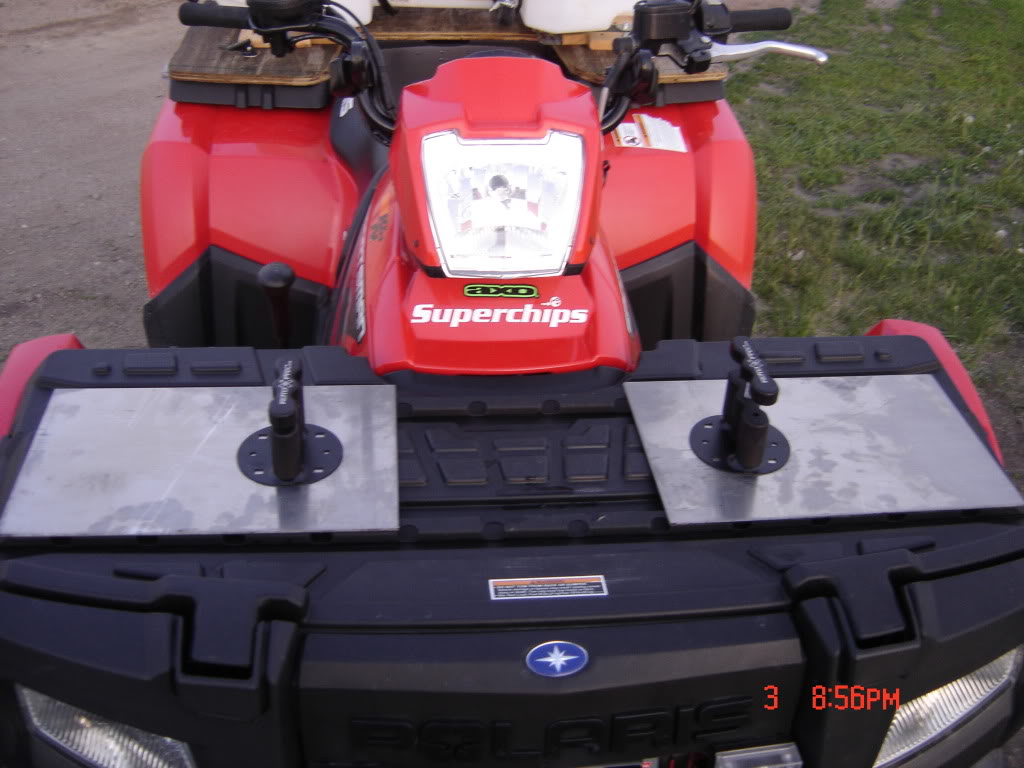
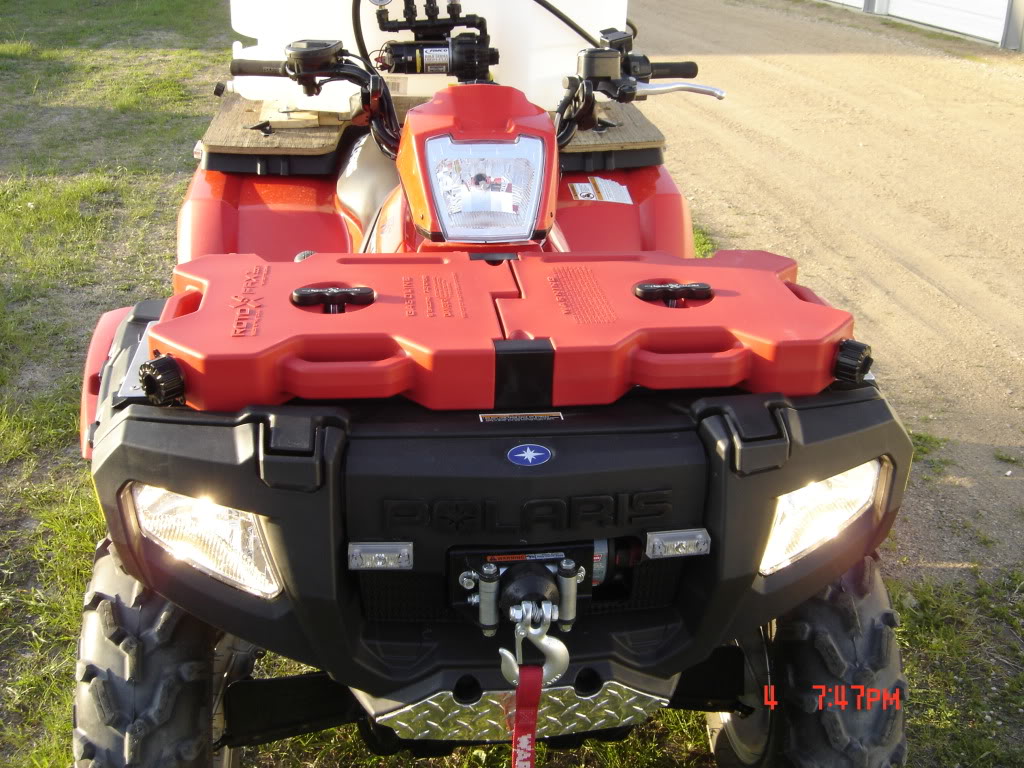
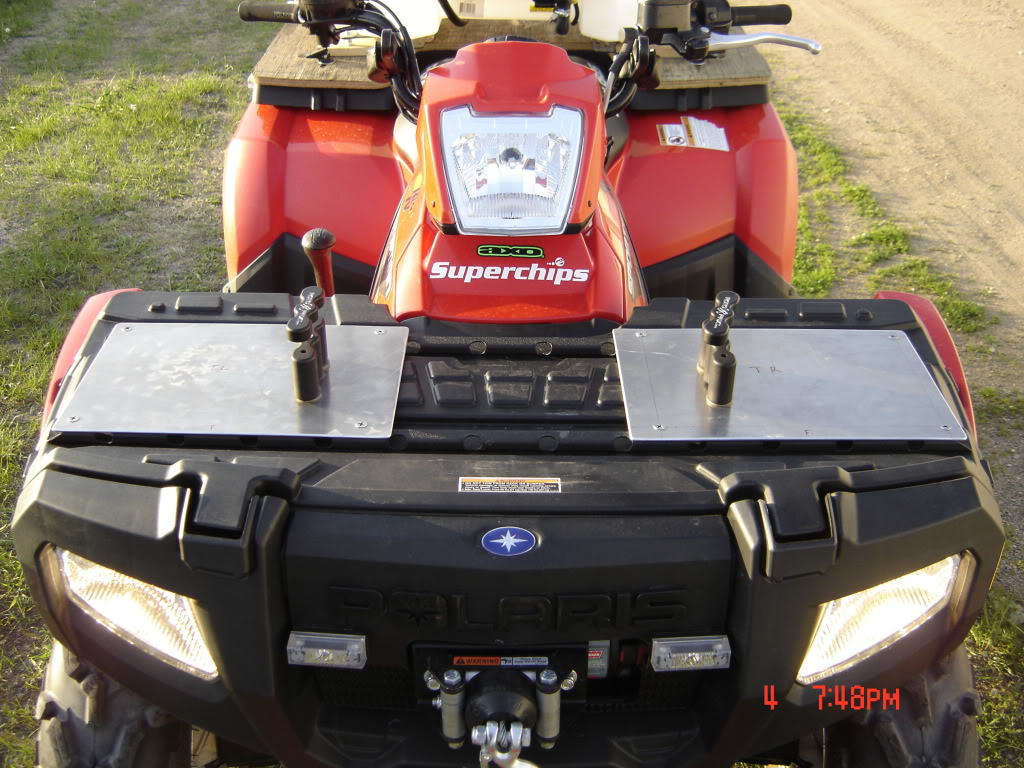
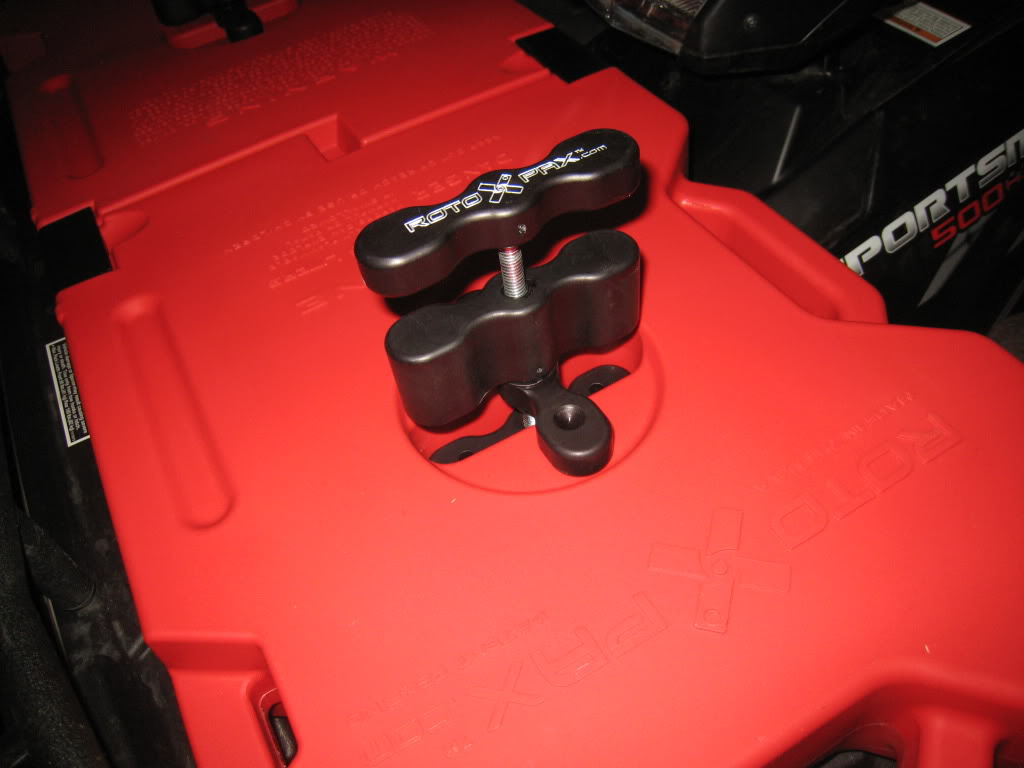
ok here they are mounted...
and the alum and mounts..
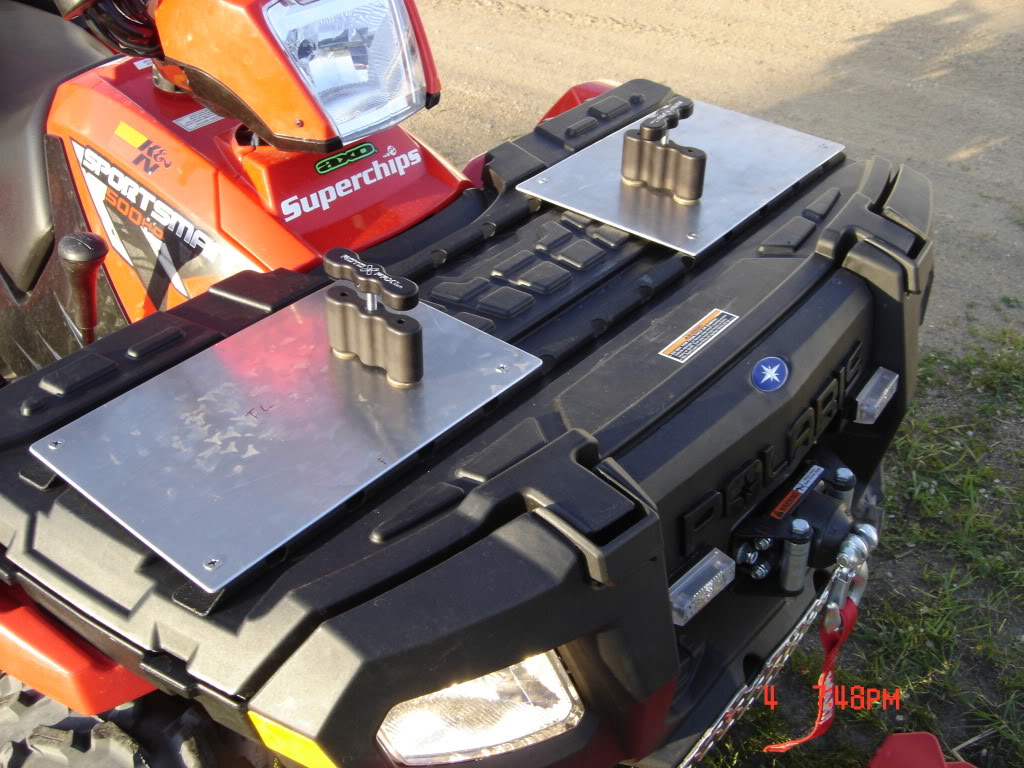
i am also thinking about now getting 4 longer stainless screws and mounting the oem bases back under the stands....... hummmm
i will add pics of the support straps when i get them on in a few days.
i just thought sbout this. soon there wont be much for me to add. ill have to get a new wheeler and start over. lol
and the alum and mounts..
i am also thinking about now getting 4 longer stainless screws and mounting the oem bases back under the stands....... hummmm
i will add pics of the support straps when i get them on in a few days.
i just thought sbout this. soon there wont be much for me to add. ill have to get a new wheeler and start over. lol
#10
06-05-2009, 03:45 AM
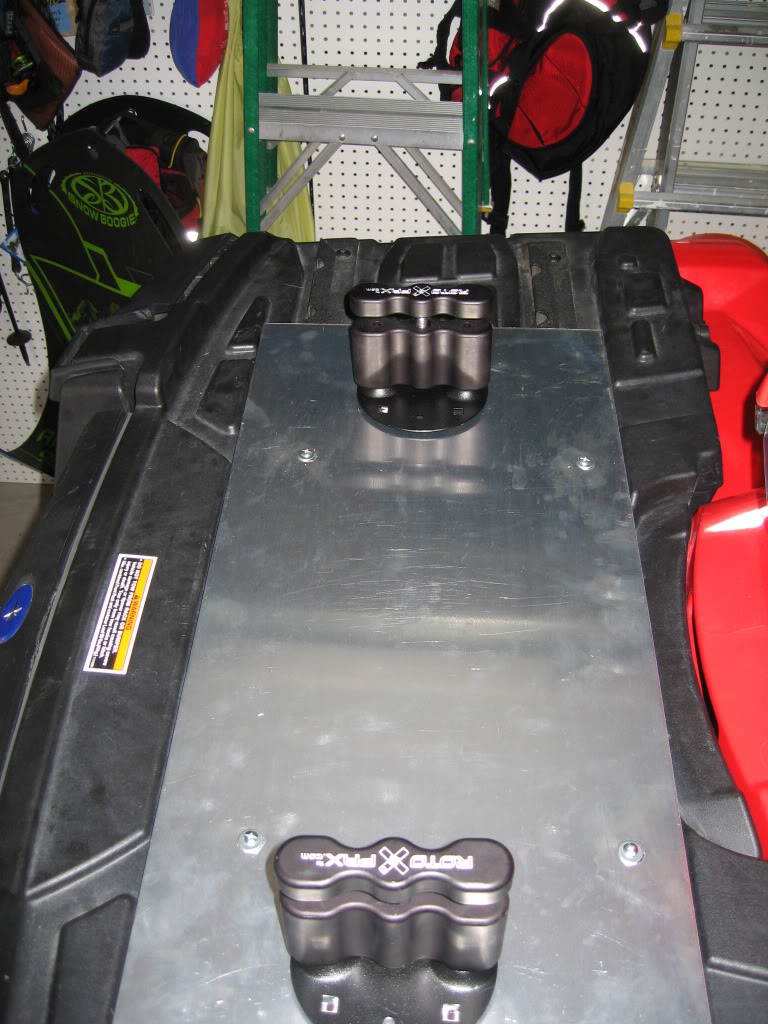
Chuck, I mounted mine tonight as well. I used a piece of diamond plate aluminium, but turned upside down so that the tanks rest on the smooth side. The extra holes are where I first did the mount with the bases (not shown)
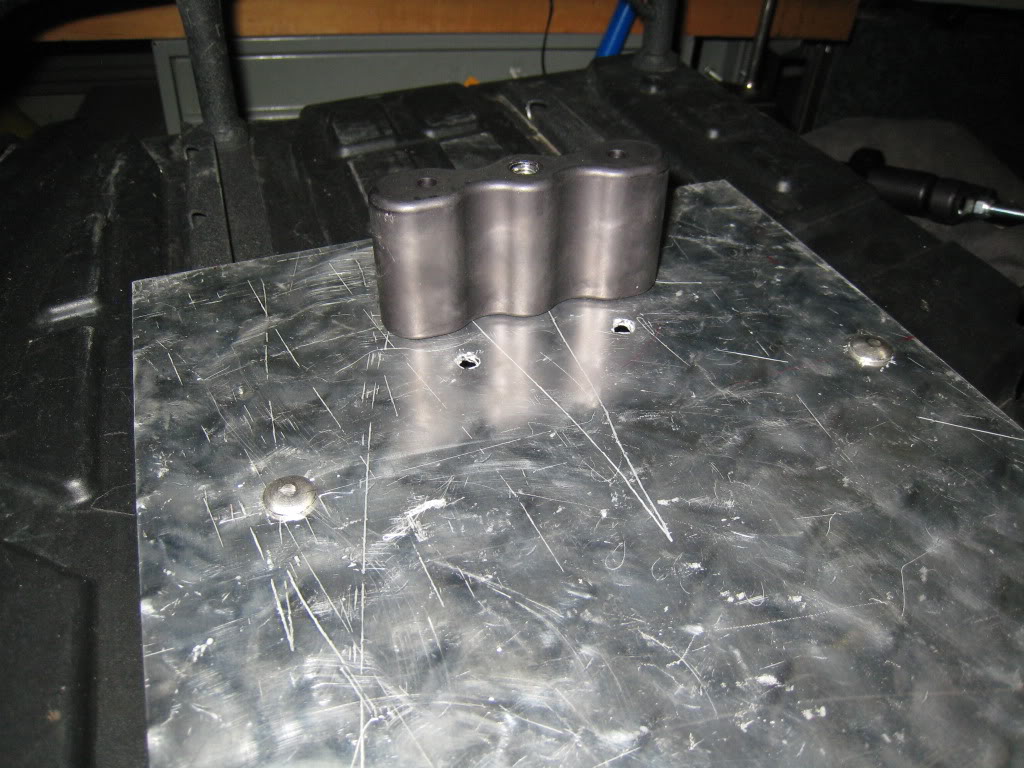
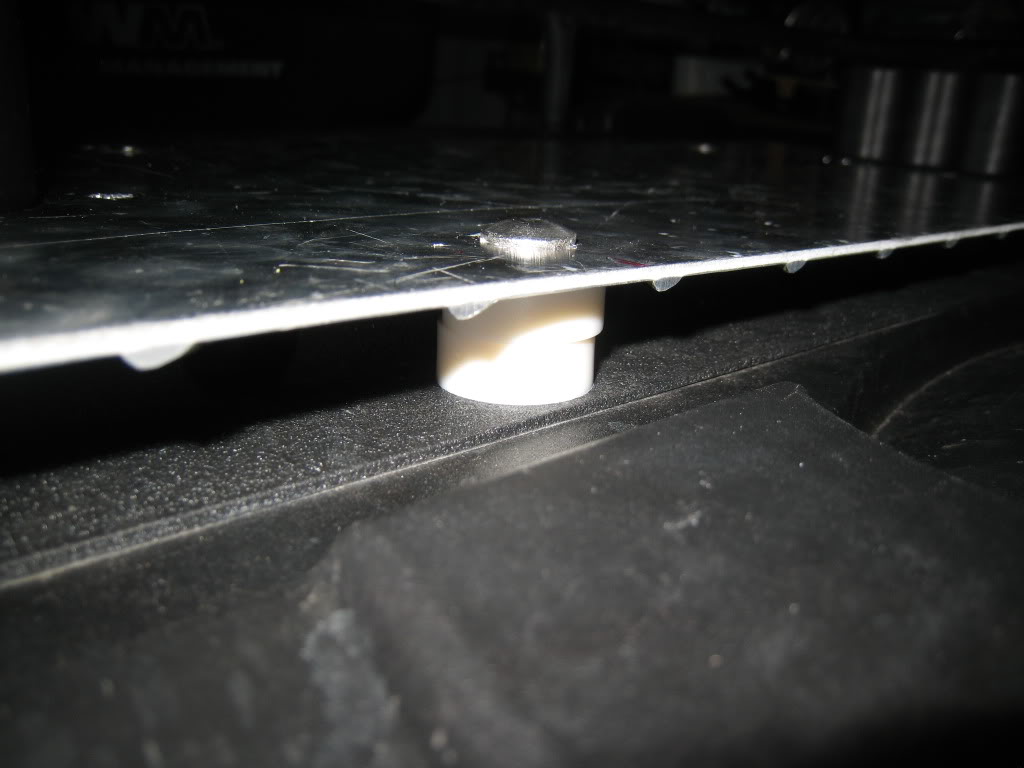
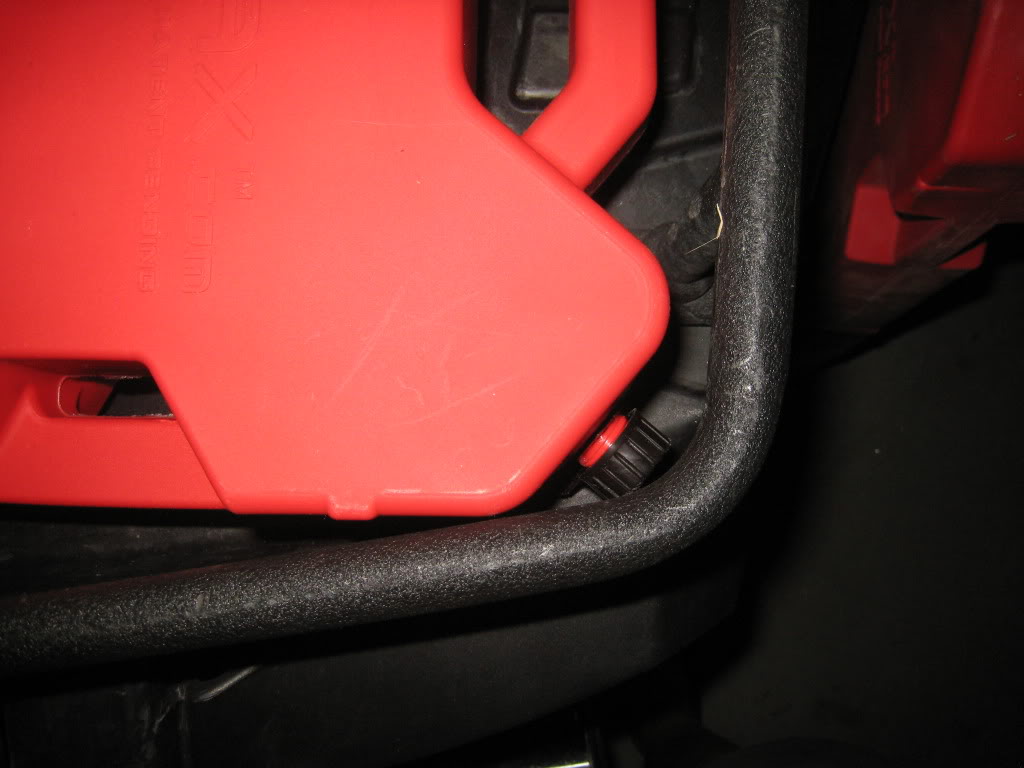
I used stainless steel carriage bolts, nylon lock nuts, plastic bushings, and plastic covers (all from Lowes). I mounted them all through the existing holes also.
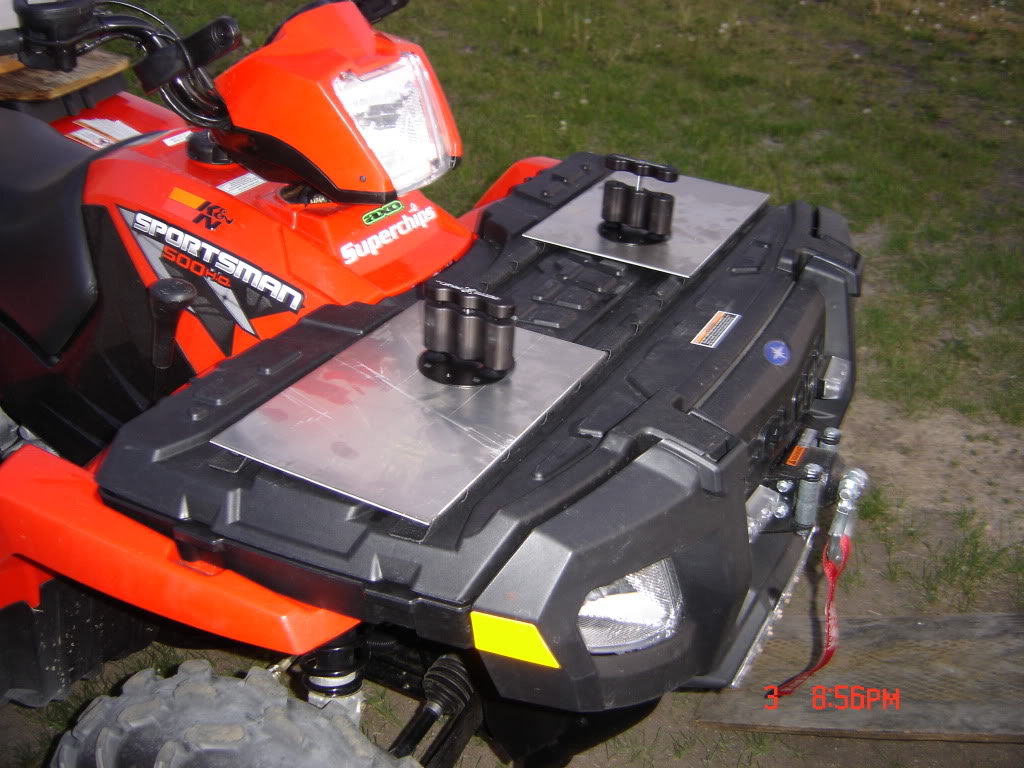
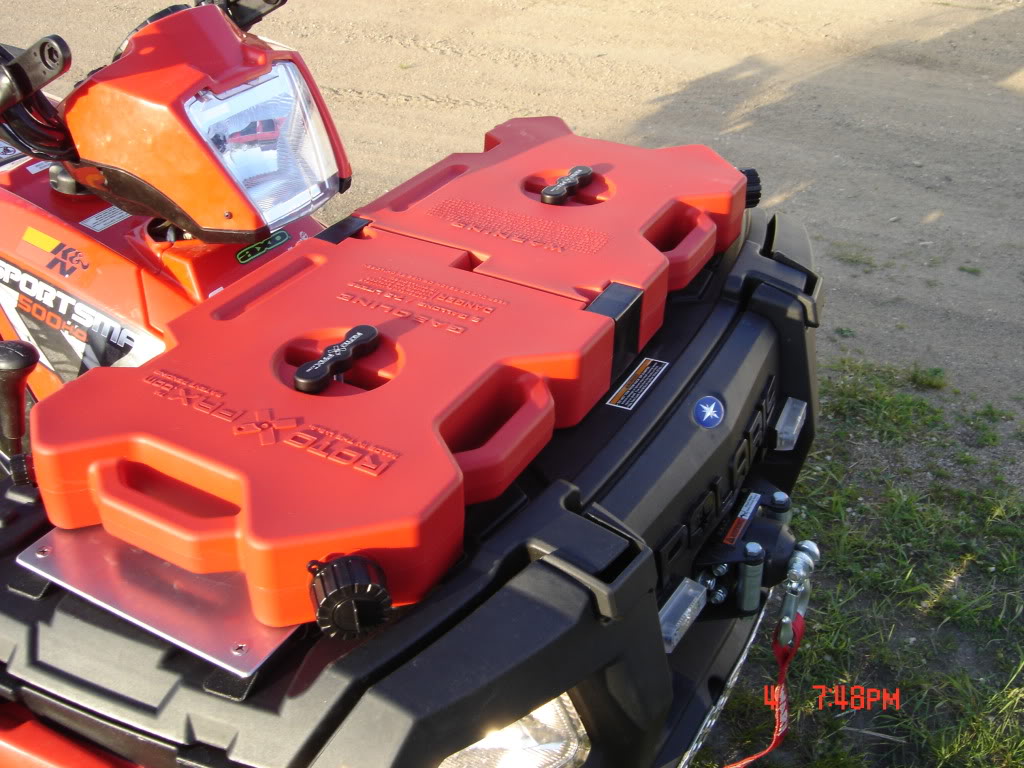
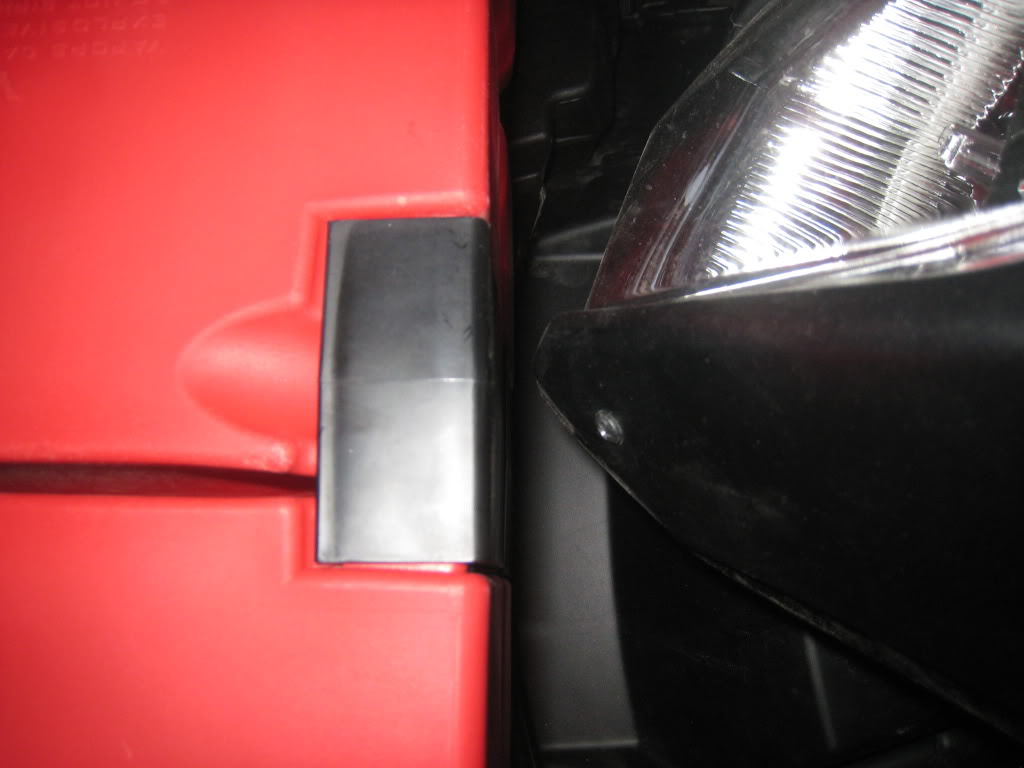
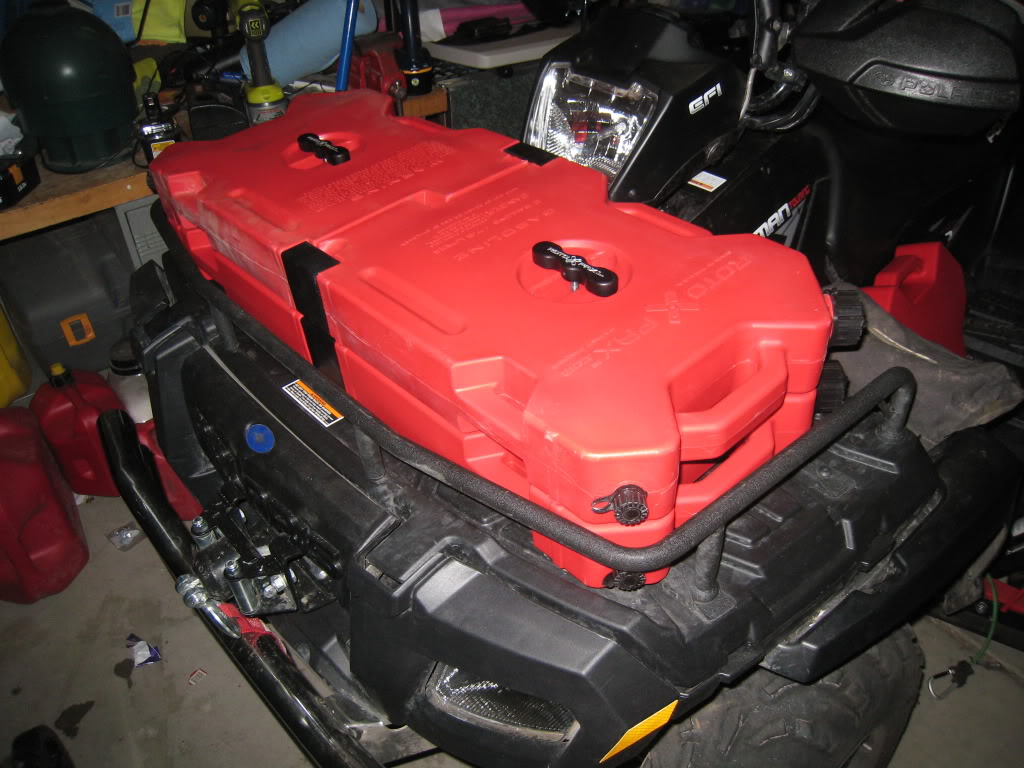
In order to reduce the overall height I did not use the mount bases and as you can see from the photo the first tank is just about flush with the top of the rack extender and below the headlight.
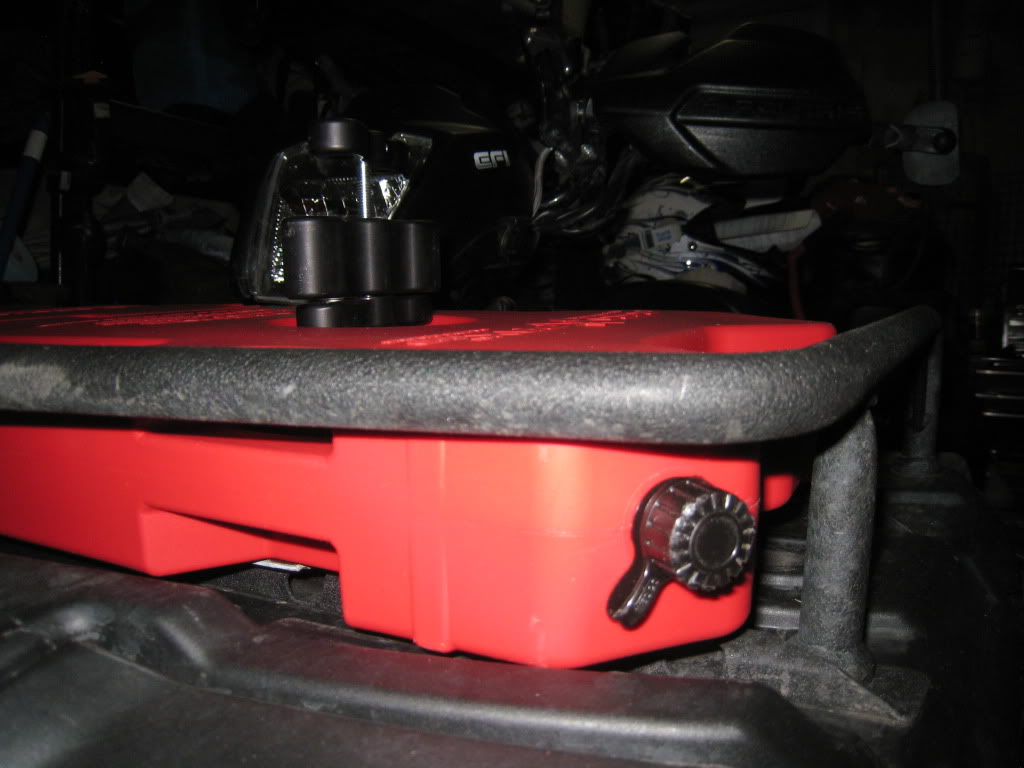
Speaking of which in order to keep the rack extender the fit was very tight between the headlight and the second tank - less than 10mm during a turn, so I will be paying close attention during the first few rides.
 I
I
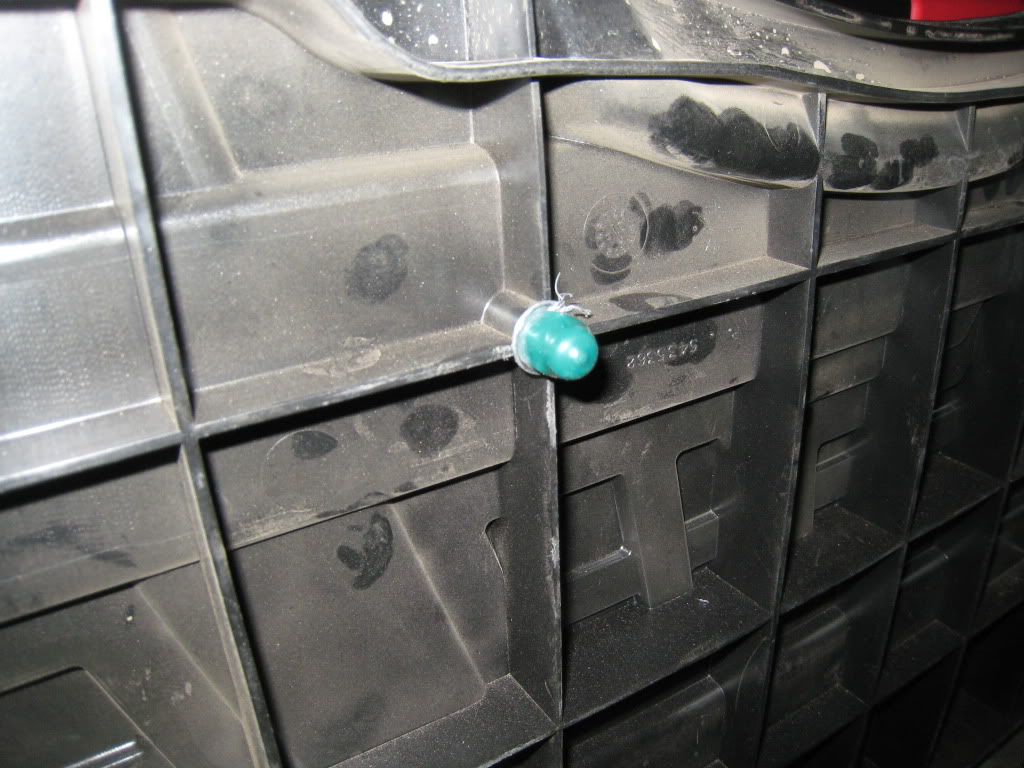
I will add some strips of rubber or maybe carpet to prevent the tanks rubbing against the bolt heads. As we've discussed before I'll also add some kind of cable and strap to protect the hinges. I also added some plastic covers to protect the contents of the storage box.
The mounts and extensions are beautifully engineered.
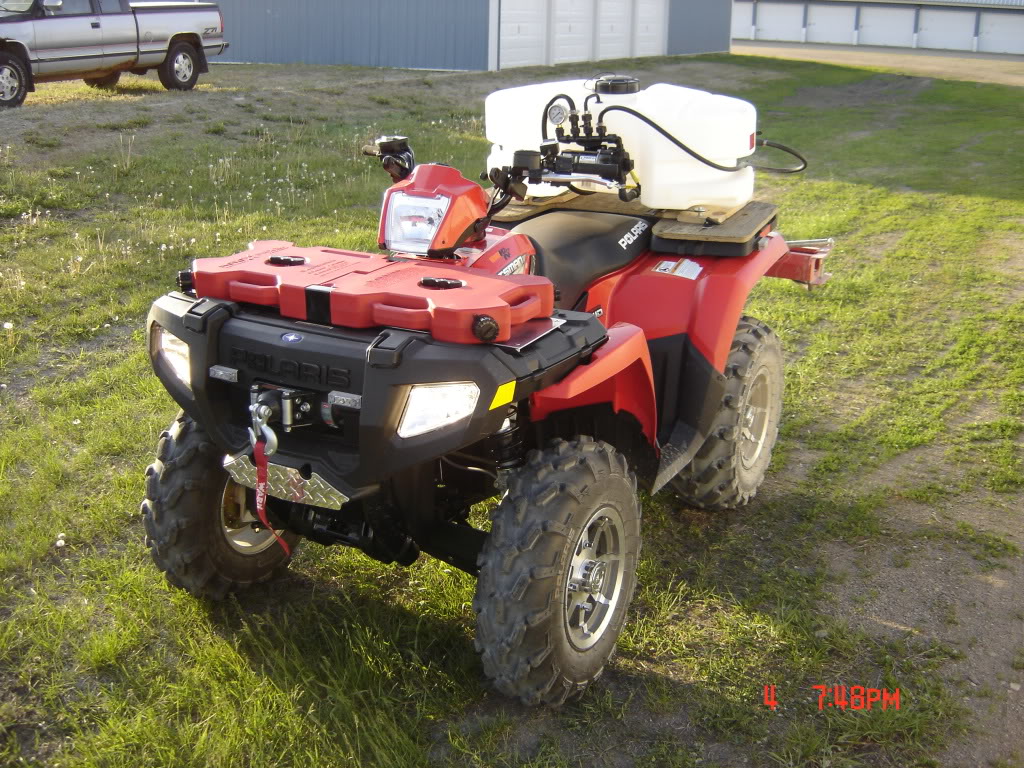
So now I'm ready to go with 3 x 2 gals of fuel (6) and 2 gals water - the extra gas can shown is borrowed from a buddy to complete the installation.
An overnight trip is planned as a field test this weekend.
Good luck!
I used stainless steel carriage bolts, nylon lock nuts, plastic bushings, and plastic covers (all from Lowes). I mounted them all through the existing holes also.
In order to reduce the overall height I did not use the mount bases and as you can see from the photo the first tank is just about flush with the top of the rack extender and below the headlight.
Speaking of which in order to keep the rack extender the fit was very tight between the headlight and the second tank - less than 10mm during a turn, so I will be paying close attention during the first few rides.
I I will add some strips of rubber or maybe carpet to prevent the tanks rubbing against the bolt heads. As we've discussed before I'll also add some kind of cable and strap to protect the hinges. I also added some plastic covers to protect the contents of the storage box.
The mounts and extensions are beautifully engineered.
So now I'm ready to go with 3 x 2 gals of fuel (6) and 2 gals water - the extra gas can shown is borrowed from a buddy to complete the installation.
An overnight trip is planned as a field test this weekend.
Good luck!