
sportsman front homemade spring spacers w/pictures
 Oct 19, 2009 | 04:44 PM
#1
Thread Starter
|
Super Quad Patrol
I'm watching you!
I'm watching you!

Joined: Jul 2003
Posts: 14,269
Likes: 8
From: central maine
ok guys heres the spring post i promised on how to do it and whats needed.
tools: 1/2" wrench, 3/4" wrench, 3/8" wrench,t-20 torque socket, 1/2" socket and ratchet set up(maybe w/ an extention), what ever you need to take off the tire lug nuts(differnt rims require differnt sizes) and a floor jack as well as a jack stand(or a block of some kind to hold up the bike), a regular ratchet tie down strap(you might not need this).
parts: 2* 2" cpvc cupplings, a small pice of 2" pipe to fill in the fittings.(about $1 ea. at any hardward store and maybe $2.00 for pipe total price $3.00)
time:depnds on how you do it. about 30 minutes per side +*
start by making your spacers(i painted mine after they were completed) by placing the pipe inside of the cuppler and sawing flush each side for the fill. see picture;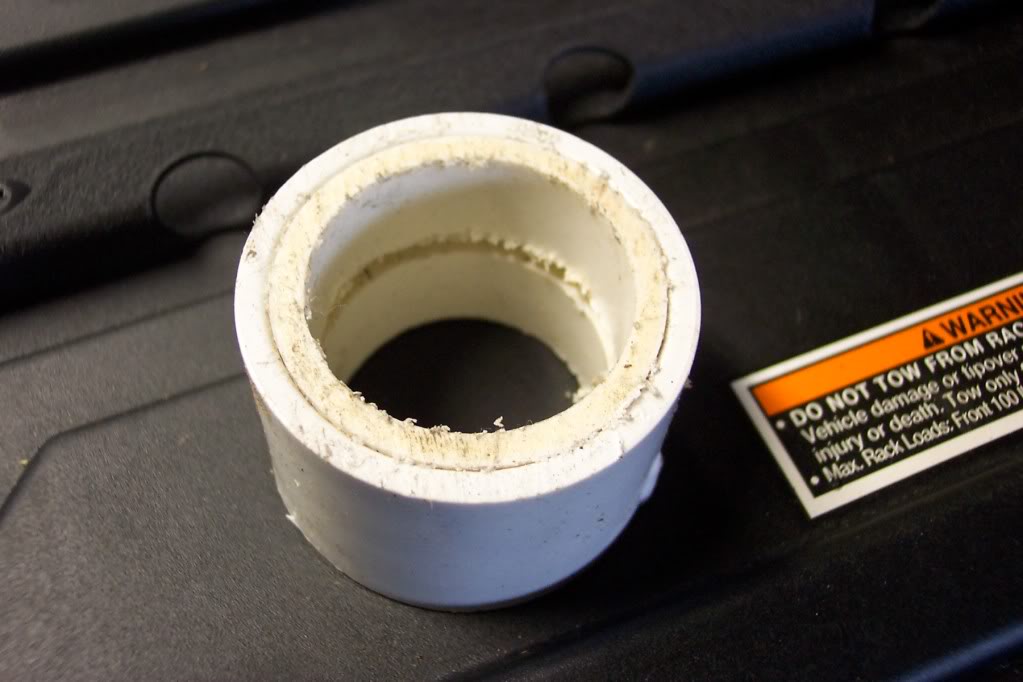
next take off the front storage box which has 4 - 1/2" bolts that hold it to the frame and 4 torque screws(2 each side) in the back beside the latches. there are also 4 torque screws(again 2 ea. side) under the fenders near the out side.
when storage box is out of way you can easily see and get to the strut towers to remove the nut's that hold them into the frame.
next you should jack up the wheeler and put a stand under front part of frame to hold it up while you remove the jack to use under the ball joint to jack up the strut.(side note: loosen the lug nuts while the wheel is still on the floor, but don't take off until wheel is jacked up). when wheel has been removed, place jack under the ball joint and jack up to theres just a little bit of pressure so it won't fall when you loosen the 2- 1/2" strut retaing bolts and nuts.
when these are loose, you the 3/8"and 3/4" wrenches to loosen and remove the strut nut on top removing the washers/spacers(remember which way they go for reassembly) picture;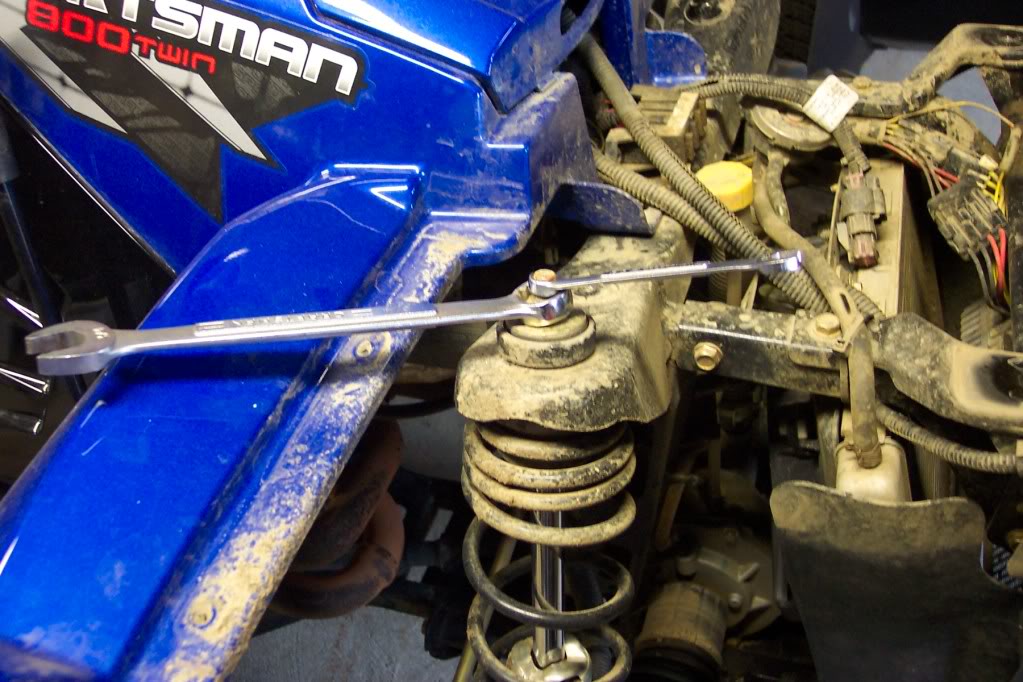
when the nut is off you should be able to lower the jack down(carefully not to let it drop too far and hurt the cv joint)and the spring and strut will swing out of the frame support. see picture and side note;
(side note: i used the strap on this side to show you might have to compress the spring to make it lower enough to swing it out of holder, but for the most part you will not have to do this w/ stock springs. try it w/out the strap first and use your hands if need be to push down on the strut/spring to gain the extra room needed. on the other side i did not use the starp at all and was much quicker w/out it.)
you should be able to pick the strut and spring assembly right out of the strut housing and place the premaid spacers right on the washer that sits under the spring. see picture;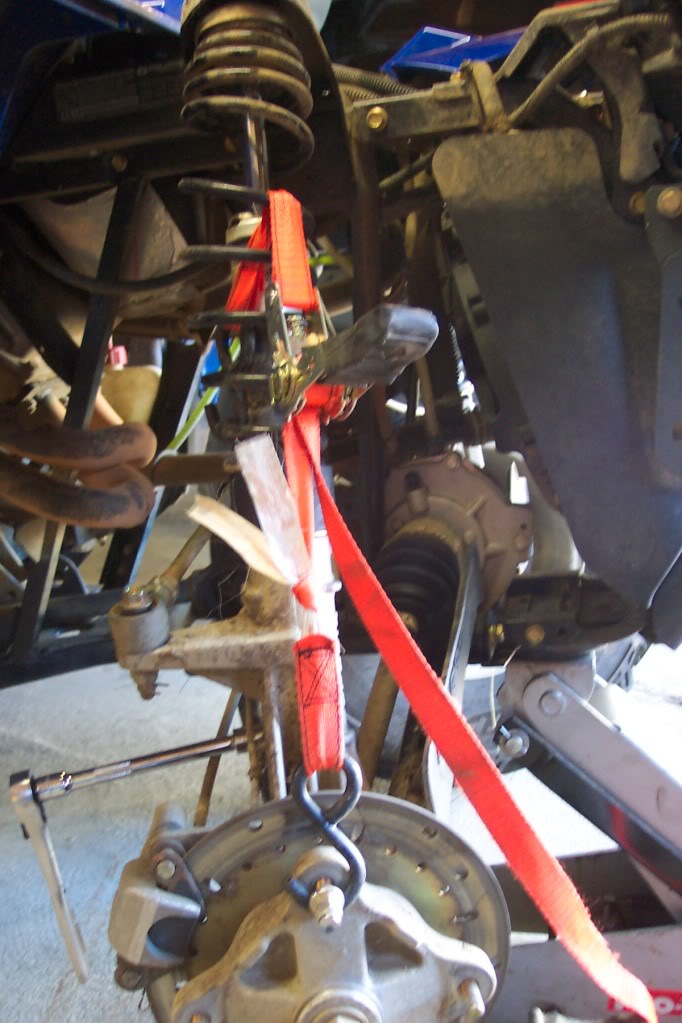
when spacer is in place and centered, set strut spring assembly back into the holder. then slide assembly back under the top frame support. you may ned to rejack up under the ball joint to add pressure to be able to put washers/spacers and nut bak on the top of strut and tighten w/ the 2 wrenches. picture;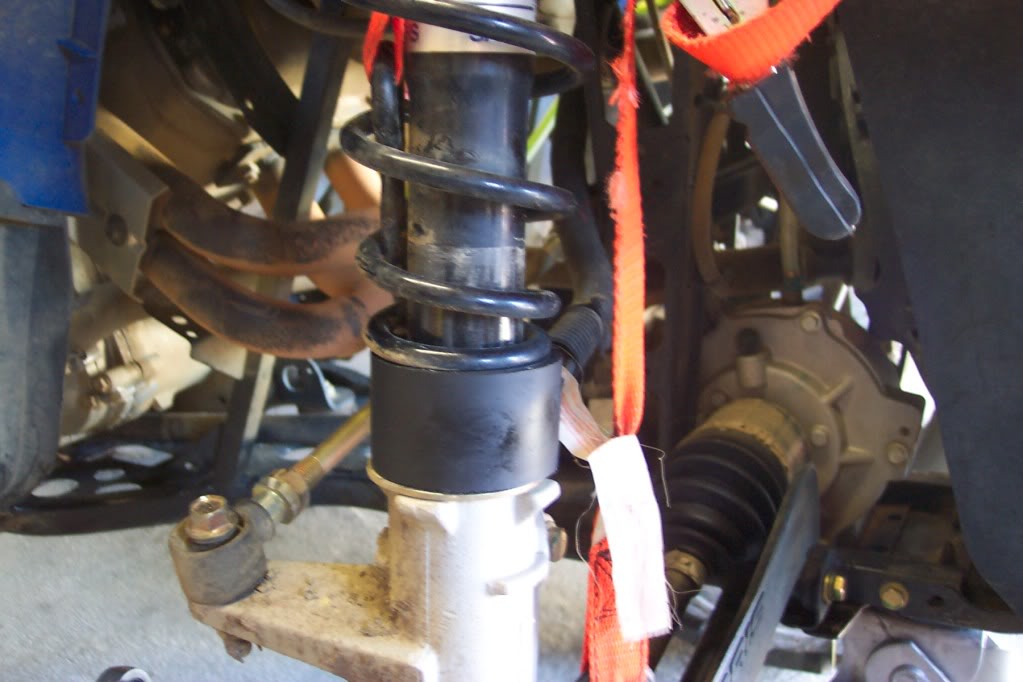
when the top has been tightend down and you have jacked up on the ball joint to raise the hub/strut assembly up, make sure you have the strut bottomed out into the holder. you should be able to look at the bottom of the holder(looking up at it) and see the strut bottomed out(down as far as it goes) and then tighen the holder bolts and nuts back up. you might either have to use the strap or by hand push down on the moveable part of the strut body(not the crome shaft) to seat the strut in the holder. once you have tighened all the bolts and made sure the strut is back into the correct place, you can put tire back on and front storage box back on and your done. repeat for other side and you will have stiffer springs and no more sag.
Last edited by stendori; Oct 4, 2011 at 02:28 PM.
Sep 24, 2011 | 06:47 PM
#2
Thread Starter
|
Super Quad Patrol
I'm watching you!
I'm watching you!
Joined: Jul 2003
Posts: 14,269
Likes: 8
From: central maine
well i'm in the middle of doing my 02' 500 and didn't know until i got it apart that the spring has a washer w/ a screw down nut to hold the spring down in place. this time i just dropped the spring assembley down from the holder w/ out taking anything off except tire and unbolted wires going down to the speed sensor and awd.

Thread
Thread Starter
Forum
Replies
Last Post
Currently Active Users Viewing This Thread: 1 (0 members and 1 guests)