
Coolster 3125-XR8 carb issue?? New.
 May 1, 2012 | 11:42 AM
#71
Trailblazer
Joined: Mar 2012
Posts: 39
Likes: 0
Did you try just turning the carb 180 degrees and pointing it forward ? Didn't work for me with the goose necked intakes.
This may interest you:
25MM INTAKE MANIFOLD CRF50 SSR PRO PIT BIKE DIRT BIKES | eBay
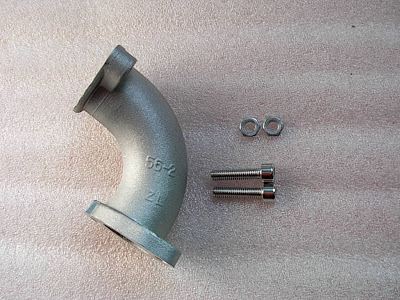
This is a 25mm id offset intake. I would check all bolt dimensions but it may cure your too small intake and placement issues. It will also have a smoother flow to the air with a gentle arc vs the abrubt turn around in the goose neck intake you have now.
The adaptor plate :

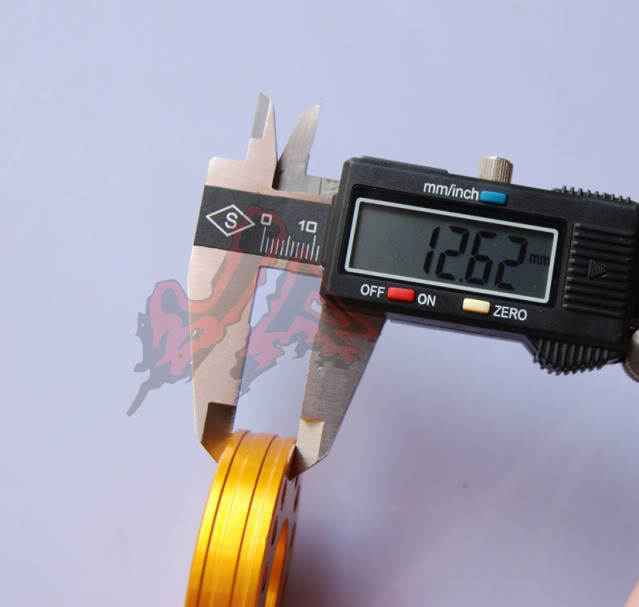
I ended up using the plate and it works good. Be aware though it will add 12.6 mm or 1/2 inch height to the whole unit and with that goose neck and the angle it may still have a few fit issues.
This may interest you:
25MM INTAKE MANIFOLD CRF50 SSR PRO PIT BIKE DIRT BIKES | eBay
This is a 25mm id offset intake. I would check all bolt dimensions but it may cure your too small intake and placement issues. It will also have a smoother flow to the air with a gentle arc vs the abrubt turn around in the goose neck intake you have now.
The adaptor plate :
I ended up using the plate and it works good. Be aware though it will add 12.6 mm or 1/2 inch height to the whole unit and with that goose neck and the angle it may still have a few fit issues.
May 1, 2012 | 12:42 PM
#72

Range Rover
Joined: Dec 2011
Posts: 104
Likes: 0
crap.. if only you had posted yesterday 
I already ordered the adapter ring + a bigger manifold and with shipping I spent 4.5X as much as the one you linked would have cost me..
oh well
you say you used the adapter ring - what type of quad and carb and jets did you install, and was the outcome worth the trouble?
thanks
I already ordered the adapter ring + a bigger manifold and with shipping I spent 4.5X as much as the one you linked would have cost me..
oh well
you say you used the adapter ring - what type of quad and carb and jets did you install, and was the outcome worth the trouble?
thanks
May 1, 2012 | 12:46 PM
#73
Range Rover
Joined: Dec 2011
Posts: 104
Likes: 0
this is a pic of OldMans drilled exhaust in case anyone else wanted to see it
http://www.flickr.com/photos/78121832@N00/7132613417/http://www.flickr.com/photos/78121832@N00/7132613417/ by http://www.flickr.com/people/78121832@N00/, on Flickr
http://www.flickr.com/photos/78121832@N00/7132613417/http://www.flickr.com/photos/78121832@N00/7132613417/ by http://www.flickr.com/people/78121832@N00/, on Flickr
May 1, 2012 | 04:38 PM
#74
Trailblazer
Joined: Mar 2012
Posts: 39
Likes: 0
crap.. if only you had posted yesterday
I already ordered the adapter ring + a bigger manifold and with shipping I spent 4.5X as much as the one you linked would have cost me..
oh well
you say you used the adapter ring - what type of quad and carb and jets did you install, and was the outcome worth the trouble?
thanks
I already ordered the adapter ring + a bigger manifold and with shipping I spent 4.5X as much as the one you linked would have cost me..
oh well
you say you used the adapter ring - what type of quad and carb and jets did you install, and was the outcome worth the trouble?
thanks
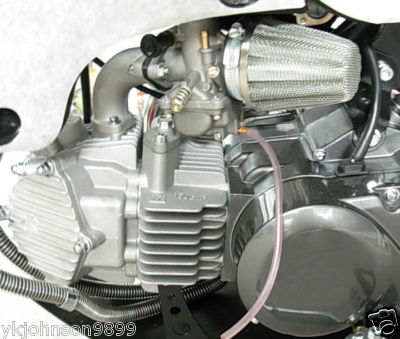
Application is on a Gio Rebel T1, 110cc. As far as jets go who knows, I used a welders tip cleaner and opened up both jets.
Little known trick with these pz carbs is the removal of the float restrictor tab in the bowl as well. I your bowl has a little bar molded into the bottom of it then it is used to make sure the float does not drop too far. This also does not allow the float to drop down as far as it could to let more fuel into the bowl faster. Again it depends on the carb but the stock ones on these CHONDAS seems to have them, esp the round bowl shaped ones.
PS the guy in the ebay link is a very good shop owner, would recomend him.
May 1, 2012 | 04:57 PM
#76
Trailblazer
Joined: Mar 2012
Posts: 39
Likes: 0
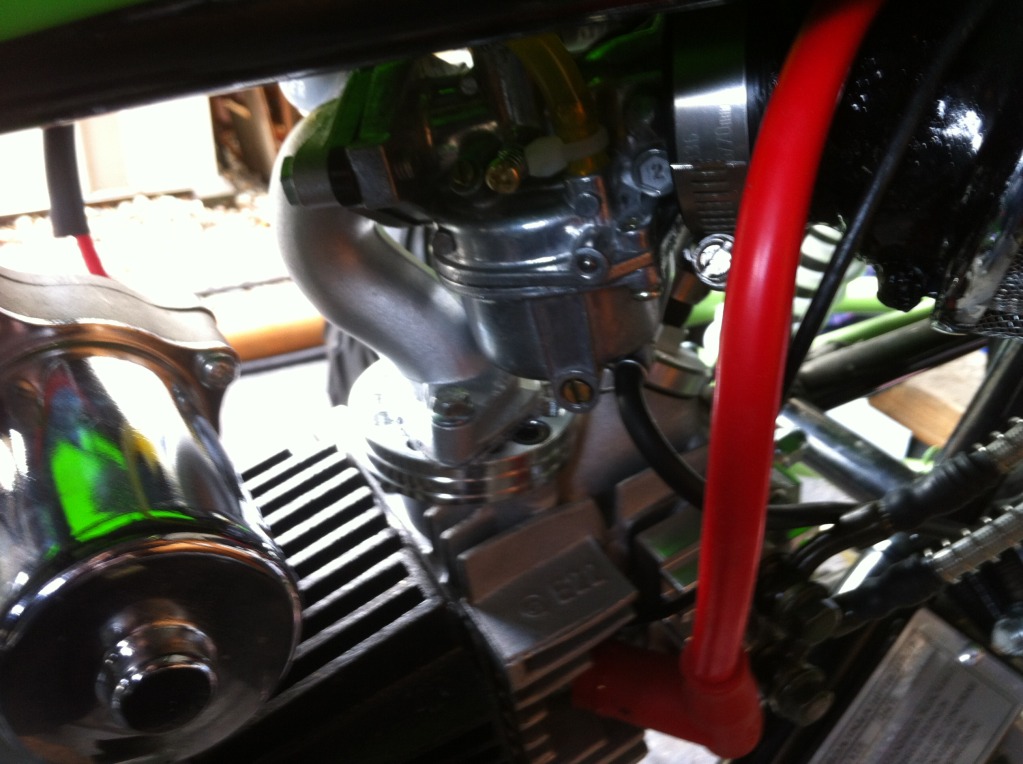
First off the adaptor ring.
Muffler Mod.
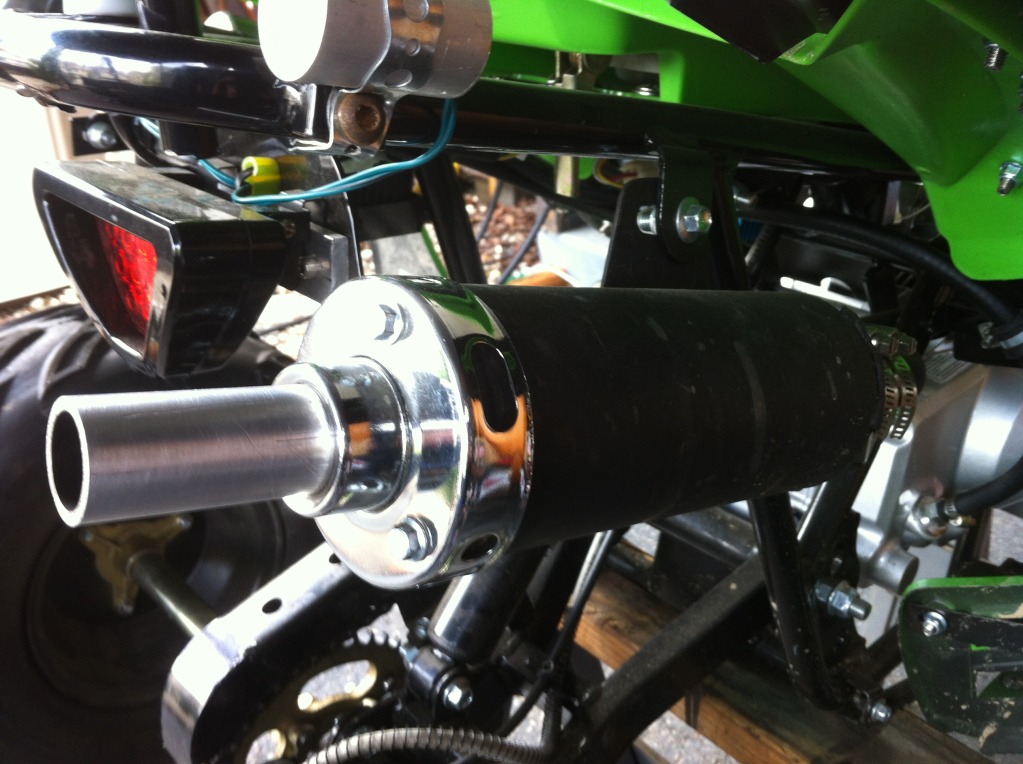
For the muffler I took off the chromish plate on the end and removed the little tube that was sticking in it. I then drilled out the end the same size as the hole in the chromish cover. That gave me lots of room to get in there and completely drill out the internal baffle plate, reducing it to nothing and shaking out all the little bits. I then cut the aluminum pipe that you see sticking out so that it just cleared the internal baffle and is about an inch away from the inlet pipe to the muffler. I then used JB Weld to attach the aluminum pipe to the chrome plate and bolted it back on. Works like a hot dam and still has some sound deadening due to the one inch gap between the inlet and outlet pipe.
As for the float bow restrictor:
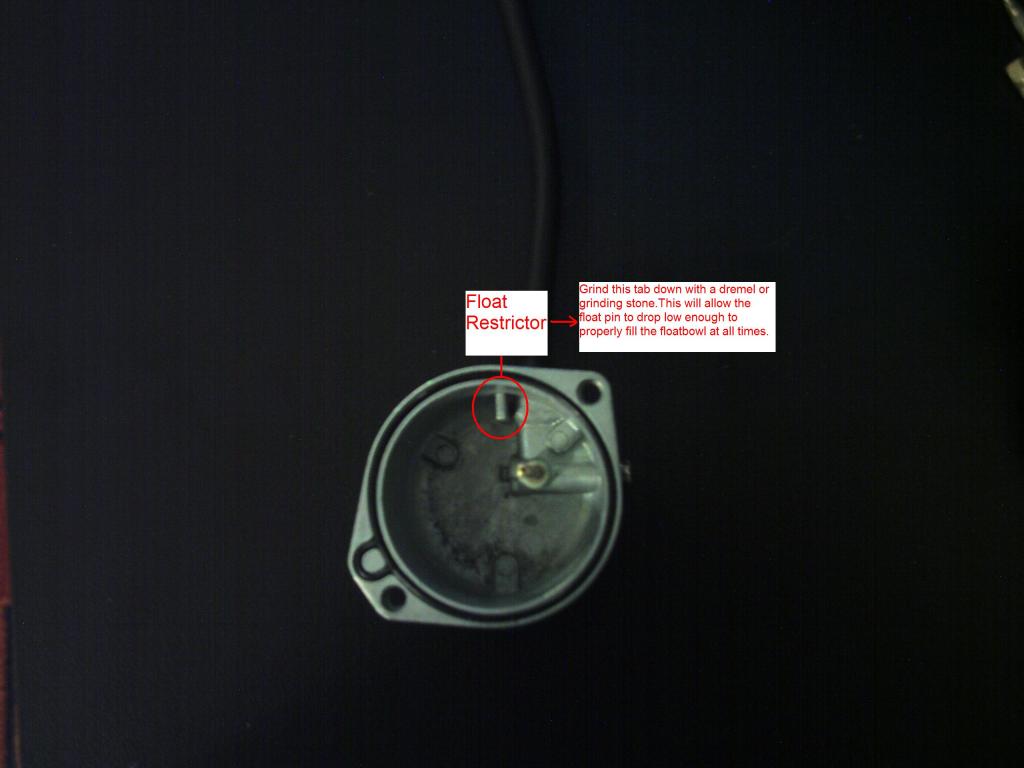

Dremmel out the tab and walla.
Muffler Mod.
For the muffler I took off the chromish plate on the end and removed the little tube that was sticking in it. I then drilled out the end the same size as the hole in the chromish cover. That gave me lots of room to get in there and completely drill out the internal baffle plate, reducing it to nothing and shaking out all the little bits. I then cut the aluminum pipe that you see sticking out so that it just cleared the internal baffle and is about an inch away from the inlet pipe to the muffler. I then used JB Weld to attach the aluminum pipe to the chrome plate and bolted it back on. Works like a hot dam and still has some sound deadening due to the one inch gap between the inlet and outlet pipe.
As for the float bow restrictor:
Dremmel out the tab and walla.
May 2, 2012 | 08:32 AM
#78
Trailblazer
Joined: Mar 2012
Posts: 39
Likes: 0
It can't possibly hurt removing all the restrictions to good breathing from the exhaust system though.
May 3, 2012 | 06:55 AM
#79

Trailblazer
Joined: Apr 2012
Posts: 32
Likes: 0
Well, the next item I want to mess with is valve clearance. Looking around the forums, it looks like .004 is the clearance to shoot for. High Boost, what settings did you use?
I found this video on another page. makes the task look very easy, and answered all questions.
Http://www.youtube.com/watch?v=2xkxQi_aPuw
I found this video on another page. makes the task look very easy, and answered all questions.
Http://www.youtube.com/watch?v=2xkxQi_aPuw
May 3, 2012 | 09:09 AM
#80
Range Rover
Joined: Dec 2011
Posts: 104
Likes: 0
I found the valve adjustment to be a real P.I.A. I did .004, or .003.. I am not sure it would matter with that small of a differance.
the intake valve is easy, its on top and there is some room to work
the exhaust valve sucks. Besides the fact that it faces the ground and you have to work on your back, the frame on mine was getting in the way.
I put my quad up on stands to do the bottom one, so I could lay under it. If you could turn it up on the side it would be way easier, but then oil and gas will probably spill out.
The video you linked is broken, but all the videos I watched to learn how to do it had the motor out on a bench, that is why they look so easy.