
UMHF Frame Mod - 2010 Oulander 650 XT
 Feb 22, 2010 | 01:21 PM
#1
Thread Starter
|
Trailblazer
Joined: Jan 2010
Posts: 31
Likes: 0
This has been well documented on the web, but here is our contribution on how Rick and I installed a UMHF Frame mod from Go Hard Racin on a 2010 Outlander 650XT.
Some of the pics below are a bit dark and difficult to see. Must have had the setting wrong on my camera.
Tools We used:
Ratchet
10mm socket (Plastic Guard removal)
15mm socket (Bolts for the Hitch Plate removal)
12mm socket for the bolts supplied by Go Hard
Vise Grips
Pry Bar
Drill w/steel bits
Cone Shaped Grinding attachment for the drill
Reciprocating Saw with steel cutting blade.
Blade Chisel
3 pound malet
wood block
trouble light
safety glasses
Preperation:
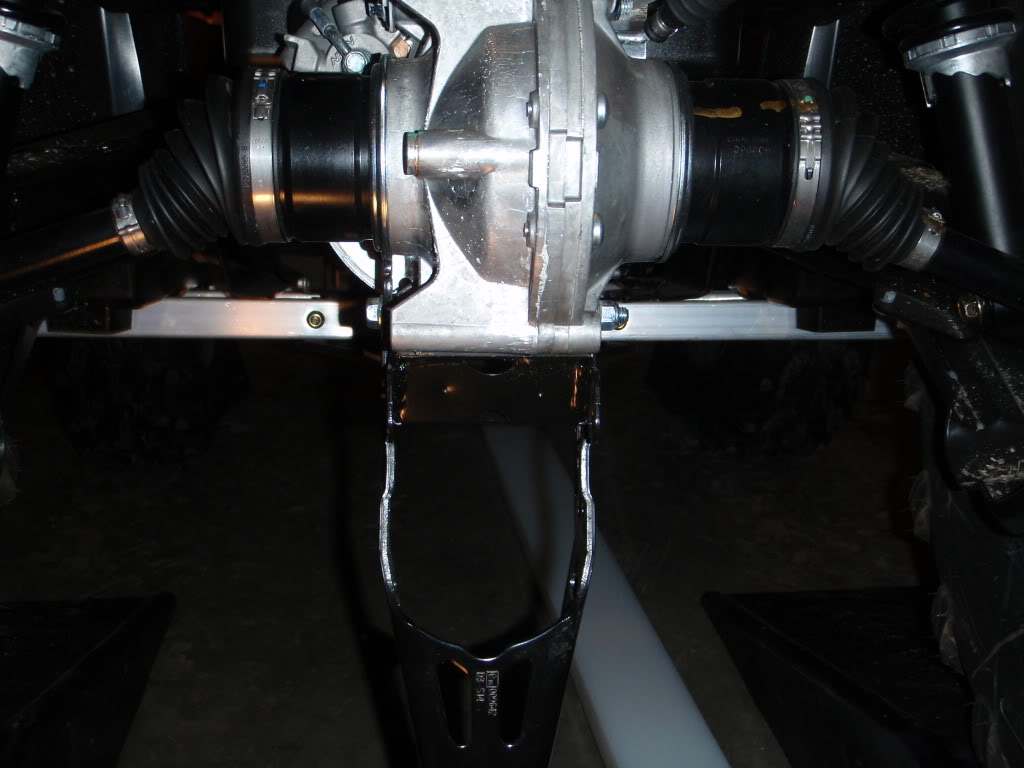
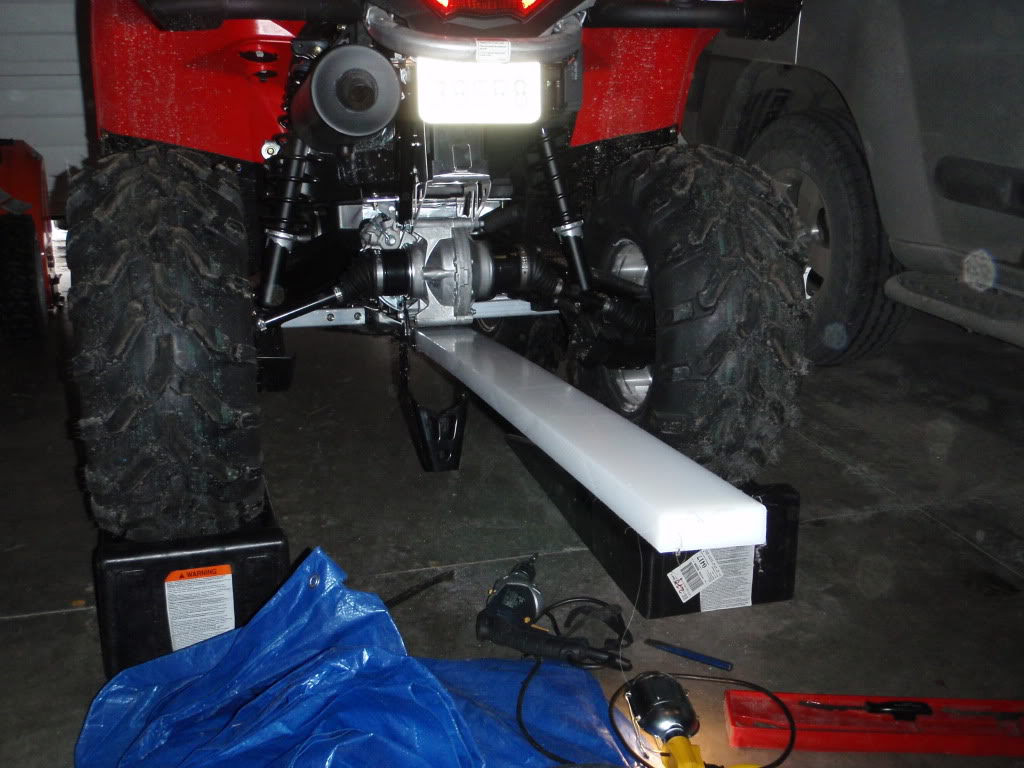
I went to Crappy Tire and bought some Rhino Ramps for $60.00. Backed the quad up onto these so the *** end was up in the air and then chauked the front wheels. Gives much easier access and security and made a great angle to pound in the Frame Mod. I'll use the Ramps from now on when washing the quad to help keep water out of the airbox when the plastics are off, and for greasing the u-joints. I removed the four 10mm bolts holding the Rear Plastic Guard and took it off, and then the two 15mm bolts at the bottom of the Hitch Plate. There are two 15mm through bolts holding the hitch plate on. Remove the one closest to the rear of the quad and loosen the front one. Then you will be able to swing the Hitch Plate down without taking it completely off and it will not interfere with the procedure. They are pretty tight.
Next Step:
Call a friend with all the above tools and if nessessary, bribe them with coffee/donuts or their favorite beverage to help you with the mod.....
Frame Mod - Step One
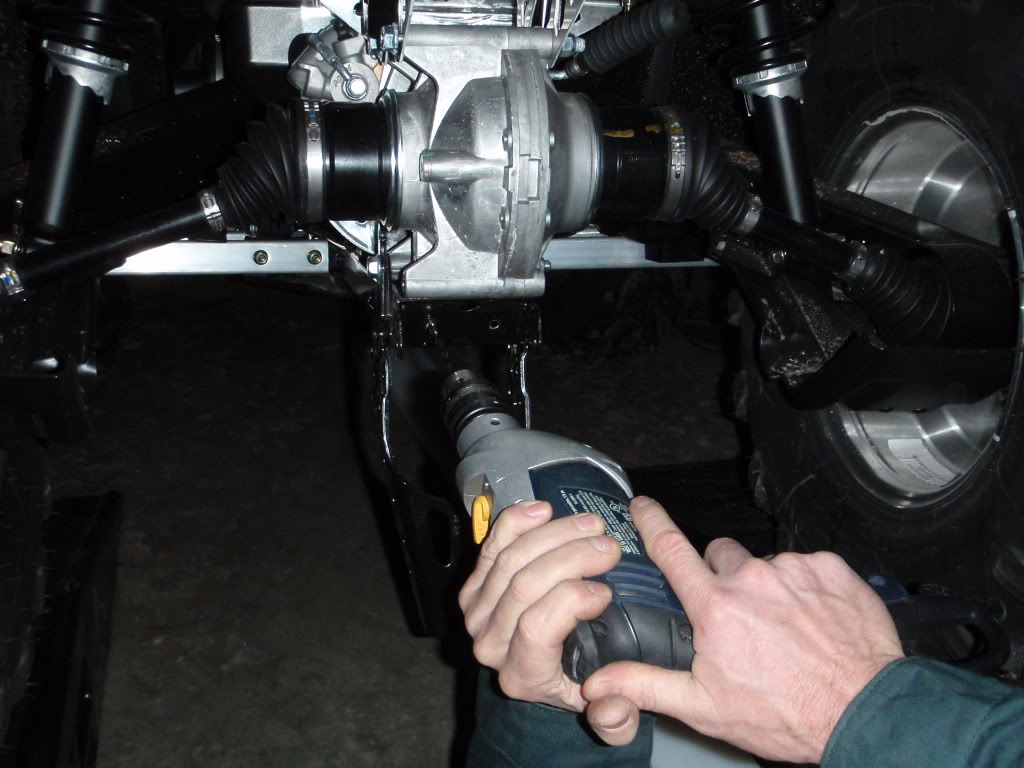
With the UMHF Mods, the final Step is to srcew in two 8mm bolts. Before you cut the rear plate, drill two holes for the bolts into the rear plate.
Picture showing Hitch Plate loosened and slid downwards providing access to the rear frame plate. Kinda dark I know.
Drilling Two 8mm Holes for the Bolts that will screw into the frame mod when completed.
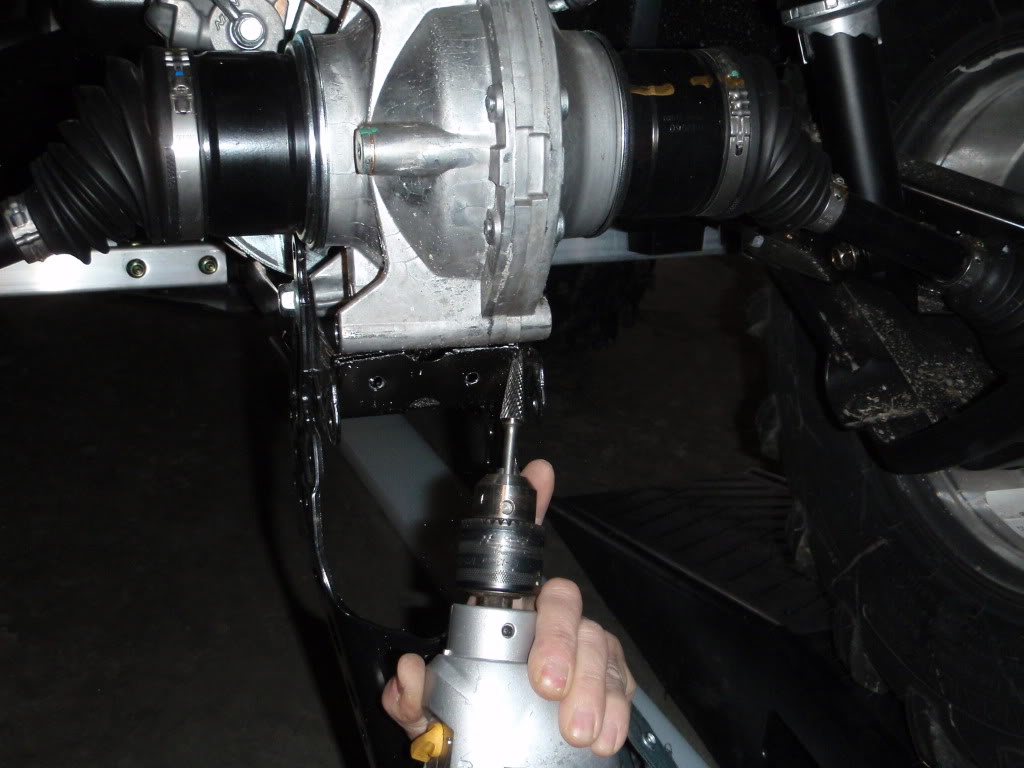
With the saw, cut horizontaly across the top of the rear frame plate left and right. Very easy to do and took about 30 seconds per side. There is a hole in the top center of the rear frame plate that makes it easy to insert the blade of the saw into and begin cutting.
Making Two Horizontal Cuts Left/Right on the Back Plate using the Reciprocating Saw
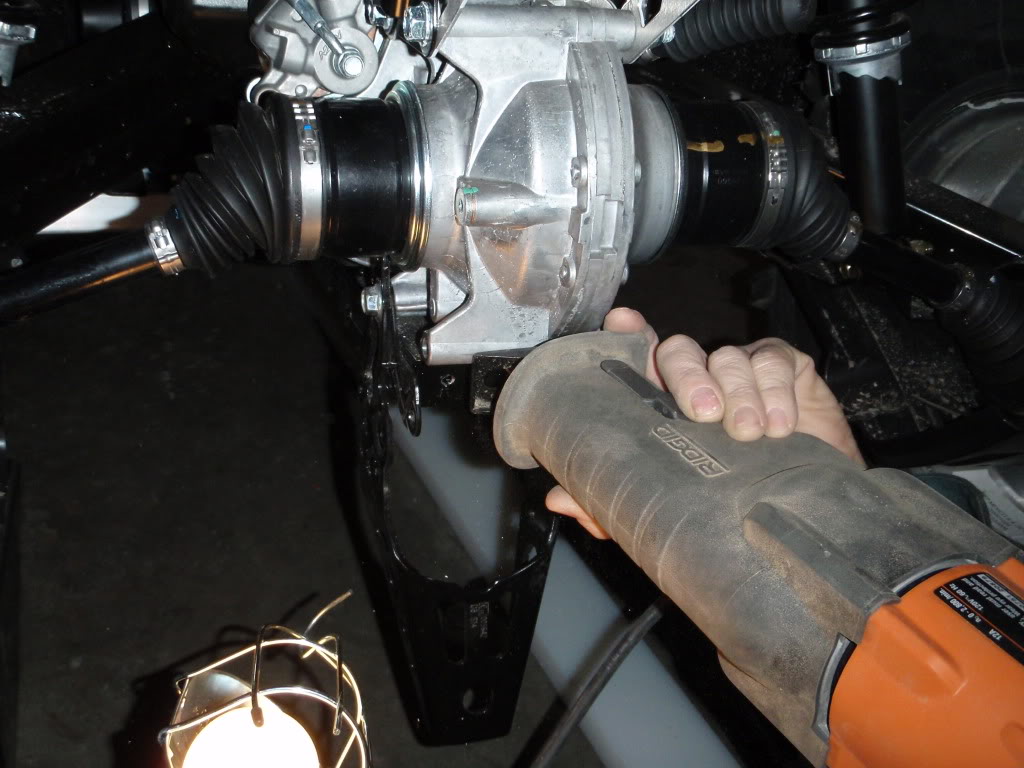
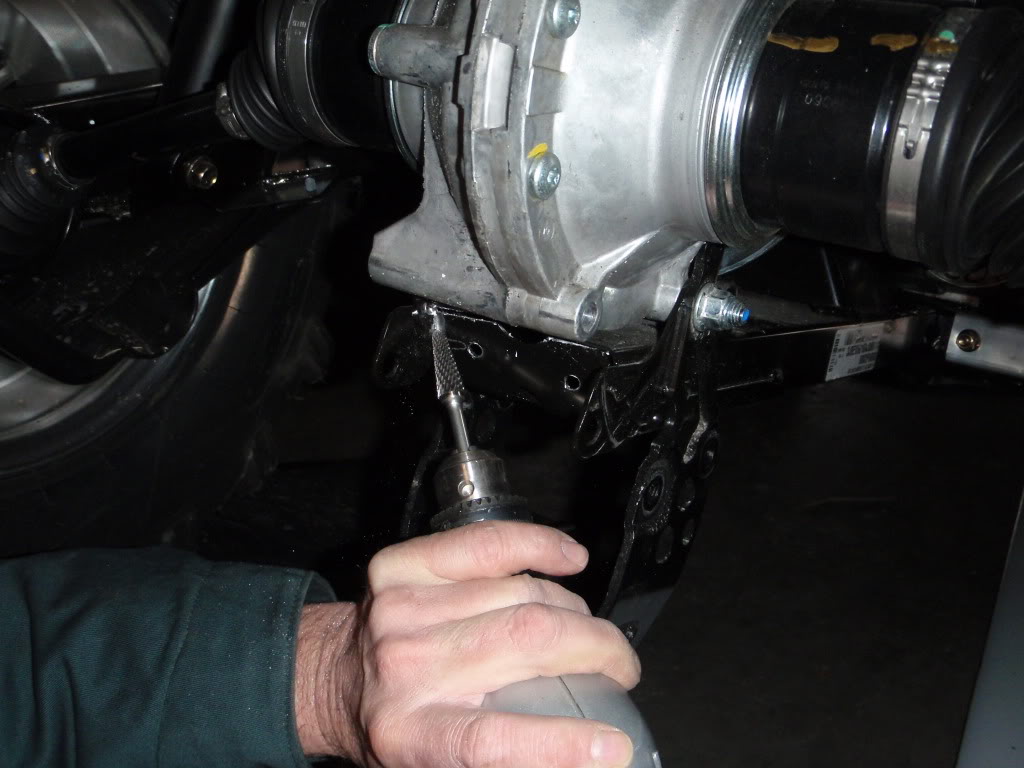
You cannot cut the vertical welds on the left/right sides of the plate. To tight in there with the saw. We ground them with a cone shaped grinder bit attached to the drill and when they were weakened, hit them with a flat tipped chisel and broke the welds.
Grinding the left/right vertical welds on the plate
Insert a small pry bar and pry down the rear plate
Prying the rear plate down

Clean up the rim of the rear plate with the grinder removing any burs of steel. Take your time doing this and get it as smooth as possible to make insertion of the frame Mod easy. This was the longest part of the procedure for us. When this is done insert the Mod into the rectal area with the Curved Side Down. We did not use any grease or other lubricant as suggested. If I were to do this again, I would use grease, as it would probably have made it easier to pound in the Mod.
Mod Inserted into Quads Rectum
Next Step is to pound the Mod in by placing a wood block at the rear of the Mod, and slug away with a mallet. I think the one we used was three pounds. It was quite a tight fit and without grease took quite a few hits to get it all the way in. Sorry, no actions photo's of this step. Below is a pic of the Mod completely inserted.
Mod Completey Inserted

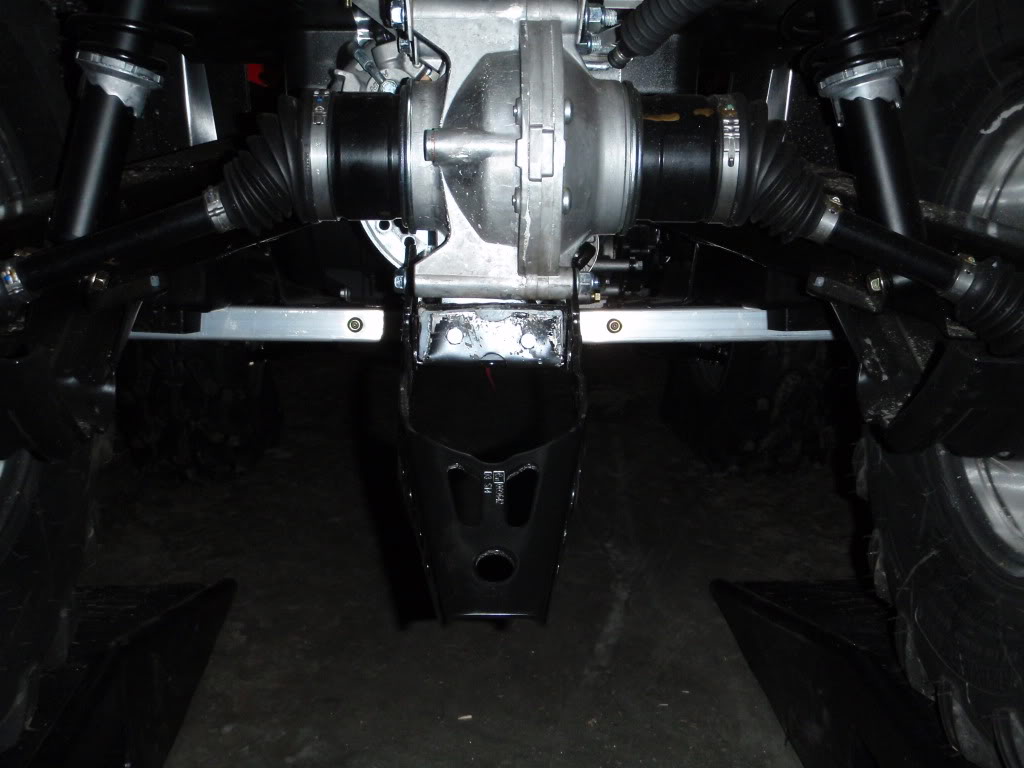
Final Steps are to tap the rear plate back up to the vertical so that is flush with the rear of the Frame mod and then screw the two 8mm bolts into the mod using your pre drilled holes. finally spray some metal paint over the area to prevent rust. Replace the Hitch Plate and the Plastics.
UMHF Frame Mod Completely installed and secured with screws.
All done, HAVE A BEER or favorite beverage.
Total Time: One hour.
including removing the Rear Plastic Joint Guards and loosening the Hitch, which was done the day before we did the Mod.
Some of the pics below are a bit dark and difficult to see. Must have had the setting wrong on my camera.
Tools We used:
Ratchet
10mm socket (Plastic Guard removal)
15mm socket (Bolts for the Hitch Plate removal)
12mm socket for the bolts supplied by Go Hard
Vise Grips
Pry Bar
Drill w/steel bits
Cone Shaped Grinding attachment for the drill
Reciprocating Saw with steel cutting blade.
Blade Chisel
3 pound malet
wood block
trouble light
safety glasses
Preperation:
I went to Crappy Tire and bought some Rhino Ramps for $60.00. Backed the quad up onto these so the *** end was up in the air and then chauked the front wheels. Gives much easier access and security and made a great angle to pound in the Frame Mod. I'll use the Ramps from now on when washing the quad to help keep water out of the airbox when the plastics are off, and for greasing the u-joints. I removed the four 10mm bolts holding the Rear Plastic Guard and took it off, and then the two 15mm bolts at the bottom of the Hitch Plate. There are two 15mm through bolts holding the hitch plate on. Remove the one closest to the rear of the quad and loosen the front one. Then you will be able to swing the Hitch Plate down without taking it completely off and it will not interfere with the procedure. They are pretty tight.
Next Step:
Call a friend with all the above tools and if nessessary, bribe them with coffee/donuts or their favorite beverage to help you with the mod.....
Frame Mod - Step One
With the UMHF Mods, the final Step is to srcew in two 8mm bolts. Before you cut the rear plate, drill two holes for the bolts into the rear plate.
Picture showing Hitch Plate loosened and slid downwards providing access to the rear frame plate. Kinda dark I know.
Drilling Two 8mm Holes for the Bolts that will screw into the frame mod when completed.
With the saw, cut horizontaly across the top of the rear frame plate left and right. Very easy to do and took about 30 seconds per side. There is a hole in the top center of the rear frame plate that makes it easy to insert the blade of the saw into and begin cutting.
Making Two Horizontal Cuts Left/Right on the Back Plate using the Reciprocating Saw
You cannot cut the vertical welds on the left/right sides of the plate. To tight in there with the saw. We ground them with a cone shaped grinder bit attached to the drill and when they were weakened, hit them with a flat tipped chisel and broke the welds.
Grinding the left/right vertical welds on the plate
Insert a small pry bar and pry down the rear plate
Prying the rear plate down
Clean up the rim of the rear plate with the grinder removing any burs of steel. Take your time doing this and get it as smooth as possible to make insertion of the frame Mod easy. This was the longest part of the procedure for us. When this is done insert the Mod into the rectal area with the Curved Side Down. We did not use any grease or other lubricant as suggested. If I were to do this again, I would use grease, as it would probably have made it easier to pound in the Mod.
Mod Inserted into Quads Rectum
Next Step is to pound the Mod in by placing a wood block at the rear of the Mod, and slug away with a mallet. I think the one we used was three pounds. It was quite a tight fit and without grease took quite a few hits to get it all the way in. Sorry, no actions photo's of this step. Below is a pic of the Mod completely inserted.
Mod Completey Inserted
Final Steps are to tap the rear plate back up to the vertical so that is flush with the rear of the Frame mod and then screw the two 8mm bolts into the mod using your pre drilled holes. finally spray some metal paint over the area to prevent rust. Replace the Hitch Plate and the Plastics.
UMHF Frame Mod Completely installed and secured with screws.
All done, HAVE A BEER or favorite beverage.
Total Time: One hour.
including removing the Rear Plastic Joint Guards and loosening the Hitch, which was done the day before we did the Mod.


Thread
Thread Starter
Forum
Replies
Last Post
speedbuff
Polaris Ask an Expert! In fond memory of Old Polaris Tech.
13
Nov 11, 2020 10:16 AM
Currently Active Users Viewing This Thread: 1 (0 members and 1 guests)