
LT230 Project
 May 27, 2010 | 10:35 PM
#11
Thread Starter
|
Pro Rider
Joined: May 2010
Posts: 420
Likes: 0
From: Gardner ☮ Boston ~ MA
The G(second digit in the silver section) denotes an '86 model year. I had the same model  .
.
Unfortunately a few of your digits have been scuffed off, but that is pretty common on these things. It makes sense if you use that faq link and work your way to either side using the G as the year.
.Unfortunately a few of your digits have been scuffed off, but that is pretty common on these things. It makes sense if you use that faq link and work your way to either side using the G as the year.
 SO I got me an 86'
And I just found these so looks like I have everything I need to put this beast back together again:

 May 29, 2010 | 12:00 AM
#12
Thread Starter
|
Pro Rider
Joined: May 2010
Posts: 420
Likes: 0
From: Gardner ☮ Boston ~ MA
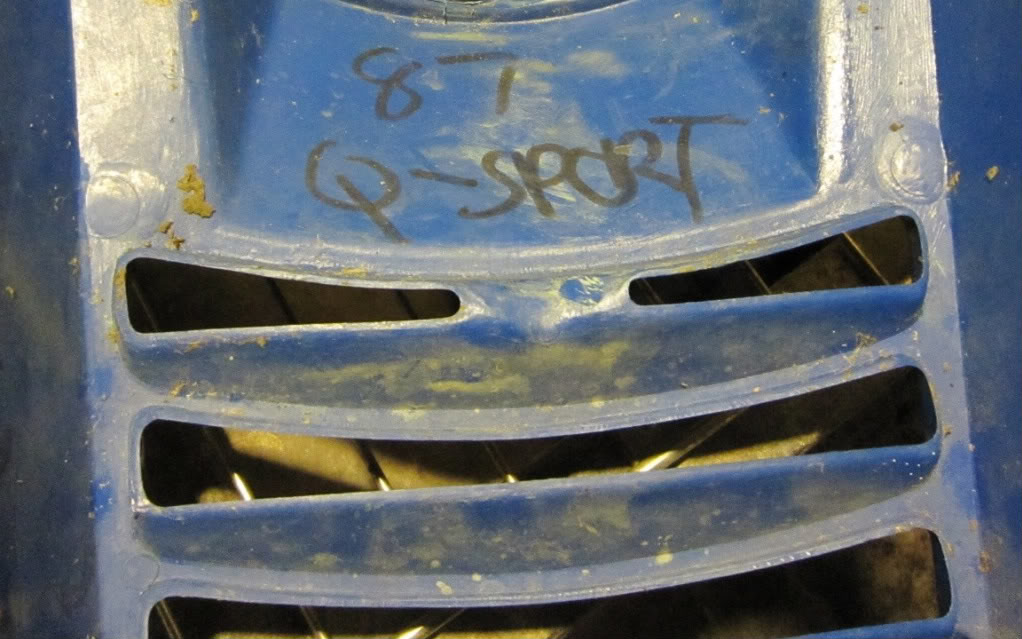
The grill says it's off an 87' and the 87's I think were blue and the 85 and 86 where black? I thought they discontinued the 230s and replaced it with the 230e in 87'?
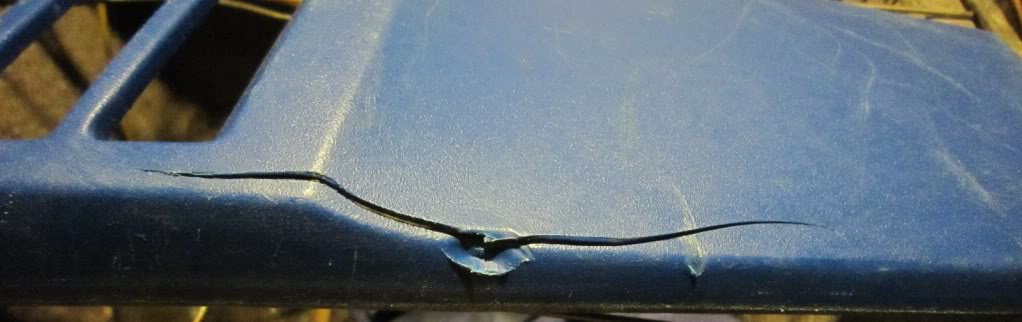
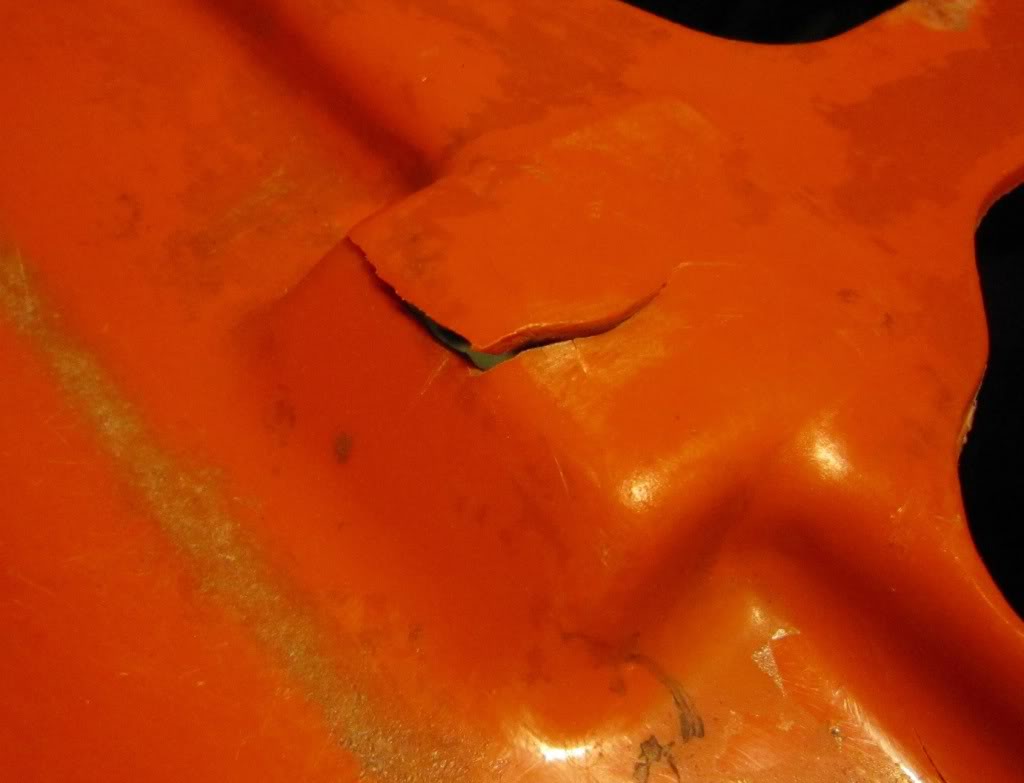
There's a crack in it:
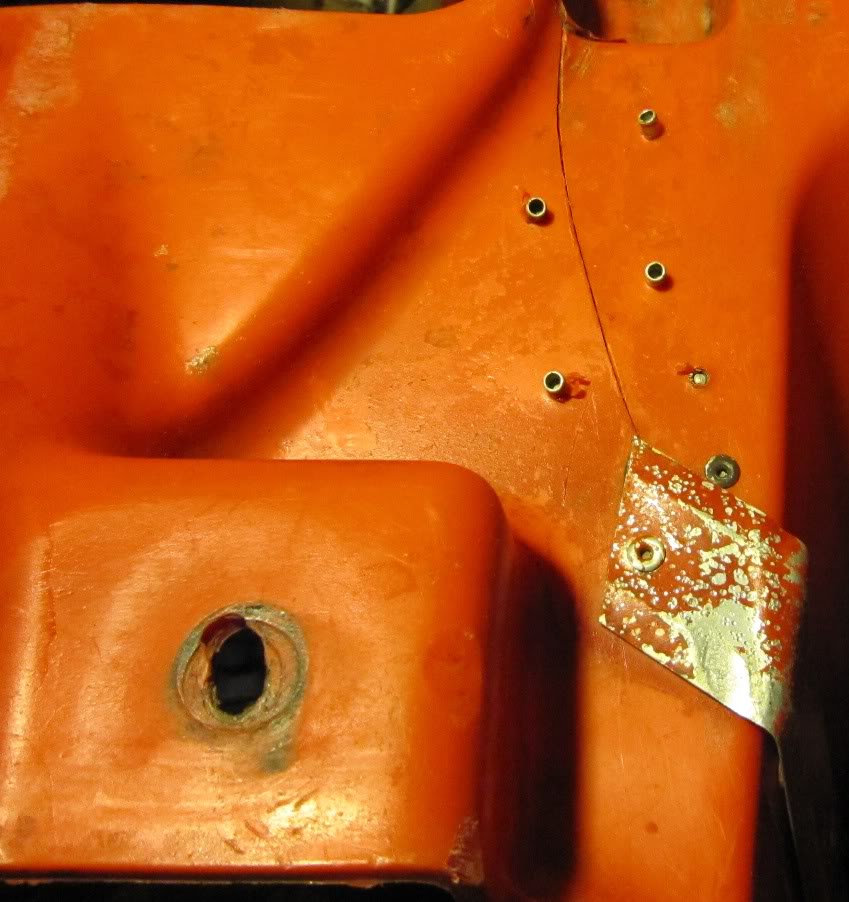
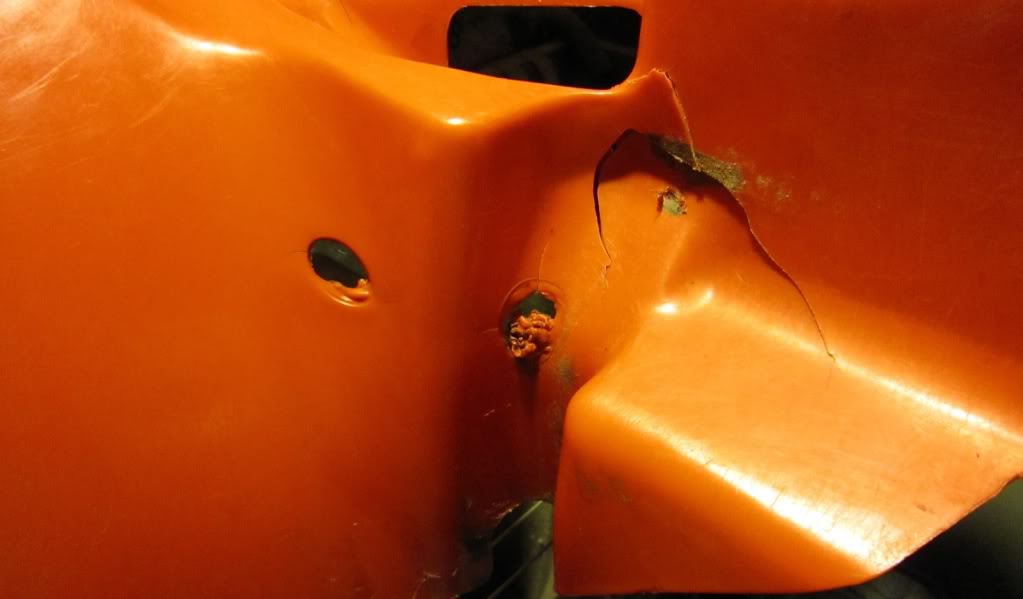
The rear fenders are cracked up badly, but I think I can fix them by pop riveting a thin washer over/around the top mounting holes:
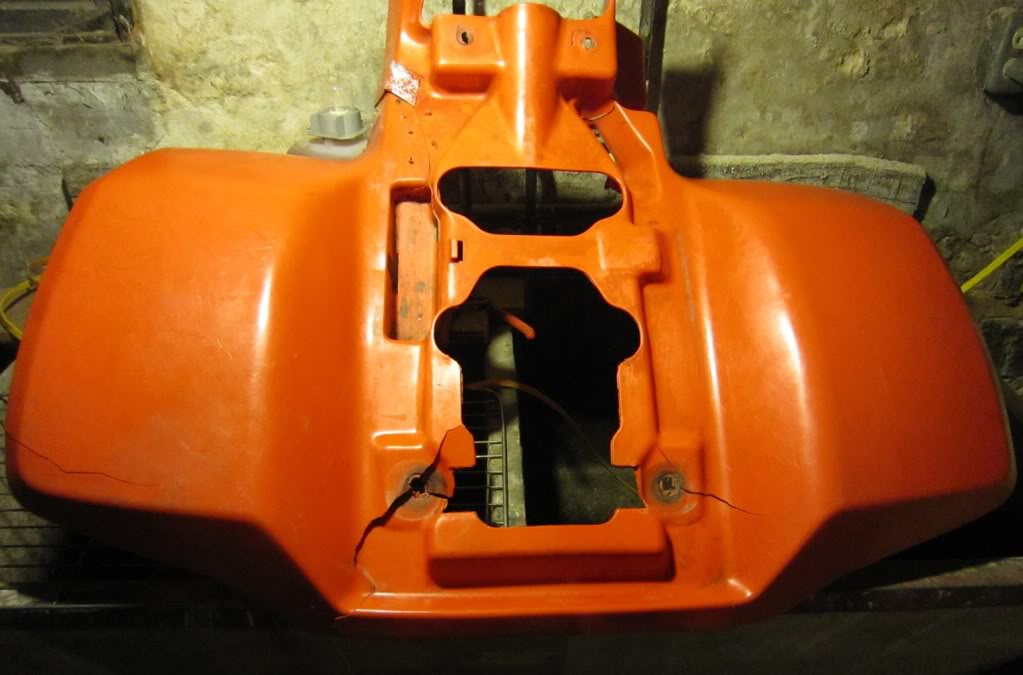
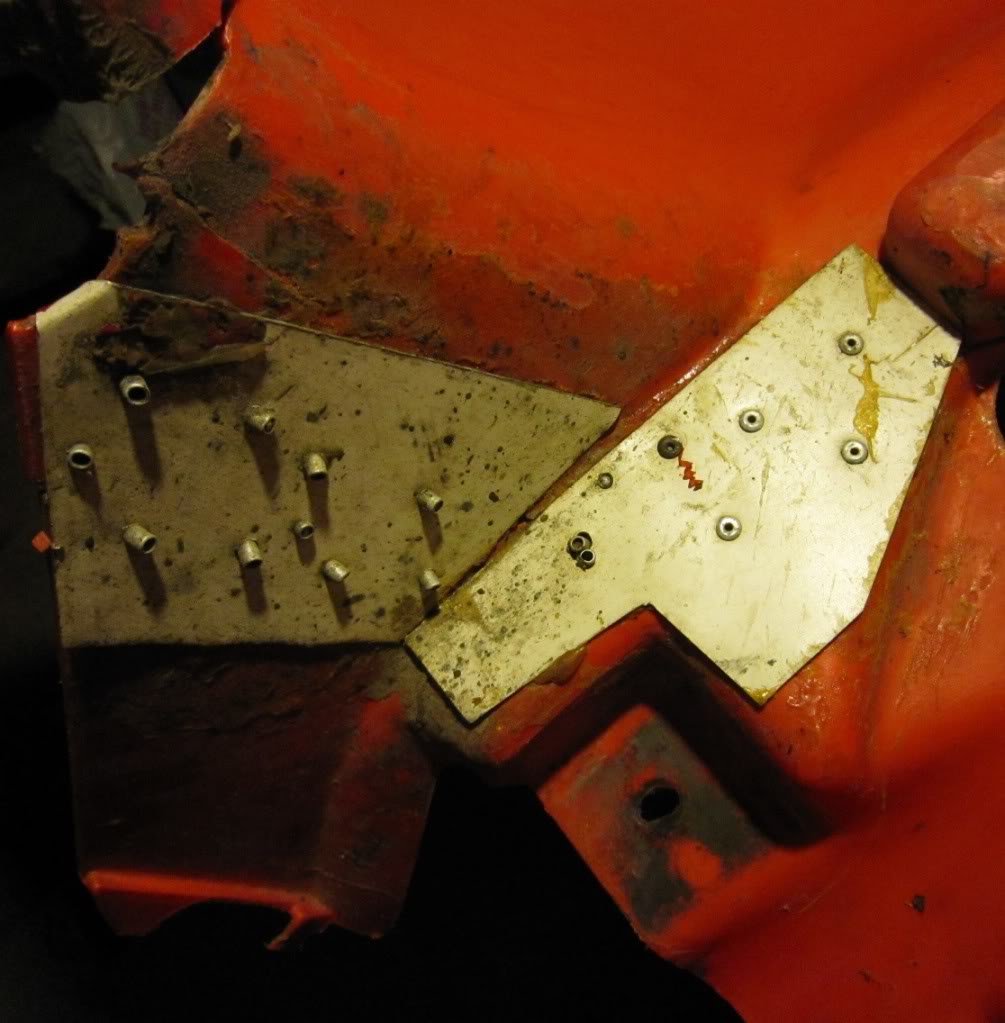
Looks as if someone else already tried some repairs:
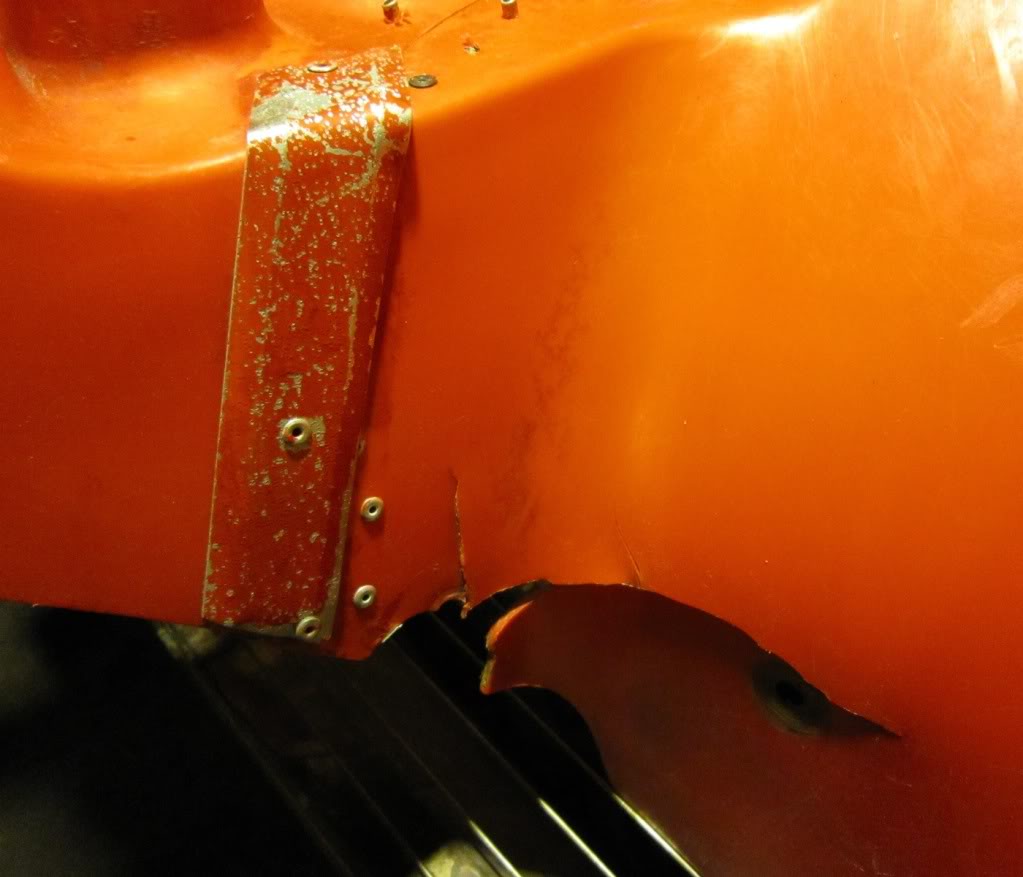
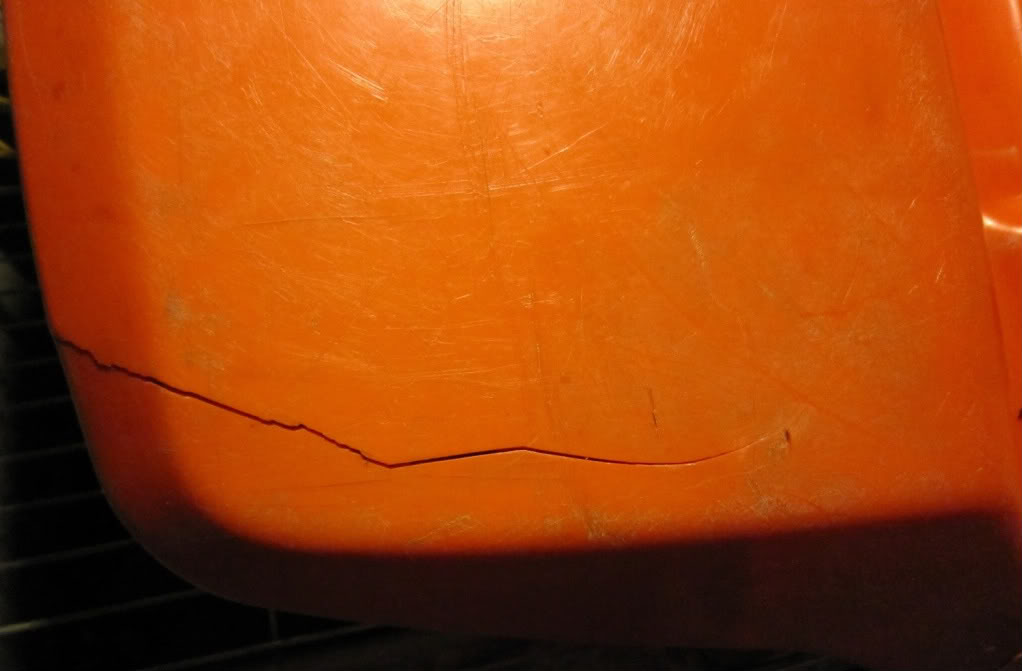
More cracks:
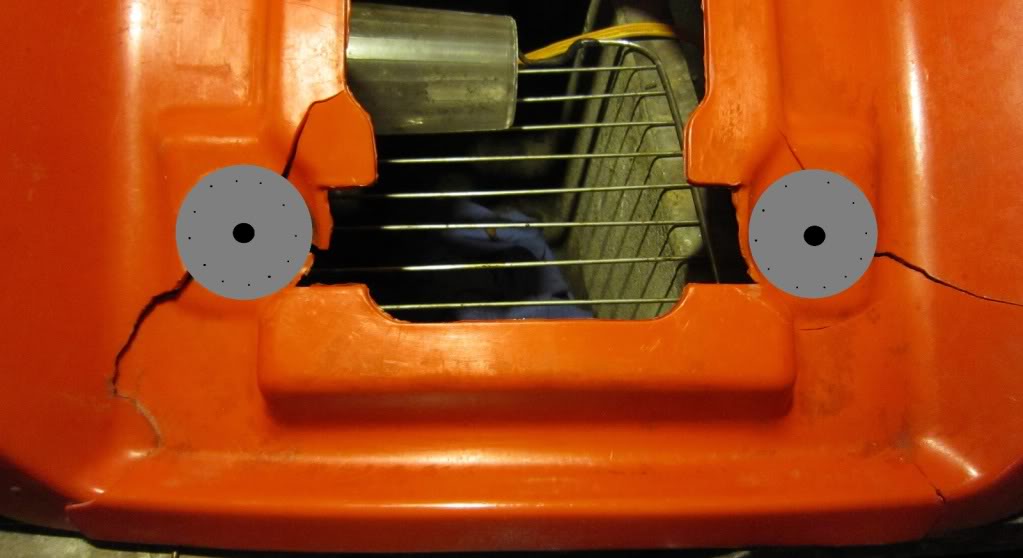
This is how I am going to try to fix them since they are clean breaks, join them and pop rivet pieces of aluminum carpet threshold to the underside. Then use a Dremel and run down the cracks widening them a tiny bit so that there is more surface area for the bondo to grab. Then lightly sand everything with fine fine sand paper and spray paint them yellow with Krylon Fusion!


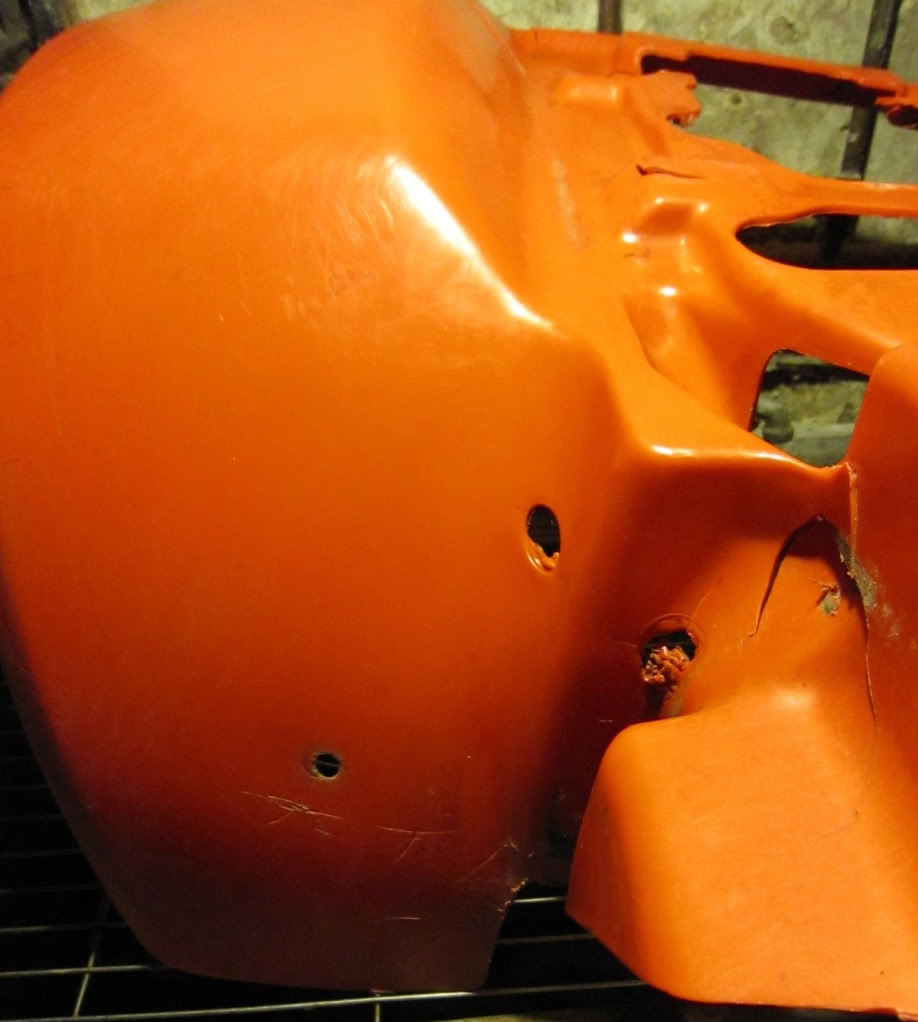
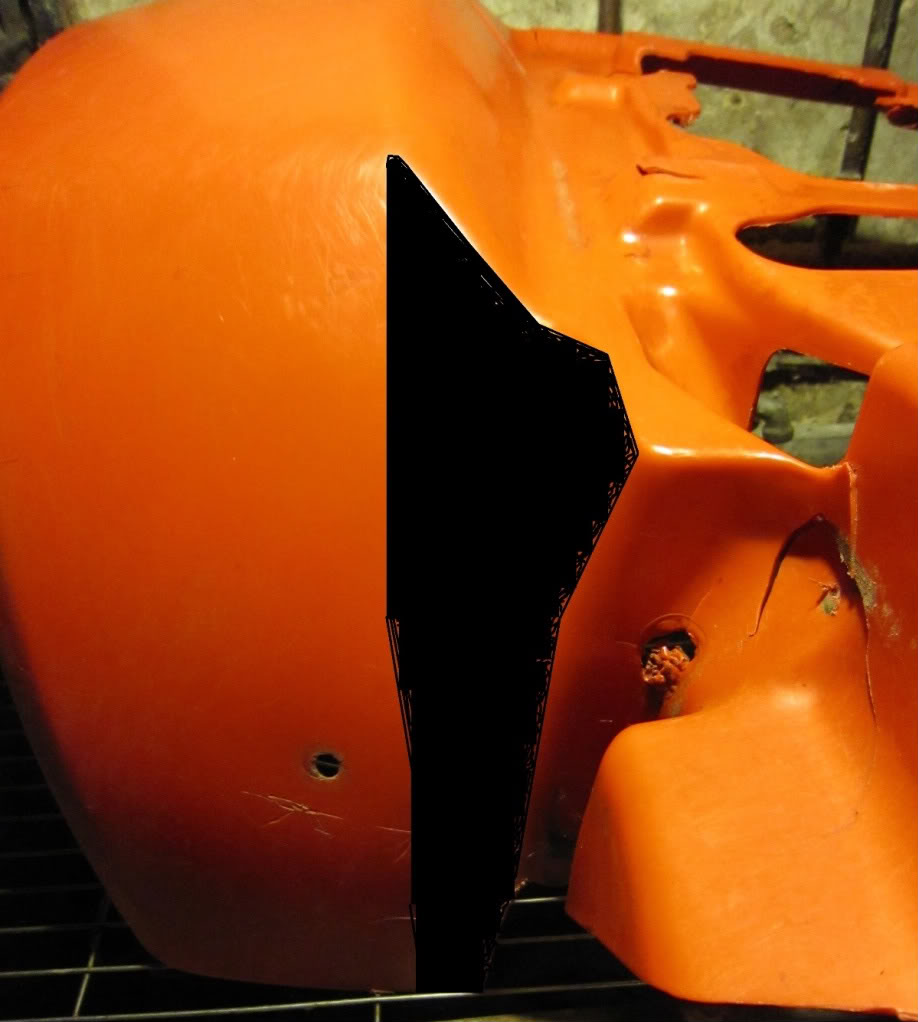
This is my idea for the rear fenders, cut the black area out so they look cooler since eventually I will but putting a lt250r axle in it anyway.
There's a crack in it:
The rear fenders are cracked up badly, but I think I can fix them by pop riveting a thin washer over/around the top mounting holes:
Looks as if someone else already tried some repairs:
More cracks:
This is how I am going to try to fix them since they are clean breaks, join them and pop rivet pieces of aluminum carpet threshold to the underside. Then use a Dremel and run down the cracks widening them a tiny bit so that there is more surface area for the bondo to grab. Then lightly sand everything with fine fine sand paper and spray paint them yellow with Krylon Fusion!
This is my idea for the rear fenders, cut the black area out so they look cooler since eventually I will but putting a lt250r axle in it anyway.
May 29, 2010 | 06:03 AM
#13

Extreme Pro Rider
Knows Old ATV Questions!
Knows Old ATV Questions!
Joined: Sep 2003
Posts: 5,127
Likes: 3
Old age getting to me. Yes the '85 was a black seat and nose, '86 was a blue seat, black nose, and '87 was blue seat and nose, umm, I think... Anyway I would go by the vin, as it would be easy to replace the nose piece from a different year. The last few years of pruduction the S model got a small displacement bump closer to 250cc, and wore white plastics with blue highlights. '87 probably was the first year of the E model, but it didn't replace the S. The E had electric start and an auto clutch vs kick and manual. They were sold side by side for several years.
A few things on the plastics. Drill stop the cracks where you can. What I mean by that, is take a drill bit and drill a hole right at the end of the crack. This helps keep the crack from getting bigger. I have had good luck drilling holes on either side of the crack, then, use zip ties and a zip tie gun(maybe $10.00 at wally world) to pull the sides together. Makes a fairly low profile, cheap, and sturdy repair. At 25 + years old, I don't think I would cut any of the plastic away like in that one pic. That stuff is probably getting pretty brittle seeing all the cracks it already has.
A few things on the plastics. Drill stop the cracks where you can. What I mean by that, is take a drill bit and drill a hole right at the end of the crack. This helps keep the crack from getting bigger. I have had good luck drilling holes on either side of the crack, then, use zip ties and a zip tie gun(maybe $10.00 at wally world) to pull the sides together. Makes a fairly low profile, cheap, and sturdy repair. At 25 + years old, I don't think I would cut any of the plastic away like in that one pic. That stuff is probably getting pretty brittle seeing all the cracks it already has.
May 29, 2010 | 10:55 PM
#14
Thread Starter
|
Pro Rider
Joined: May 2010
Posts: 420
Likes: 0
From: Gardner ☮ Boston ~ MA
Thanks for the advice. I would rather stay away from ugly looking zip ties if I can. Instead of cutting them I'll find rear fenders off a warrior.
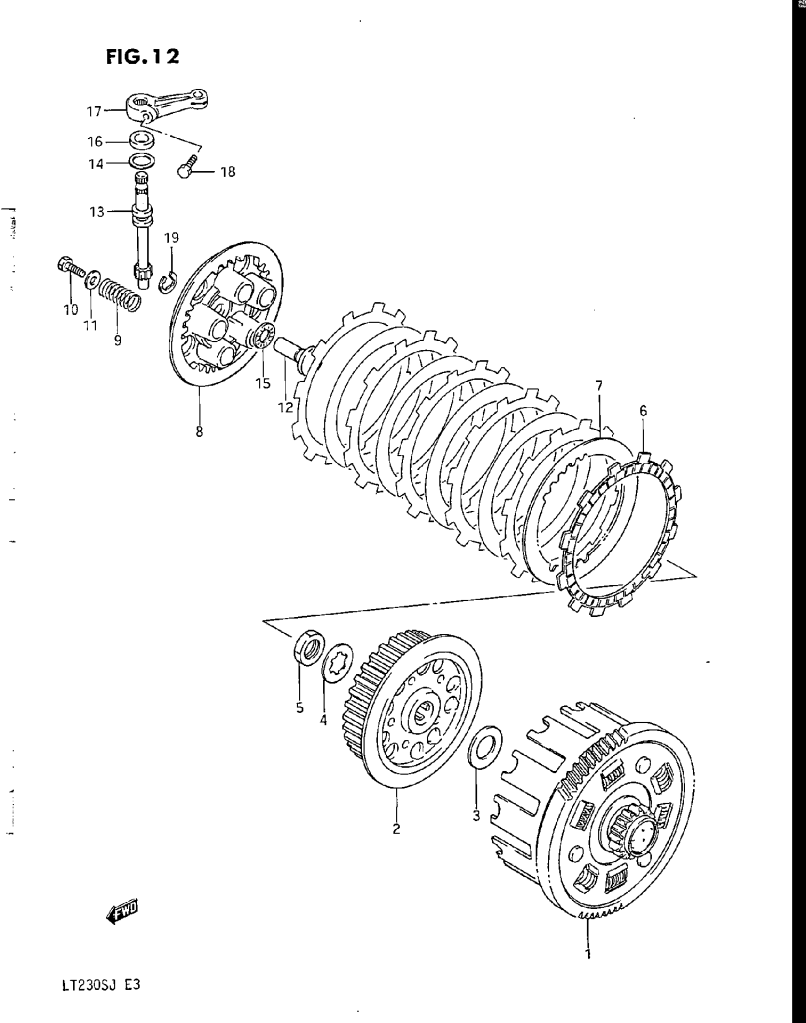
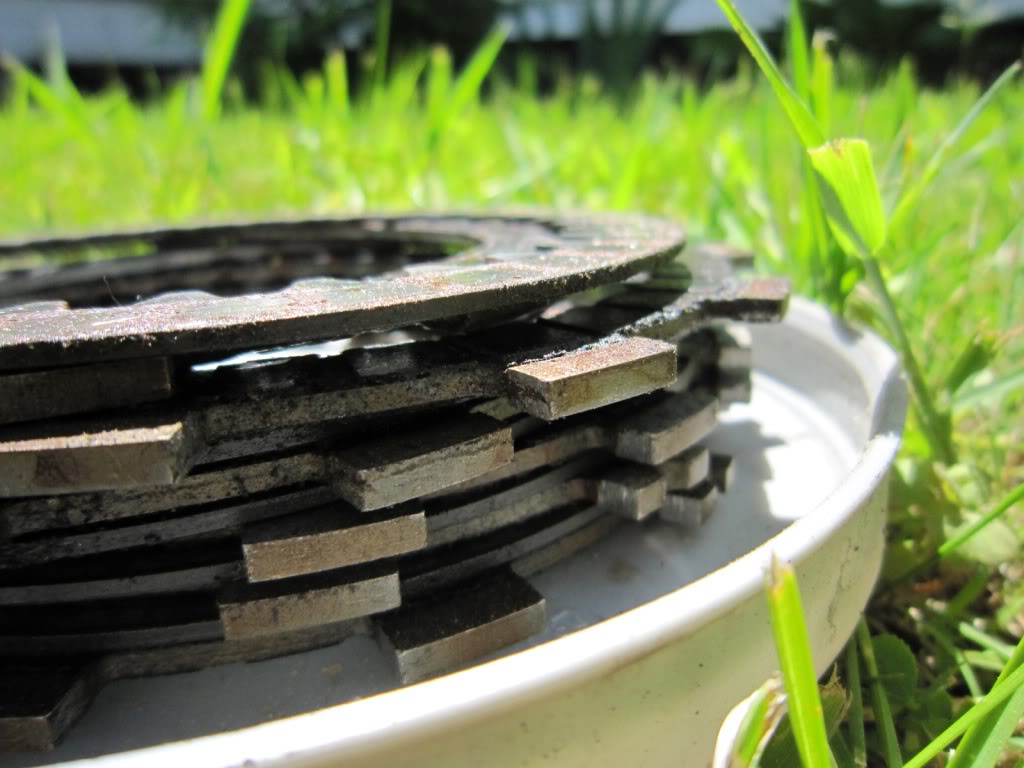
CLUTCH QUESTIONS! - The metal rings between the friction plates should be reusable right? I'll have to post pictures of my plates but the squares are very very thin. The pressure plate and the sleeve hub both have a little groove in them that looks like the plate squares fit in, and the sleeve hubs rear wall is worn thin. It this because of beating on the clutch when the plates needed to be replaced? I hope I can reuse them, and, how tight do I snug the bolts on the pressure plate, what torque lbs rating? Also I noticed that the pressure plates have a grove notch in them, are they all suppose to be lined up (all the notches?)
CLUTCH QUESTIONS! - The metal rings between the friction plates should be reusable right? I'll have to post pictures of my plates but the squares are very very thin. The pressure plate and the sleeve hub both have a little groove in them that looks like the plate squares fit in, and the sleeve hubs rear wall is worn thin. It this because of beating on the clutch when the plates needed to be replaced? I hope I can reuse them, and, how tight do I snug the bolts on the pressure plate, what torque lbs rating? Also I noticed that the pressure plates have a grove notch in them, are they all suppose to be lined up (all the notches?)
May 30, 2010 | 10:49 PM
#15
Thread Starter
|
Pro Rider
Joined: May 2010
Posts: 420
Likes: 0
From: Gardner ☮ Boston ~ MA
Ok so hopefully these photos help determine things.
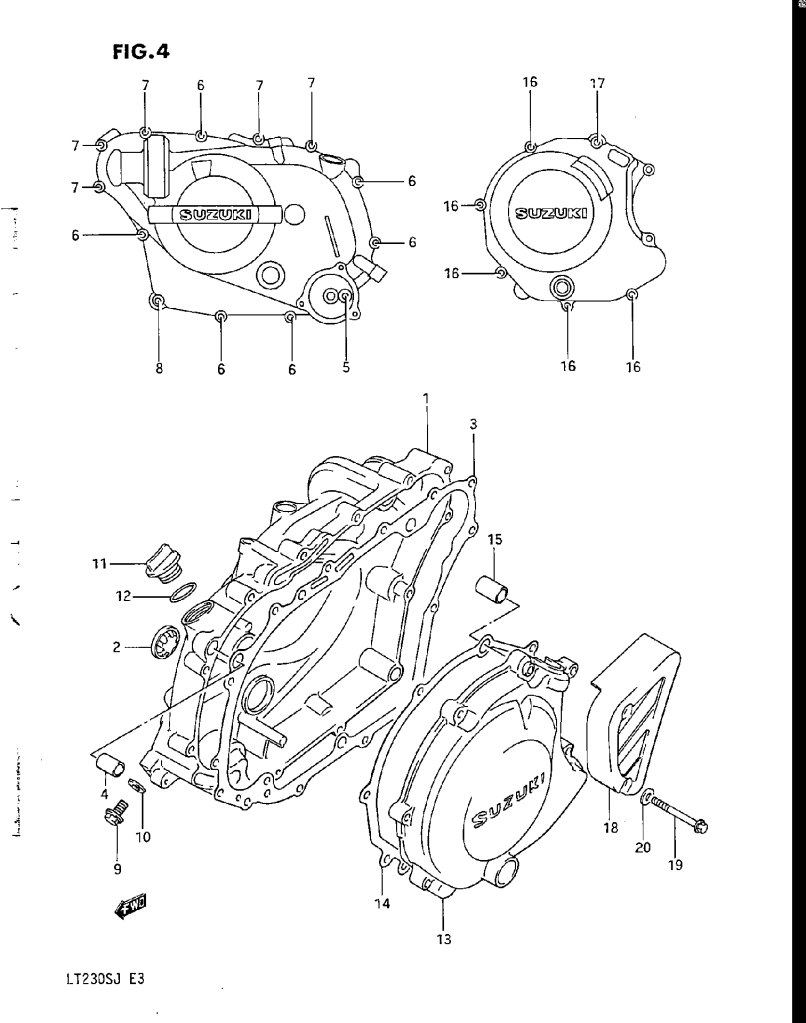
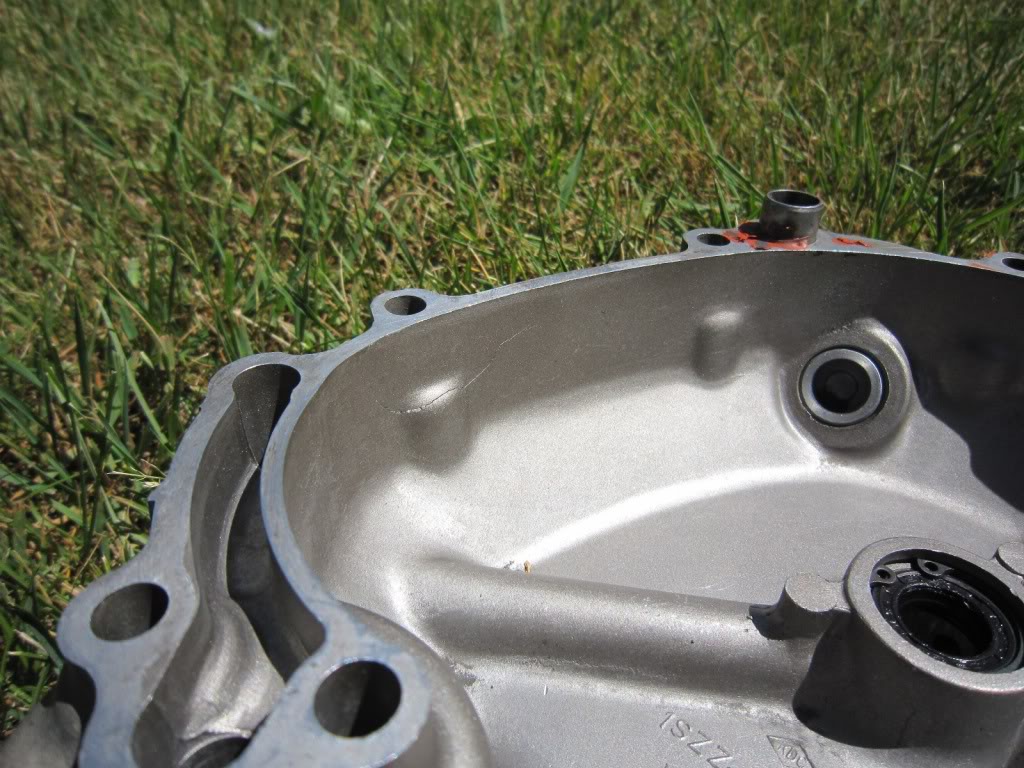
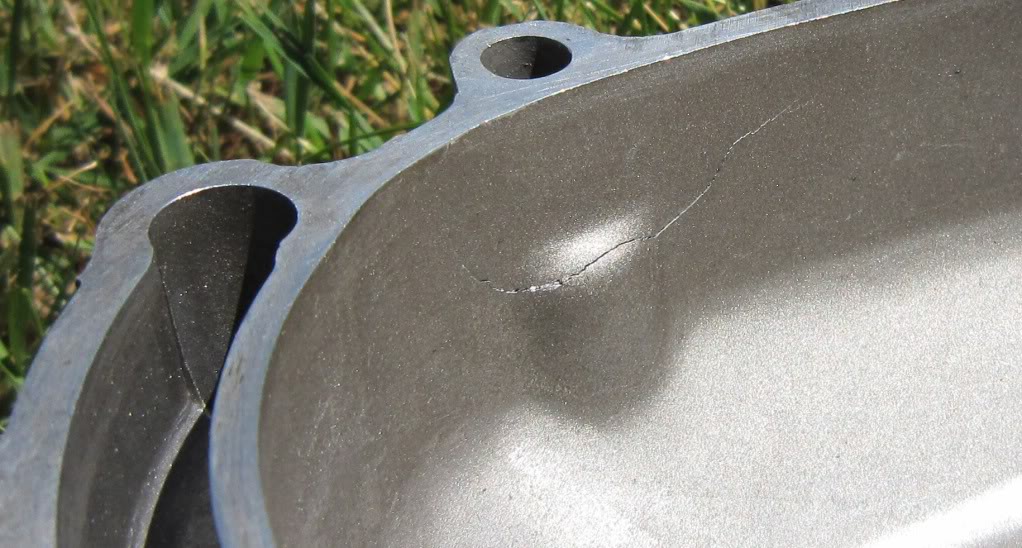
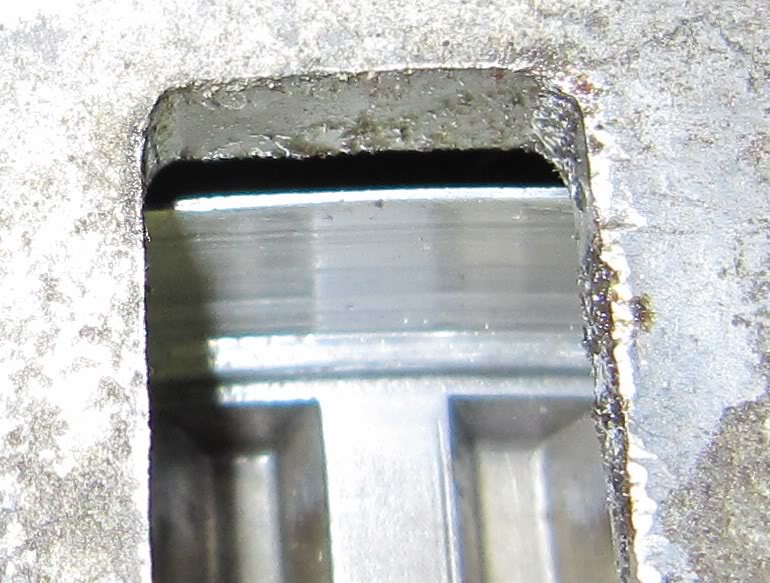
This is a small crack in the engine side cover, does this HAVE to be smooth? Can I patch this up from the inside with a little JBweld mixture?
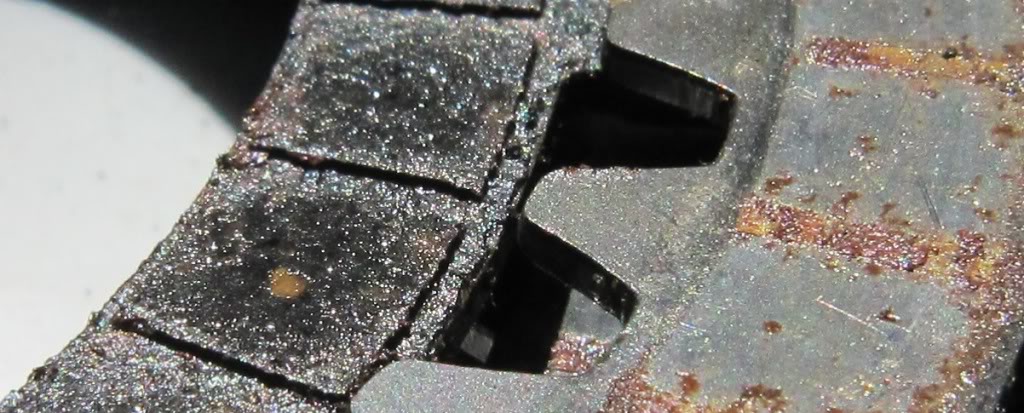
This is the pressure plate, is it ok to reuse? It's worn down a tad bit?
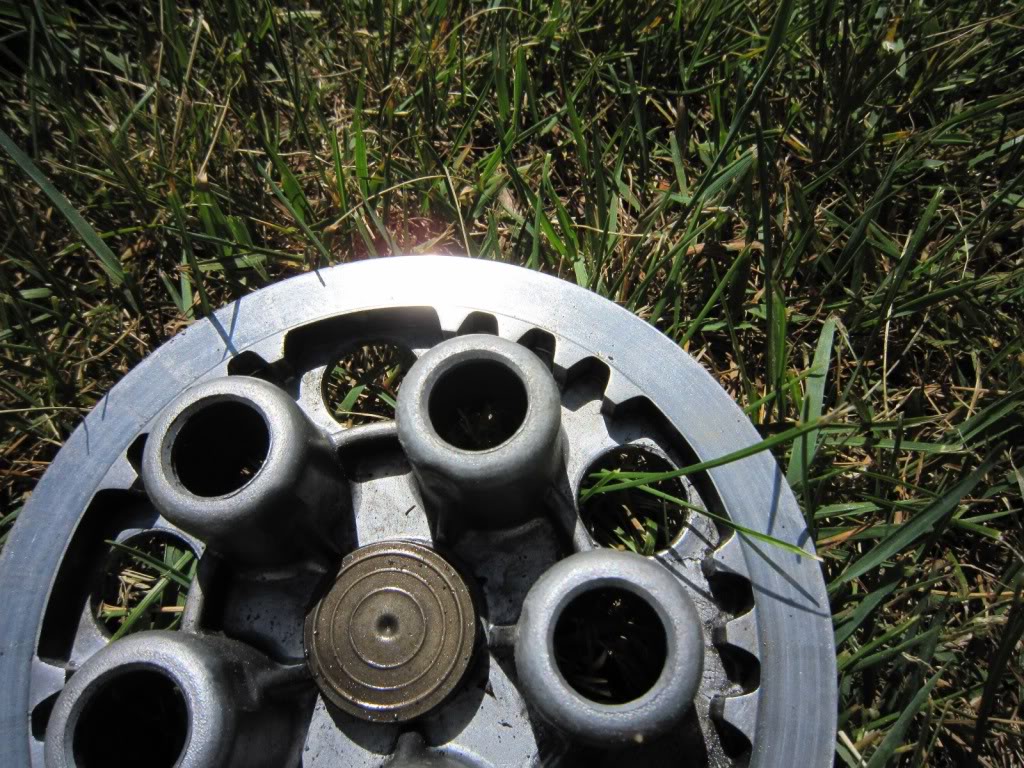
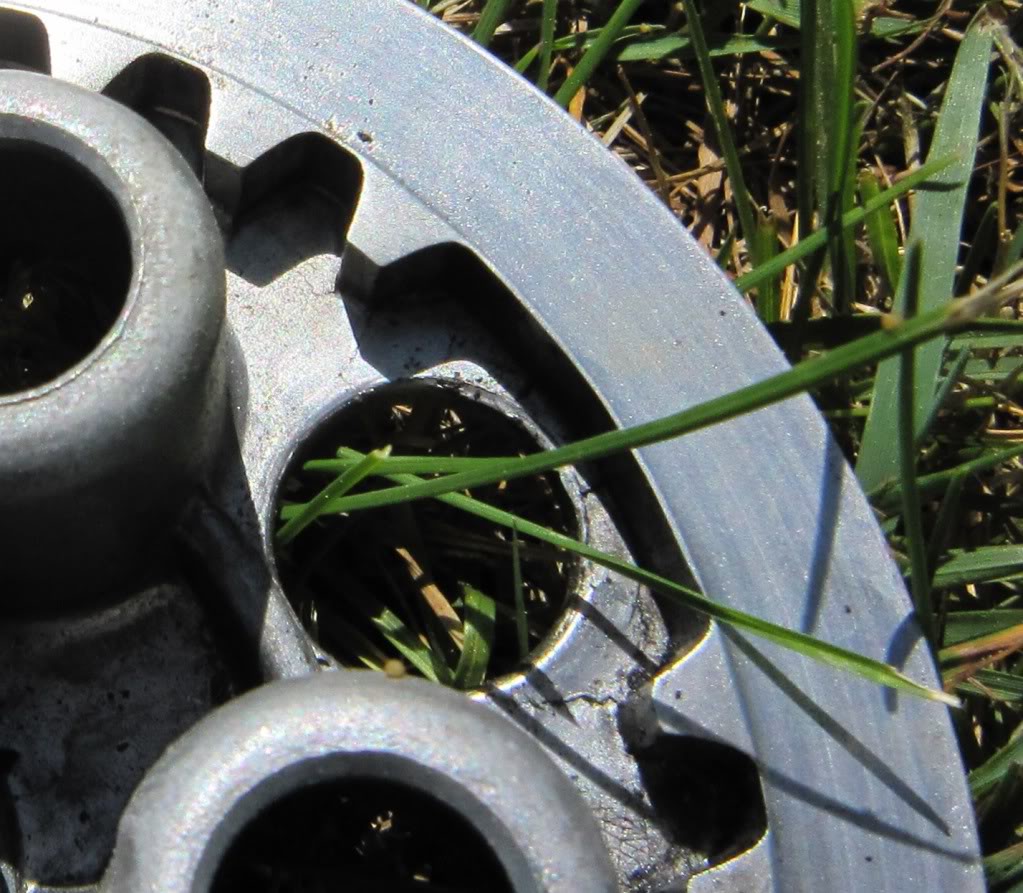
How about the clutch hub? Is it too thin to reuse?
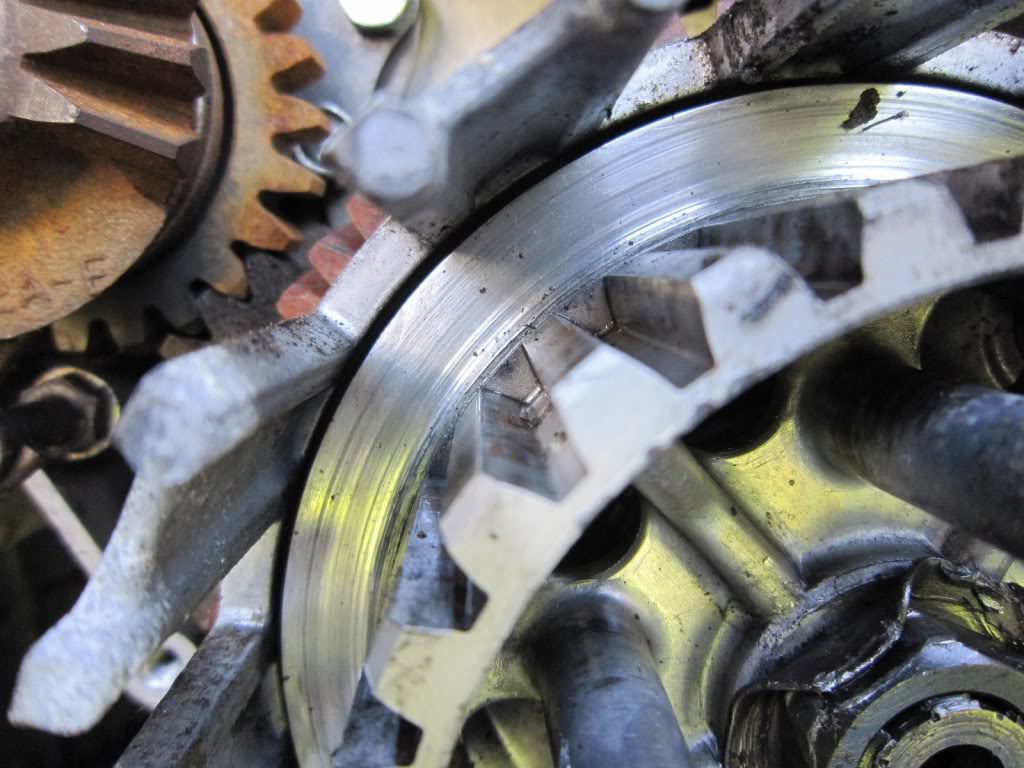

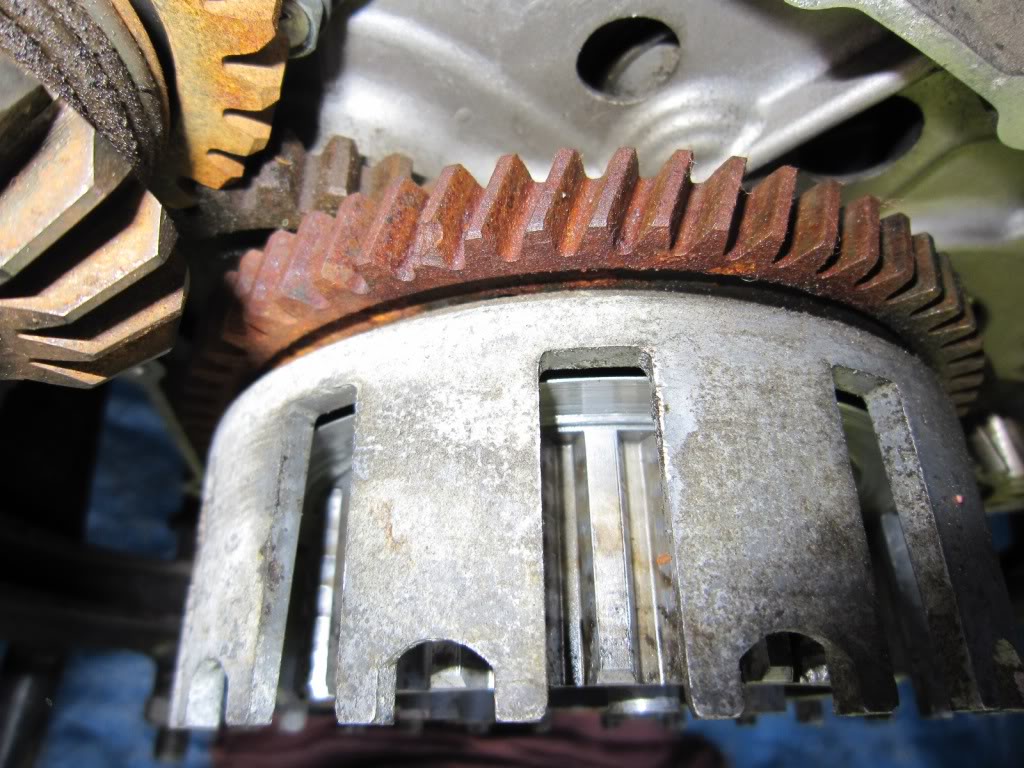
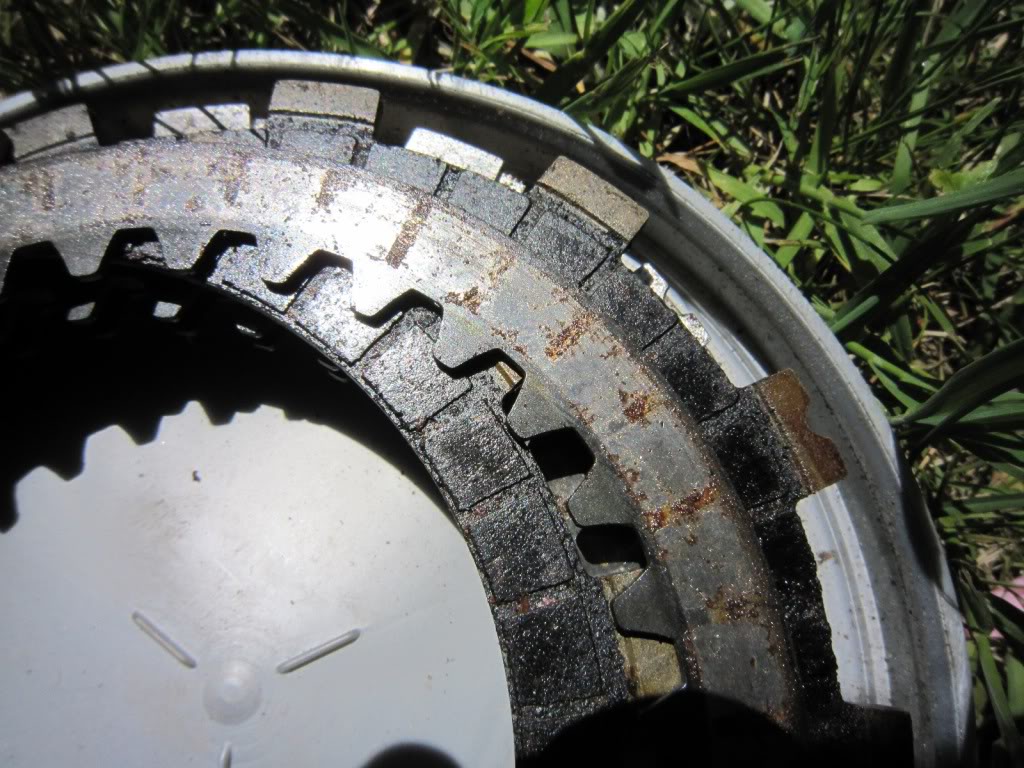
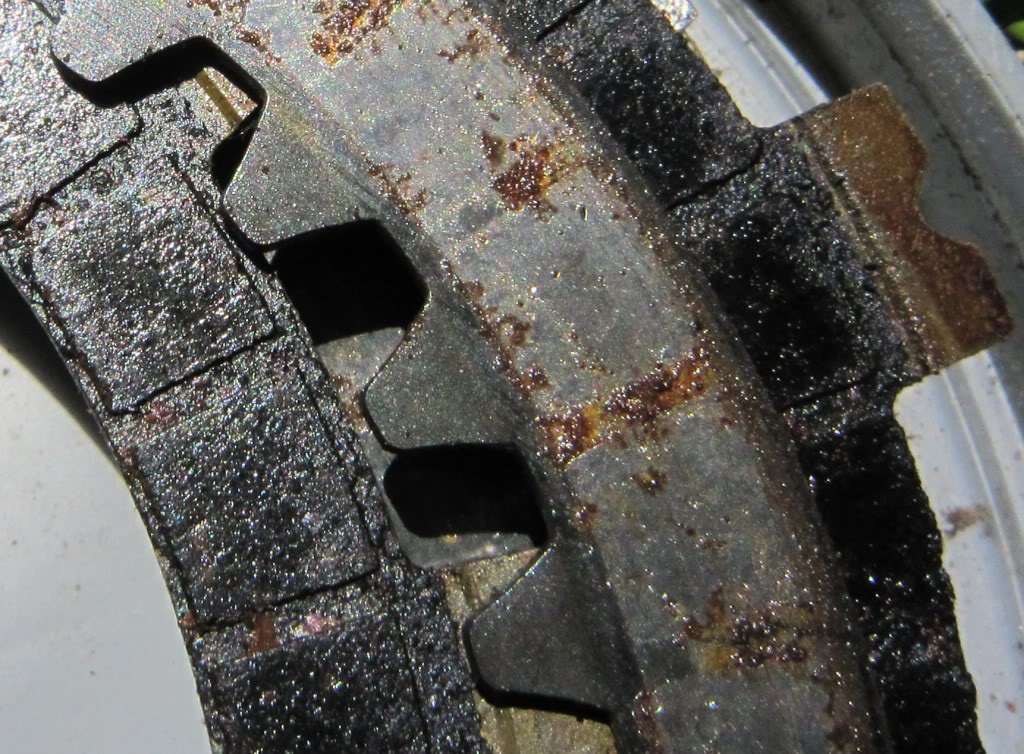
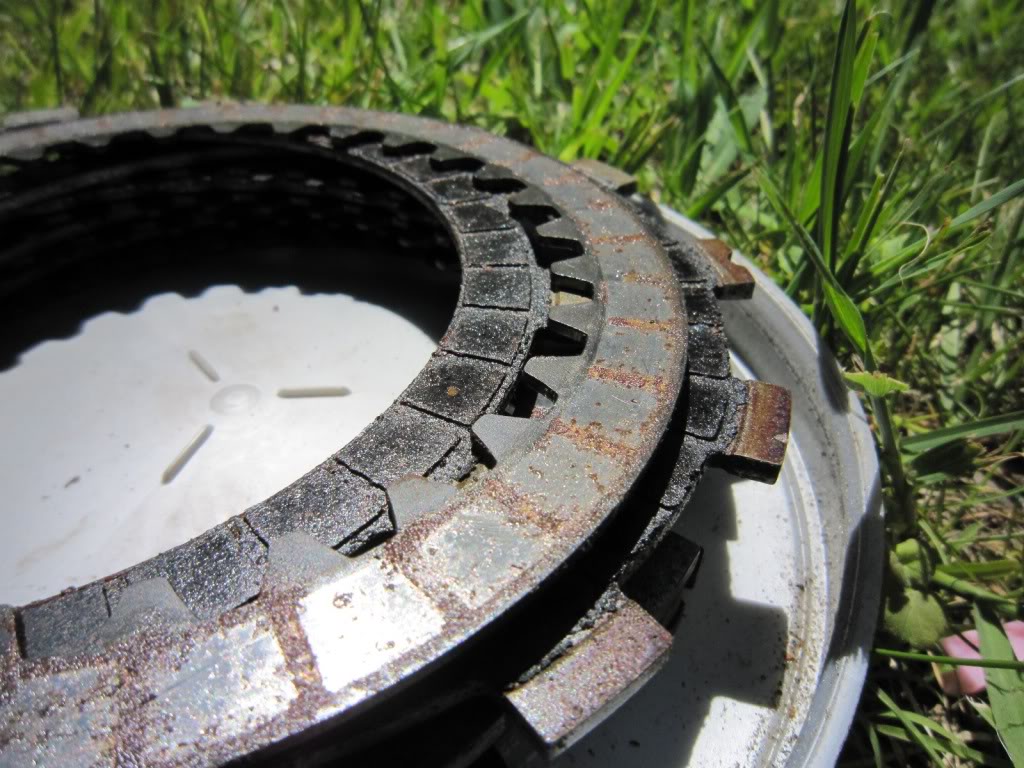
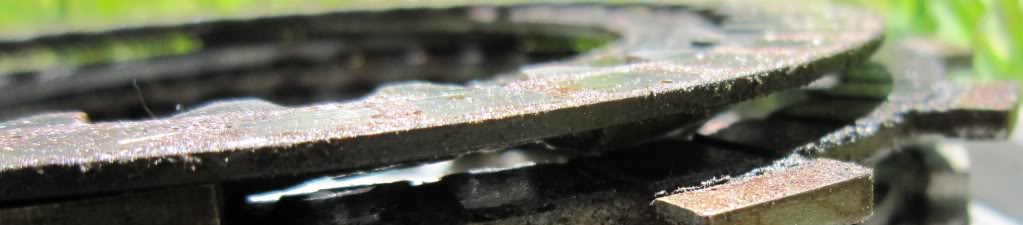
And the friction plates, those are gone right? Can I reuse the metal disks? They are not too thin?
This is a small crack in the engine side cover, does this HAVE to be smooth? Can I patch this up from the inside with a little JBweld mixture?
This is the pressure plate, is it ok to reuse? It's worn down a tad bit?
How about the clutch hub? Is it too thin to reuse?
And the friction plates, those are gone right? Can I reuse the metal disks? They are not too thin?
May 31, 2010 | 05:16 PM
#16
Extreme Pro Rider
Knows Old ATV Questions!
Knows Old ATV Questions!
Joined: Sep 2003
Posts: 5,127
Likes: 3
Generally, the metal plates can be reused as long as they aren't warped, but with the way those are looking, I would replace them. As for the other parts, get a service manual for it so you can check tolerances. I don't see a problem fixing that crack, but why not have it welded since it is already apart?
Jun 1, 2010 | 07:40 AM
#17
Thread Starter
|
Pro Rider
Joined: May 2010
Posts: 420
Likes: 0
From: Gardner ☮ Boston ~ MA
Well I can not find the disks anywhere online for sale so I was going to try to clean these up smooth. Then replace the friction plates for now. I can not find anyone that will weld white aluminum for cheap around the area. We have a welder but just gas/stick.
Jun 1, 2010 | 03:18 PM
#18
Extreme Pro Rider
Knows Old ATV Questions!
Knows Old ATV Questions!
Joined: Sep 2003
Posts: 5,127
Likes: 3
Since it is an older model, you will have to call most companies to verify if they have them. You should still be able to get OEM wherever you found the parts diagrams. I just peaked at Barnetts' site and they show part numbers for the fibers, steels, and springs. I'm sure they could hook you up. That top steel looks warped in the one pic, may just be an optical illusion. Even after cleaning them up, i have a feeling the pitting left behind from the rust and/or the loss of width will make them virtually useless. I would hate to see you put in new fibers only to burn them out right away with other parts being bad.
Usually the Japanese aluminum is of good quality, I don't know what a new case costs, but it shouldn't be any more than $50.00 to weld and smooth that surface back up to snuff.
Usually the Japanese aluminum is of good quality, I don't know what a new case costs, but it shouldn't be any more than $50.00 to weld and smooth that surface back up to snuff.
Jun 1, 2010 | 09:20 PM
#20
Extreme Pro Rider
Knows Old ATV Questions!
Knows Old ATV Questions!
Joined: Sep 2003
Posts: 5,127
Likes: 3
If you aren't into re welding the side cover, I would try the JB or something along that line first. A lot of machines out there fixed that way and running fine. I just figured since it was apart it made sense to weld it for a stronger fix. Does the crack go through to the outside surface?