
LT250R Overhaul Project
 Jun 6, 2011 | 08:53 PM
#171

Pro Rider
Joined: Sep 2010
Posts: 314
Likes: 0
To check for leaks just clean the welds very good, then put just a little oil on the inside of the case where the spots where welded and then wait over night or a couple days and see if you see any oil on the outside of the case, if you find oil, I would take it back and have them weld it more.
Jun 6, 2011 | 09:00 PM
#172
Thread Starter
|
Pro Rider
Joined: May 2010
Posts: 420
Likes: 0
From: Gardner ☮ Boston ~ MA
The swing arm bearings fit nice and snug so I should be all set with that weld. I had to put the bearings in the freezer overnight, then use an electric heat gun to heat the aluminum up around the holes. Took a rubber mallet and tapped them in, works very well!
") Jul 19, 2011 | 09:28 PM
Jul 19, 2011 | 09:28 PM
#175
Thread Starter
|
Pro Rider
Joined: May 2010
Posts: 420
Likes: 0
From: Gardner ☮ Boston ~ MA
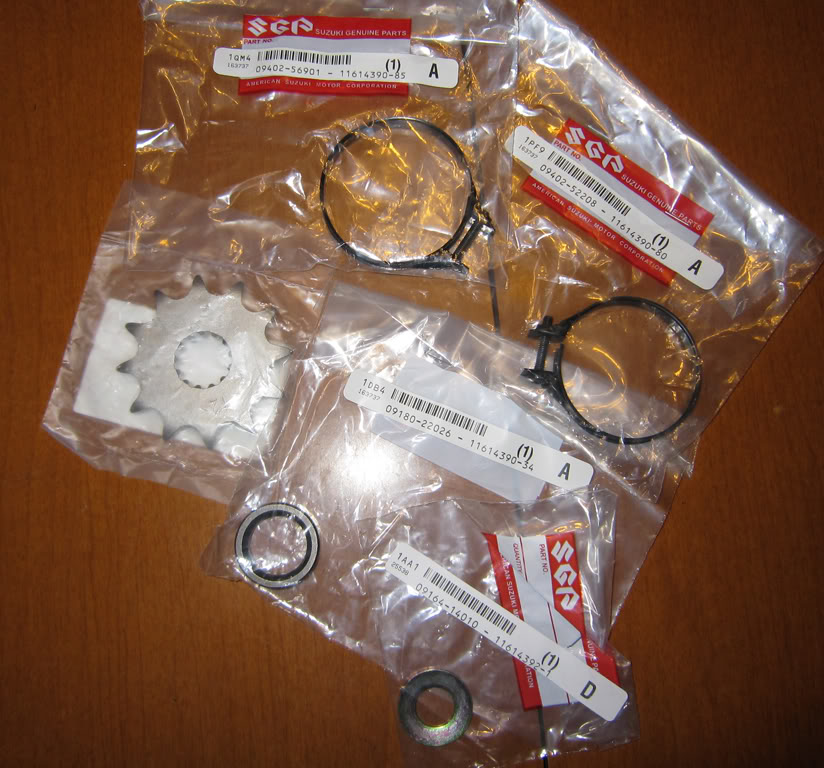
More parts, still no time. Intake boot clamps, front 12T sprocket (dropped a few teeth for some torque over speed) a final drive shaft outer spacer (should hold the oil back now behind the front sprocket) and an OEM balancer lock washer update (the first generation did not use one and the balancer would come loose)
Jul 26, 2011 | 10:06 PM
#176
Thread Starter
|
Pro Rider
Joined: May 2010
Posts: 420
Likes: 0
From: Gardner ☮ Boston ~ MA
As you can see the new lock washer for the crank balancer drive gear has more spring to it, so hopefully it will not fall off again like in the beginning of this thread.
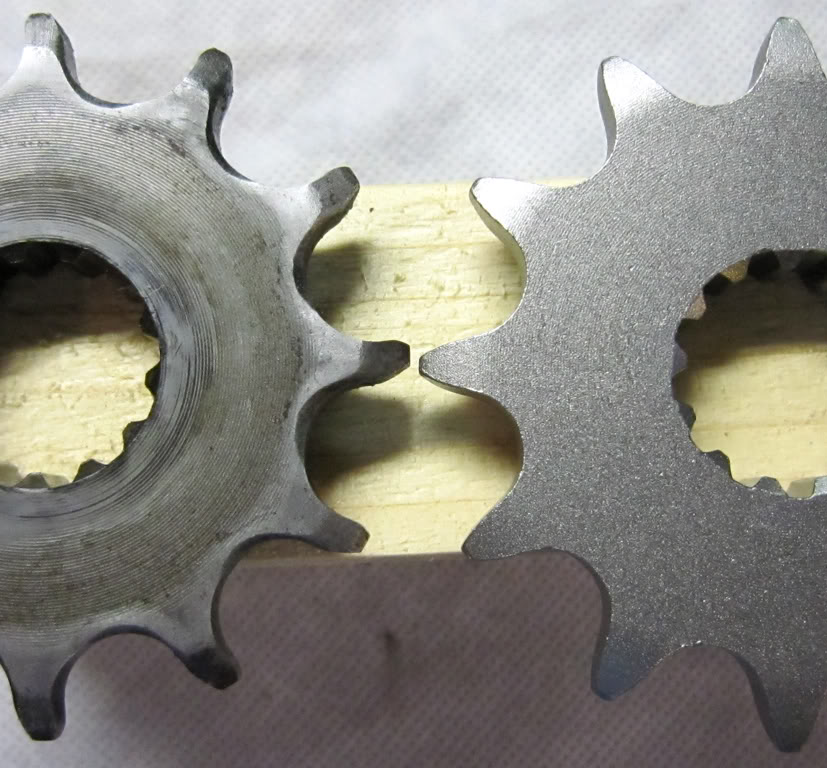
Comparing new to old sprockets, the old one was actually already a 12T so I am not gaining anymore torque (no wonder it spins the tires everywhere I go) also the old sprockets teeth are all bent in one direction.
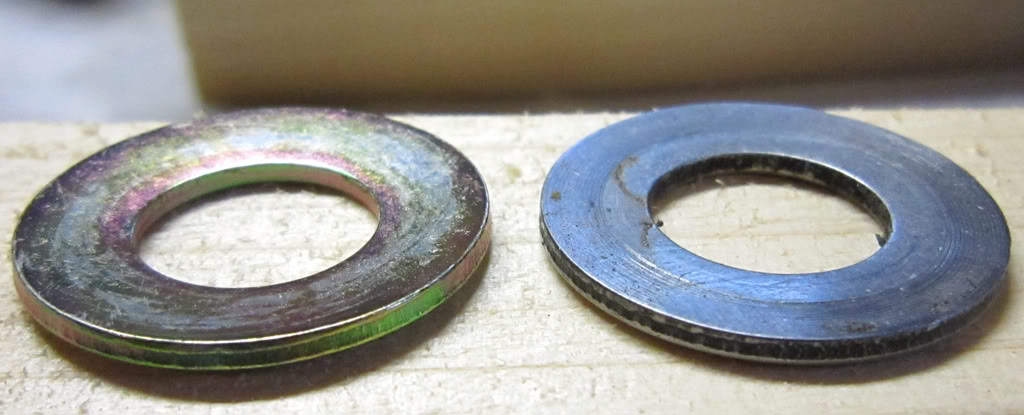
The old final drive shaft spacer had grooves in it, possibly leaking oil around the front sprocket.
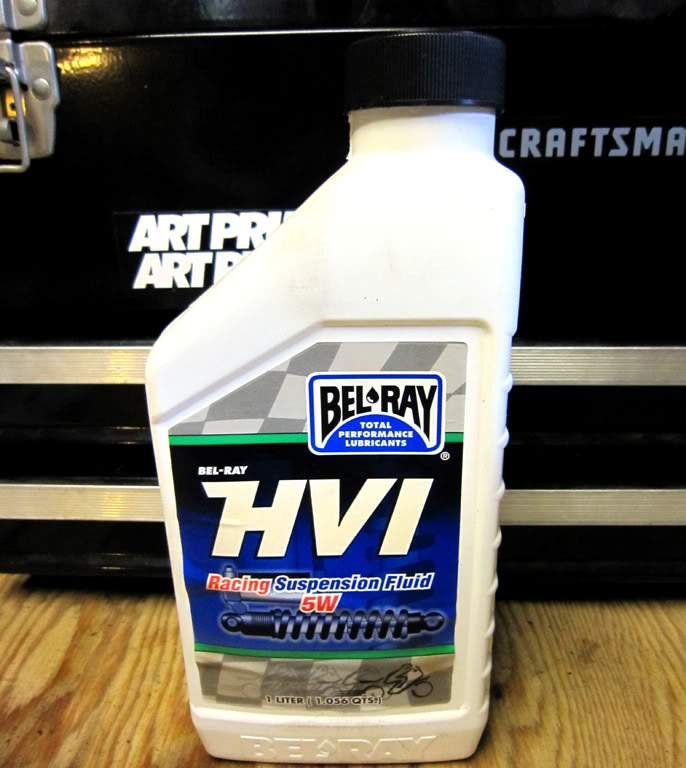
The guru at the shop sold me this, he said it was good stuff but kind of expensive ($17 I think it was) but since no body else has good info about rebuilding the rear shock and I am left with more questions then answers I will show you all how it is done.
Comparing new to old sprockets, the old one was actually already a 12T so I am not gaining anymore torque (no wonder it spins the tires everywhere I go) also the old sprockets teeth are all bent in one direction.
The old final drive shaft spacer had grooves in it, possibly leaking oil around the front sprocket.
The guru at the shop sold me this, he said it was good stuff but kind of expensive ($17 I think it was) but since no body else has good info about rebuilding the rear shock and I am left with more questions then answers I will show you all how it is done.
Oct 11, 2011 | 07:04 PM
#178
Thread Starter
|
Pro Rider
Joined: May 2010
Posts: 420
Likes: 0
From: Gardner ☮ Boston ~ MA
It certainly has! I have not touched it since, I have been very busy. My grandmother died and then I started working 40+ hours a week again, plus I now have a truck to work on. This will be completed as a winter project (as soon as it's too cold to work on my truck outside haha) will keep you posted.
May 6, 2012 | 11:29 PM
#179
Thread Starter
|
Pro Rider
Joined: May 2010
Posts: 420
Likes: 0
From: Gardner ☮ Boston ~ MA
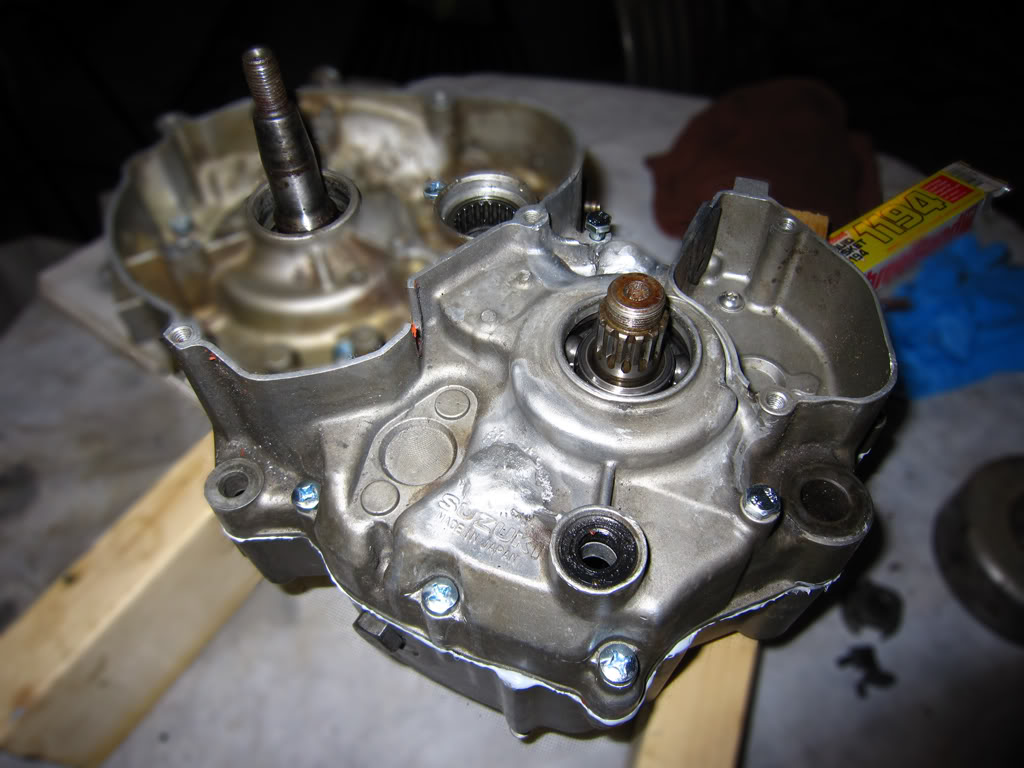
WELL...so long for the Winter project! It has sparked my interest again so I grabbed a buddie and some brews and started re-assembling today. I cleaned the inside thoroughly (the outside/flywheel compartments still need to be cleaned better before I continue reassembly) but I got the entire crankcase and transmission lubed and reassembled. All the seals but one have been pulled ready for the installation of the new ones, the Three-Bond that leaked out will need to be cleaned up with a razor tomorrow. The hardware store did not have all the bolts I needed in the same type, so I have three different head styles. I started with the slim allen heads, then phillips head machine screws like stock...then the hexagon bolts (you can see one sticking up I need to clean the thread tomorrow with a tap). The engine will deff need a good polishing after I am done, I gave the Three-Bond a few min to get tacky before joining the case half's but I do not remember reading to only go so tight for a few hours like Permatex usually says so I star pattern tighten it down:
May 13, 2012 | 09:23 PM
#180
Thread Starter
|
Pro Rider
Joined: May 2010
Posts: 420
Likes: 0
From: Gardner ☮ Boston ~ MA
I installed the crank balancer, driven and drive gears...along with the kick starter driven and water pump drive (and all the seals). Everything turns really hard now, not sure if it's just new seals being tight but I made sure to oil up all new seals good with that red assembly lube. You would think if I did not get the seals pressed in completely that torquing the gears on would push them in, but like I said they turn harder but smoothly:

The shift fork seal seems like it does not go in all the way either, I used a socket and a rubber mallet to be sure. Does this look right to you?
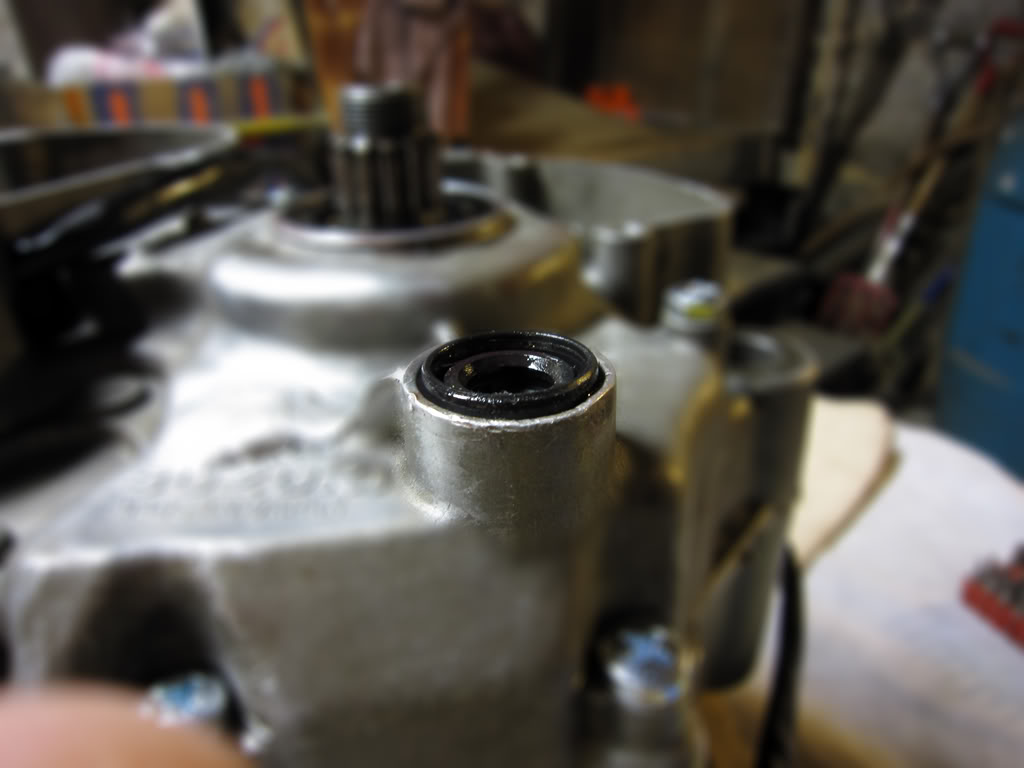
The stator plate is slotted, what does this do?? Adjust timing or spark strength??

The shift fork seal seems like it does not go in all the way either, I used a socket and a rubber mallet to be sure. Does this look right to you?
The stator plate is slotted, what does this do?? Adjust timing or spark strength??

