


LT250R Overhaul Project
 May 30, 2012 | 01:06 AM
#211
Thread Starter
|
Pro Rider
Joined: May 2010
Posts: 420
Likes: 0
From: Gardner ☮ Boston ~ MA

Problem solved, never use lock or spring washers lol. I went to the hardware store in search for (even though they did not come on my engine) copper washers, no luck but I did find brass washers and I figured brass will take a bite better than steel:
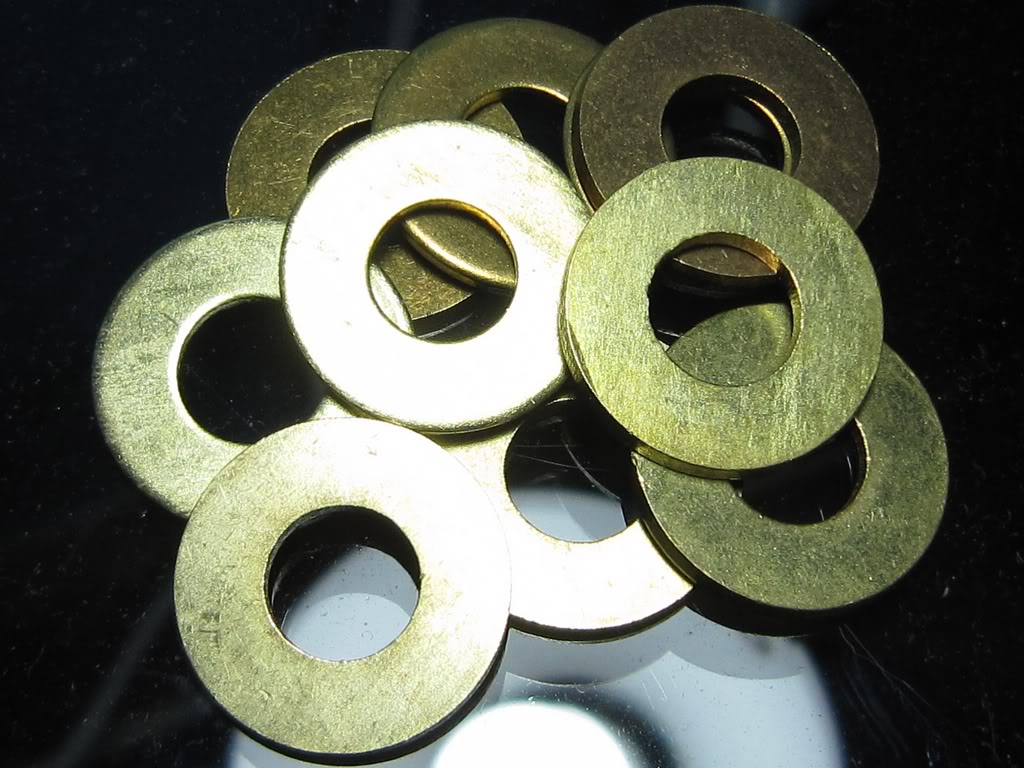
Replaced all 6 head washers and the four 8mm base washers, runs great no death rev...I also turned the air mixture screw in it was quite far out. I no longer see coolant on the outside edge of the gaskets so I can confirm those spring washers either loosen or read a false rating or do not transfer the torque through the washer.
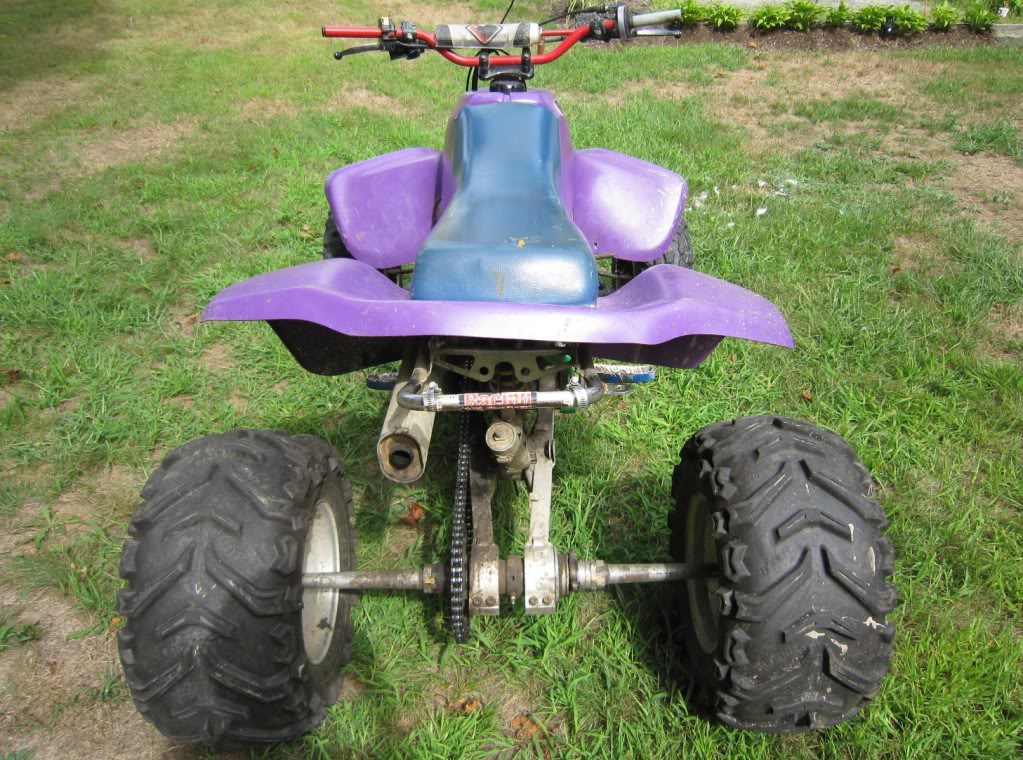
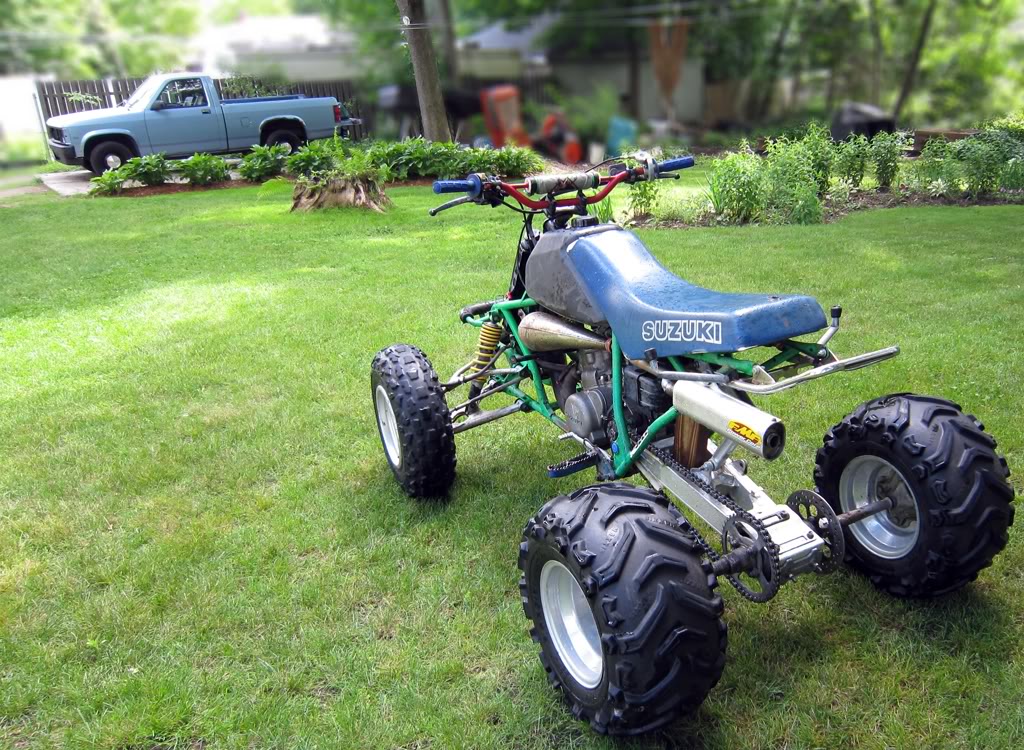
This is what I'm thinking on doing with the paint:
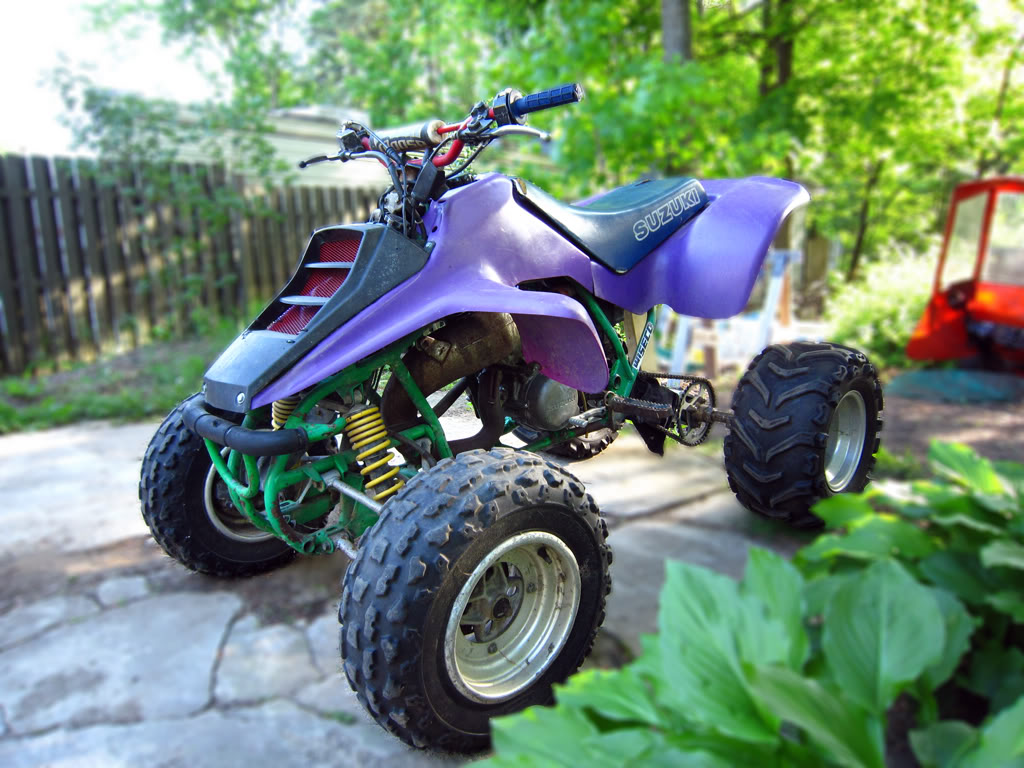
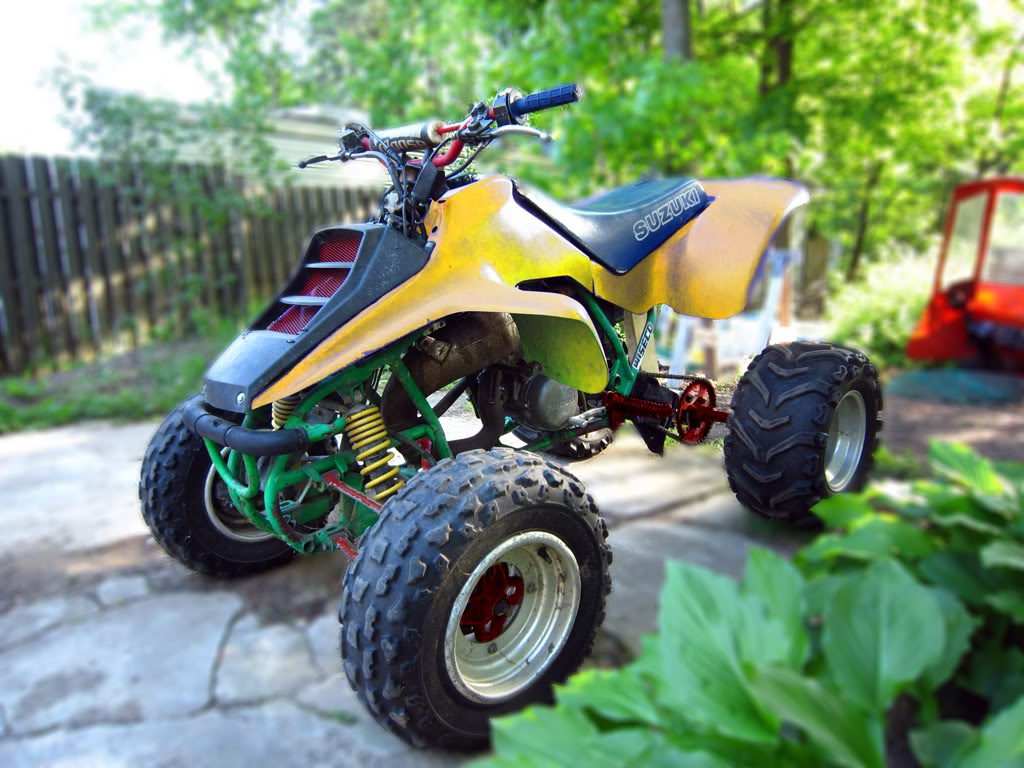
Replaced all 6 head washers and the four 8mm base washers, runs great no death rev...I also turned the air mixture screw in it was quite far out. I no longer see coolant on the outside edge of the gaskets so I can confirm those spring washers either loosen or read a false rating or do not transfer the torque through the washer.
This is what I'm thinking on doing with the paint:
Jun 2, 2012 | 04:23 PM
#212
Thread Starter
|
Pro Rider
Joined: May 2010
Posts: 420
Likes: 0
From: Gardner ☮ Boston ~ MA
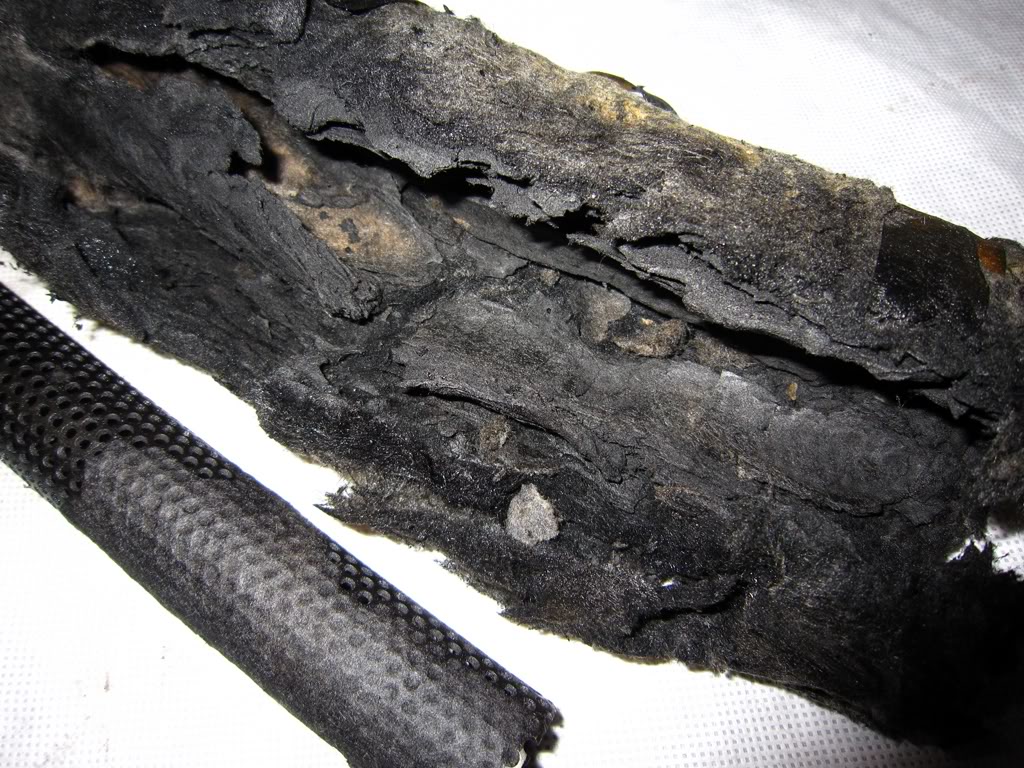
Slowly making my way through all parts/assembly's...took apart my FMF silencer. Must have been shot for YEARS, the inside was completely cooked and crispy/hard/flaky:
The inner tube was clogged, a wire brush only worked if I smashed it directly down into the holes but I eventually got it all clean:

I was in a pinch to use what I had laying around so with some research fine steel wool and fiberglass insulation seemed like the best DIY materials I had on hand. I unraveled "finishing" steel wool pads into strips and wound them tightly around the inner tube then tied it down with pieces of welding wire instead of masking tape or tip ties:
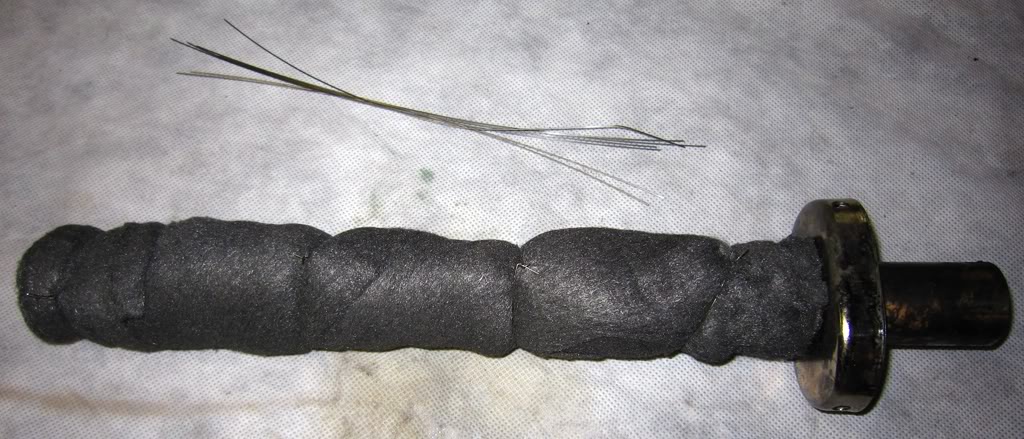
I then used home fiberglass insulation, tightly wrapped of course. More welding wire securing the outer fiberglass layer as well (instead of holding both materials with one layer of wire ties on the outside of the insulation):

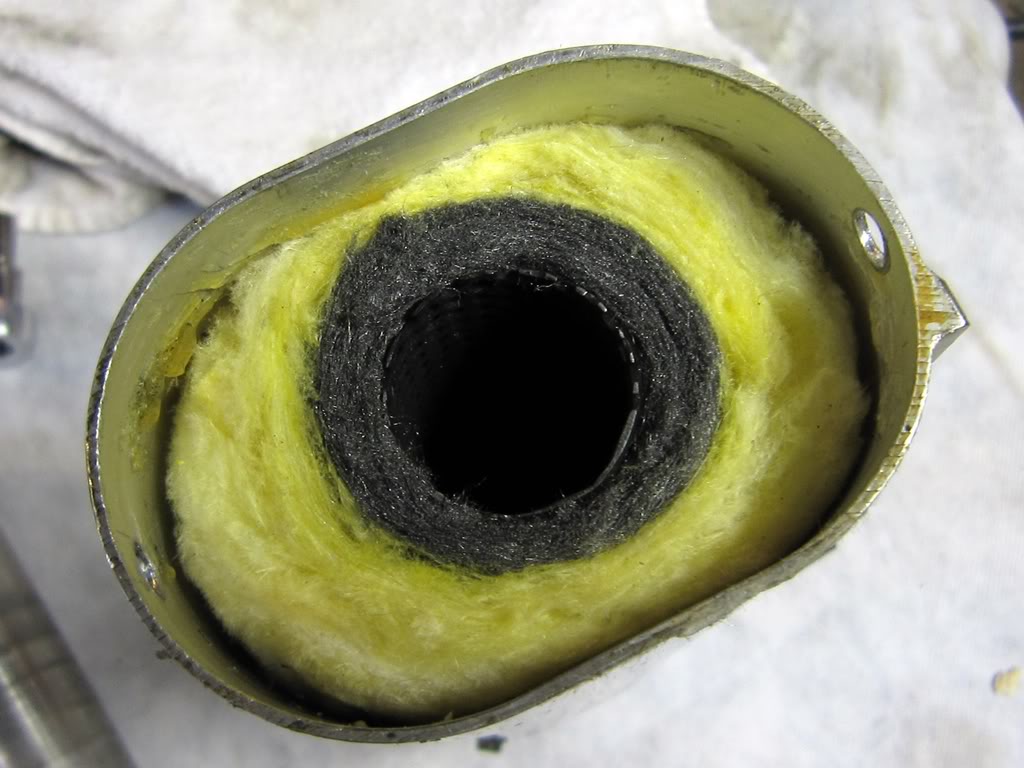
Almost done, sealed both sides with some Permatex "black" maximum oil resistance gasket maker. The layers might not be 100% evenly dense on all sides but this seems pretty damn good for what I had laying around, I tested it too and it DEFF made a difference; it has a nice deep sound to it now (just don't stand behind the exhaust for a few runs as to not breath in fiberglass):
The inner tube was clogged, a wire brush only worked if I smashed it directly down into the holes but I eventually got it all clean:
I was in a pinch to use what I had laying around so with some research fine steel wool and fiberglass insulation seemed like the best DIY materials I had on hand. I unraveled "finishing" steel wool pads into strips and wound them tightly around the inner tube then tied it down with pieces of welding wire instead of masking tape or tip ties:
I then used home fiberglass insulation, tightly wrapped of course. More welding wire securing the outer fiberglass layer as well (instead of holding both materials with one layer of wire ties on the outside of the insulation):
Almost done, sealed both sides with some Permatex "black" maximum oil resistance gasket maker. The layers might not be 100% evenly dense on all sides but this seems pretty damn good for what I had laying around, I tested it too and it DEFF made a difference; it has a nice deep sound to it now (just don't stand behind the exhaust for a few runs as to not breath in fiberglass):
Jun 2, 2012 | 08:06 PM
#213

Trailblazer
Joined: Feb 2012
Posts: 87
Likes: 0
From: Northern CA
I just finished the heat cycles on my 87 LT250r, took it for a short ride today and it runs incredible. Actually scared me in fourth when the front tires came off the ground after I started giving it throttle down the straight. Can't wait to get my bike in the sand!
Jun 2, 2012 | 08:34 PM
#214
Thread Starter
|
Pro Rider
Joined: May 2010
Posts: 420
Likes: 0
From: Gardner ☮ Boston ~ MA
 Jun 4, 2012 | 12:53 AM
#215
Thread Starter
|
Pro Rider
Joined: May 2010
Posts: 420
Likes: 0
From: Gardner ☮ Boston ~ MA

86' LT250R During Restoration: Idle & Rev #1/2 (Full FMF) - YouTube
86' LT250R During Restoration: Idle & Rev #2/2 (Full FMF) - YouTube
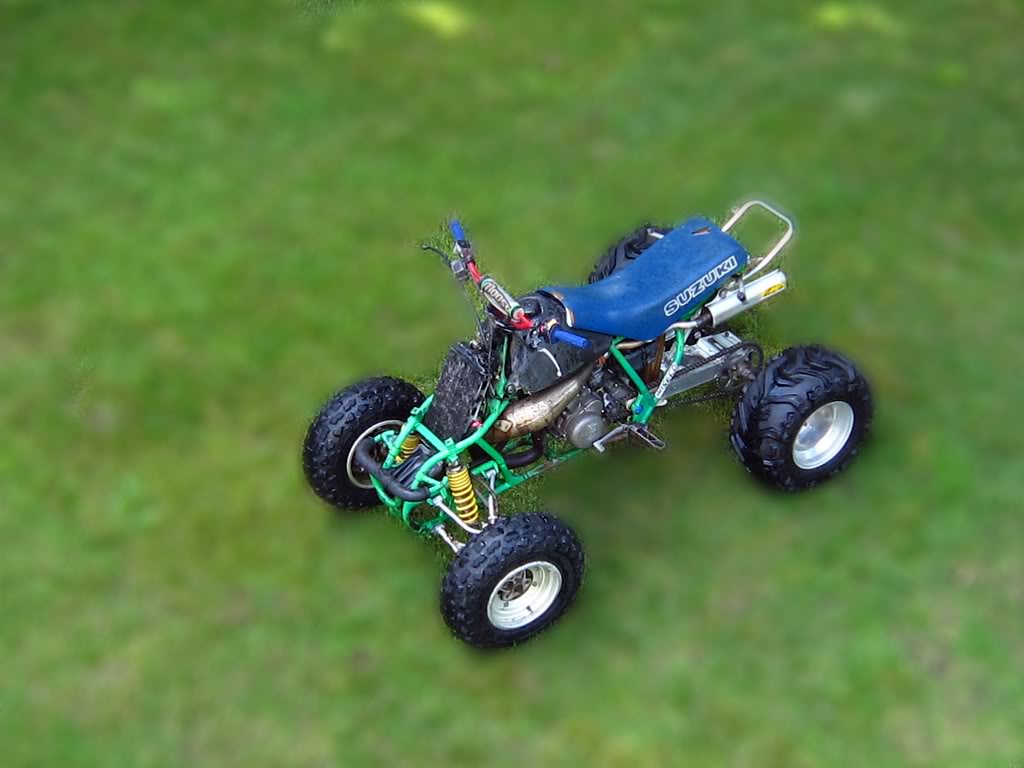
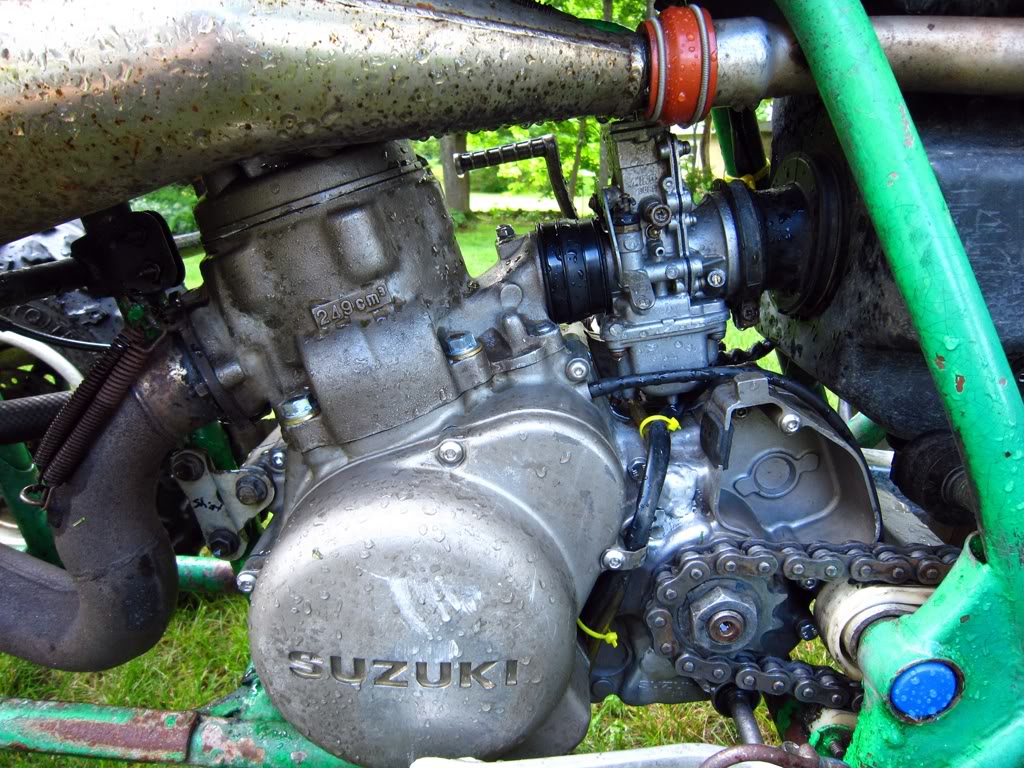
Basically there is a fresh engine in there now minus the jug (but honed) along with ALL new oil seals in the rear suspension + new swinger, pivot bearings/seals and some brakes:
The kicker arm still needs to be rebuilt and a few more pieces of hardware need to be swapped out:
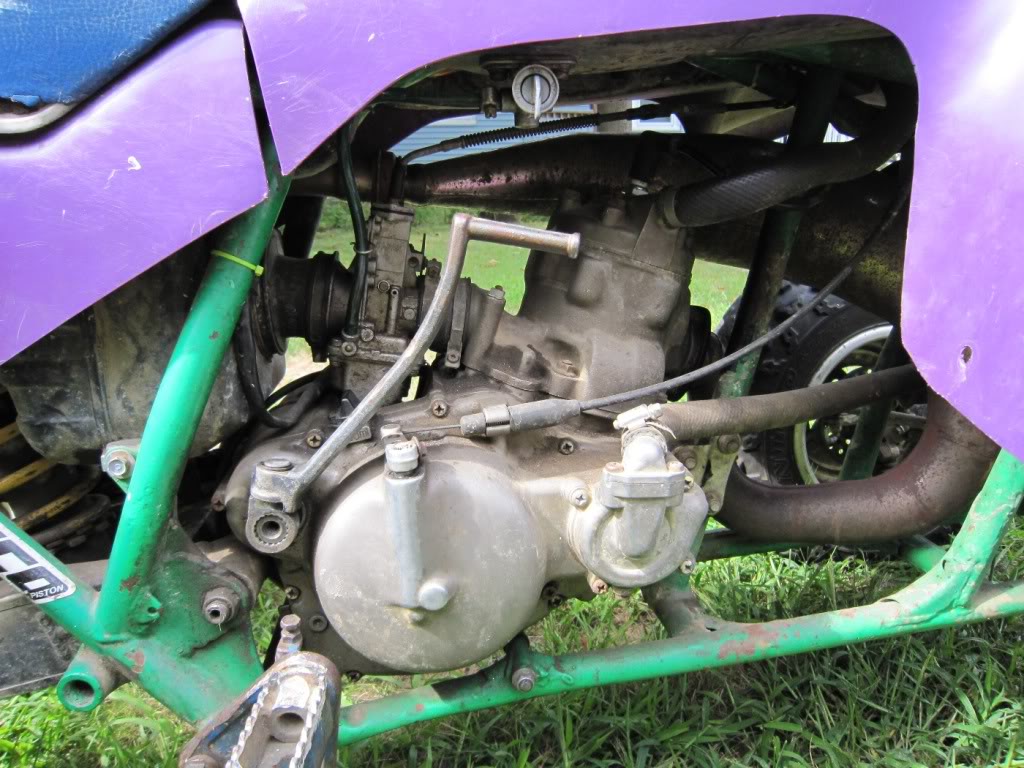
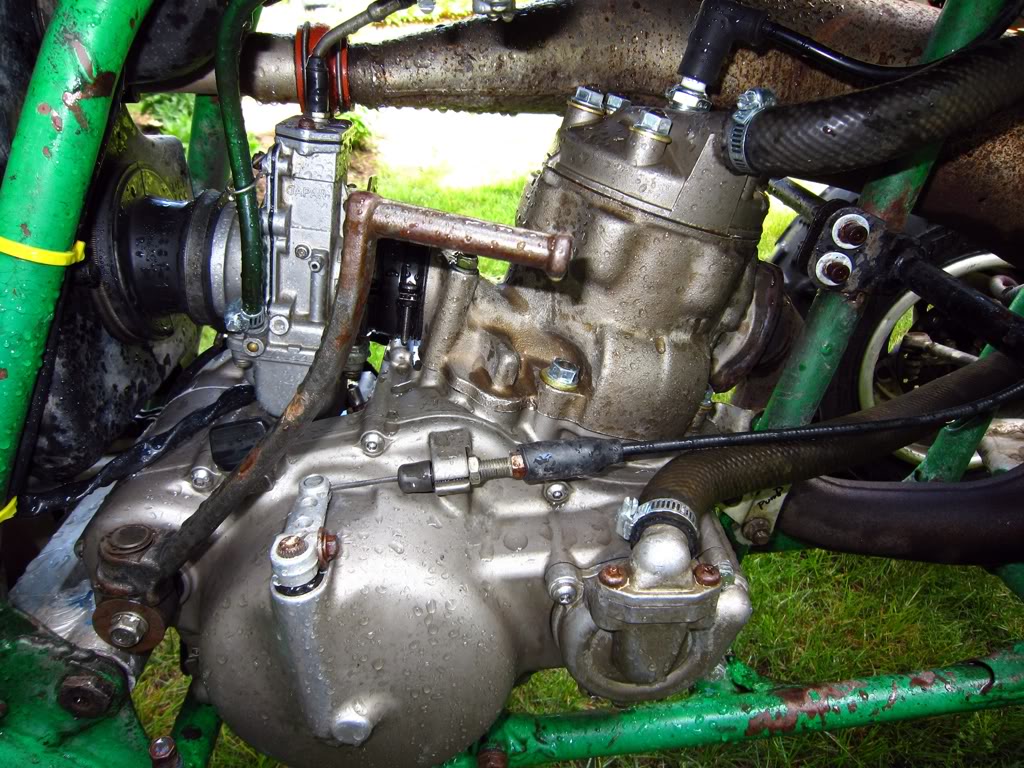
As you can see most all the hardware has been changed out to stainless and hex heads, the false tach compartment cover is a little bit chewed up so I am fabricating a new one out of chrome plated steel. I will paint the crankcase and top end red, then polish the clutch and flywheel covers:

86' LT250R During Restoration: Idle & Rev #2/2 (Full FMF) - YouTube
Basically there is a fresh engine in there now minus the jug (but honed) along with ALL new oil seals in the rear suspension + new swinger, pivot bearings/seals and some brakes:
The kicker arm still needs to be rebuilt and a few more pieces of hardware need to be swapped out:
As you can see most all the hardware has been changed out to stainless and hex heads, the false tach compartment cover is a little bit chewed up so I am fabricating a new one out of chrome plated steel. I will paint the crankcase and top end red, then polish the clutch and flywheel covers:
Jun 25, 2012 | 12:41 AM
#217
Thread Starter
|
Pro Rider
Joined: May 2010
Posts: 420
Likes: 0
From: Gardner ☮ Boston ~ MA
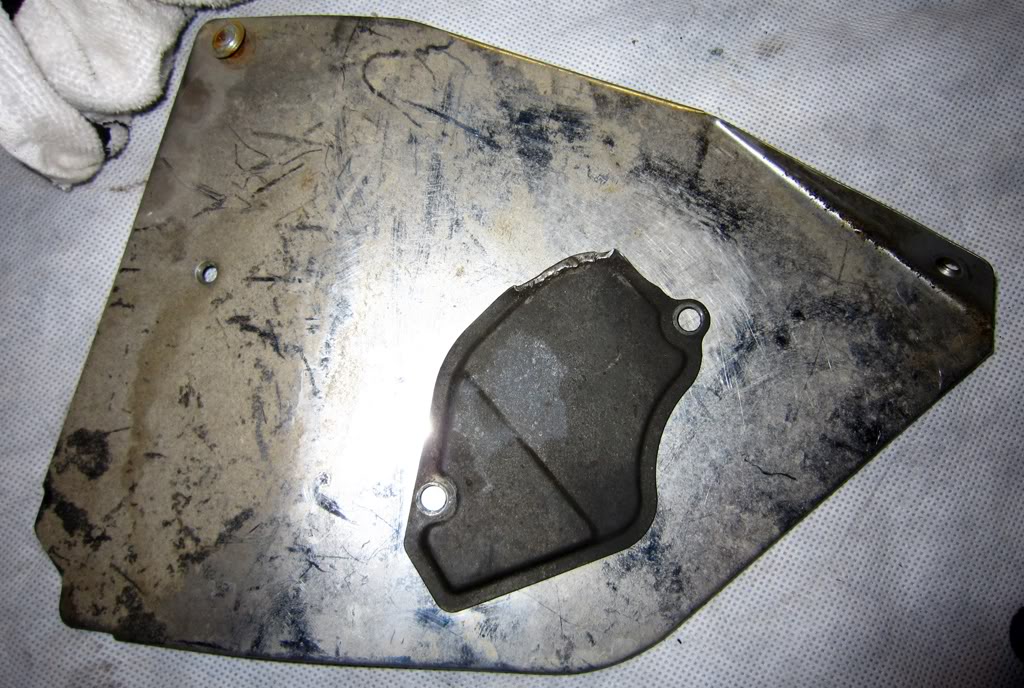
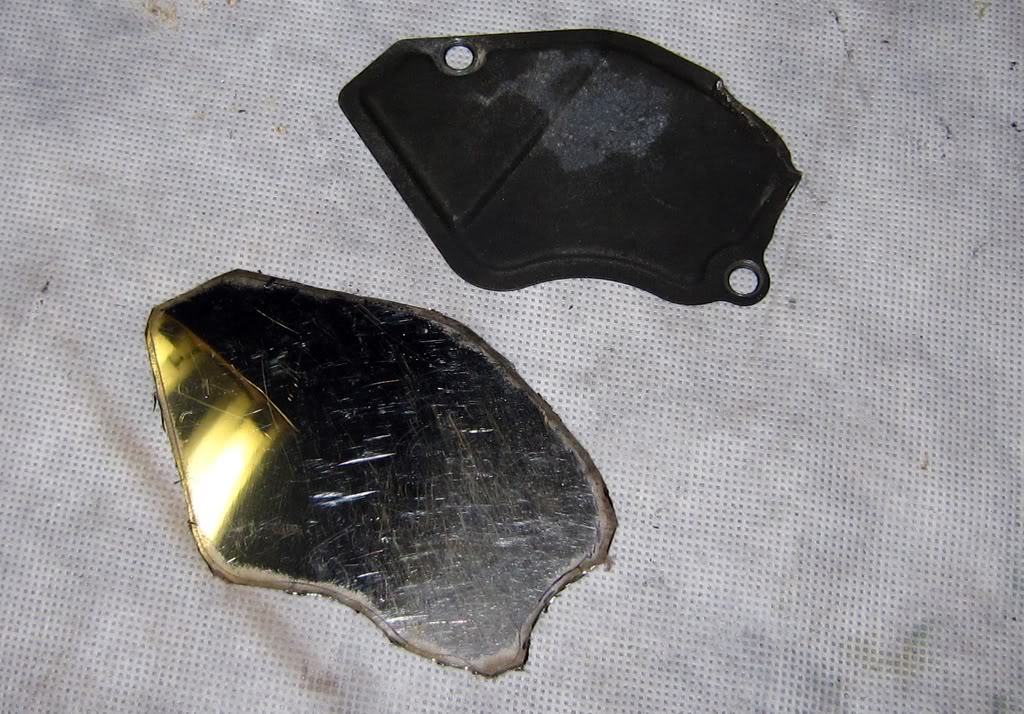
The false tach bay cover got eaten up by the chain by it's previous owner and those are hard to come by, so I made my own seeing how that seems to be what everyone does. I cut it out of this chrome plated piece of steel; a piece from an old Buick Riviera I think:
I took a Scotch-Brite pad to it in a circular motion to create a brushed look since it's not aluminum and I can not buff it out...not bad, not bad:
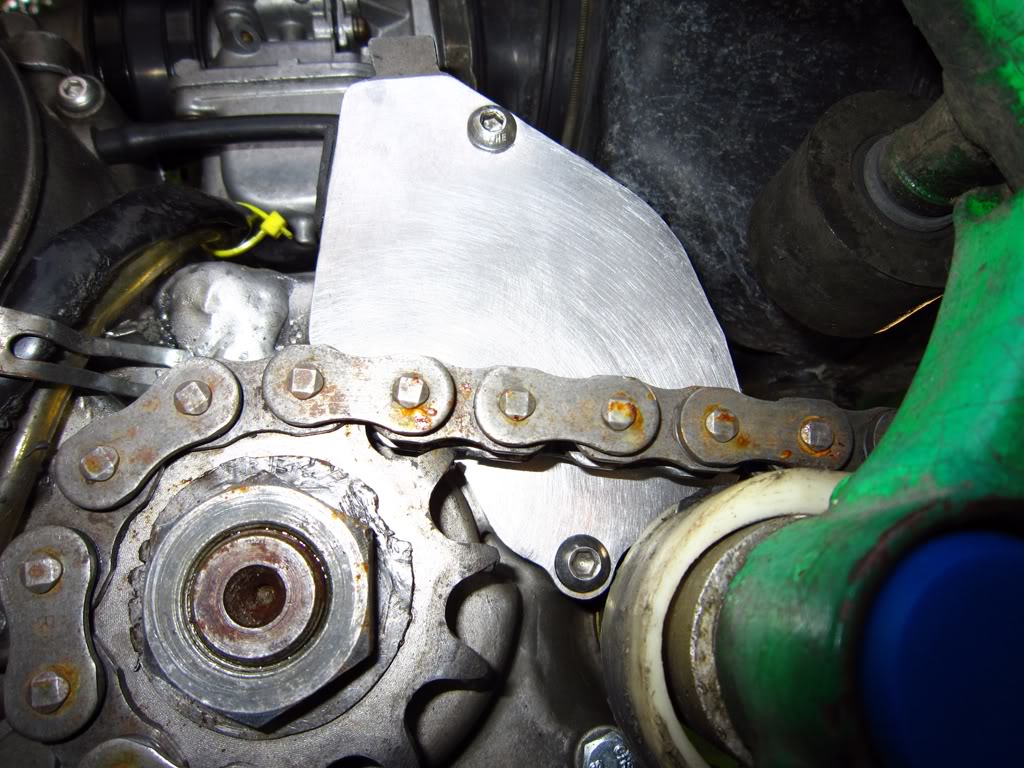
I took a Scotch-Brite pad to it in a circular motion to create a brushed look since it's not aluminum and I can not buff it out...not bad, not bad:
Jun 27, 2012 | 11:55 AM
#218

So... freakin Craigslist almost got me killed once again, I read an ad that was something like lt250r/trx250r/banshee/warrior/etc part out. As I arrive closer to the address I get deeper and deeper into a ghetto, and lewered to a building with rows of bay doors but the door I went to went down on the inside under the building into the basement unlike all the others it was something like right out of a Fast & Furious movie haha tons of pit-bull dogs everywhere and in front of my own eyes rows, and rows, and rows of old rare quads I'm talking everything you can imagine and most with chrome and after market parts some were on jack stands all parted out. I have never seen so many quadzilla's and trx250r's in the same room, even online! ANYWAY I made it out alive with a 1989 swinger, carrier, and the disc/caliper torque link bar I did not have all for $140
It's real clean too here it is next to mine:


It has brand new bearings in it already he said, and looks like new oil/dust seals too!

Now, I willingly bought it knowing there was a crack which is in a different place then my original swinger. Do you think this is going to be a harder weld to keep strong because it kind of looks like that loop is under spring type tension already and I do not think it can be welded from the inside yet I do not have any size restraints for the top weld so it can be piled up. I live near a welding shop that does aluminum so I am going there this week to see what can be done:


The only thing I did not realize until I got home was that the other side has a bearing setup that is entirely frozen and looks wallowed out on the top right corner. I plan on getting all new bearings and spacers anyway, but hopefully the impact that cracked the other side did not pancake this side. But the wallowing on the top right makes me think it was ridden with the other side cracked putting a lot of pressure on this side:

When I got home some new parts had come in

^complete engine gasket set with oil seals, rear shock cylinder head, wiseco rings, power reeds, another new spark plug, and a much needed silencer wash plug.
Also got some new kickass front tires:

It's real clean too here it is next to mine:
It has brand new bearings in it already he said, and looks like new oil/dust seals too!
Now, I willingly bought it knowing there was a crack which is in a different place then my original swinger. Do you think this is going to be a harder weld to keep strong because it kind of looks like that loop is under spring type tension already and I do not think it can be welded from the inside yet I do not have any size restraints for the top weld so it can be piled up. I live near a welding shop that does aluminum so I am going there this week to see what can be done:
The only thing I did not realize until I got home was that the other side has a bearing setup that is entirely frozen and looks wallowed out on the top right corner. I plan on getting all new bearings and spacers anyway, but hopefully the impact that cracked the other side did not pancake this side. But the wallowing on the top right makes me think it was ridden with the other side cracked putting a lot of pressure on this side:
When I got home some new parts had come in
^complete engine gasket set with oil seals, rear shock cylinder head, wiseco rings, power reeds, another new spark plug, and a much needed silencer wash plug.
Also got some new kickass front tires:
Jul 6, 2012 | 09:08 AM
#220

Trailblazer
Joined: Sep 2011
Posts: 31
Likes: 0
I enjoyed reading all of this and the pictures.
I did catch several mistakes. and I wanted to chime in. even though it's pretty late past the stages.
Or unless I missed the correction. Because it was allot of reading.
In no order.
1- All flywheels have to be balanced, they are cast made, And they have to drill or remove or add. to make it be balanced.
2-In order to proper check compression, you have to warm the engine up for 10 to 15 minutes. while checking compression, right after that, make sure you keep the throttle wide open, during kicking.
Make sure your fuel is off, because compression will keep raising, because you are dumping fuel into the cylinder, it gives you a higher reading, then what you really have.
You usually only do 3 or 4 times, and throw out the high and low number and keep the middle reading for what you have.
I did not catch, if you bothered to put in new piston rings. From your pictures, you had allot of blow buy coming from the original engine/ before you had it honed. The brown on the piston just above the top piston ring, still yet on the side of the piston, is blow buy.
You do not have to add 3 bond, ect, when using new gaskets. It can cause leaks, buy doing that.
A good machine shop, will tell you the specs of the cylinder wall. most know what the min and max specs should be, and a manual tells you also.
You did a great job, if this waws your first time, trial and error and learning curve.
Would enjoy knowing with proper compression test, what you have now ?
further tips.
novu2 2 and a buffer, can make the plastic looks like new almost.
If you are gonna paint it, use kyrlon fushion paint. its for plastic. wet sand with 1,000 grit first tho.
Did you ever replace the muffler gasket ? resolve the leak there ?
FYI, anti freeze begins to break down after a year. and 50/50 is what I always recommend.
You asked about the color differance and I dont think anyone every asnwered you. some of that was due to old anti freeze, some of it, was due to moisture getting into it, thur cold weather / winter. condensation over the years.
Sporty
I did catch several mistakes. and I wanted to chime in. even though it's pretty late past the stages.
Or unless I missed the correction. Because it was allot of reading.
In no order.
1- All flywheels have to be balanced, they are cast made, And they have to drill or remove or add. to make it be balanced.
2-In order to proper check compression, you have to warm the engine up for 10 to 15 minutes. while checking compression, right after that, make sure you keep the throttle wide open, during kicking.
Make sure your fuel is off, because compression will keep raising, because you are dumping fuel into the cylinder, it gives you a higher reading, then what you really have.
You usually only do 3 or 4 times, and throw out the high and low number and keep the middle reading for what you have.
I did not catch, if you bothered to put in new piston rings. From your pictures, you had allot of blow buy coming from the original engine/ before you had it honed. The brown on the piston just above the top piston ring, still yet on the side of the piston, is blow buy.
You do not have to add 3 bond, ect, when using new gaskets. It can cause leaks, buy doing that.
A good machine shop, will tell you the specs of the cylinder wall. most know what the min and max specs should be, and a manual tells you also.
You did a great job, if this waws your first time, trial and error and learning curve.
Would enjoy knowing with proper compression test, what you have now ?
further tips.
novu2 2 and a buffer, can make the plastic looks like new almost.
If you are gonna paint it, use kyrlon fushion paint. its for plastic. wet sand with 1,000 grit first tho.
Did you ever replace the muffler gasket ? resolve the leak there ?
FYI, anti freeze begins to break down after a year. and 50/50 is what I always recommend.
You asked about the color differance and I dont think anyone every asnwered you. some of that was due to old anti freeze, some of it, was due to moisture getting into it, thur cold weather / winter. condensation over the years.
Sporty