


LT250R Overhaul Project
 May 10, 2011 | 10:53 AM
#141
Thread Starter
|
Pro Rider
Joined: May 2010
Posts: 420
Likes: 0
From: Gardner ☮ Boston ~ MA

I got some problems though, one I do not see any grease fittings ANYWHERE on the carrier like the 85/86 is it just a pack and go style? Also the bracket to hold the shock and cushion lever on an 1989 is WIDER then the 86' it uses a different wider bearing setup on the lever. So I have two options, beef up the play with washers or get an 89' lever hoping it will fit in my cushion arm, if not maybe the 89' arm will fit in my frame on my 87' shock. What do you think?
May 10, 2011 | 04:25 PM
#142

Pro Rider
Joined: Sep 2010
Posts: 314
Likes: 0

You could either do washers, though it would probably be better just to make spacers to the right fitment, that way you don't have six washers jammed in there and instead you would have two spacers in there, one on each side.
May 10, 2011 | 06:51 PM
#143
Thread Starter
|
Pro Rider
Joined: May 2010
Posts: 420
Likes: 0
From: Gardner ☮ Boston ~ MA
That's a pretty good idea, I'm sure they would not be that hard to produce. I'm still toying with the 89' linkage idea if I can get the rest of it dirt cheap from the same douchbag that sold me the swinger. Do you know if there is suppose to be a grease fitting on the carrier or not?
I looked at a "good" sprocket hub while I was there and there are no rings around it like both of mine, the guy said that is from the bearings failing and it being ridden on them. Looks like I will be buying a new one of those, and may return to purchase his aftermarket billet brake disc hub.
I looked at a "good" sprocket hub while I was there and there are no rings around it like both of mine, the guy said that is from the bearings failing and it being ridden on them. Looks like I will be buying a new one of those, and may return to purchase his aftermarket billet brake disc hub.
May 13, 2011 | 08:42 PM
#145
Thread Starter
|
Pro Rider
Joined: May 2010
Posts: 420
Likes: 0
From: Gardner ☮ Boston ~ MA

Putting the finishing touches on the LT230, I dropped the swing arm off at the welding garage today. Guys a guru so it will come out good, I know the bill is going to come out at least $50 but well worth his experience.
I began the engine tear down, here is the clutch side and flywheel side:


So, the rusty bottom flywheel is on the motor, the one on top has a bunch of dents in it (came out of the extra parts bin):
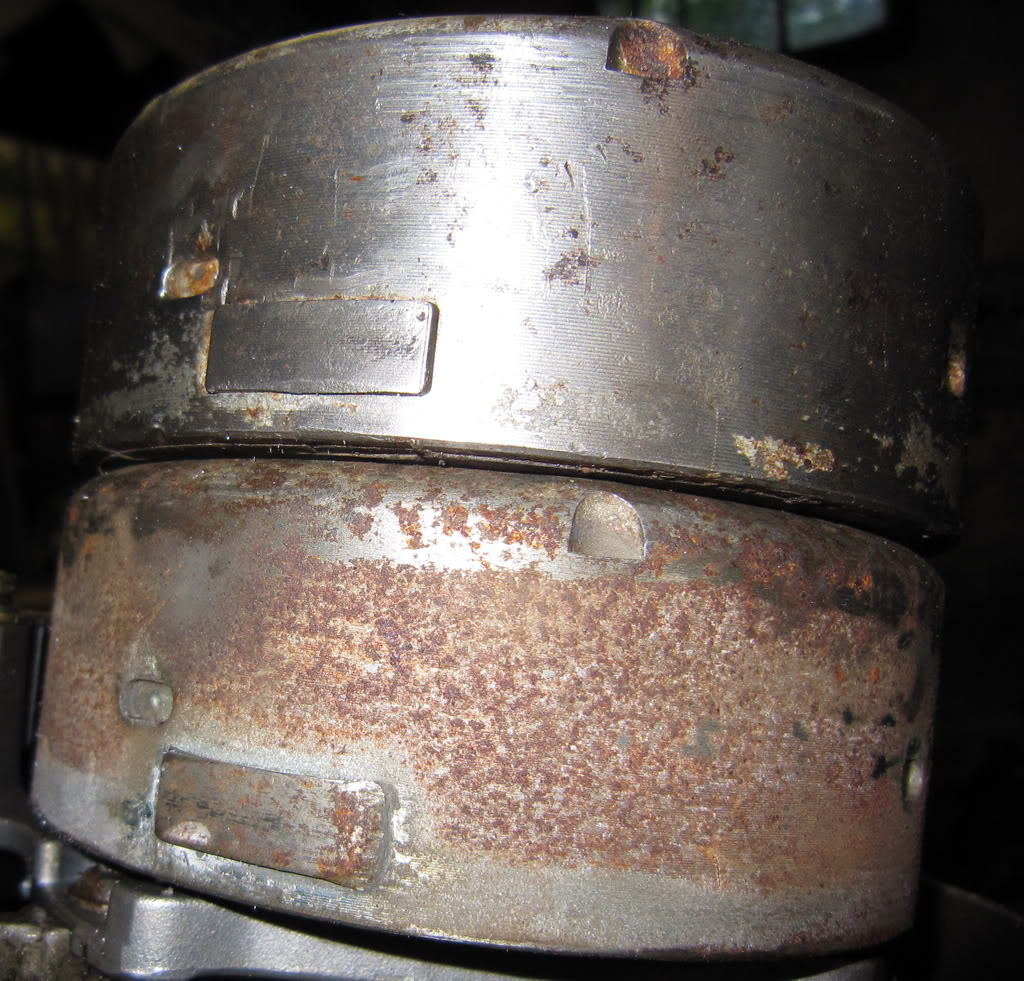
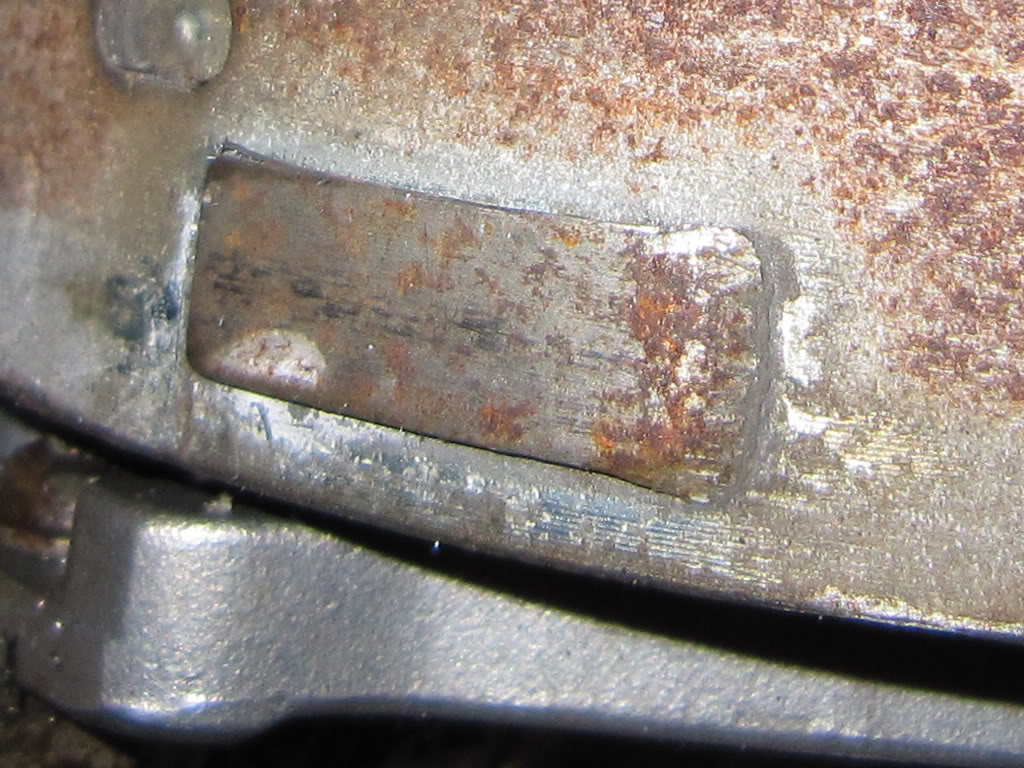
Is this pickup shaved down on purpose? Timing? The top one is squared off.
Also, the bottom flywheel on the engine has 6 holes drilled in it:

The top spare flywheel has only 2 holes, and in a complete different place on the wheel:
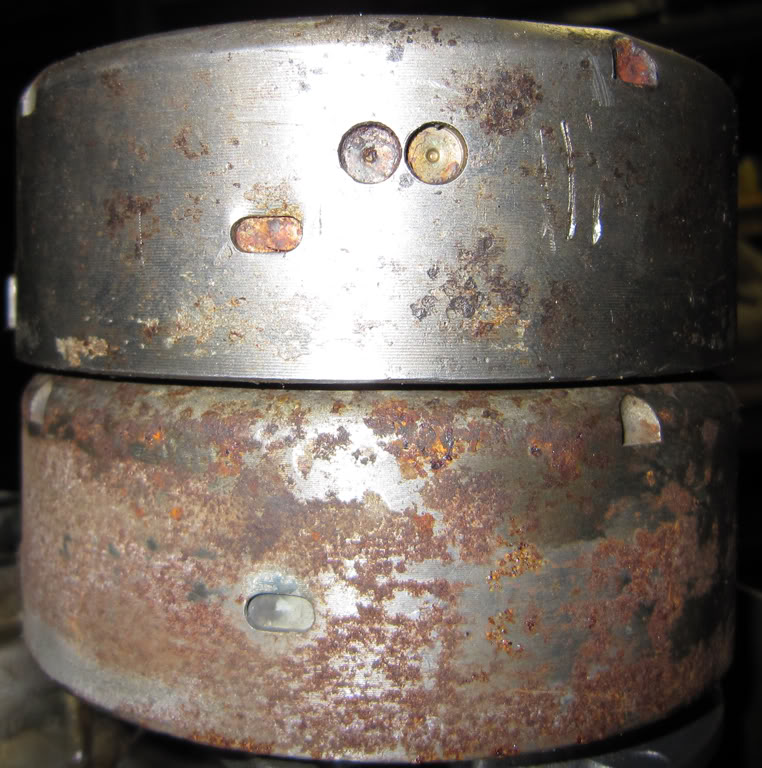
^ Possibly some sort of balancing method or?
I began the engine tear down, here is the clutch side and flywheel side:
So, the rusty bottom flywheel is on the motor, the one on top has a bunch of dents in it (came out of the extra parts bin):
Is this pickup shaved down on purpose? Timing? The top one is squared off.
Also, the bottom flywheel on the engine has 6 holes drilled in it:
The top spare flywheel has only 2 holes, and in a complete different place on the wheel:
^ Possibly some sort of balancing method or?
May 15, 2011 | 09:25 PM
#146
Thread Starter
|
Pro Rider
Joined: May 2010
Posts: 420
Likes: 0
From: Gardner ☮ Boston ~ MA
This flywheel was a bitch, soaked overnight in penetrating oil. Then found a way to pull it without buying the threaded puller. My awesome grandfather came up with this, an old steering wheel puller with some threaded rod we took a torch to and bent.
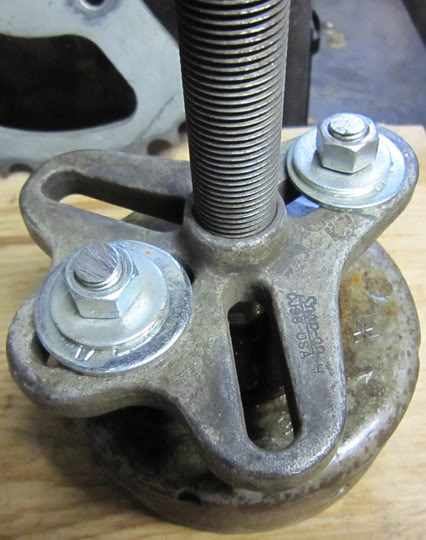
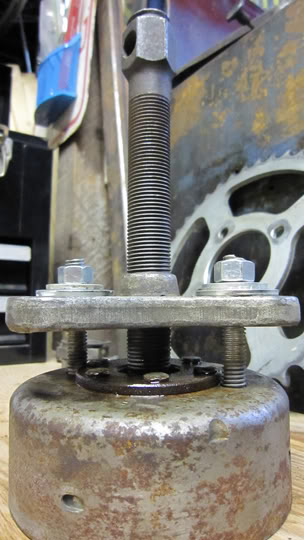
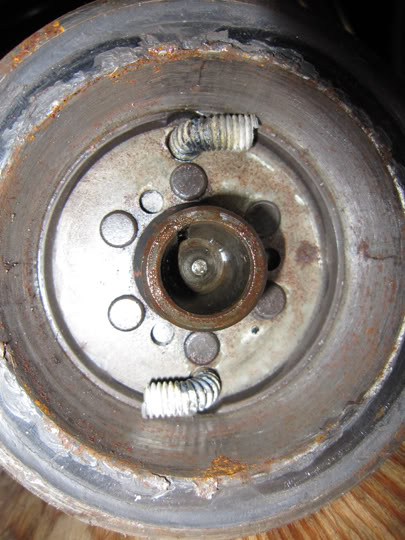
He told me to tighten it up then smack it with a hammer, which I just can't understand. So I put an impact wrench on it, set it to low power and slowly drove it up.
He told me to tighten it up then smack it with a hammer, which I just can't understand. So I put an impact wrench on it, set it to low power and slowly drove it up.
May 16, 2011 | 07:55 PM
#147
Pro Rider
Joined: Sep 2010
Posts: 314
Likes: 0
I would recommend sanding some of that rust off or getting some rust remover. You don't want it flaking off while riding and getting in your engine and destroying the bearings. I would say the drill marks where to lighten it. It ran fine before, so I wouldn't worry about it. For that left side case in your pics, you could polish it up to give it a chrome look, it might look a little nicer and I would probably get some new bolts and not the standard bolts that are on it, they strip way to easy on that side case.
May 16, 2011 | 10:18 PM
#148
Thread Starter
|
Pro Rider
Joined: May 2010
Posts: 420
Likes: 0
From: Gardner ☮ Boston ~ MA

I would recommend sanding some of that rust off or getting some rust remover. You don't want it flaking off while riding and getting in your engine and destroying the bearings. I would say the drill marks where to lighten it. It ran fine before, so I wouldn't worry about it. For that left side case in your pics, you could polish it up to give it a chrome look, it might look a little nicer and I would probably get some new bolts and not the standard bolts that are on it, they strip way to easy on that side case.
Second I planned on buying a dremel polishing kit off Amazon, and bringing both the clutch and magneto covers to a mirror finish, possibly the stock front rims too if they will clean up. Last year when I had to tear into the clutch side to repair the crank balancer drive gear, I replaced all the screws with hex bolts which don't strip as easy and have a shiny finish. It's funny you mention it though, what should have taken me 5 minutes today took 5 hours. Whoever designed this engine for Suzuki needs to be taken out back and shot in the head, why would you use a phillips head screw for something that needs to be torqued!? I couldn't get any of the screws out holding the case half's together, I tried a good Snap-On screw driver with a wrench on it, one of those things you hit with a hammer and it turns, needle nose vise grips, butterfly impact wrench with a phillips bit, easy-out tools/bits, mini cutting wheels on a dremel, and finally what it came down to is drilling out the heads and using a small chisel and hammer to dig into the now thin walls, hook and smack them to the left broke the torque for the most part, a few had to be cutoff. Somebody locktited all the case screws, are you even suppose to do that!? I will be replacing all of these also with hex head bolts, by the time I got the phillips heads out this is what they looked like....

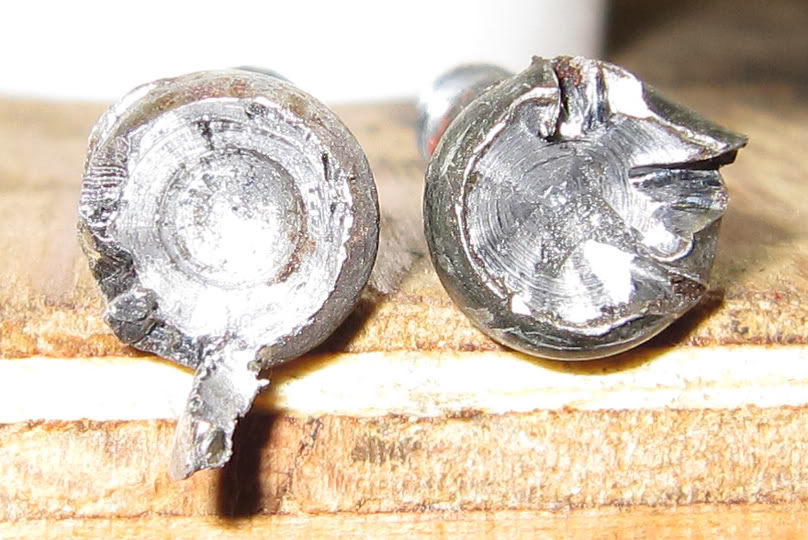

If it wasn't for my grandfather, none of this would have been possible! God bless the old man hes almost 80
May 17, 2011 | 10:41 PM
#149
Thread Starter
|
Pro Rider
Joined: May 2010
Posts: 420
Likes: 0
From: Gardner ☮ Boston ~ MA
WOW.... even with the case bolts out this was not splitting. I tapped it with a rubber mallet all the way around, even smashed a chisel into the case meet inside where it would touch the outside of the cylinder skirt to the side of the connecting rod. This must be why you don't use a normal gasket maker, semi-dry would not do this??
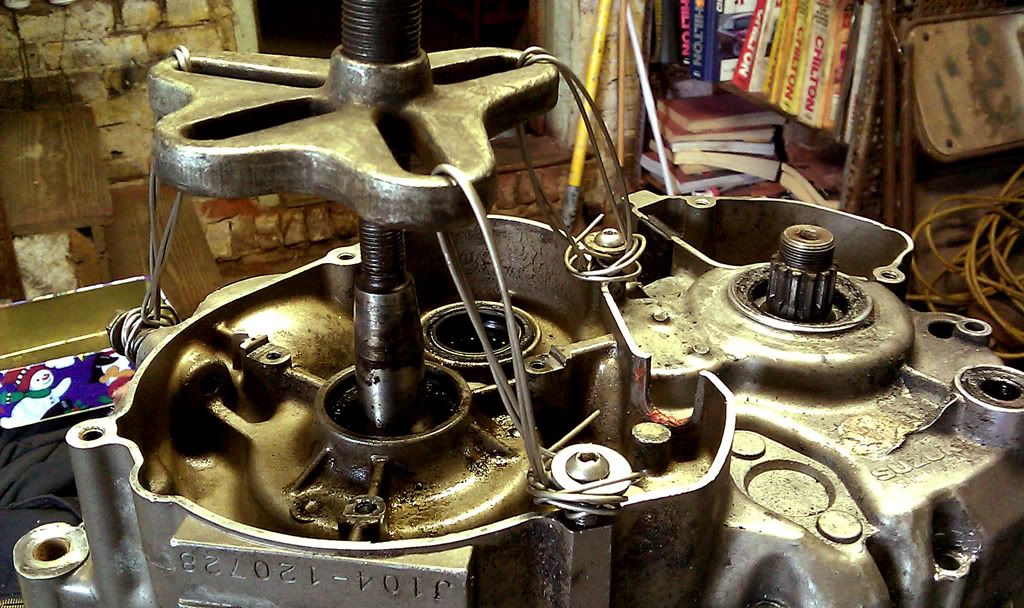
Anyway I took that same old puller, and used some thick metal wire banded 4 times. The screws were all the way in using all threads, and 1 head bolt. Cranked her in quite far putting a crap load of tension on the wires pushing off the crank. So much tension I stopped and went back to the rubber mallet, tapped upward on the bottom of the serial number plate and the case split and rose slowly as it broke the sealant, reminded me of opening a Pillsbury roll when they pop.

This looks pretty intimidating, I don't want to touch it but may have to in order to replace an oil seal unless they are on the outside of the case. How do you even mesh these back up there are no mesh marks?

There us a spoonful of fine metal shavings in there...

What gear is this on the top left, second drive gear?
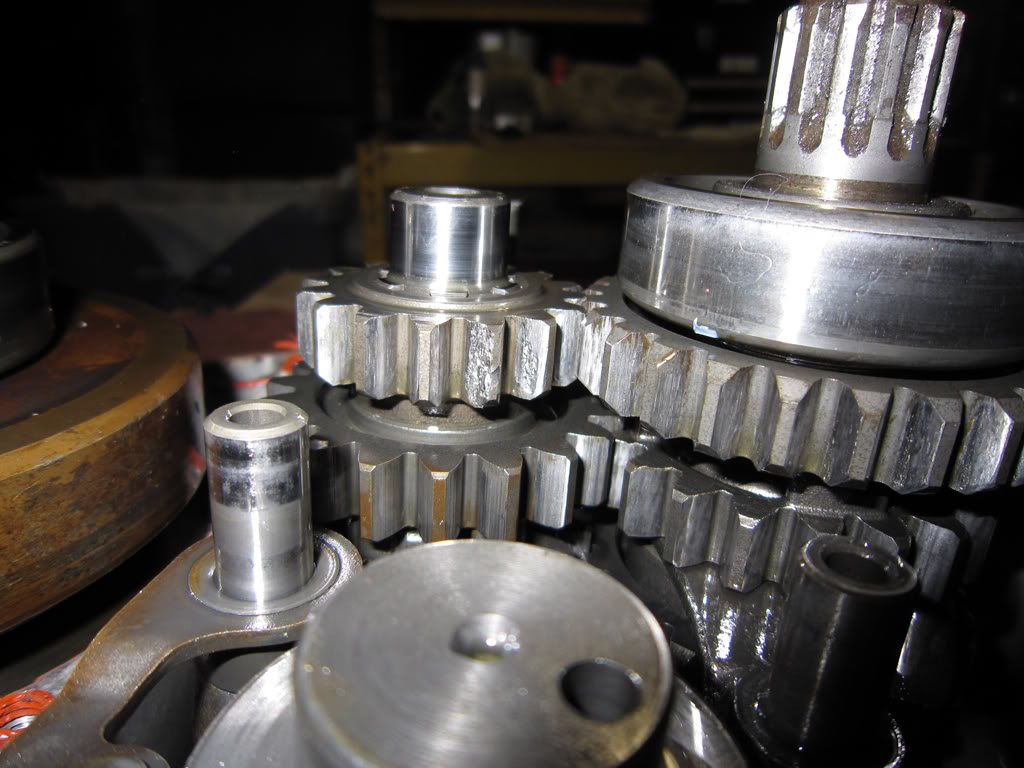
I'm guessing it definitely needs to be replaced because it's getting eaten up:

I'm really curious what caused it:

I dropped the case half off at the welding shop to have those chain guard thread holes welded, and I may make a custom case saver since they don't sell one. They did an amazing job on the swing arm I saw it on the bench, nice straight weld all the way across looks better than a factory bead! Will pick it up next week and post.
Anyway I took that same old puller, and used some thick metal wire banded 4 times. The screws were all the way in using all threads, and 1 head bolt. Cranked her in quite far putting a crap load of tension on the wires pushing off the crank. So much tension I stopped and went back to the rubber mallet, tapped upward on the bottom of the serial number plate and the case split and rose slowly as it broke the sealant, reminded me of opening a Pillsbury roll when they pop.
This looks pretty intimidating, I don't want to touch it but may have to in order to replace an oil seal unless they are on the outside of the case. How do you even mesh these back up there are no mesh marks?
There us a spoonful of fine metal shavings in there...
What gear is this on the top left, second drive gear?
I'm guessing it definitely needs to be replaced because it's getting eaten up:
I'm really curious what caused it:
I dropped the case half off at the welding shop to have those chain guard thread holes welded, and I may make a custom case saver since they don't sell one. They did an amazing job on the swing arm I saw it on the bench, nice straight weld all the way across looks better than a factory bead! Will pick it up next week and post.
May 18, 2011 | 05:21 PM
#150
Trailblazer
Joined: Mar 2011
Posts: 88
Likes: 0
man i cant believe i read this whole thread...lol you sure are gettin kinda detailed and involved in a quad that you plan on sellin..ok thats what i always tell my wife but i still have 4 in the garage..lol may as well port that thing why its apart